This tutorial will teach you how to create "planets" out of your 360 degree panoramic photos and requires Photoshop.
It is no secret that one of my favorite things to do is to create panoramic photos from very high and unique vantage points in crazy situations like sunrise, sunset, etc. One way that I have made this practice even more artistic is to create "planets" out of those panoramics. This process is actually easier than it sounds, as long as your panoramics are done well. The first step, of course, is to create a 360 panoramic out of your images. I have written a tutorial on how to do that HERE. Once you have your panoramic created, open it in Photoshop. For this tutorial, I have chosen a 360 degree panoramic that I took 2 months ago from the summit of Windom Peak, one of Colorado's more remote and rugged 14,000 ft. mountains. You don't have to use 360 degree panoramics for these planets, but it makes the editing process much easier.
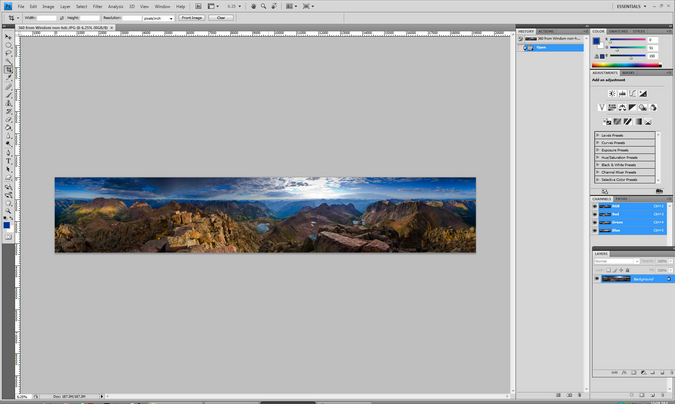
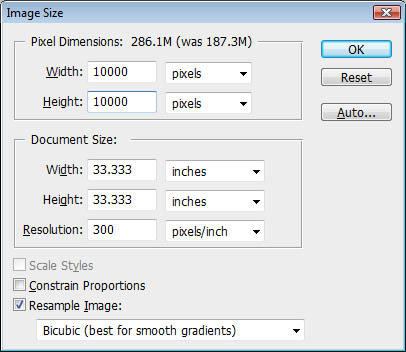
Now that you have your panoramic loaded up into Photoshop, you will need to change the size of the photo itself so that the length and width are equal. To do this, you need to click on the "Image" menu and select "Image Size." Uncheck "Constrain Proportions" and "Scale Sizes." Lastly, make the width and height the same value. I like to just use an approximation roughly equal to half the value of the width for this.
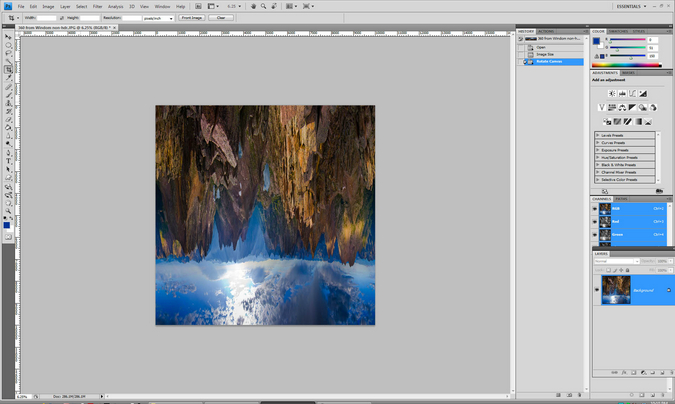
Hit "OK" and you will see the image warp into a squished looking image. Click again on the "Image" menu and rotate the image 180 degrees. It will turn the image up-side-down.
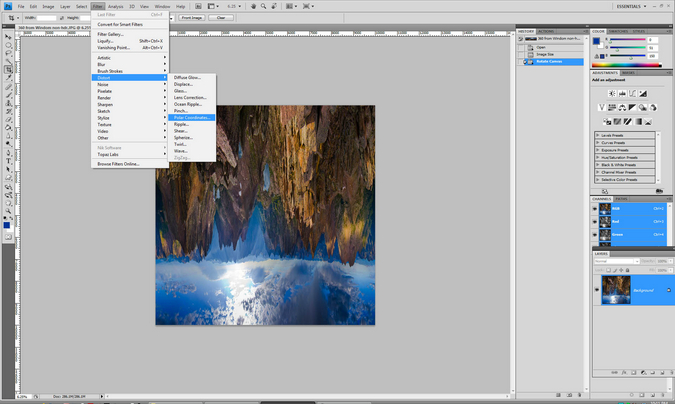
The next step is to turn it into a sphere around a polar coordinate. To do this, click on "Filter" and then on "Distort" and then "Polar Coordinates."
The result is a square image with your scene distorted to look like a planet. Crop it to your desired size. The last step is sometimes not necessary, depending on how clean your panoramic photo is and which software you used to create it. You may need to go into the seam where Photoshop joined the two ends and do some clone stamping and/or healing brush work to get it to look good. In this case, the pano fits together perfectly and is ready to publish! Here are the final results:
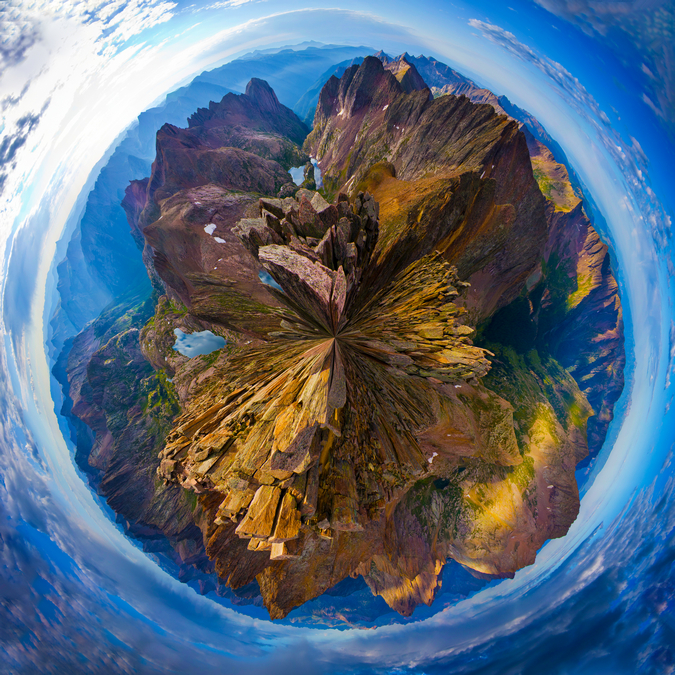
The very last thing that I sometimes will do with these is to clean up the corners, as you may notice some interesting lines shooting out from them. I usually just use the healing brush and paint in the corners. I hope that this tutorial was helpful! Please feel free to share your results with me in the comments below.
{fcomment}

