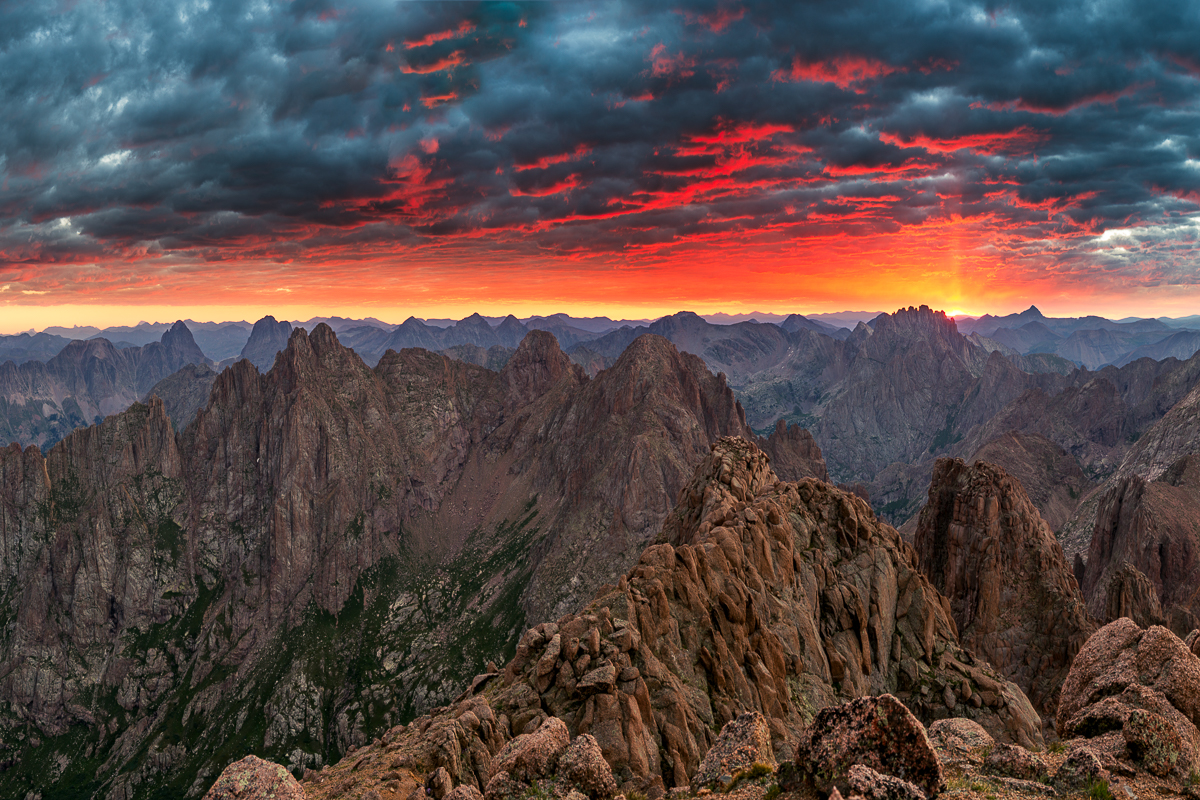
13,824 ft. Jagged Mountain has always provided ample intrigue from every angle I have ever viewed it from. It has always looked virtually unclimbable to me, representing the raw essense of Colorado's Weminuche Wilderness Area - untouched and unseen by most, scaled and appreciated by even fewer. I attempted Jagged Mountain once before in September of 2013, where my climbing partner Jeremy and I found ourselves huddled in a tent for four days during the worst flooding in Colorado's recent history. I last saw the summit of Jagged Mountain from my perch atop 13,835 ft. Turret Peak at sunrise last summer. The sun rose just behind Jagged and I felt even more of an affinity for its summit.
As 2017 unfolded, I saw that the Great American Eclipse would be happening in late August. I penciled in a trip to Wyoming to view the eclipse in totality; however, in July, my friend Natalie Moran posted on Facebook that she was looking for an additional partner for Jagged Mountain and I knew I had to jump on the opportunity to go. Since Jagged requires roped climbing, I only wanted to go with someone with experience on that mountain or with alpine technical climbing. Having climbed Dallas Peak and Teakettle Peak with Natalie in the past, I knew it would be a great trip. The trick of course was finding a way to squeeze in some photographs of the eclipse during this trip. The plan was to meet Natalie and her friend Shawn Poliquin in Silverton on Sunday morning, drive up and over Stony Pass down to Beartown Trailhead, and then backpack up and over Hunchback Pass and then into Sunlight Basin. My pack weighed in at 38.5 pounds, which was pretty good considering I had brought climbing gear, three lenses, and my tripod.
In December, I decided to switch out all of my camera gear for a much lighter experience for backpacking. Previously, I was carrying the Nikon D800 and the holy trinity.
For this particular trip, I decided to bring the following photography equipment:
Camera: Sony A7R2
Tripod: Feisol Tournament 3442 Carbon Fiber Tripod
Ballhead: Photo Clam Pro Gold II
Wide Angle Lens: Zeiss Loxia 21mm f/2.8
Mid-Angle Lens: Zeiss 55mm f/1.8
Telephoto: Sony FE 70-300
Total weight: 8.3 Pounds.
My total weight using my previous Nikon equipment: 14 pounds. I'll take the nearly 6 pounds in weight savings! My legs certainly thanked me considering the round-trip stats for this trip was 30.9 miles!
You can see the full GPS file and stats over on Gaia GPS, which is by far my go-to app for backpacking and mountaineering. It is so insanely useful, I use it on trips like this for many purposes, including planning and route-finding. You can purchase it here and help support the site.
One aspect of this particular trip that made me nervous was the drive to Beartown. I decided to take my wife's stock 2001 Jeep Cherokee through some encouragement from my co-worker and Bi-Centennial finisher, Terri Horvath. She was right, the road was not too bad, and the two creek crossings were manageable in August. I would hate to see them in early July.
Natalie, Shawn, and I arrived at Beartown at around Noon. At the suggestion of my co-worker, Terri, I surrounded my vehicle with mothballs to deter the infamous marmots that love to chew on spark plug wire assemblies.
Natalie and Shawn were planning to stay about 8 or 9 days in the Weminuche, where-as I was only planning a 4 day stay, so my pack was much less crazy than theirs.
DAY 1: The approach to Sunlight Basin.
Natalie looked as if she had brought her whole house with her on the way up Hunchback Pass.
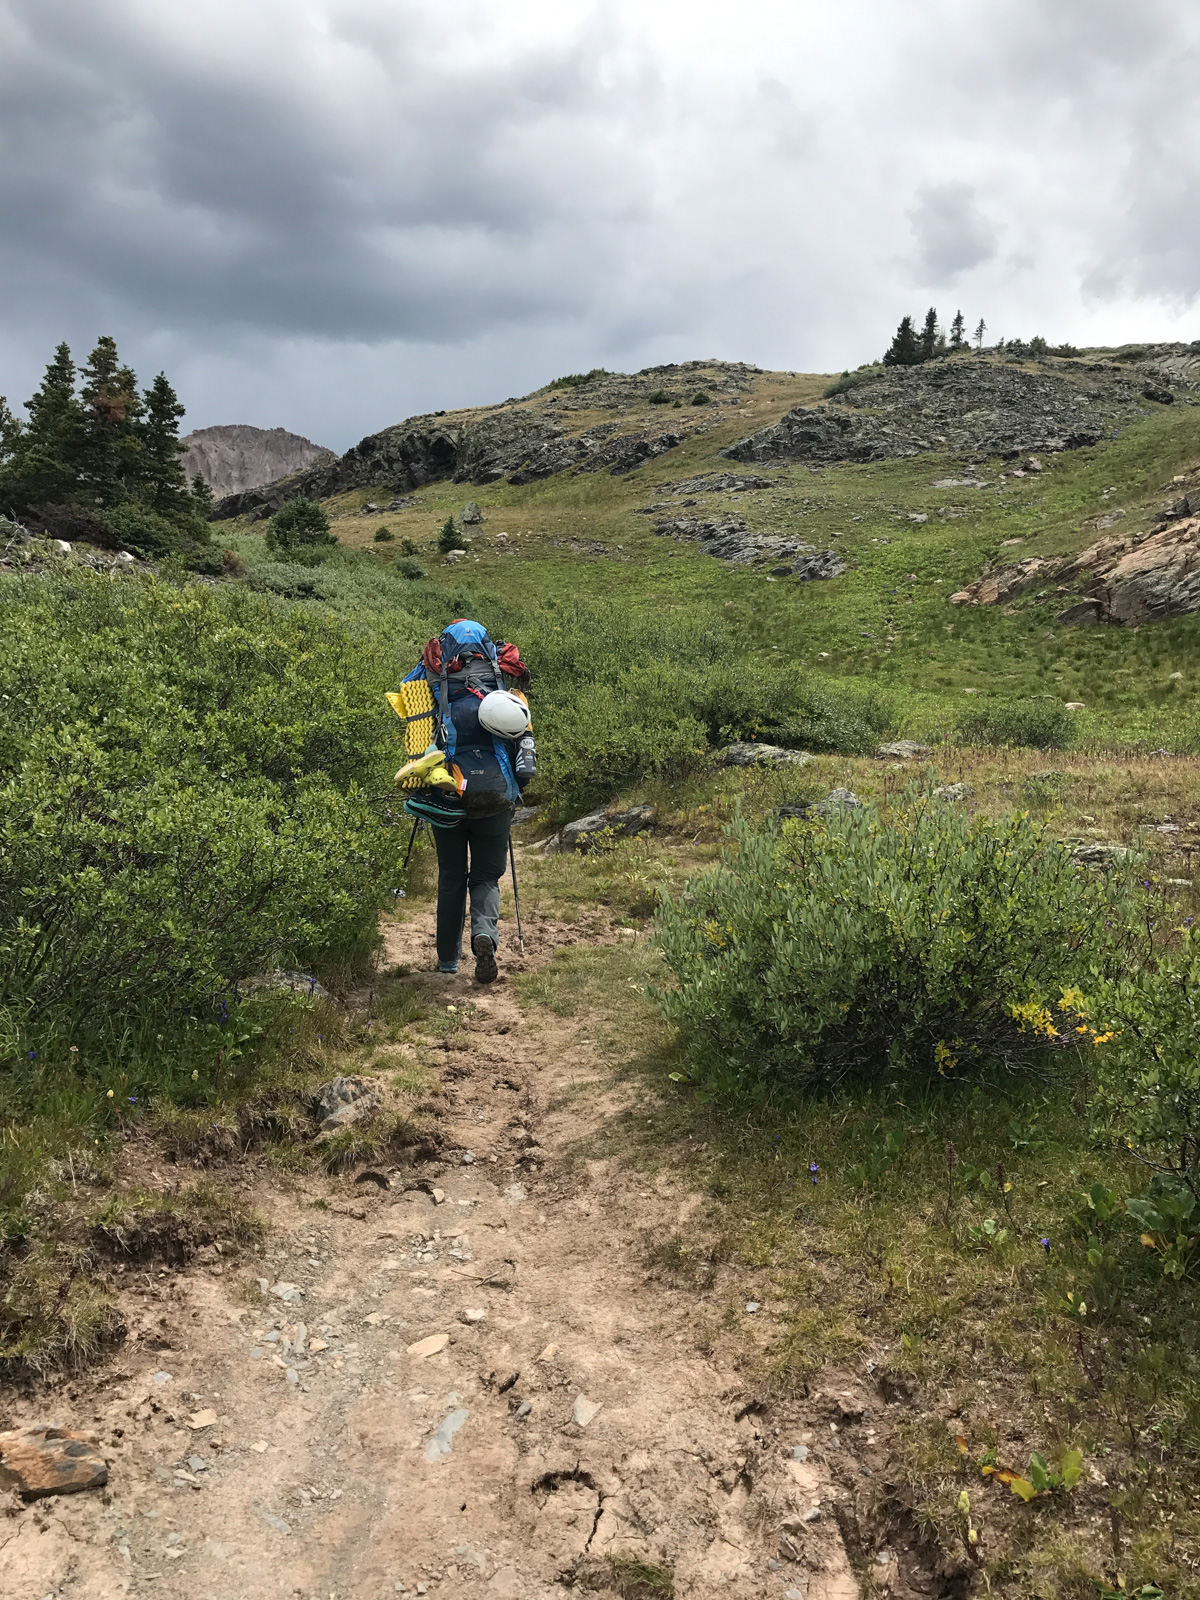
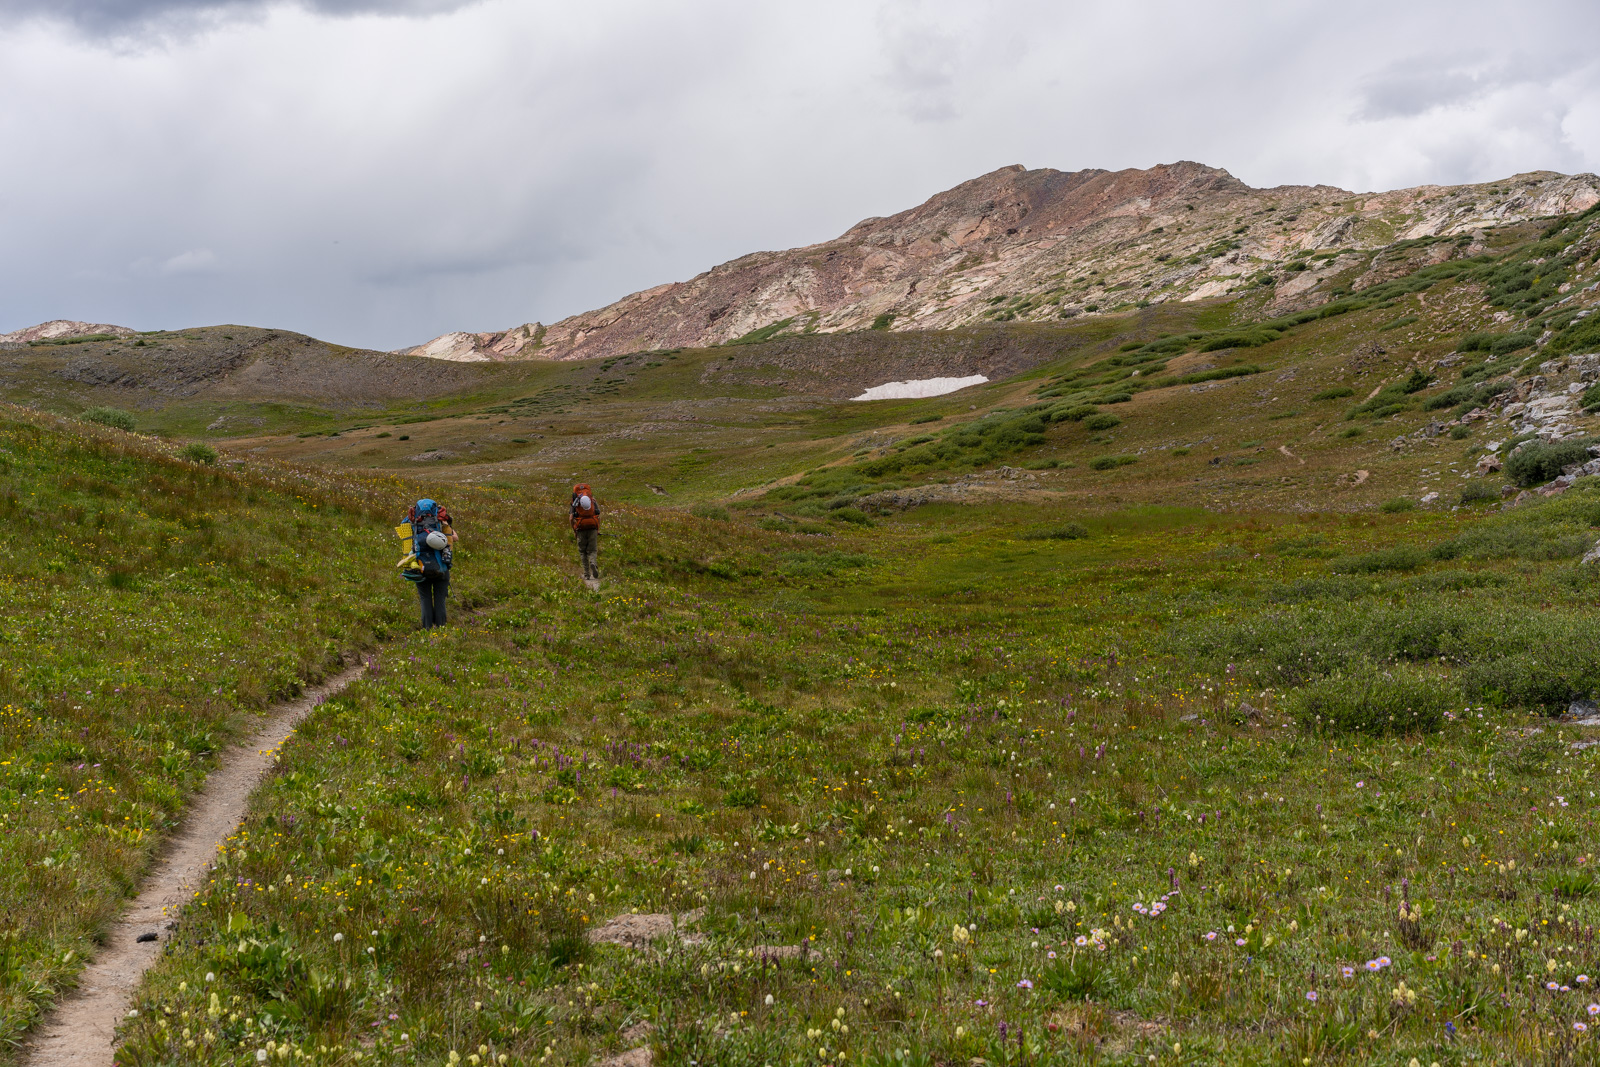
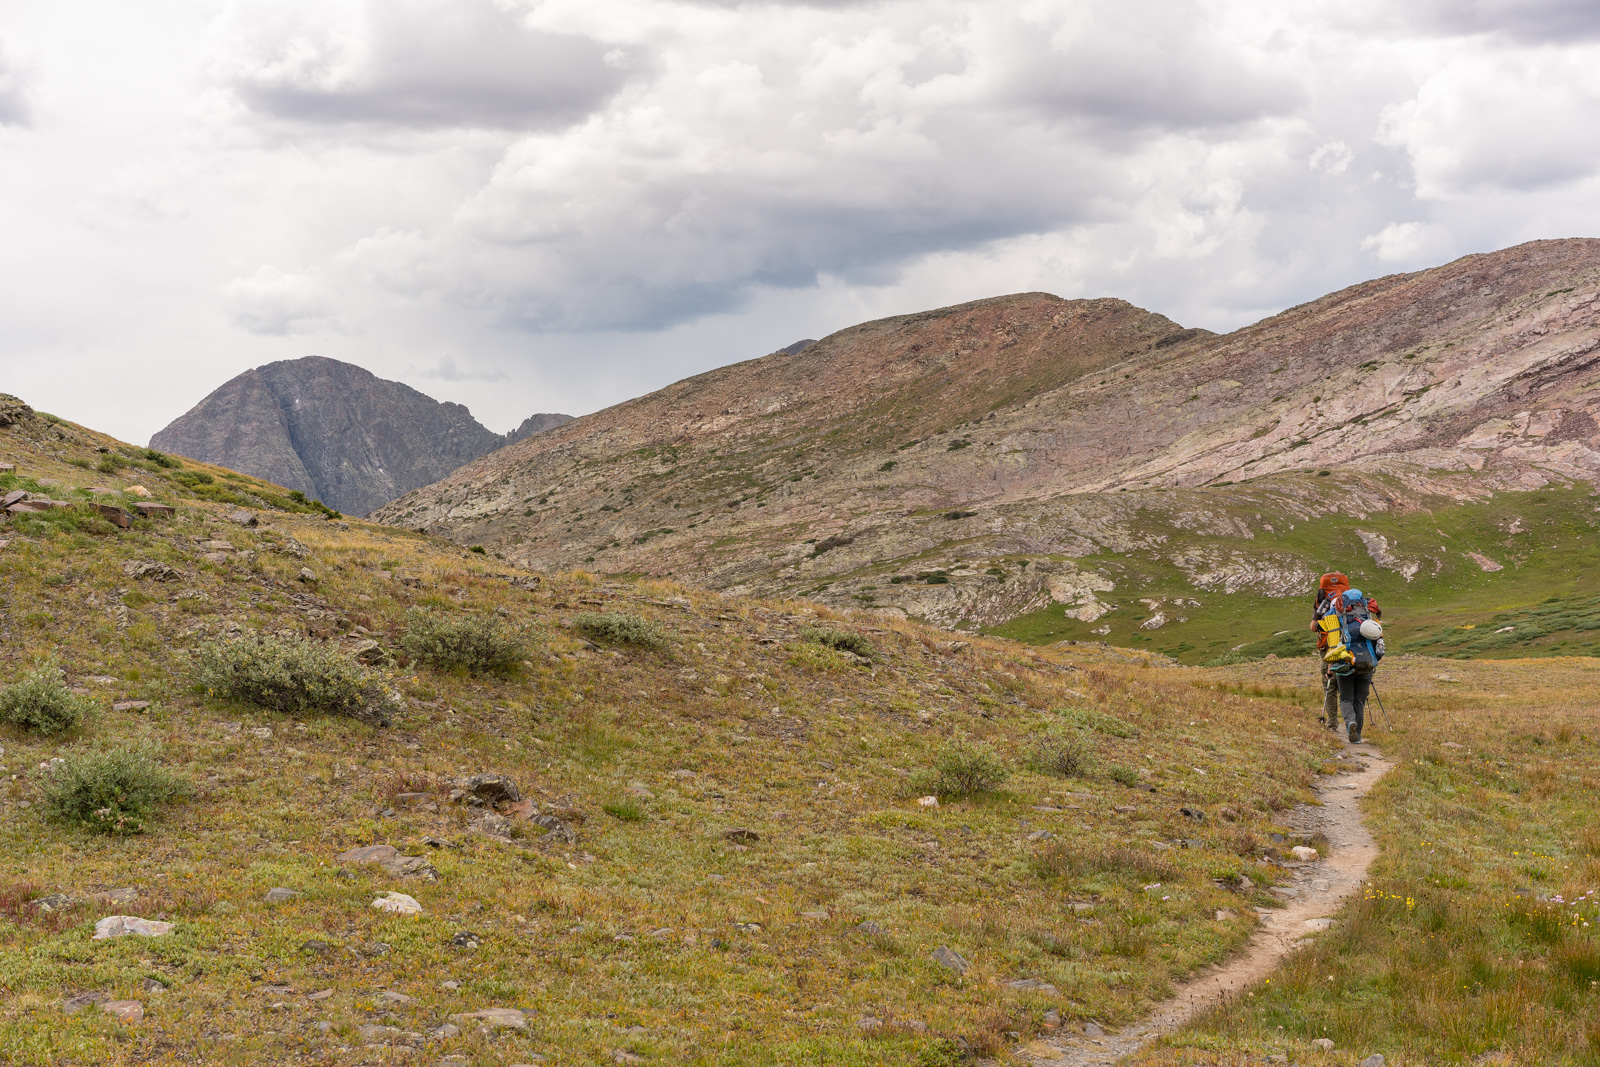
The grind up Hunchback Pass was not too terrible as the views were outstanding. We were also racing some storm clouds and wanted to be down into the trees of Vallecito Creek as quickly as possible.
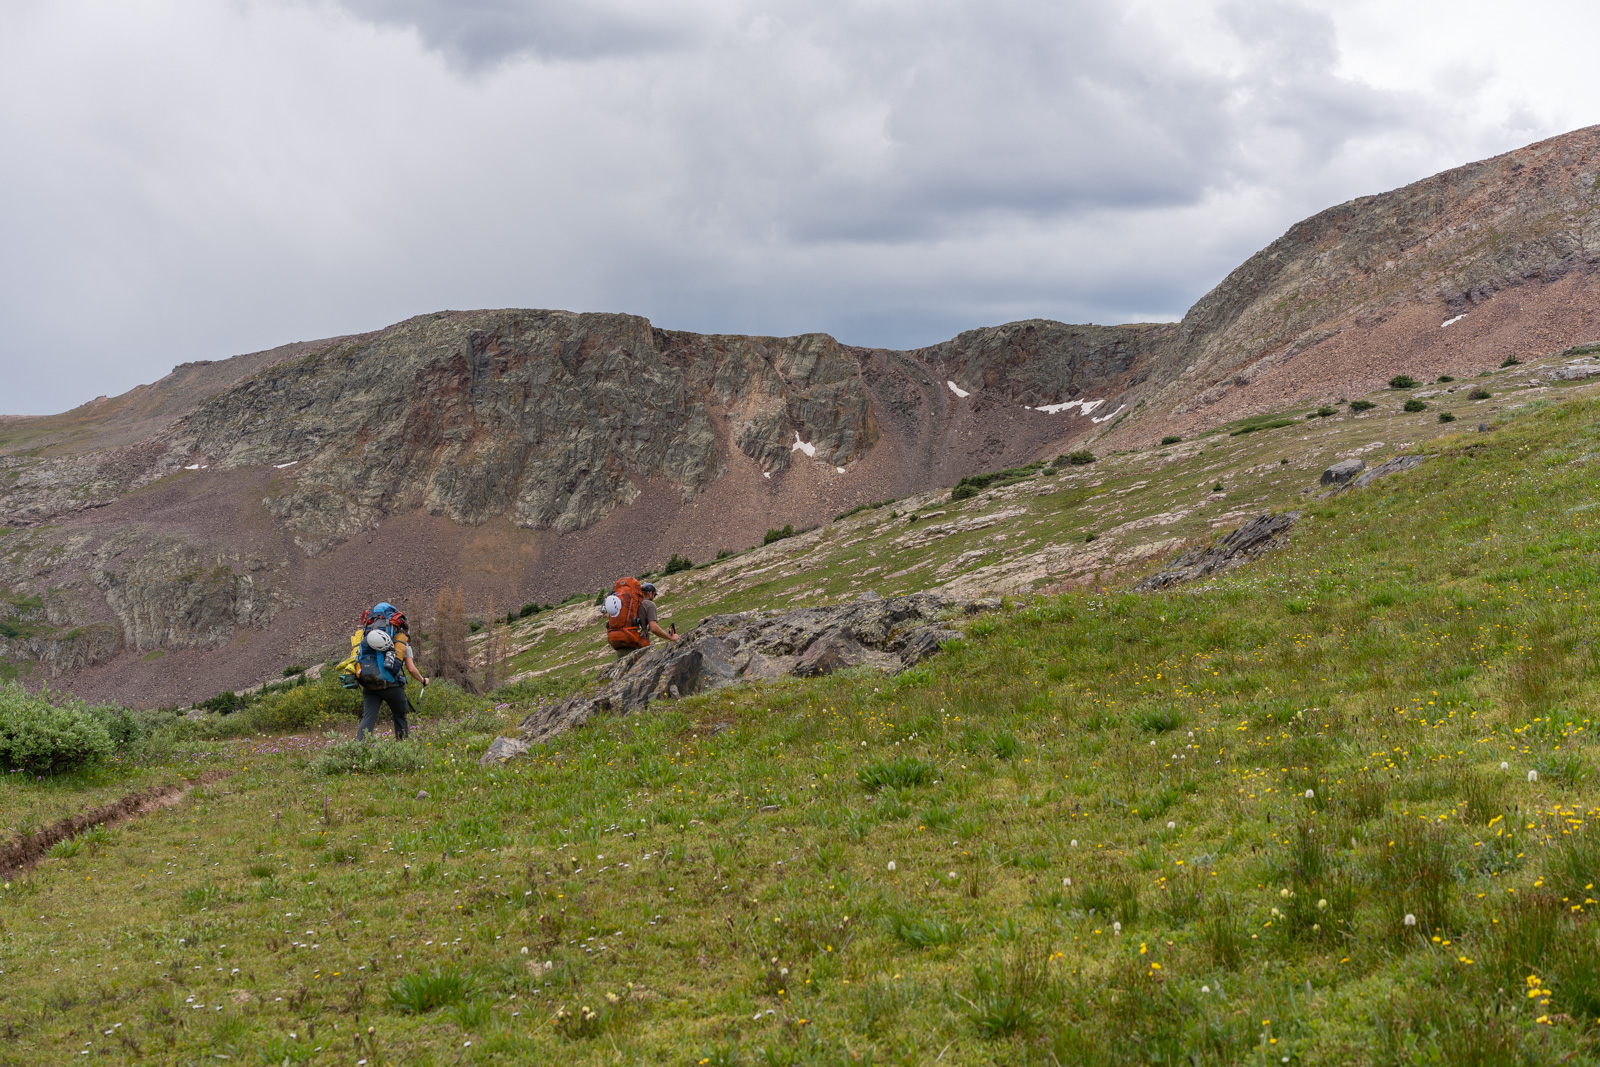
As we wound our way up the switchbacks above treeline, Hunchback Mountain came into view, the last standing peak at the end of the mighty Vallecito Creek basin. I remember climbing Hunchback way back in 2000 when I worked with Colvig Silver Camps - we were taking a group of kids from Highland Mary Lakes all the way to Vallecito Campground. That was the first time I experienced this mighty and amazing area, and I am so thankful I did!
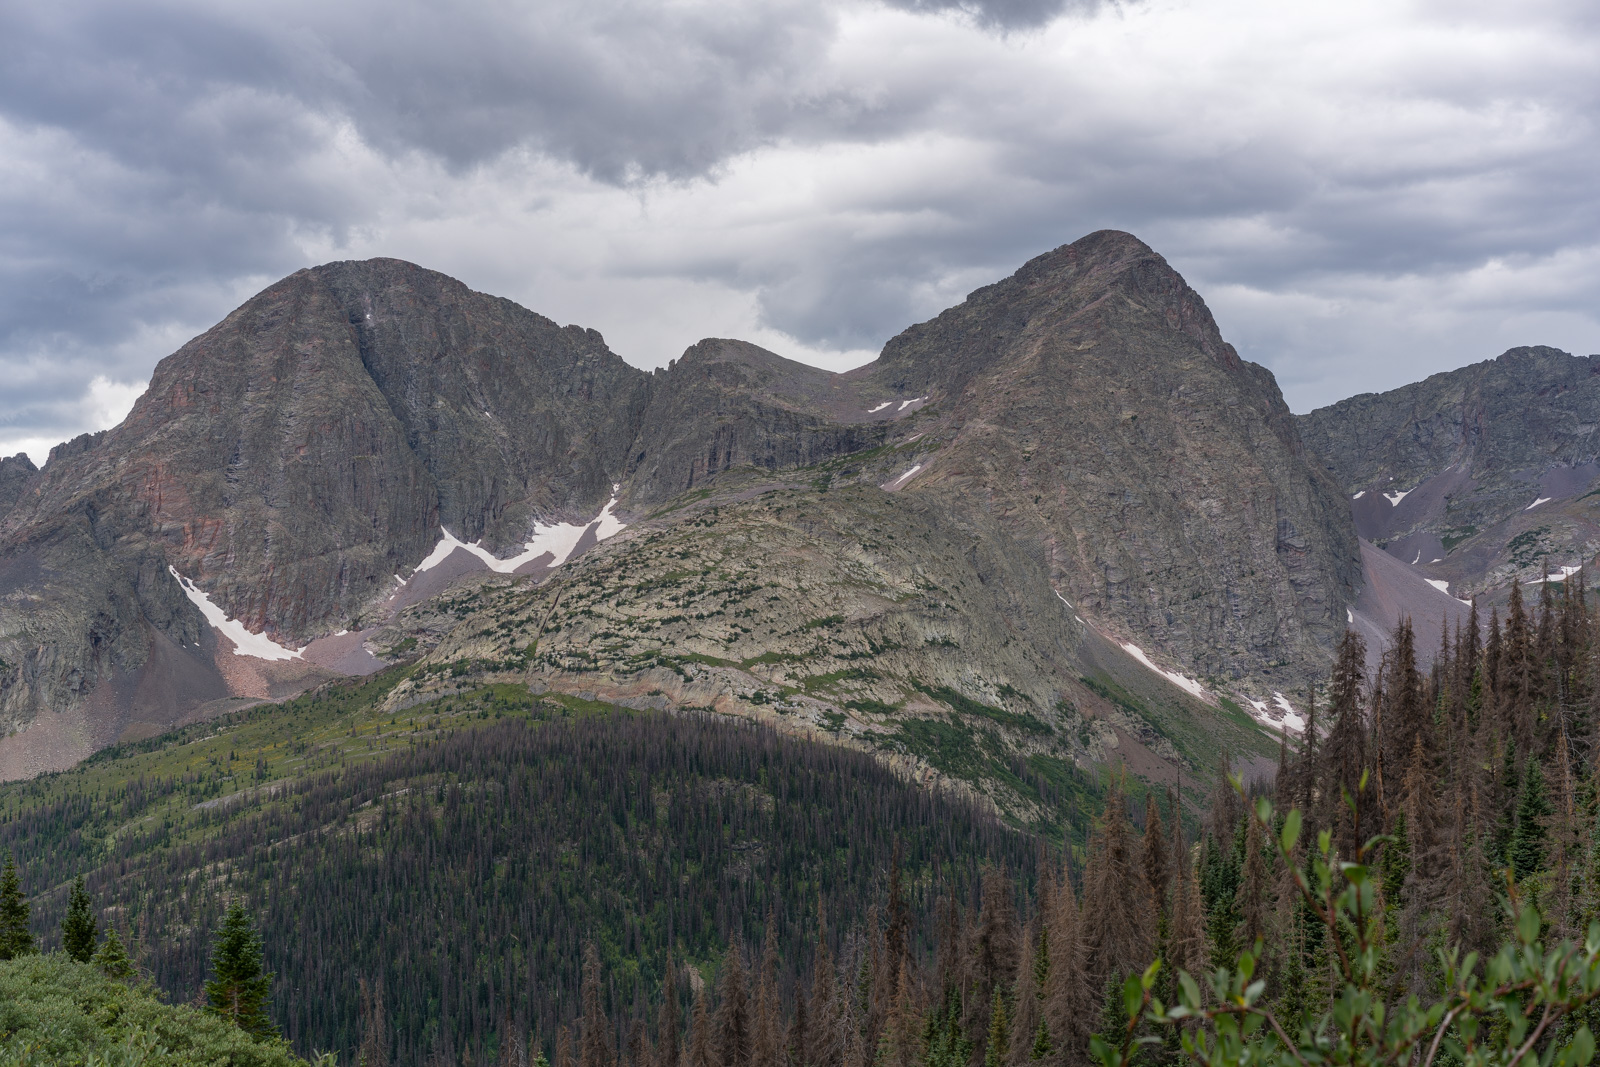
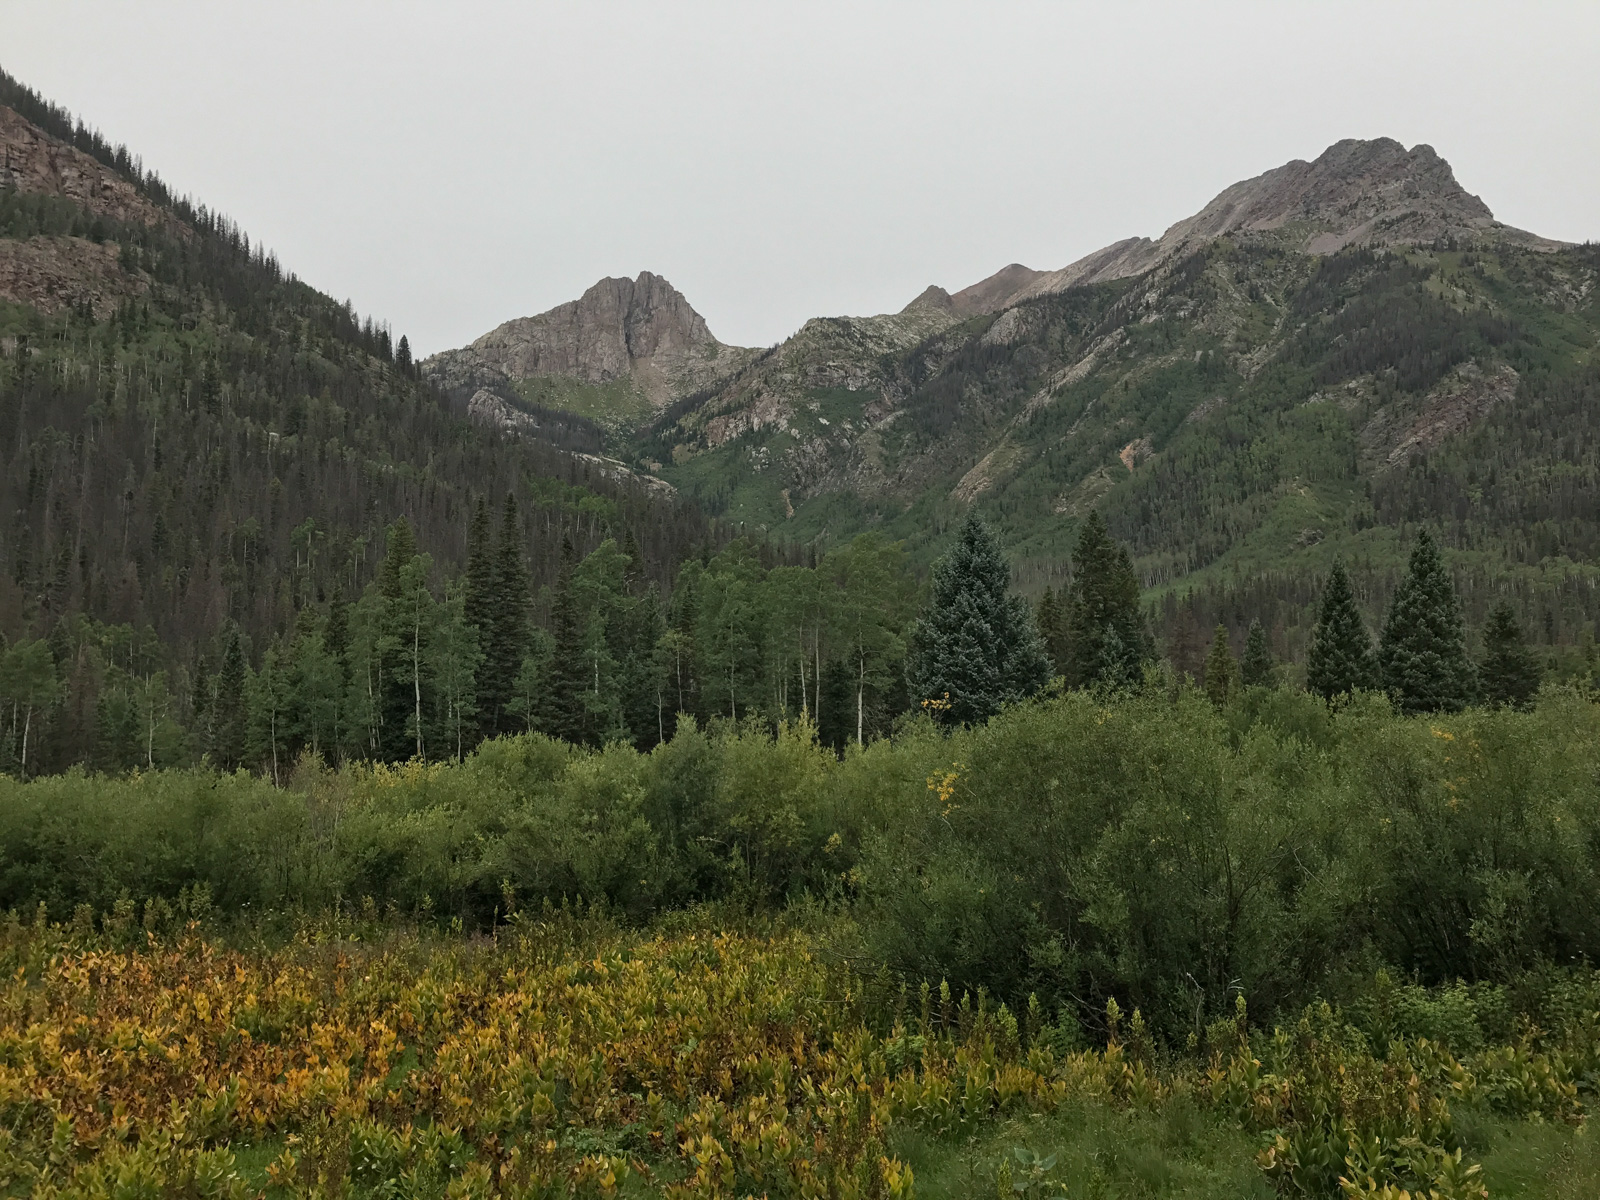
I was excited to see this area again from this vantage point. As we arrived at the summit of Hunchback Pass, the first views of 13,617 ft. "The Guardian" came into view. The Guardian is essentially the last in line and furthest east peak of the mighty Grenadier Range.
As we rounded the corner, both 13,628 ft. Mount Silex (right) and 13,617 ft. The Guardian (left) came into view. It was magical.
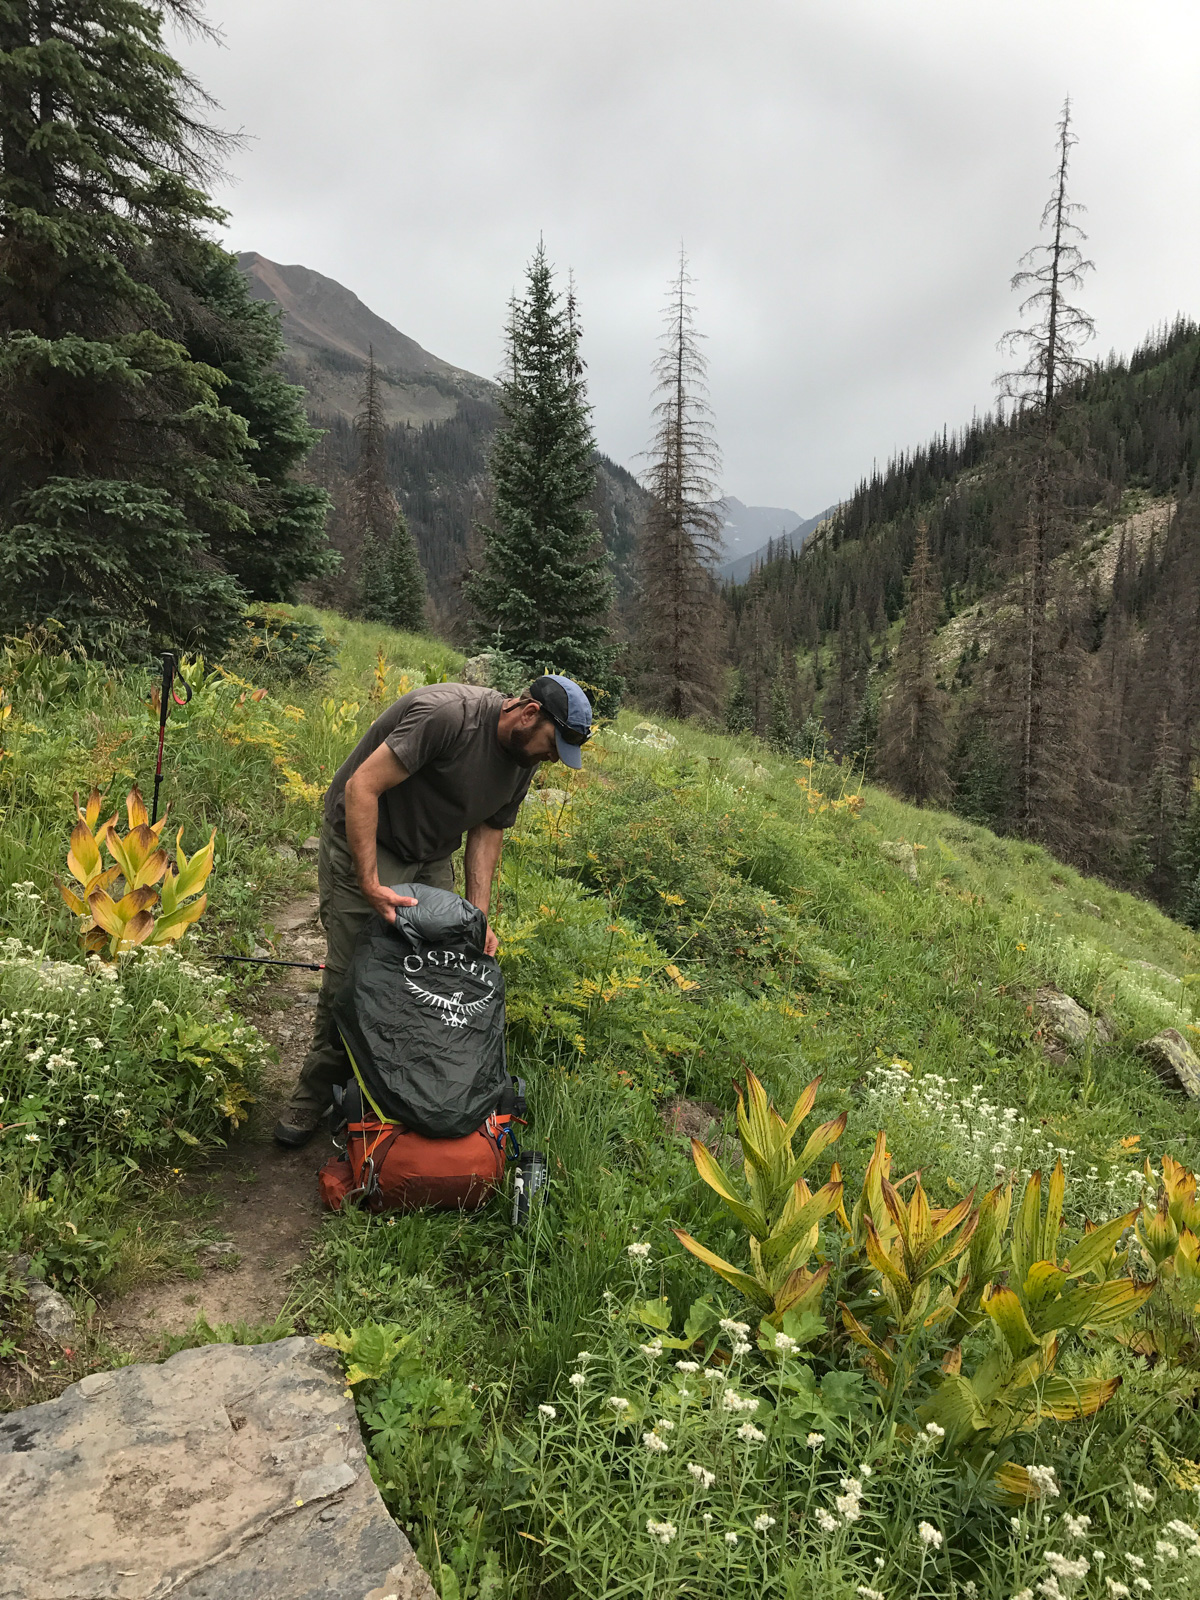
As we descended into Vallecito Basin, the weather looked as though it would bring some rain, so we decided to stop to get some snacks and to put on our rain gear. Shawn was pleasantly surprised to find that he had grabbed the wrong pack cover when he left the house. Surprisingly enough, it worked great!
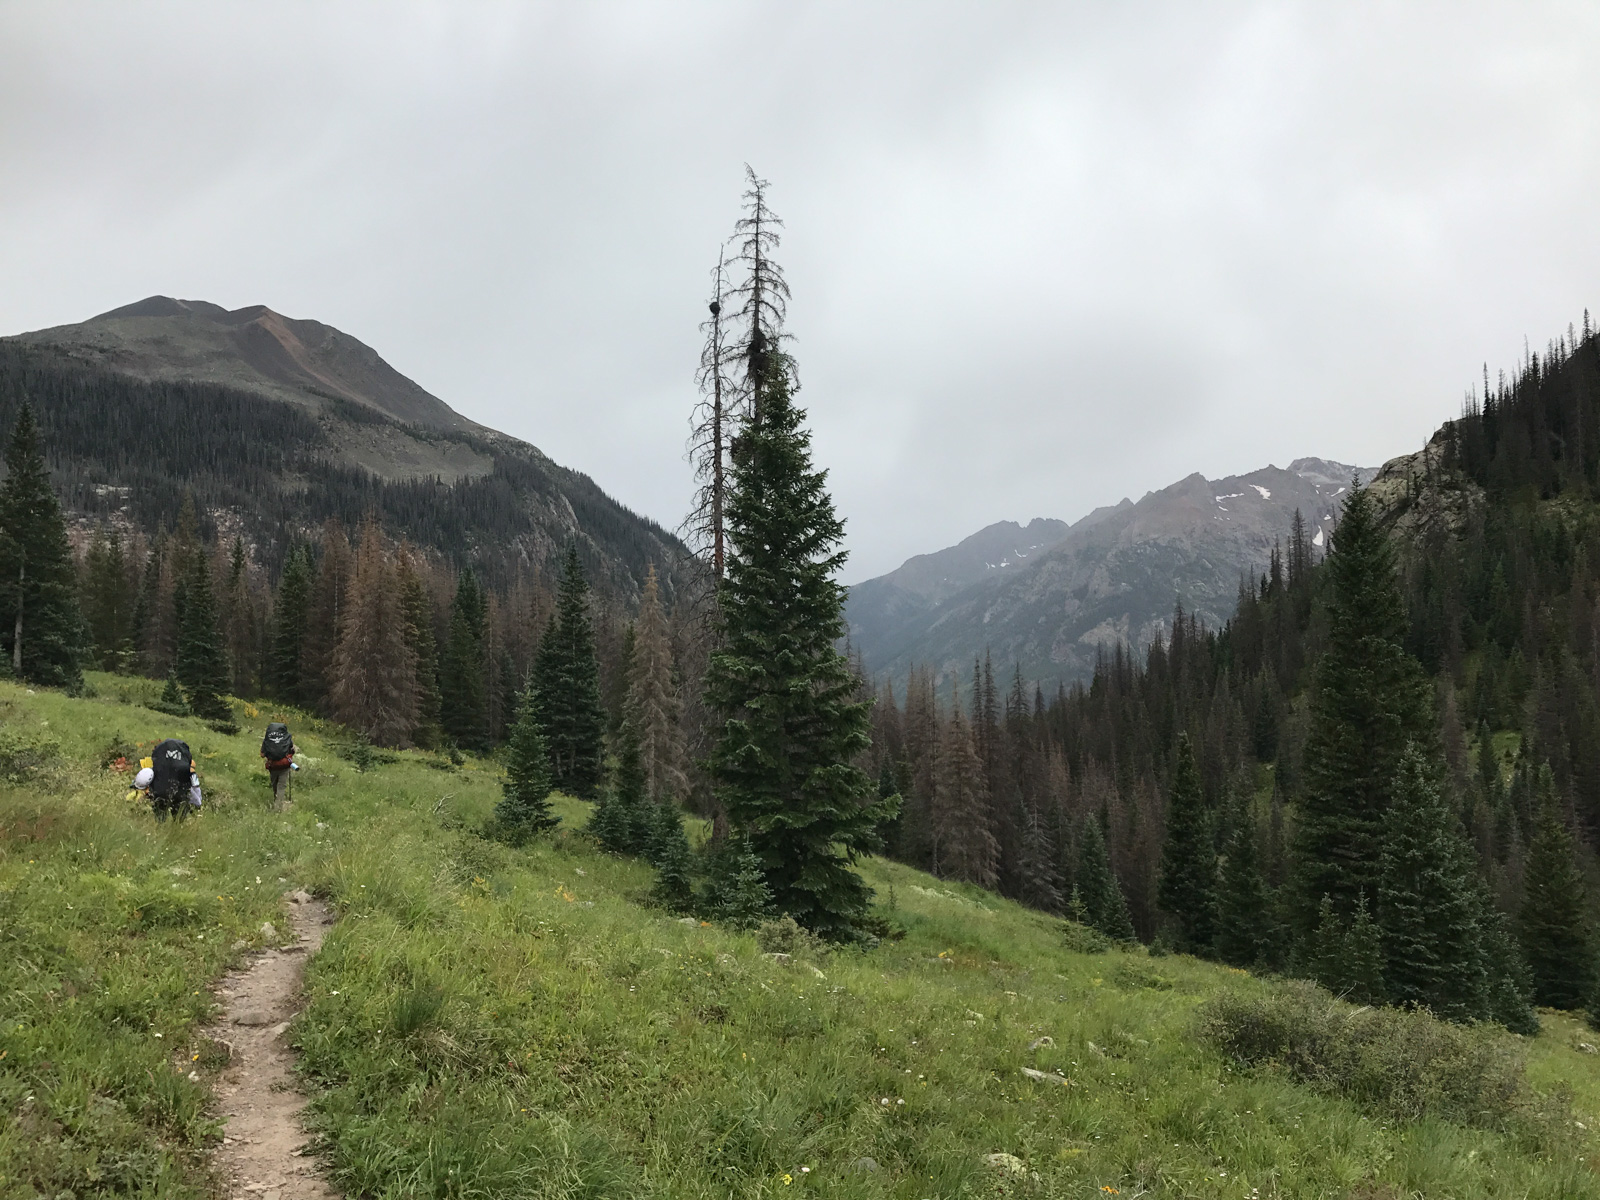
Rain covers on, we continued the gruelling hike down into the basin, with the northern flanks of some of the San Juan's greatest peaks looming in the distance, including Greylock Mountain and Thunder Mountain.
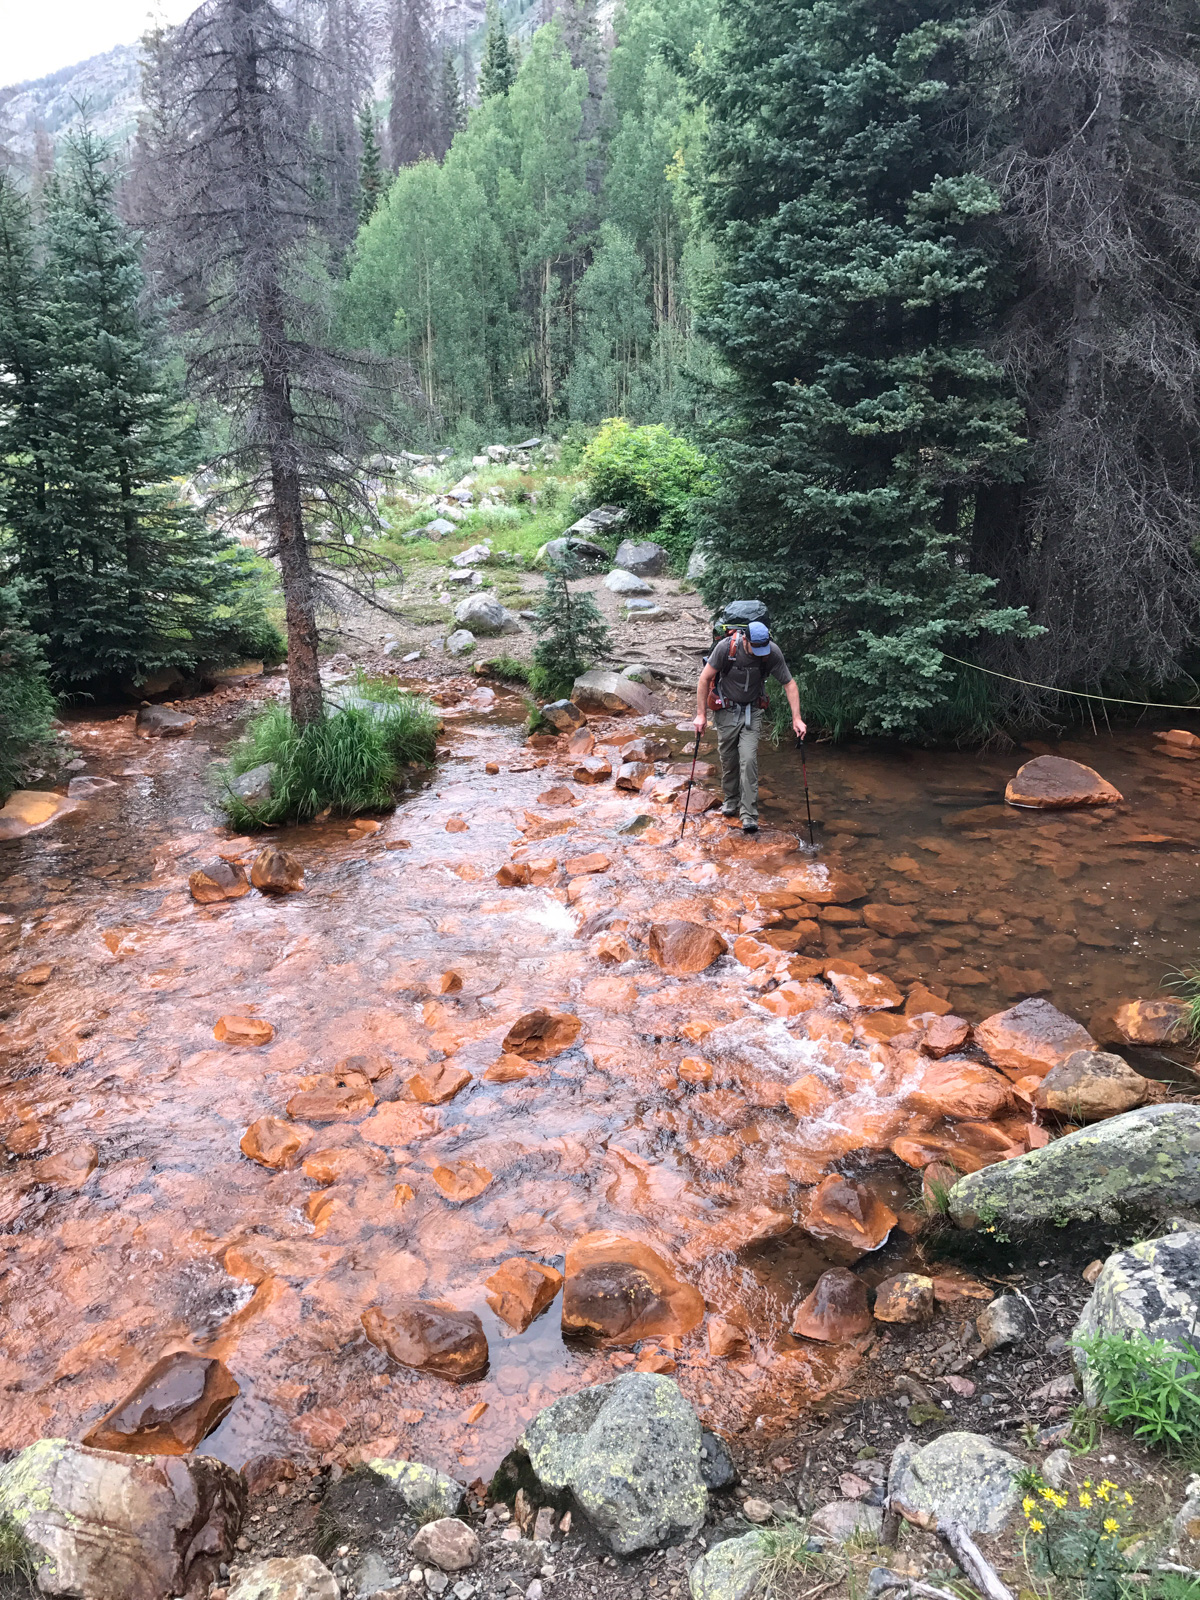
After negotiating several switchbacks into the forest below, we found ourselves at Rock Creek, which is stained an orange color, I presume from mining activity far above. We crossed without any problems.
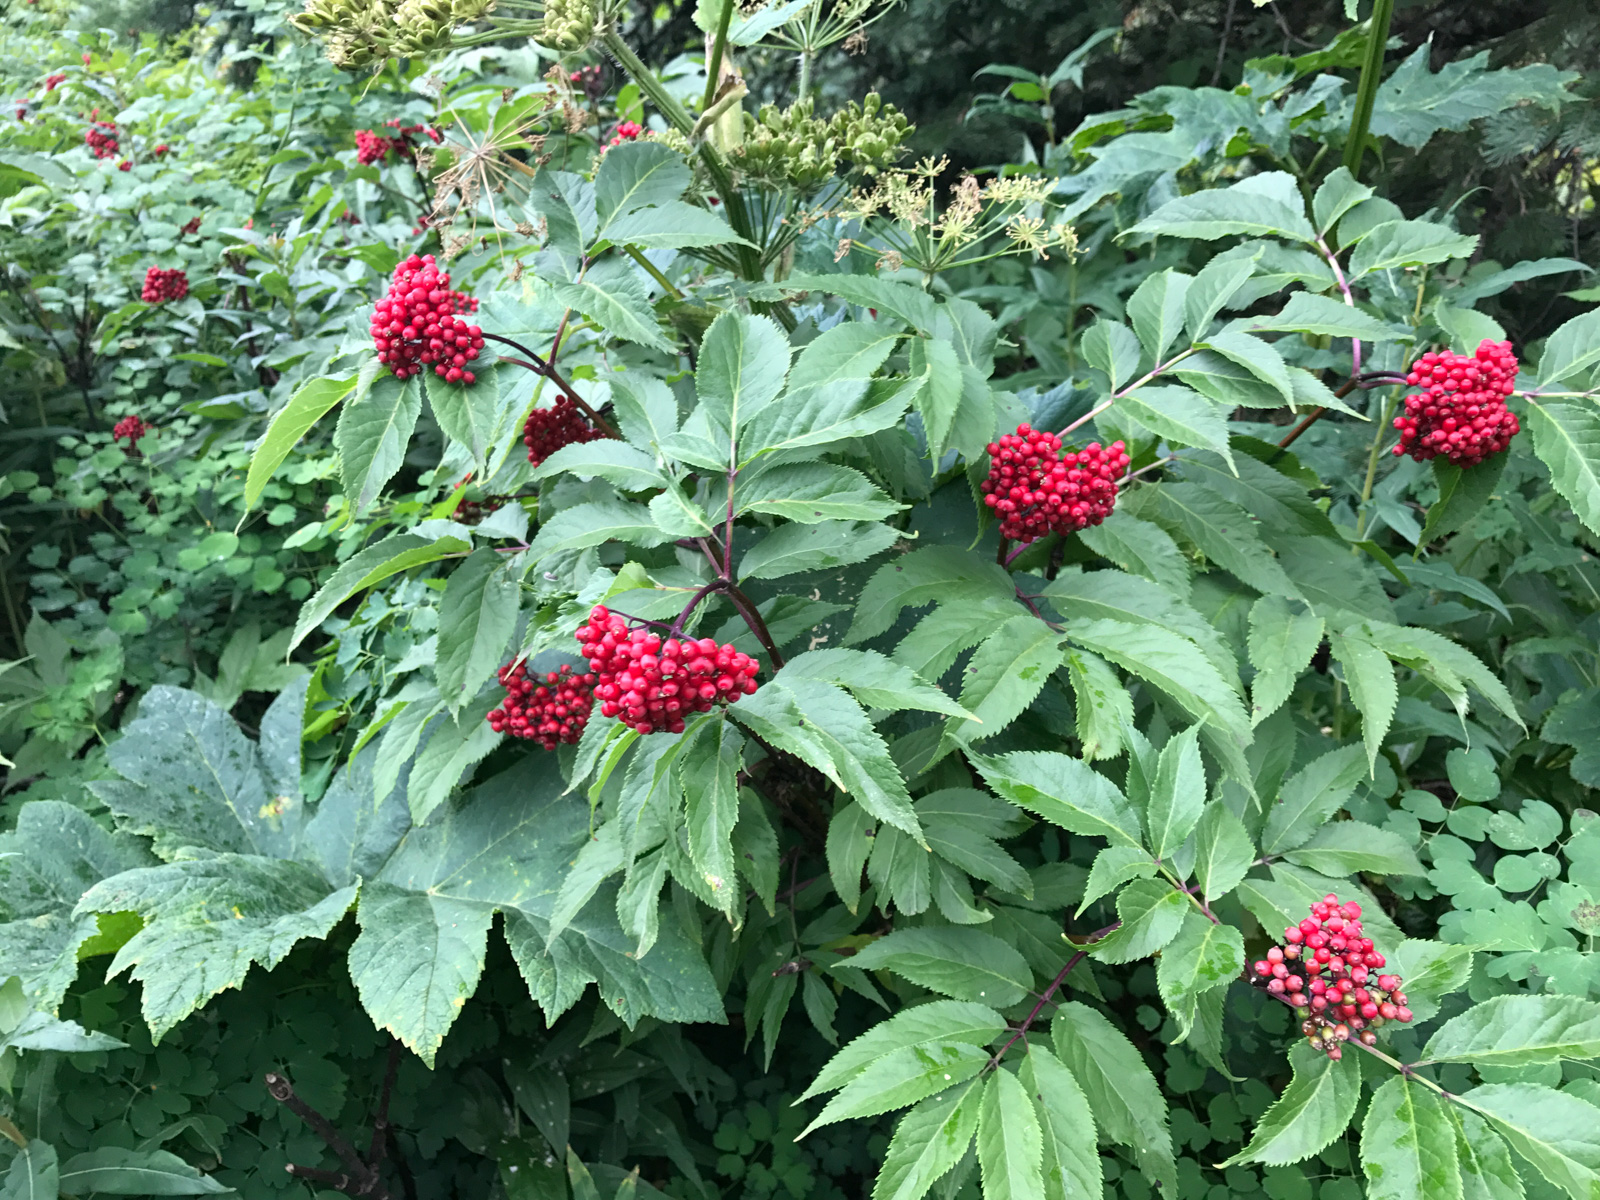
Before long, we found ourselves walking through thick plants covered in Red Elderberries, mixed in with numerous raspberry plants, which made for tasty snacks (the raspberries, not the poisonous elderberries).
Having a lot of luck with the rain so far, we found ourselves at the turn-off for Sunlight Creek.
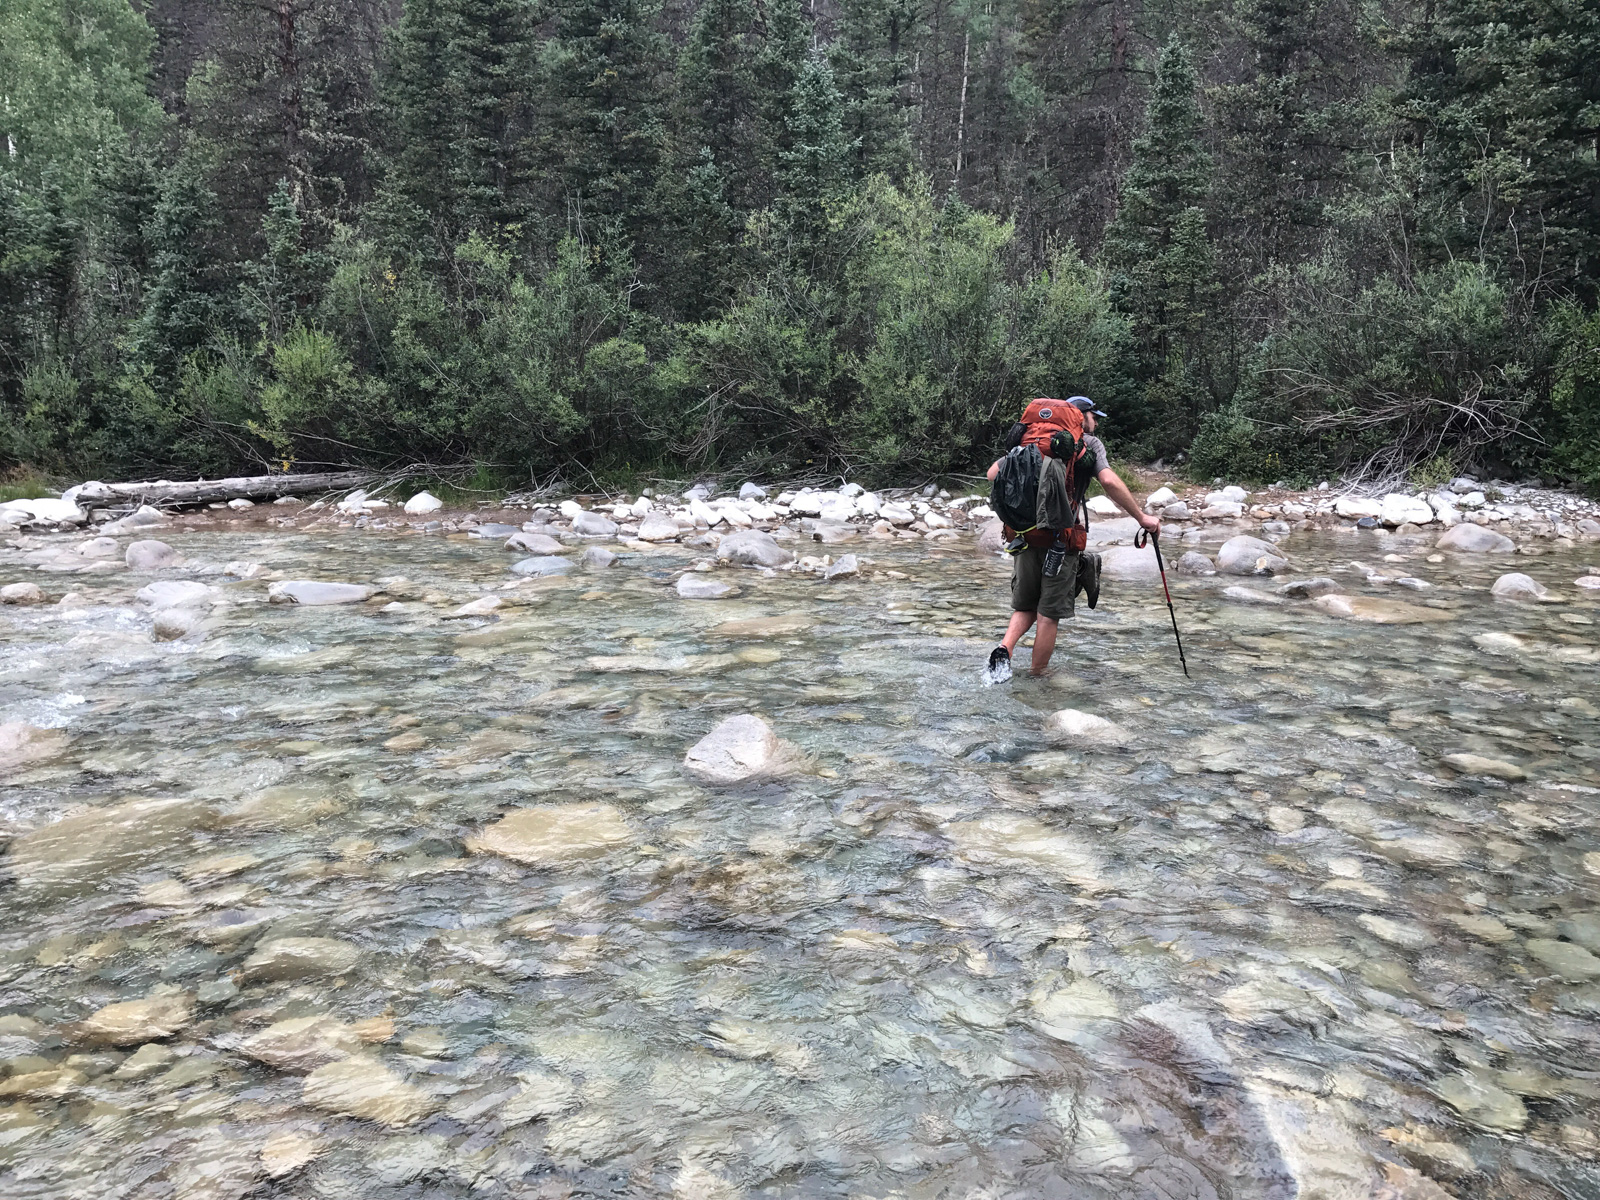
We found ourselves at Vallecito Creek and Shawn and Natalie decided to switch to their water shoes. I opted to keep my mountaineering boots on (I really did not have a choice). I managed to cross without getting my feet wet. Shawn took a nice stroll through the creek.
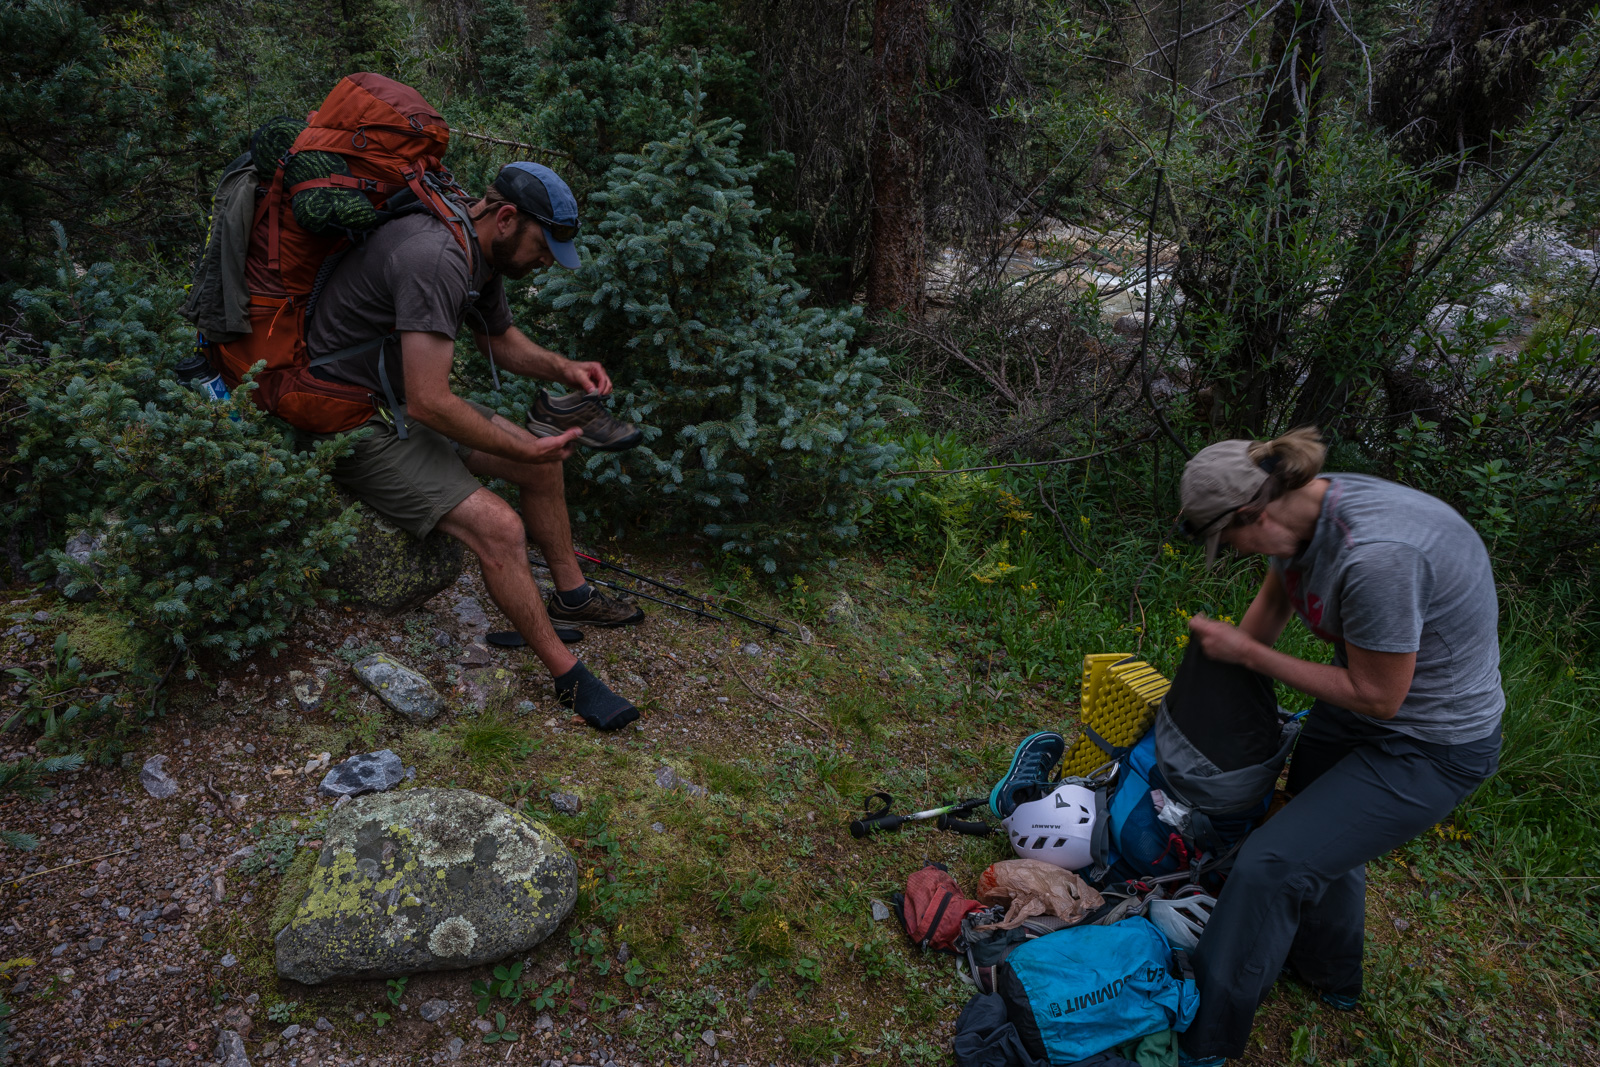
Shortly after crossing the Vallecito, Shawn and Natalie put back on their normal footwear and we were off to the races. About 5 minutes into the hike, we were forced to cross Sunlight Creek and this time Natalie and Shawn kept their normal footwear on. Both dipped into the water on accident and got wet, so they had to stop and get new socks on. Bummer!
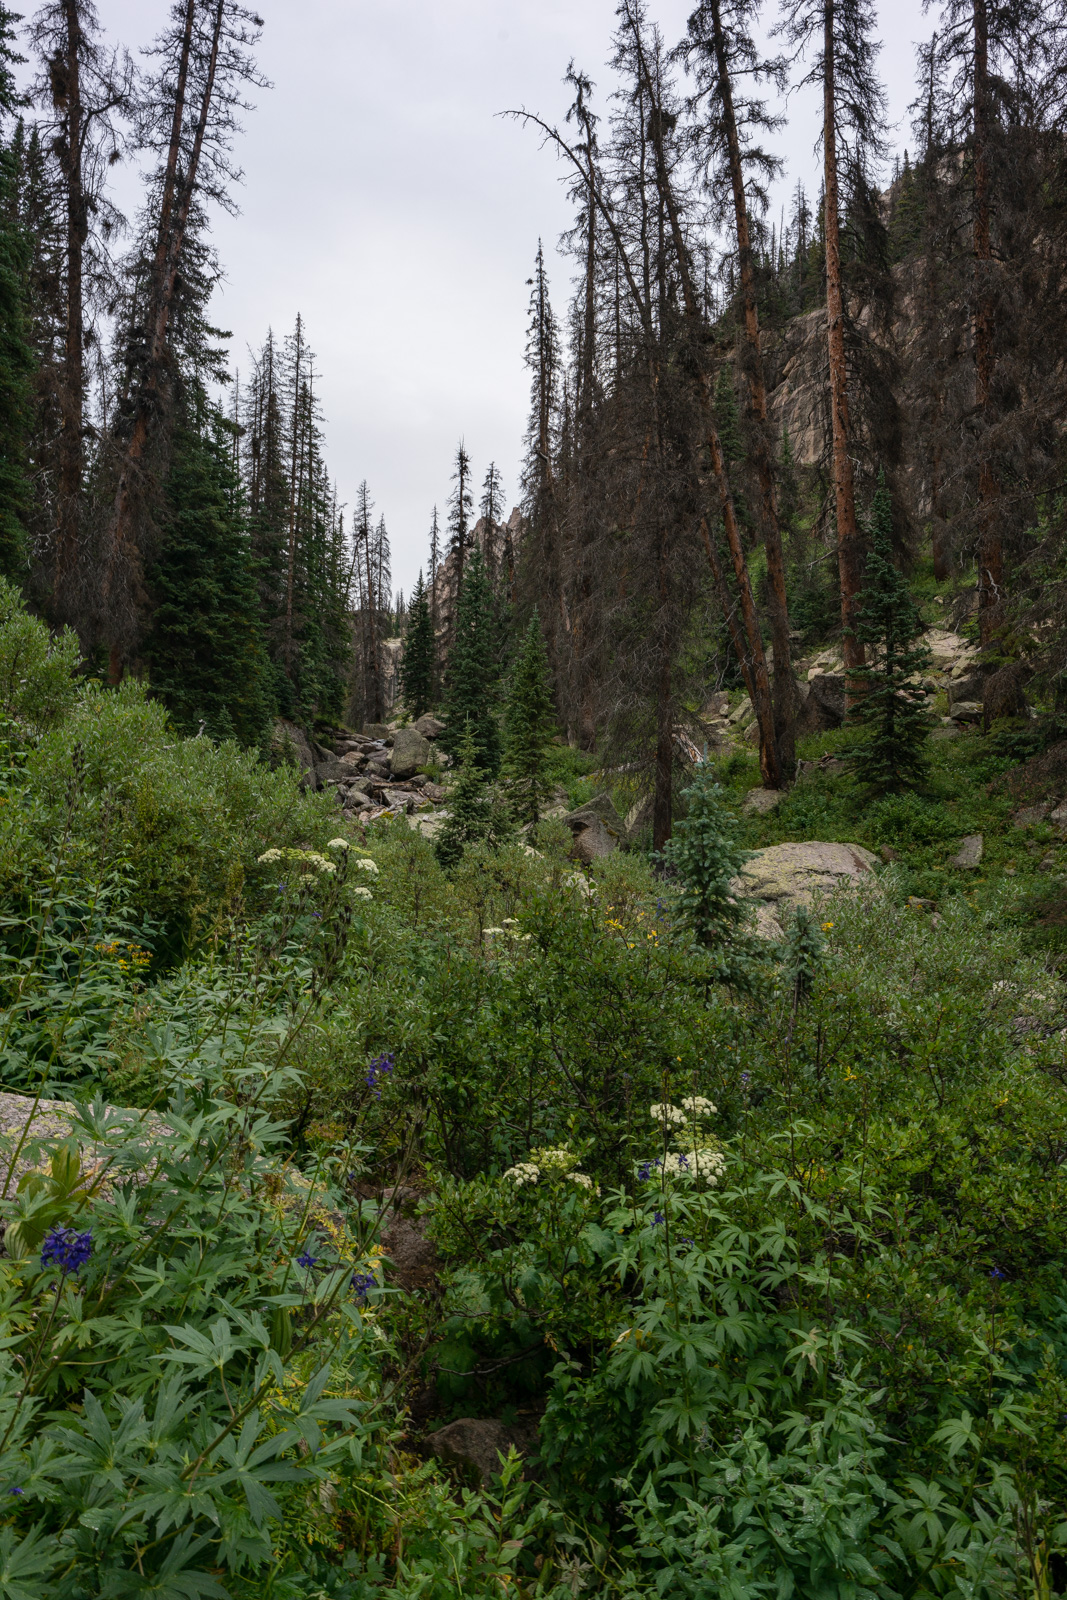
We continued to blaze up the almost hidden trail up Sunlight Creek, which was very dense in spots and really hard to navigate. Do you see a trail?
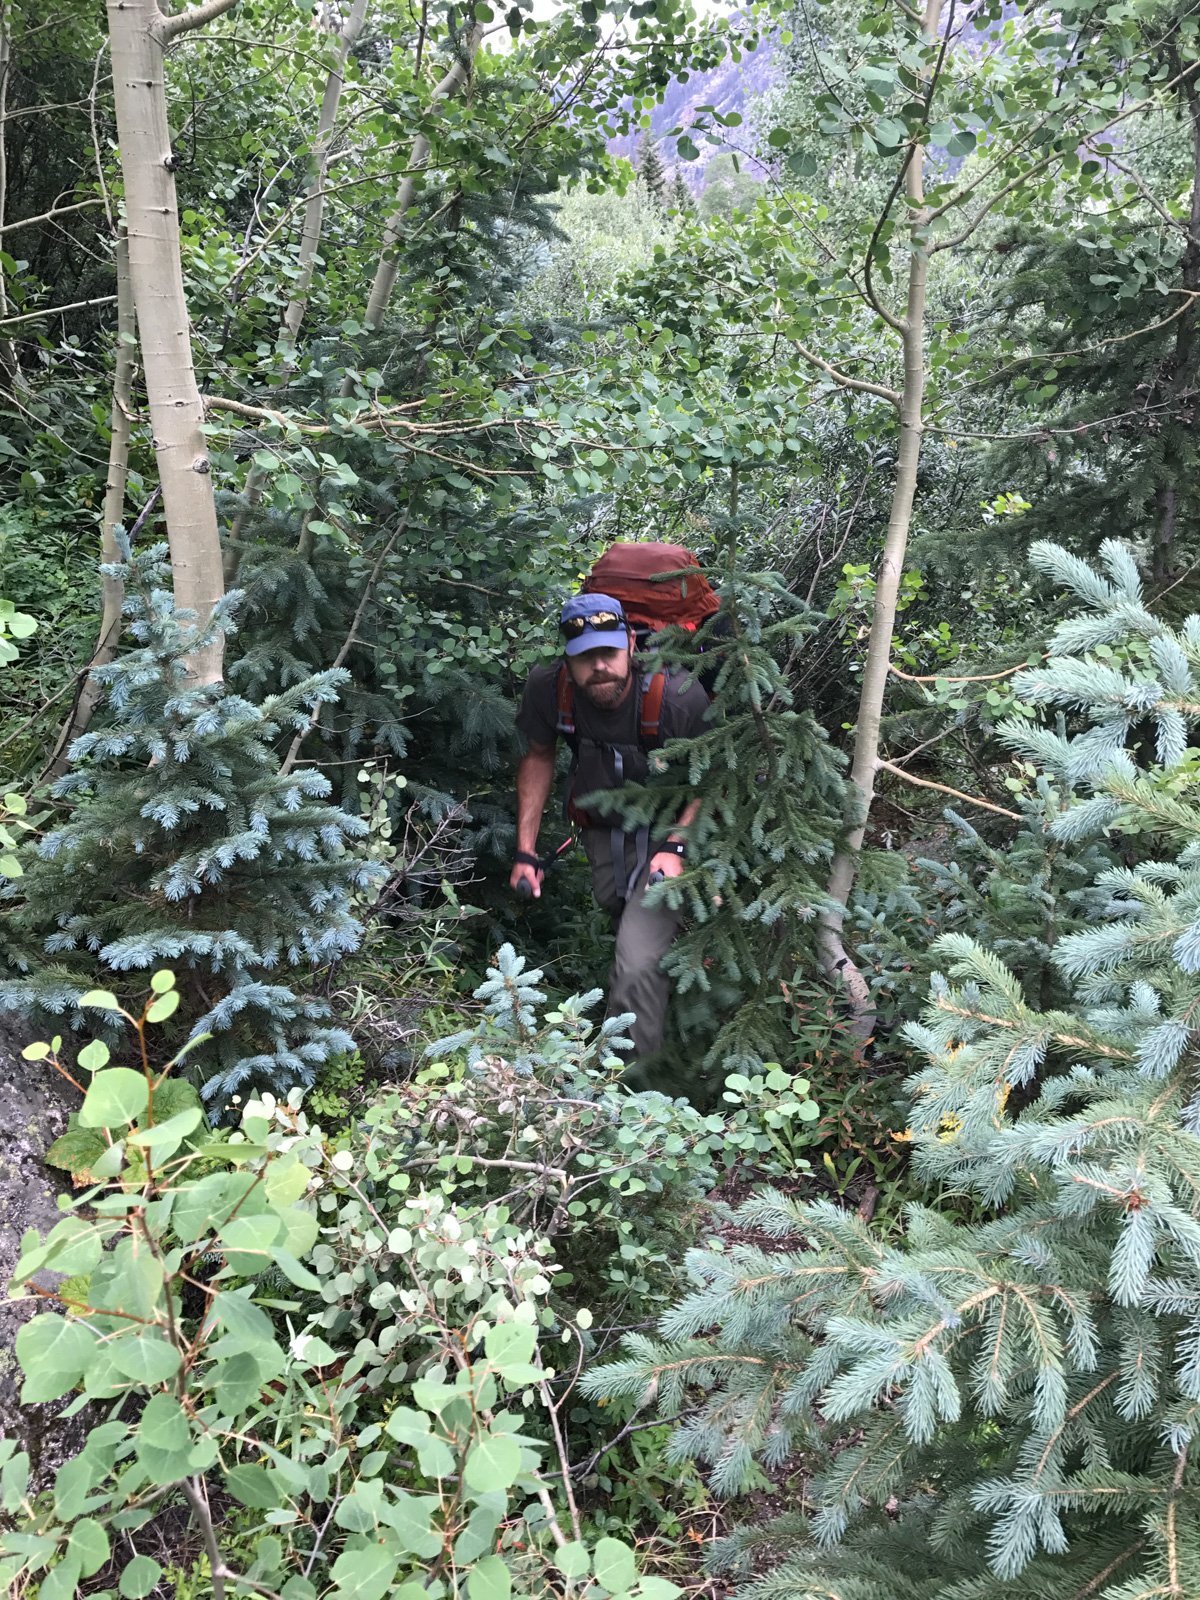
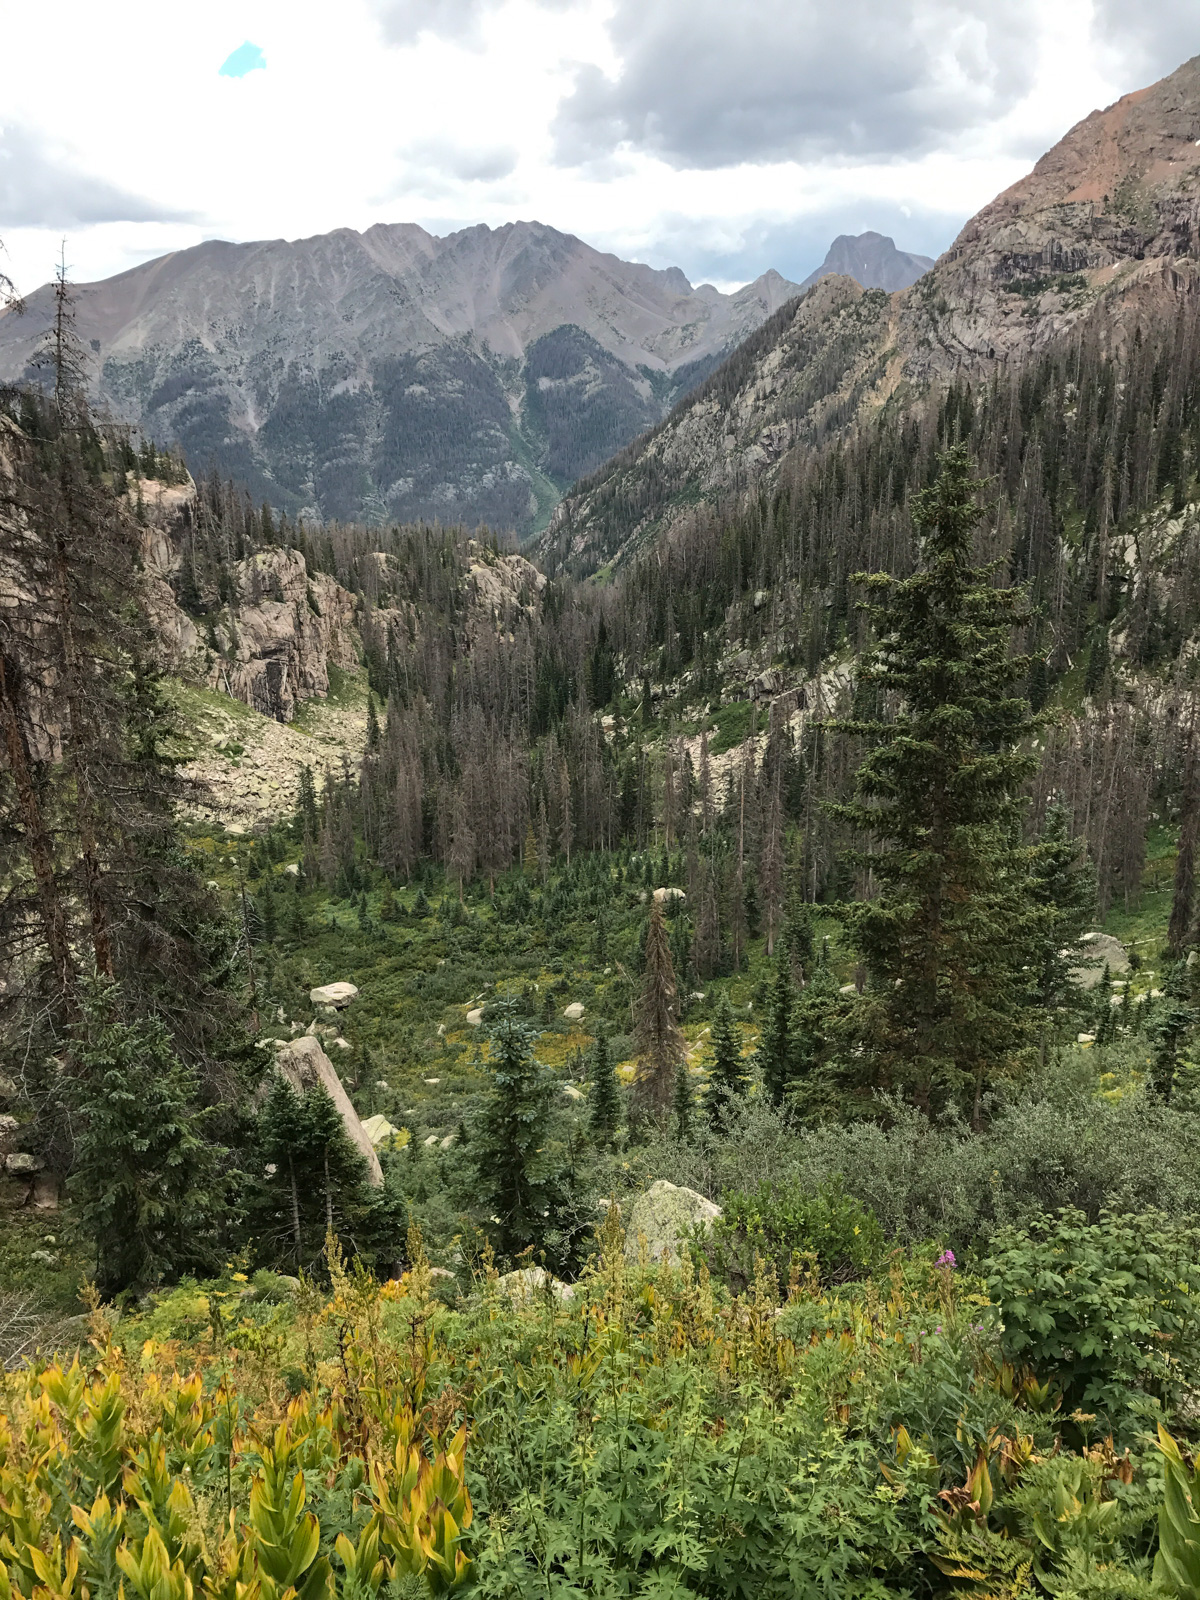
This trail was wicked steep and full of overgrowth, deadfall, and crazy twists and turns. At least the view was good at times!
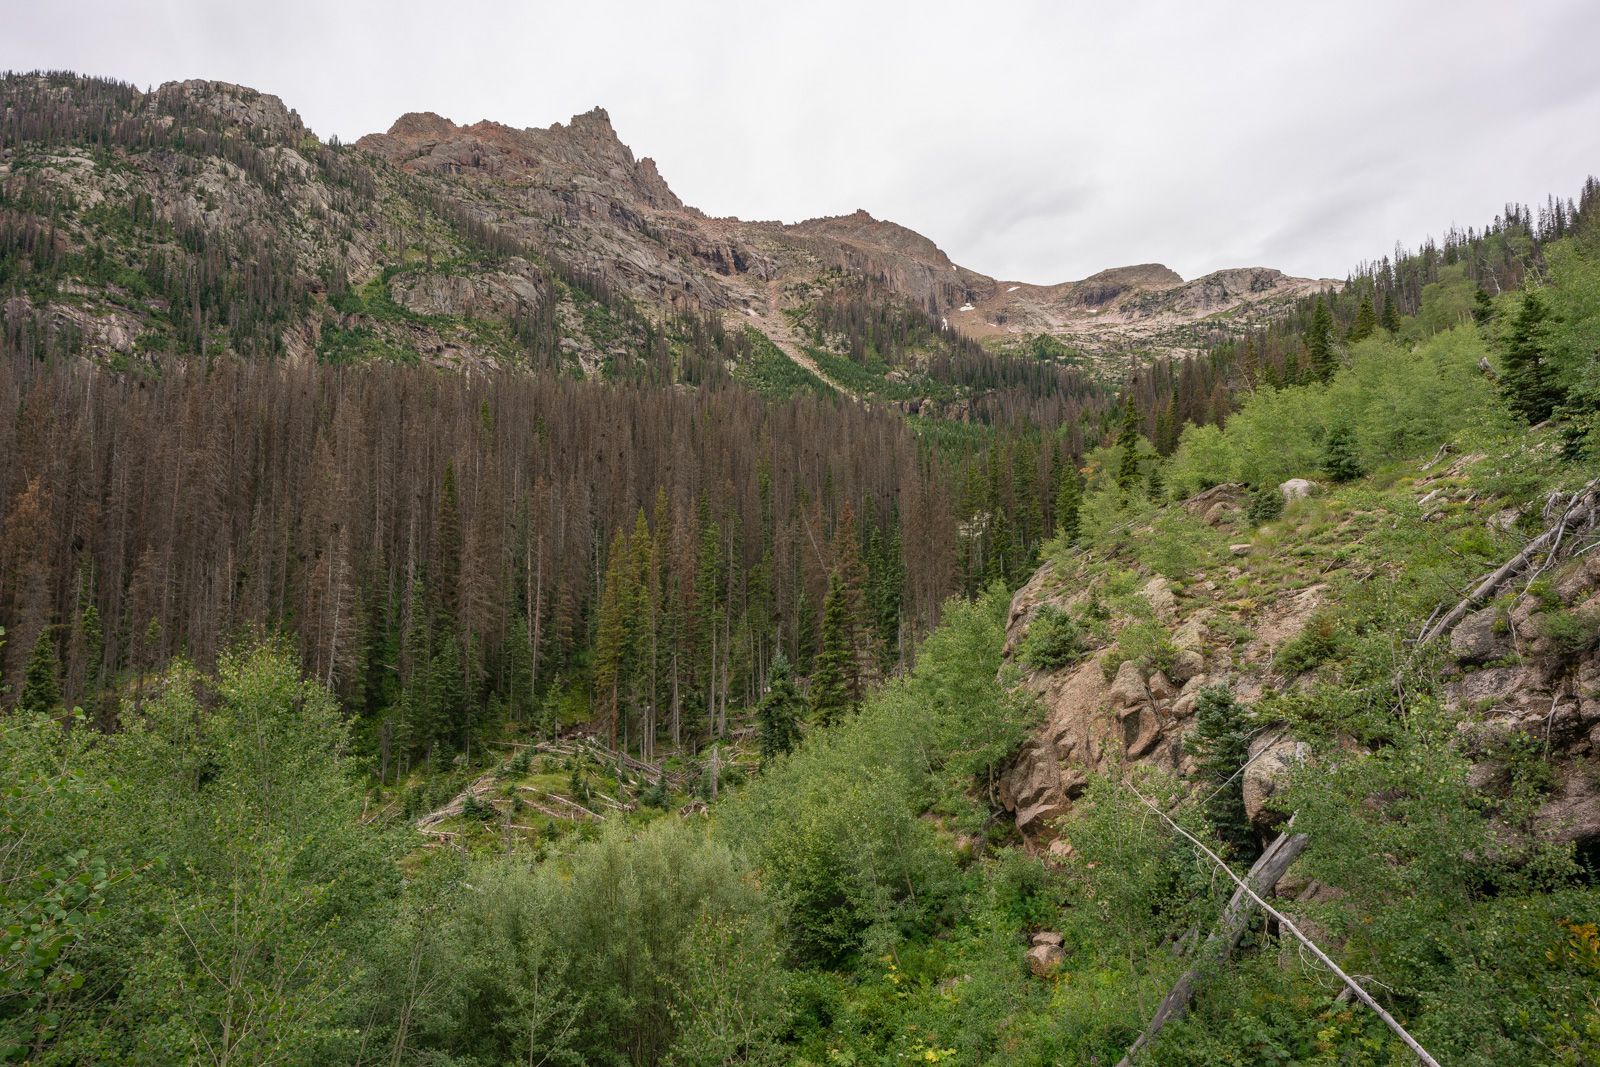
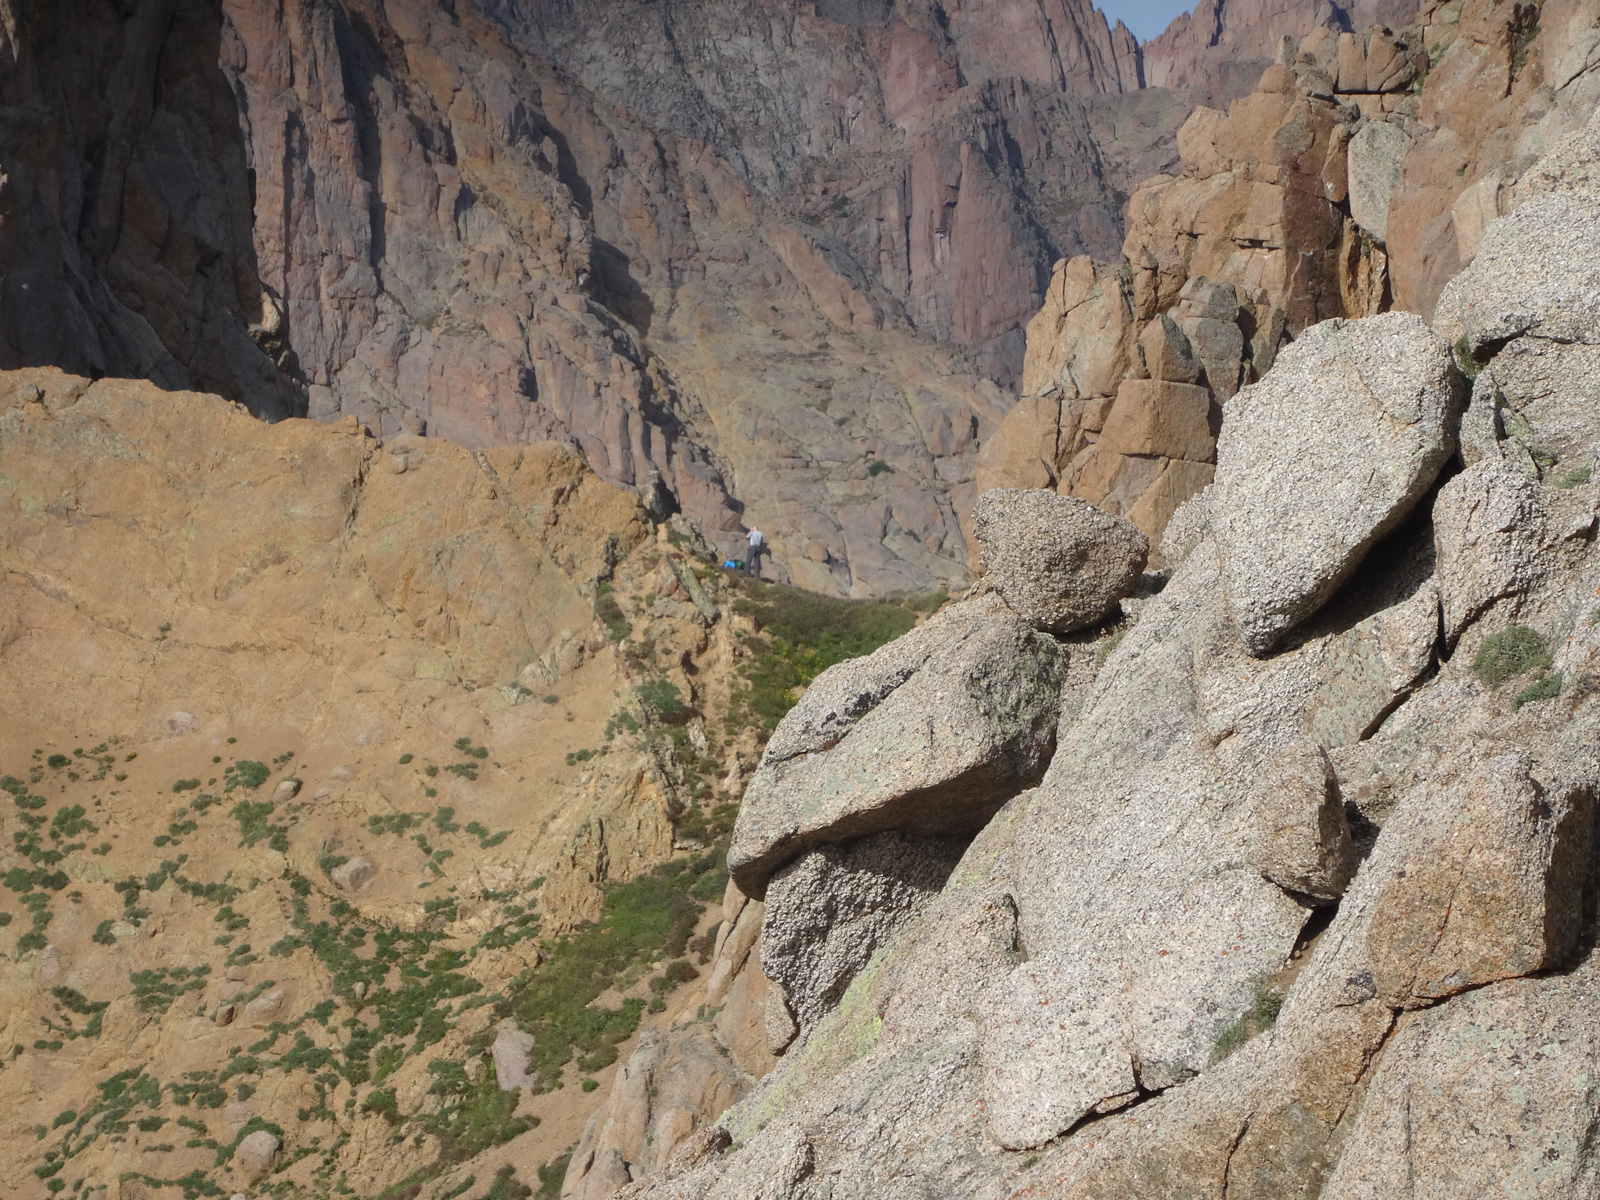
At one point in the trail, before it reaches the creek again, we were tempted to go up to the right; however, the correct right is to go down and cross the creek again and then go right up towards Jagged Mountain. This is the view of the terrain we found when we went too high.
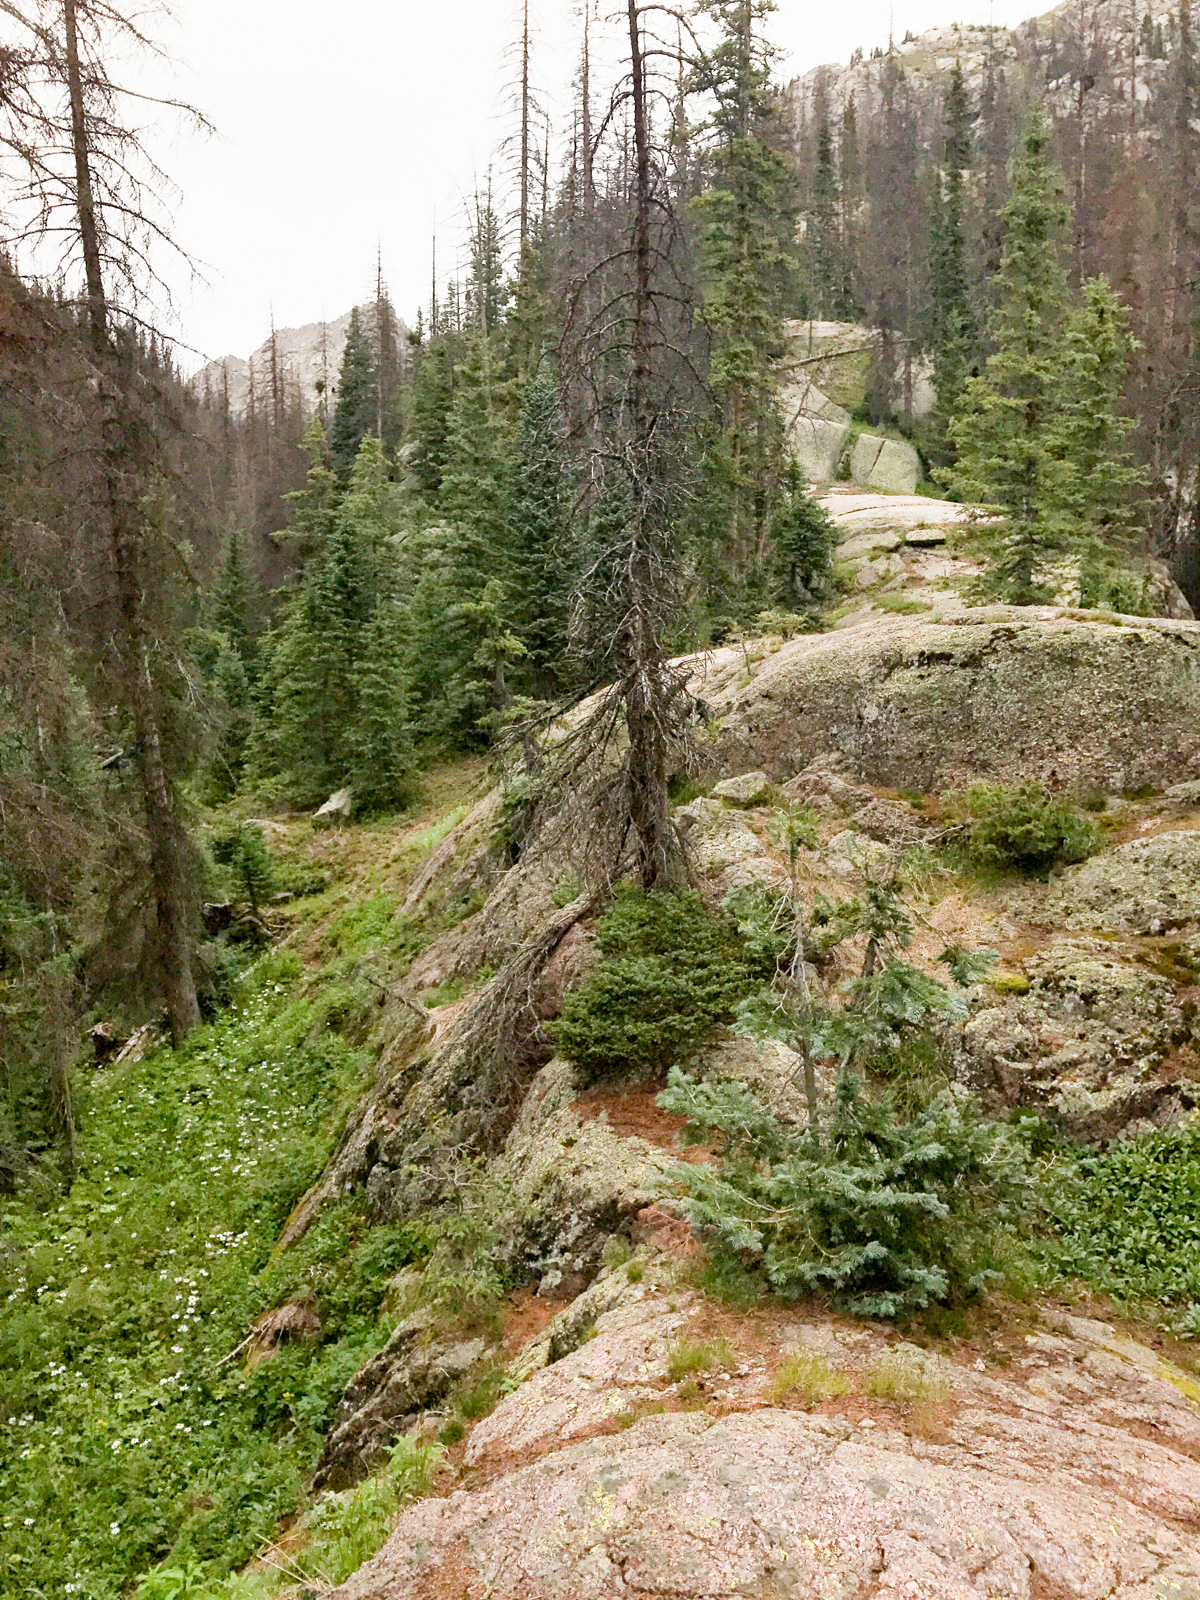
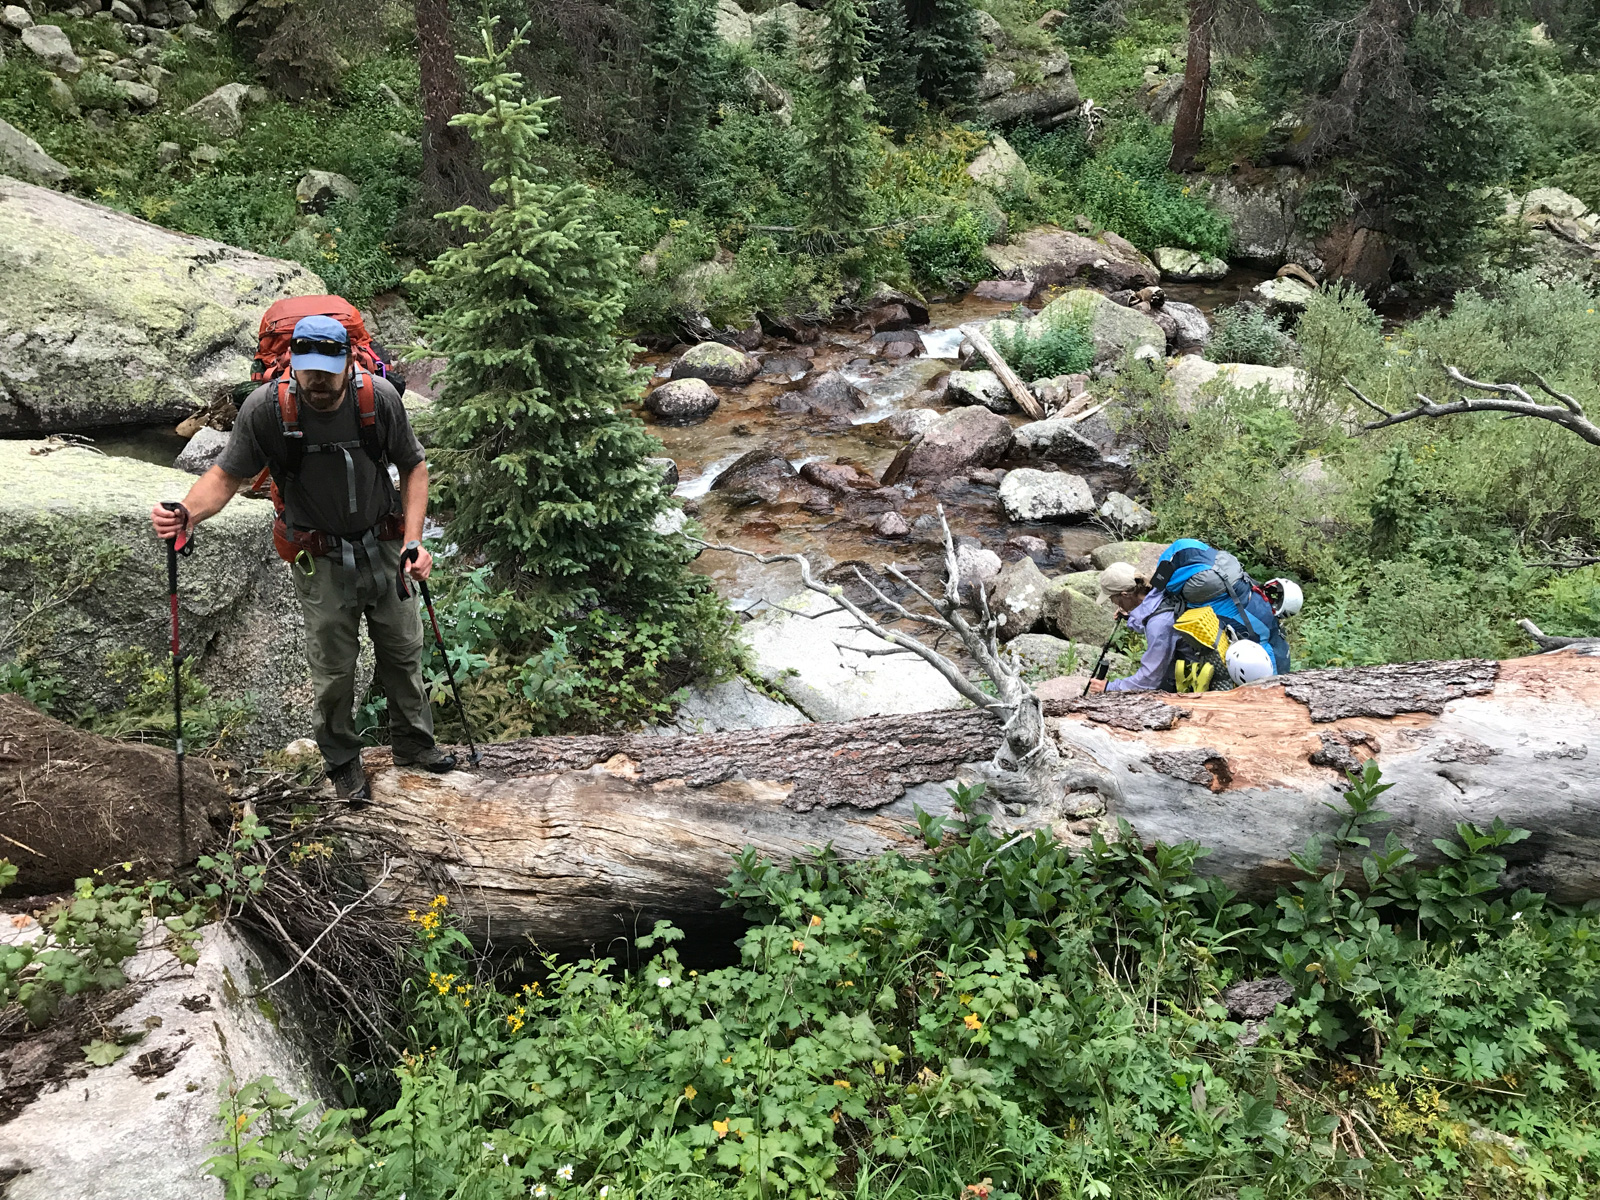
Once across the creek again, the trail was very hard to navigate through logs, wildflowers, and huge boulders. The terrain was steep, steeper than most approaches, and it was relentless.
As you can see, the trail was filled with all kinds of fun obstacles, and Natalie was growing weary with her huge pack. We were ready for camp.
Finally, we found a lovely campsite just across the creek on the right hand side below some large cliffs with a great view of the eastern face of Jagged Mountain. The campsite, if you are looking at a USGS topo map, is located just under the "l" and the "i" in Sunlight Creek at about 11,000 ft. just before the trail begins a sharp climp up to the upper basin.
We set-up our tents, ate dinner, and crashed. The plan was to get up and go up into the upper basin for a warm-up climb of either Knife Point or Peak 10. It rained a little over-night and I was exhausted but ready for the good fight!
DAY 2: Summit of the impressive 13,265 ft. Knife Point and photographing the Eclipse.
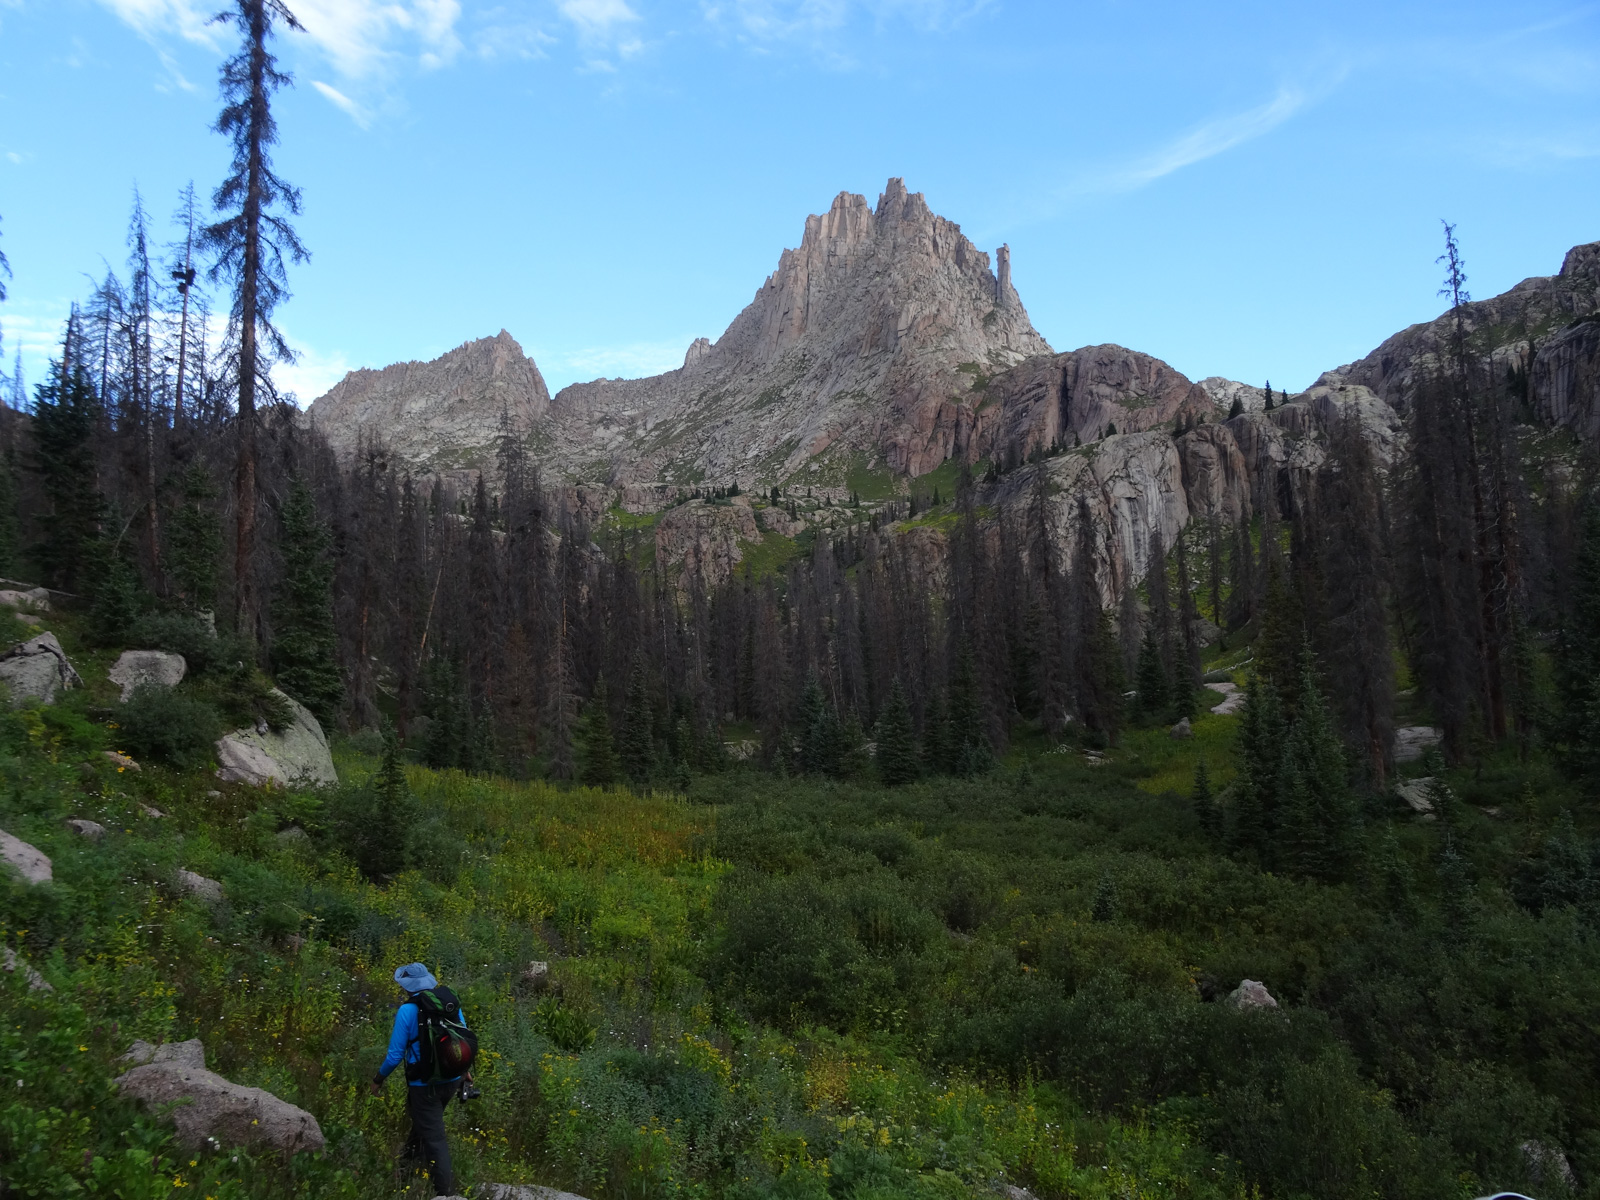
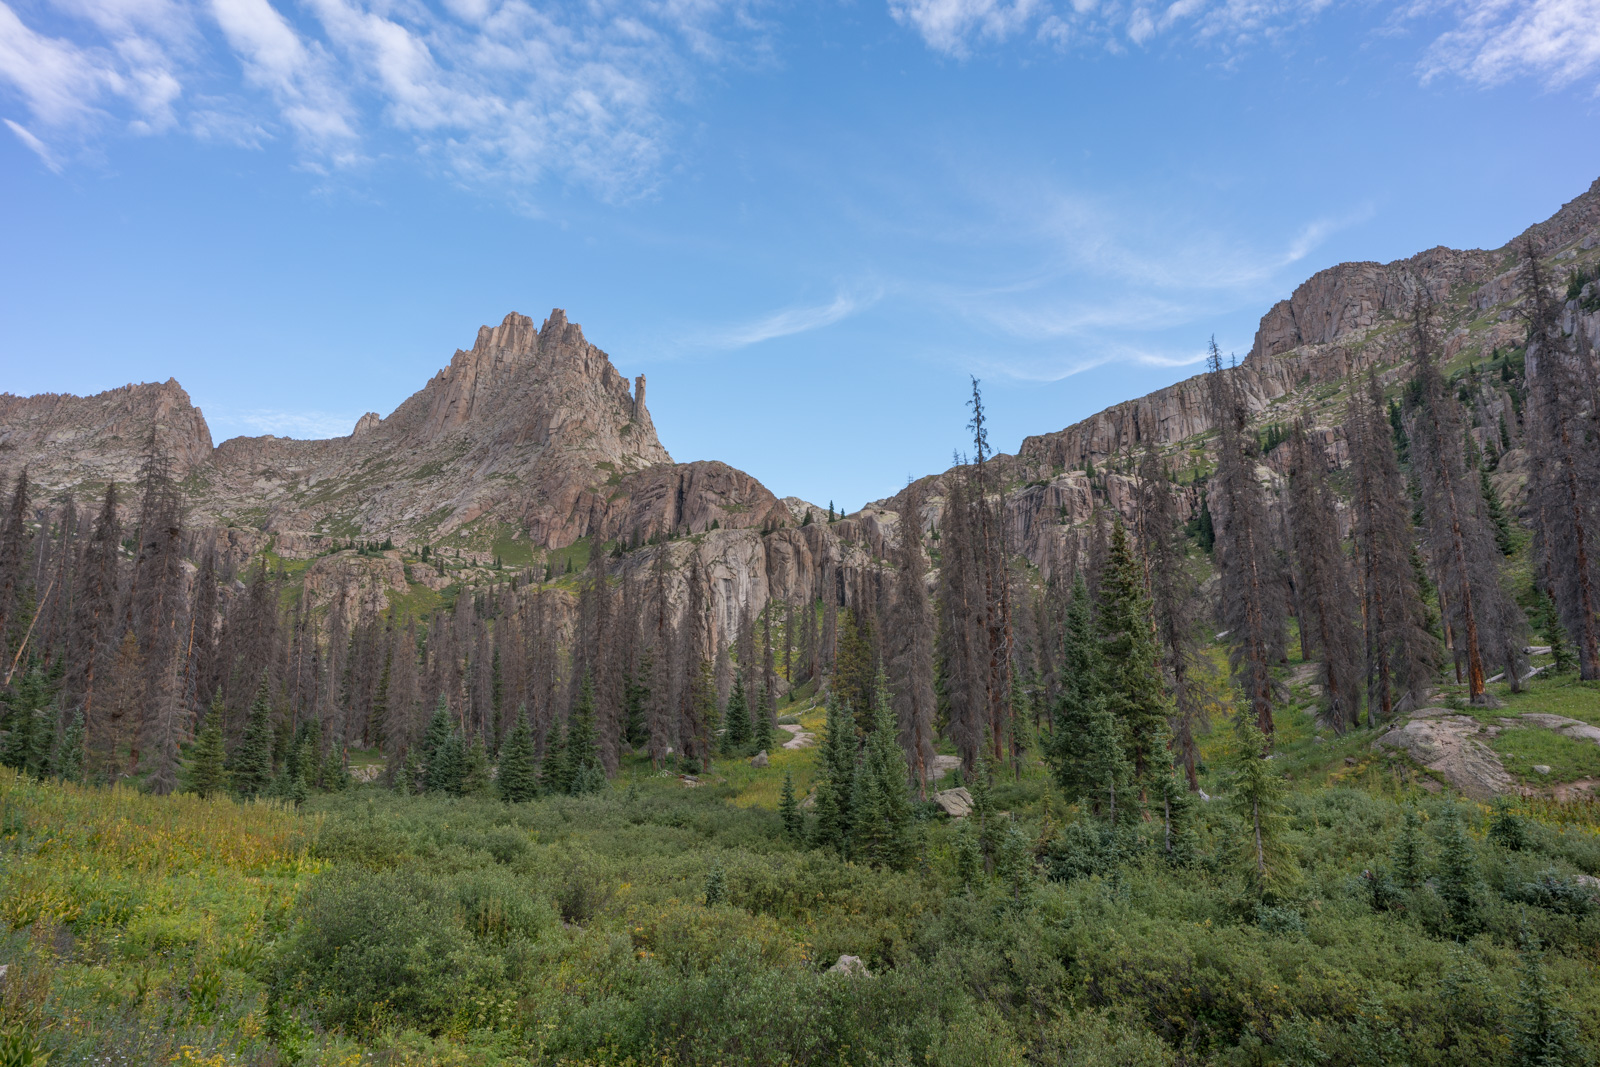
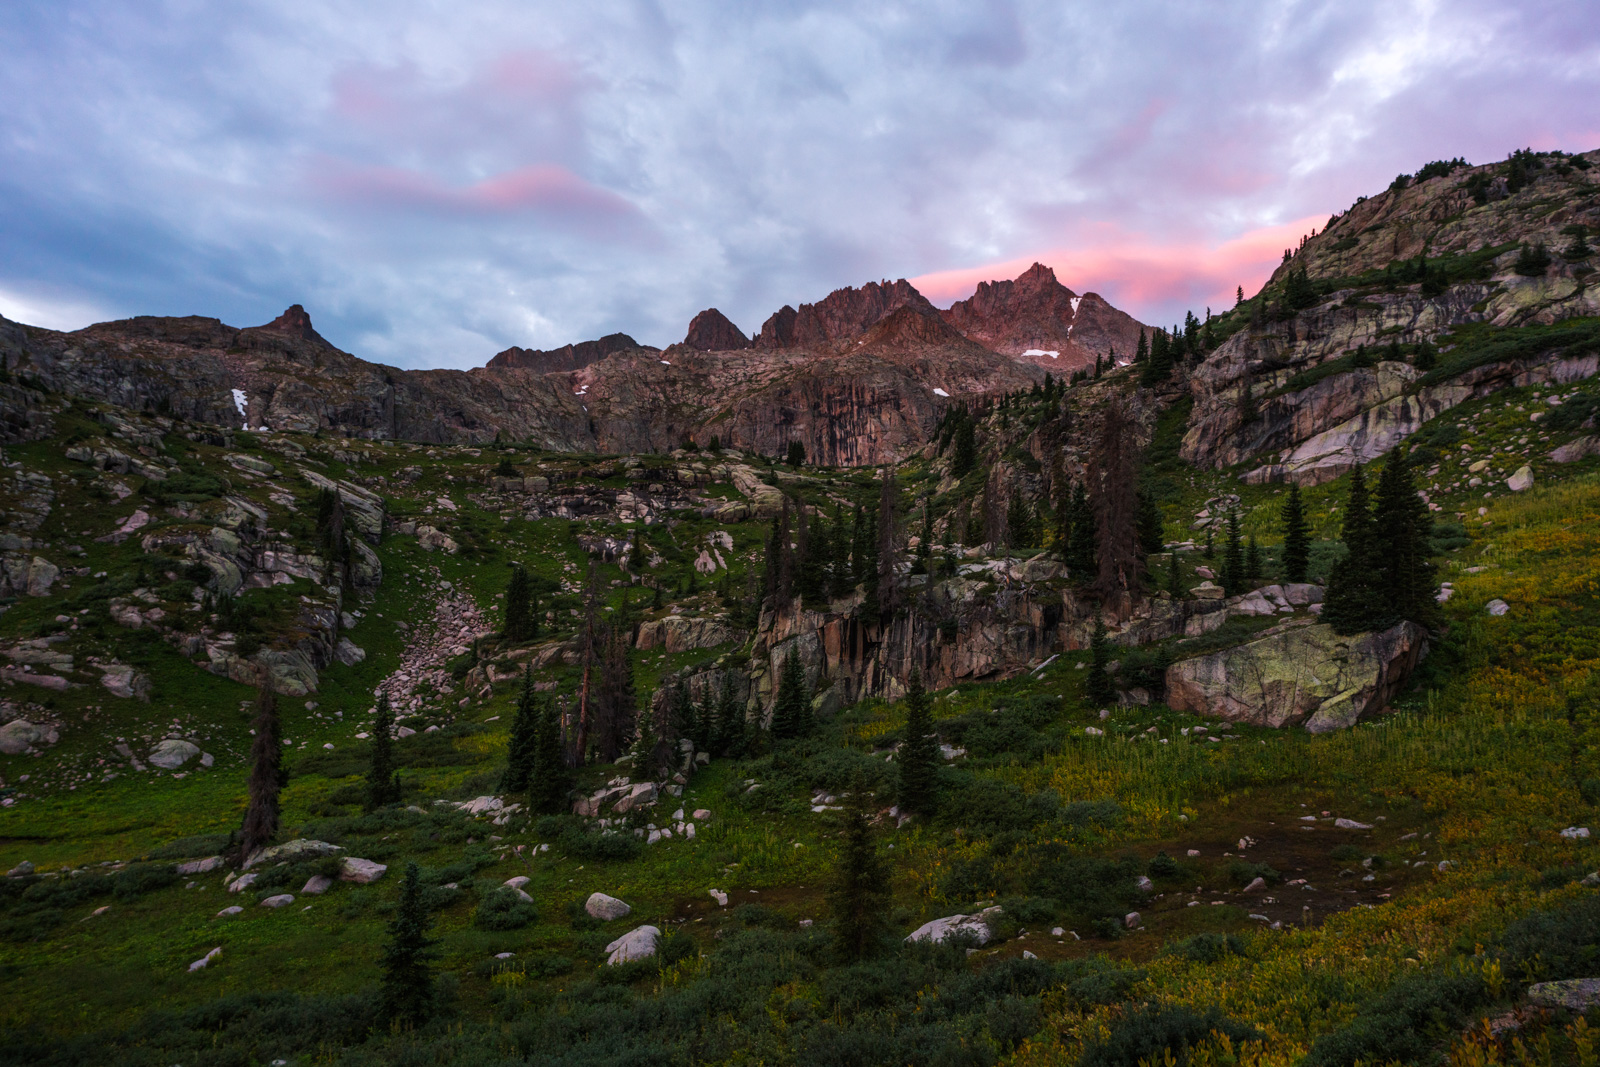
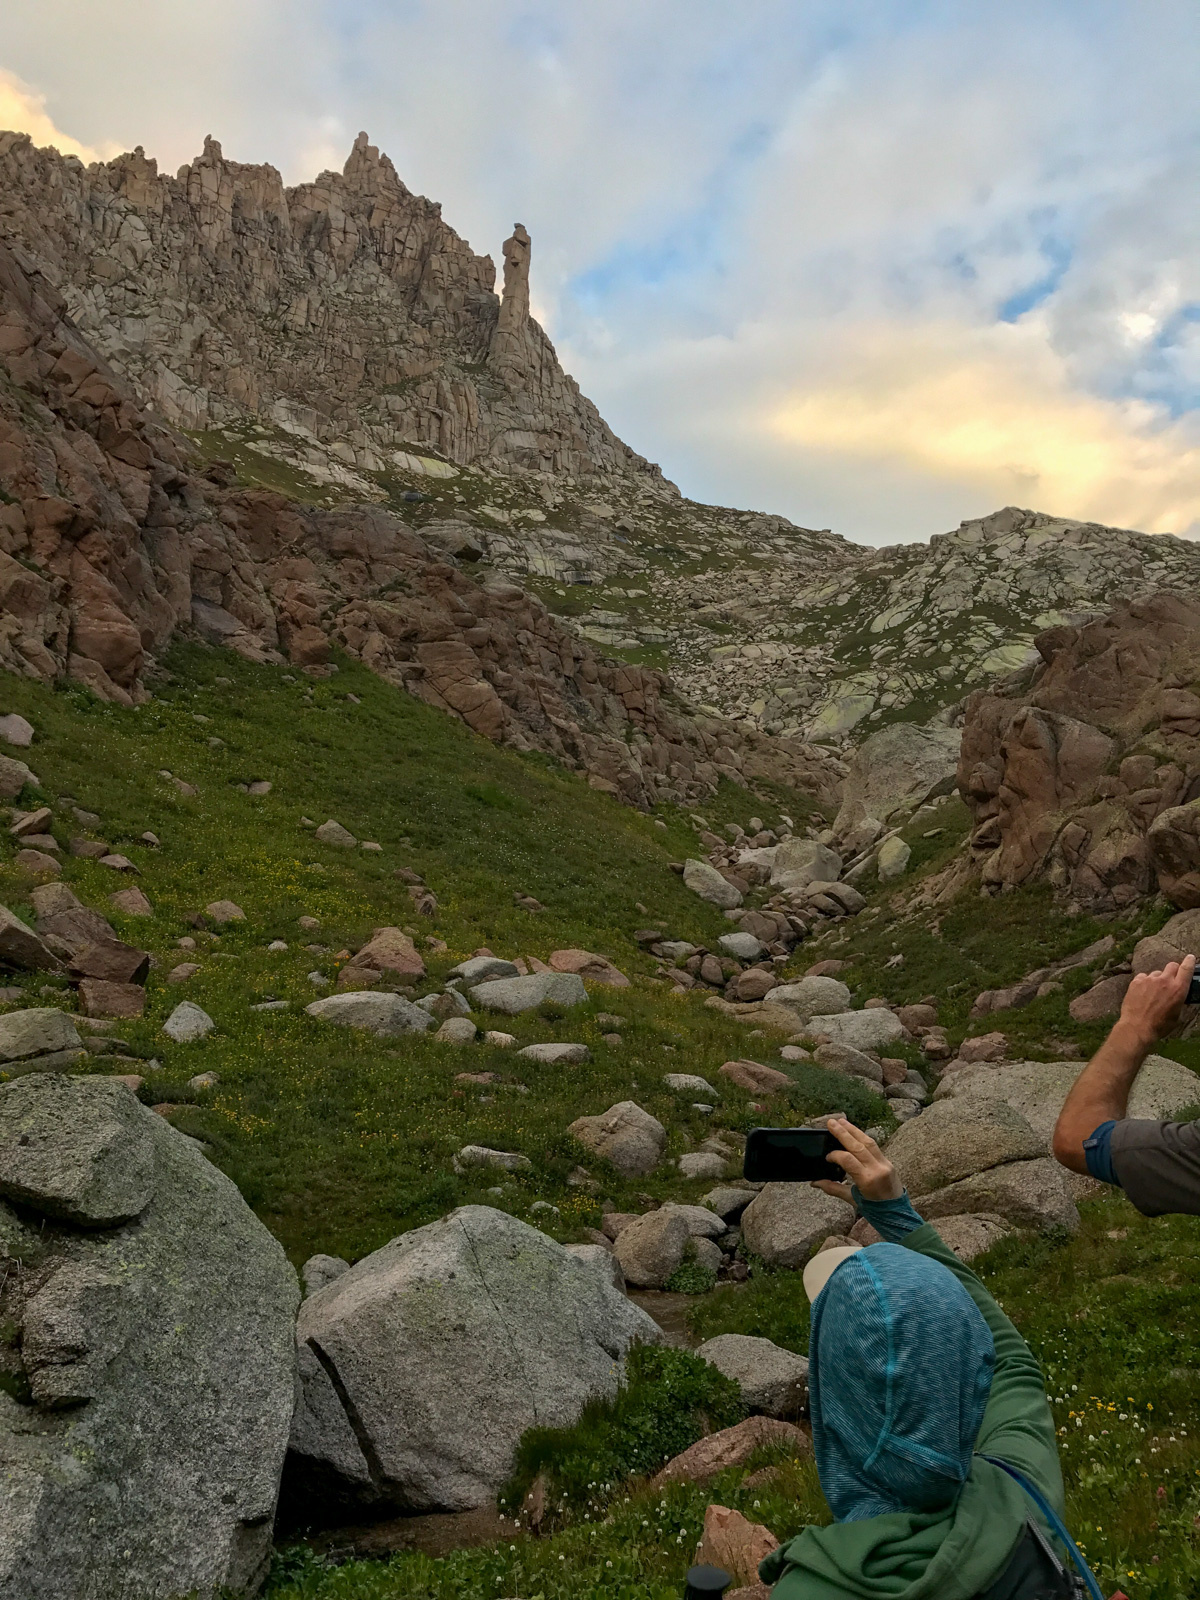
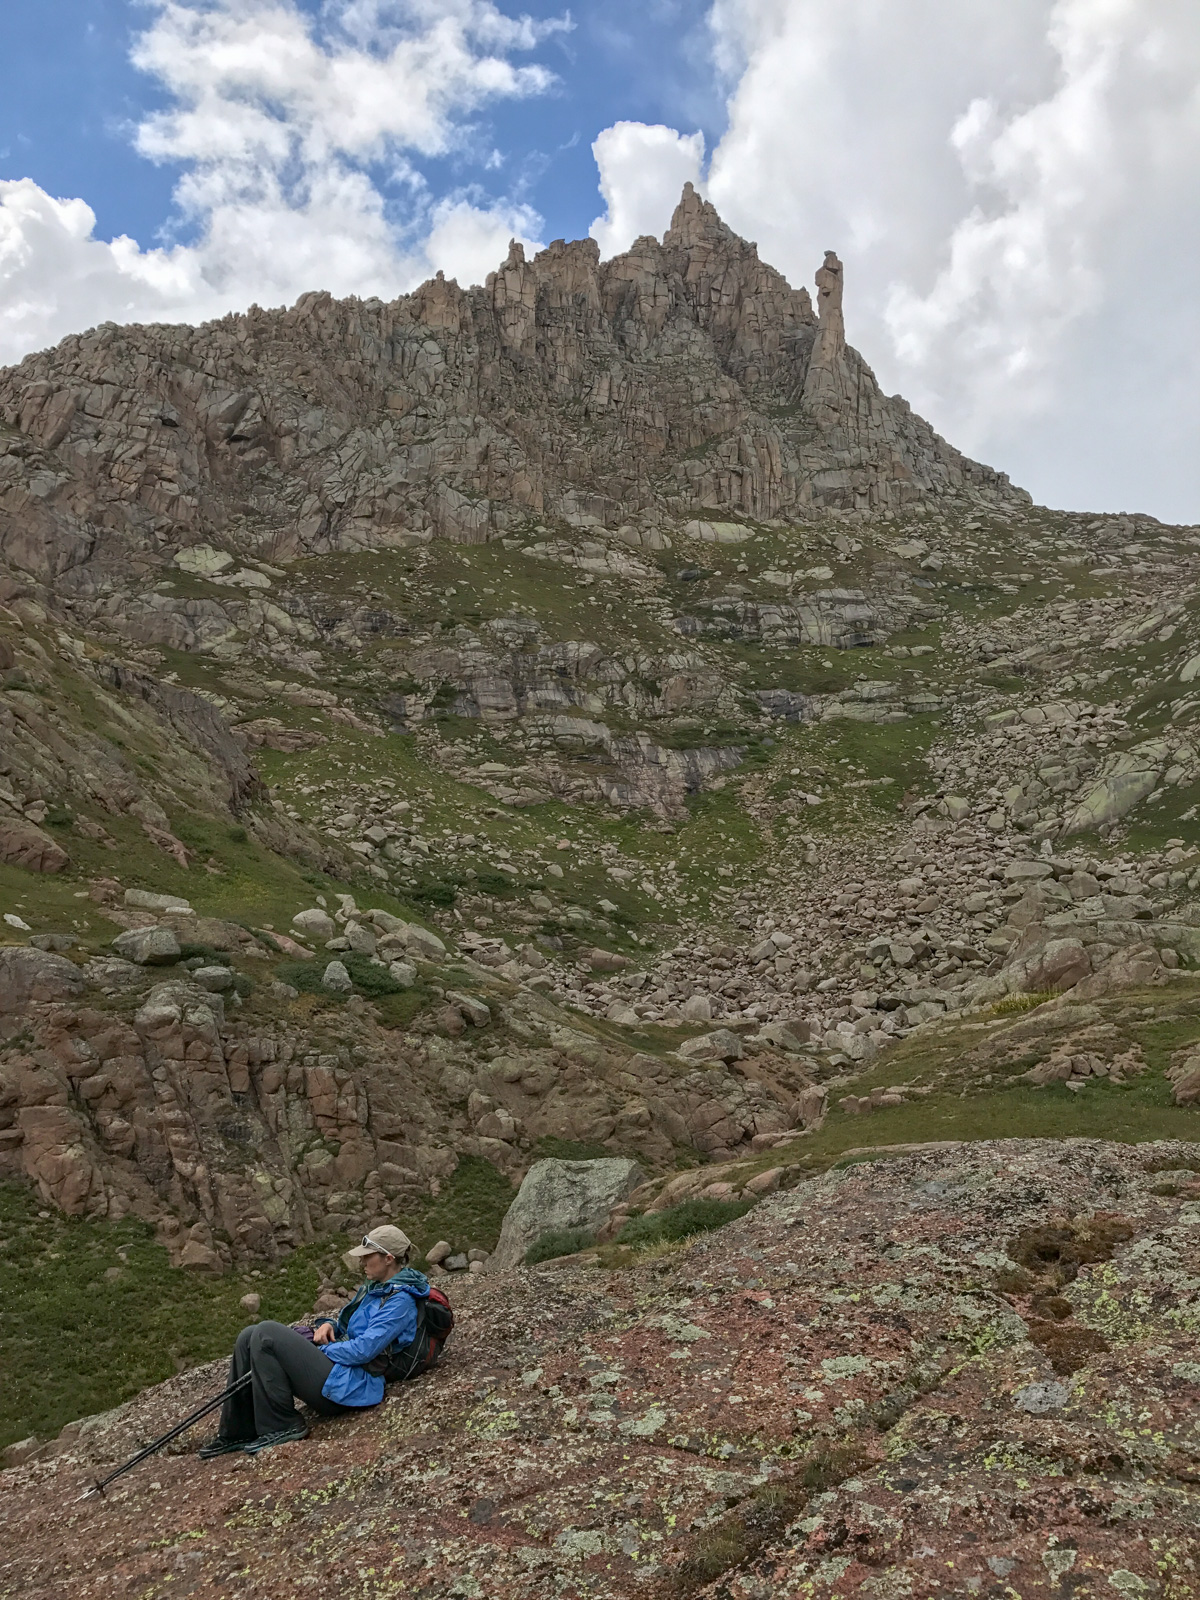
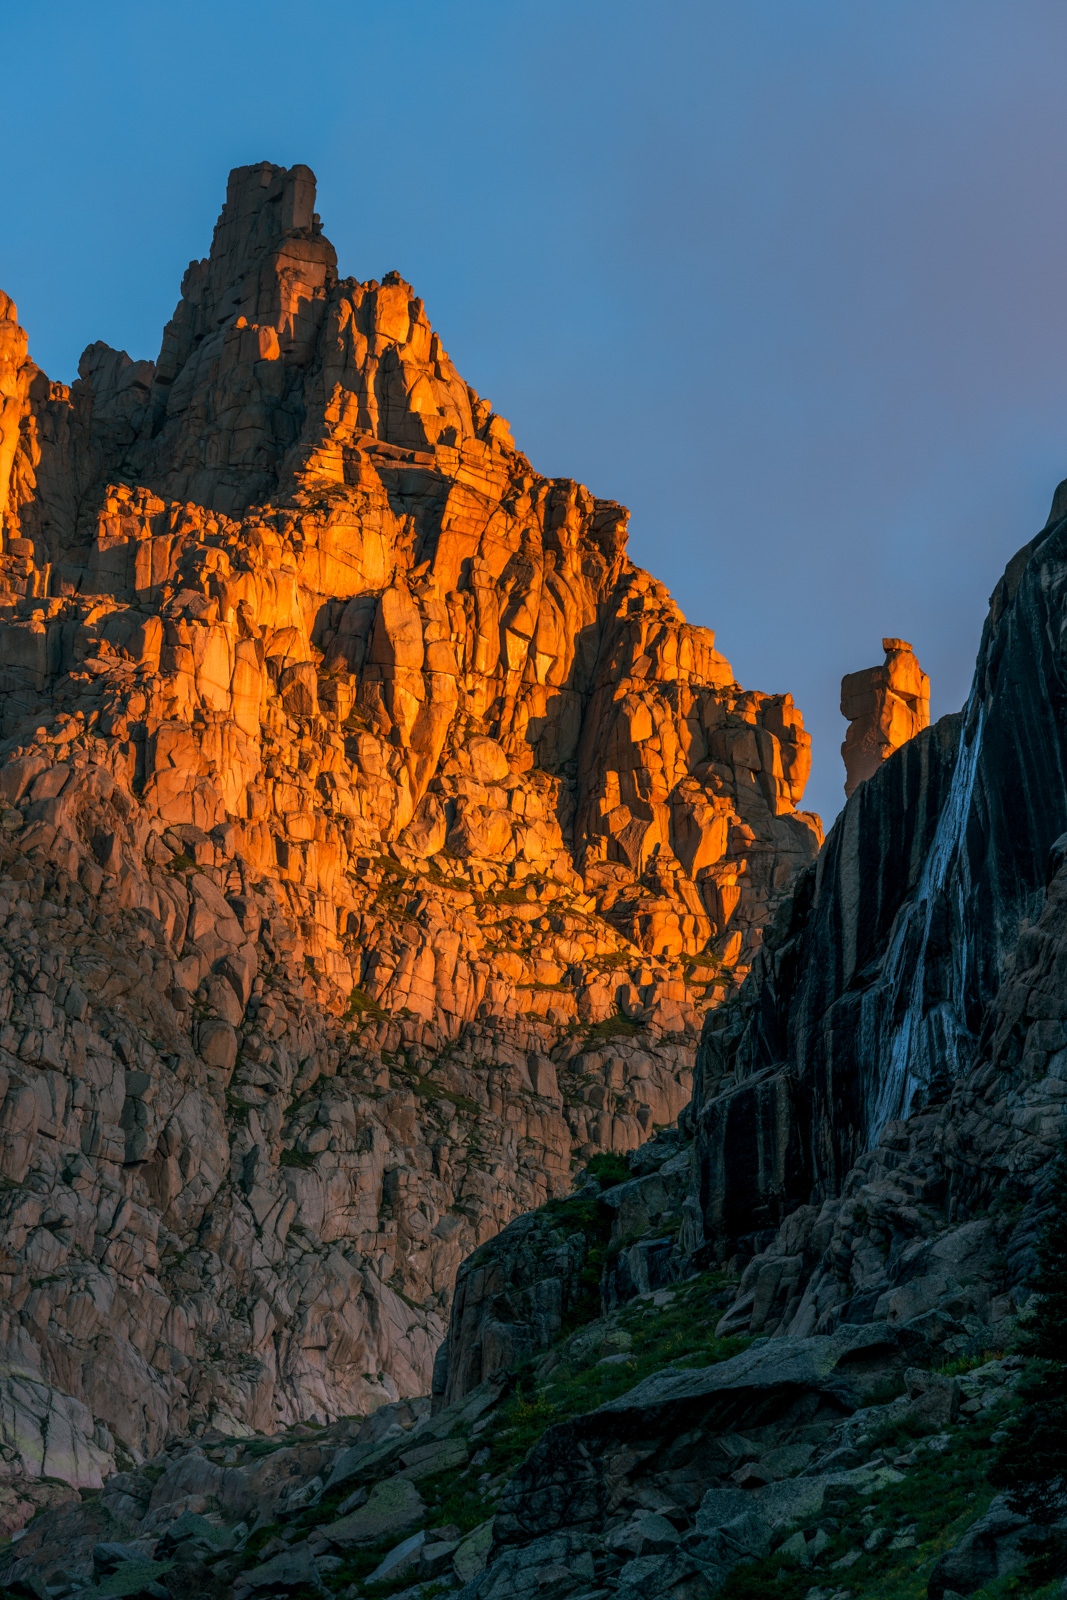
The alarm was set for 5:30 AM (not a terribly early start). We welcomed the easier day, having just killed our legs on our 12 mile approach into the basin. The early light on Jagged looked fantastic.

We took our time going up into the upper basin, and appreciated the fantastic views of Jagged Mountain on the way up. Shawn snapped this shot of me hiking in.
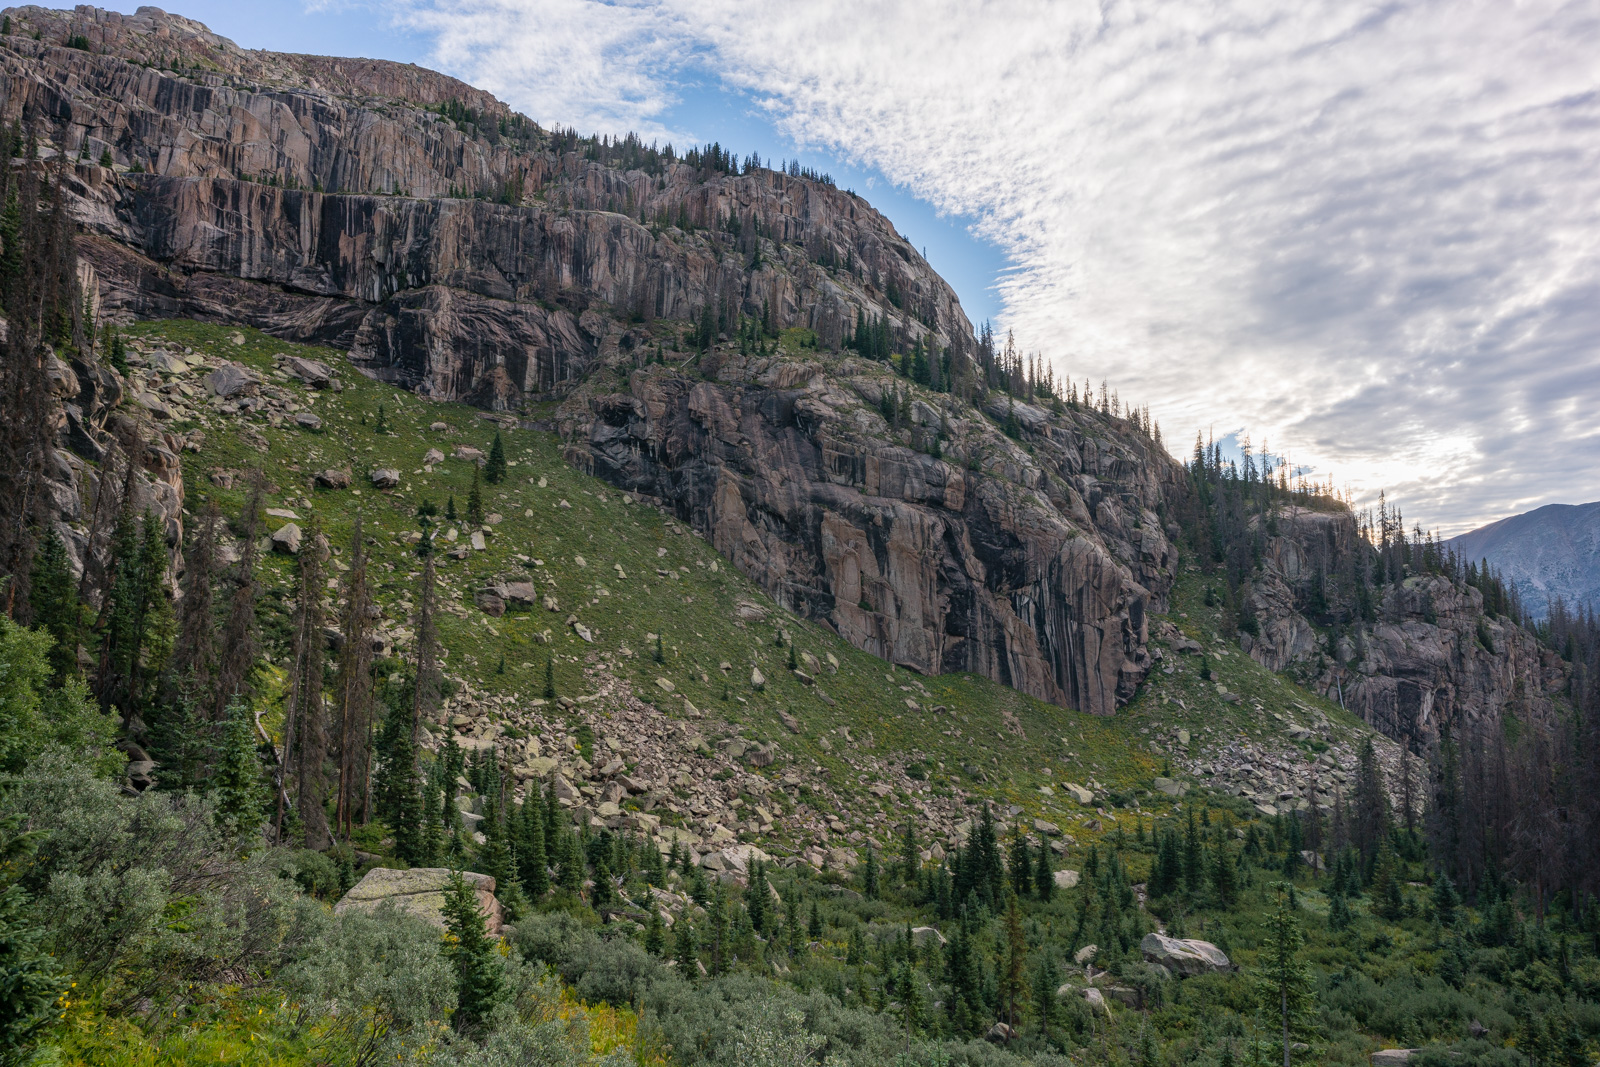
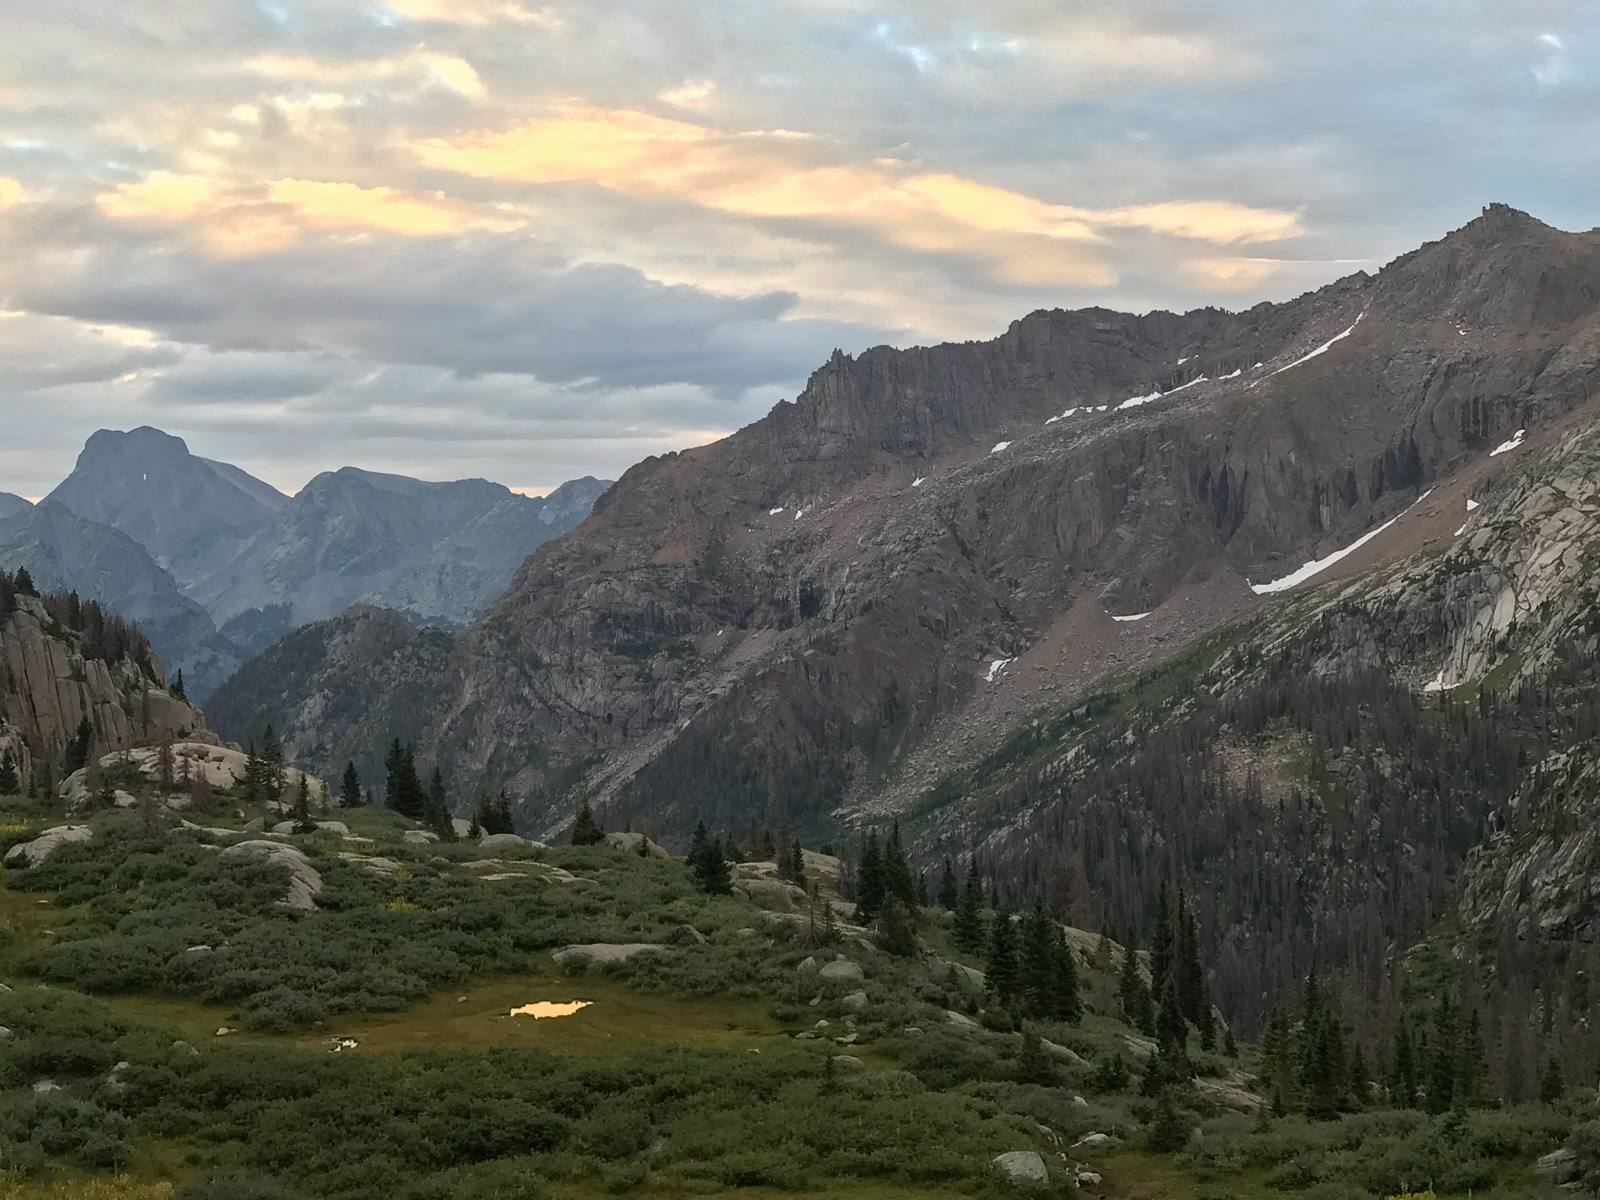
A look back towards the huge cliffs above our campsite showcased some interesting clouds that were forming for the day, which did not bode well for my opportunities to photograph the eclipse.
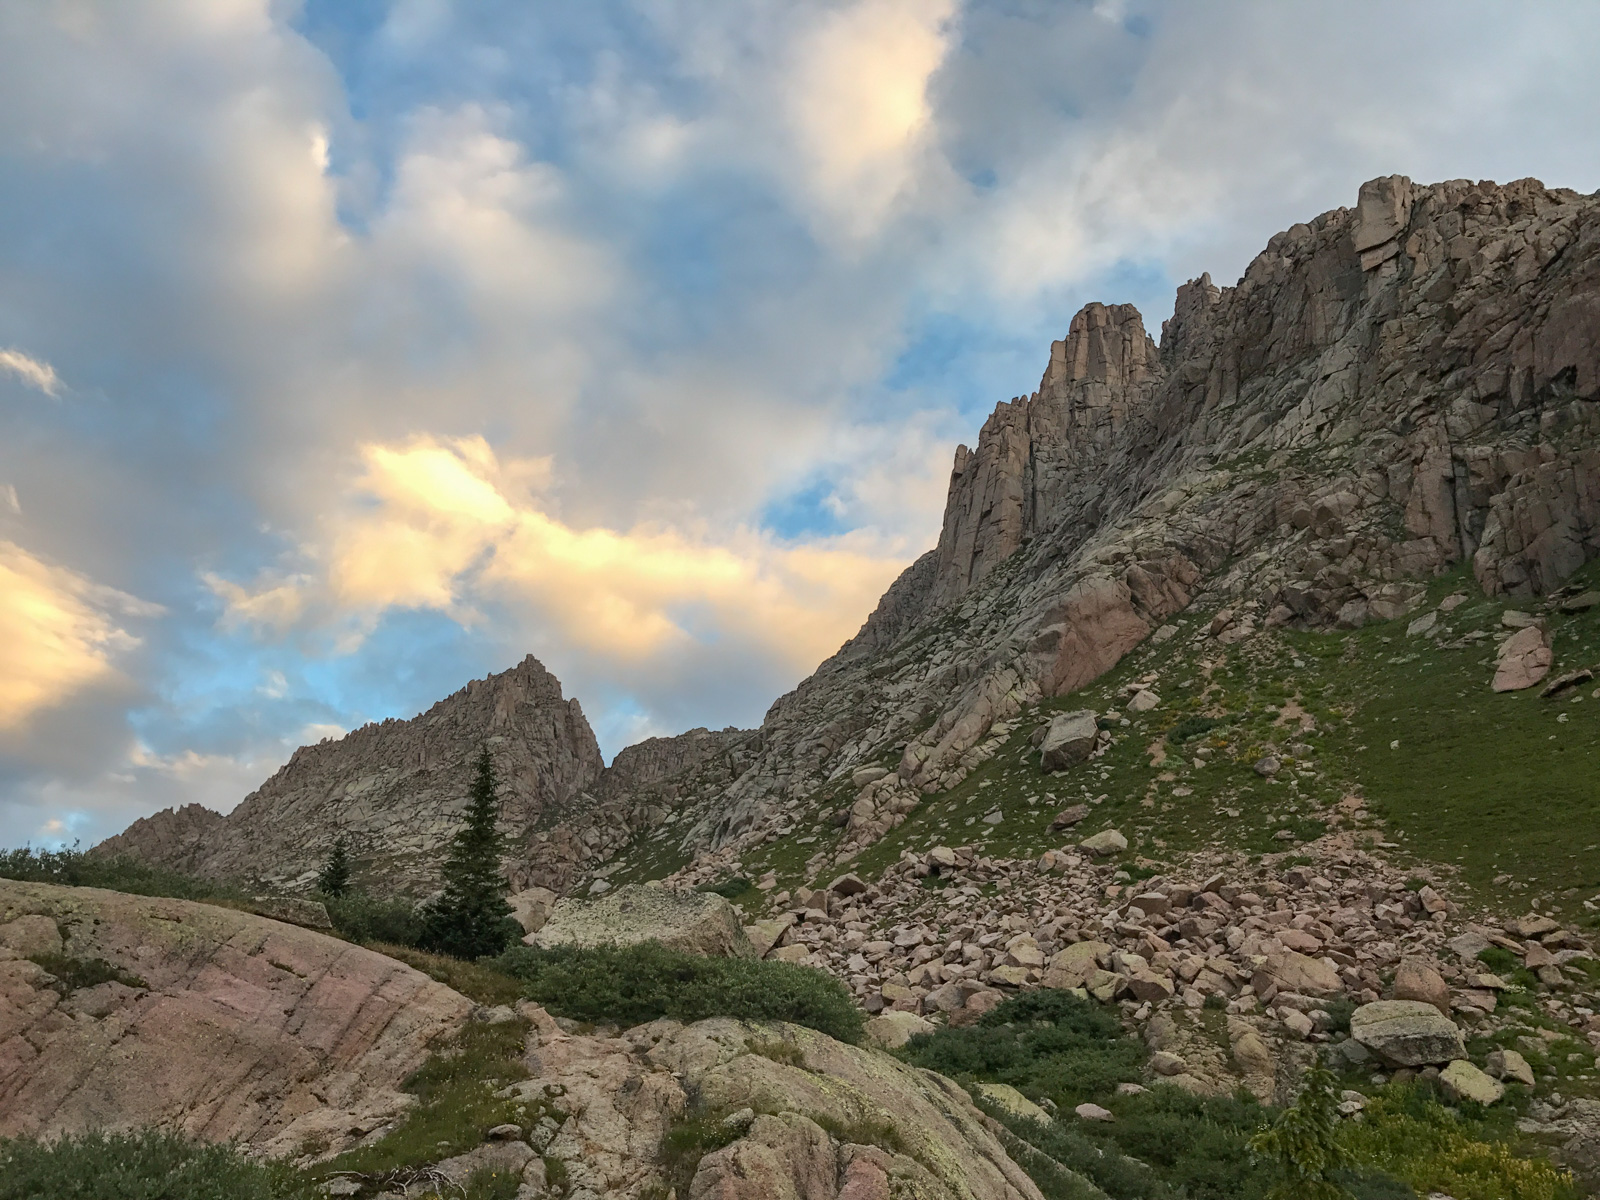
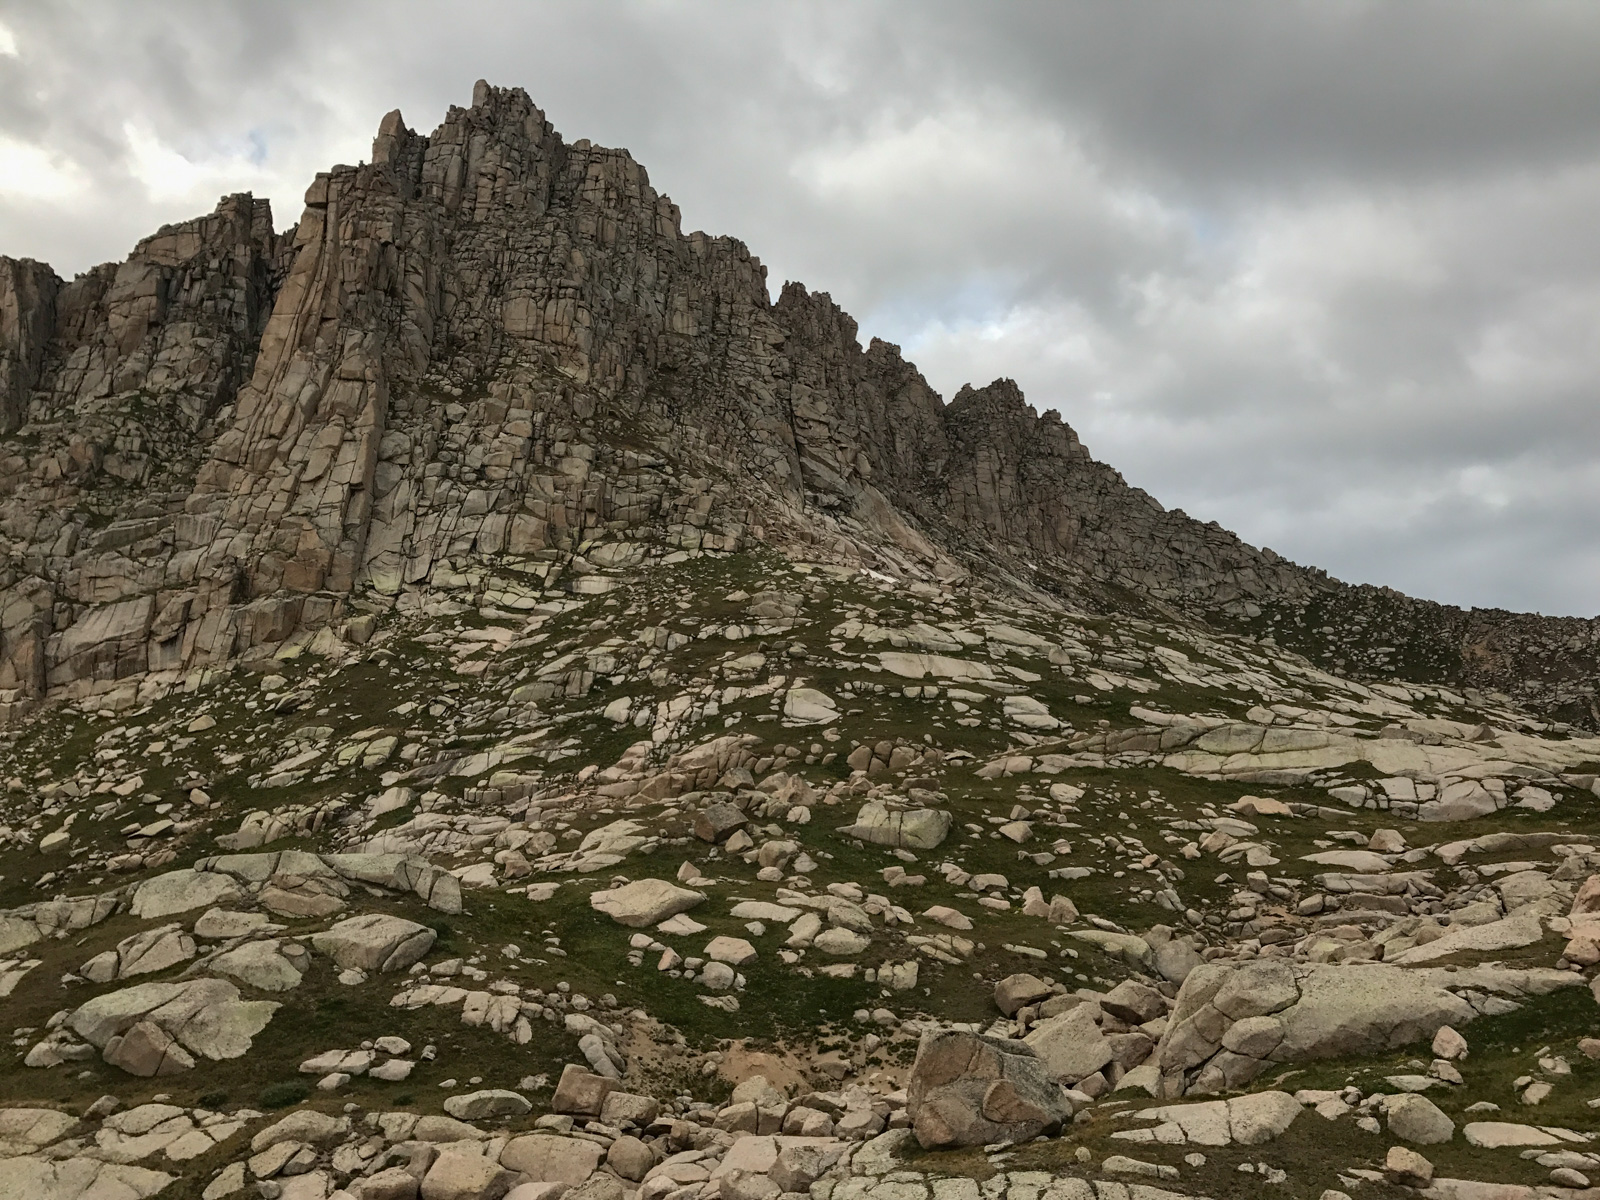
As we climbed up higher, the views of Jagged Mountain only improved.
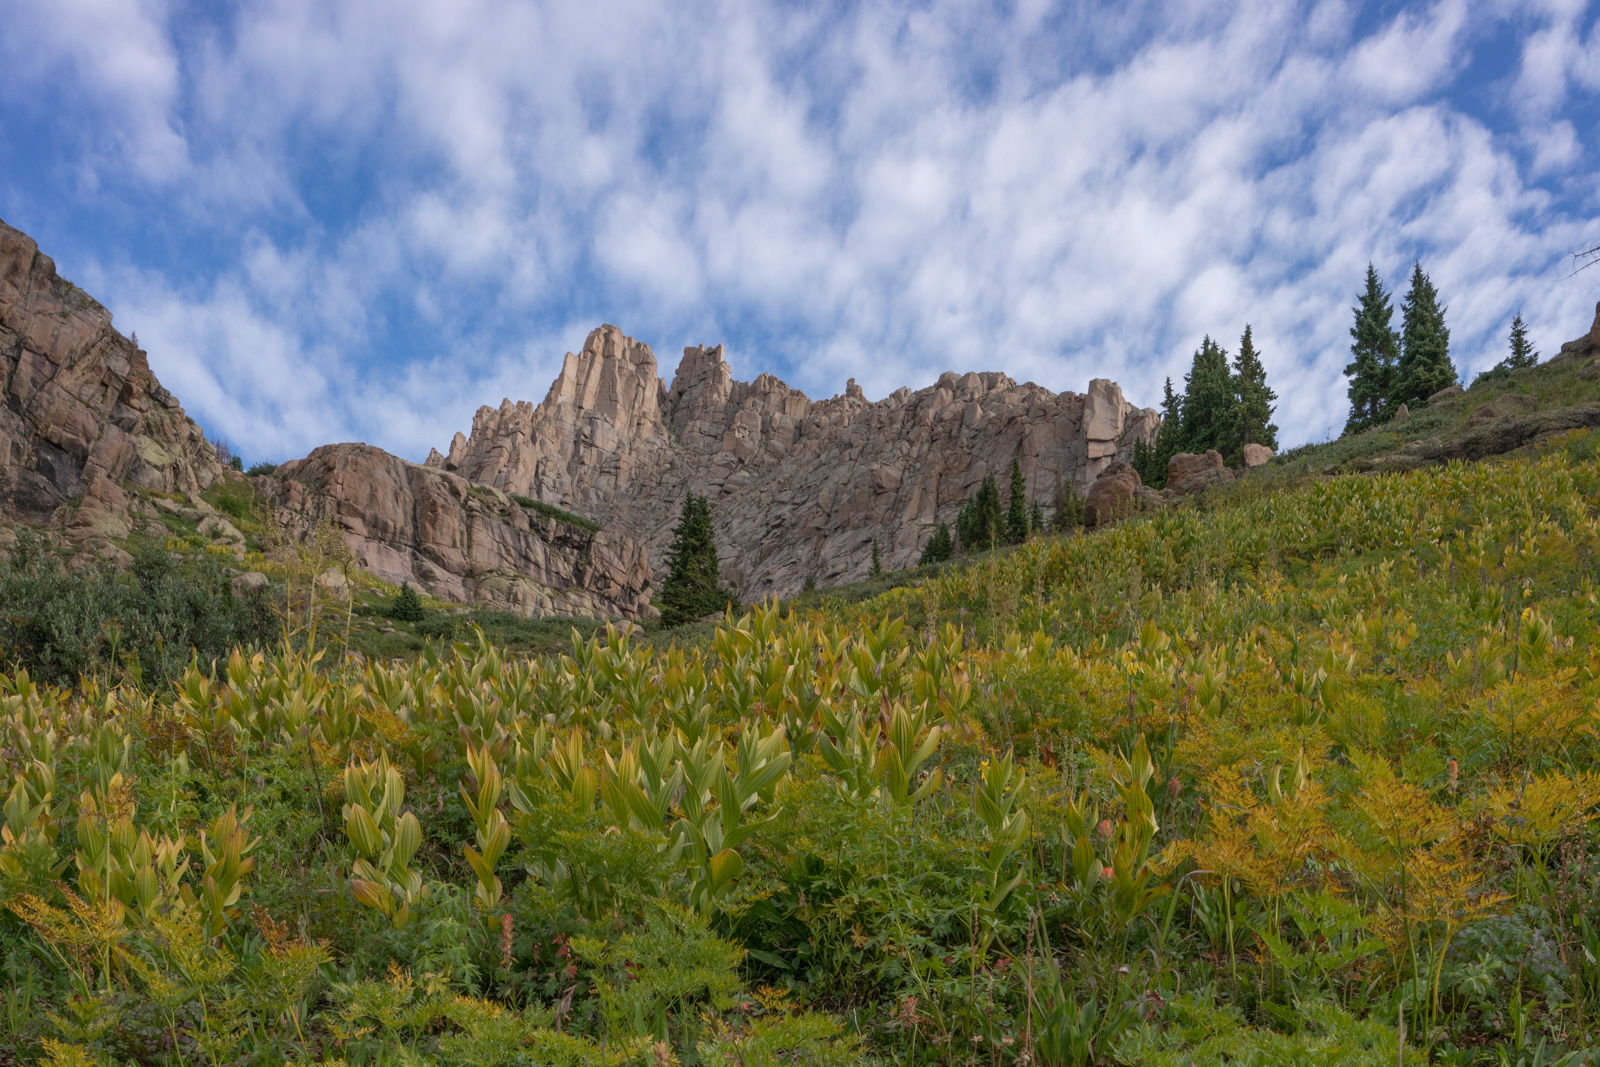
The late summer color of the Corn Lily plants was a nice complement to the high clouds above Jagged.
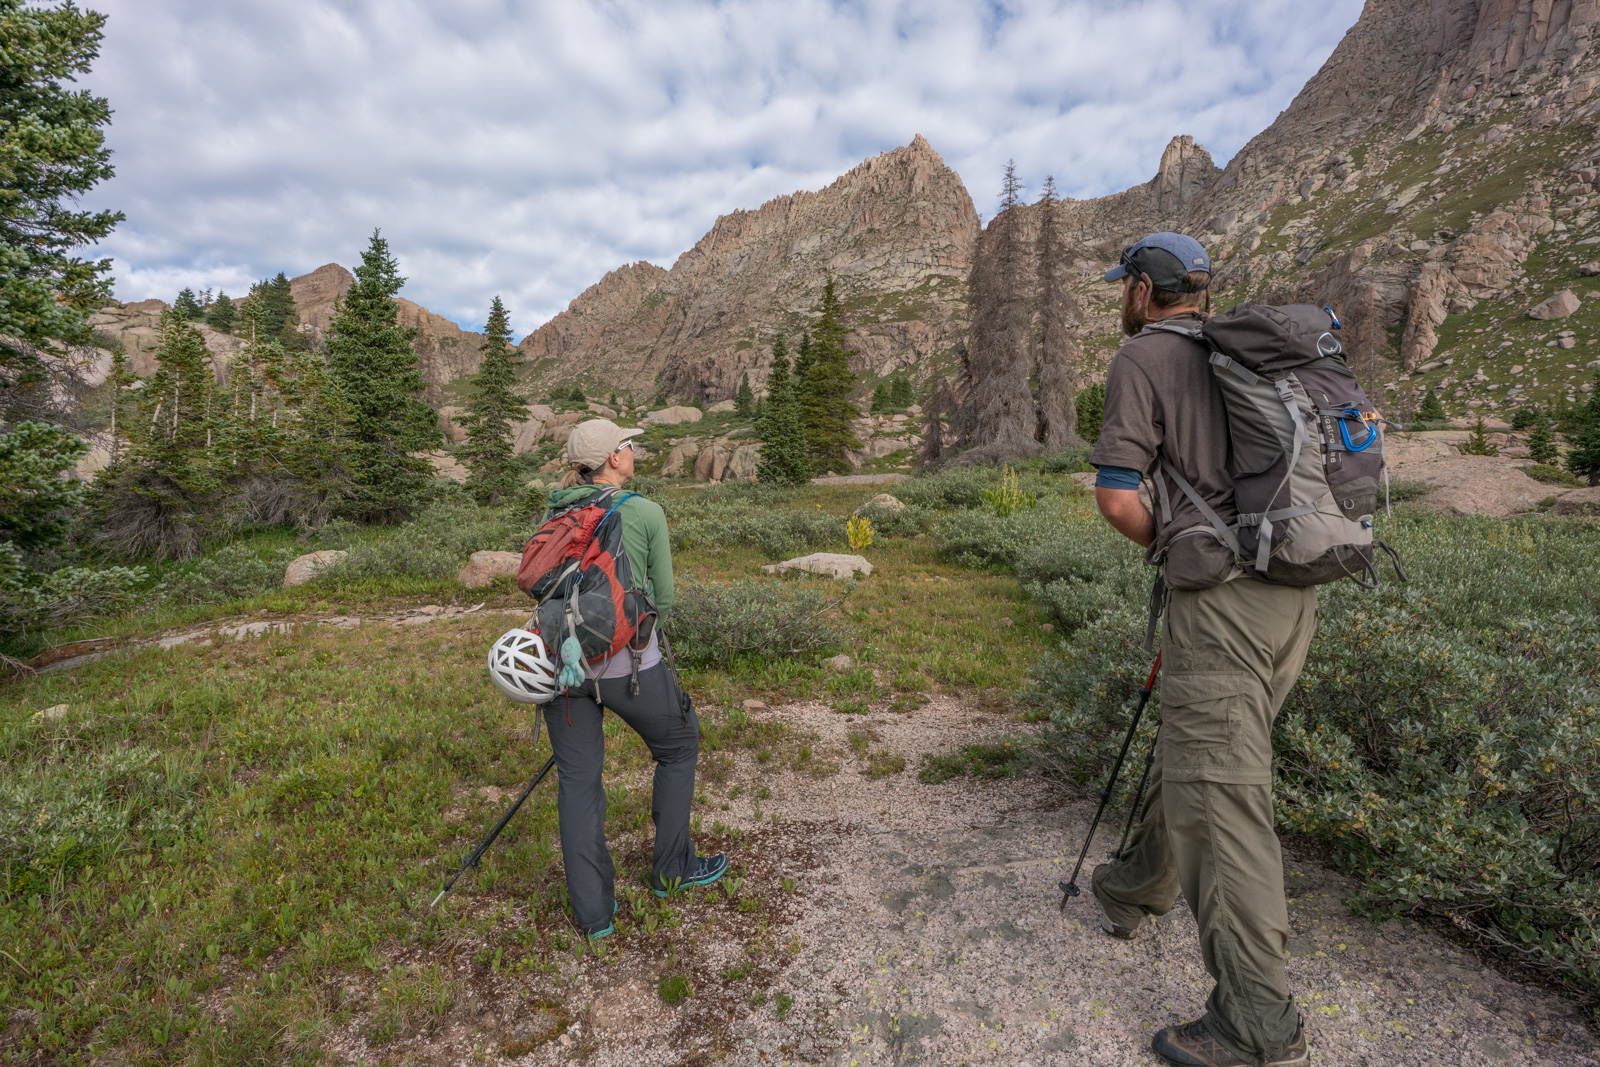
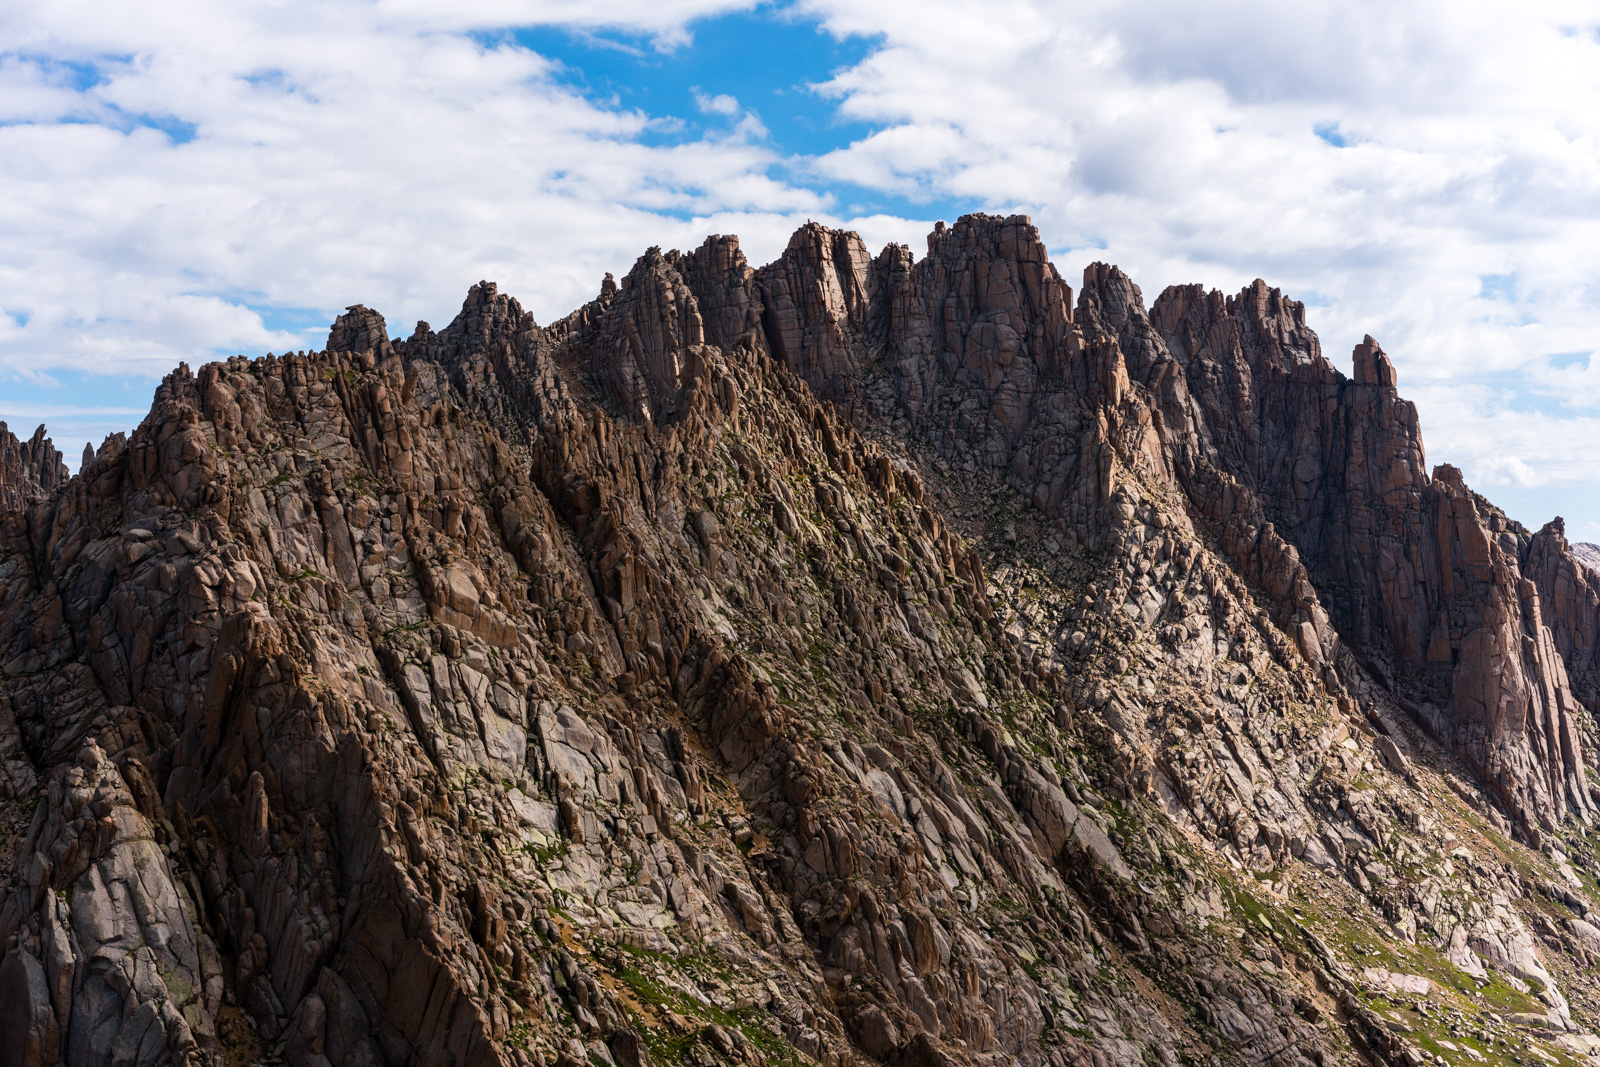
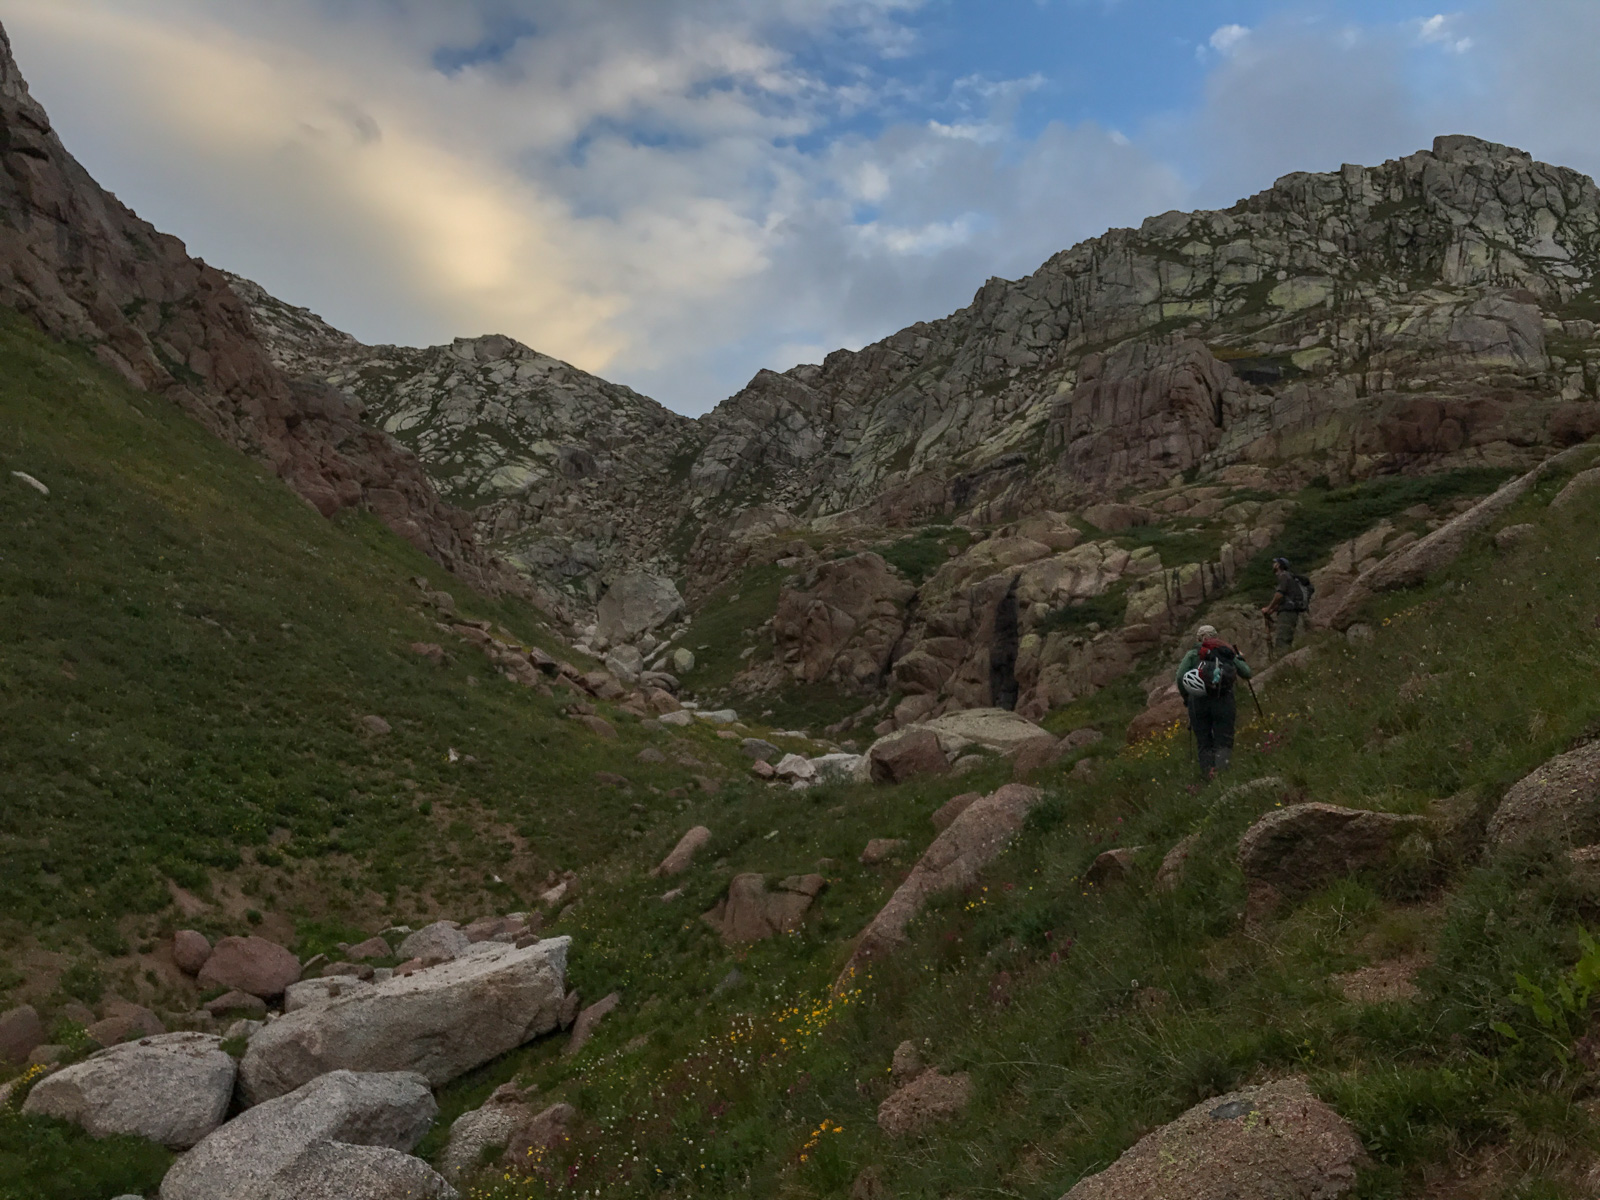
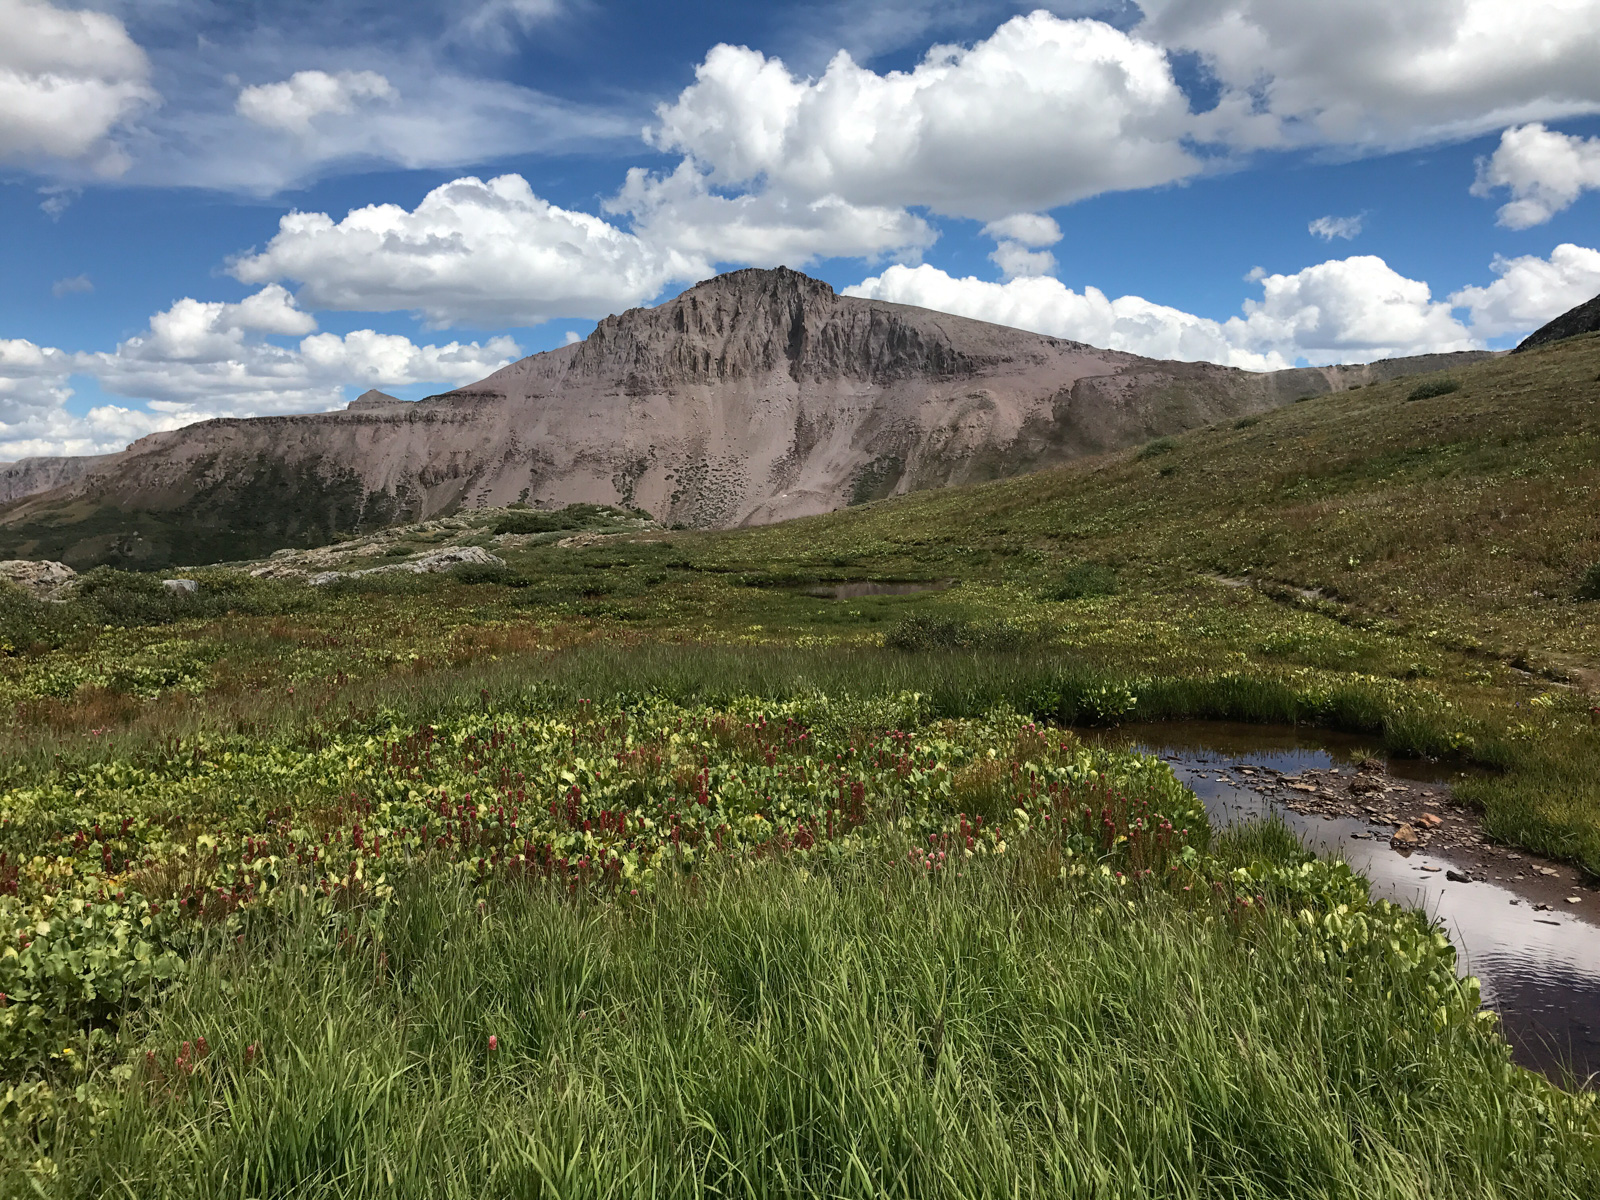
Shawn and Natalie admired Peak 10 as it came into view. I marvelled at how insane it looked. It sounded like Natalie wanted to give it a go.
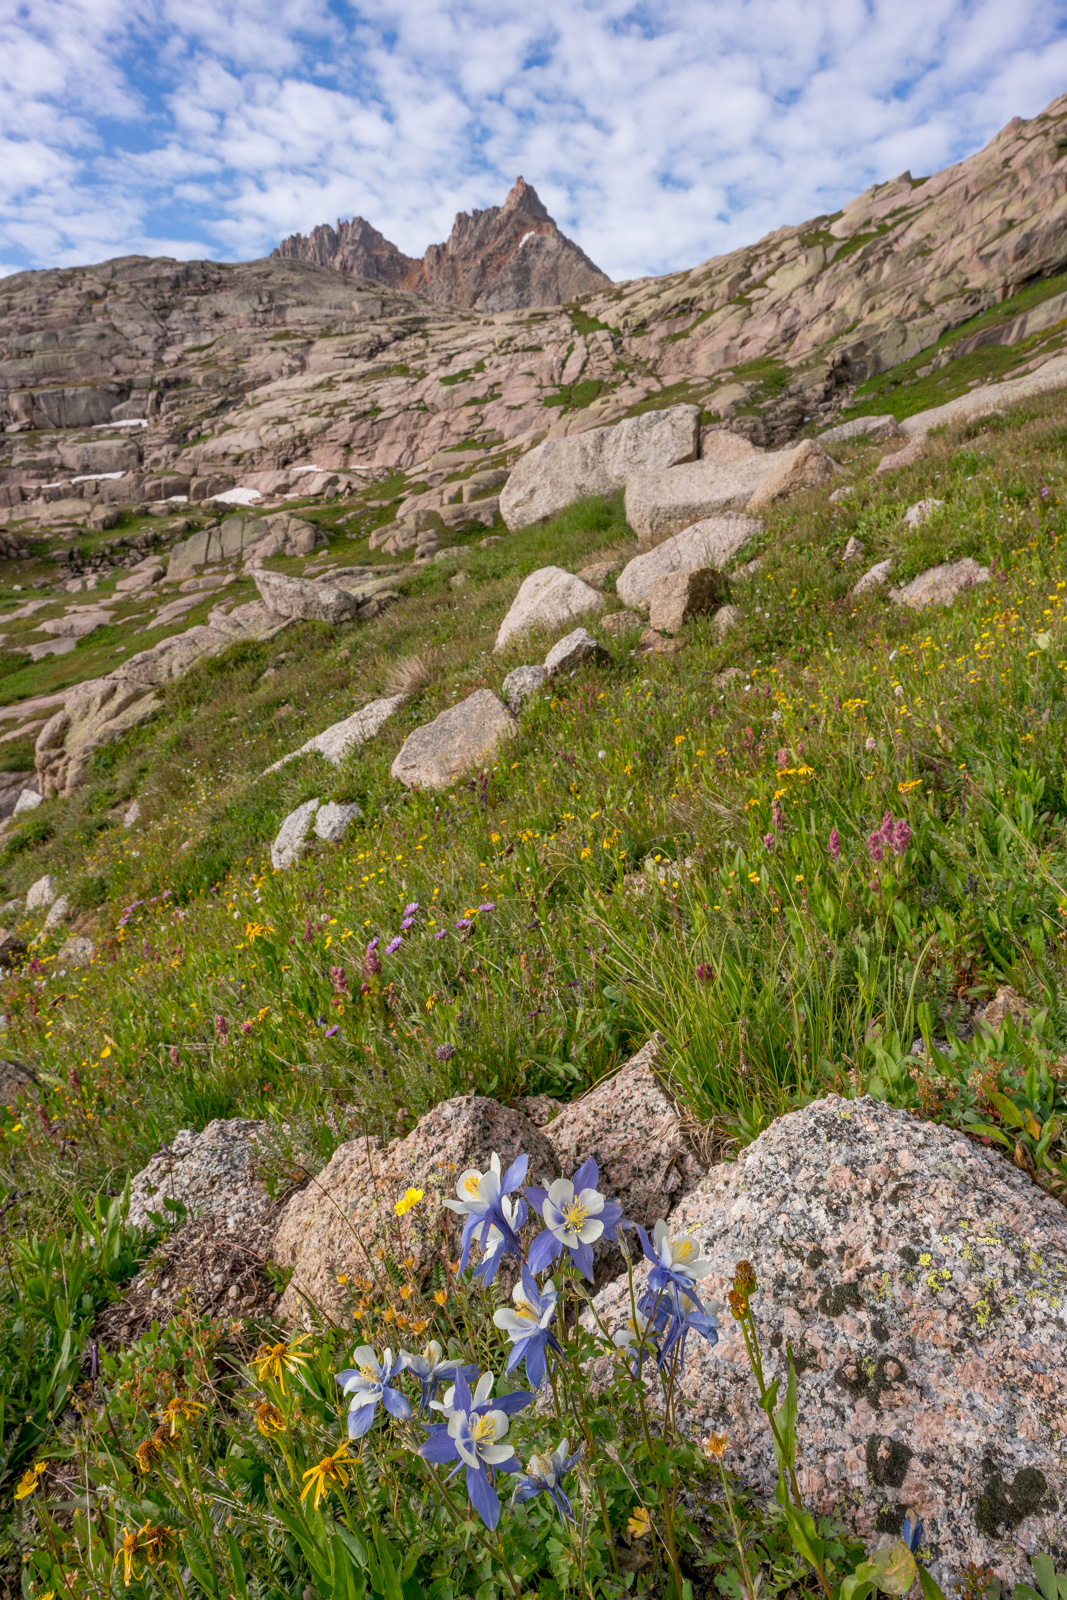
As we climbed up below Jagged, I found the wildflowers quite difficult to avoid pointing my camera at. I loved how these flowers pointed straight up and into Jagged's base.

At this point, we had to make a decision. Natalie had already climbed Knife Point and both Shawn and Natalie were looking for something challenging. I was looking for a good vantage to photograph the eclipse and had always admired Knife Point from afar, so we decided to split ways - I chose Knife Point and Shawn and Natalie chose to do Peak 10. Our plan was to meet back up in the basin below Jagged and then hike back down together, unless weather looked bad, then we would meet at camp. Worked for me.
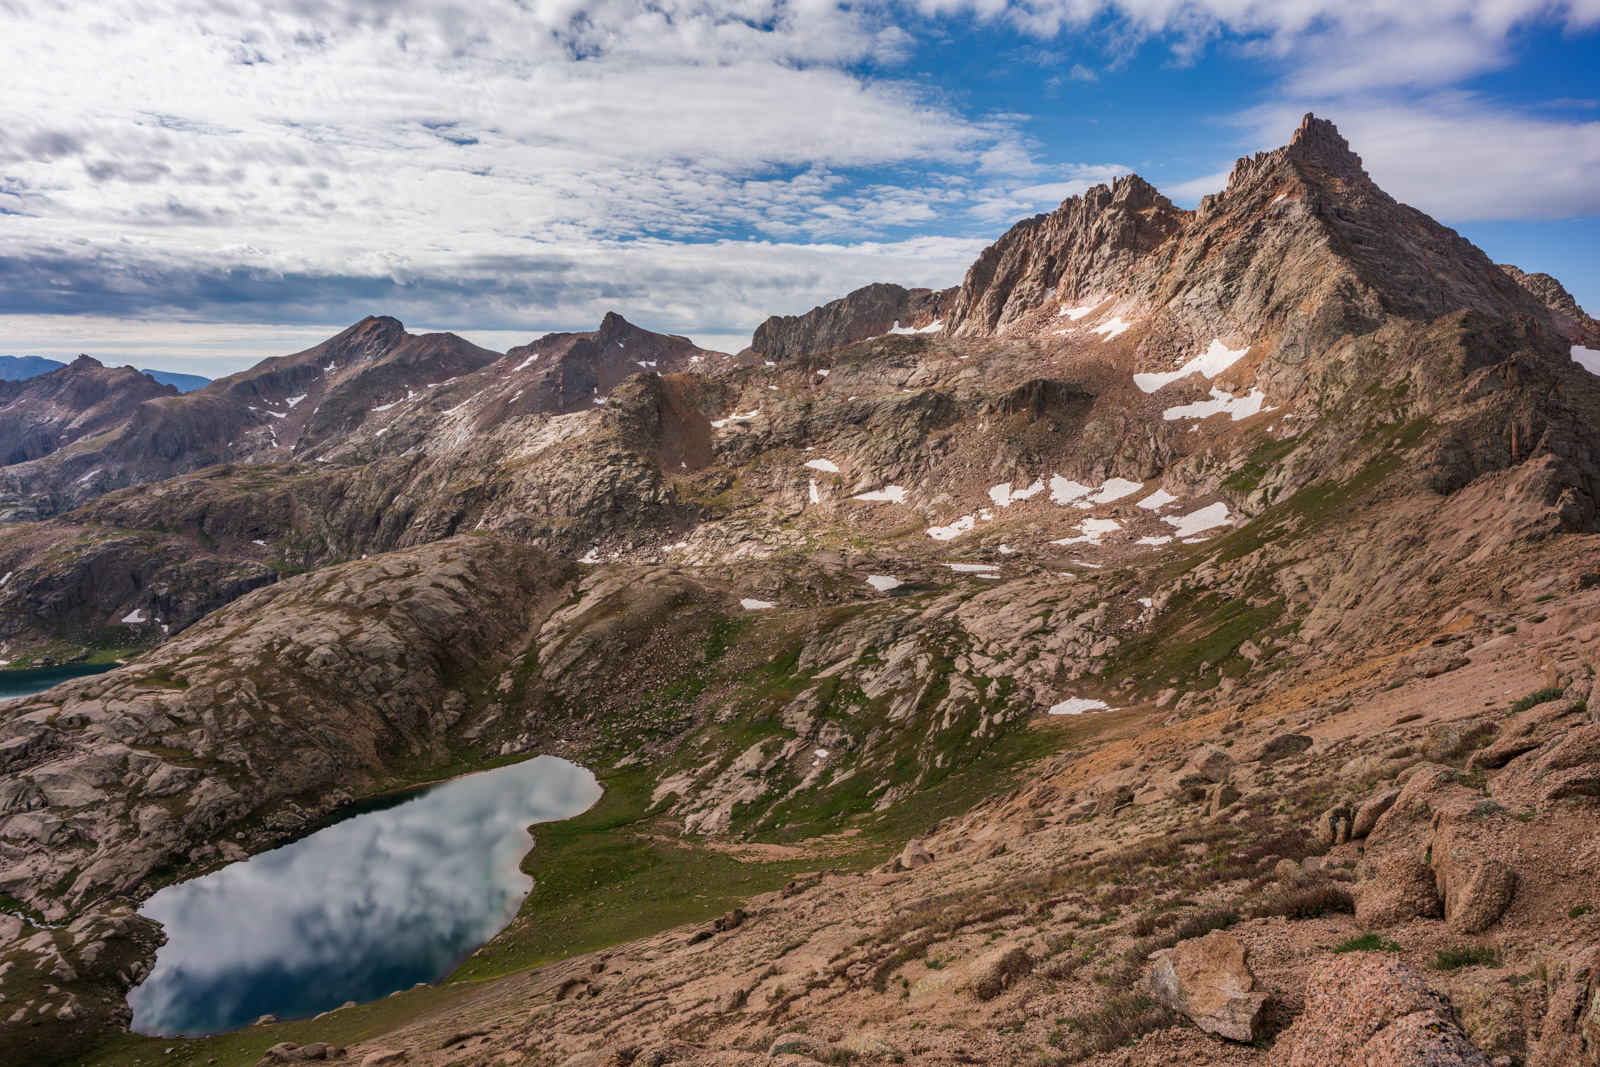
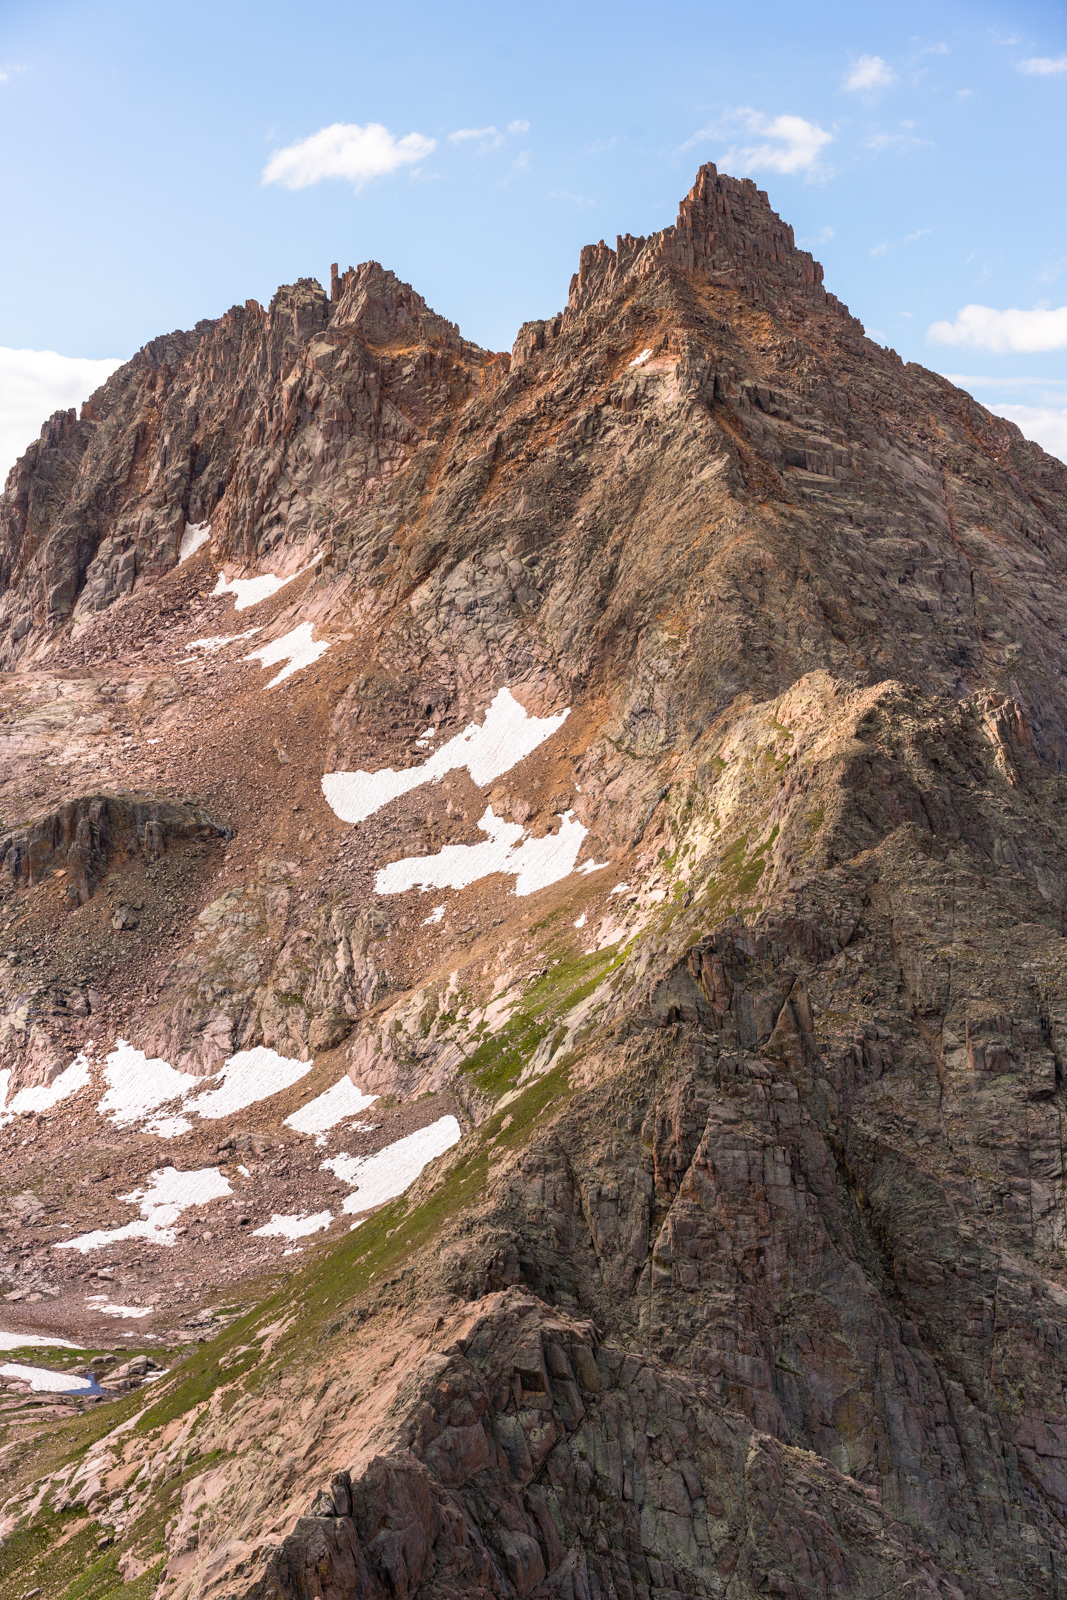
Knife Point really caught my attention in 2013, when I saw it from No Name Basin:

I continued my hike up into the upper basin and was enthralled by the huge variety of wildflowers. 14er Sunlight Peak poked out above it all and looked amazing.
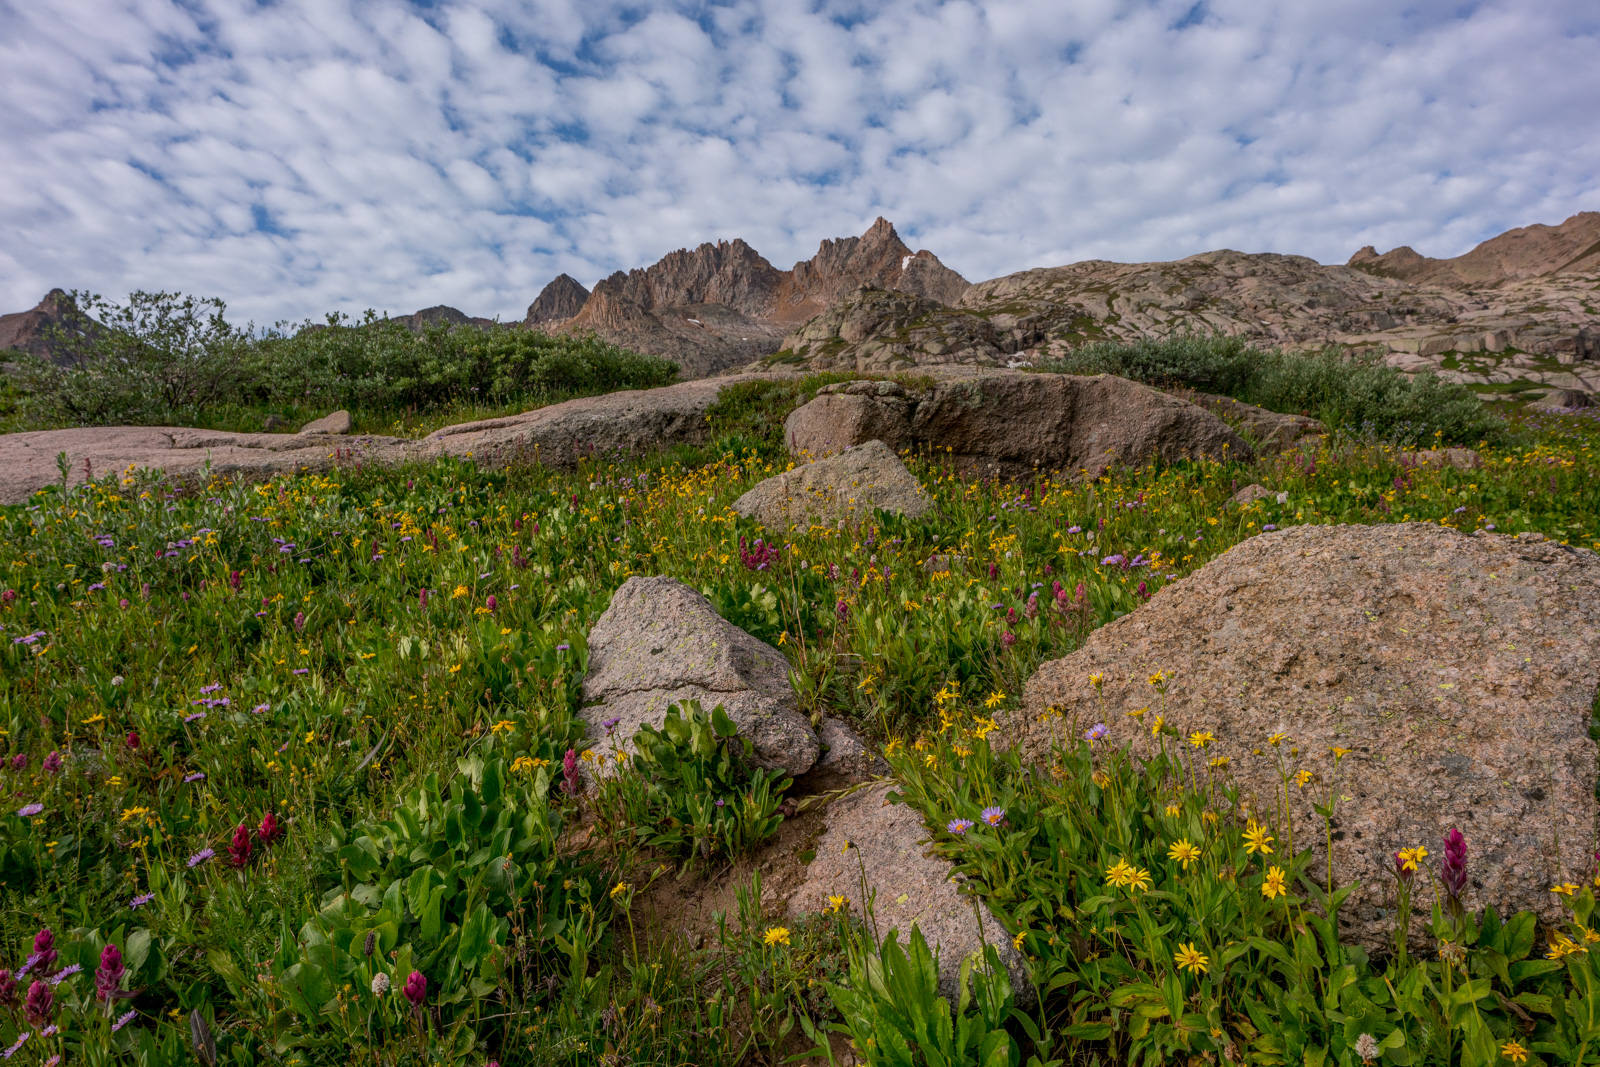
The climb up to the ridge between Peak 10 and Knife Point was very steep, but it was eased by the beautiful flowers I found along the way.
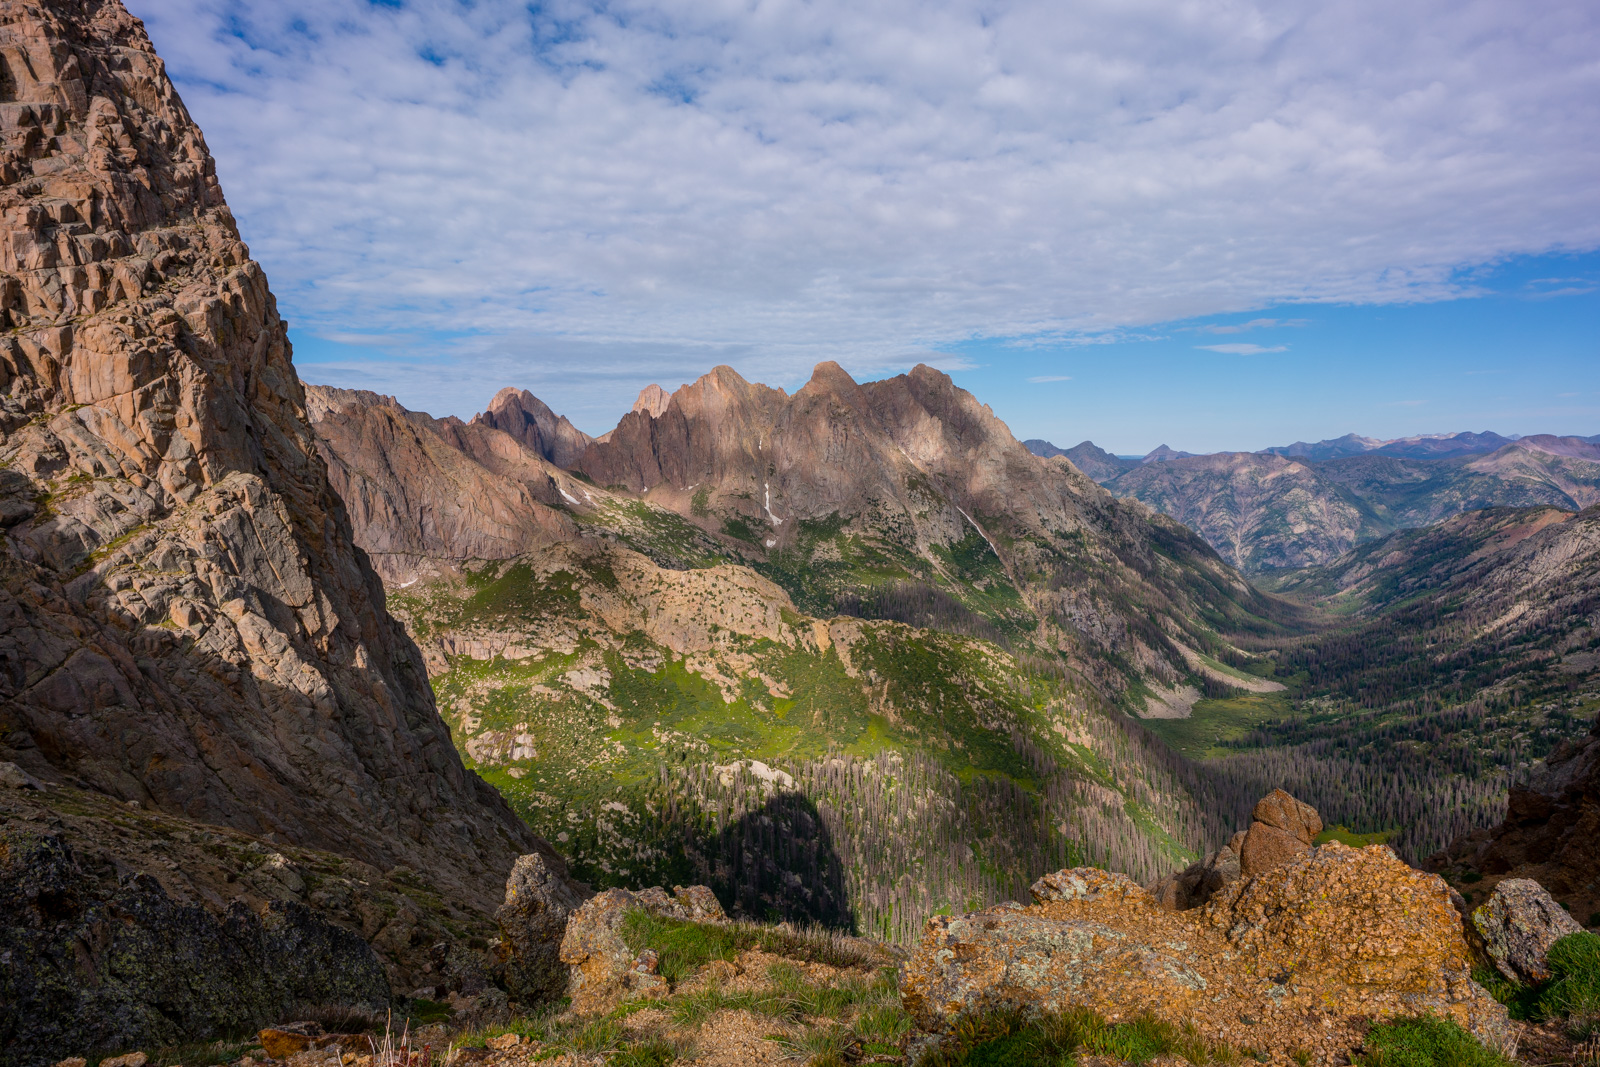
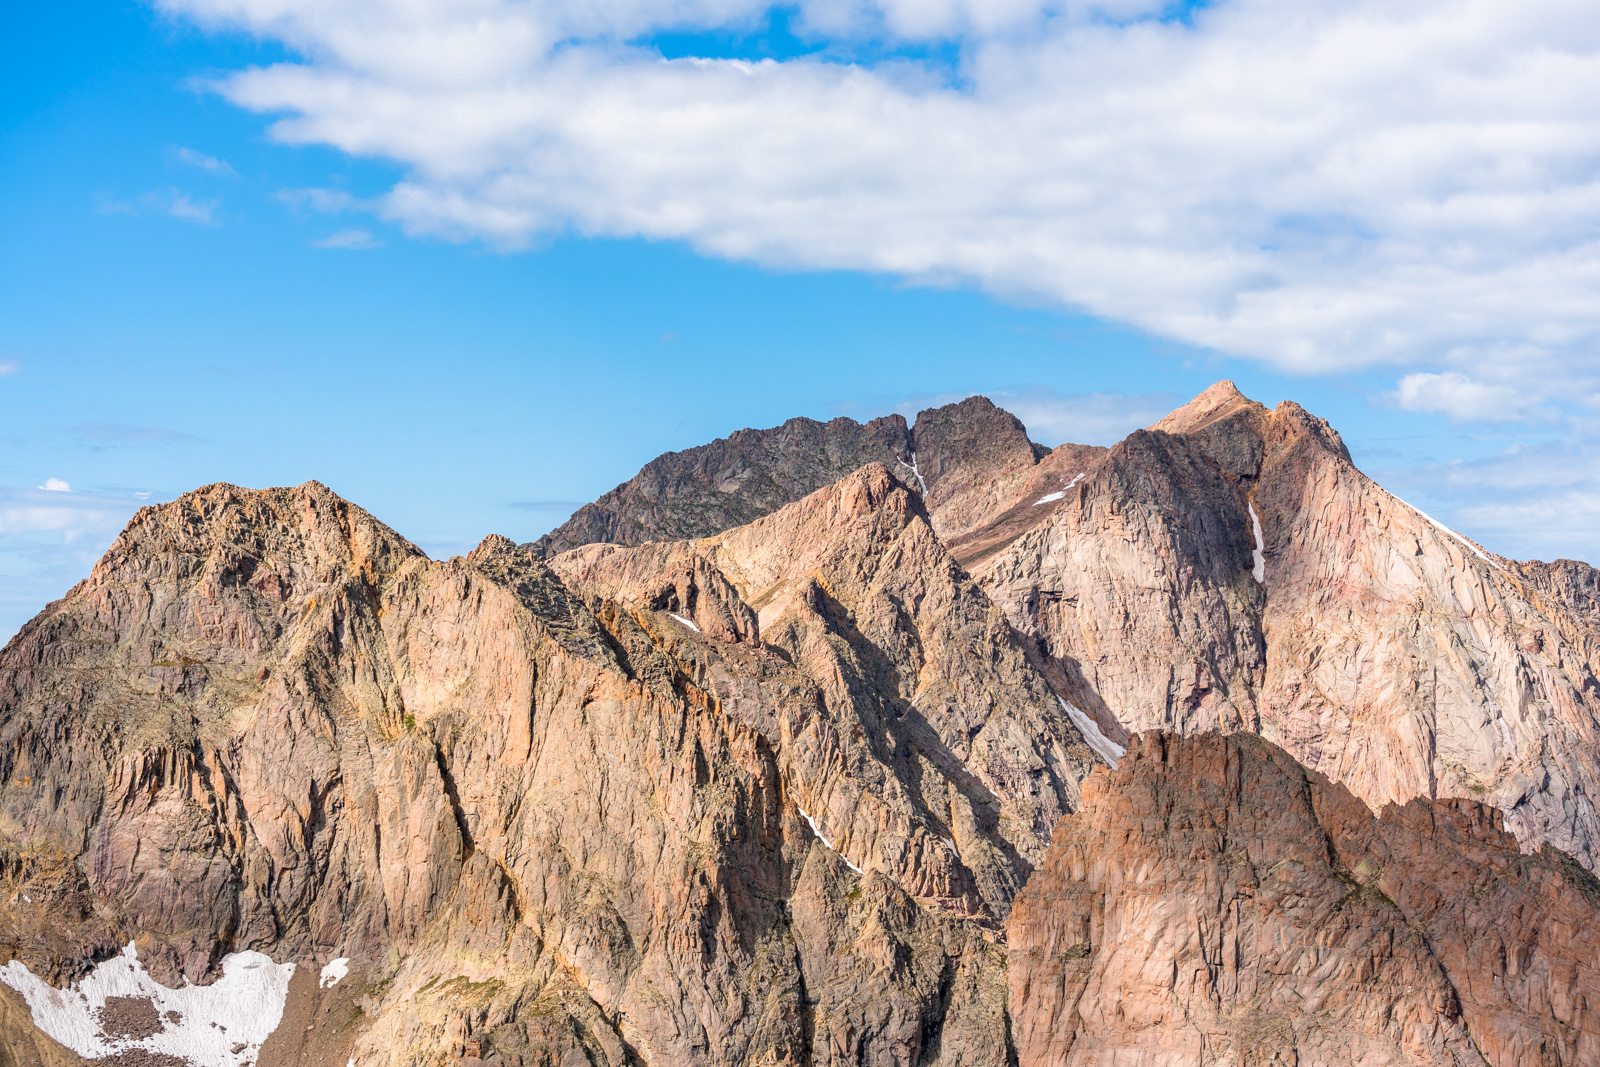
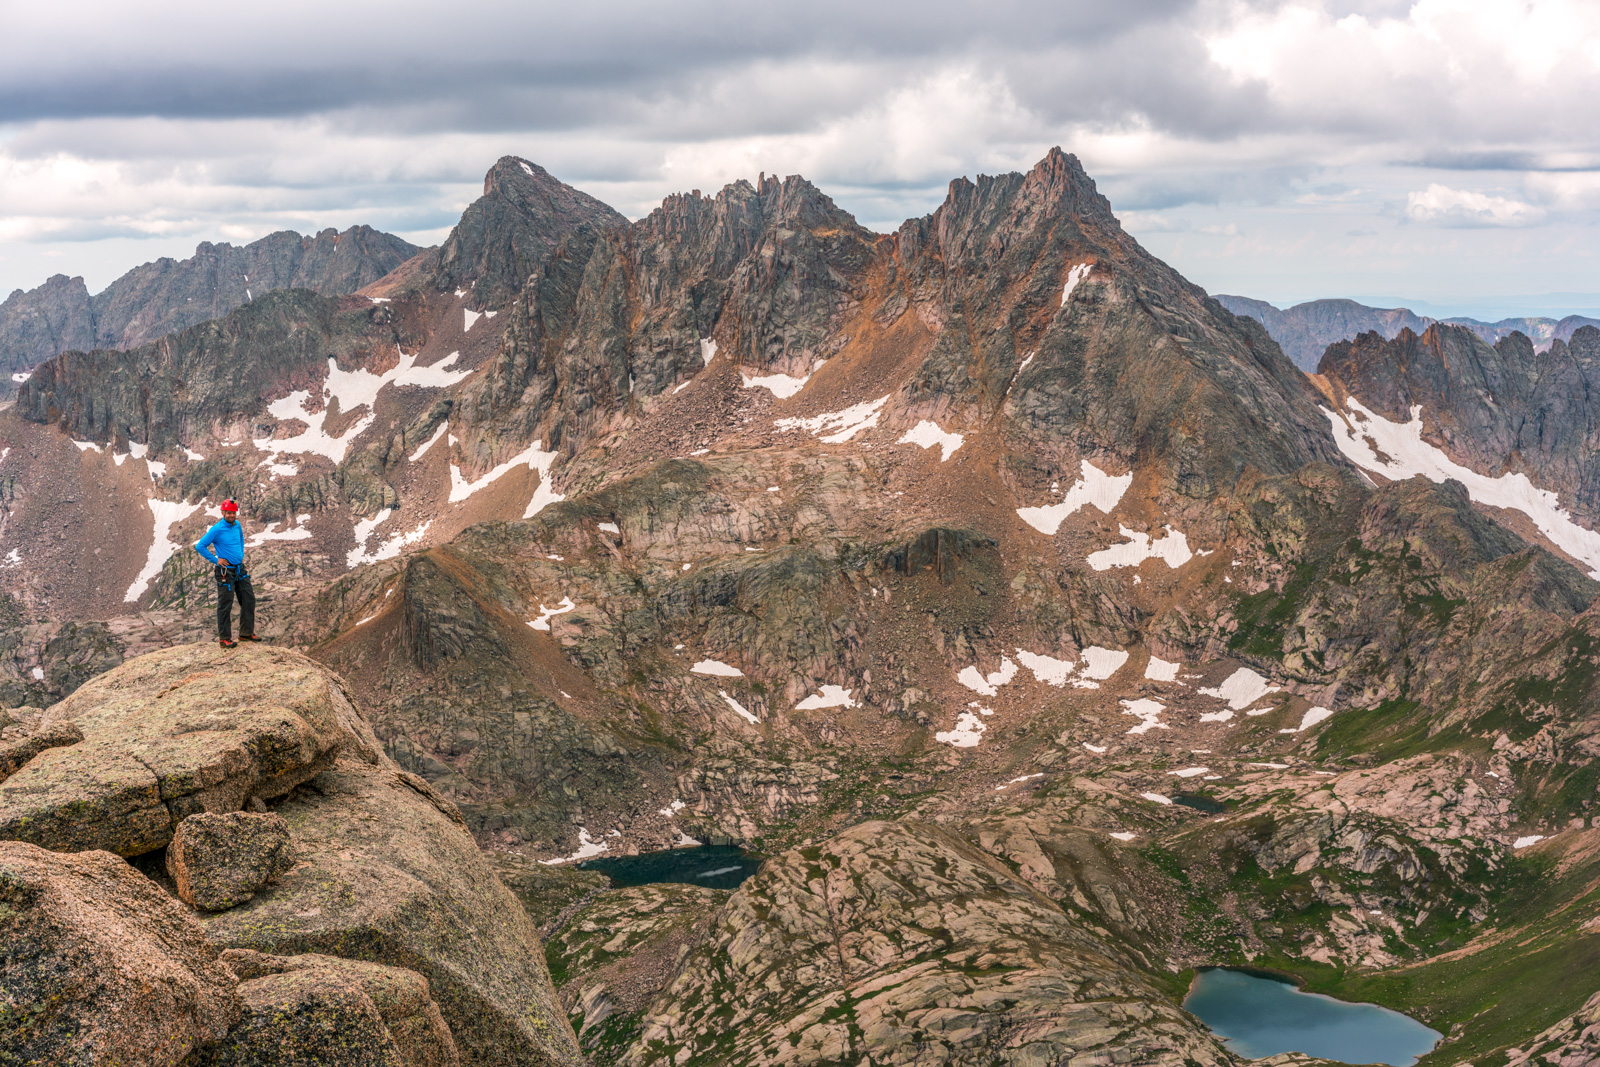
I reached the saddle and the views west towards Pigeon, Monitor, and Animas above No Name basin were great to say the least. I stopped here to take it all in and enjoy a snack.
Unbeknownst to me, Shawn had seen me gain the saddle and snapped some photos of me from Peak 10's flanks.
I scrambled up the ridge and took in the route for Knife Point. It looked like staying east and then going up the blocking face would work great.
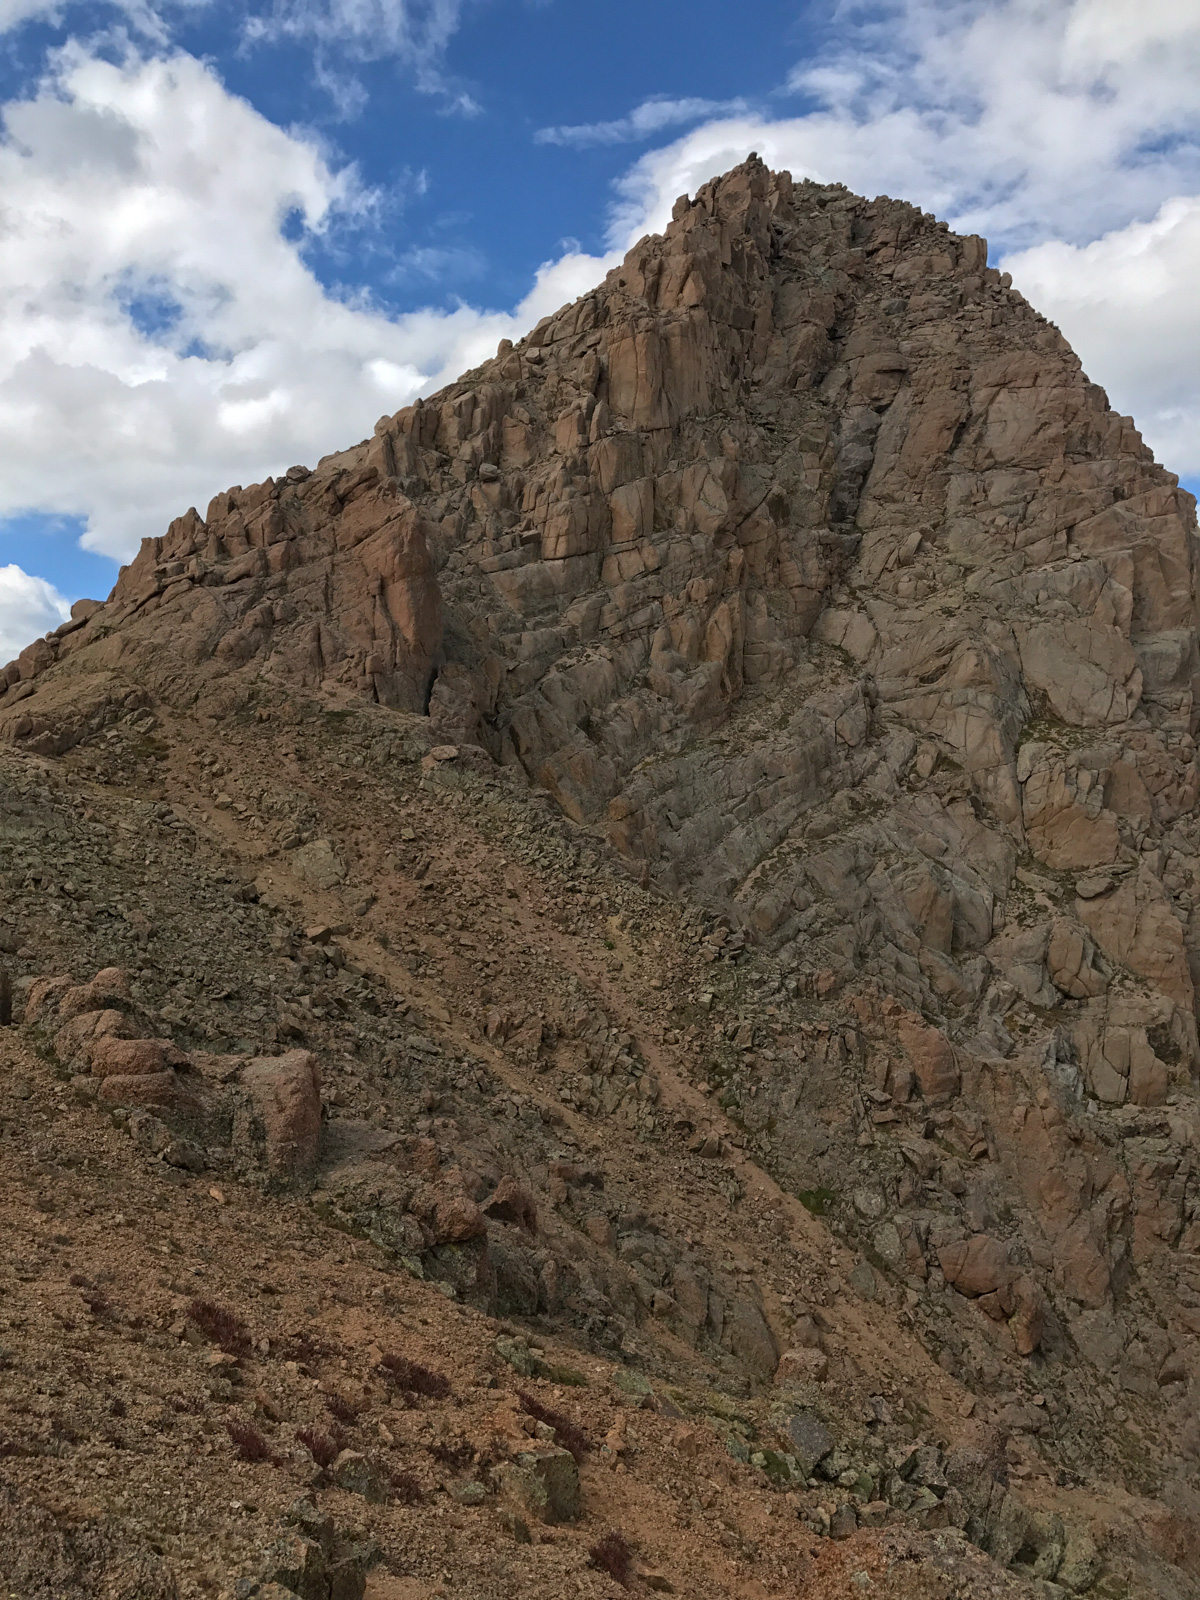
The climb up Knife Point was not terribly difficult. I would rate it class 2 with one or two easy class 3 moves mixed in for fun, which were mostly avoidable with careful route finding. The views of Sunlight Peak on the way were breathtaking!
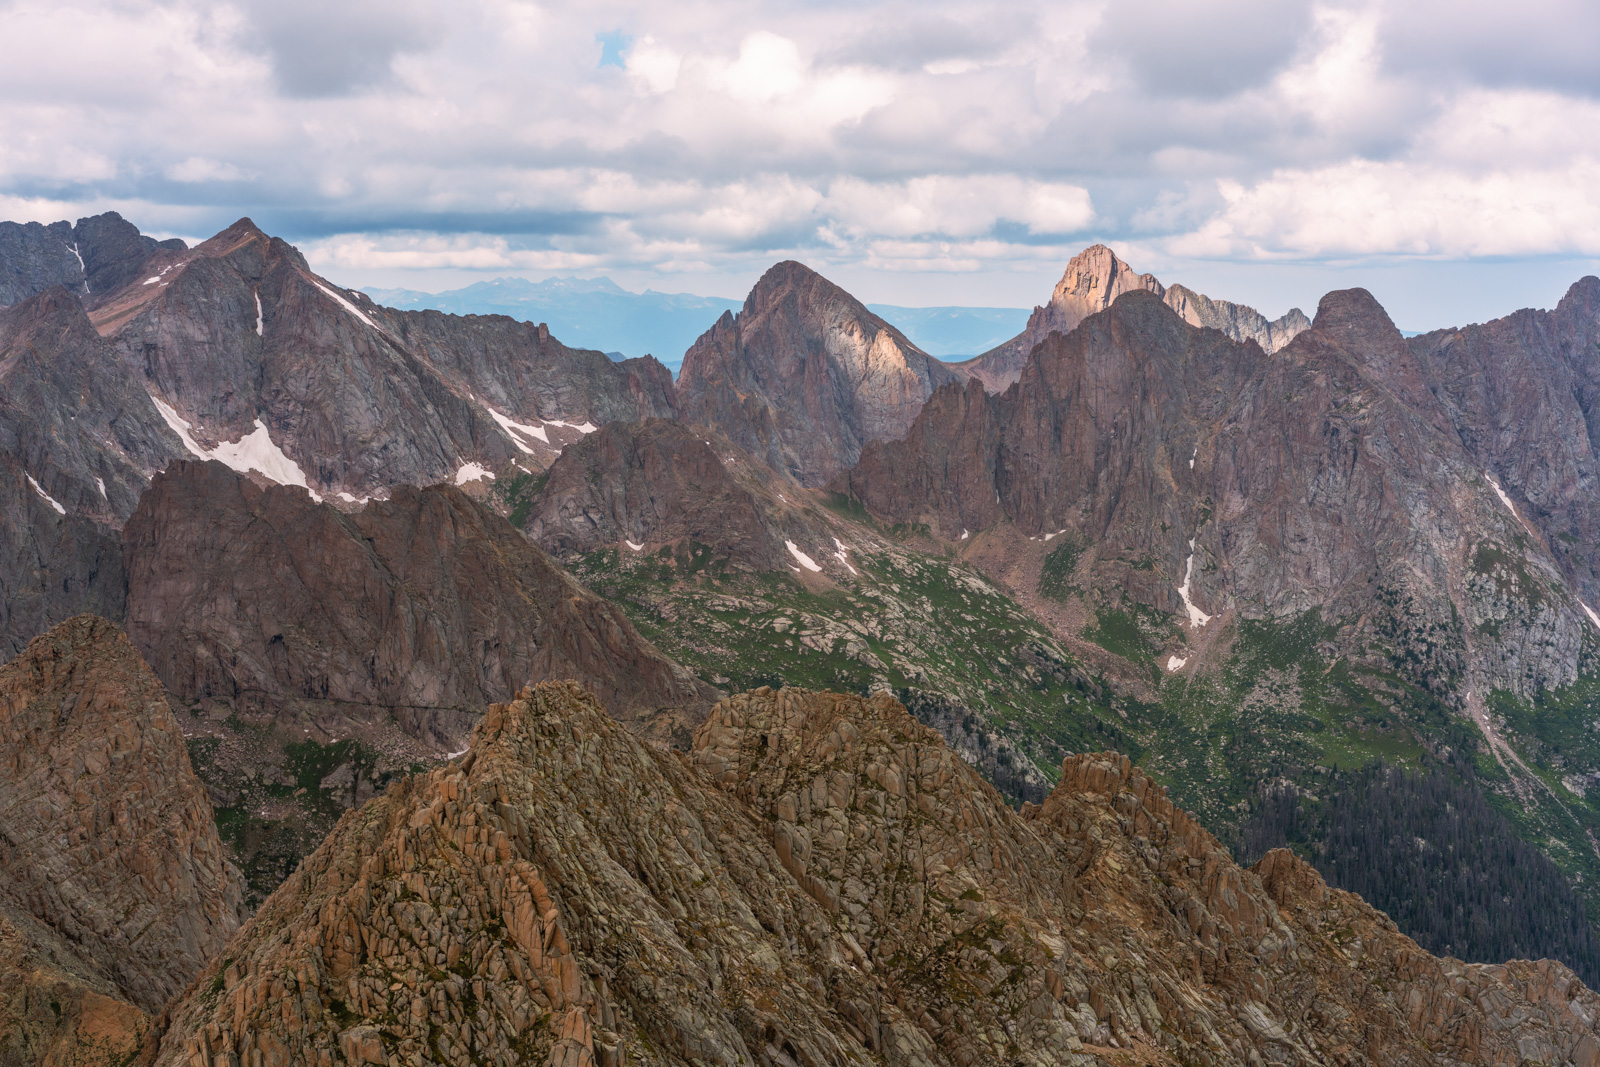
I reached the summit of Knife Point without any problems and enjoyed the amazing views of the Needle Mountains, including Sunlight Peak, Sunlight Spire, Glacier Point, Eolus, North Eolus, Pigeon Peak, Turret Peak, Animas Mountain, and Monitor Peak. What a mighty string of peaks it was to behold!
I set-up my tripod for some more detailed photo work, anticipating the eclypse. Again, unbeknownst to me, Shawn had taken some photos of me from Peak 10, this time of me setting up my tripod and shooting some photos from the summit of Knife Point.
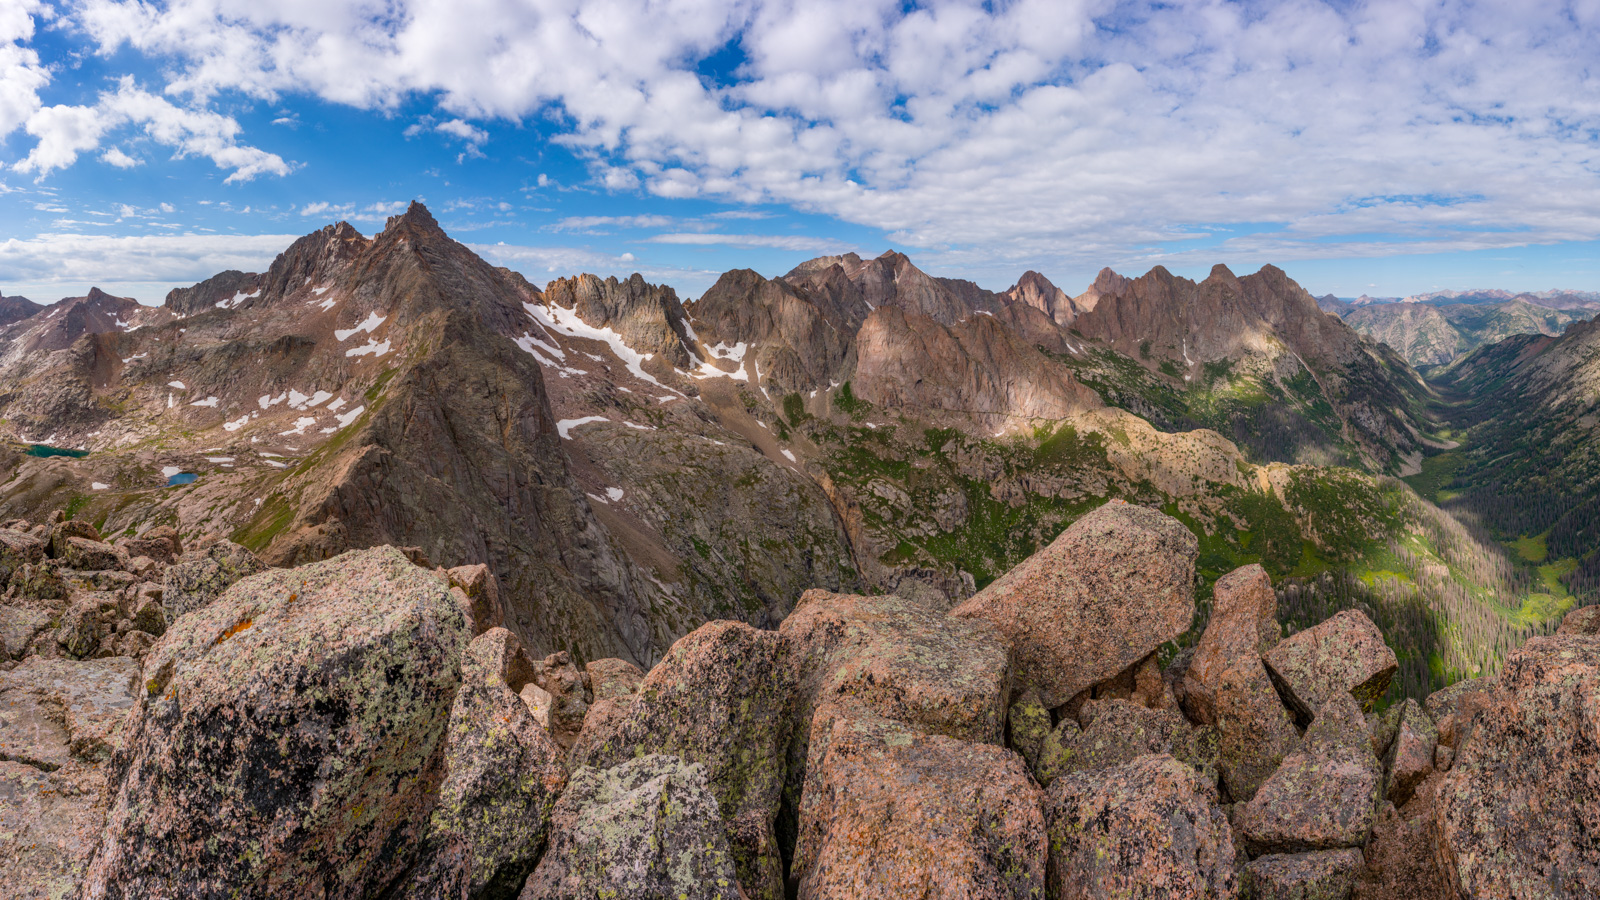
Knife Point might just be one of the more photogenic locations to photograph, as it offers impressive views of some of Colorado's most incredible peaks, including Sunlight, Eolus, and Windom, Pigeon, Turret, Monitor, and Animas, as well as Arrow Peak, Vestal Peak, and of course, Jagged Mountain, as seen in this 250 degree view.
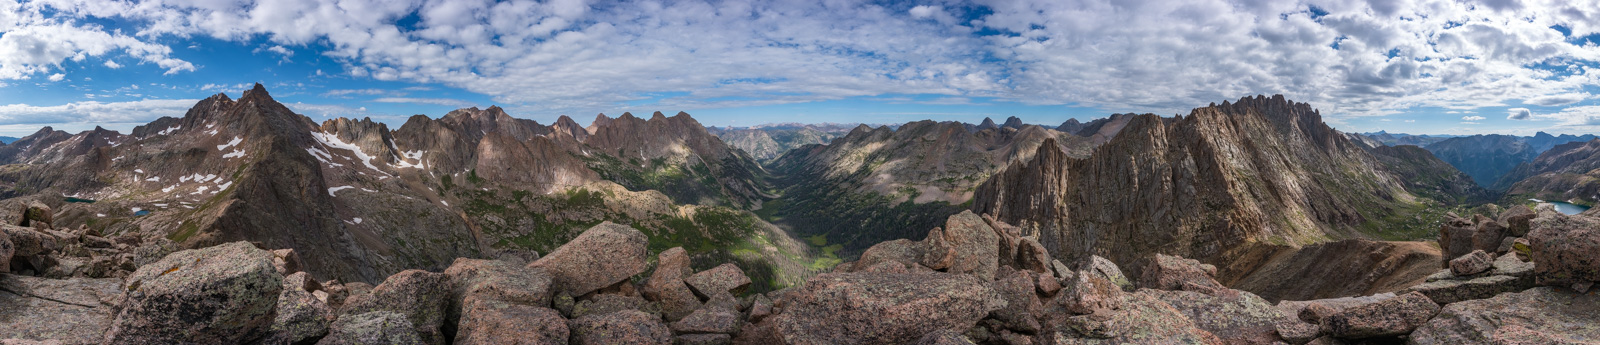
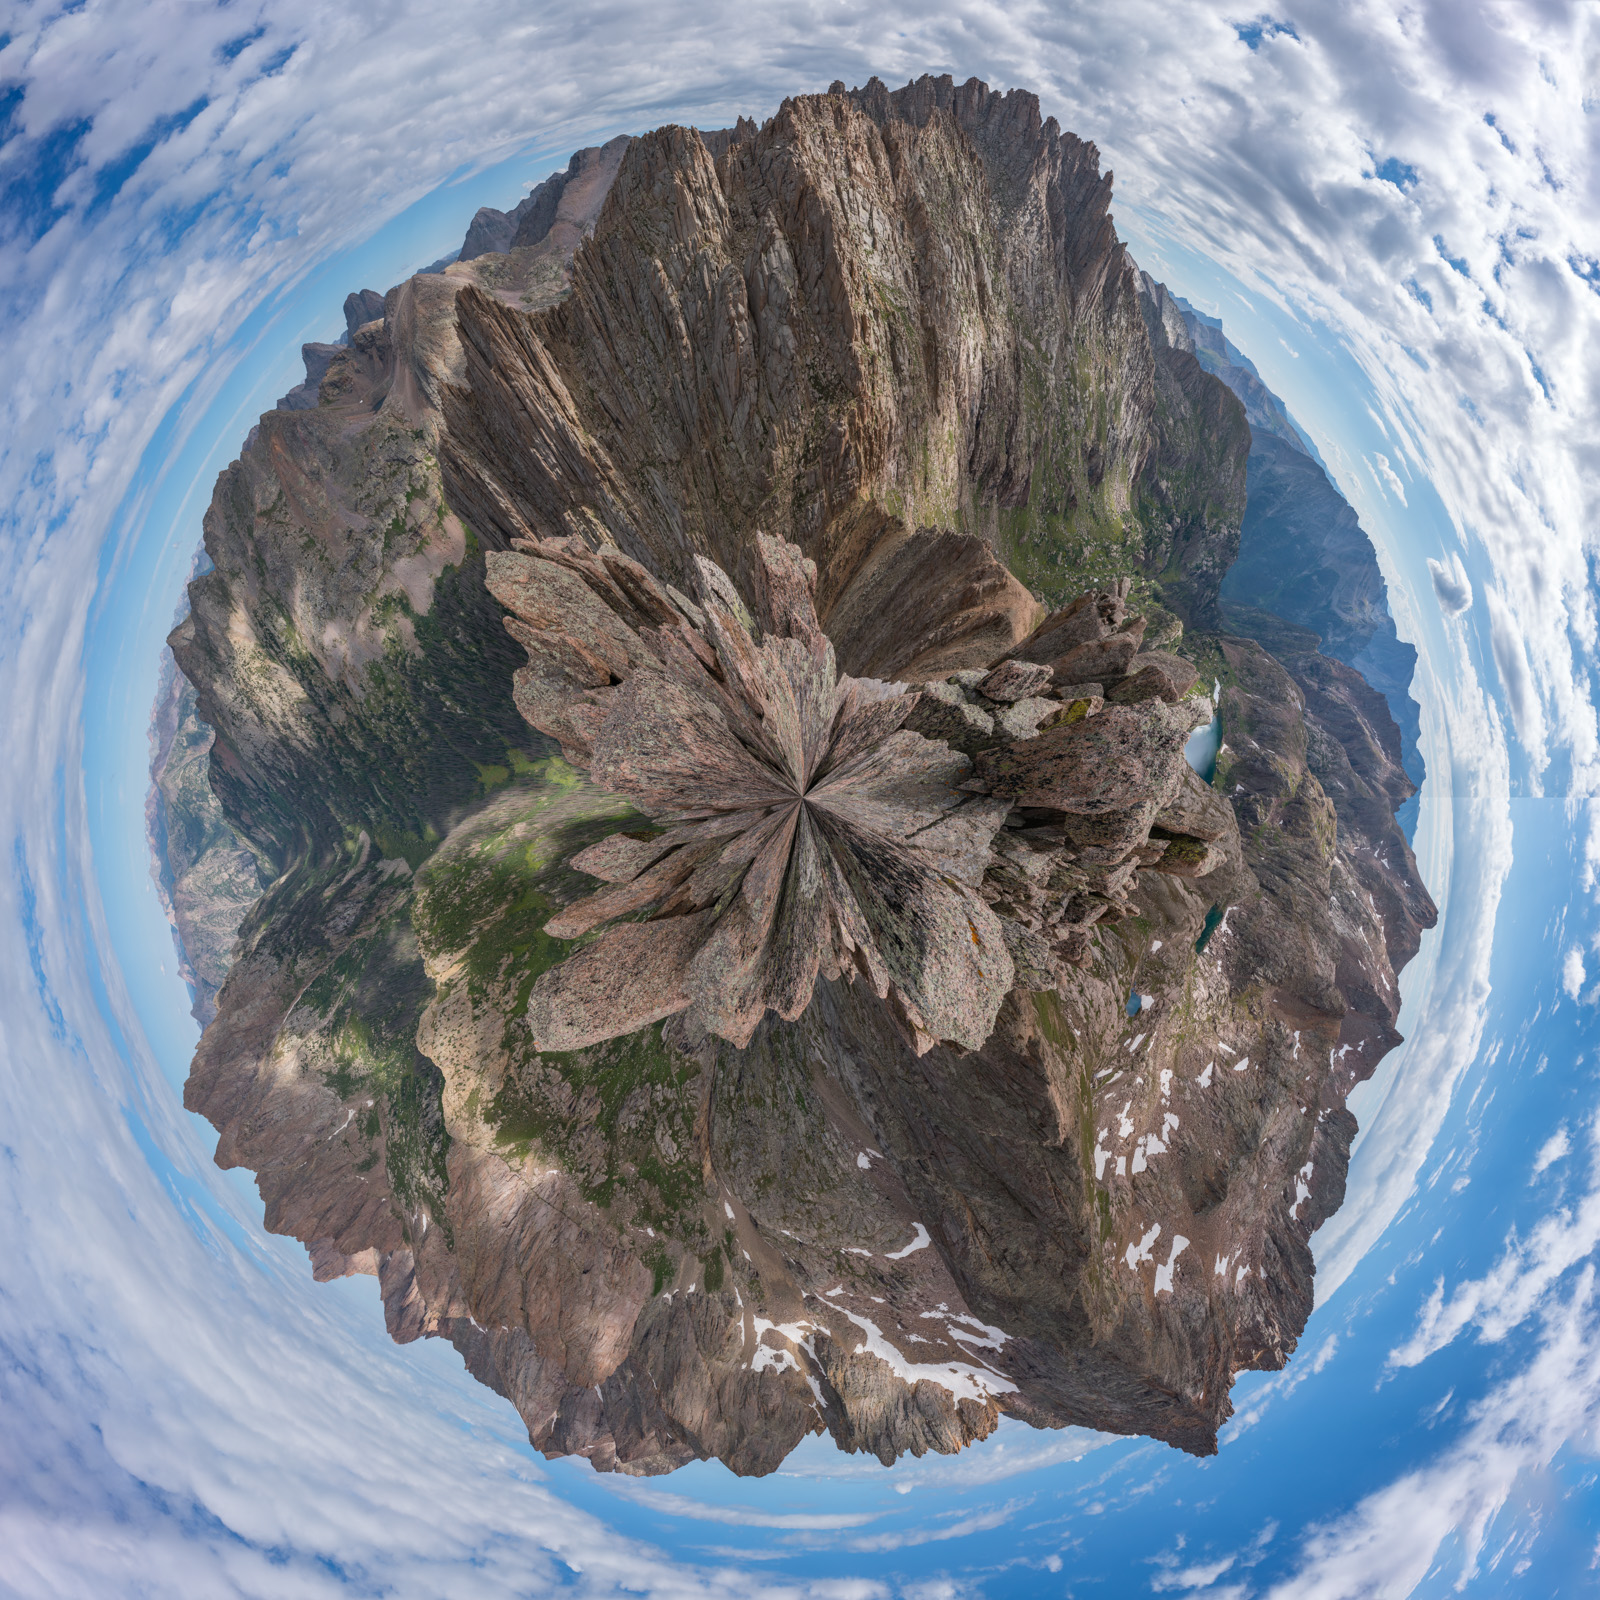
Another fun view of this scene is to take a 360 degree panorama and turn it into a planet. I call this one "Planet Weminuche."
I was thankful that I lugged my heavy telephoto lens up to the top, as I could get a nice and tight zoomed in view of Pigeon Peak, one of my faves.
And of couse a slightly less zoomed in view of the whole group, including Turret Peak, Pigeon Peak, Monitor Peak, and Animas Mountain. So freaking good looking!

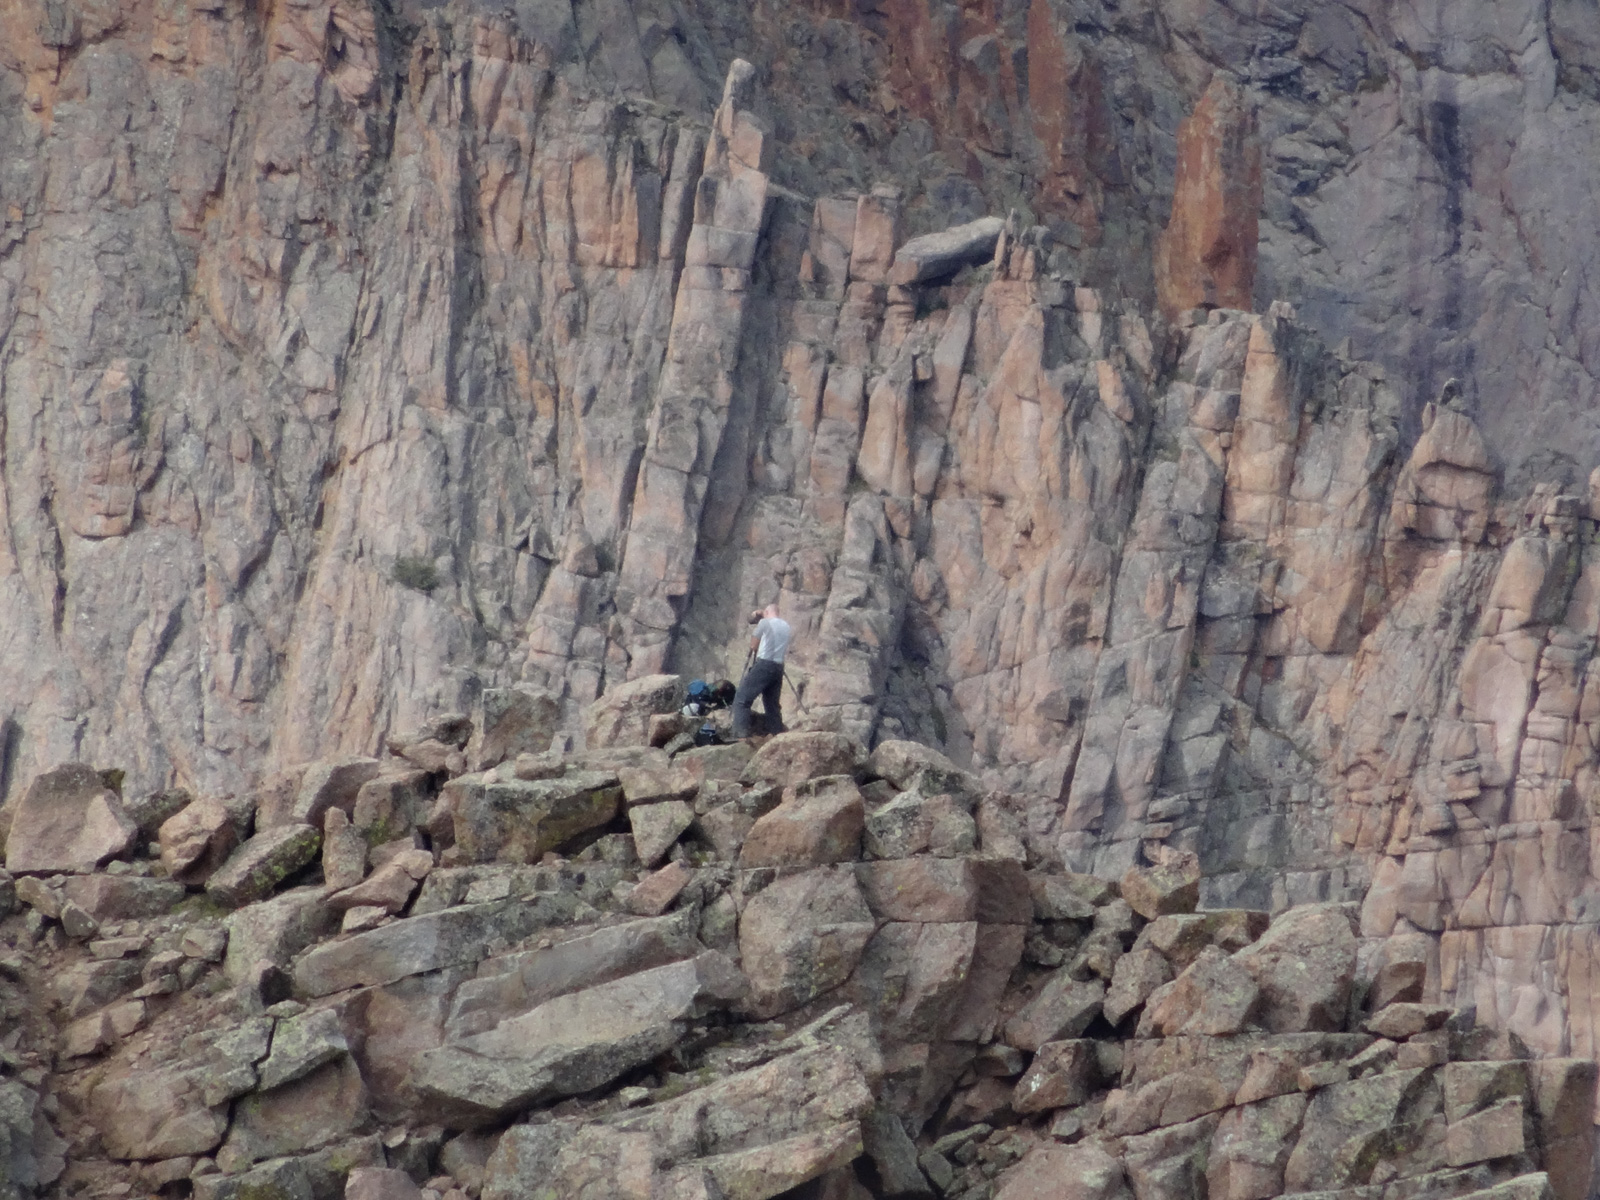
I also really appreciated the tight view of Sunlight and Sunlight Spire. Amazingly, hidden in this photograph is a tiny person I found while exploring the image from home. See the subsequent cropped photo to see if you can spot them.
Zoomed in view of where the person is - it's like Where's Waldo.
I could hear some people celebrating over on Sunlight and probbaly Eolus. Glacier Point, Eolus, and North Eolus looked mighty from this vantage as well.
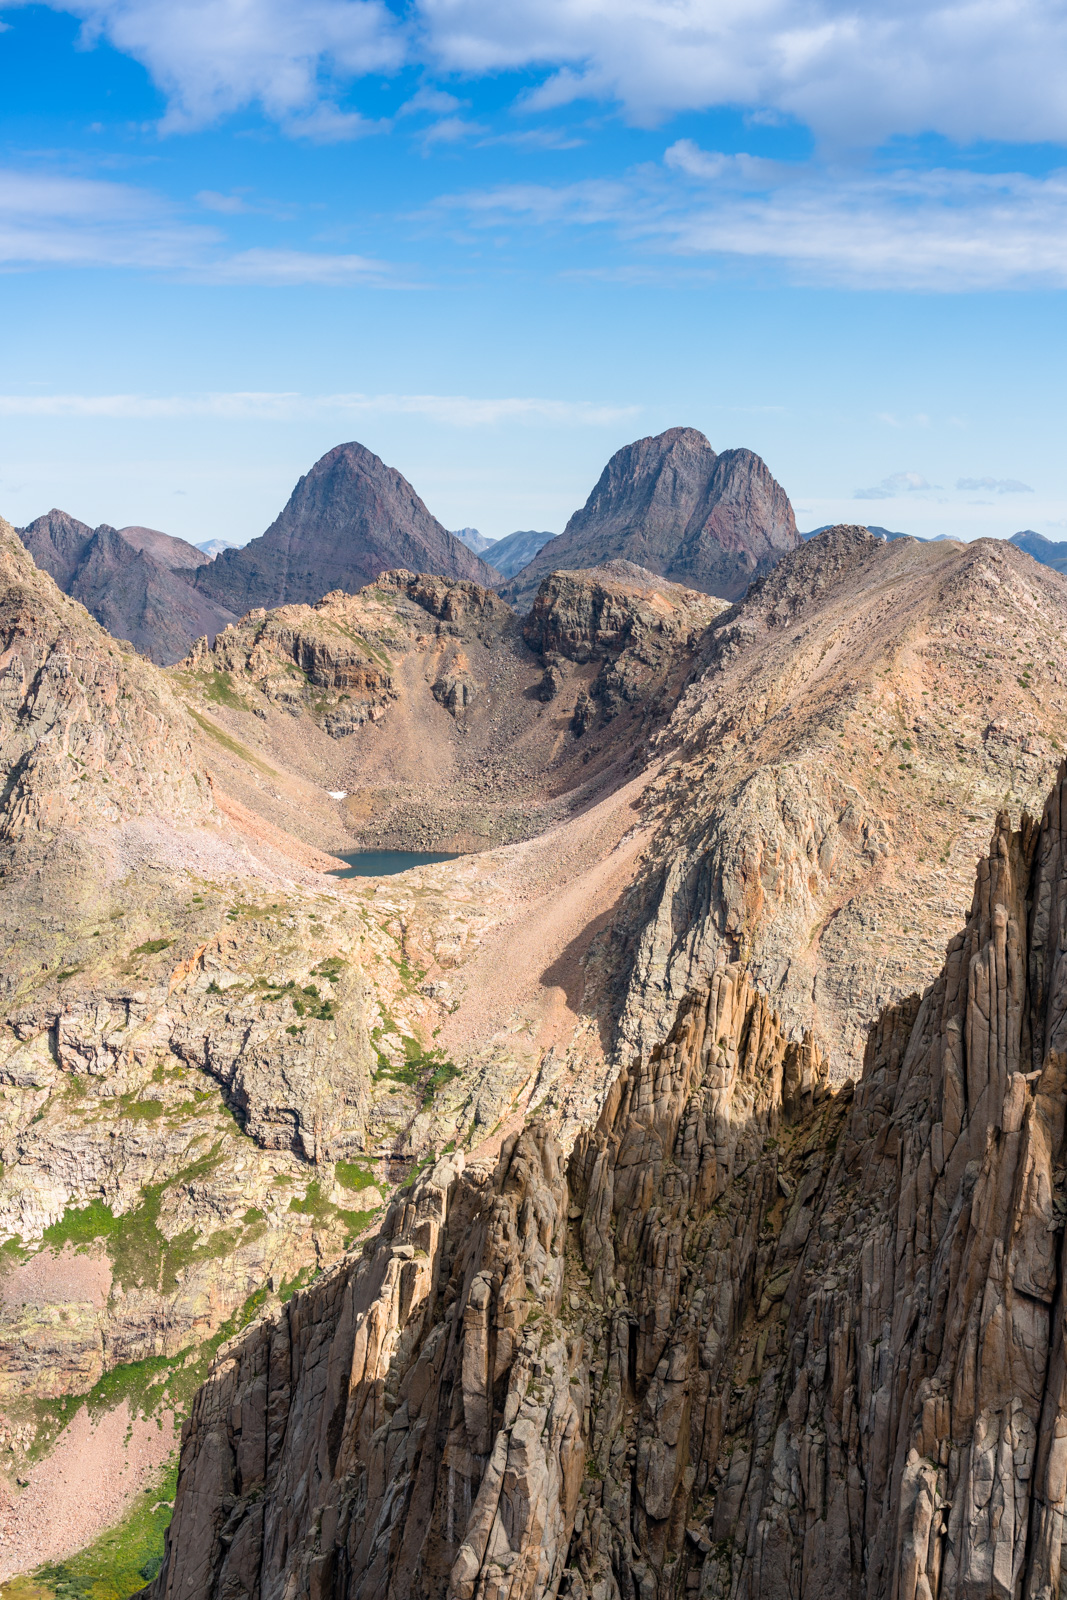
My gaze kept taking me back over to Arrow and Vestal, which rose high above a small lake between Knife Point and there, with the nasty rock of Peak 10 in the foreground.
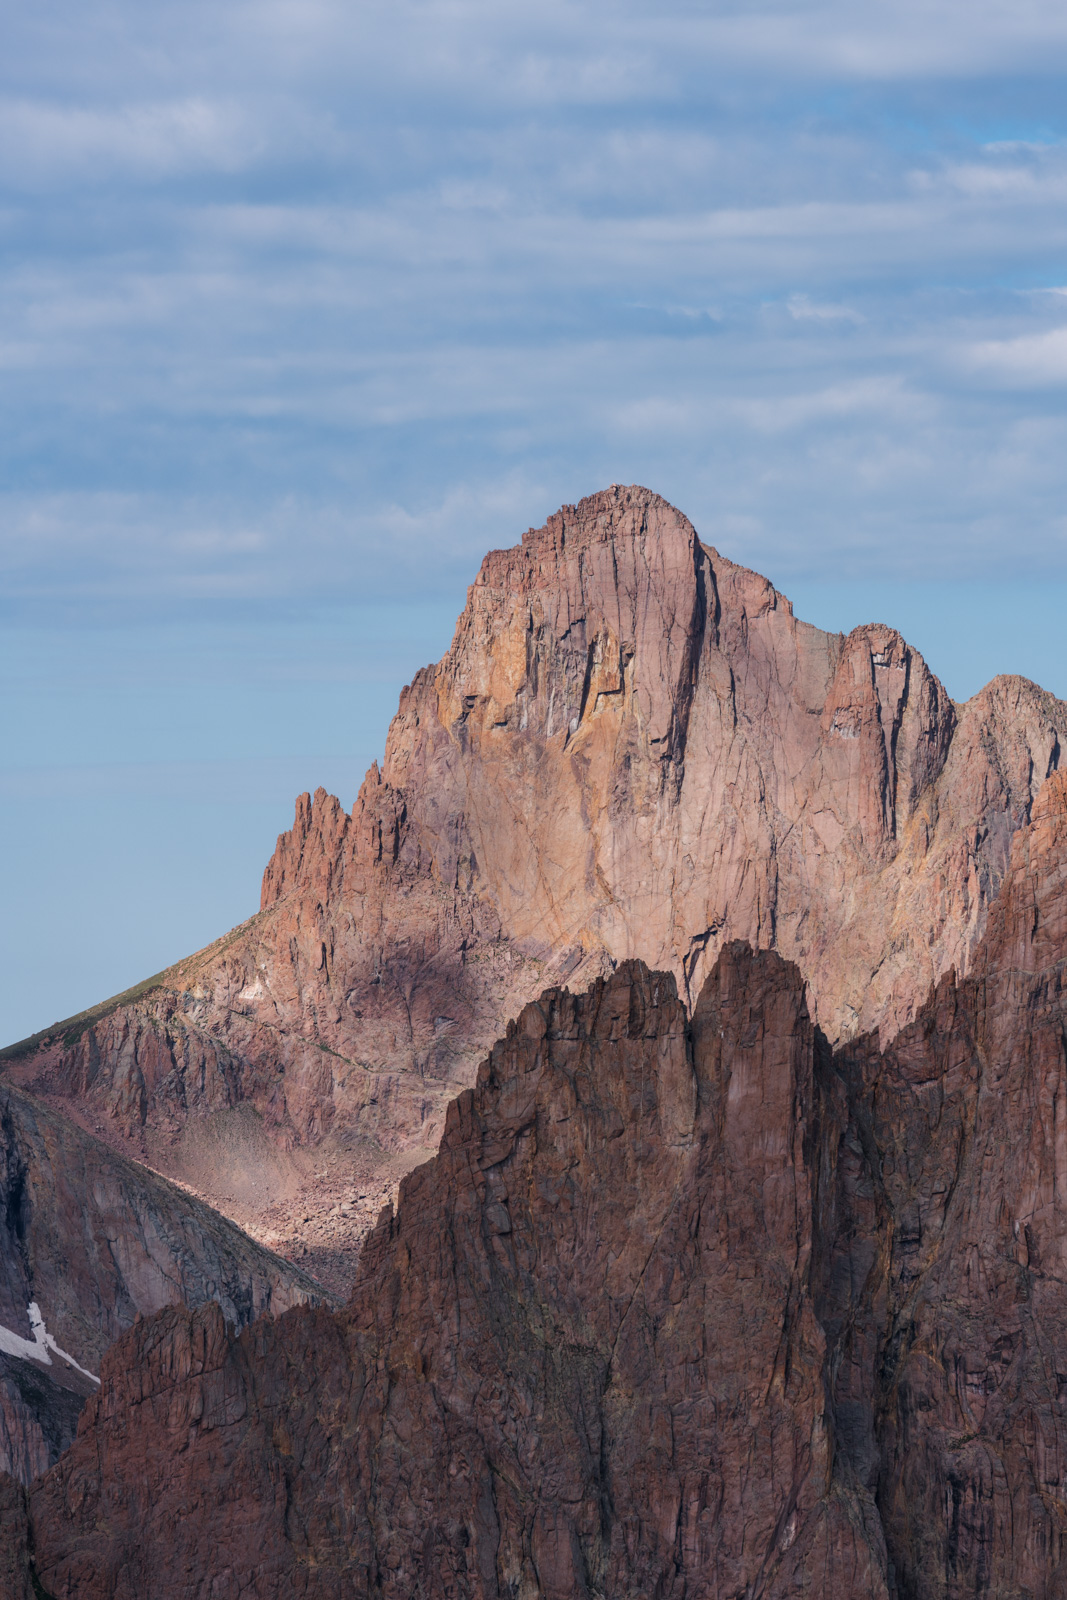
Of course, I could not help but study Jagged Mountain - it was just scary and impressive looking from here.
Just before the eclipse, I got in one more shot of Sunlight by itself. I really loved how the ridge sweeps up from below and terminates at the summit like some impressive mountain god.
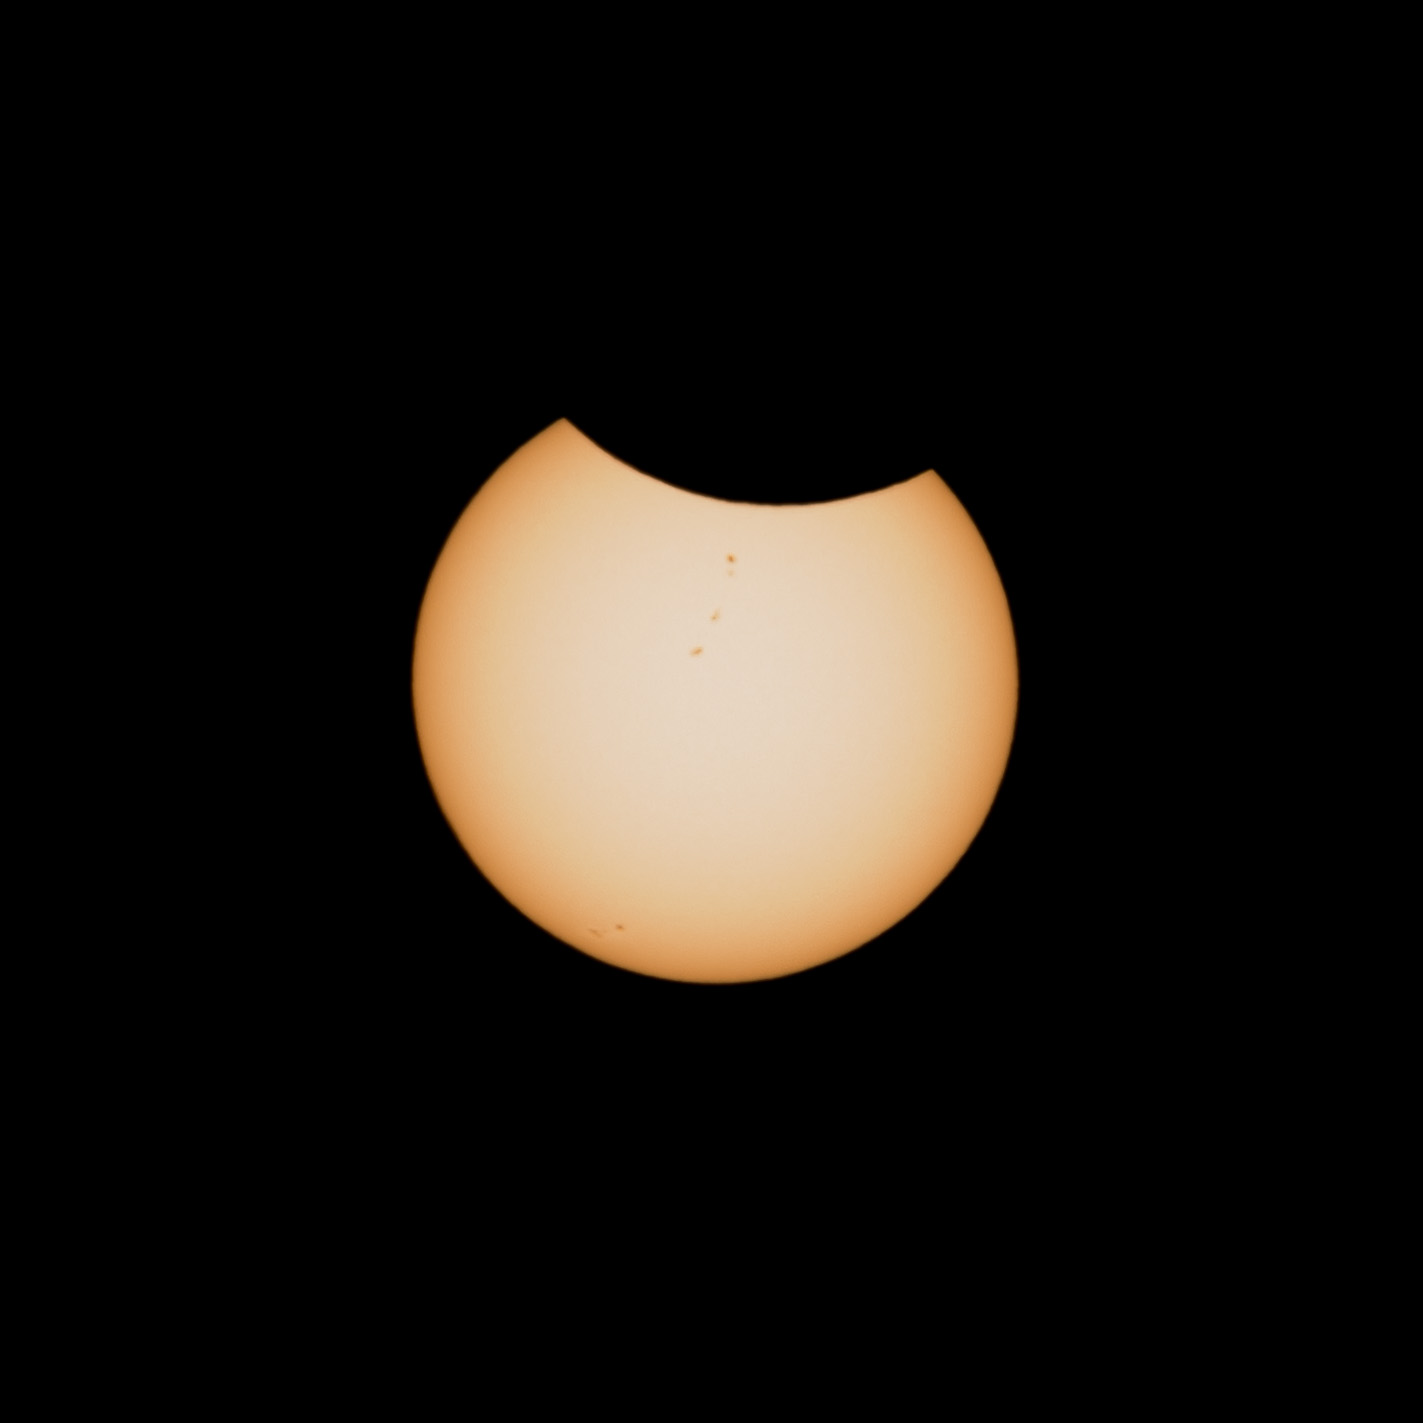
Unfortunately, clouds began to really move in and obscure my view of the sun just before the eclipse began. Additionally, the clouds did not appear to be too friendly at all; however, I might just be the only person on earth that can say they photographed a solar eclipse from the top of a 13,000 ft. mountain.
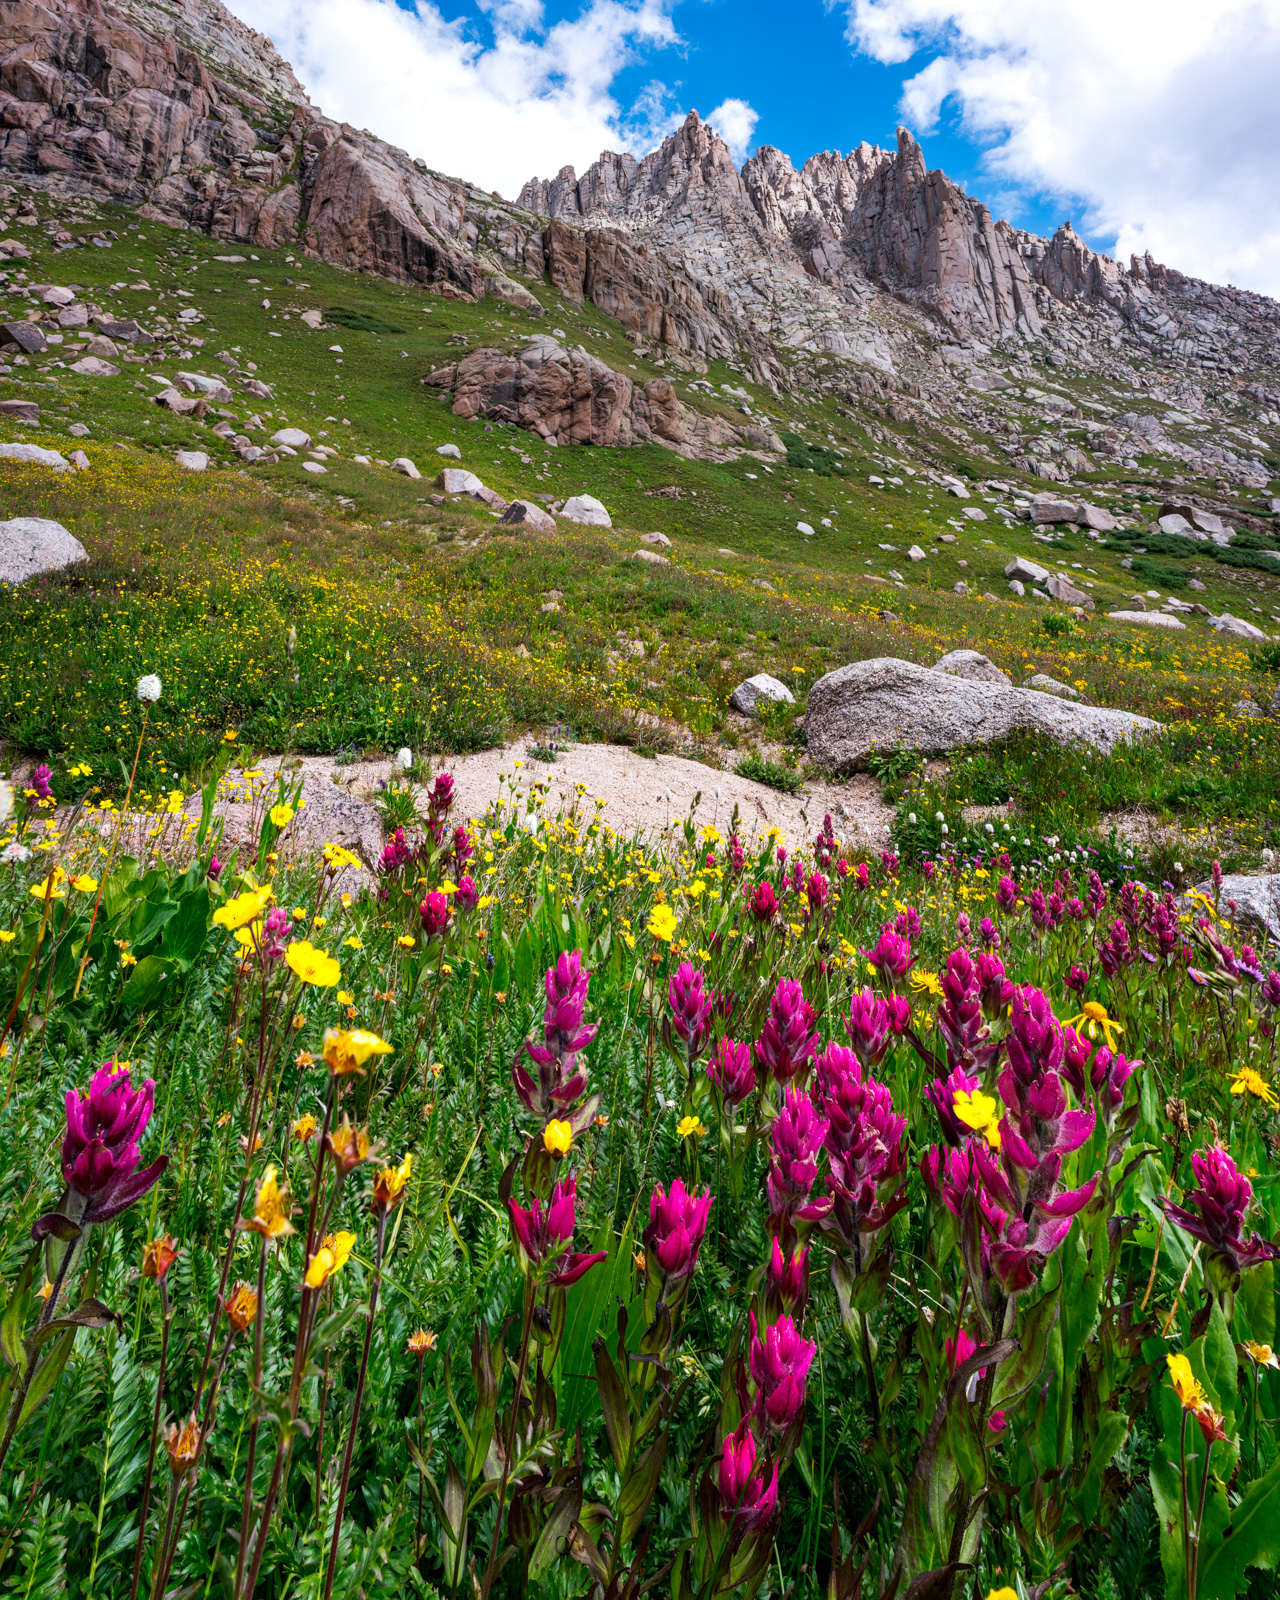
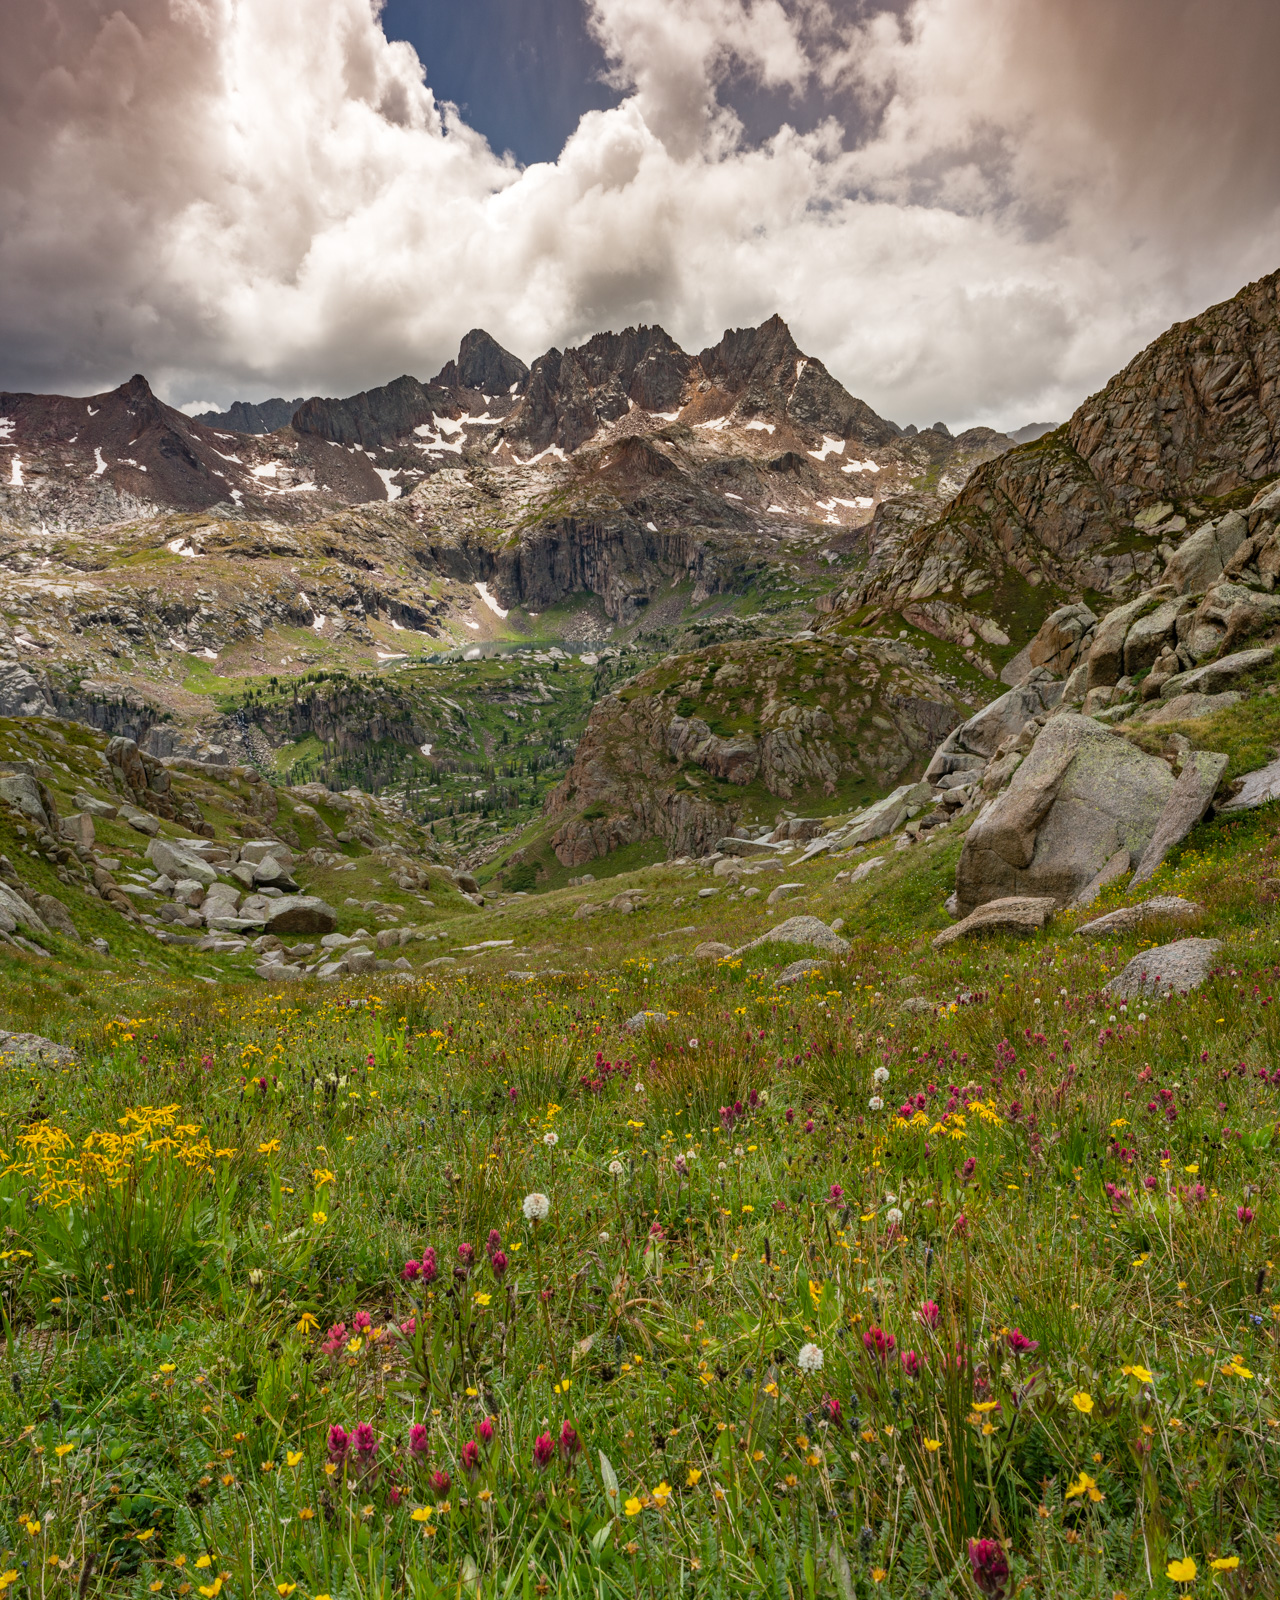
Since the weather looked iffy, I decided to descend back into the basin. I could not make out Natalie or Shawn on Peak 10 with my bare eyes or my telephoto lens, so I took my time on my way down, looking for a nice scene to snap some more shots of Jagged paired with some wildflowers - this time, Rosy Paintbrush, probably my favorite flower.
I waited around for about an hour for Natalie and Shawn. I did not see them or hear them, so I decided to go down. One last look back, I made Shawn out on the ridge between Knife Point and Peak 10! He must have scrambled over from Peak 10 (impressive). I was tired and my feet were sore, so I headed back down.
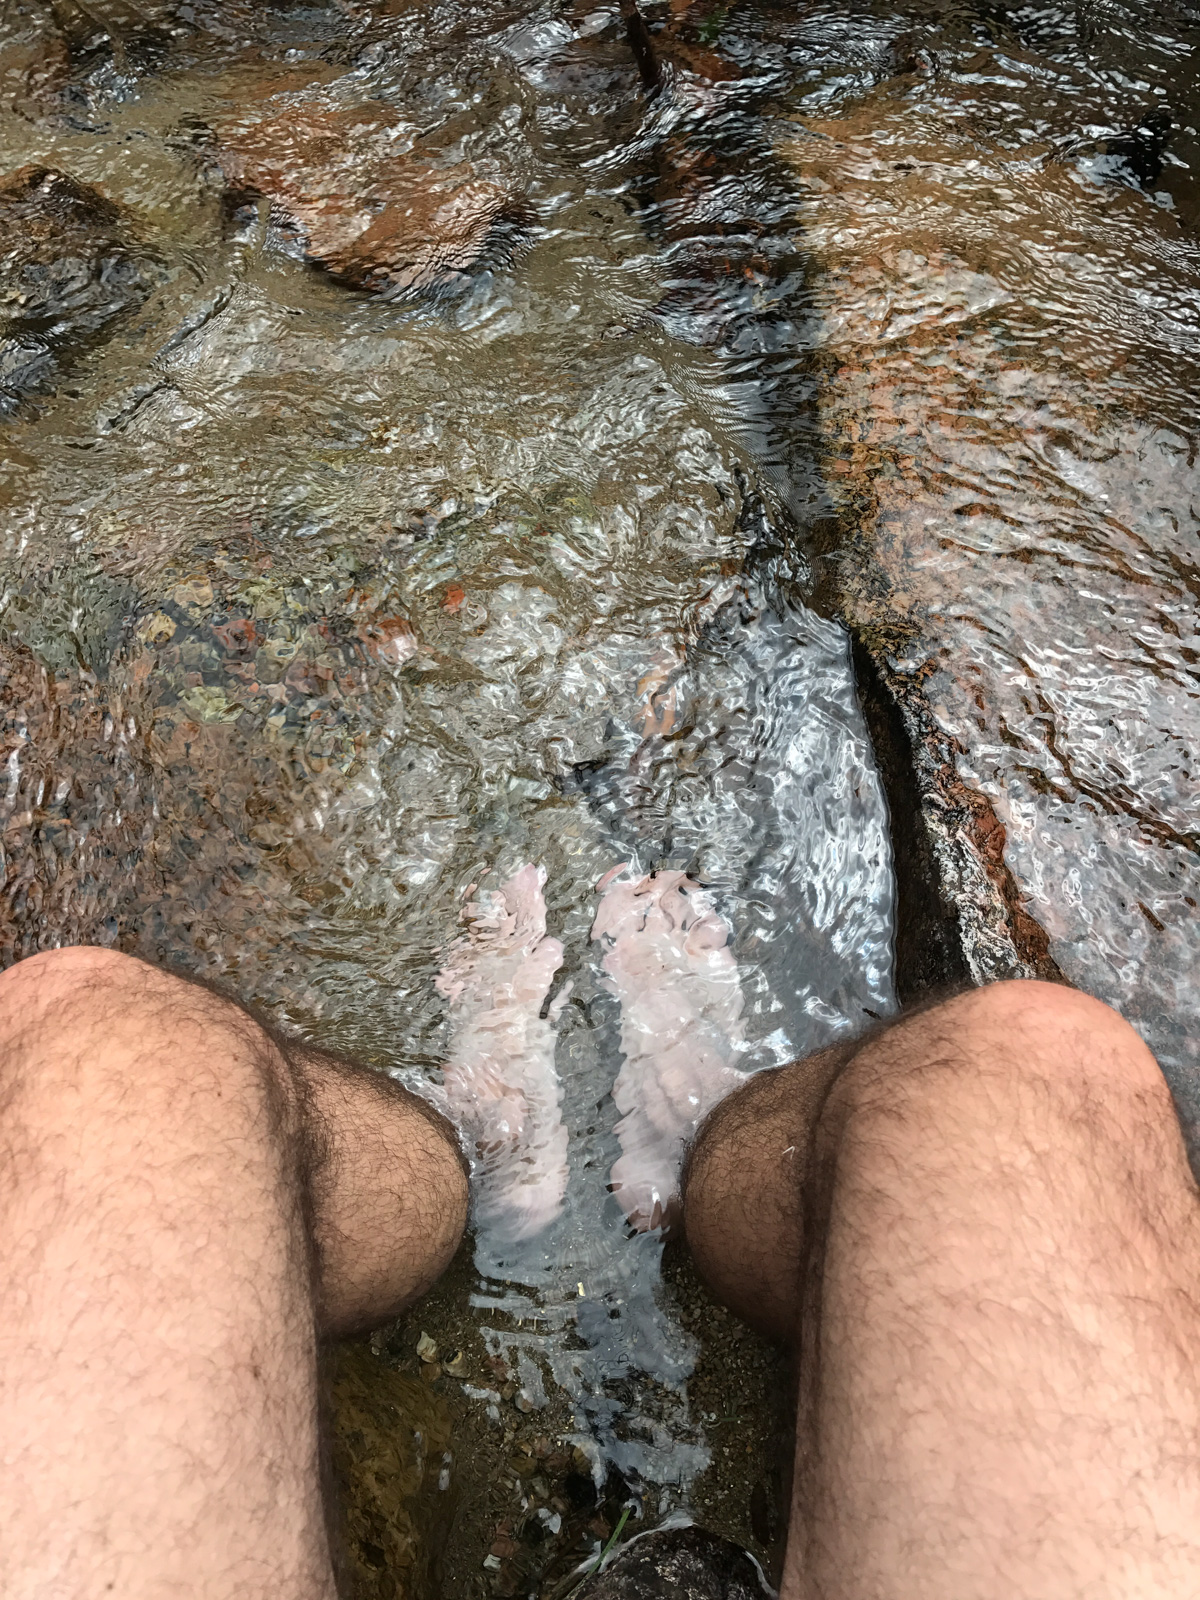
I arrived back at camp and decided to soak my feet in the creek. For some reason, my boots had shrunk since I last wore them and they were really encroaching on my achilles heels. Awww, sweet cold relief!
Natalie and Shawn both came into camp shortly after my arrival and we talked about our climbs. All was well and we made plans for a 4:30 start for Jagged Mountain. My nerves were getting more and more knotted.
DAY 3: 4:30 AM start and climb of Jagged Mountain.
Beep. Beep. Beep. Time to wake up and crush another Centennial. That's what I kept telling myself anyways. Let's do this! We got up, packed up our ropes and harnesses, re-filled water, and were off! We arrived in the upper basin just in time for some nice sunrise light above Sunlight Peak. No tripod today.
From the upper basin, the plan was to swing around the west face of Jagged and up into the lower basin between Jagged Mountain and Leviathan Peak. We were able to find a nice trail up from Sunlight Creek and made our way up, admiring Peak 10 and Jagged most of the way around the bend.
A nice pink and orange hue eminated from a small tarn below us and between us and Mount Oso in the distance.
Once around the west face of Jagged, we finally found the beginning of the steep climb up to the basin below Jagged's north face. We each decided on a separate route up from here - Shawn went right and around the huge blocky, grassy slopes. Natalie went left and up where some goats were grazing, and I decided to go pretty much straight up the grassy ledges. I think each of our routes had different advantages.
Jagged was impressive from this vantage.
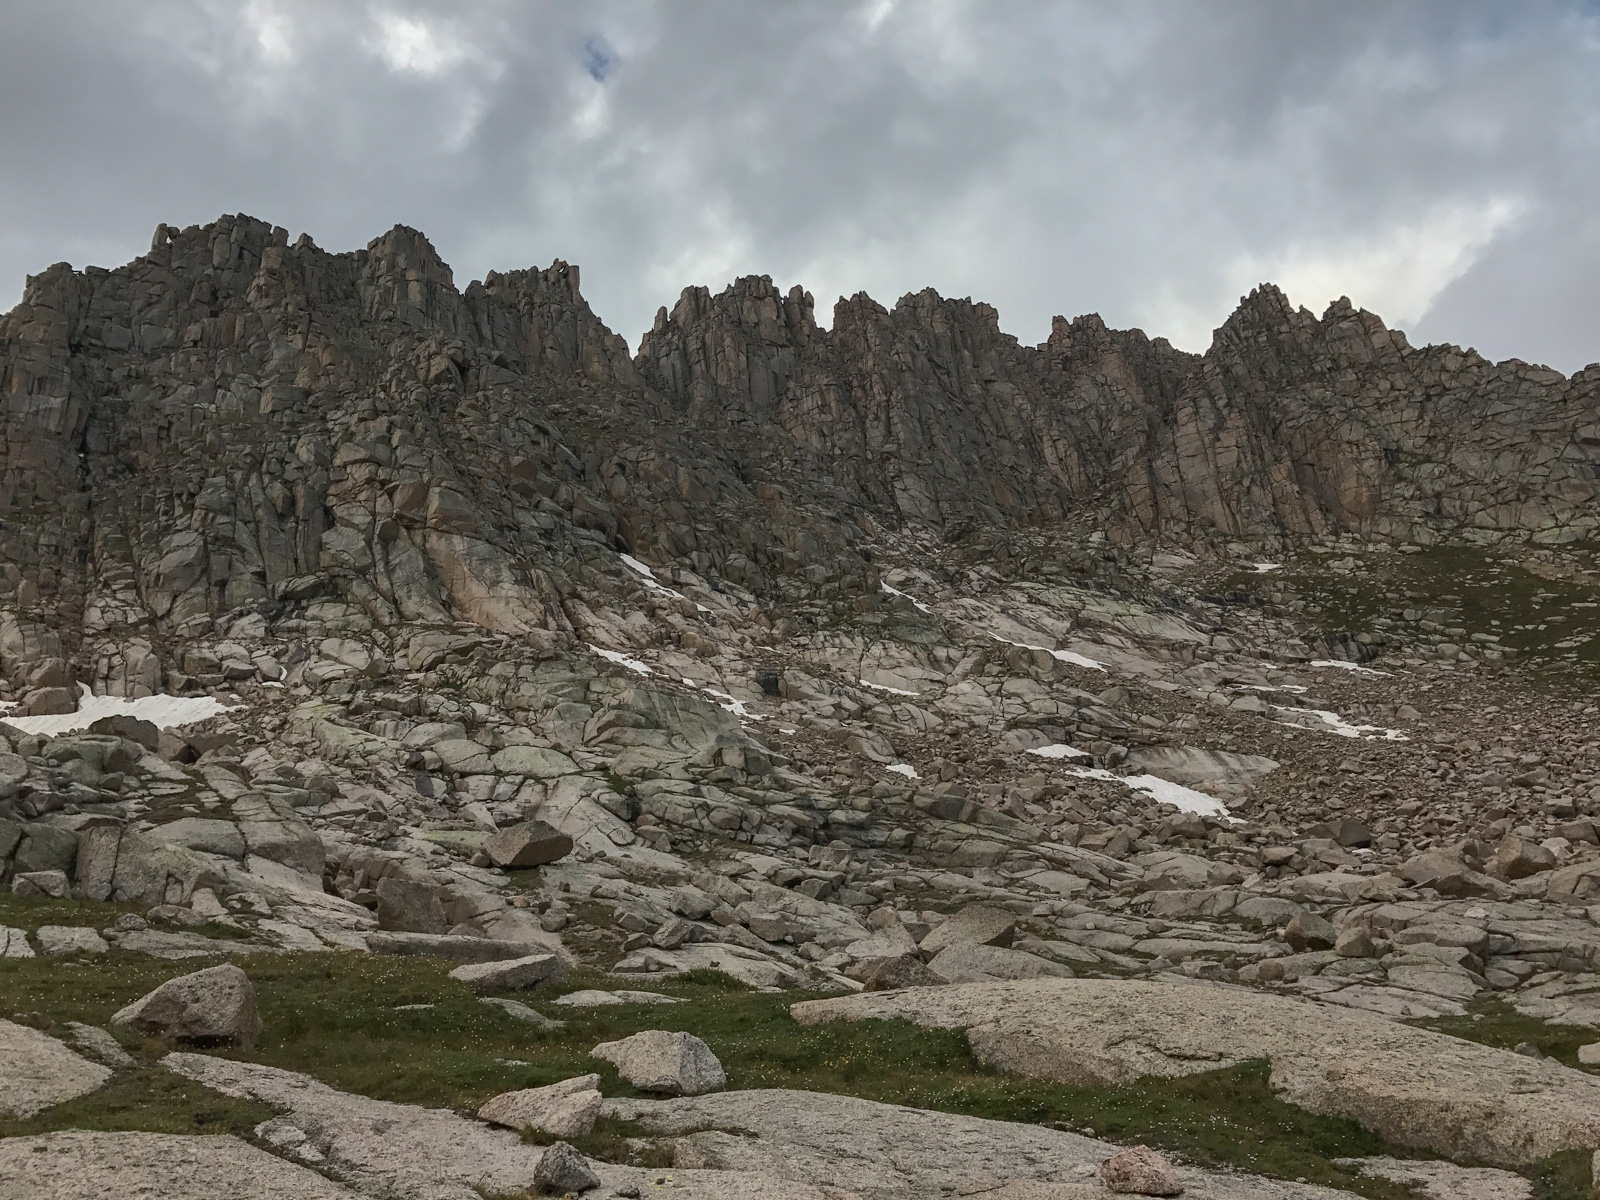
We each reached the area below Jagged's north face at about the same time, which afforded some pretty remarkable views of what lie ahead.
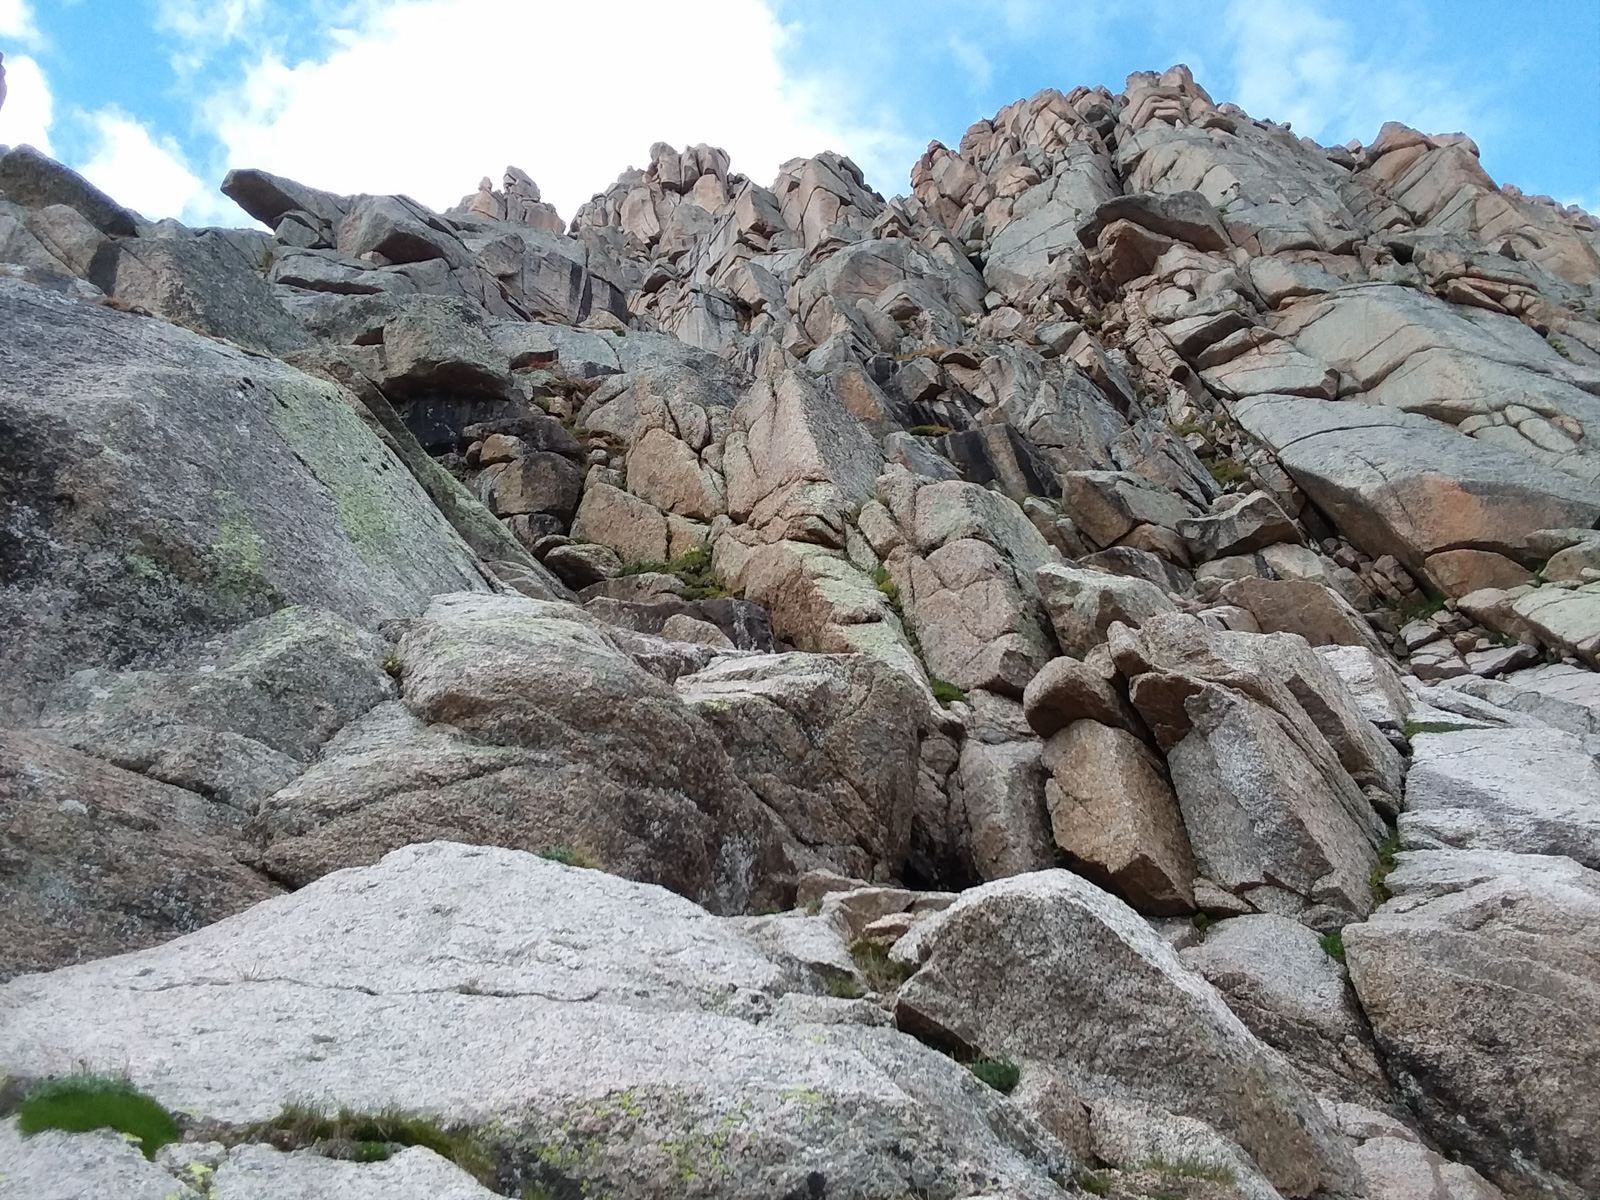
If you had not studied the route before hand, seeing this jumbled mess of rock that was called Jagged would look mighty itimidating.
We more or less found the route all the way over from Jagged Pass to our right and followed the grassy slopes to the first crux of the route, which requires rope for the faint of heart (that's me). We geared up here, and Shawn and I realized we had identicle harnesses.
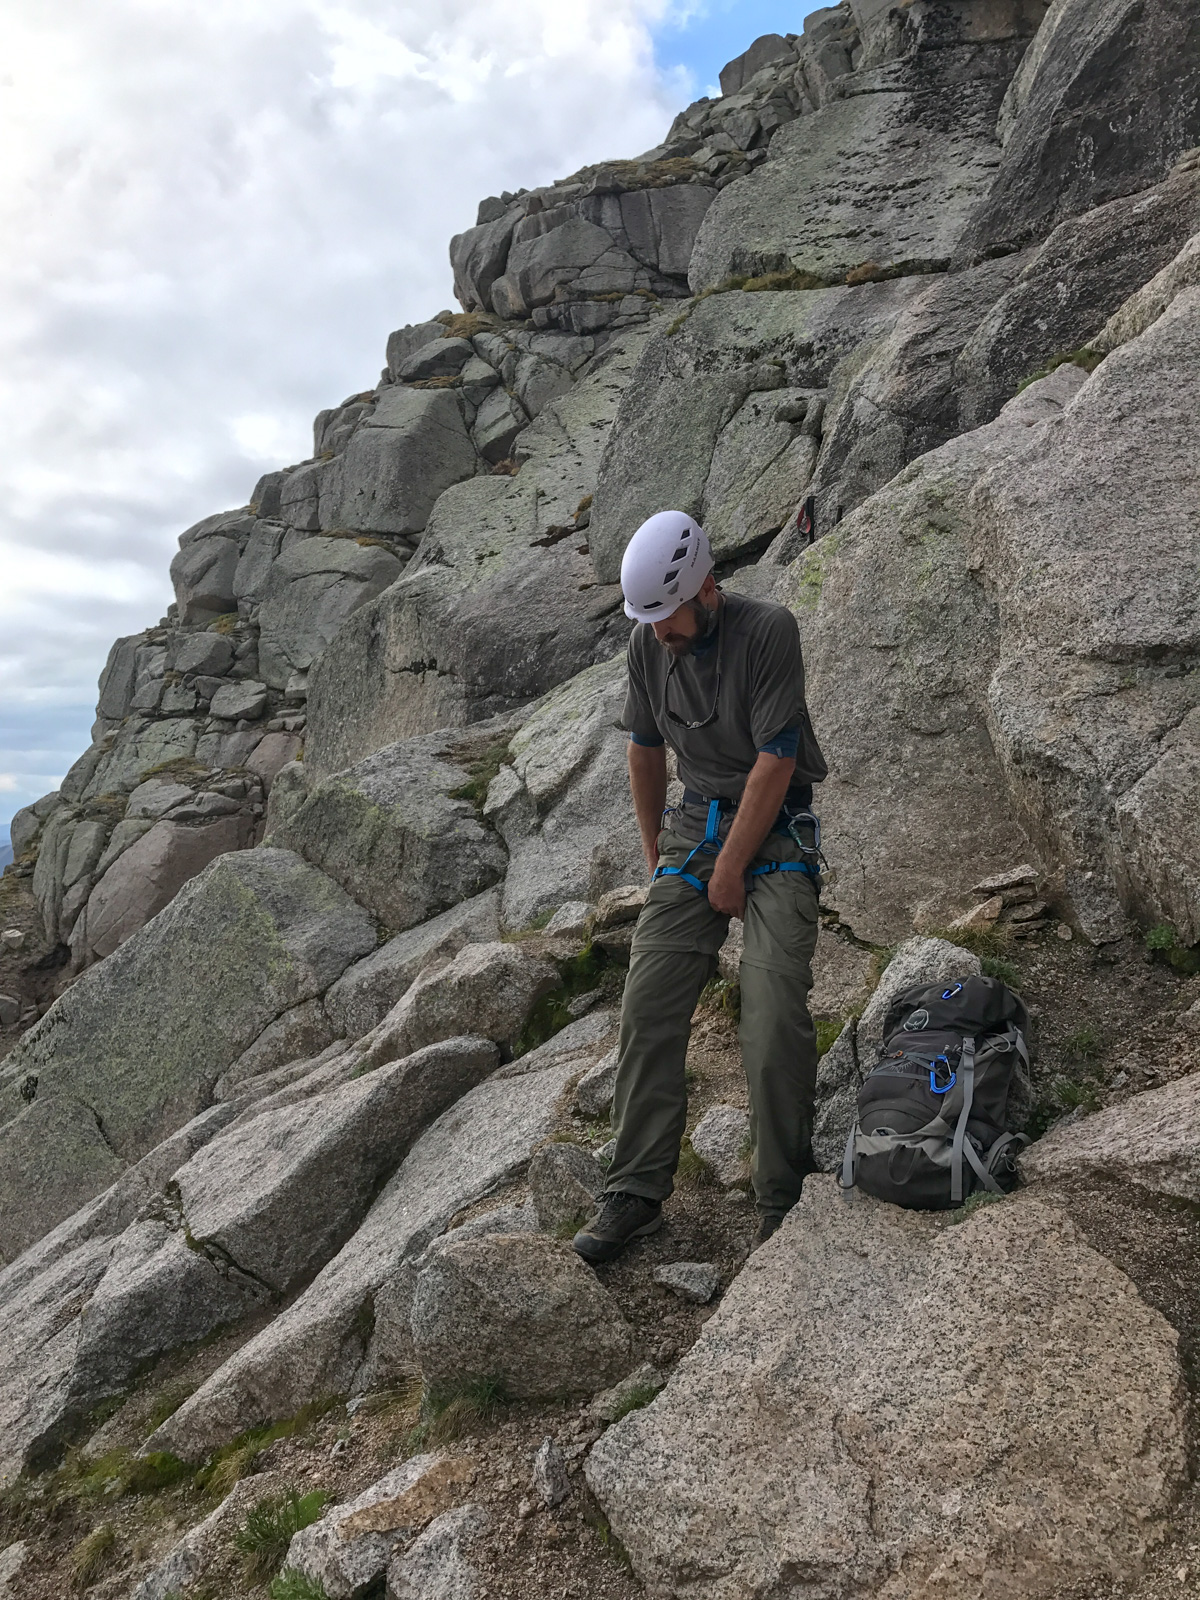
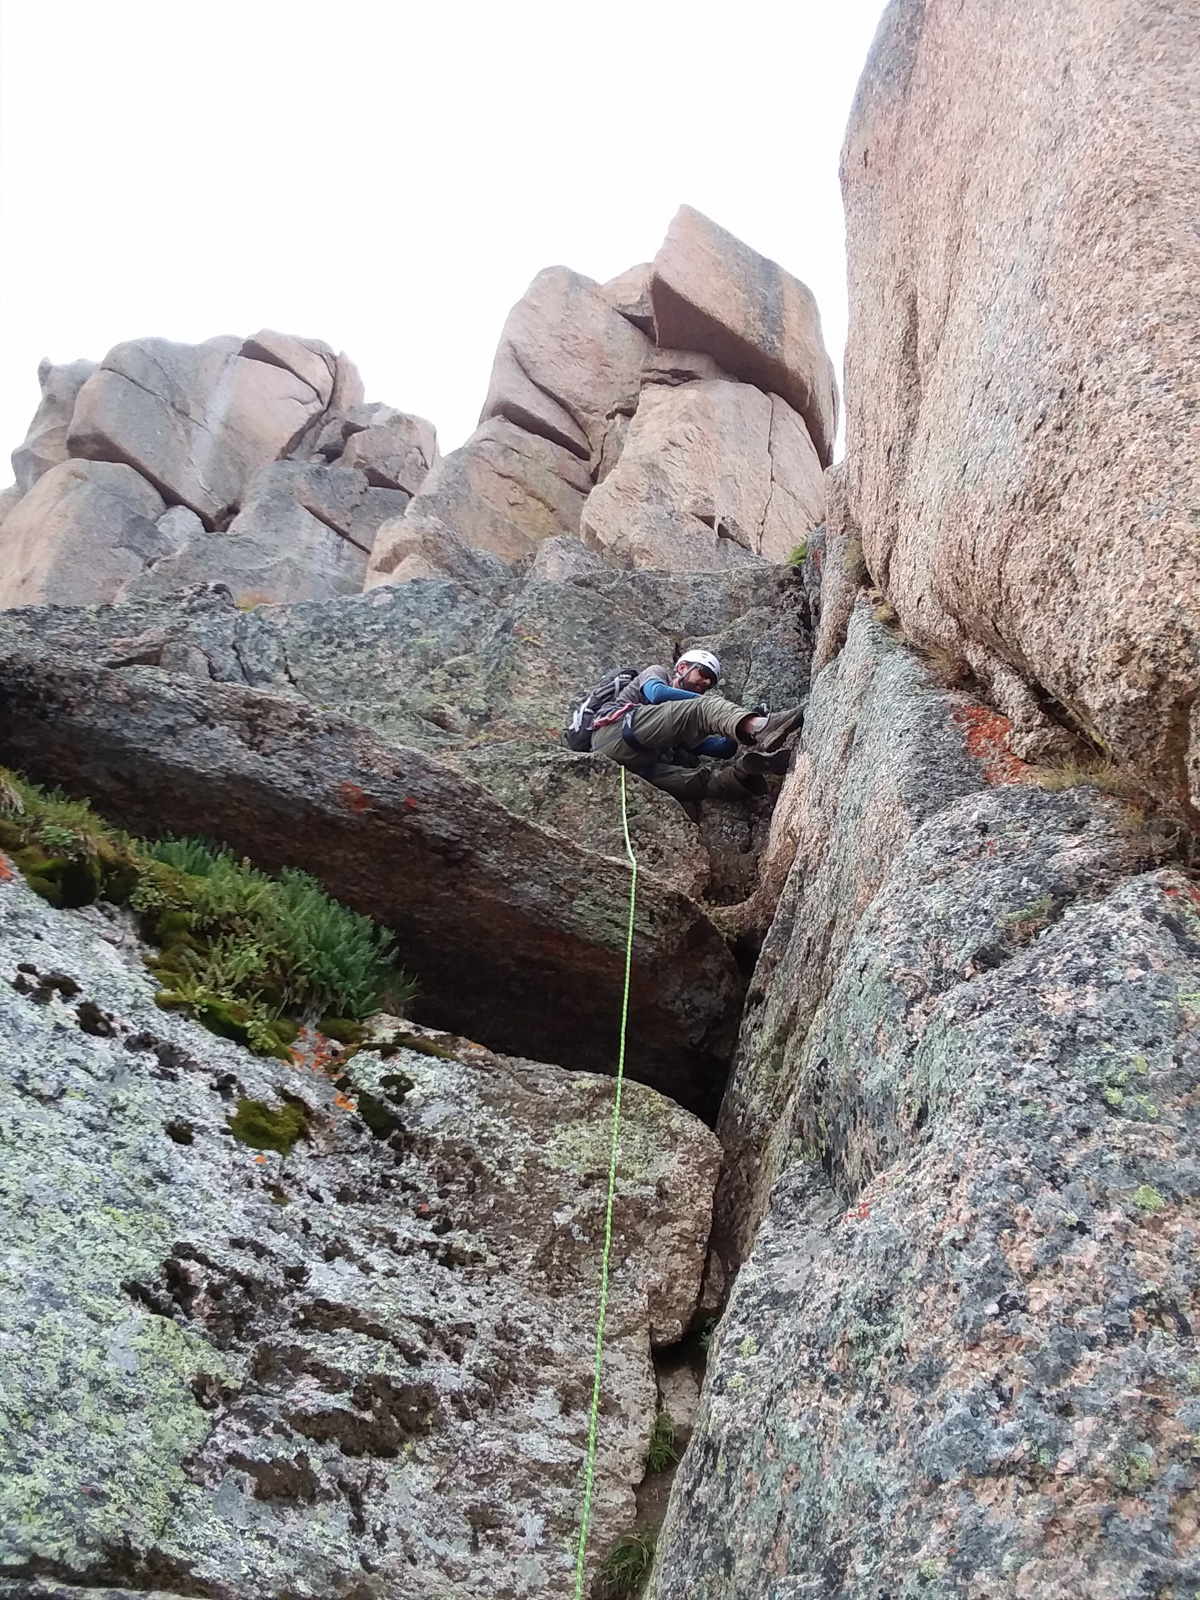
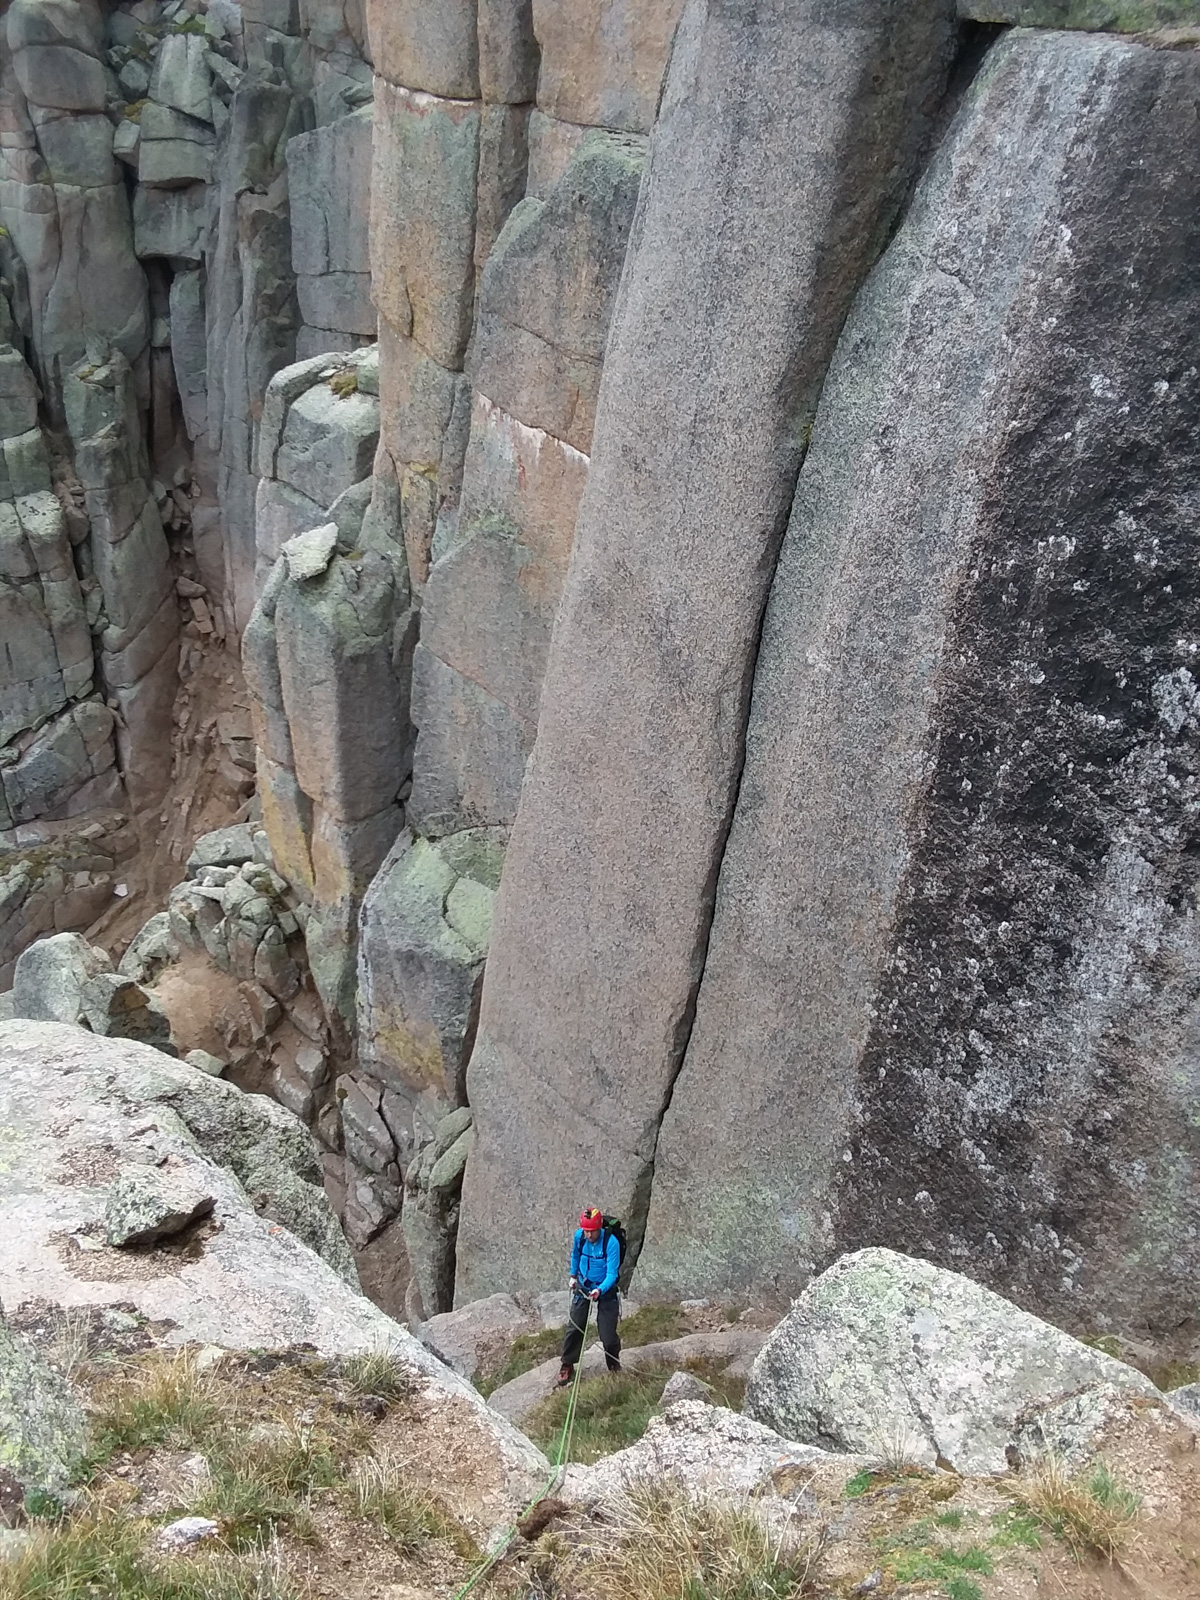
Looking up the first crux, it looked pretty straight forward, but Natalie said there was some moves that would make me appreciate having a rope. She was right. I should say from this point forward, I was mostly focused on getting GoPro footage and climbing, and did not take any photos until nearly the end of the climb. Thank you to both Shawn and Natalie for your images, they helped pull off the trip report!
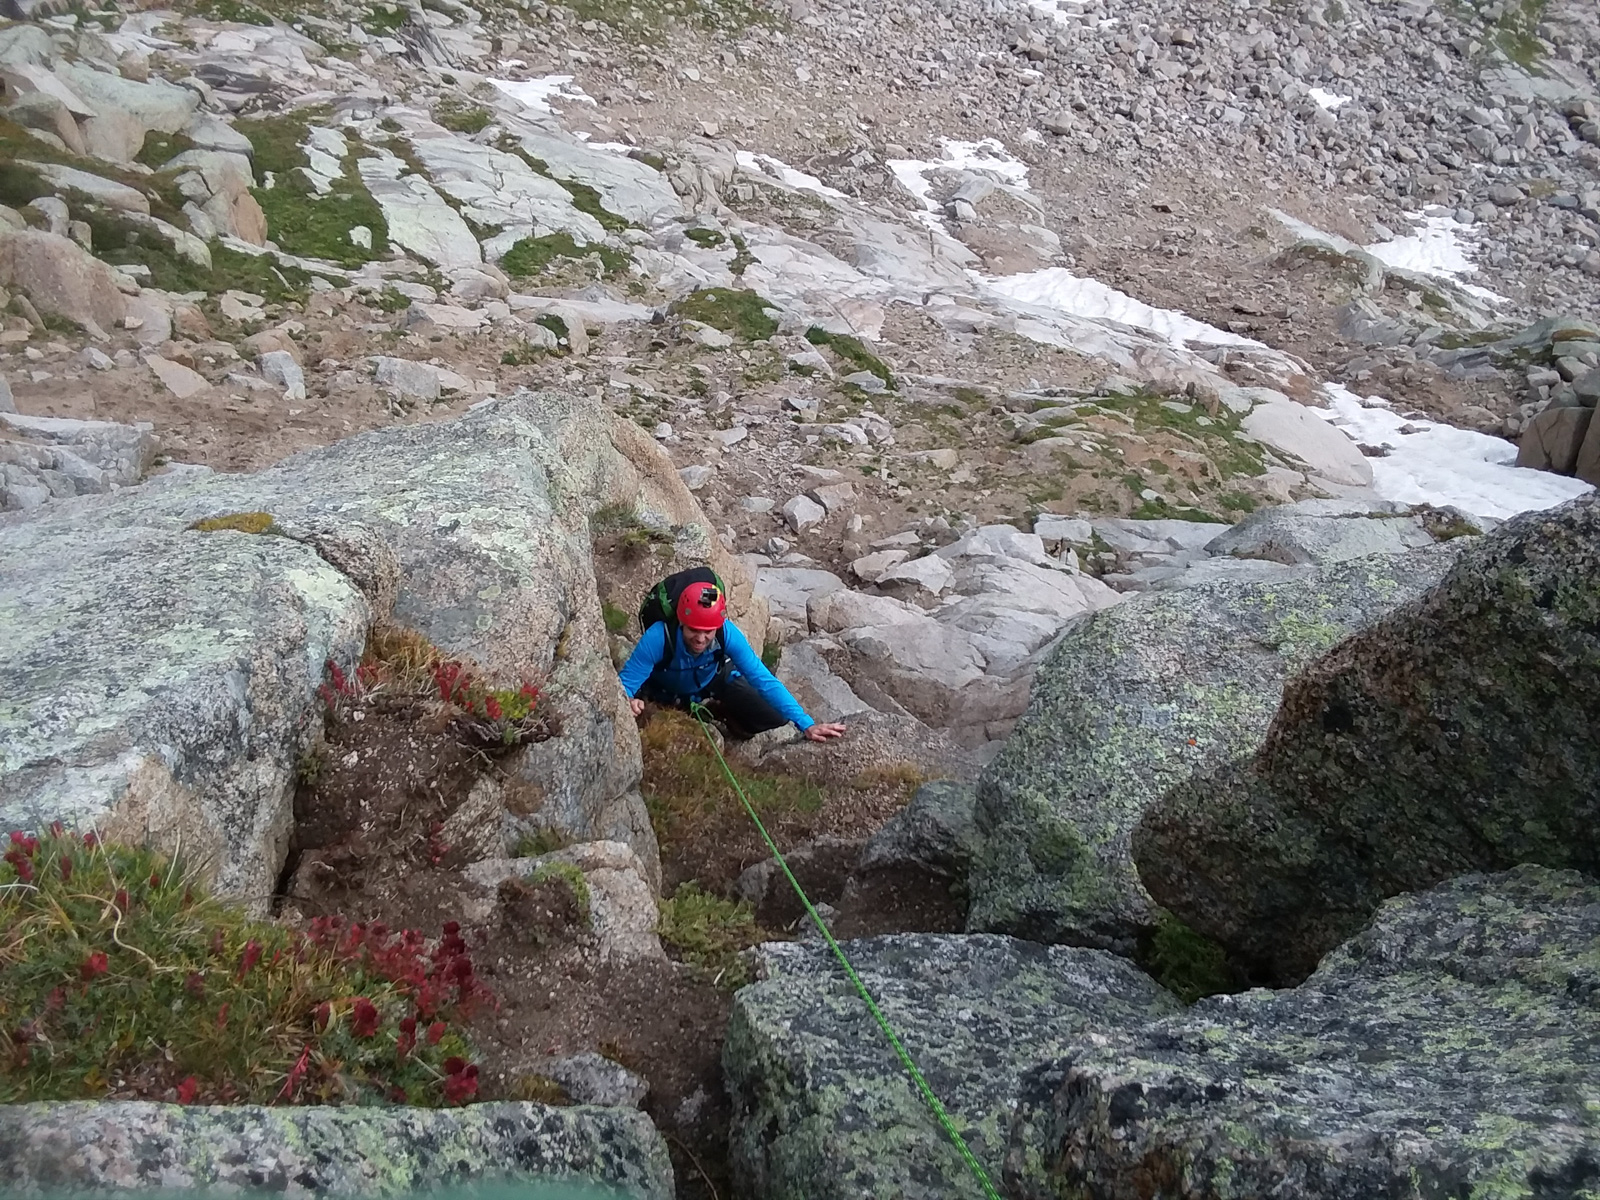
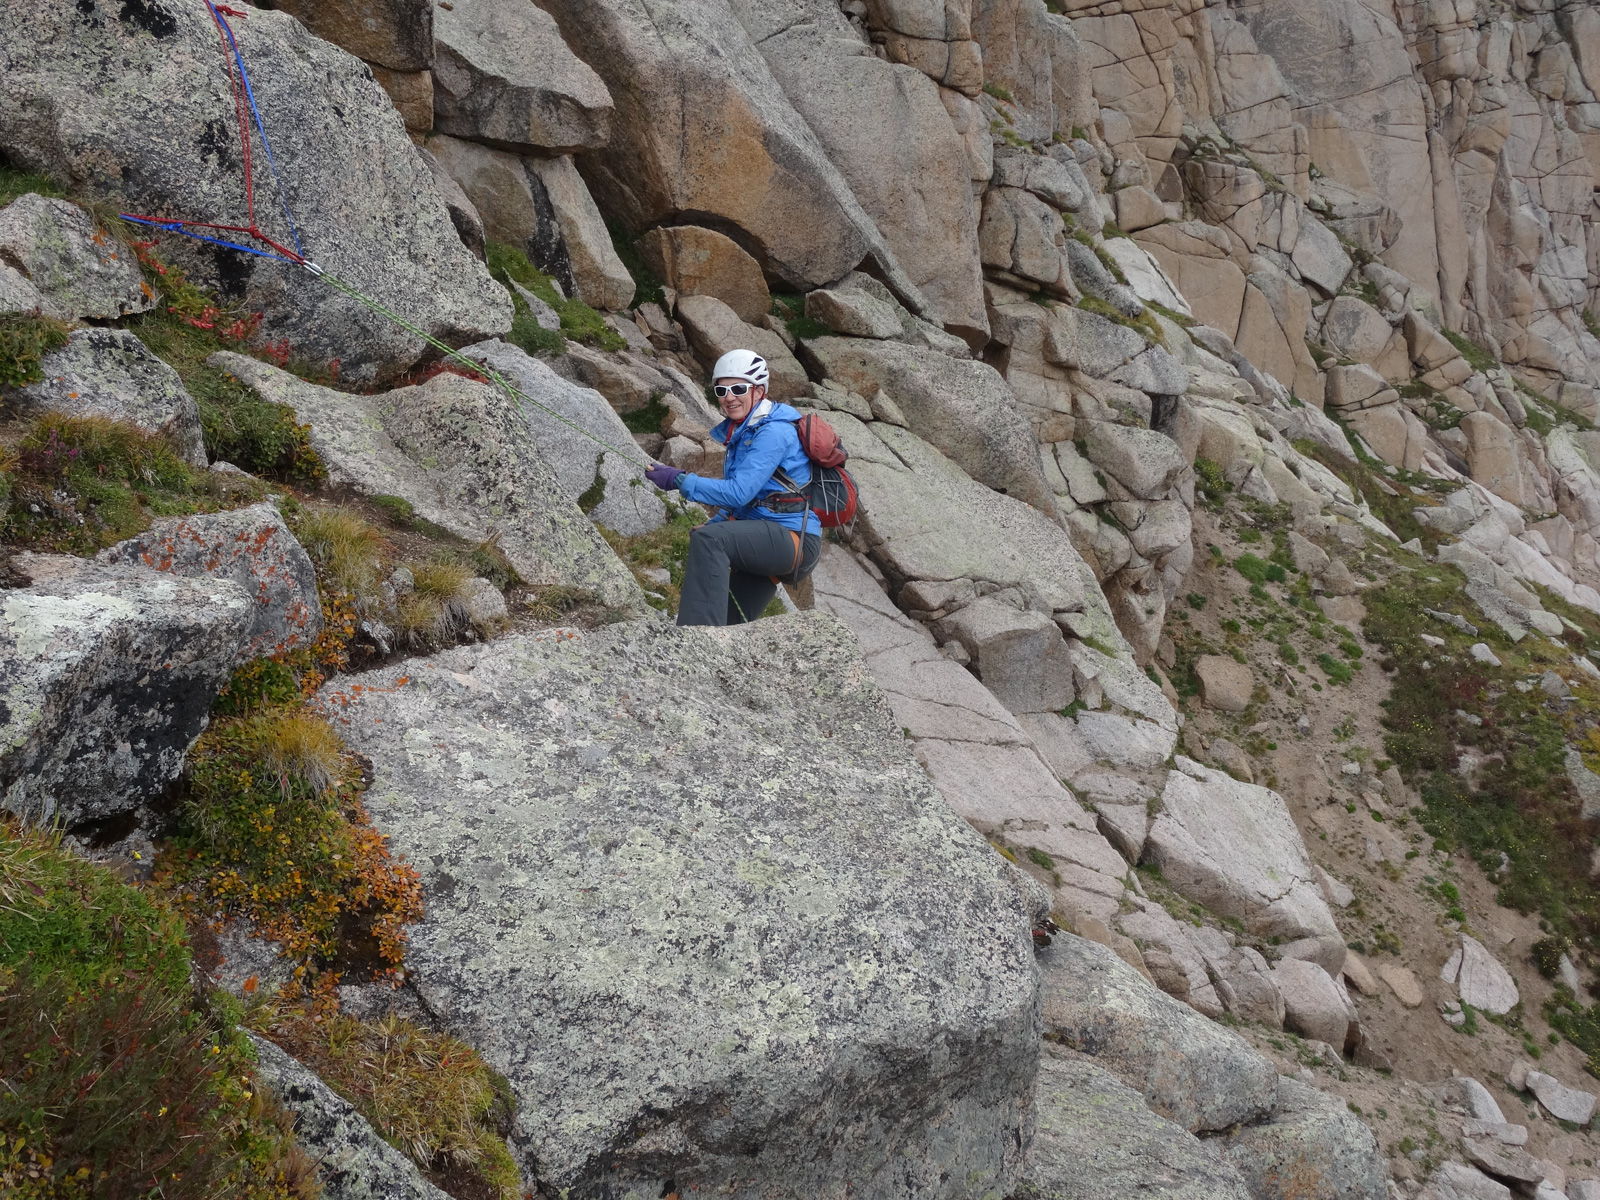
Shawn went first without rope and around a different way altogether without any issues. Natalie led the rope up and placed a small cam about halfway up and then set-up an anchor to belay me from. Here's a shot from Natalie of me coming up.
Here I started my GoPro footage, which I'll admit is a little like being on a rough boat at sea... but hopefully it gives you an idea of what the climb is like.
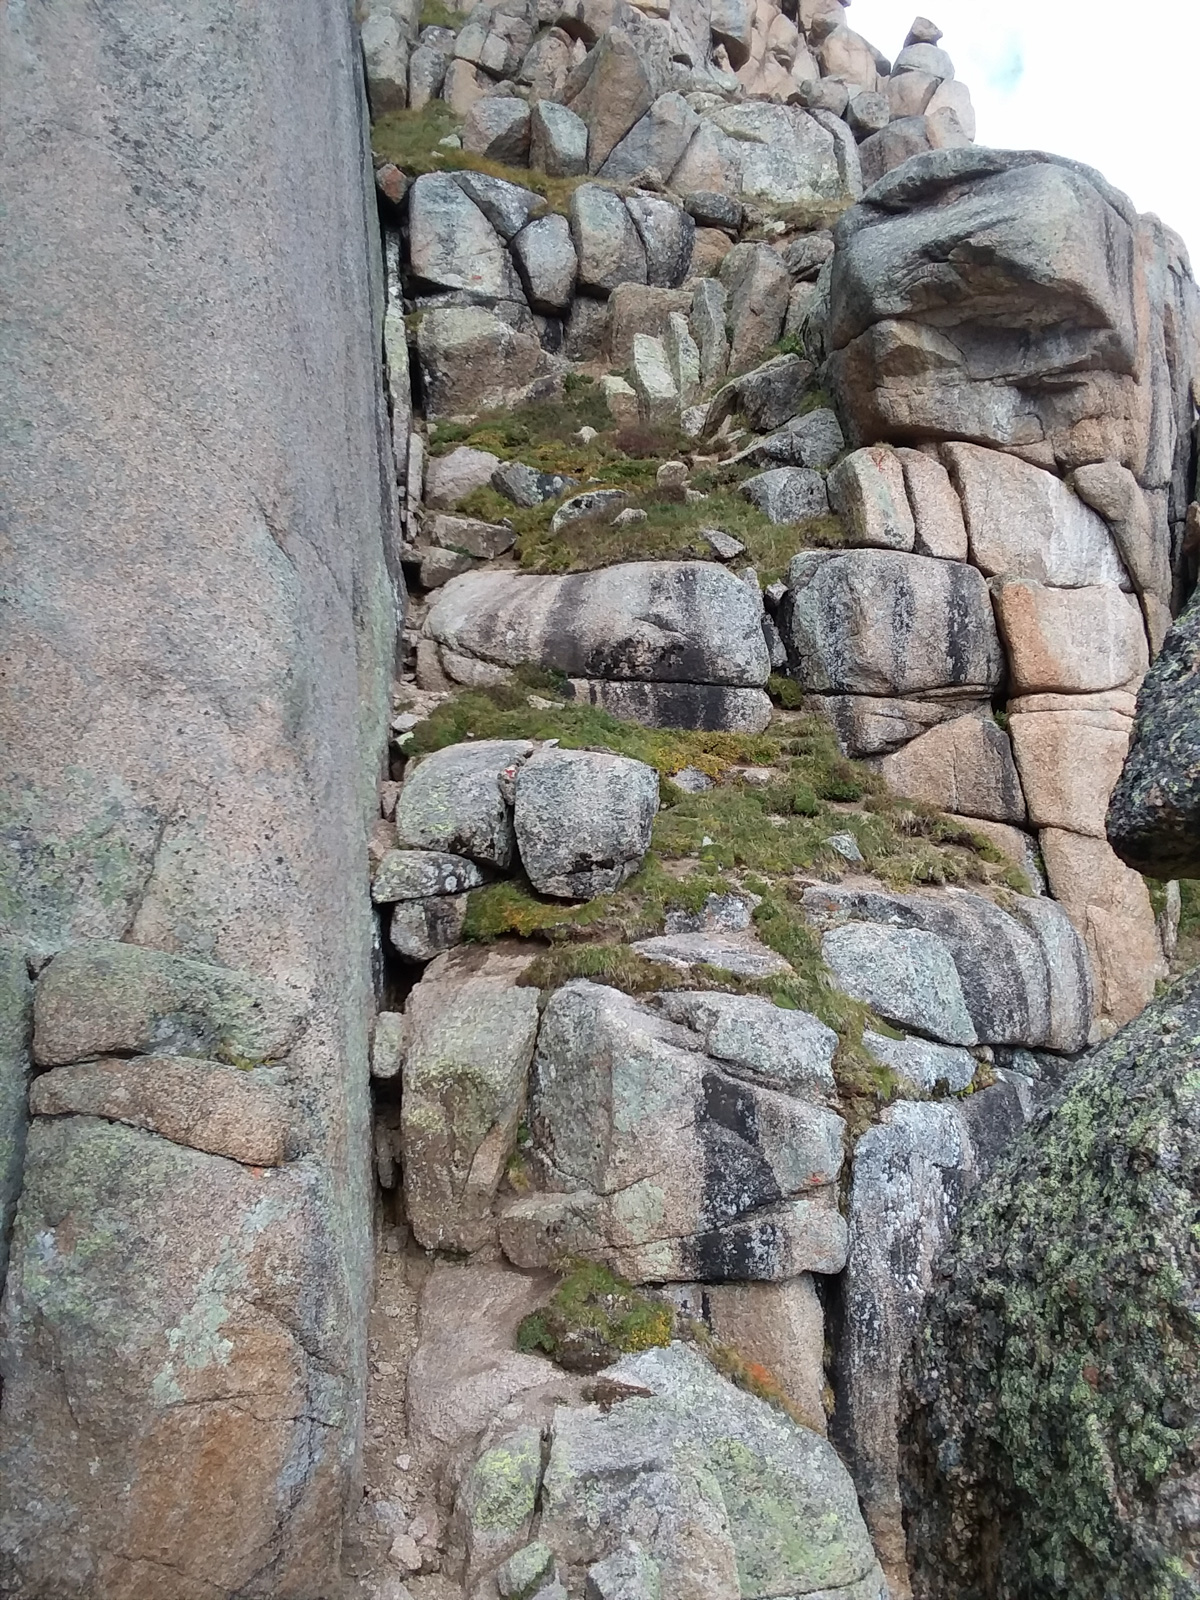
After the first crux, which had some spicy moves to contend with, we quickly made work of the grassy ledges above us, weaving right and up to the next crux, which consisted of a small 7 foot tall boulder (lower left) which we treated as a chimney, and some easy scrambling up above. I was thankful to be on rope here as I slipped on the very first move (which unroped would have been just annoying but potentially dangerous) trying to get up into the wedge.
The belay station for the second crux offered a nice view of the exposure we were facing on a consistent basis.
The third crux was the spiciest of all, which Shawn decided to free climb up with our rope. It involved some easy moves down low with a really challenging finish requiring some committed movement above big exposure.
The final move kept me stumped for a minute... as documented by Shawn.
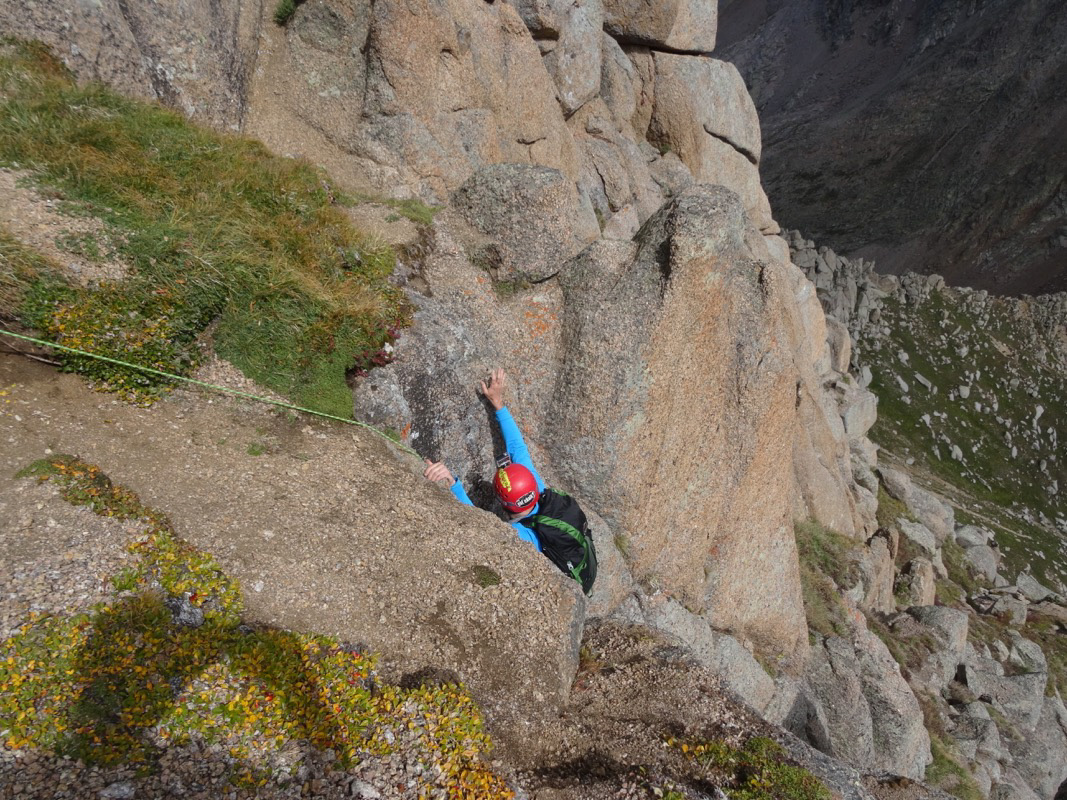
Topping out on the third crux felt great. That last move is quite a tough one in my opinion.
Almost there!
The video section for the third crux is HERE.
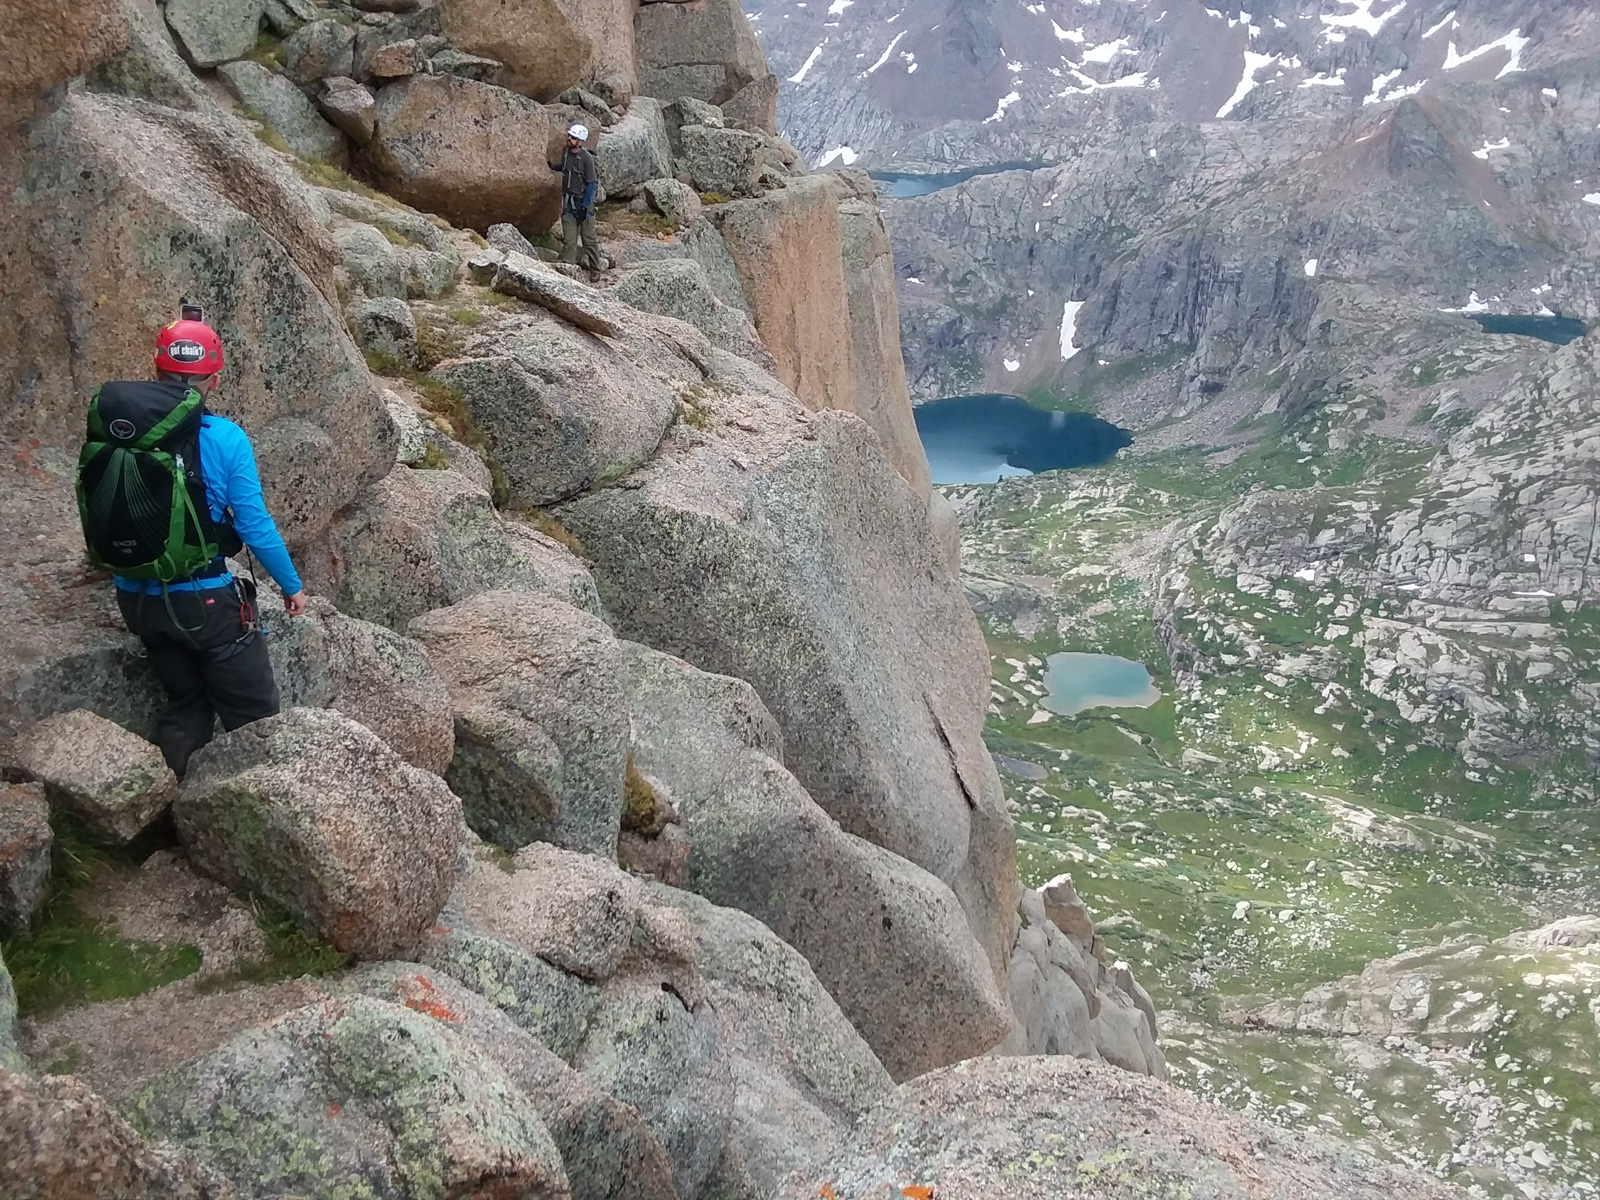
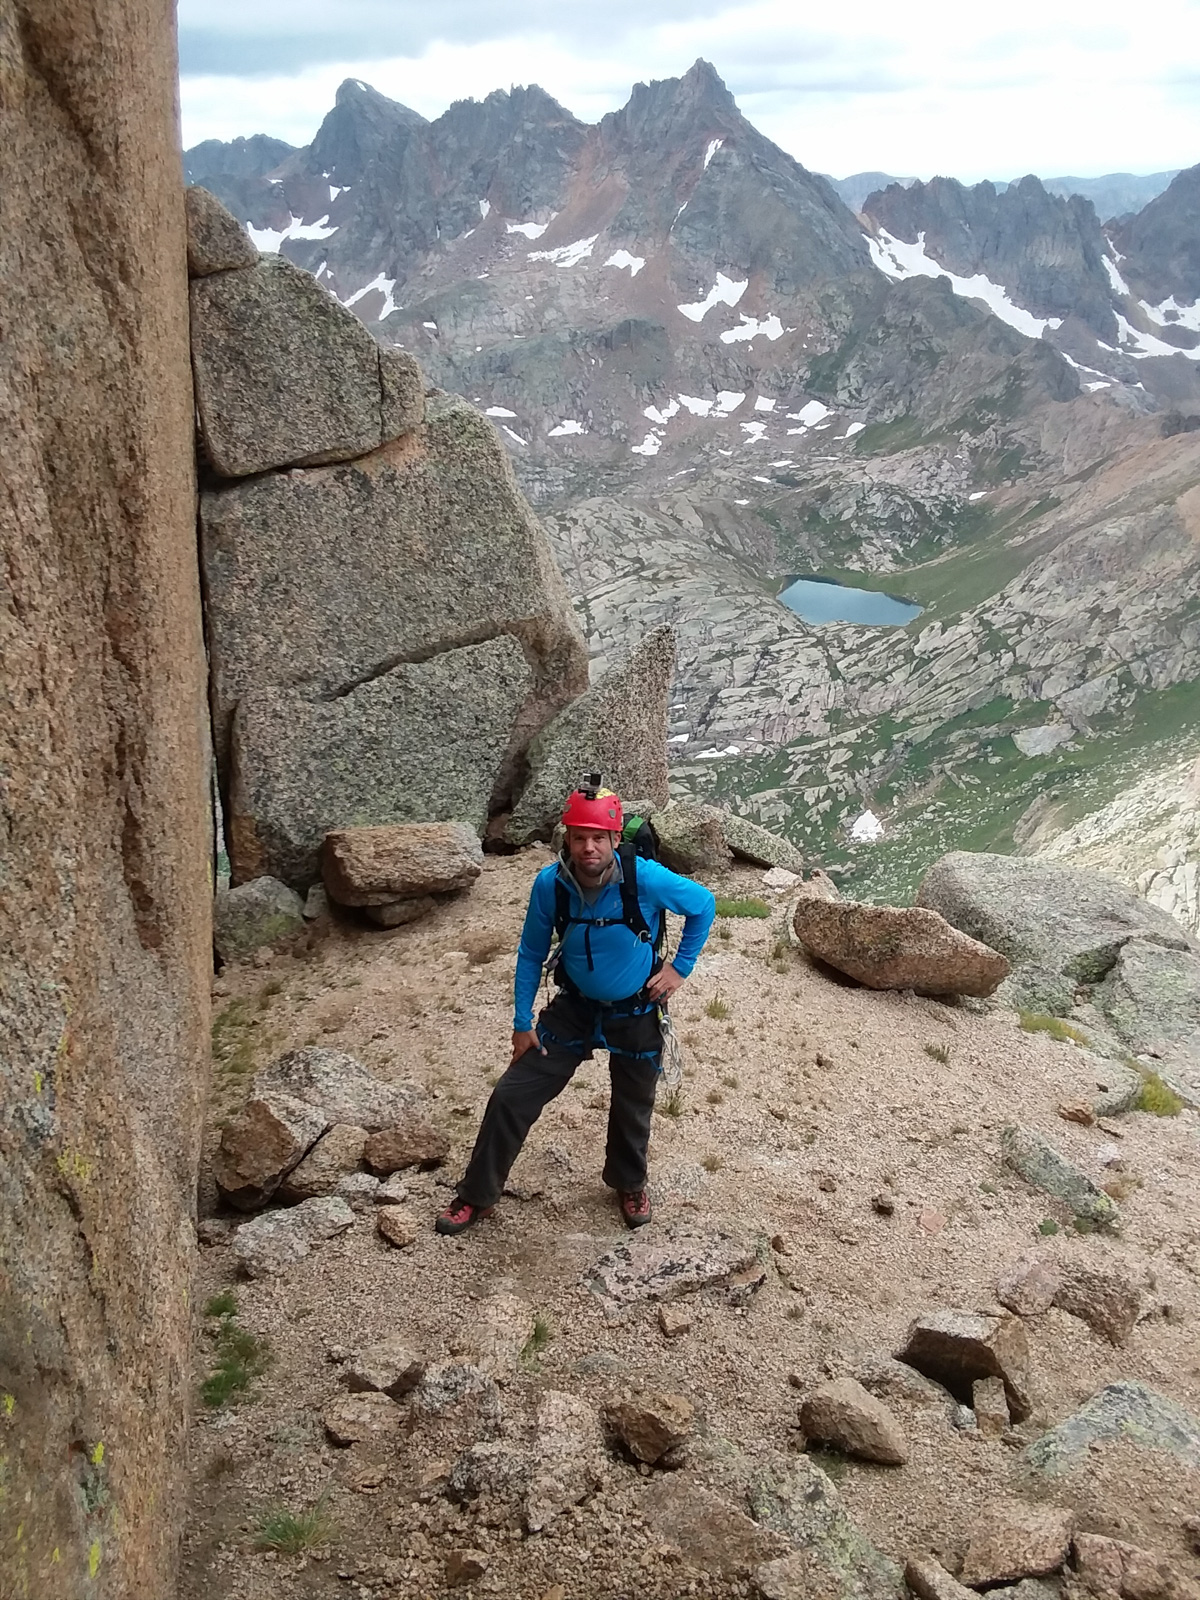
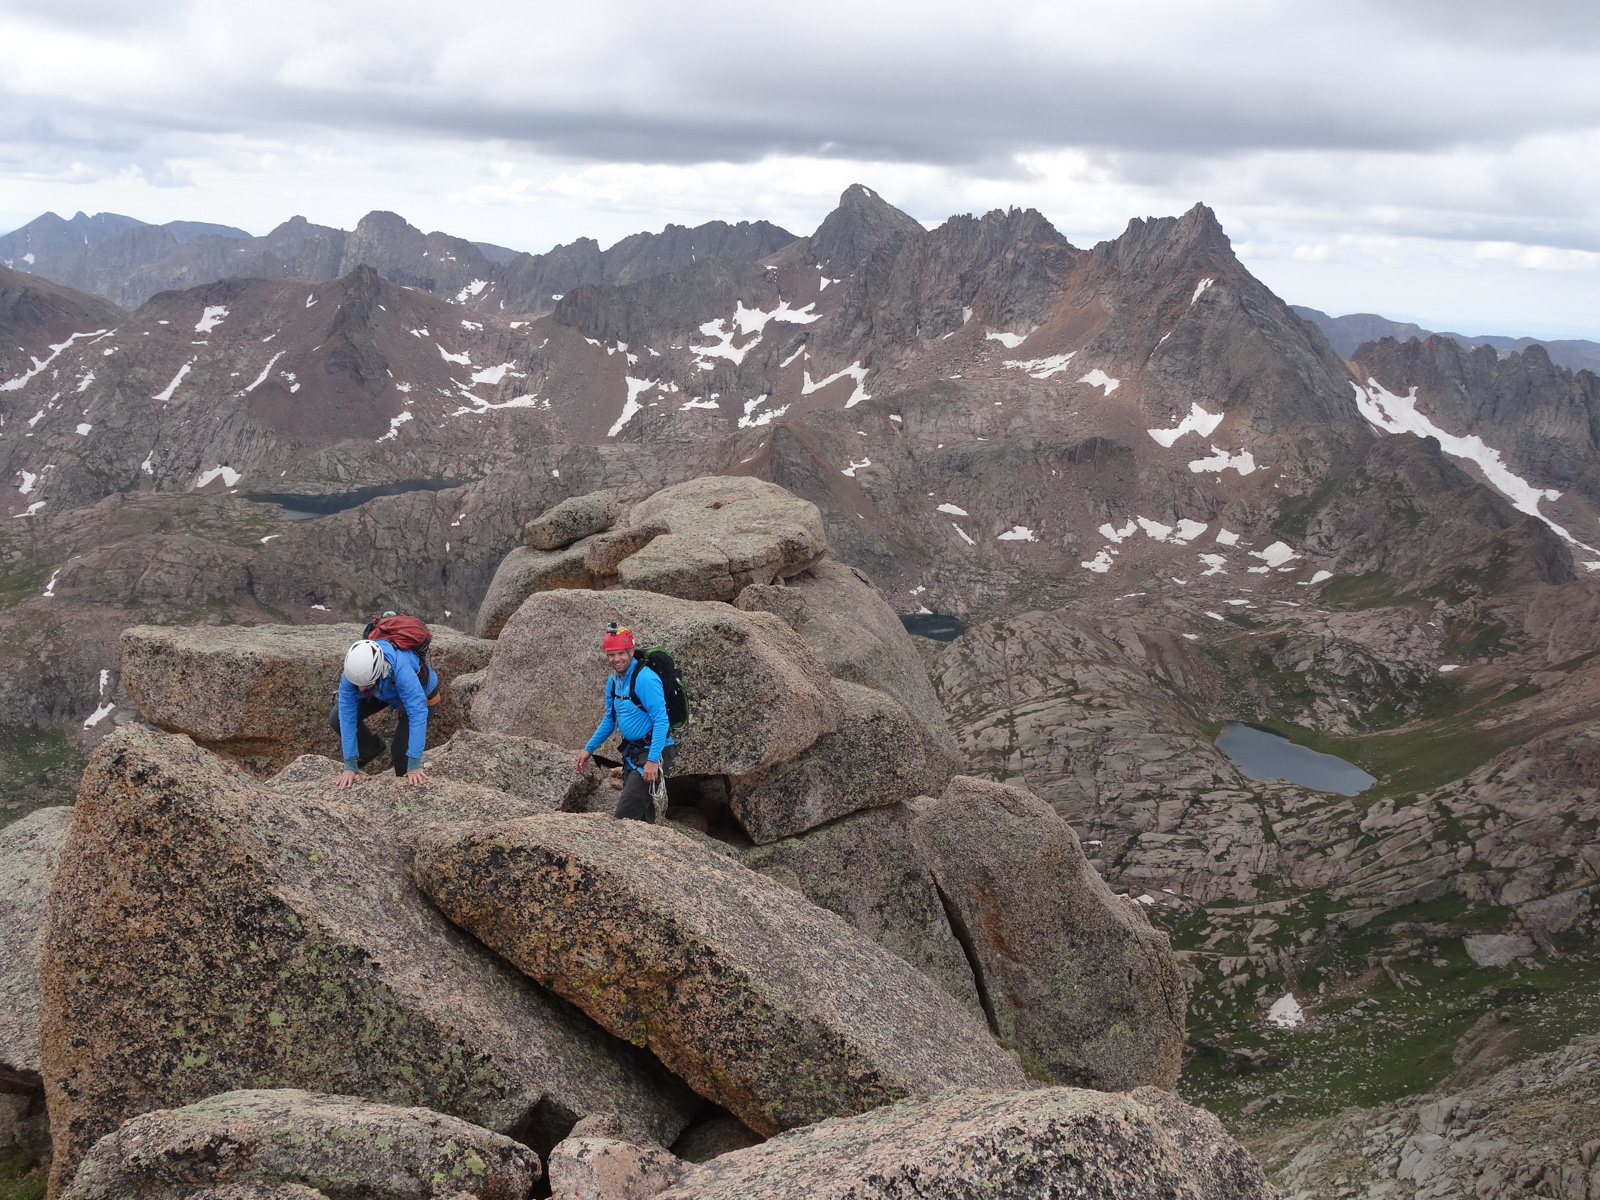
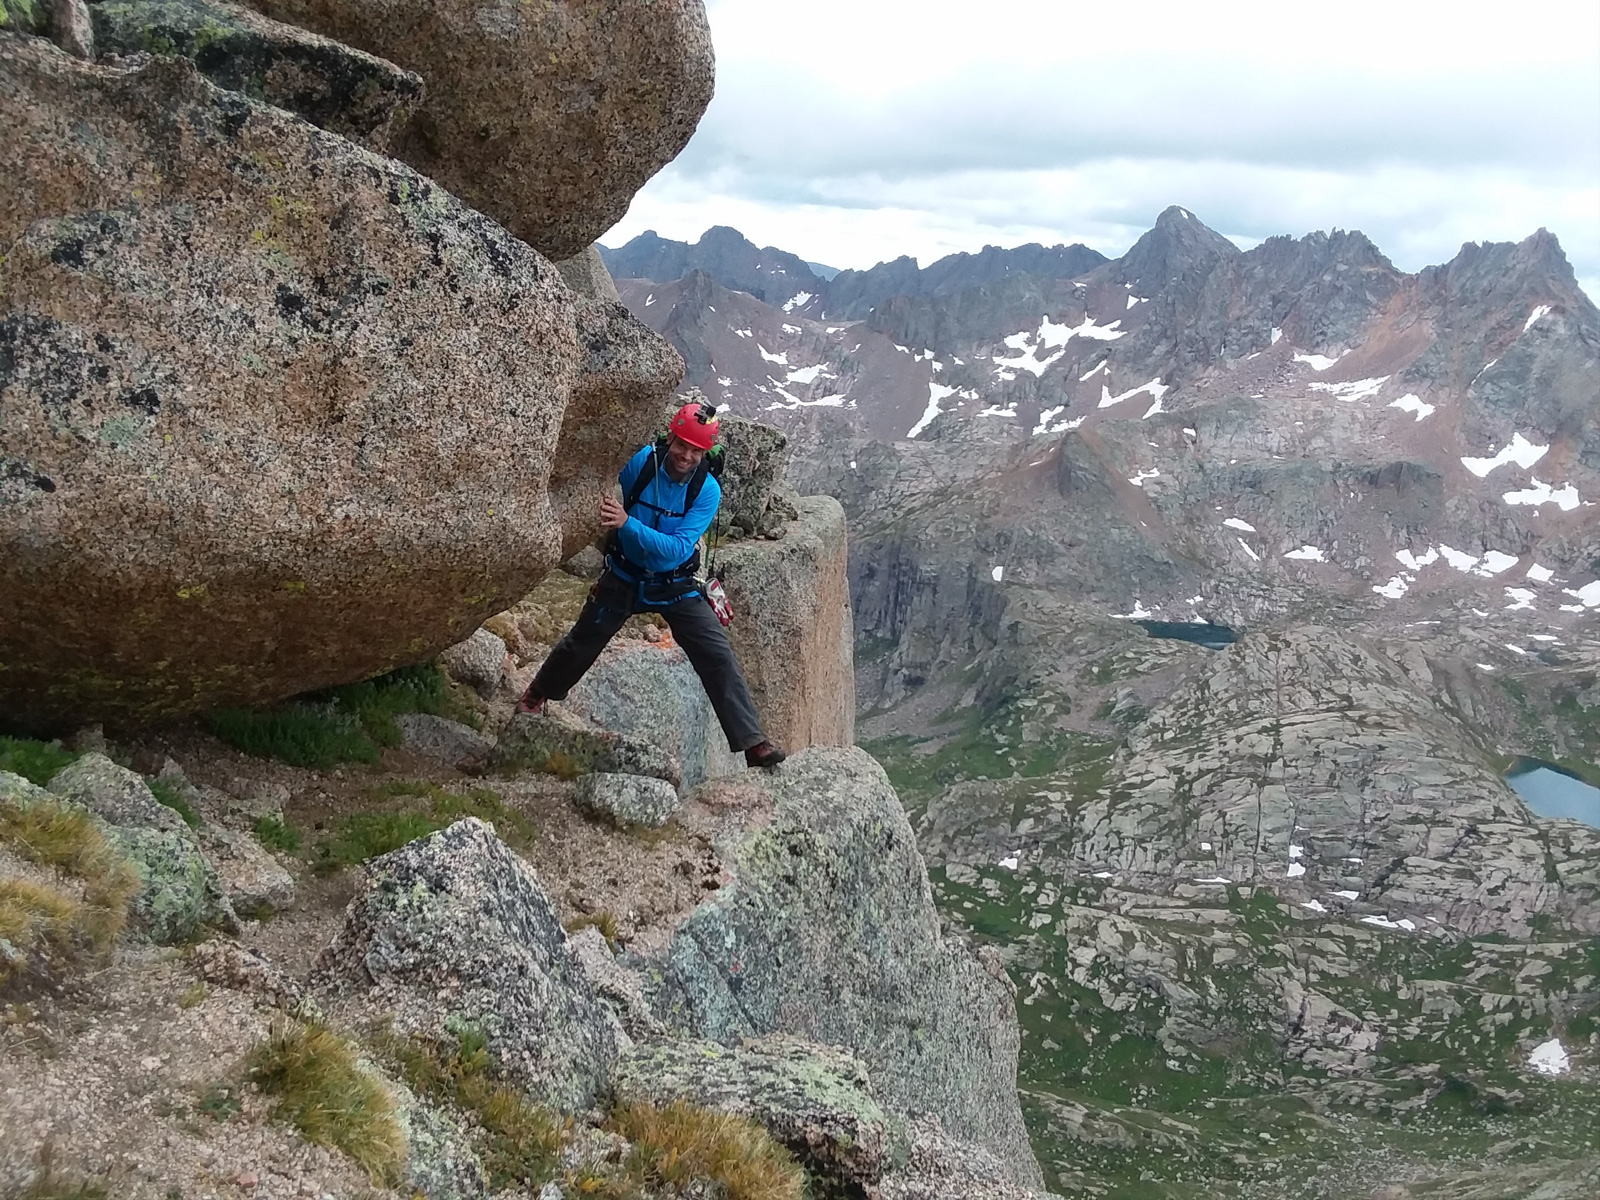
After the third crux, a quick scramble up revealed the notch which took us to the south side of Jagged. The south side was incredibly exposed - one false step and you would fall to your death without question. We all slowly weaved our way up and around the back side, picking our steps carefully. One move in particular leaves you above nothing but air and a strange jutted out boulder that awkwardly prevents you from easily going around the side of the mountain (as seen just in front of me in the photo below).
The backside was awesome... I loved it! Here's video from the notch between the two sides and the chimney.
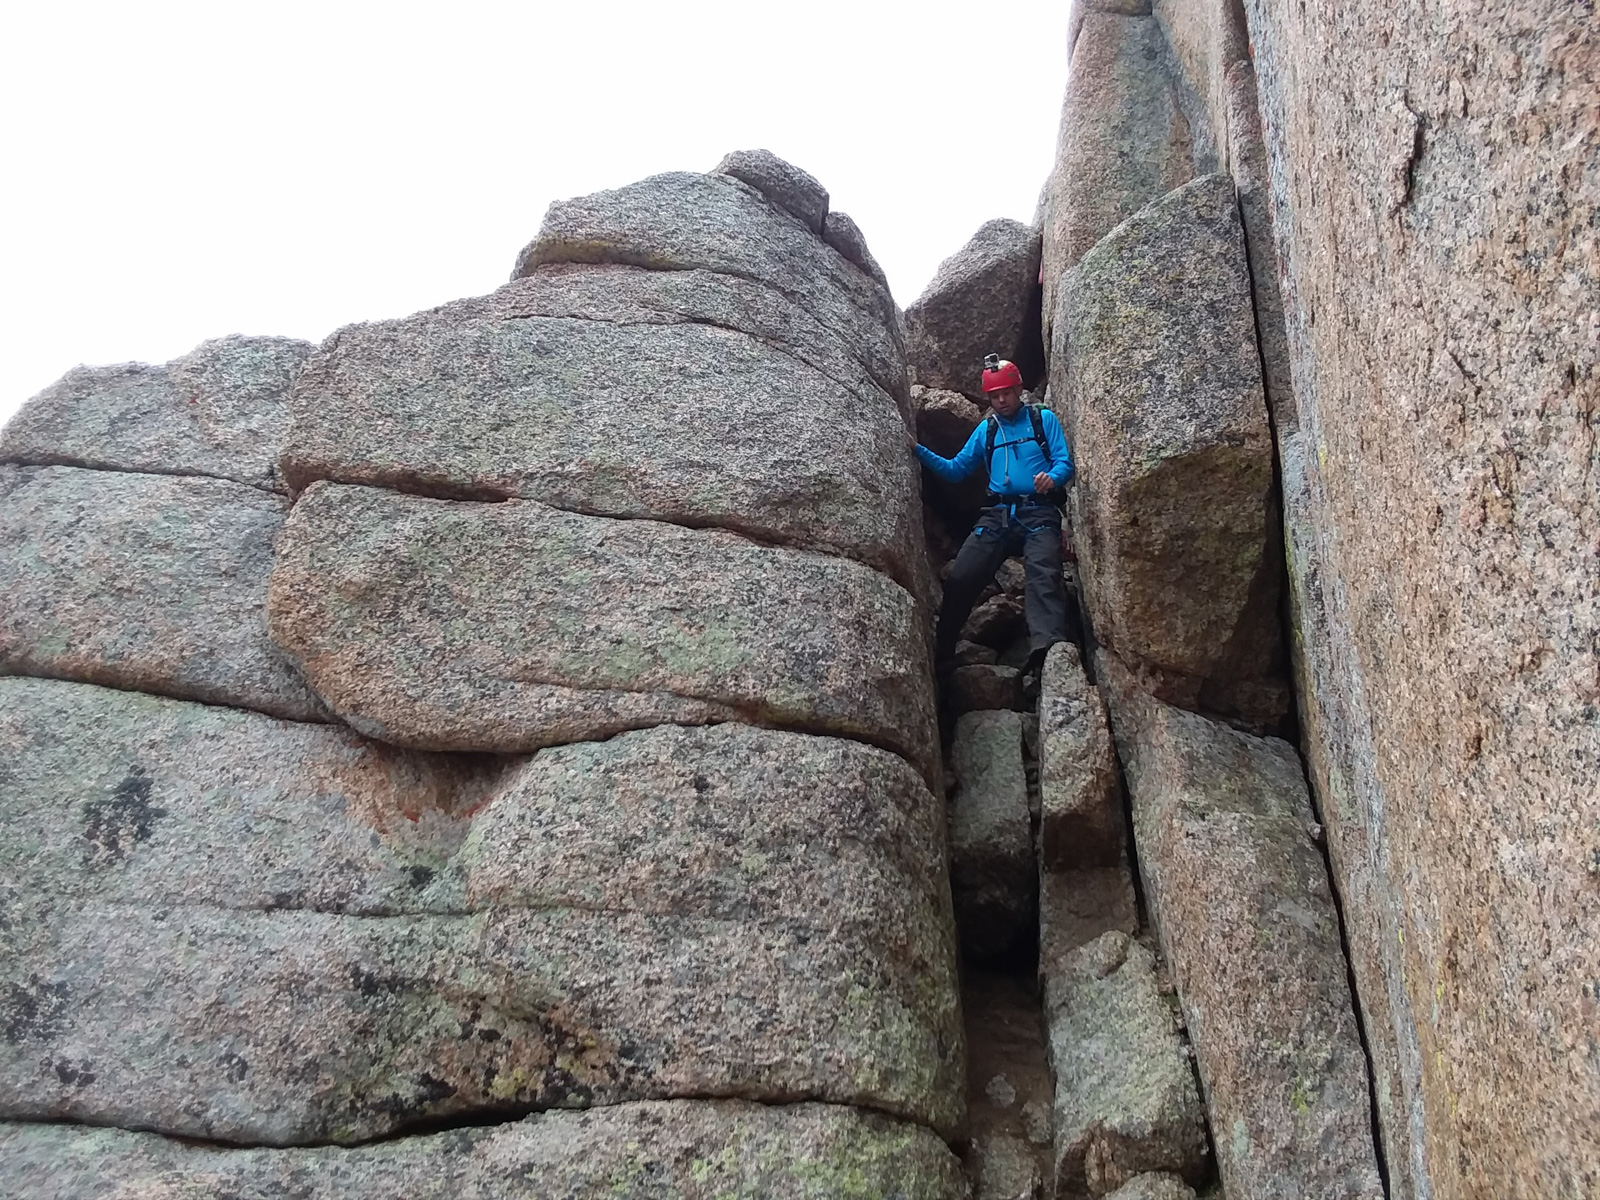
We reached the next crux of our climb, the "class 3" chimney, which I would personally rate at class 4, but I might be generous! Shawn seemed to enjoy it quite a bit!
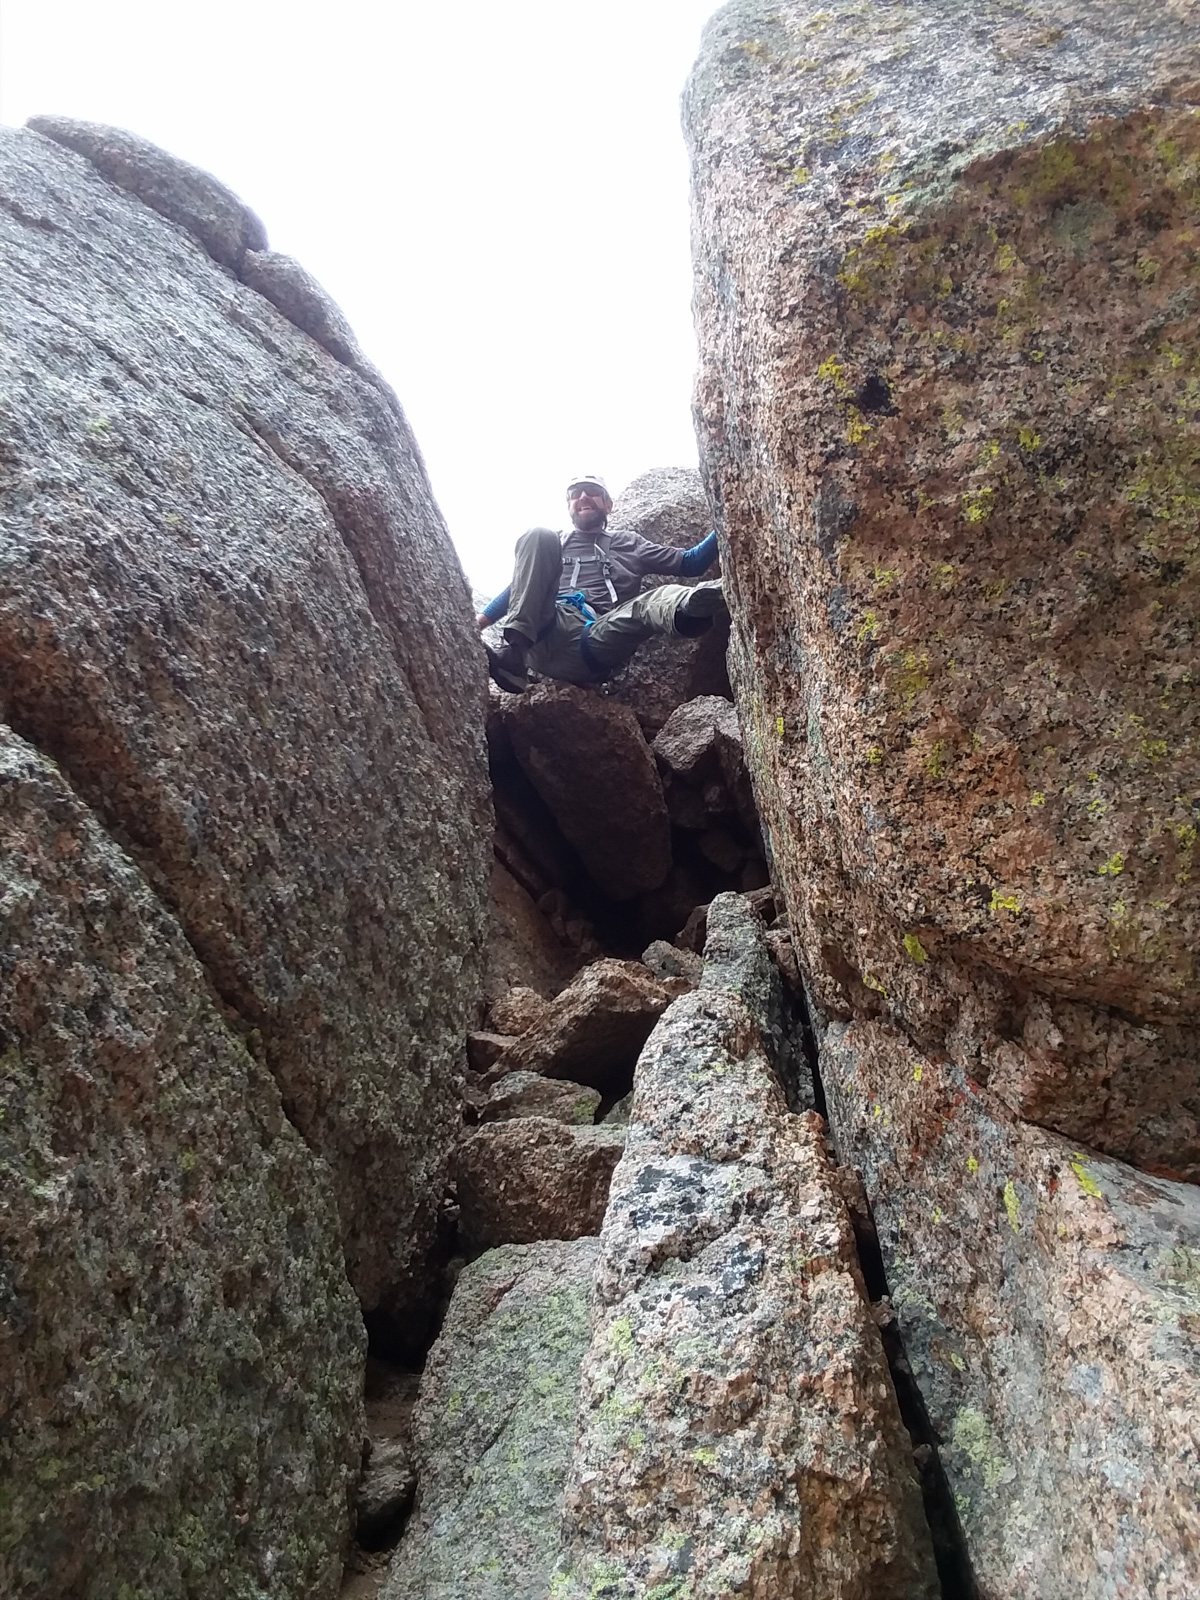
Natalie and Shawn seemed to enjoy watching me squirm up the chimney, which I found to be quite fun!
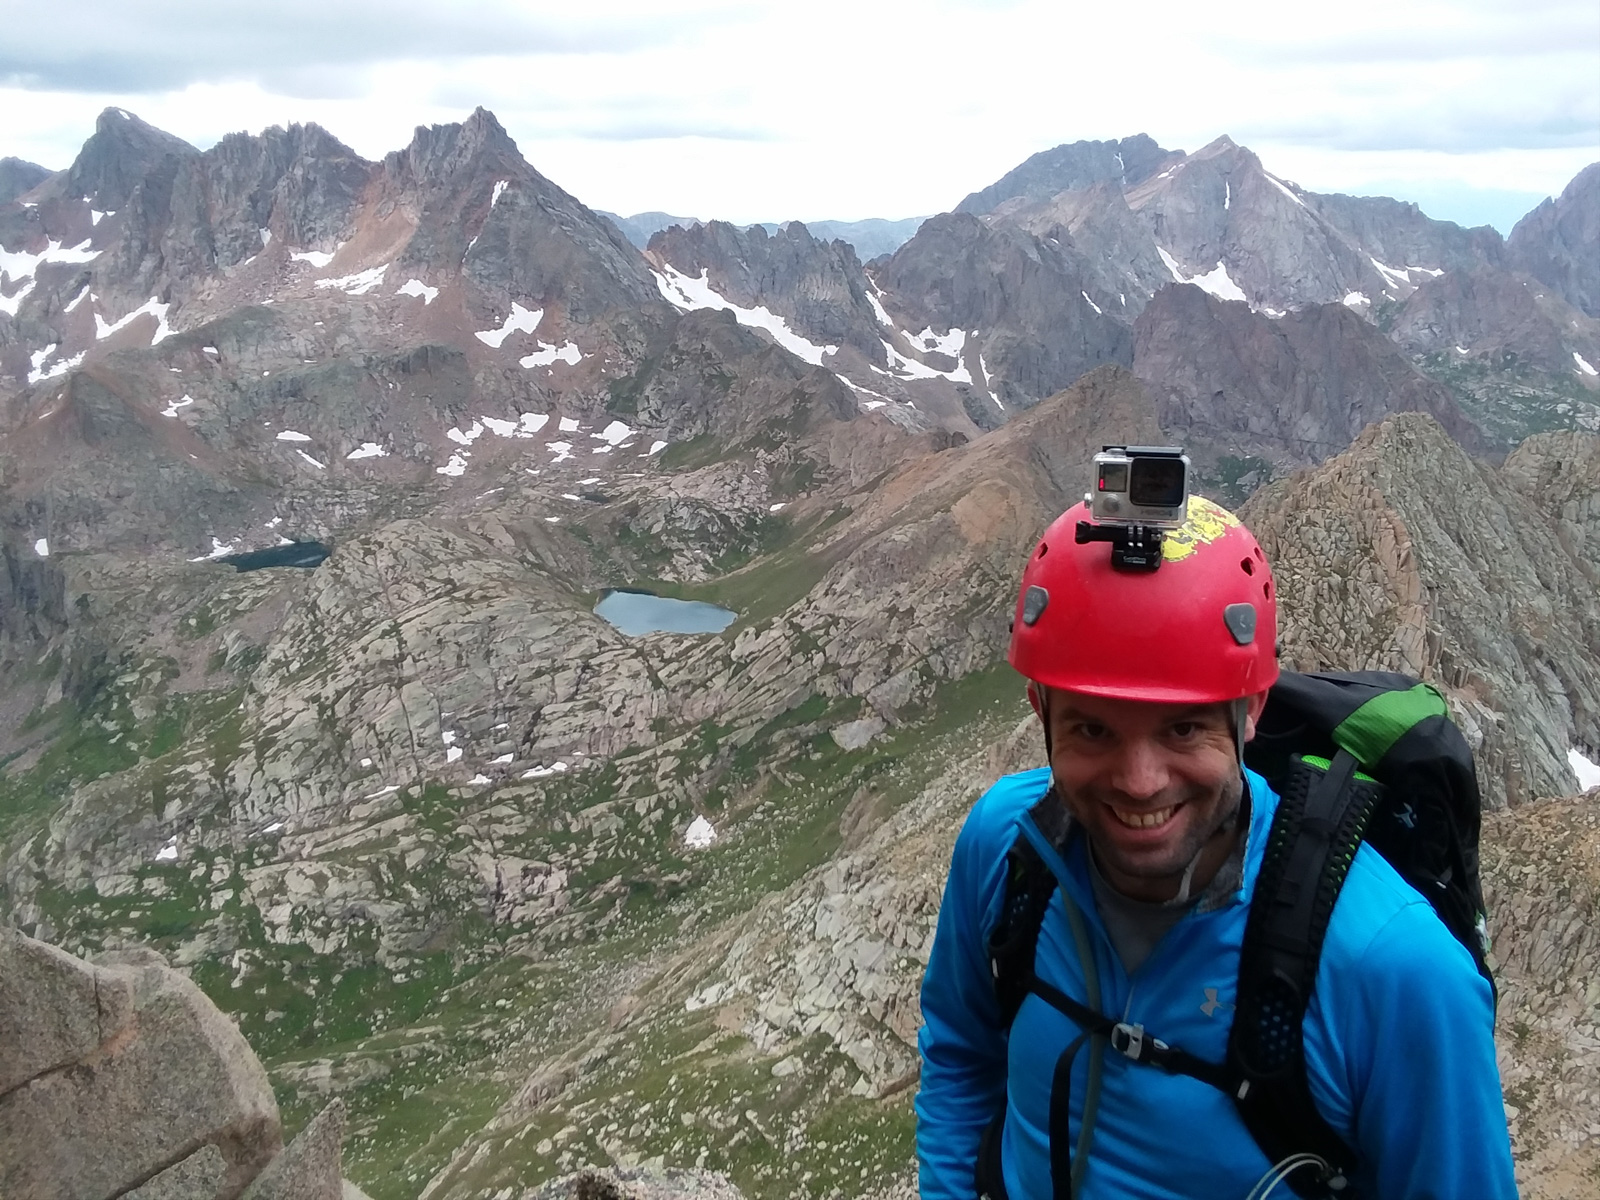
Upon reaching the top of the chimney, I was really excited. This mountain was easily one of the hardest but also one of the most fun that I've ever done.
Here is the footage of the chimney climb.
After the chimney, only one small section remained, which required some adept scrambling up and then across a chasm. Even though there was only about four feet between one side and the other, it was a very committed move to get across to the last step as seen below.
Here is footage from the final push to the summit.

And finally at last - we topped out! Thanks for the photo Shawn! What an exhilarating moment!
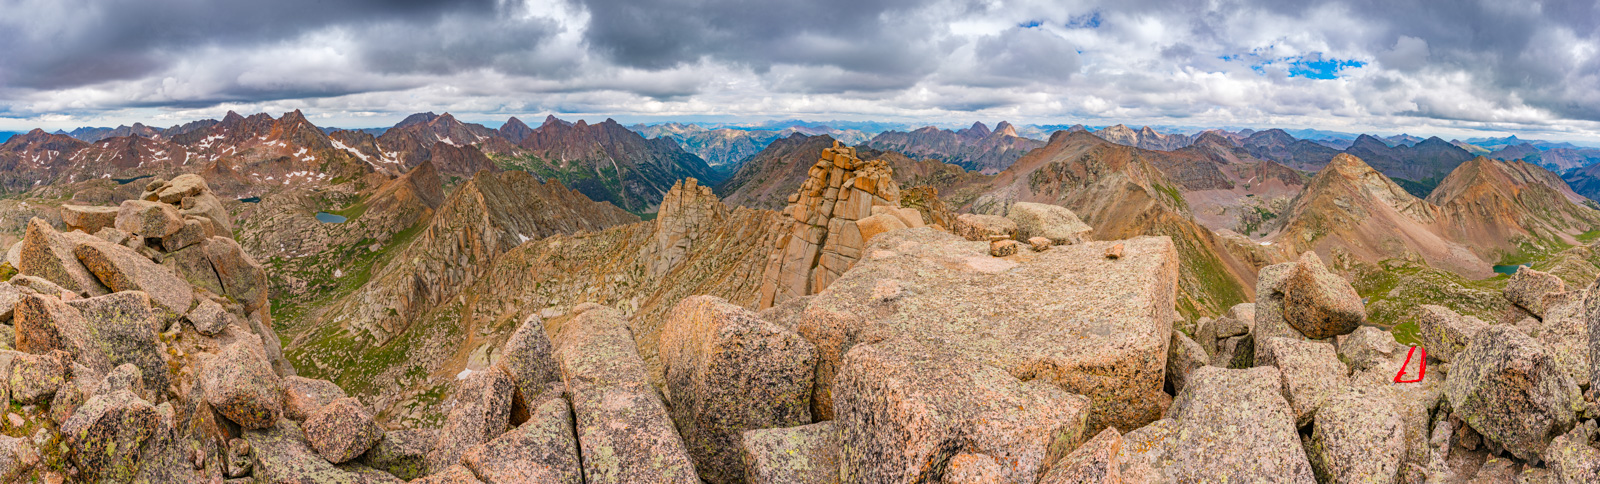
What does a nerdy photographer do when he gets to the top of Jagged Mountain? Take a 360 panorama, of course!
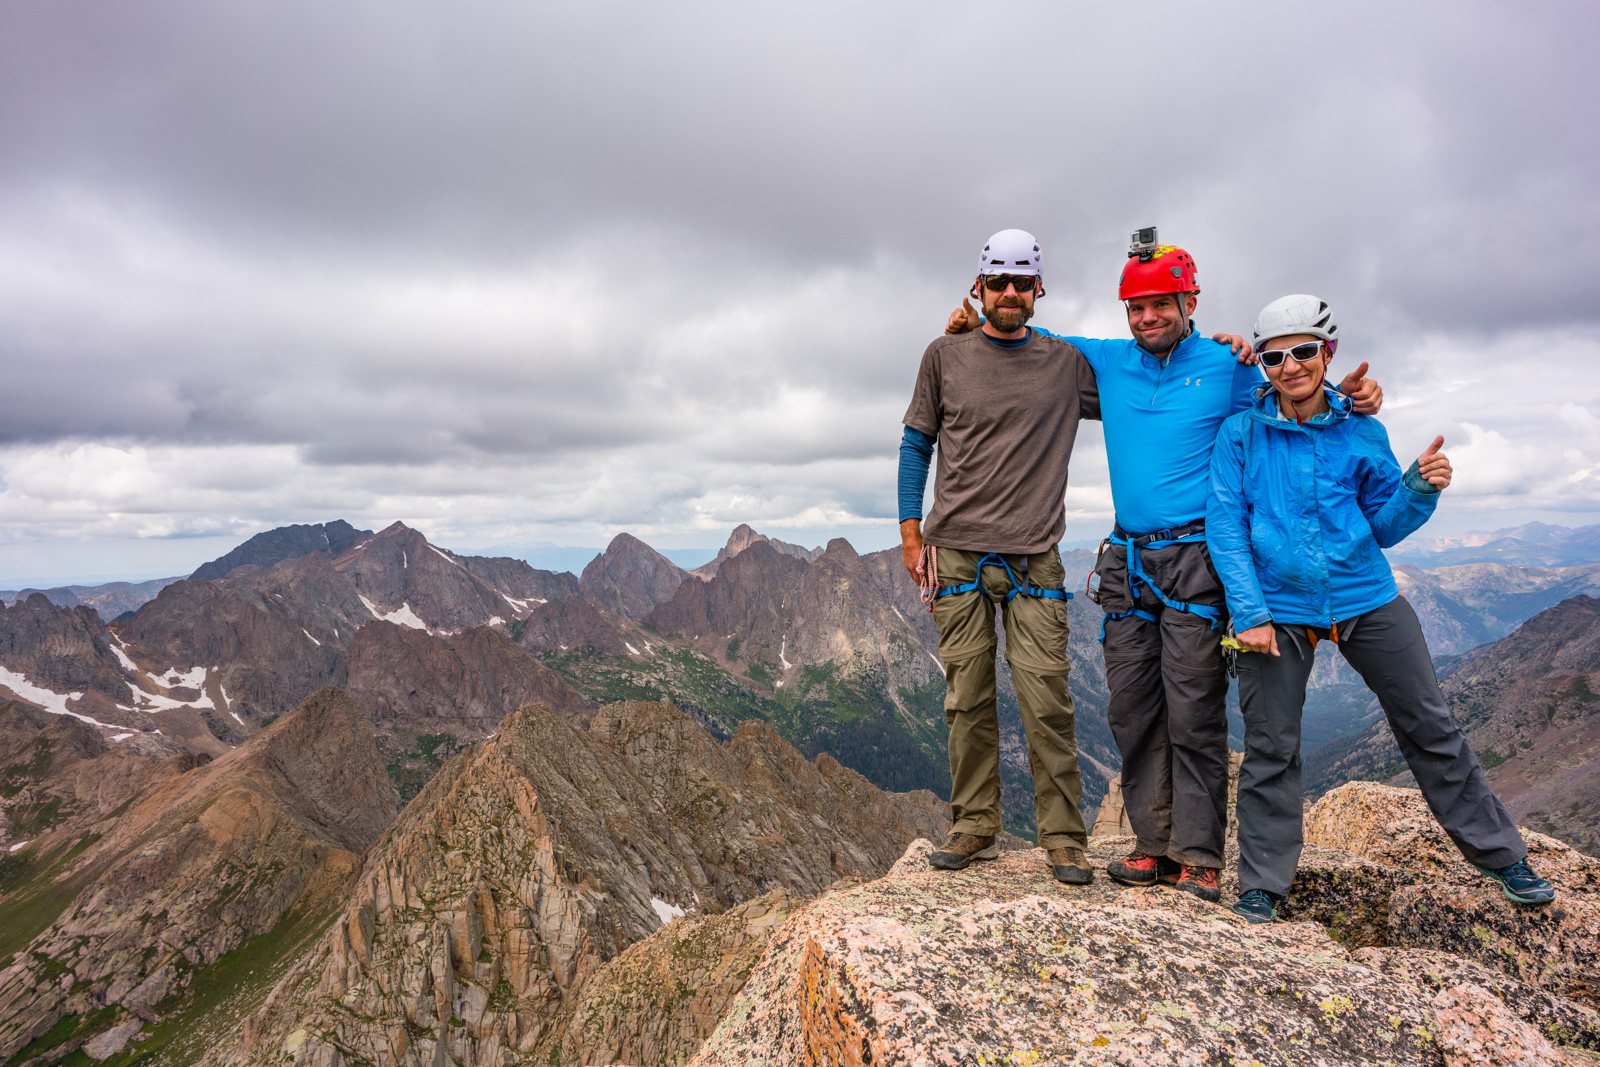
We made a makeshift tripod out of rocks and got a sweet shot of the three of us on top. What a day!
I saw a photo opportunity as well - there was a sweet ledge at the south end of the summit, overlooking Windom, Sunlight Spire, and Sunlight, so I sent Shawn down for a shot of him, and then a shot of me.
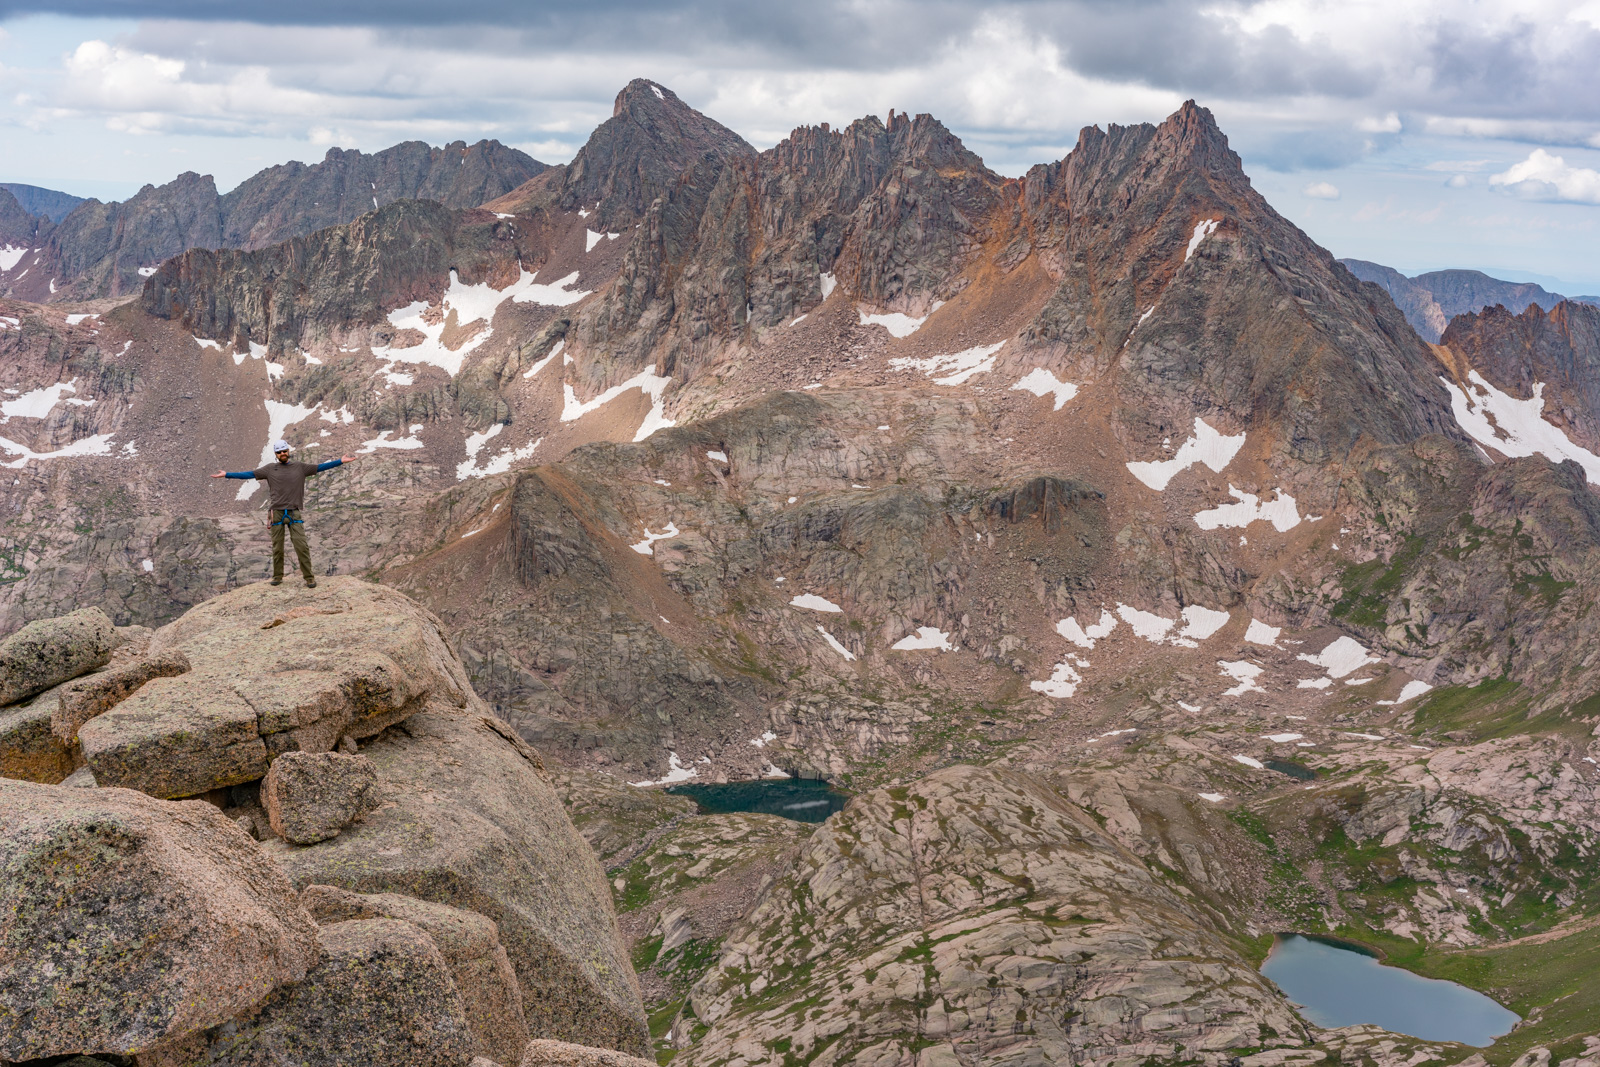
Such an awesome spot!!!
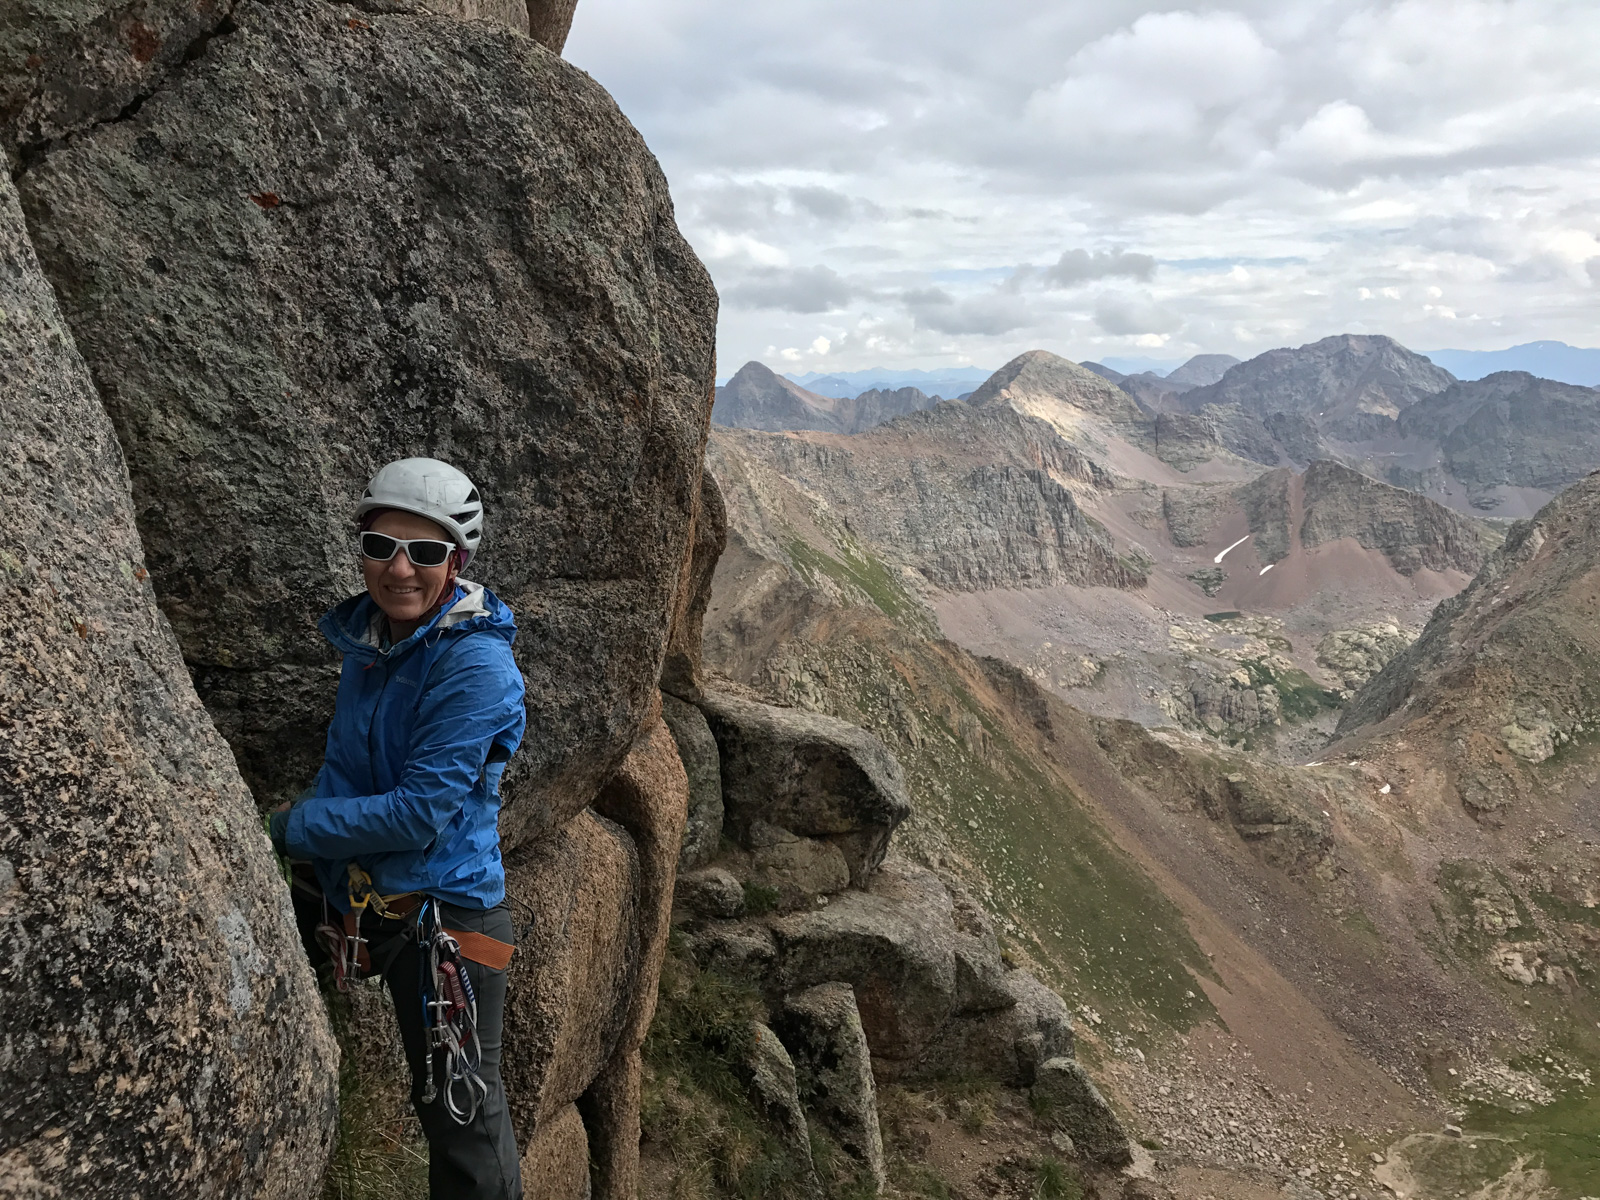
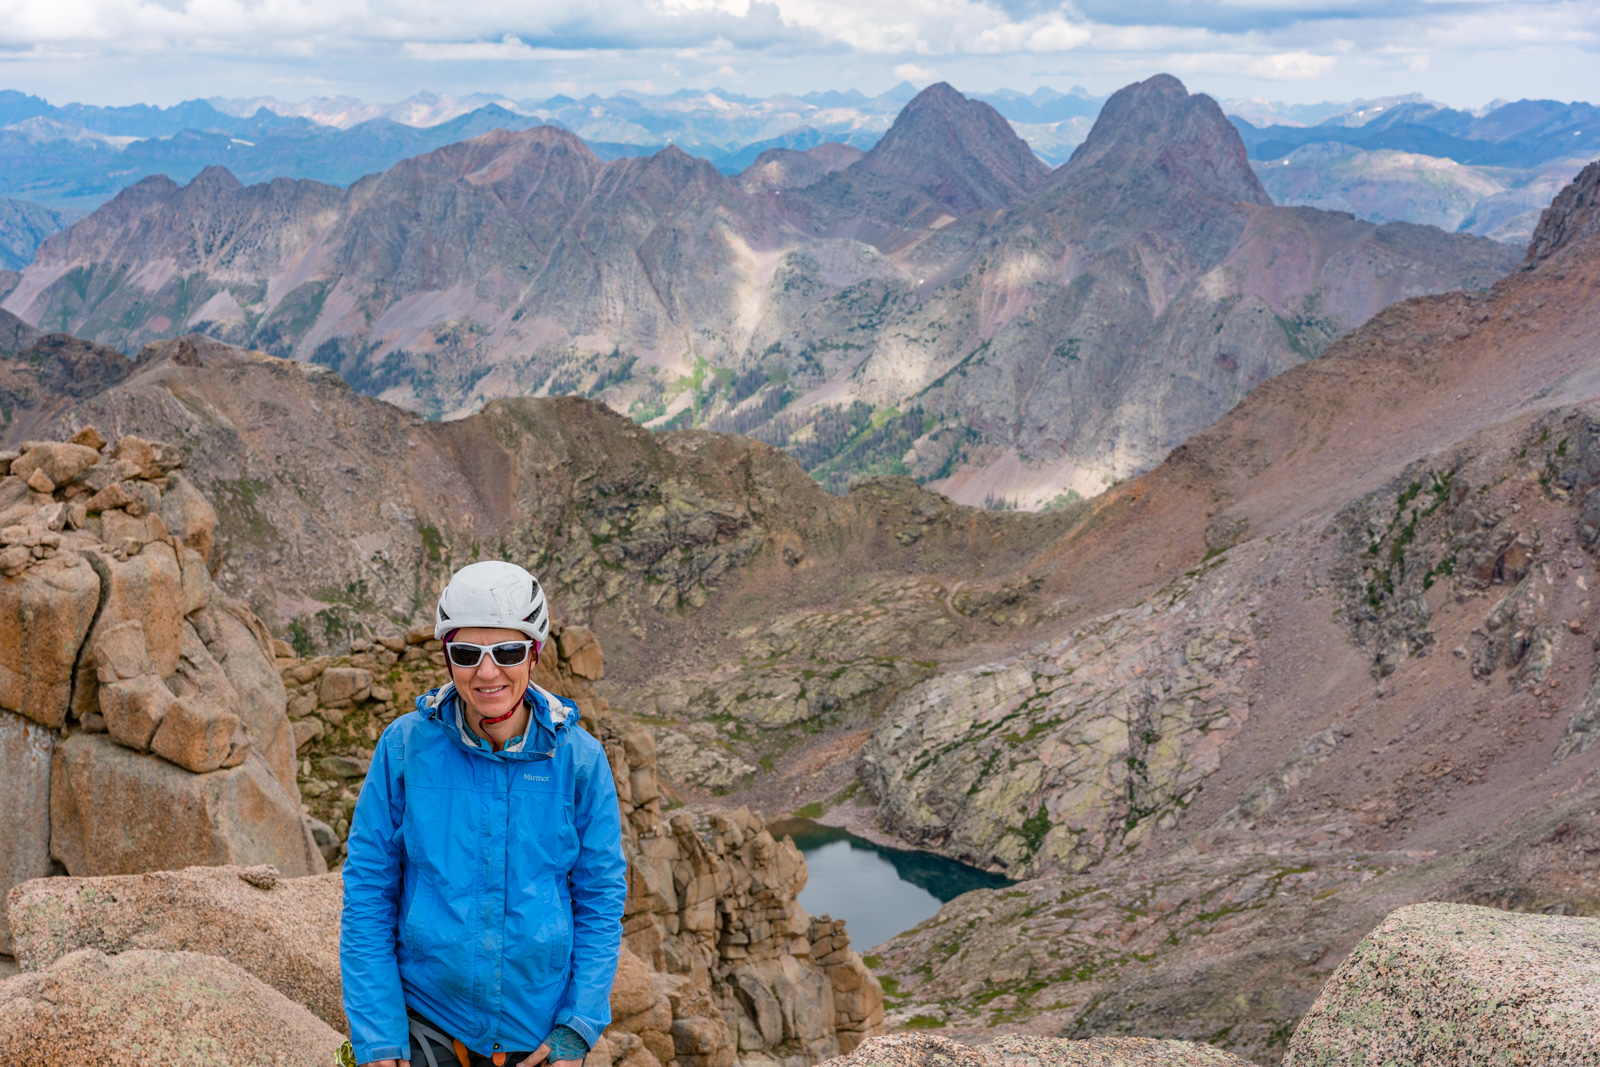
I also wanted to get a shot of Natalie with two of my favorite peaks behind her - Arrow Peak and Vestal Peak.
As we were packing up to head down, the clouds broke and shined light on Pigeon Peak. I got excited and photographed it. So awesome.
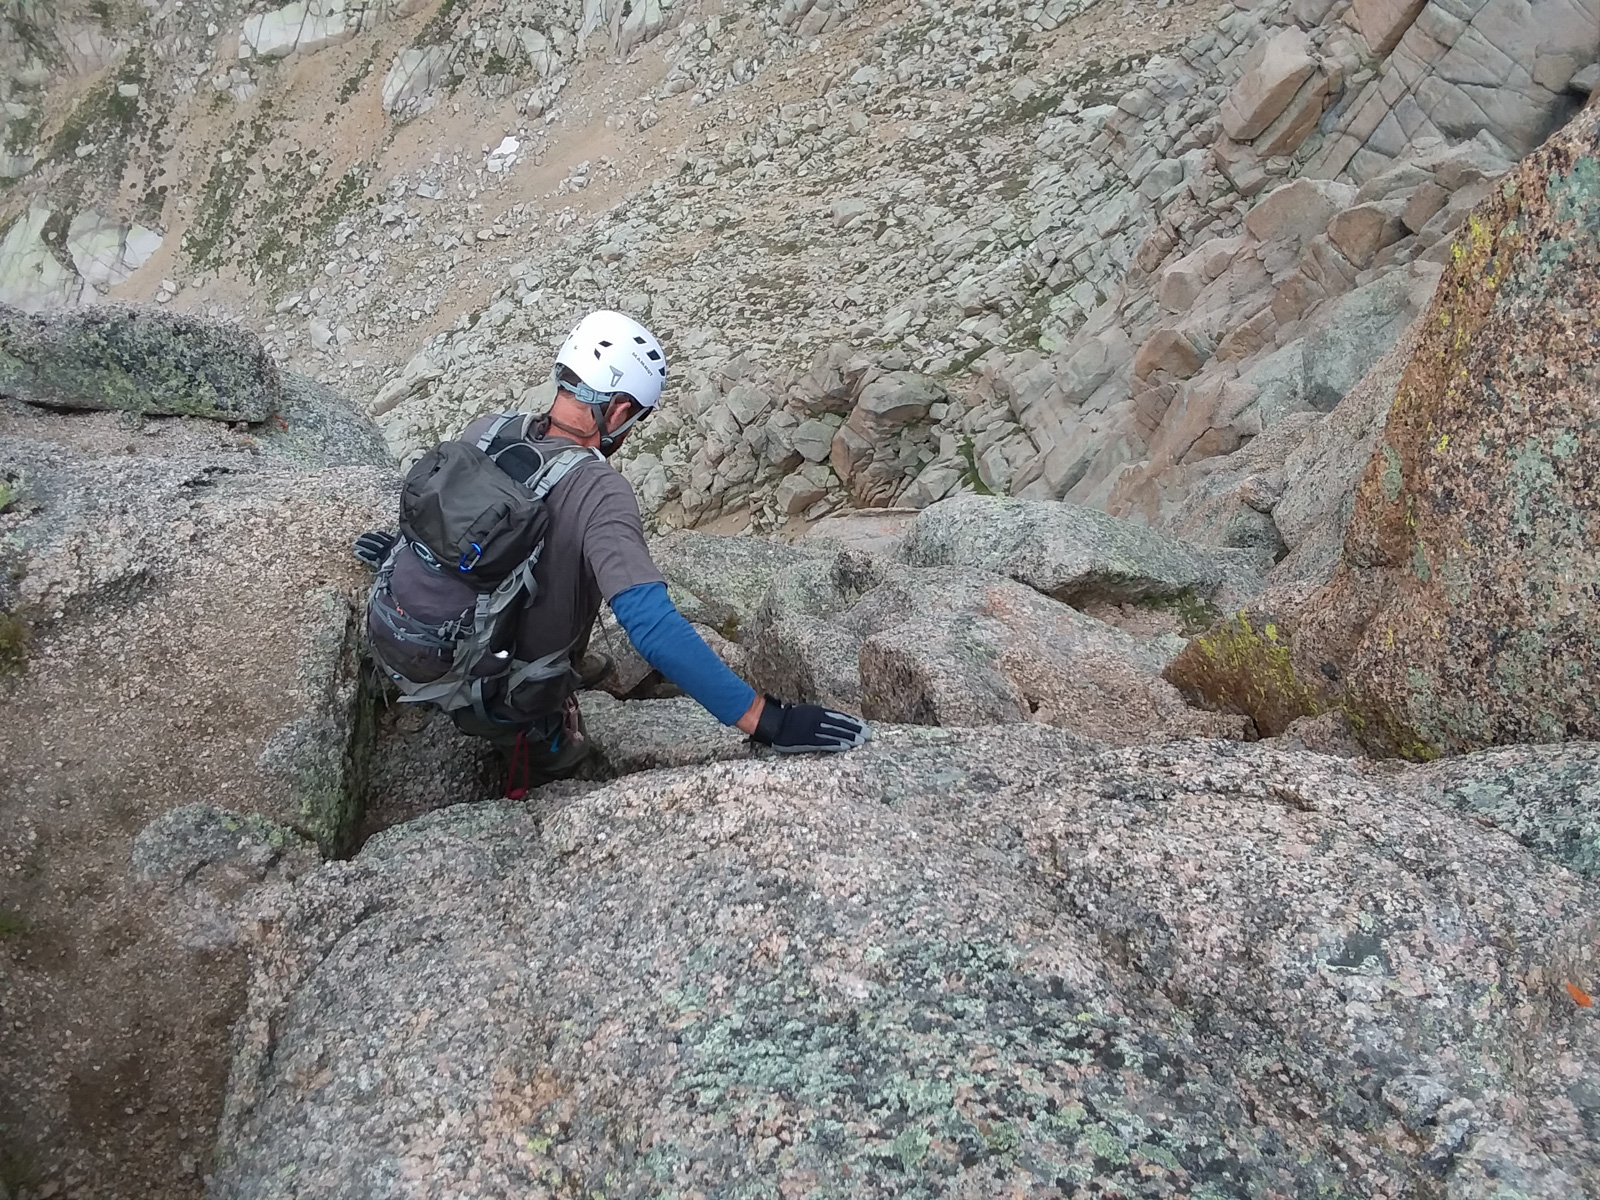
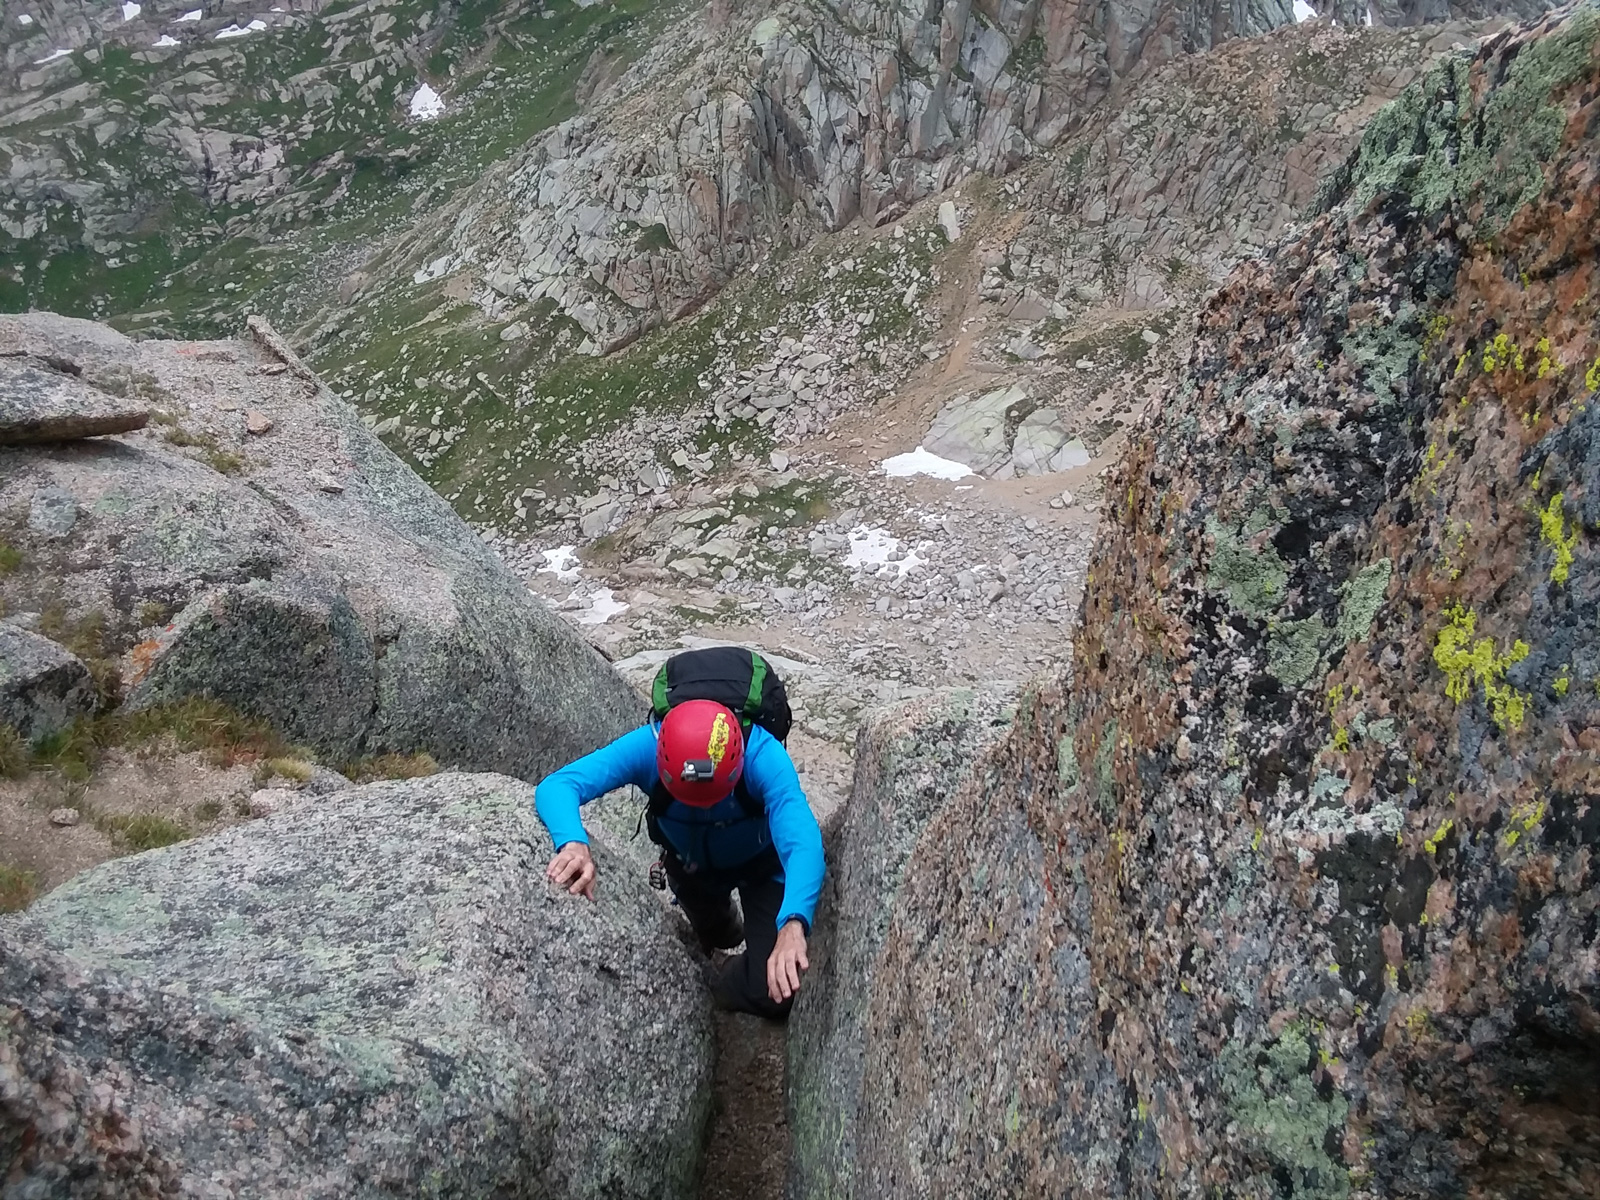
All good things must come to an end, so we decided to head back down before getting stuck in some nasty weather. It looked like it should hold for us for at least an hour or two. Shawn went first. Here's a shot of him negotiating the first tough move back down.
I found downclimbing the chimney to be a lot of fun, using my feet and back as leverage for the first and last section.
The tricky move back around the jutted out boulder was a little easier on the way back for some reason.
Directly after the tough move, there's a way to go up instead of around, so both Natalie and I chose that option instead, finding it to be easier.
Back on the north face, we quickly made our way down to the 3rd crux.
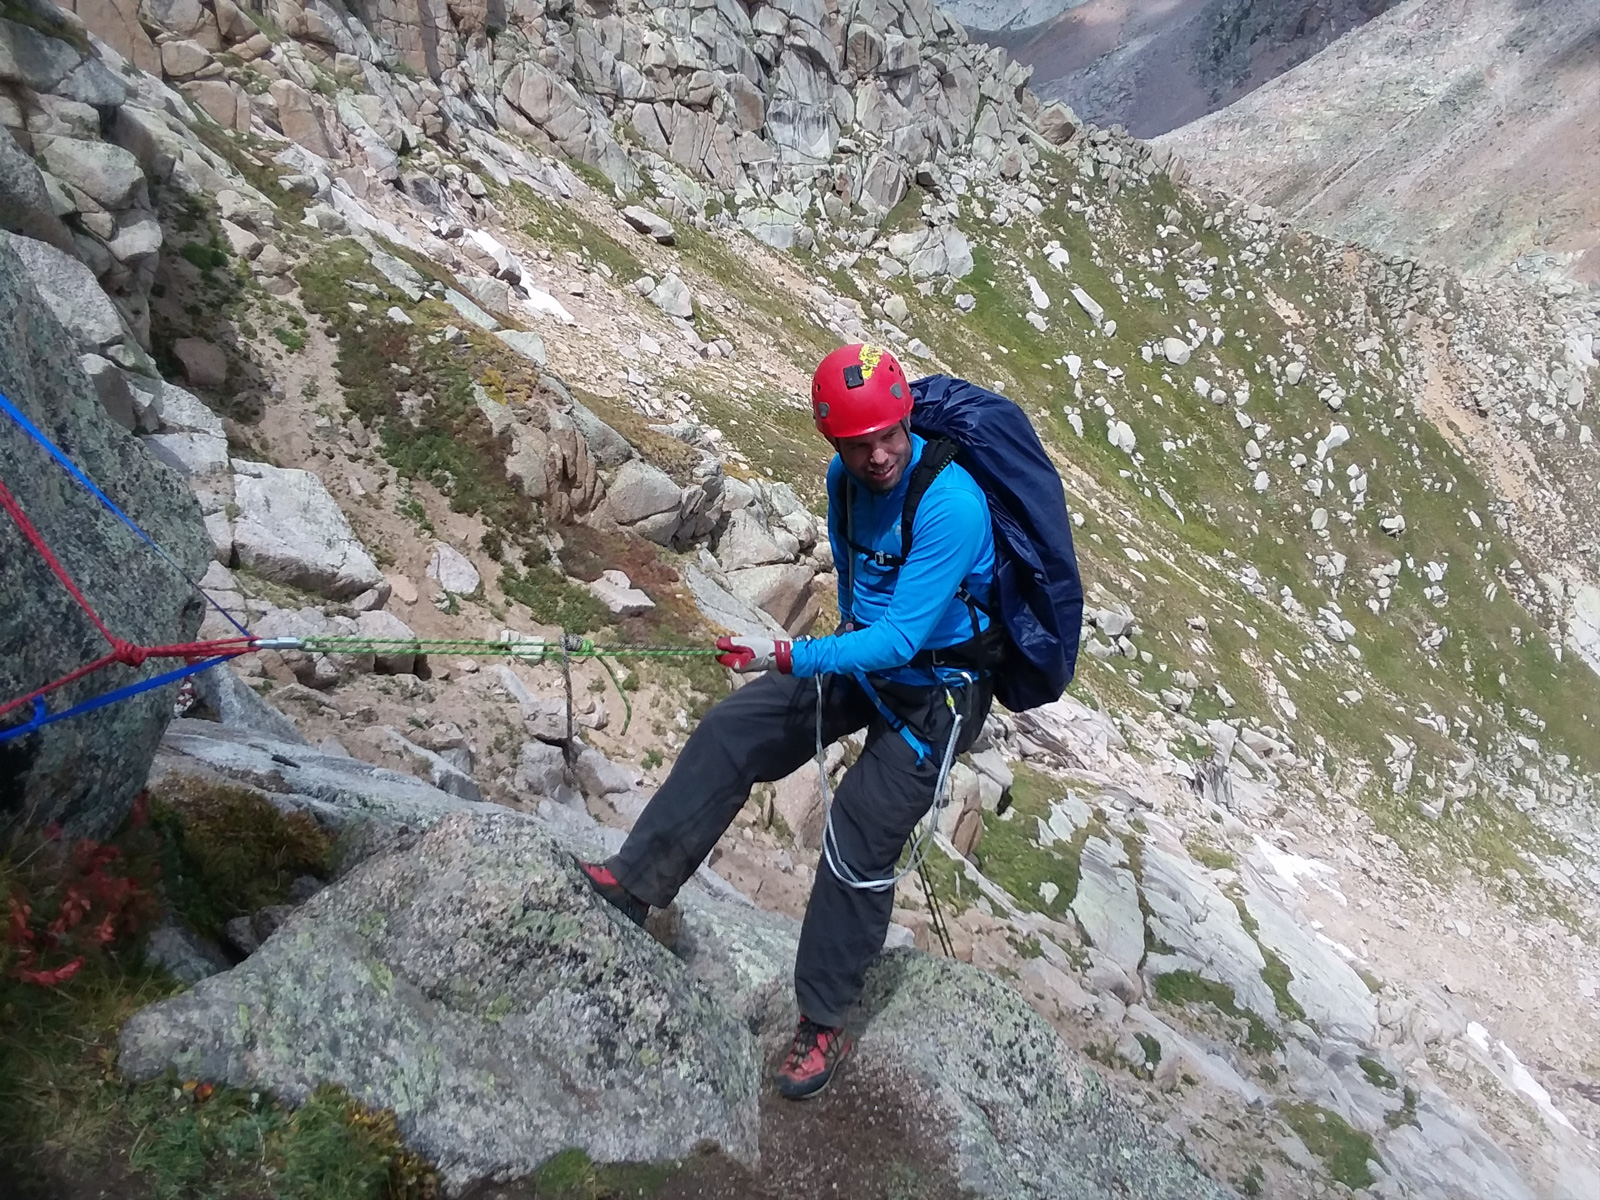
We rapped down without any problem, tying together two 30 meter ropes using a water knot. The next section was quite easy to rappel as well.
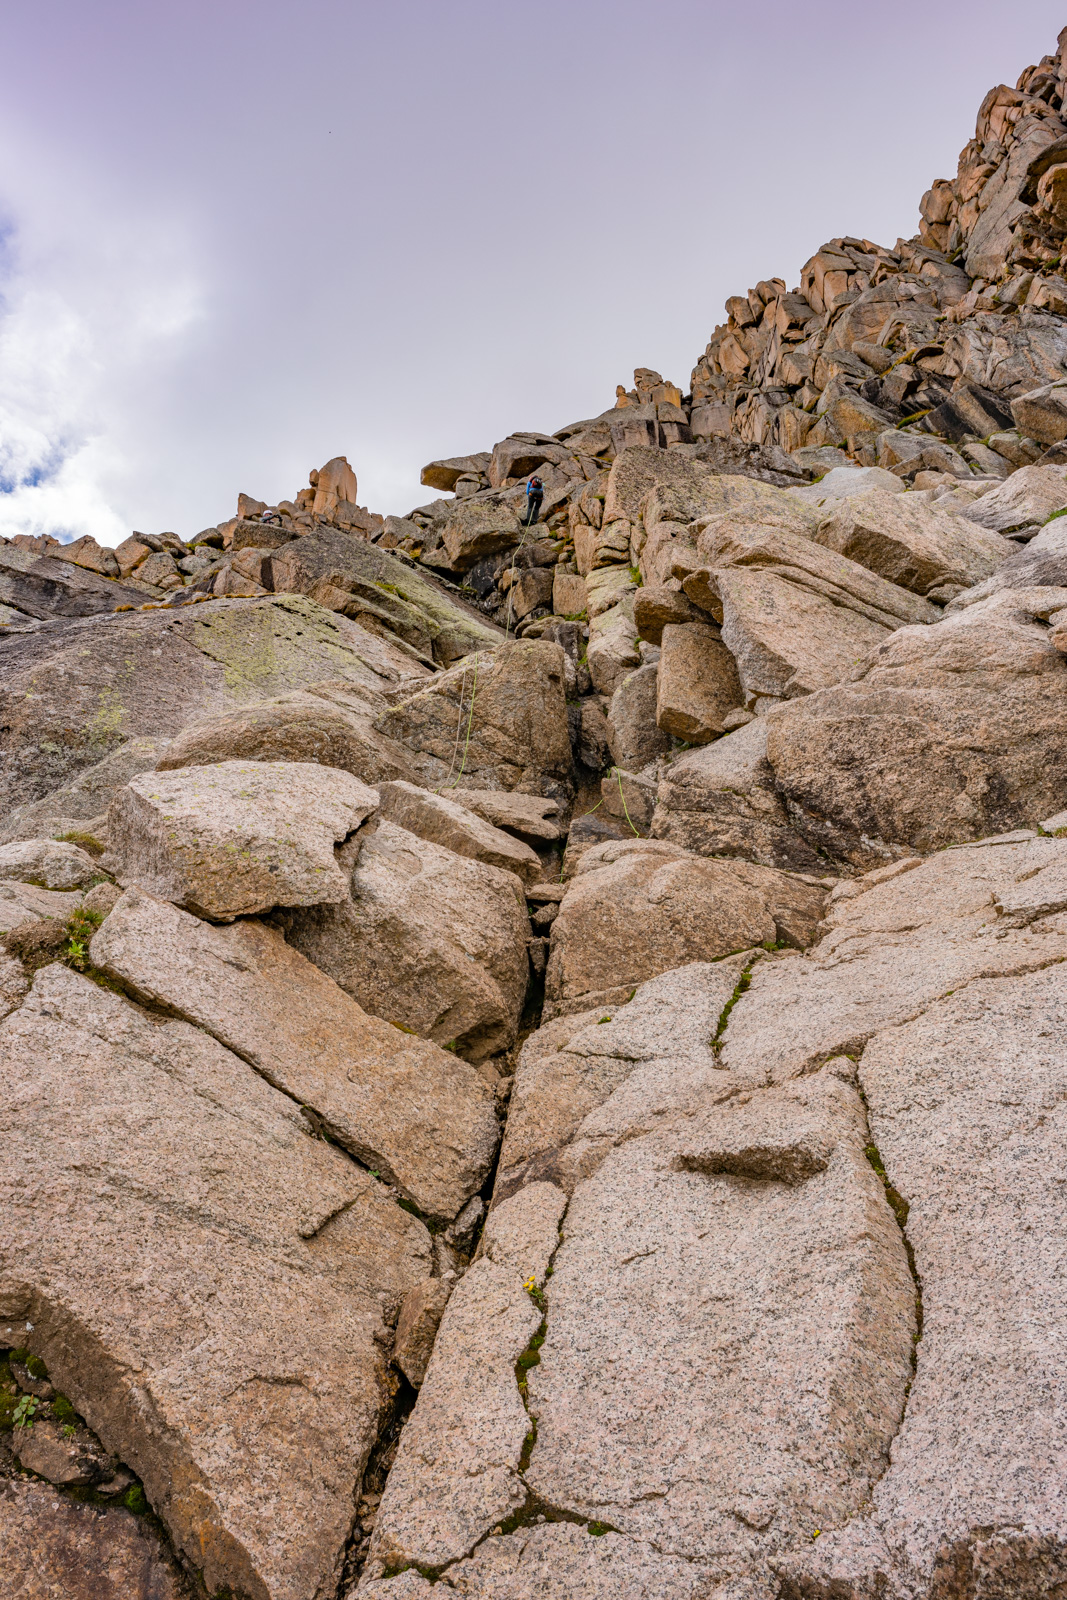
I found the final rappel the hardest, just due to how long it was down the gully. Here we go! Thanks for the shots Shawn!

A look back up shows just how long the first crux really is!
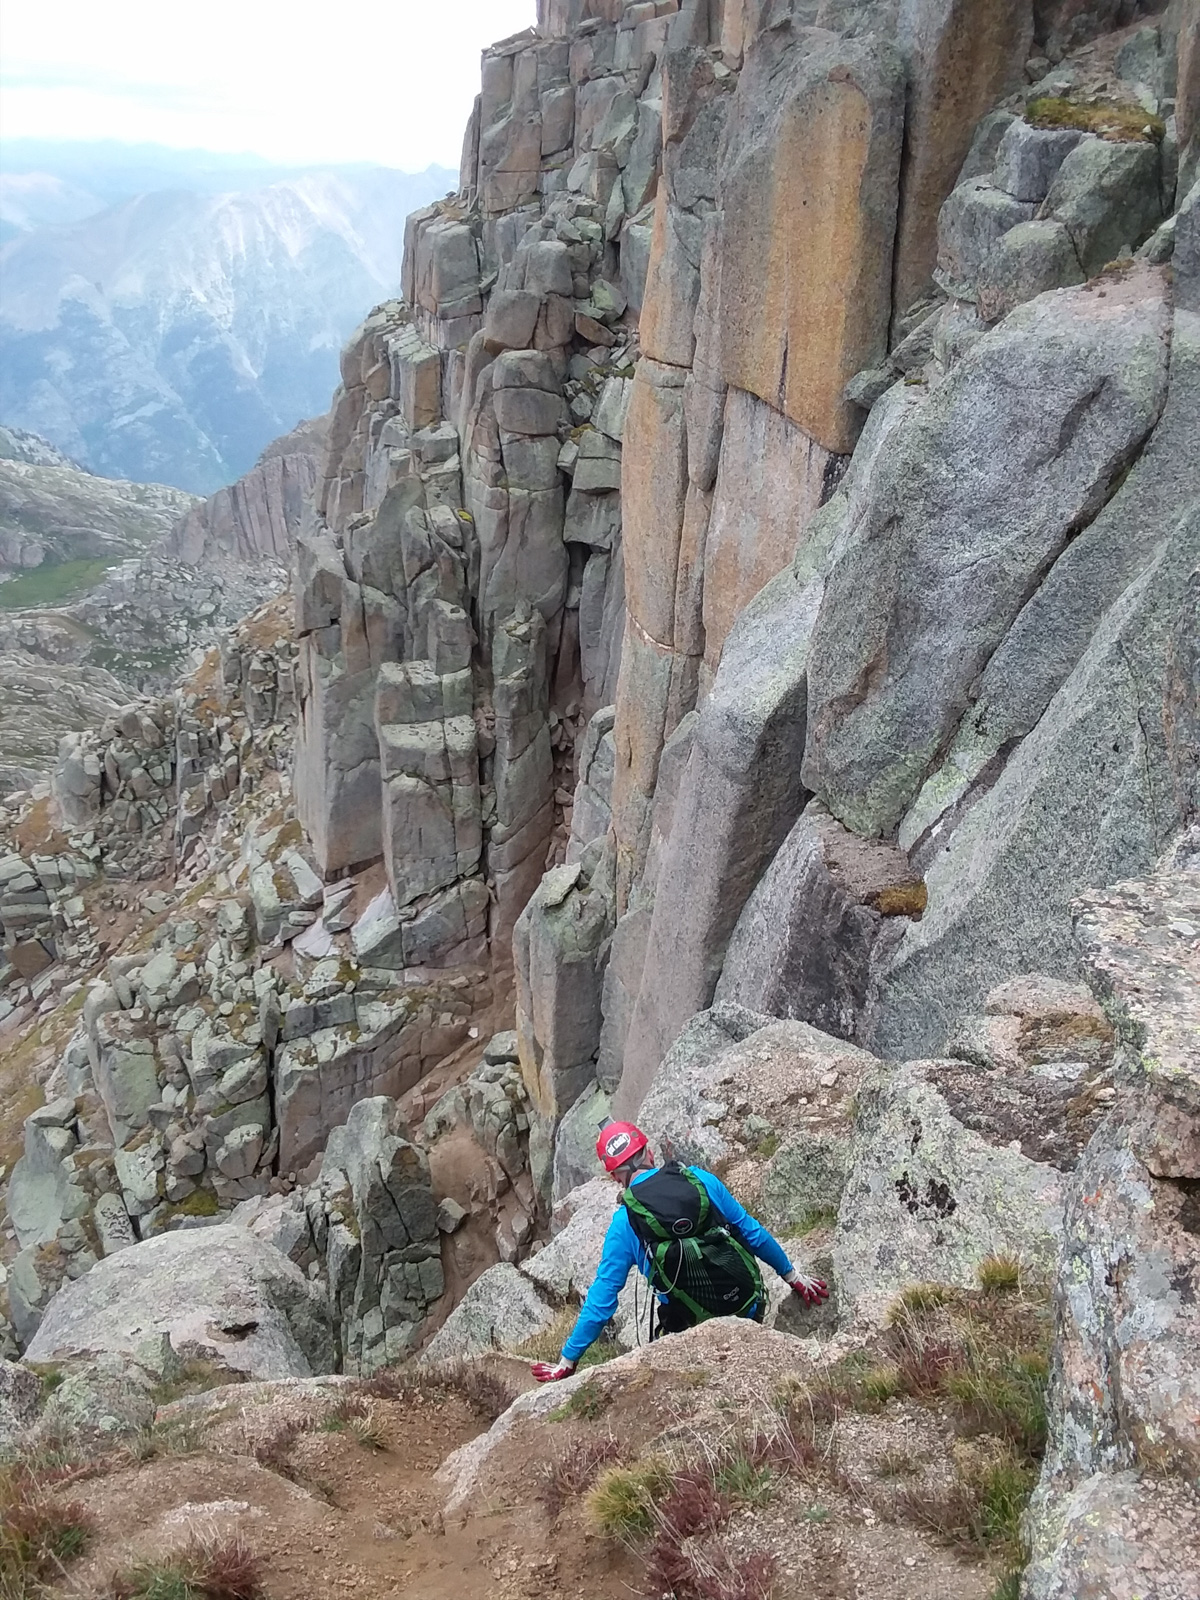
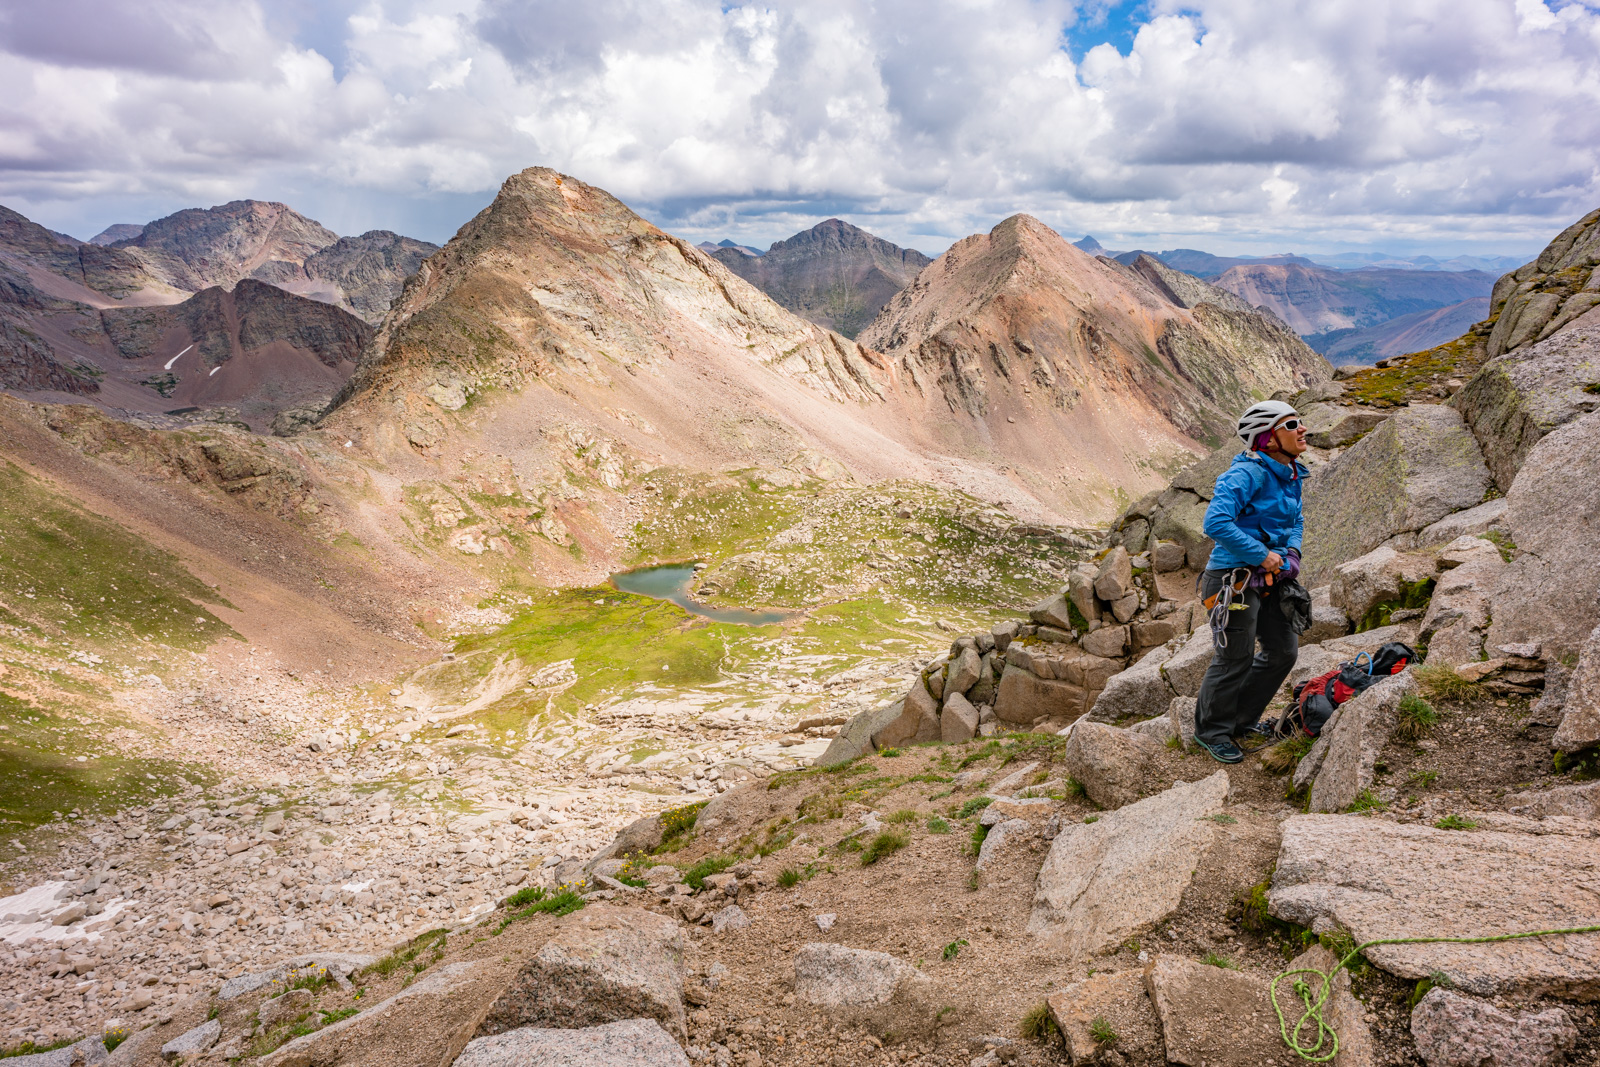
Natalie stopped to appreciate the view as well as Shawn rappelled down last. The views of Leviathan were awesome from here.
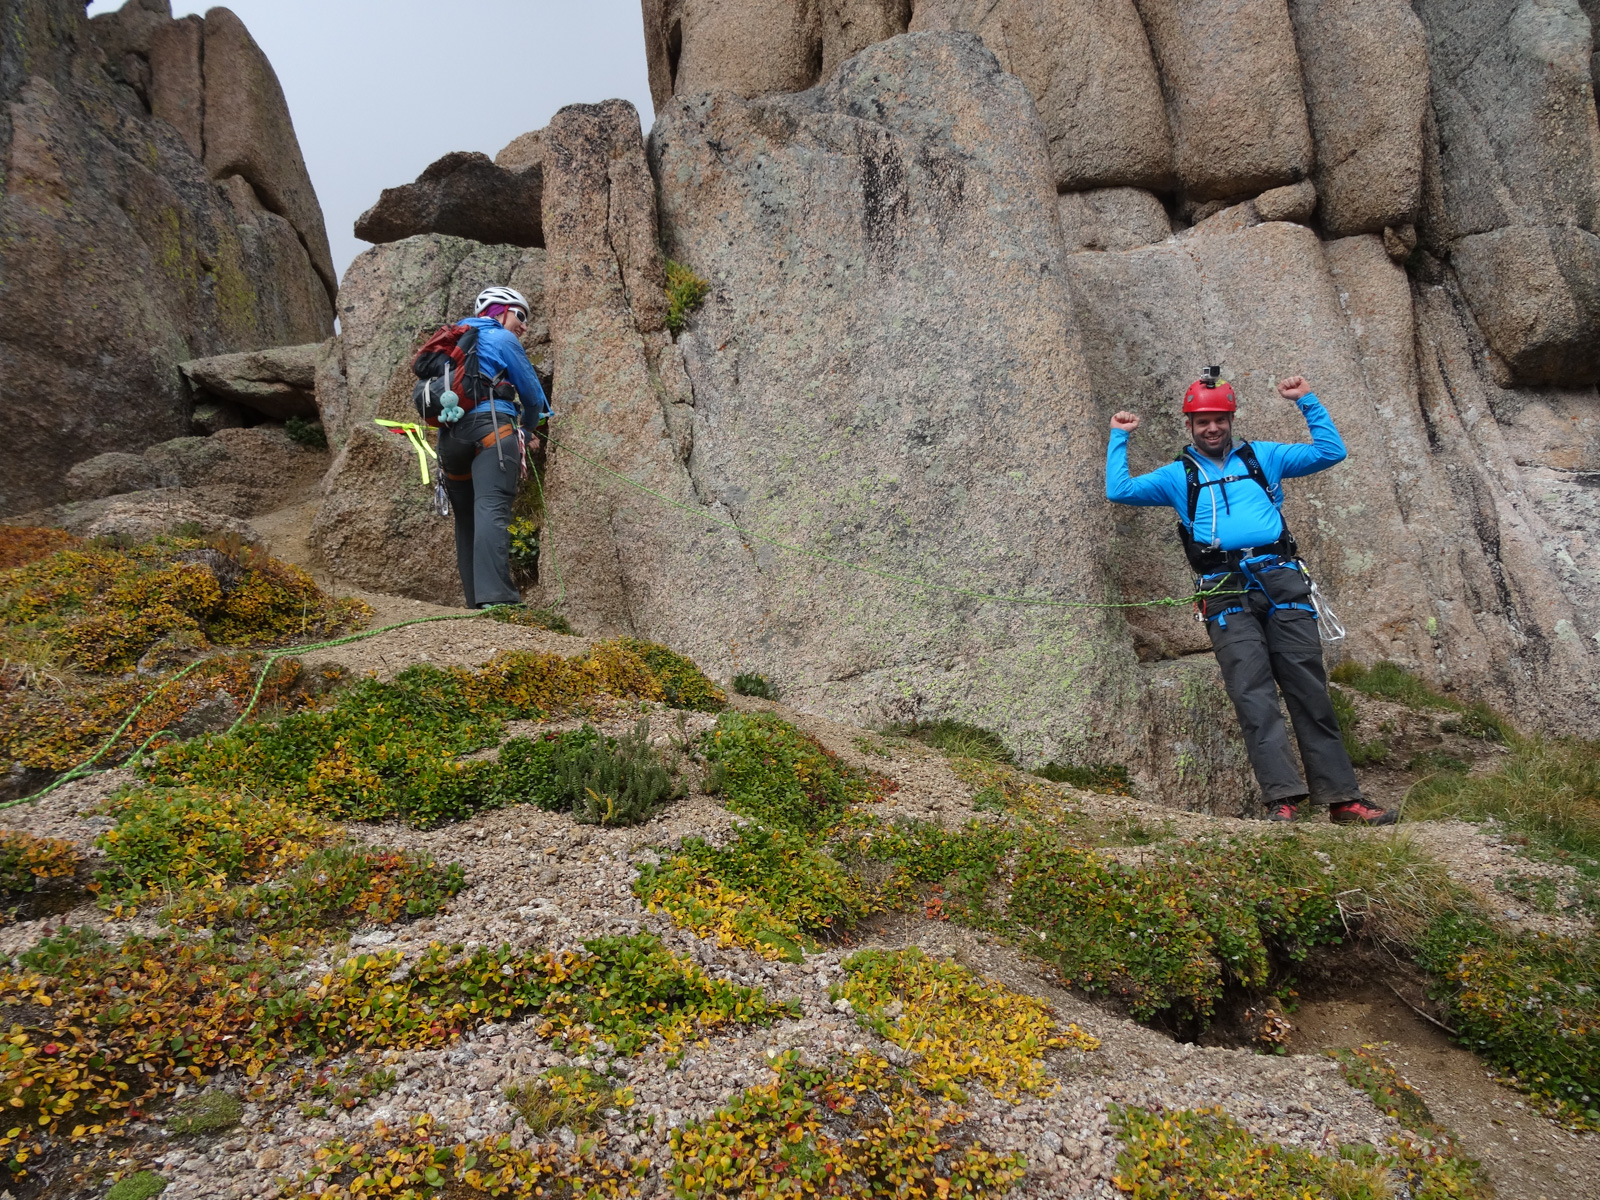
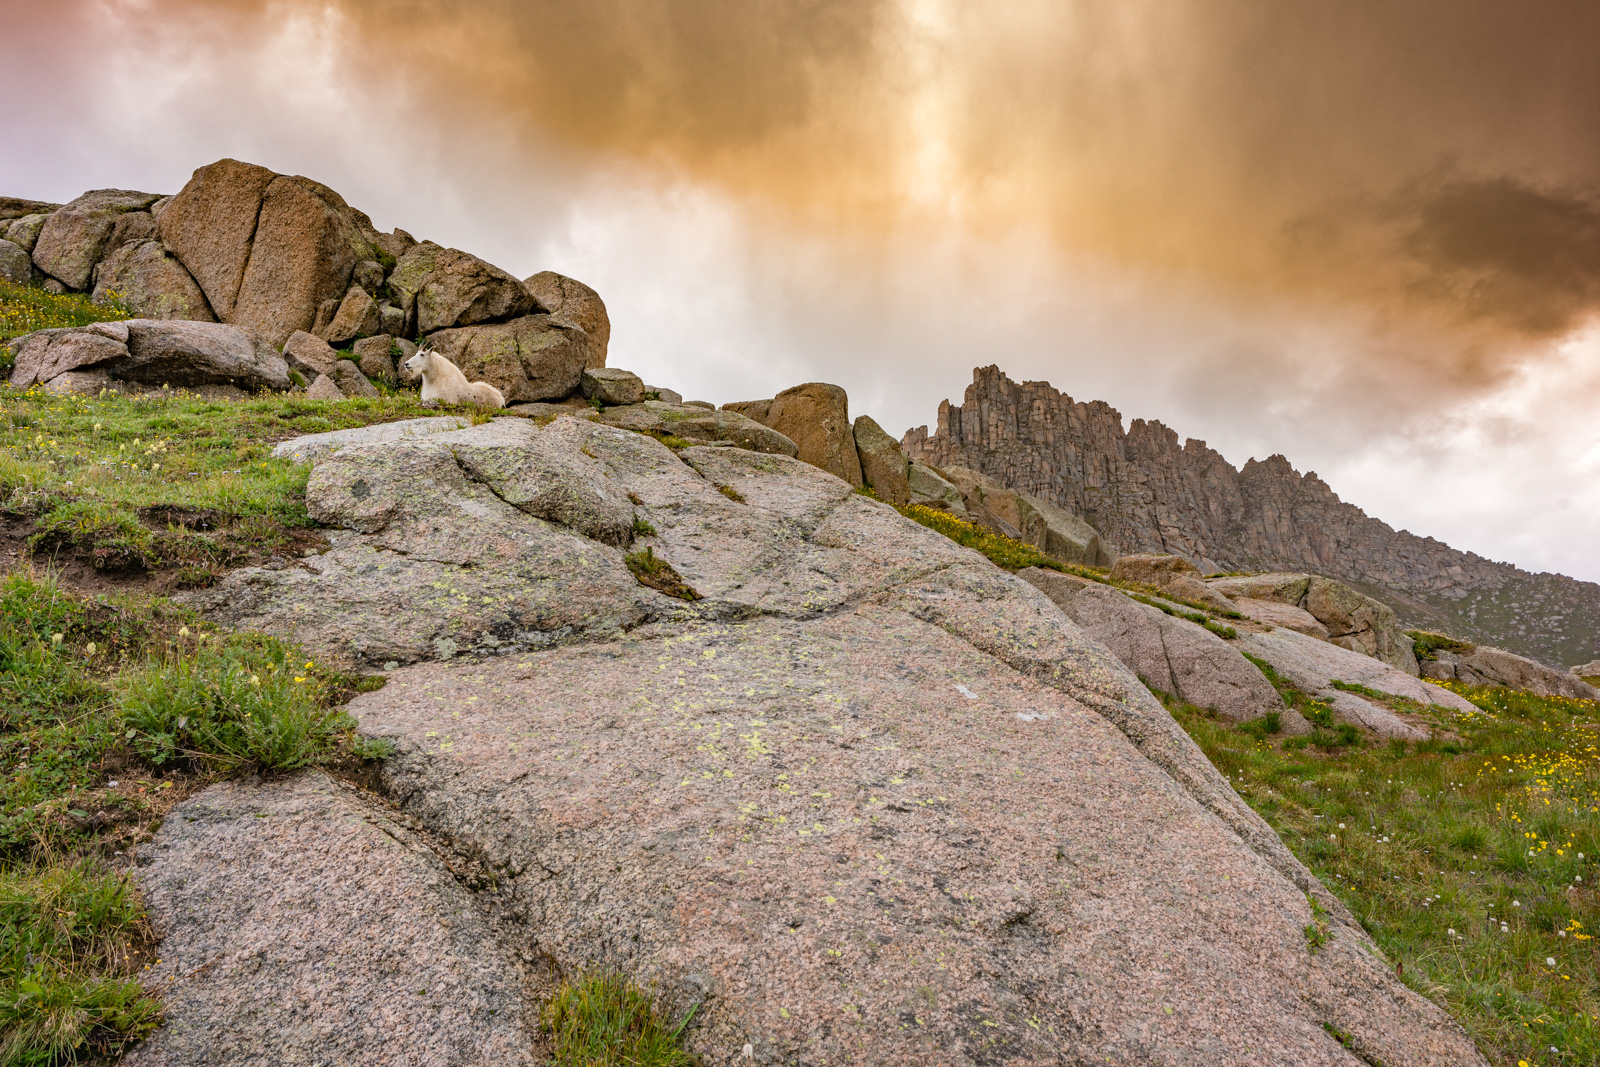
We all made it down safely from the tough sections and got ready for some rain and graupel (you know, that stuff that's like tiny hail). It was good that we avoided a "Graupel rappel." Har har. We all decided to go down the way Shawn came up as it sounded like the most scenic route. It was awesome. We ran into a solo goat while some interesting rain storms passed by.
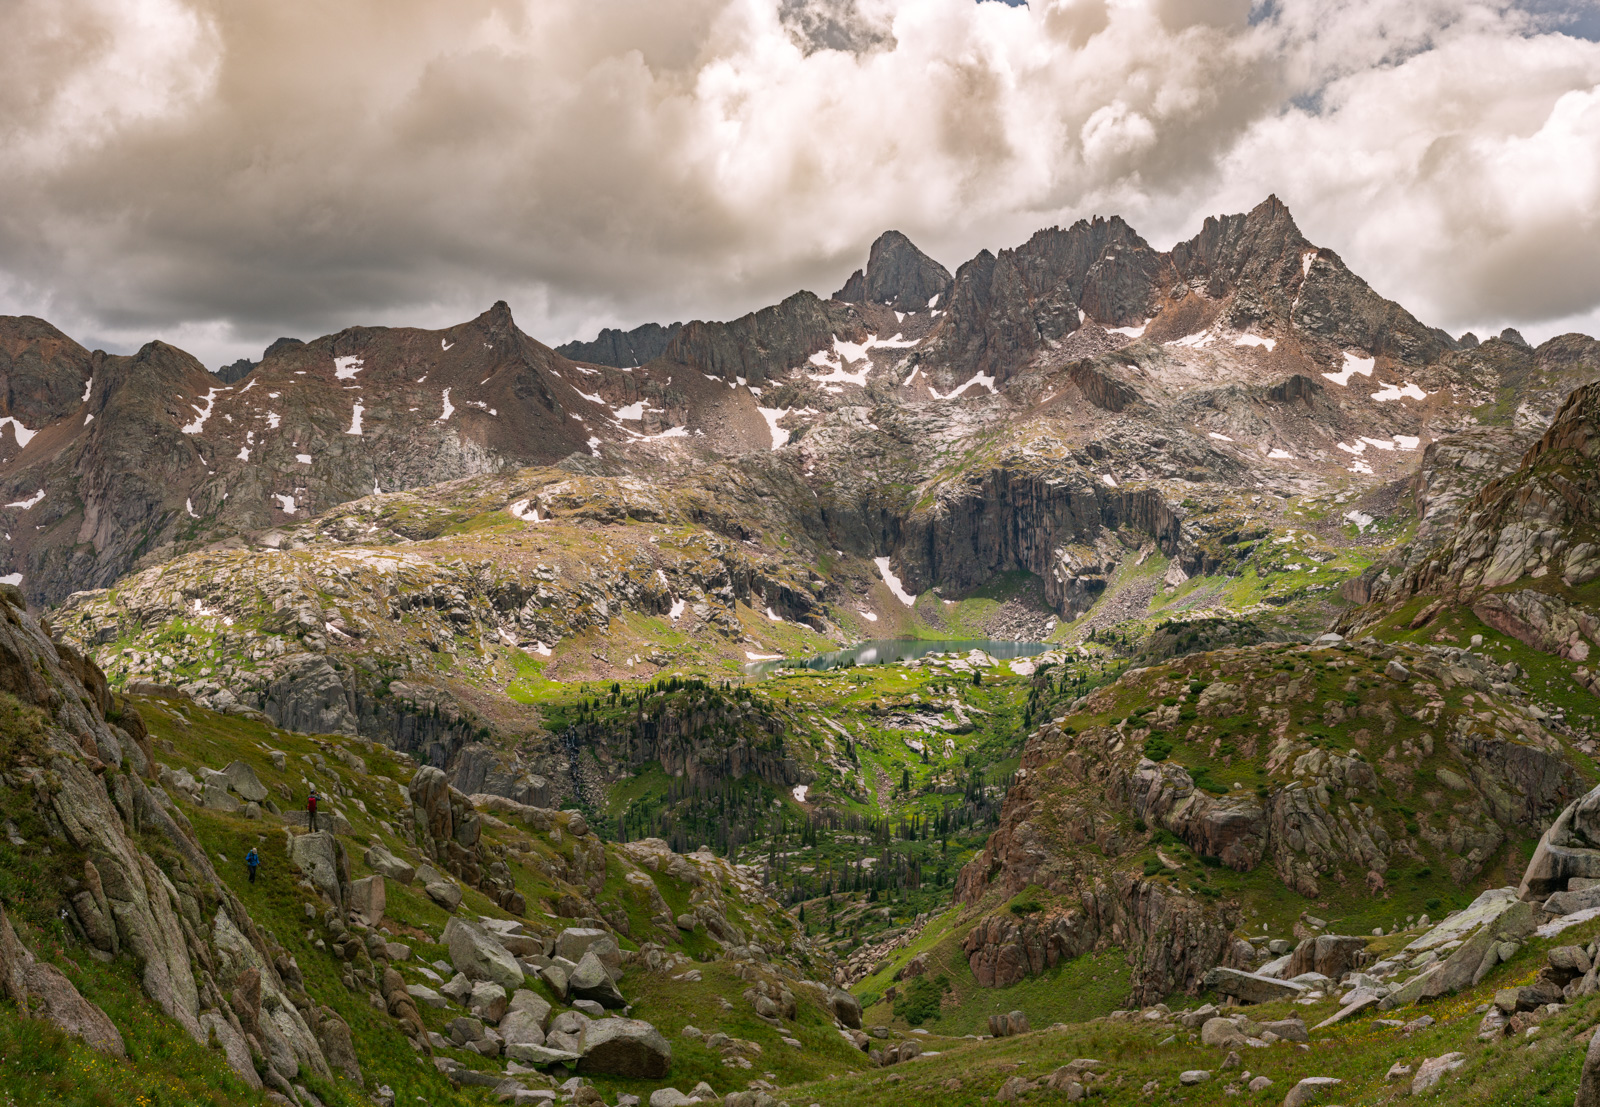
As we lowered into the basin, the atmospheric clouds added some nice effect to Sunlight and Windom.
It was hard to keep moving with a view like this. Natalie and Shawn forged ahead and are seen bottom left.
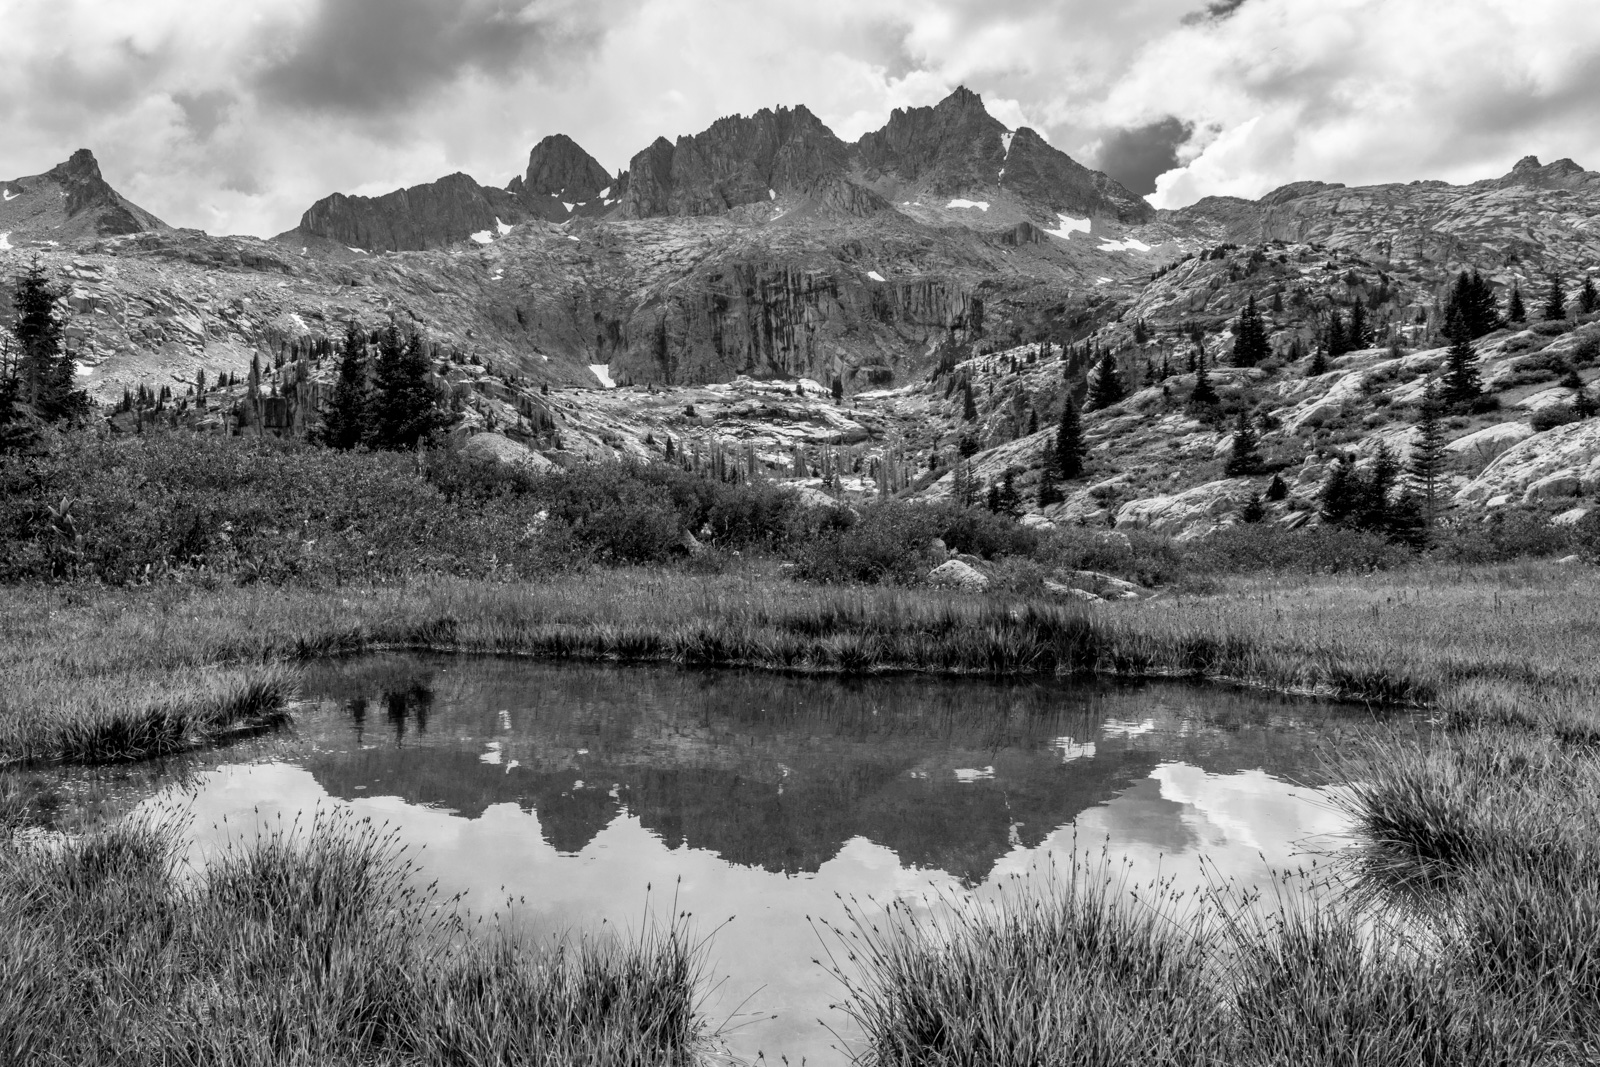
As we got lower, we found this really awesome pond with a killer view of Jagged Mountain. I was pumped.
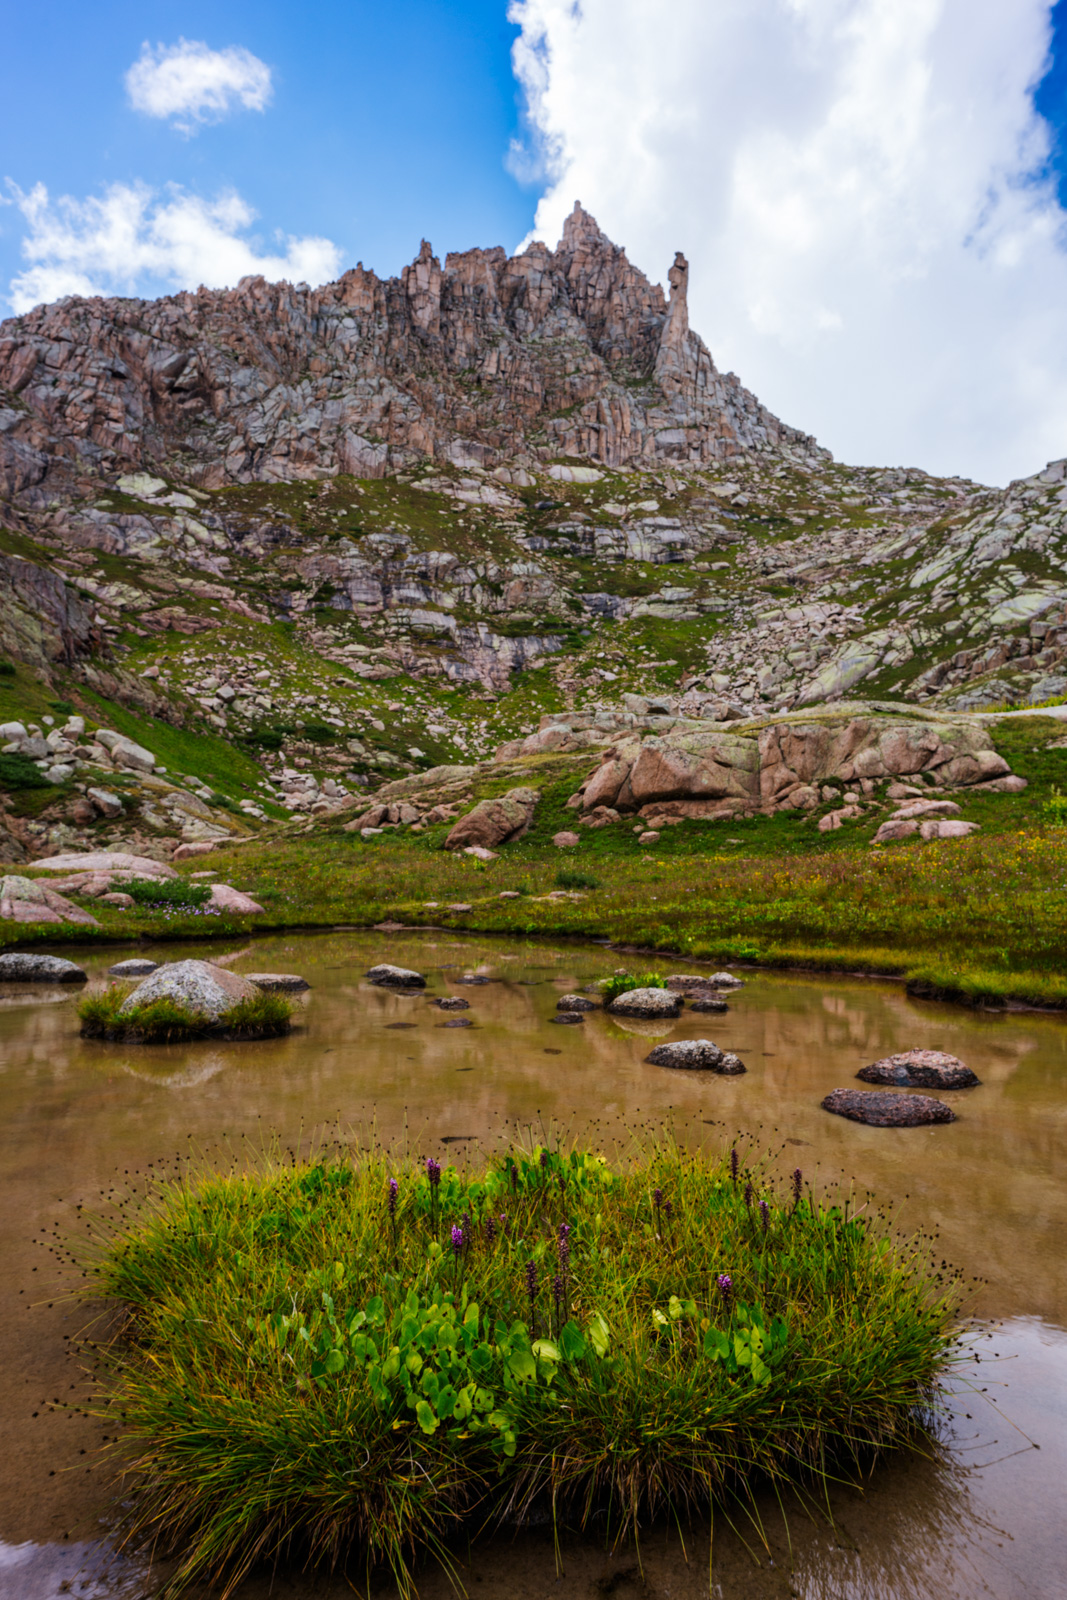
Natalie stopped to take it all in below Jagged.
We finally reached the lower sections just before rejoining the main trail and stumbled on a nice little pond which reflected Sunlight nicely.
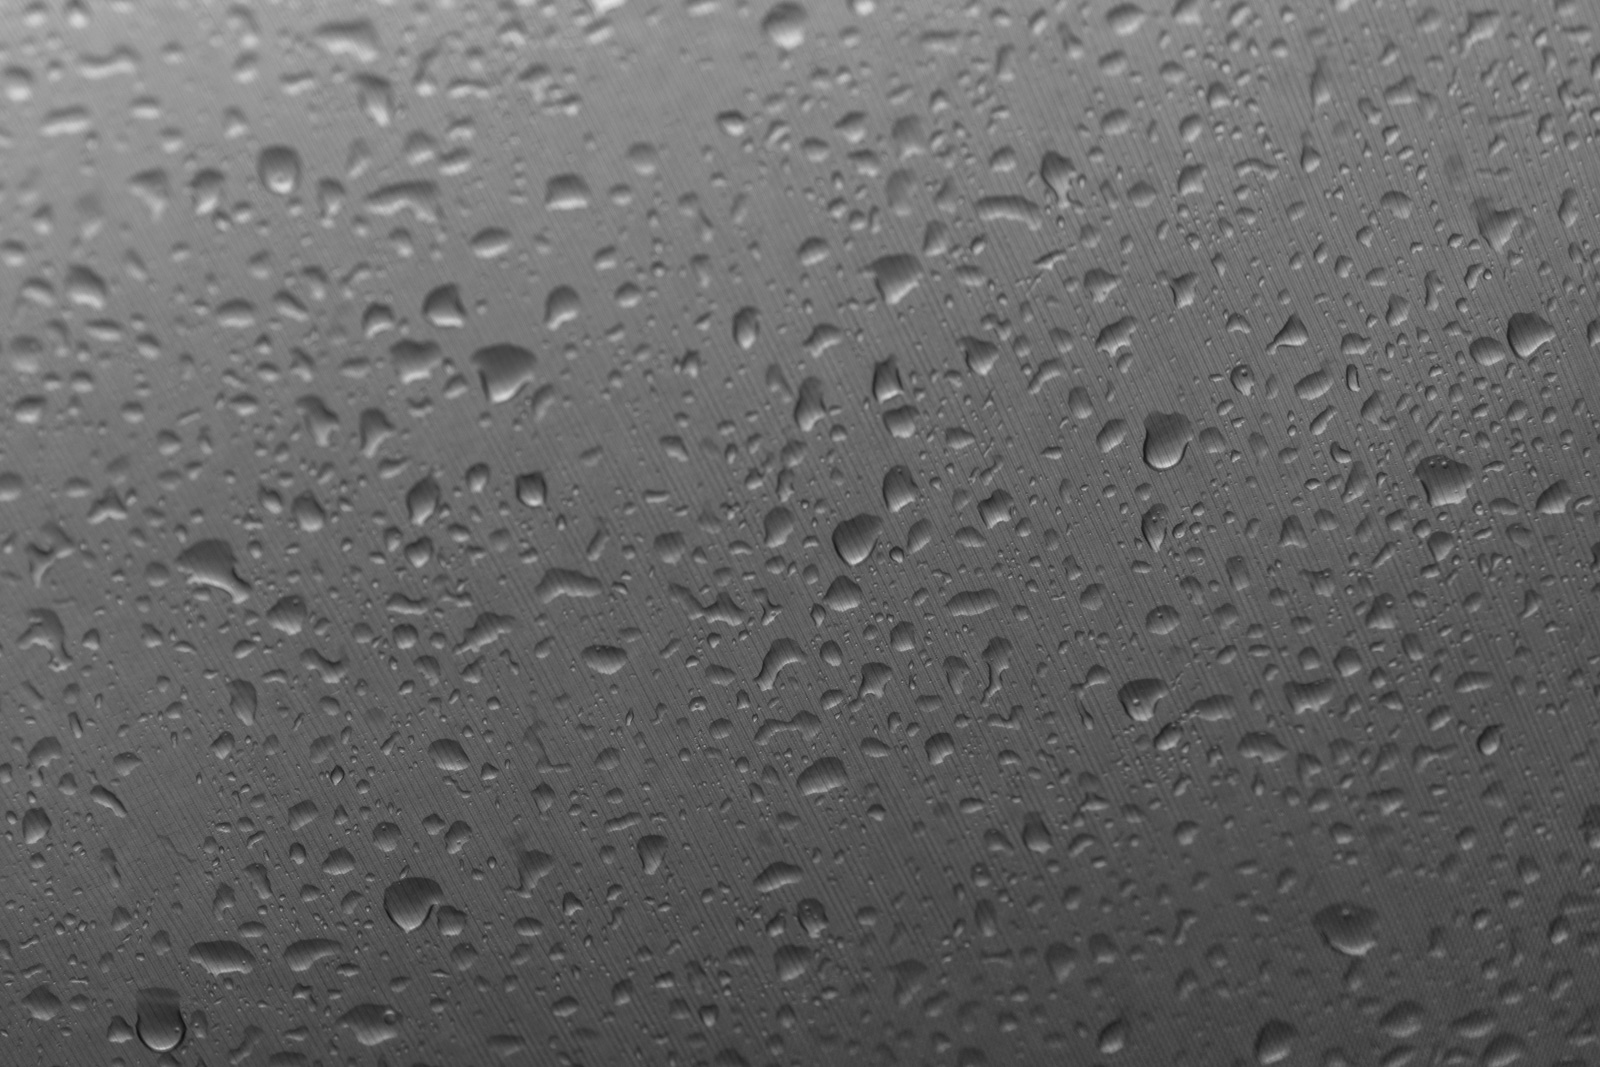
We reached our campsite without any issues. Shortly after, it began to rain... and then hail, for a couple of hours straight. It was a lot of water! I was oddly not that tired and decided to try to read and then take a photo of the water on my tent.
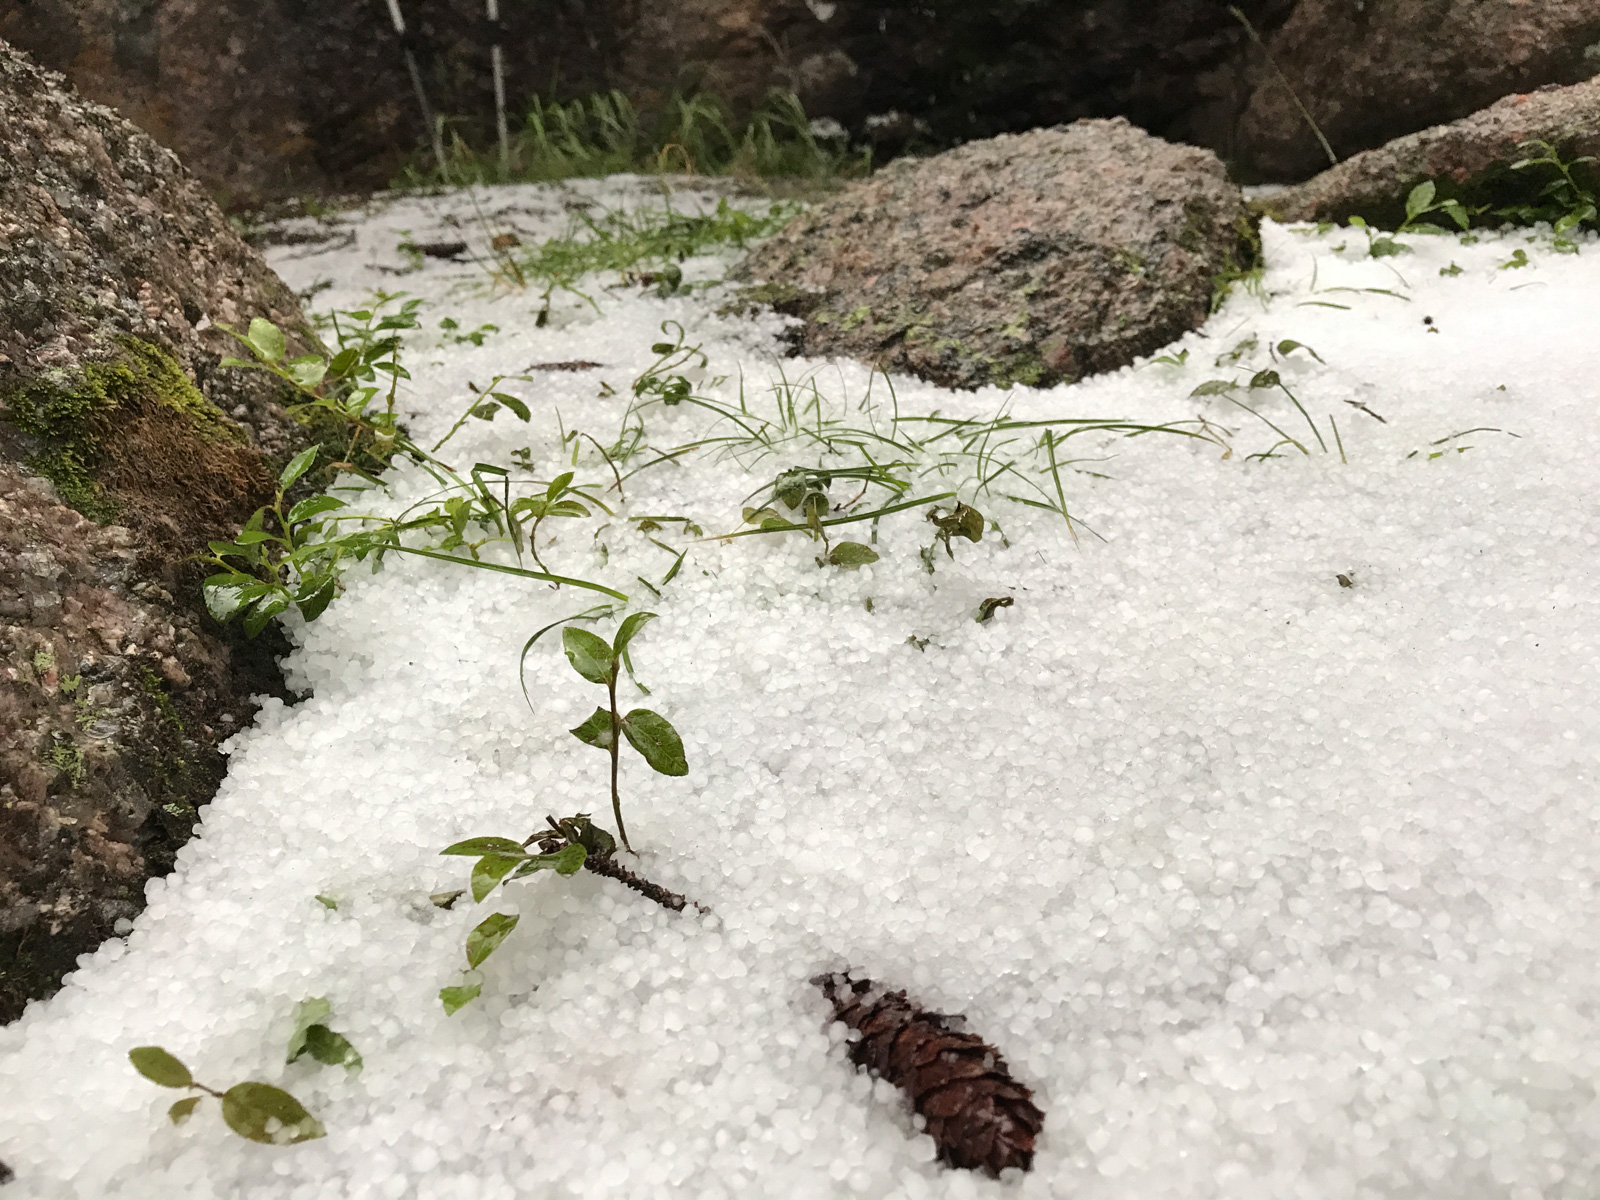
After the storm stopped, I poked my head outside to see the damage. Holy moley! Look at all that ice!
We finally decided to eat dinner and crash, as I was planning on an early hike out the next day, and it would be a tough one for sure.
DAY 4: Hike back over Hunchback Pass to Beartown.
Rise and shine. This would be a tough day. At least it started out well with a parting gift from Jagged Mountain at sunrise!
On the way out, everything, I mean EVERYTHING was wet. The dense vegetation along sunlight creek was almost unbearable. All of my clothes and both feet were soaked. Good times.
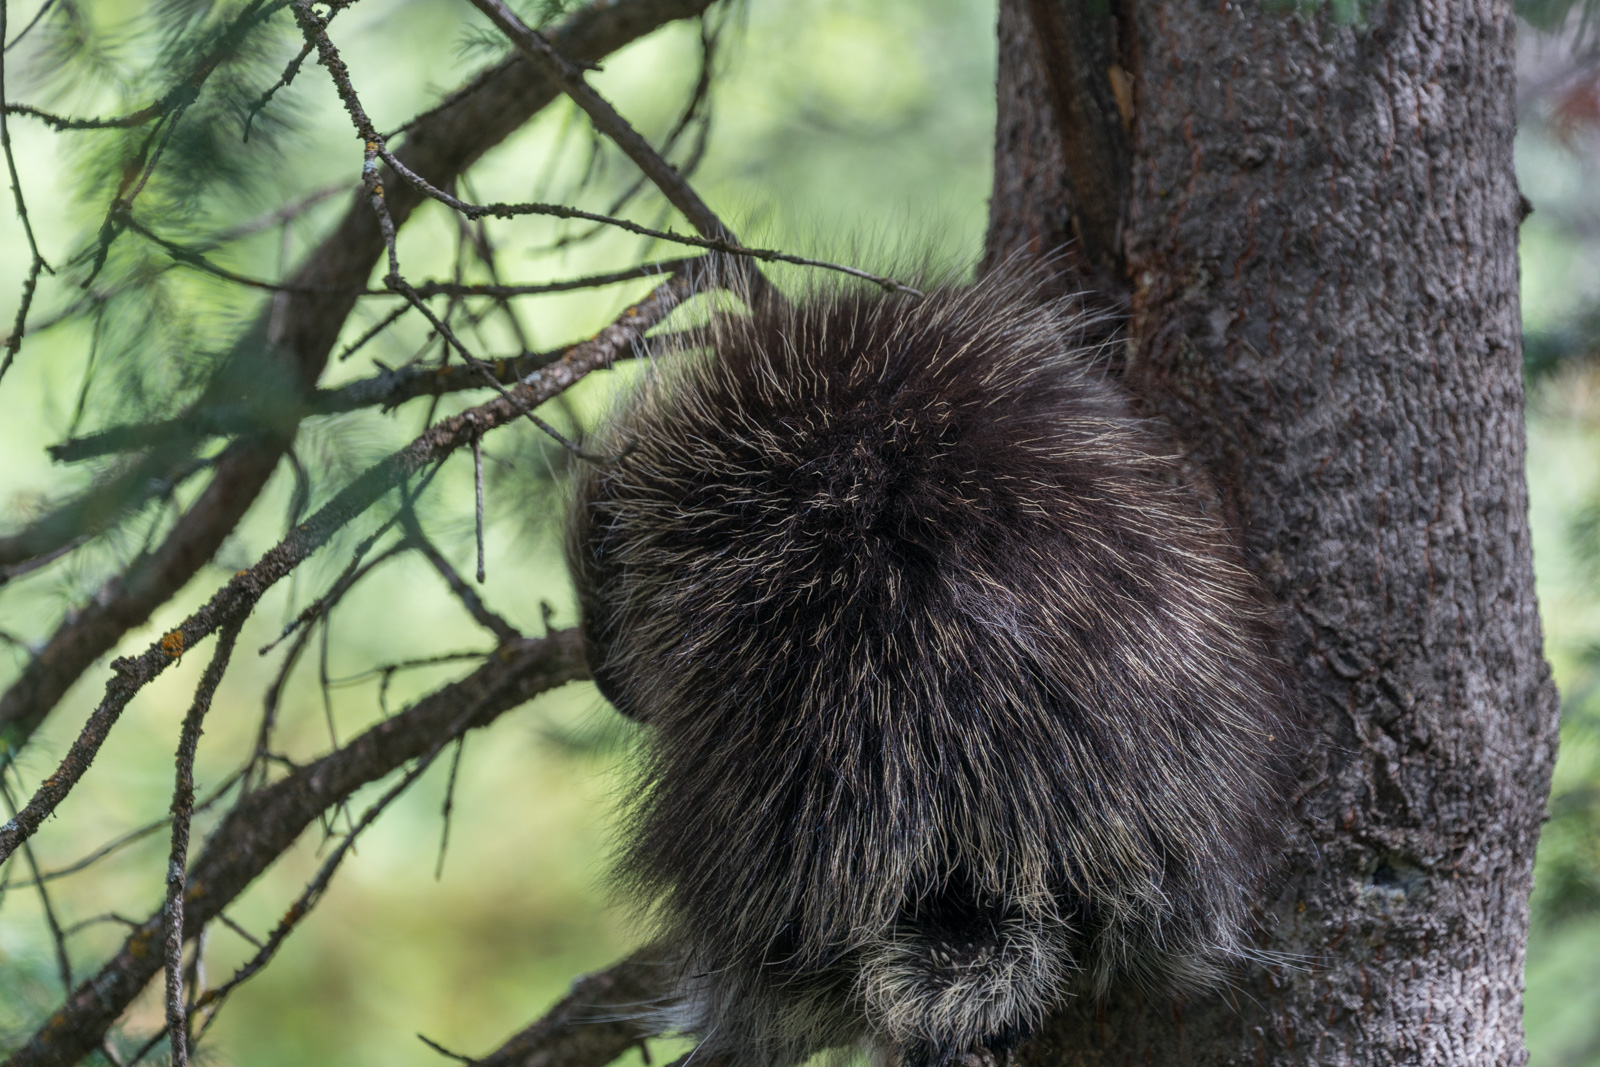
I stopped after Vallecito Creek to change socks and rinse out my boots as well as to put on some dry clothes. I chatted with a nice couple camped there and then departed. I kept my head down for most of the way back but got lucky to catch a porcupine sitting at eye level in a tree right next to the trail. I decided to go around.
It took me about 6 hours to get from camp to my car in Beartown, and I really slowed down at Hunchback Pass - I had just run out of gas. It did not help that my water reservoir was leaking and I had to stop frequently to pump water. After cresting Hunchback Pass, I was welcomed with a nice view of UN 13,308 across the valley. A nice parting gift from the Weminuche, my favorite place on earth.
Thanks again to Natalie and Shawn, you guys were amazing partners! Here's to Natalie, who led us up!
Thanks for reading! I hope you enjoyed this one. Sorry if it was slow to load! Lots of photos!