Displaying items by tag: Colorado
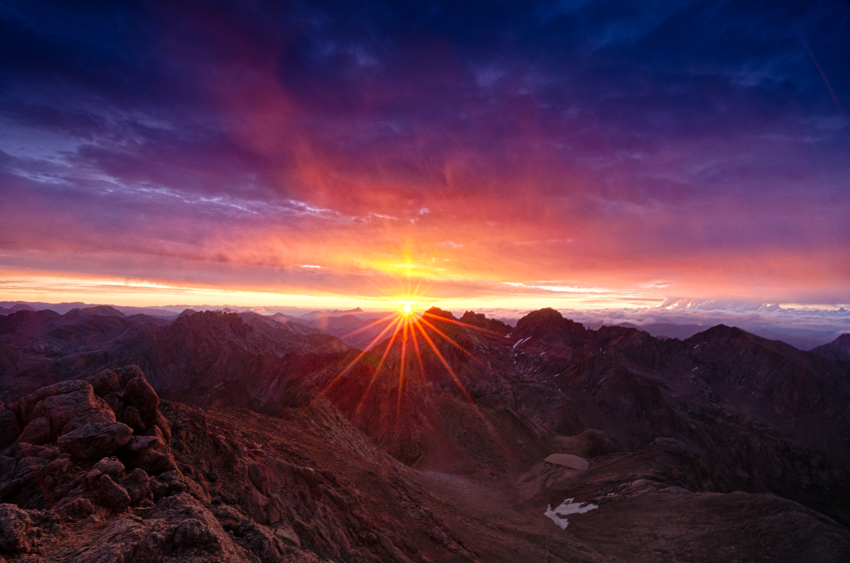
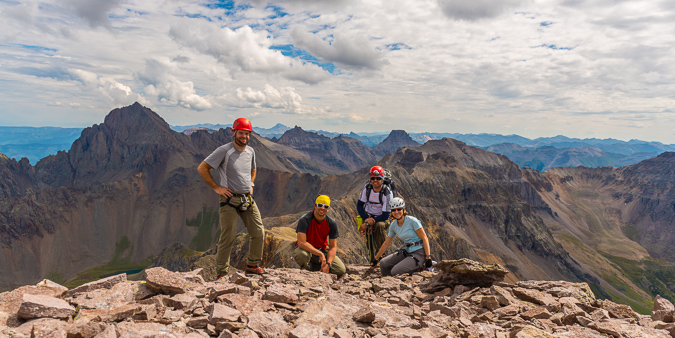
Climbing Crestone Needle in Autumn and a Fall Colors Photography Expedition
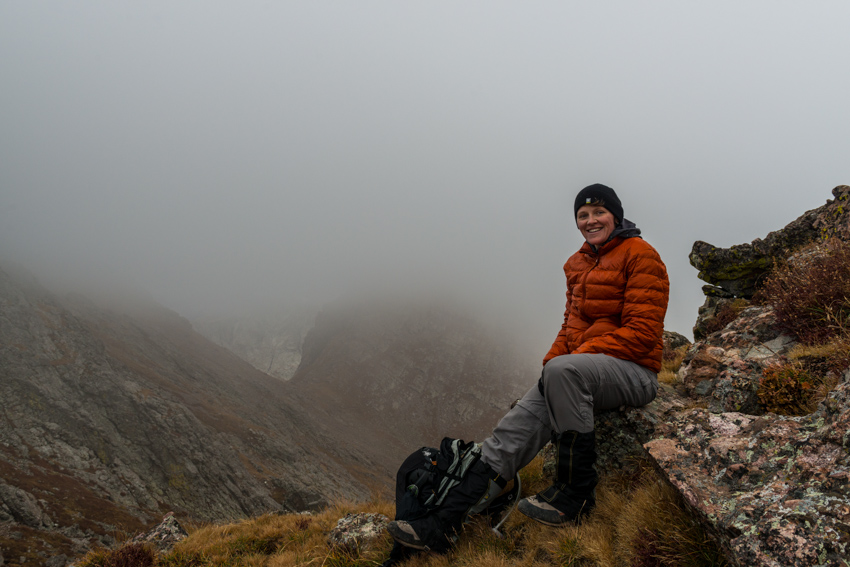
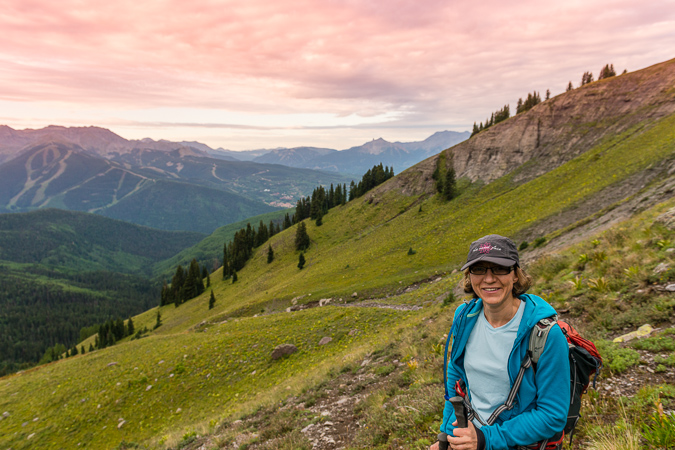
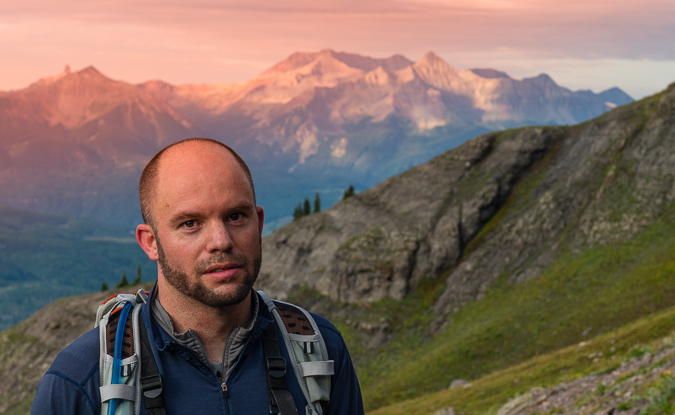
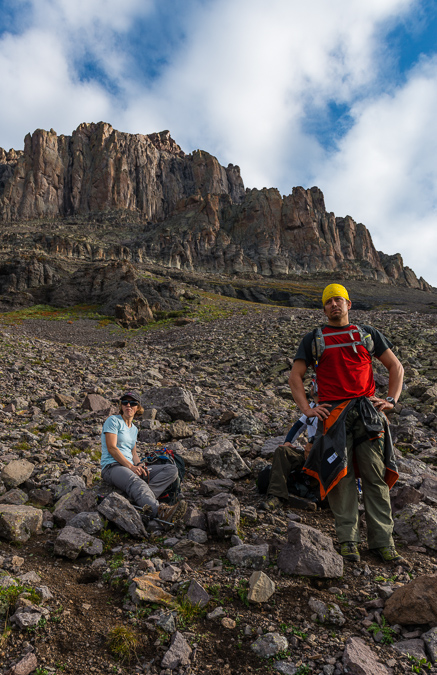
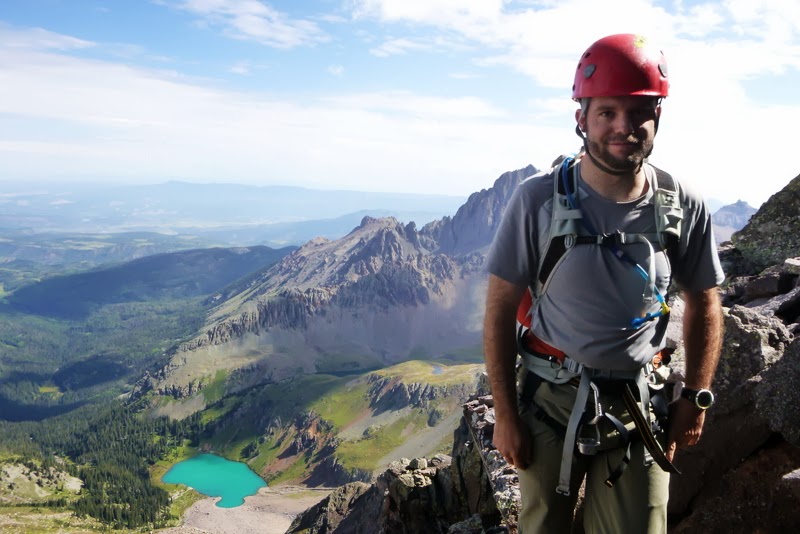
It is no secret that I moved to Portland, Oregon in January 2014 – lured by a much more walkable city than Colorado Springs, filled with breweries, vegan food, and citizens of a much similar political and philosophical mindset. I’m not going to lie though; I miss my friends and I miss the Colorado Mountains deeply. I was born in Colorado and have been climbing Colorado’s high peaks since 1982. The mountains run deep within my veins. So, when I knew I would be spending a week in Colorado over the last week of September, I jumped all over the opportunity and locked in a three-day backpacking stint into the South Colony Basin beneath Crestone Needle and Crestone Peak in the mighty Sangre de Cristo Mountains with my best friend Sarah Musick. Our goals were simple: enjoy the wilderness, enjoy our time together, and climb mountains.
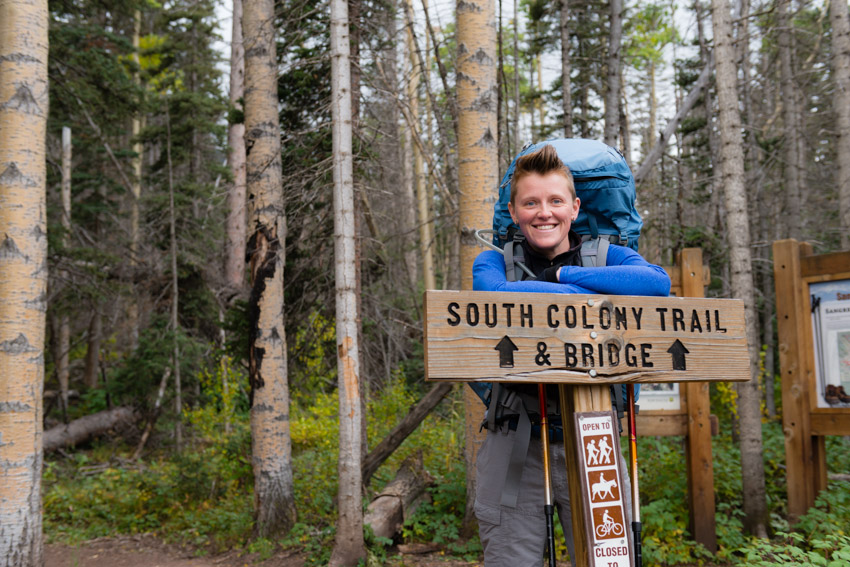
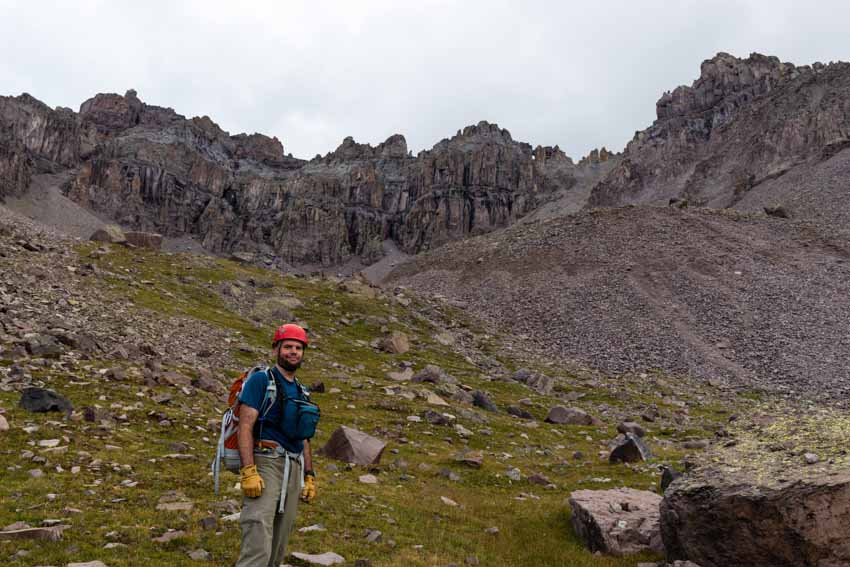
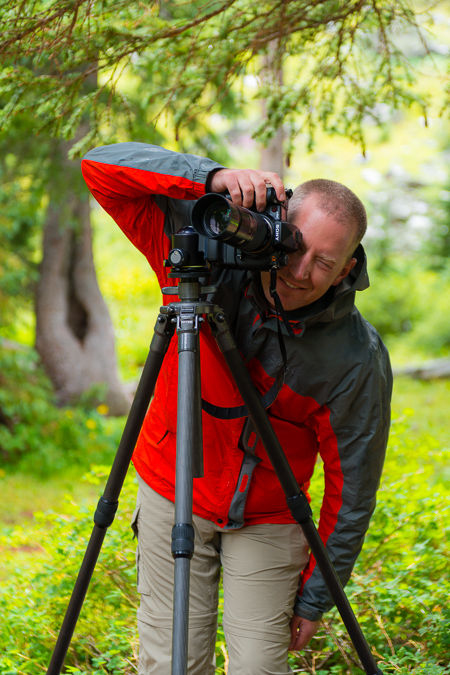
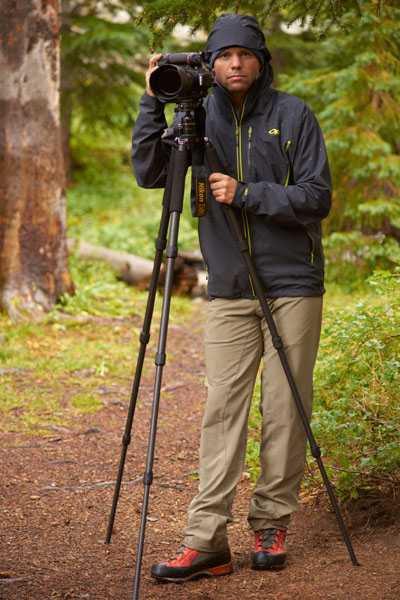
Packing for a longer backpacking trip involving a lot of photography gear with limited space in the backpack due to travel constraints was quite a challenge. I decided to use my Osprey Talon 44 (hardly a backpacking pack) and go as light as possible, opting to take two lenses paired with my Nikon D800: the Nikon 14-24 and the Nikon 24-70. I really wanted to bring my Nikon 70-200 for wildlife and other landscape uses; however, that lens weighs a ton and takes up quite a bit of space in the pack, so it had to stay behind for this one. I felt pretty good about the weight of my pack after it was all said and done – weighing in at just 40 lbs. - with a tripod, two lenses, a gripped D800, filters, a tent, pad, sleeping bag, gloves, hats, food, and stove. Not bad! Sarah would be bringing a water filter and a gas canister for the stove, so we were good to go! Bare-bones backpacking – always a little nerve-wracking, but easy on the back and knees!
The final challenge to solve before ensuring a successful trip was to secure transportation. My wife and I left a car in Colorado; however, she needed it for work as she telecommutes from Portland but when we are in Colorado she drives into work. In the 25th Hour we were able to get Sarah’s wife to let us use her Subaru Forester for the somewhat difficult South Colony Road, which I had driven successful many times in the past in similar vehicles. With all the details finalized, we departed from my parent’s house in Colorado Springs at around 10:30 AM on the morning of September 21st for the picturesque South Colony Basin. We arrived around 12:30 PM without incident. I left a small bag of raisins and a half-filled water bottle in the cup-holders below the dash, saving them as a prize upon our return on Tuesday. The parking lot was sparsely filled, mostly by what seemed to be trucks and SUVs of hunters or day-hikers, based on the people we passed on the trail on the way up.
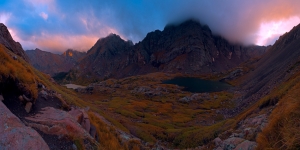
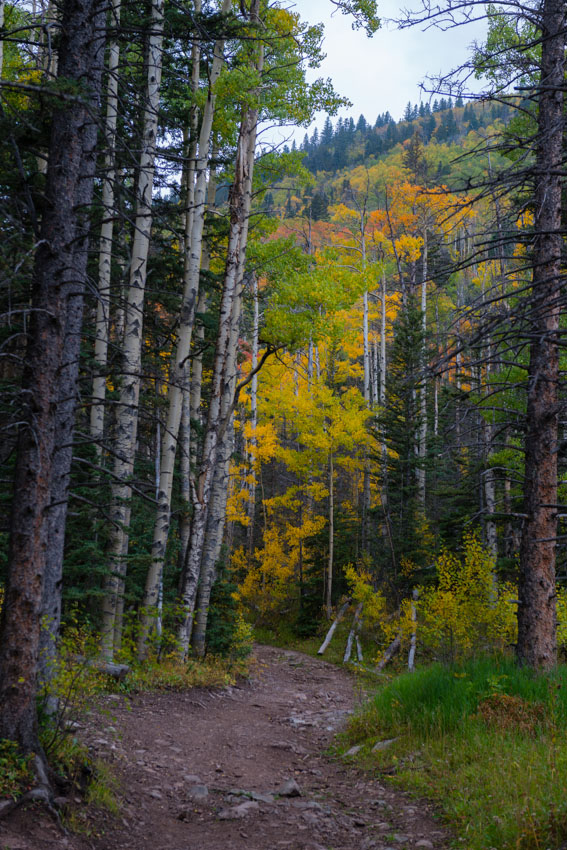
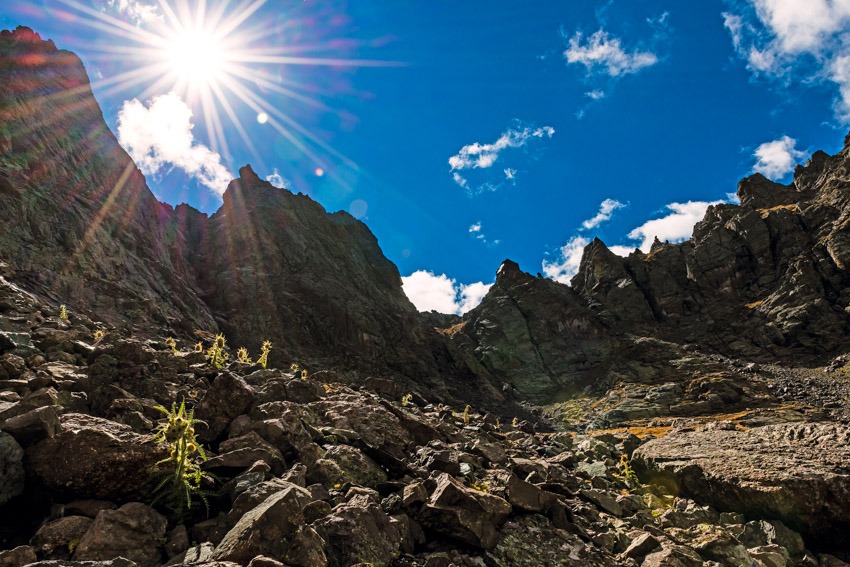
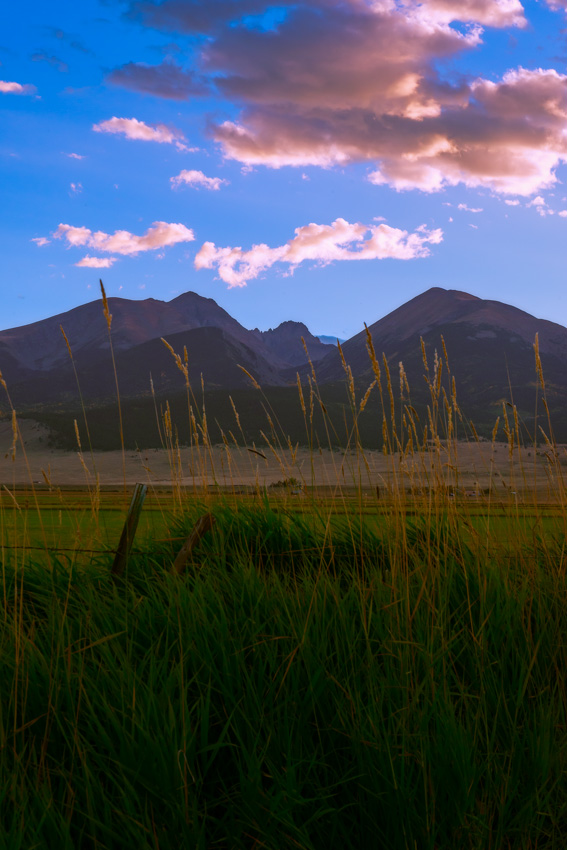
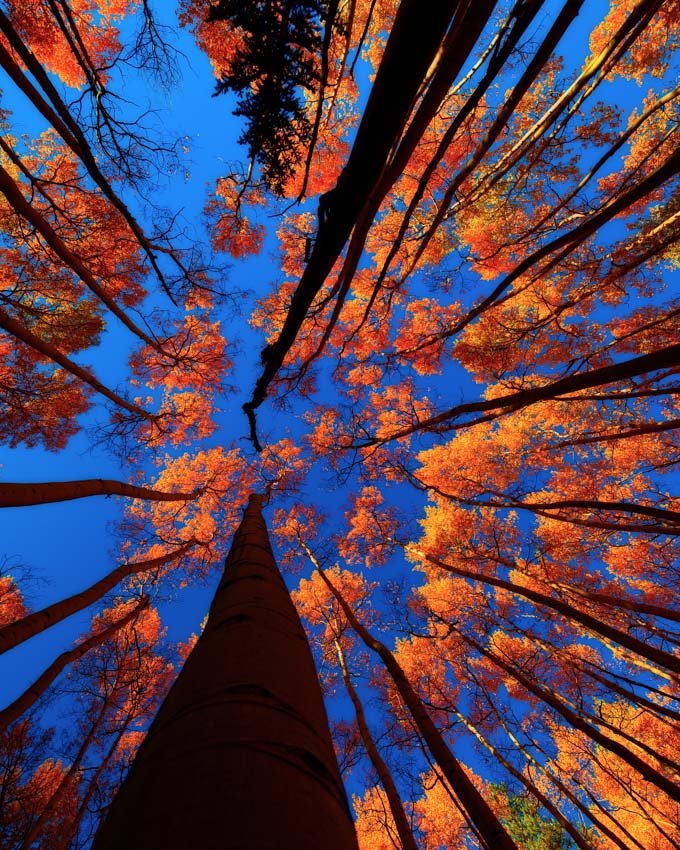
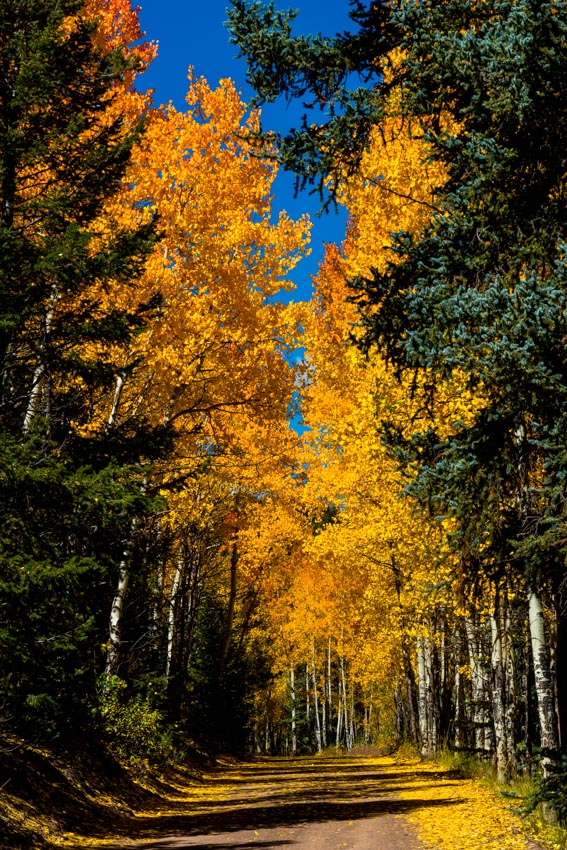
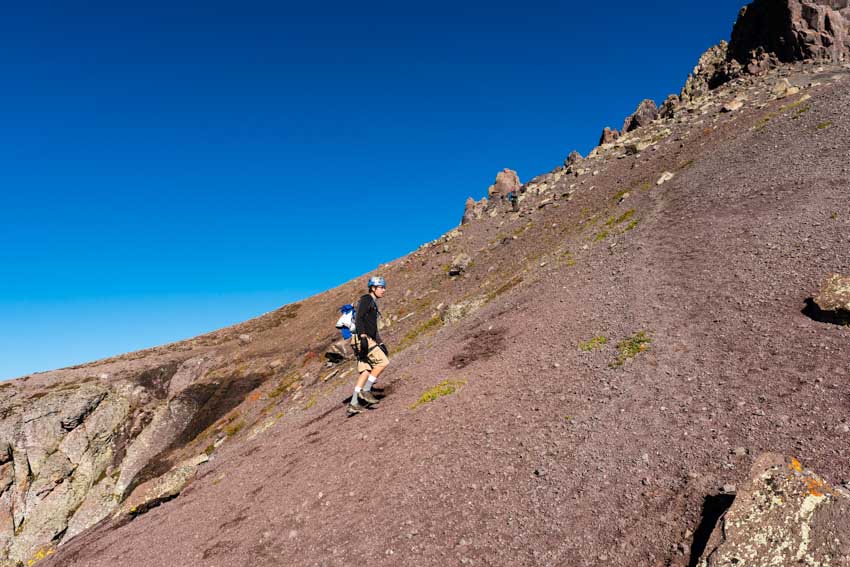
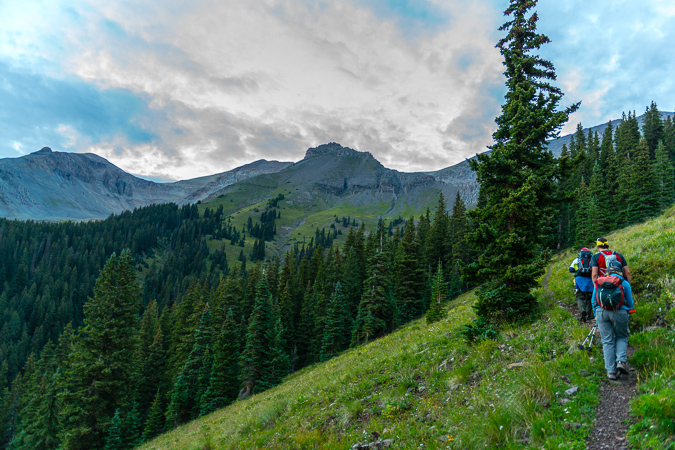
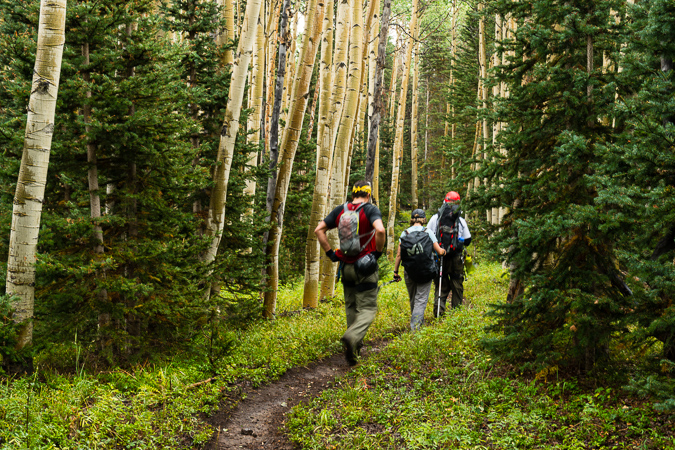
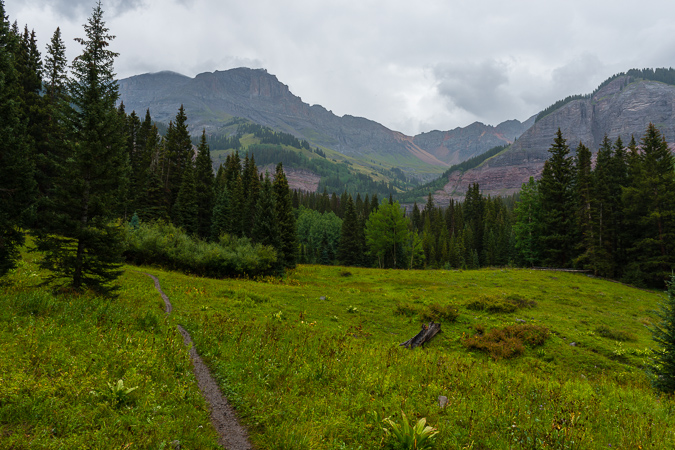
Upon starting our hike we were immediately struck by the amazing fall colors that had adorned the aspen trees and scrub oak lining the sides of the trail (which is really the remnants of an old 4WD road which was closed in 2009 at the current terminus of the South Colony Road).
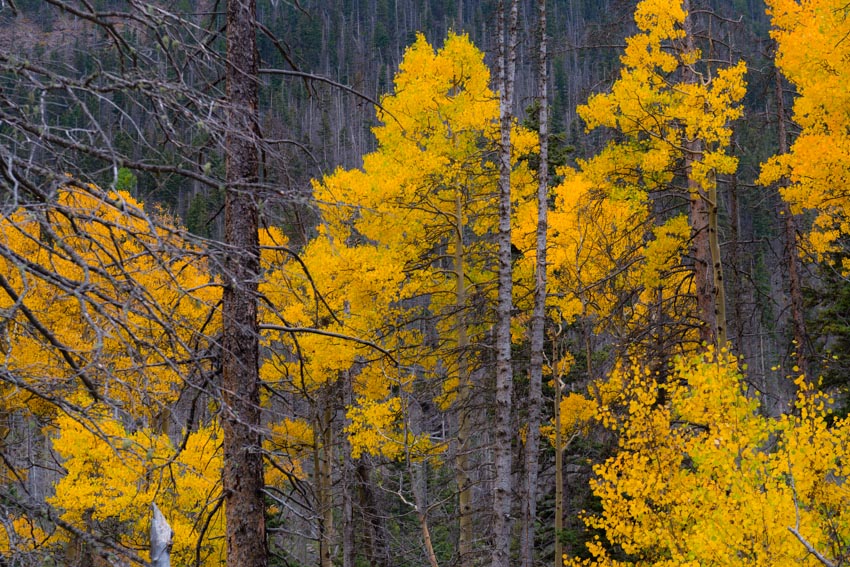
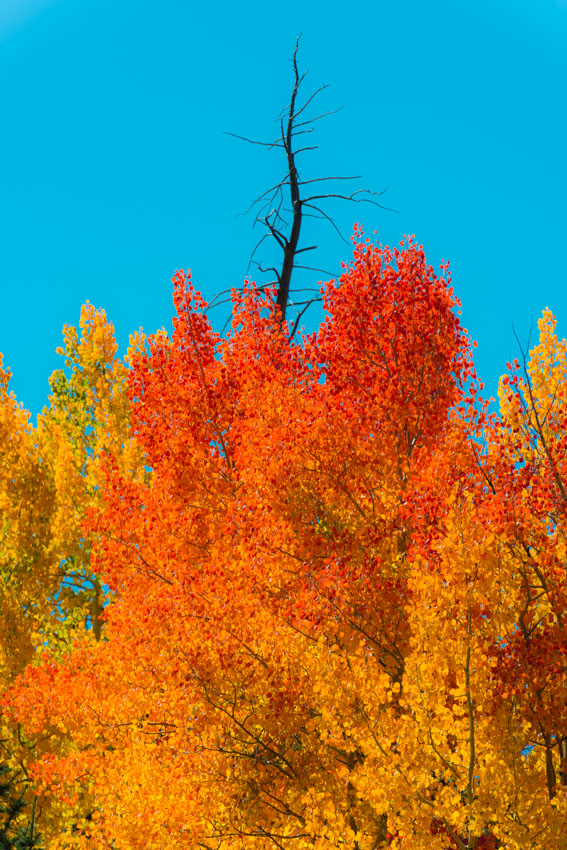
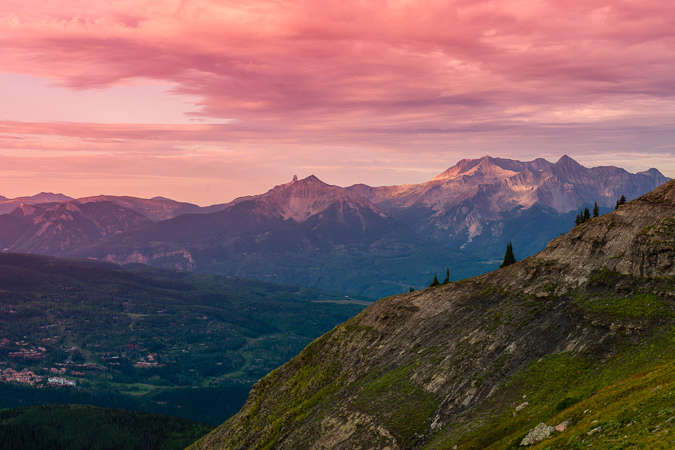
The trees were nearing peak color – hues of yellow, gold, crimson, and green filled the air, all held tight by a low layer of clouds which came all the way down to the valley floor. The formidable clouds were ubiquitous and ominous – a clear and mostly unwelcome portent for the events yet to come on our voyage into the Sangre de Cristo Wilderness.
This was the third time I ventured up this particular trail, the first being on my ascent of Humboldt Peak in 2007 with my friend Ethan – the first 14er I climbed after a very long hiatus from climbing in my twenties and the first real shift towards a healthier lifestyle. The second time was during my visit last year as the Vice President of the Board of Directors for Rocky Mountain Field Institute (RMFI), the non-profit organization responsible for amazing conservation stewardship in the South Colony Basin including the construction and maintenance of the entire incredibly well-built network of trails leading to the 14ers in the area. Due to the popularity of this pristine and ecologically sensitive area, there are numerous campsites and social trails littered across the basin which have required a lot of hours of hard labor from RMFI staff, volunteers and Earth Corps students to clean up and maintain these sites and trails. If this basin is important to you in any way, I would urge you to donate to RMFI to ensure the area is available for the enjoyment of future generations. You can check out the amazing work they did in the South Colony Basin in this video:
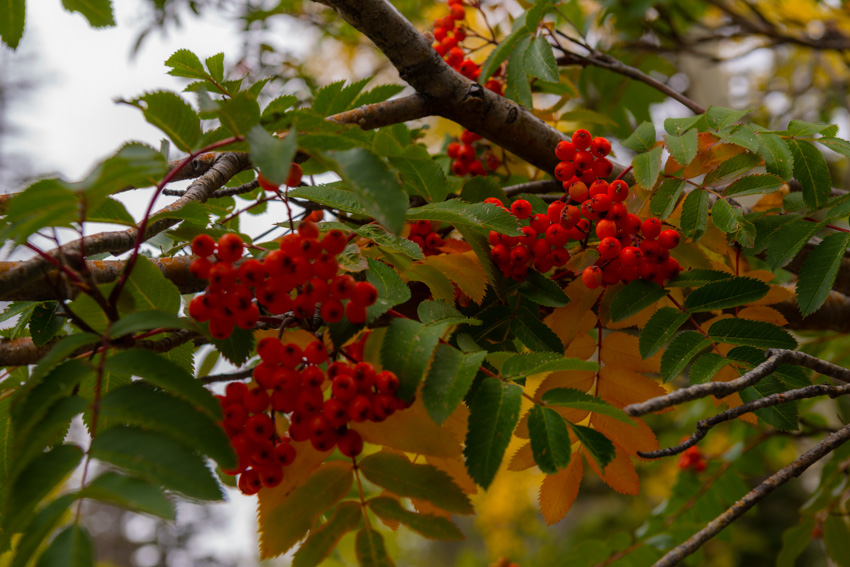
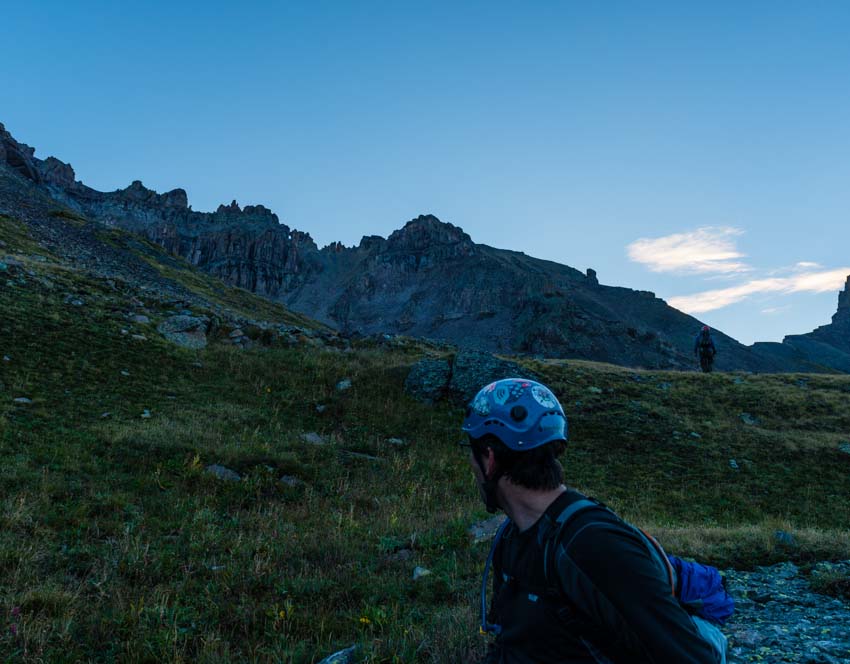
Our hike up the old road was completely uneventful, having passed a few hikers on their way out, presumably there to enjoy the changing fall colors for the day. The wooded basin offered up a plethora of sensory delights – red and orange berries, earthy scents from the rotting leaves, fresh and clean air blown in by the weather system that had settled into the basin, and a humid wetness on the skin. Given the wet and stormy weather that had moved into the basin, our hopes of accomplishing anything more than finding a suitable campsite for the three days we would be there had dissolved and our focus was singularly placed on locating our temporary home. We joked about just staying in the basin forever, and how that might work – living in a cave in the side of the mountain, finding food, sewing clothing out of marmot pelts, and even speculation about other issues which caused us to laugh heartily.
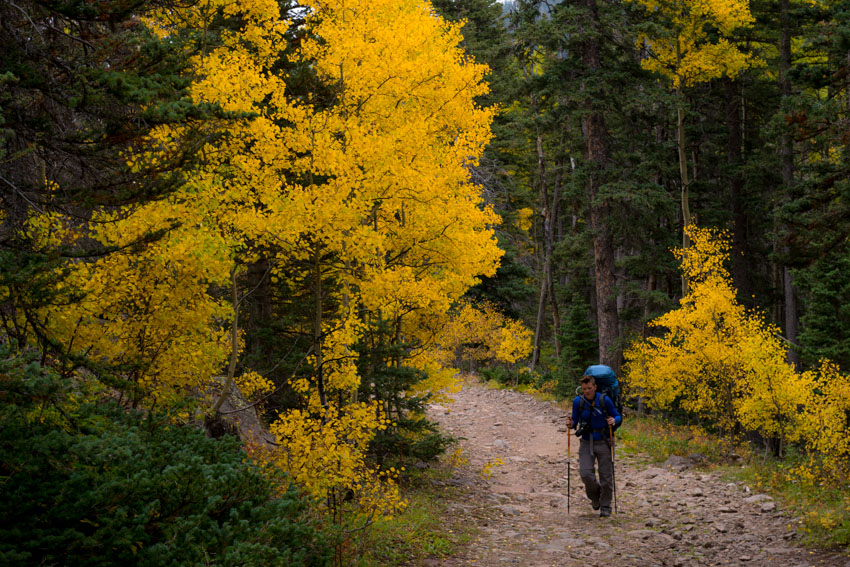
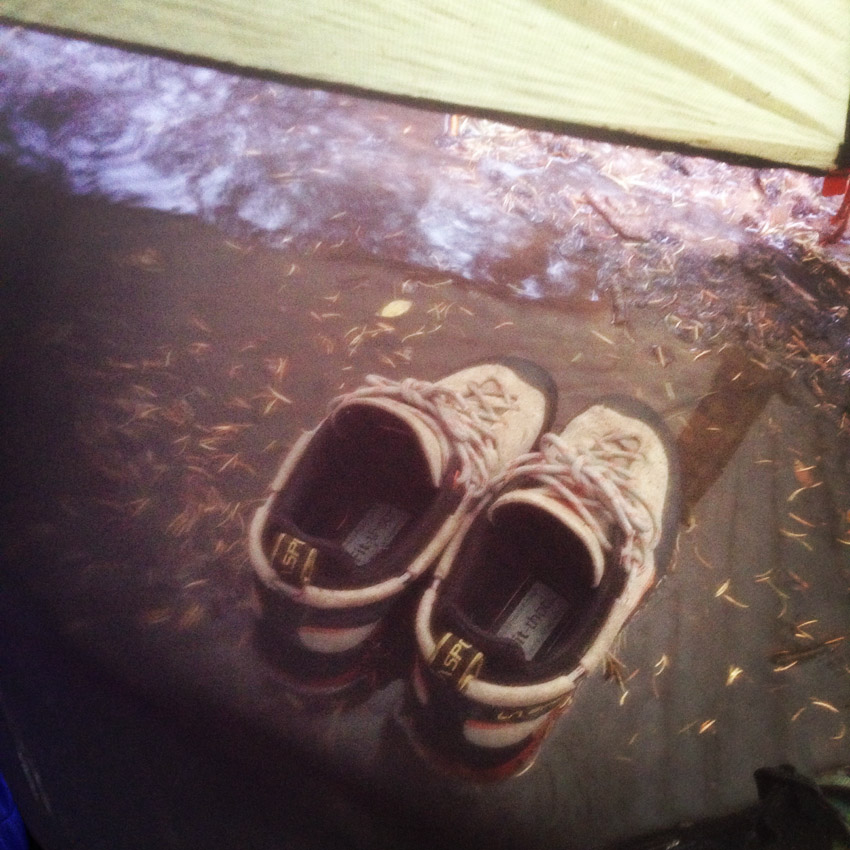
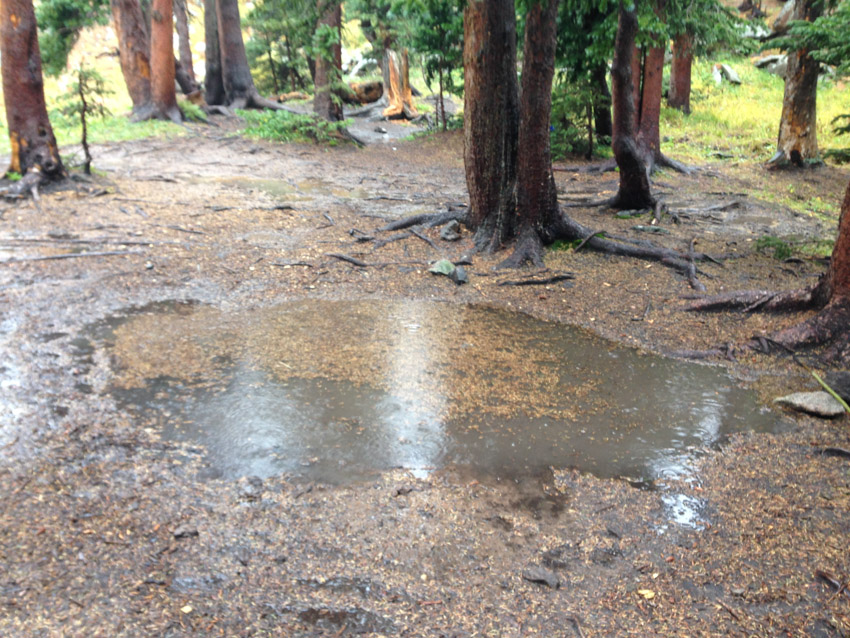
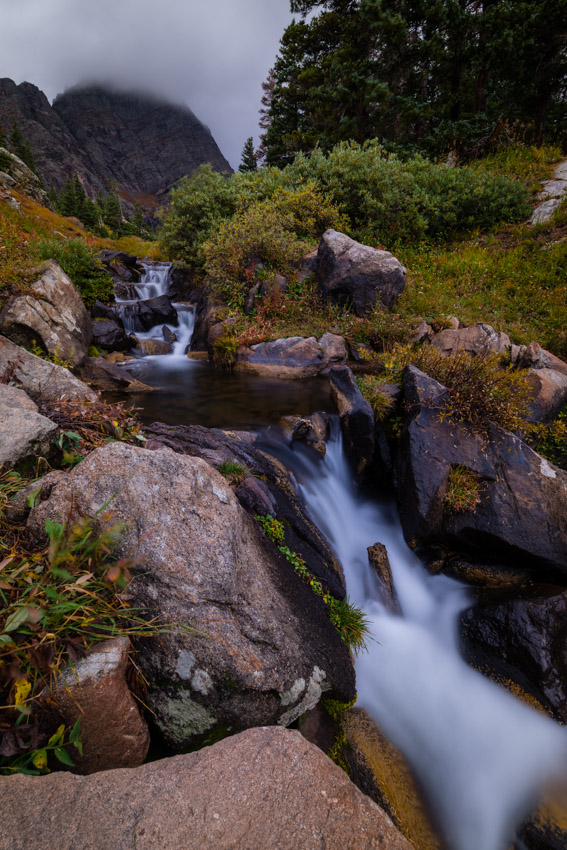
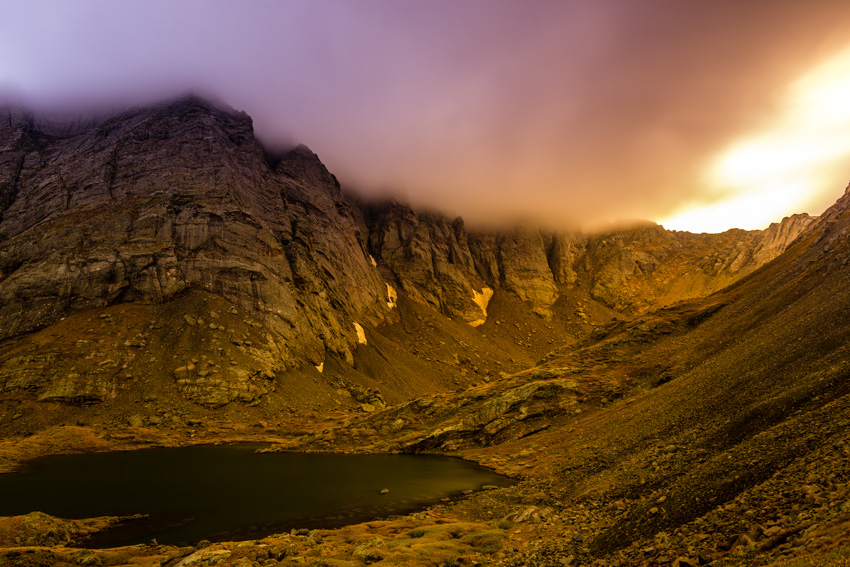
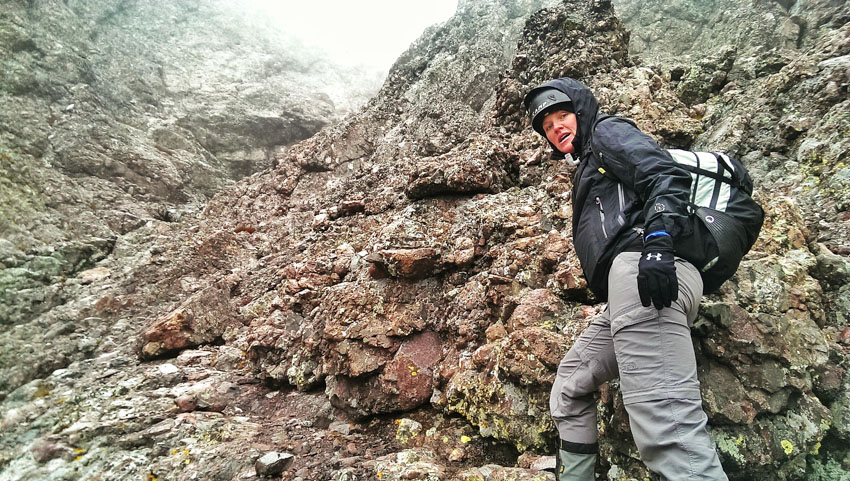
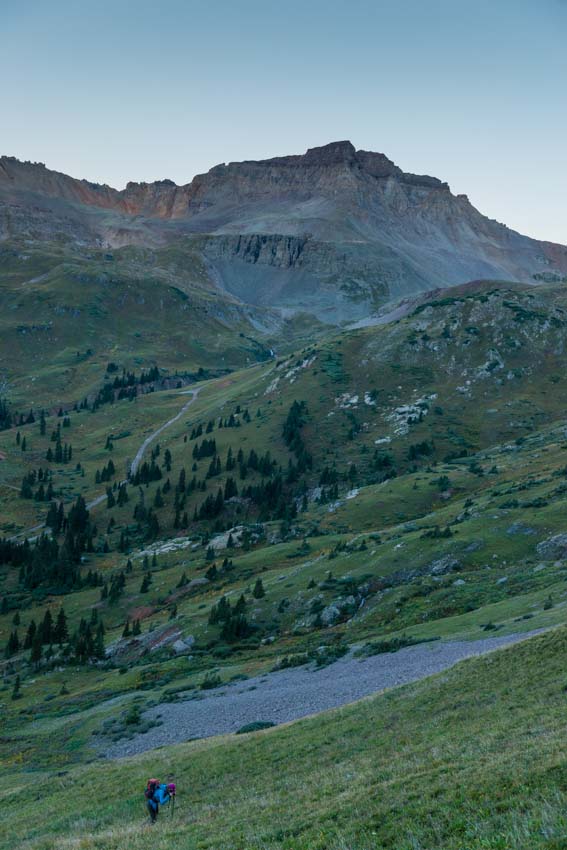
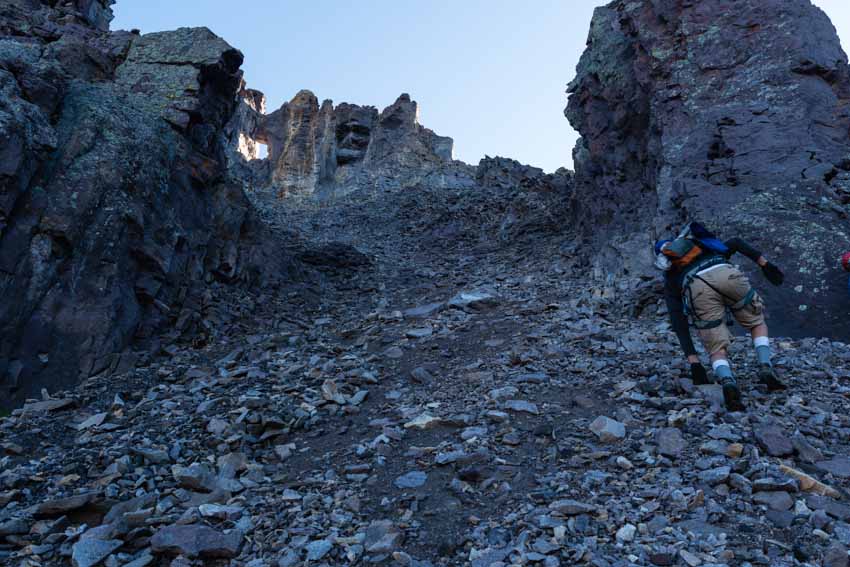
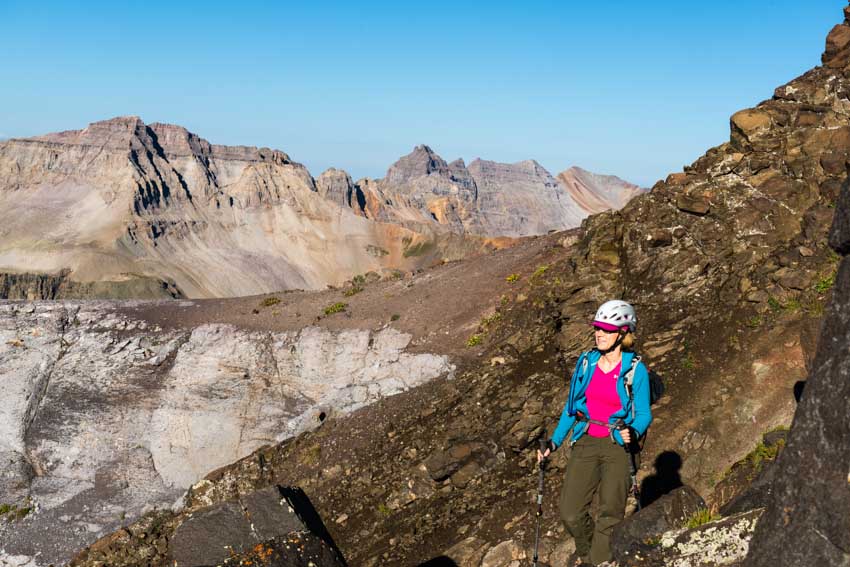
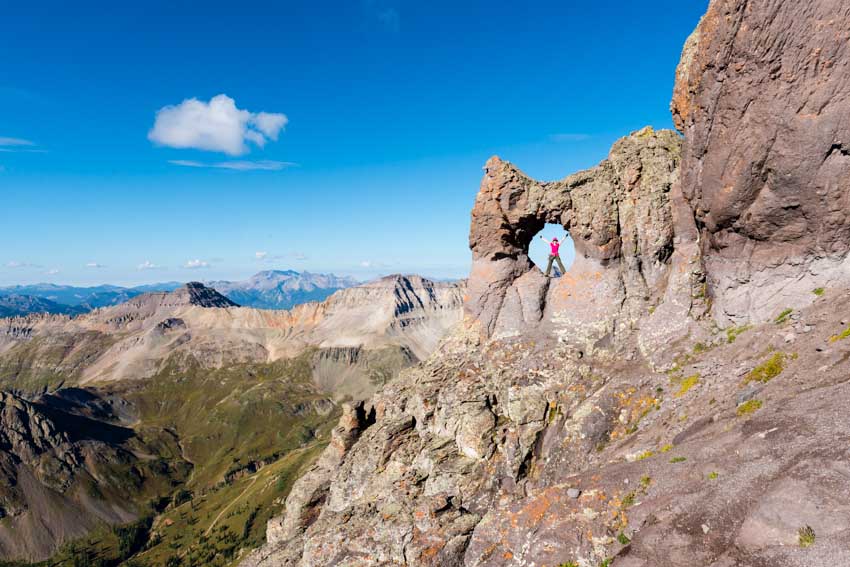
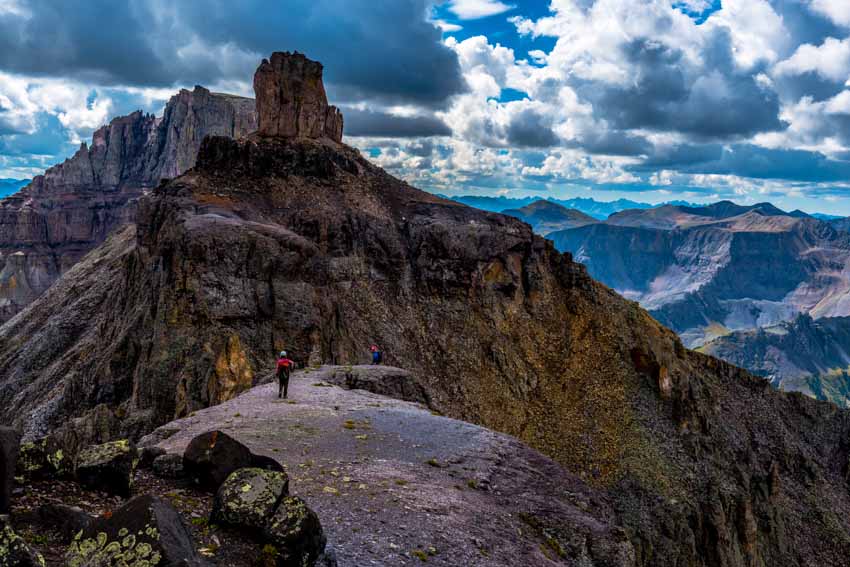
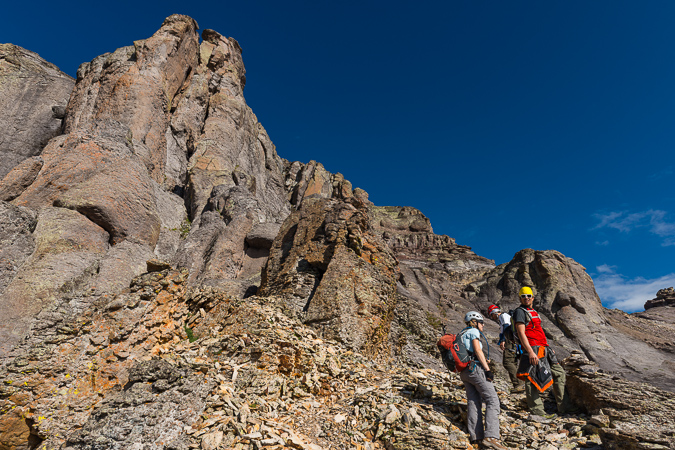
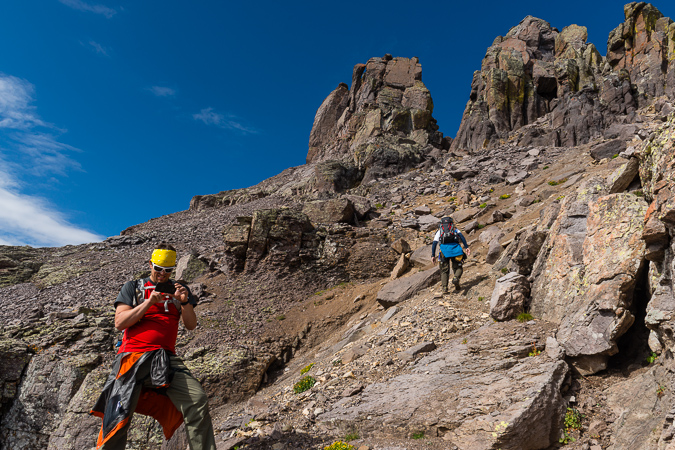
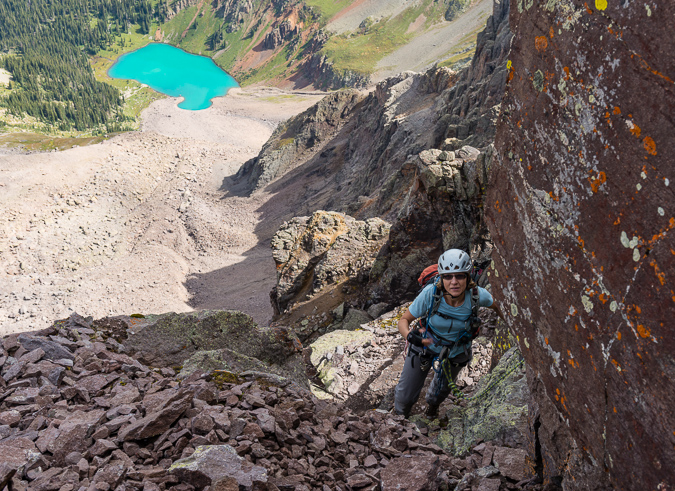
Every other time I had been into the basin I had taken the first trail on the right from the old upper 4WD parking lot, which is more direct and steeper than the trail going over the footbridge which goes directly to the trail leading up to Broken Hand Pass. For this trip, we opted to take the trail over the footbridge so we could easily find the connecting trail to Crestone Needle. Knowing from other adventures into the basin that the trails were connected higher up by way of a network of trails between campsites near where I took one of my favorite shots of Crestone Needle last year with a stream in the foreground, we decided to aim for that area to camp at. Even though Crestone Needle was completely hidden within the very low clouds, finding the location was easy since my image from that spot is burned into my memory, being one of my absolute favorite photographs of all time. We unpacked right there at the site just above the stream from this location and placed my tent on a dry and flat area near an old fire ring at the campsite. The tent site had cracks in the soil, indicating that this might be a place where water pooled; however, we understood from the weather forecast that we were to only expect about a quarter inch of rain over the next couple of days, so we felt safe to put our tent there. This turned out to be a horrible mistake!

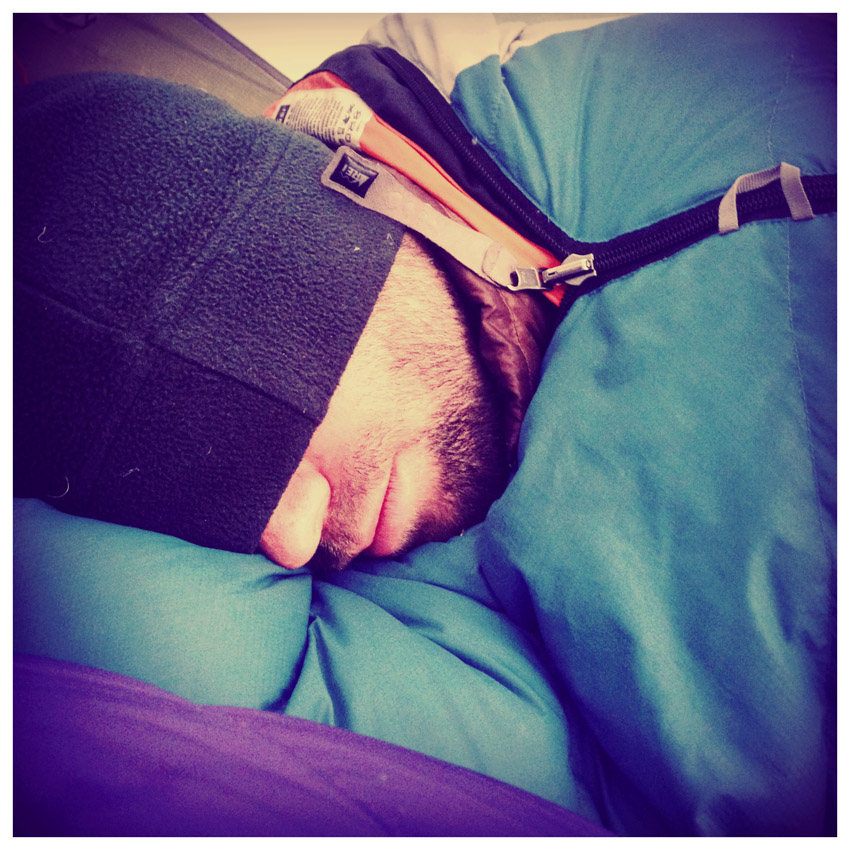
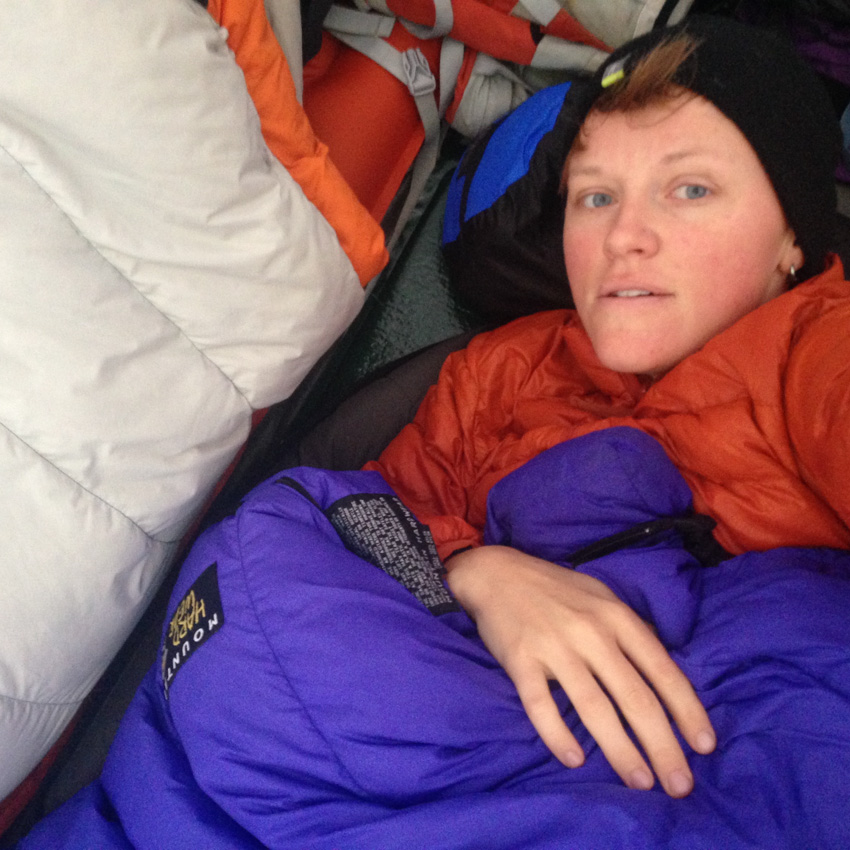
Shortly after getting our tent setup and our food hung in a nearby dead tree, the rain began. Hooray. I was somewhat dreading the rain, having spent the entirety of my previous backpacking trip in Colorado in a tent for four days below Jagged Mountain last September. I did not want a repeat of that trip, not even in the slightest; however, I welcomed the opportunity to catch-up on some much needed sleep and to spend time catching up with Sarah. Sarah took many opportunities to document our sleep adventure...
 |
 |
The rain and strong wind was unrelenting, a shock for sure. We kept an eye on our tent situation, finding that water had quickly begun to pool near and around the base of the rainfly. We napped off and on as the rain continued and in the early evening we began to take notice of the water situation with a greater level of concern. Sarah noticed that water had begun to seriously pool under the tent and we decided to take action, despite the fact that the rain did not subside.
 |
 |
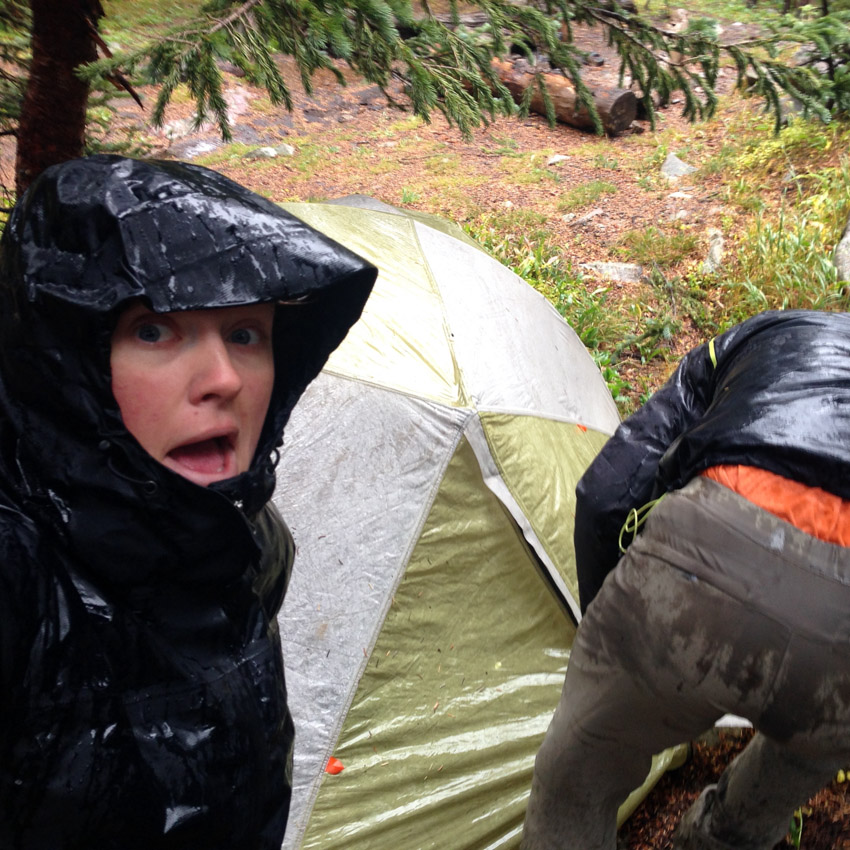
We hurriedly packed everything into our packs and relocated the tent down the hill under some trees on top of a nice soft bed of pine needles. Sarah documented the whole ordeal.
 |
 |
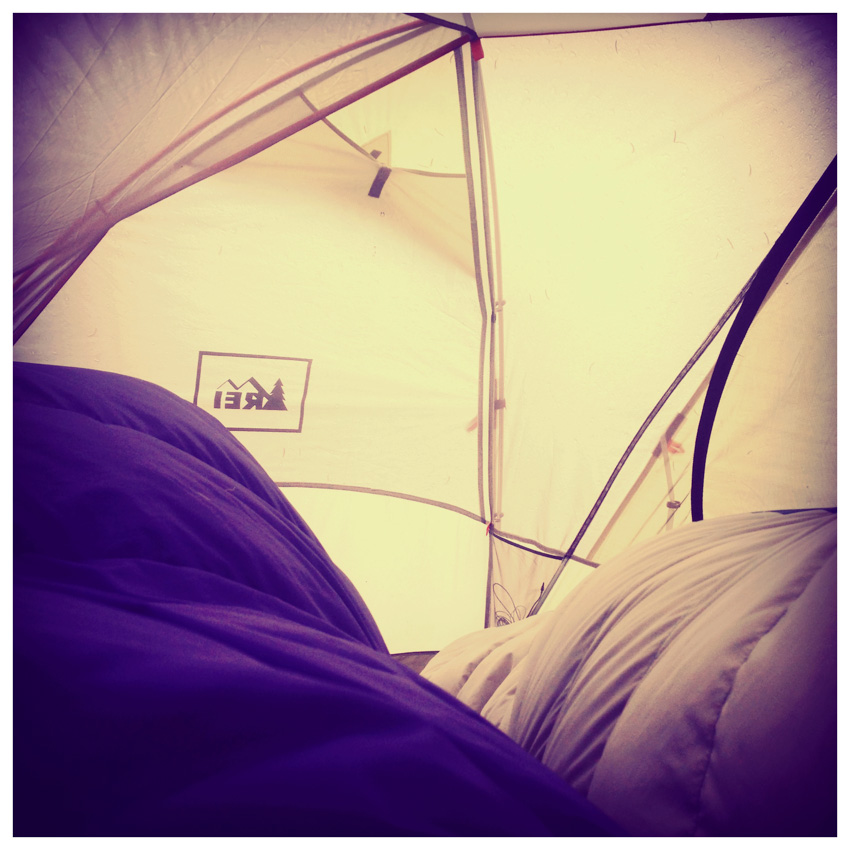
We felt quite lucky – even though the tent was on top of a lake of water; the inside had remained mostly dry! Consider this a tried and true endorsement for the REI Quarterdome – a truly versatile backpacking tent, not the lightest nor the heaviest tent around; however, it kept us dry and withstood strong wind without any problems. Our old tent's location now looked like this:
The rain stopped just long enough for us to heat up some food, which we took full advantage of, returning to our sleeping bags to stay warm. The valley was caught in some sort of weather system, trapping moisture, clouds, fog and wind in the basin and continually obscuring all of the peak right above us.
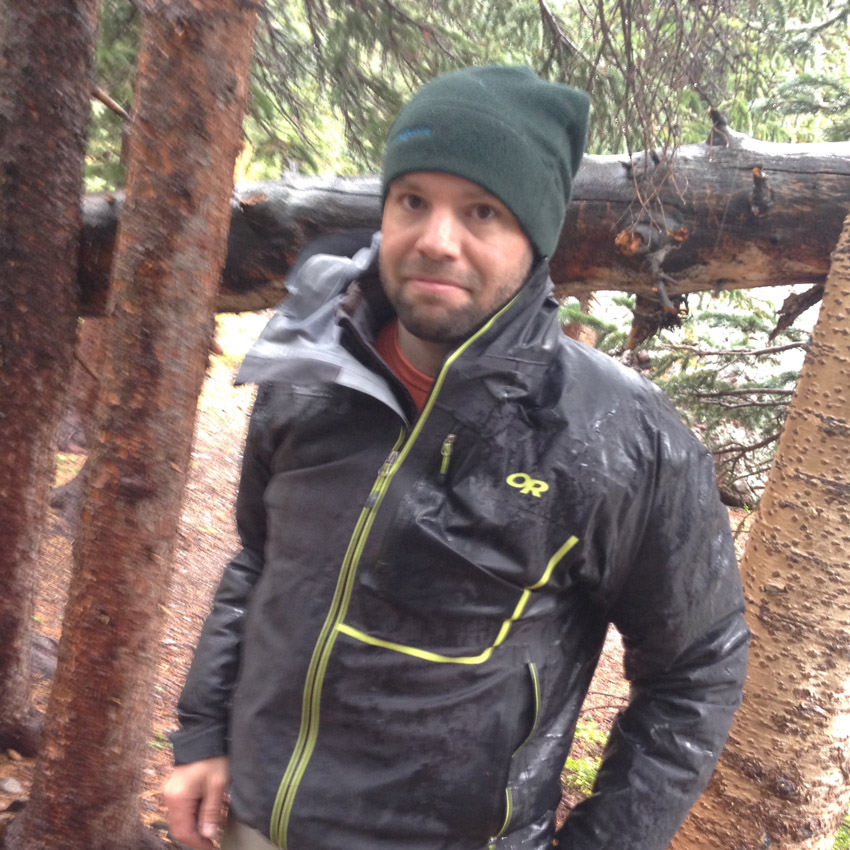
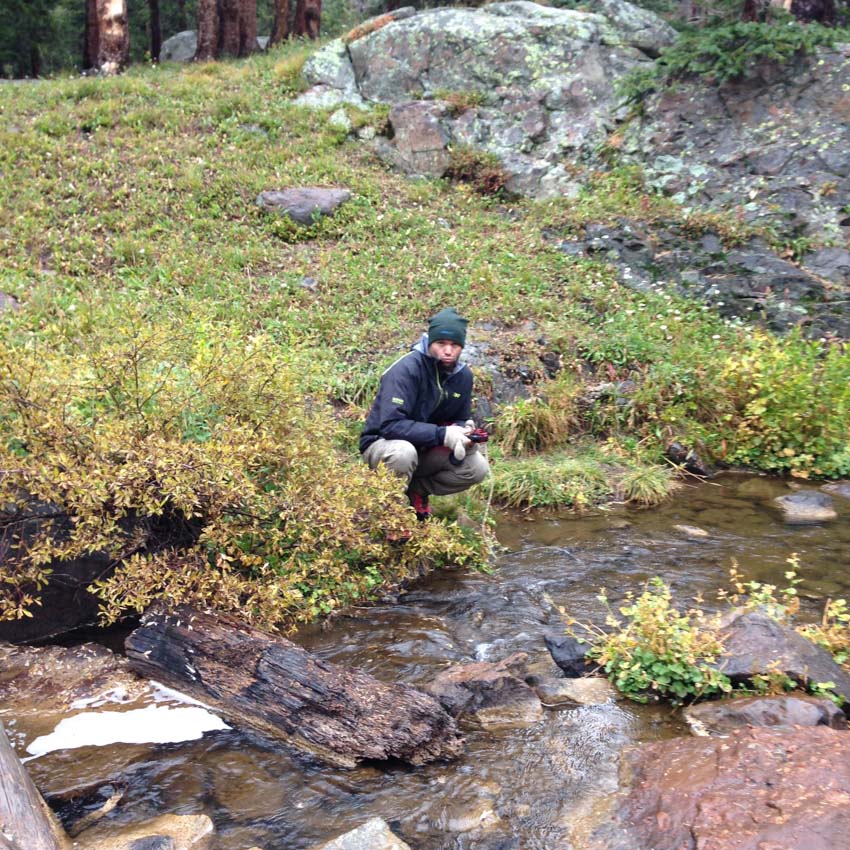
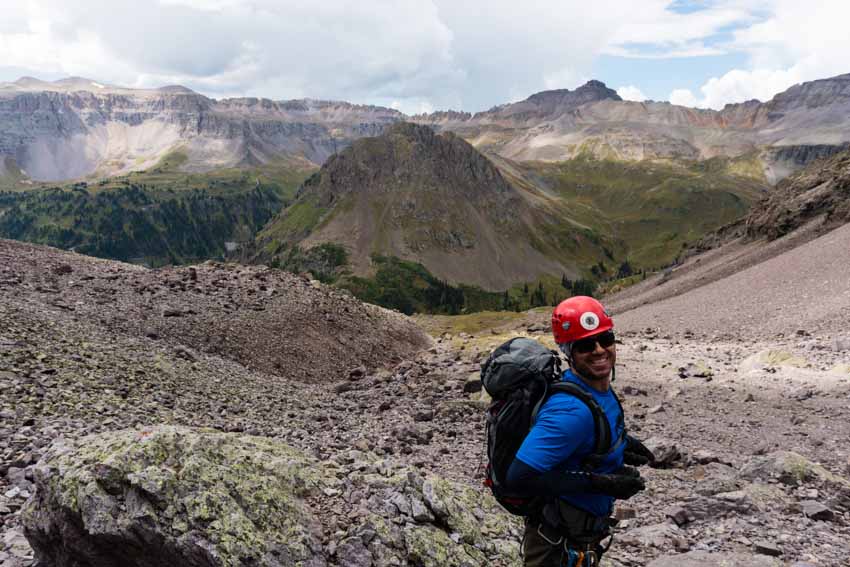
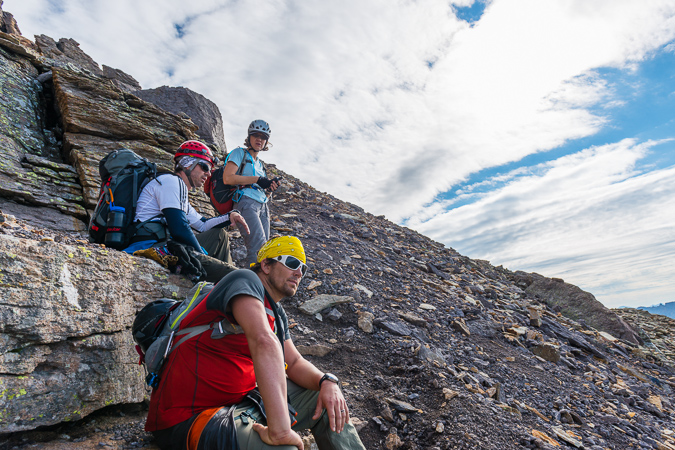
As darkness descended, we found ourselves in need of replenishing our water supply; however, Sarah’s water filter was not working, so we were forced to resort to using my old iodine tablets, which I keep in my first aid kit for such occasions. Drinking the iodine treated water brought back fond memories of working at Colvig Silver Camps in 2000 near Durango – I did not mind one bit. Here I am filtering some water in the rain.
We decided to set our alarm for 4 AM, hoping the rain would subside and allow for an ascent of one of the three 14ers in the basin. As we discussed our priorities for the trip, having climbed all of the 14ers already, I had very little to add, only hoping that Crestone Needle would be on the top of our list since it was my favorite 14er to climb. Sarah needed all three of the 14ers; however, she thought that she could save Humboldt for another trip and that Crestone Needle was high on her list. With that being said, we figured that aiming to climb Crestone Needle first would be a good idea... [Click Next to continue reading]
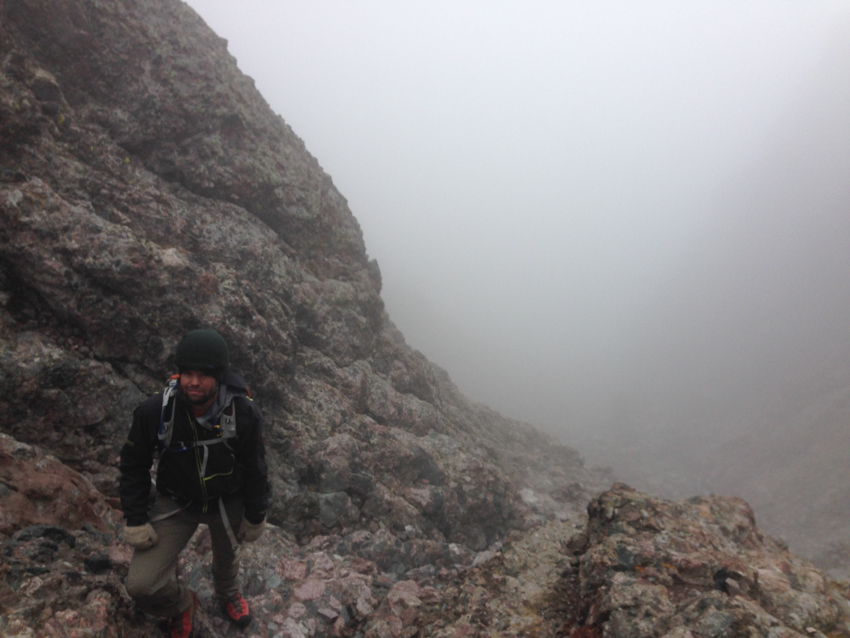
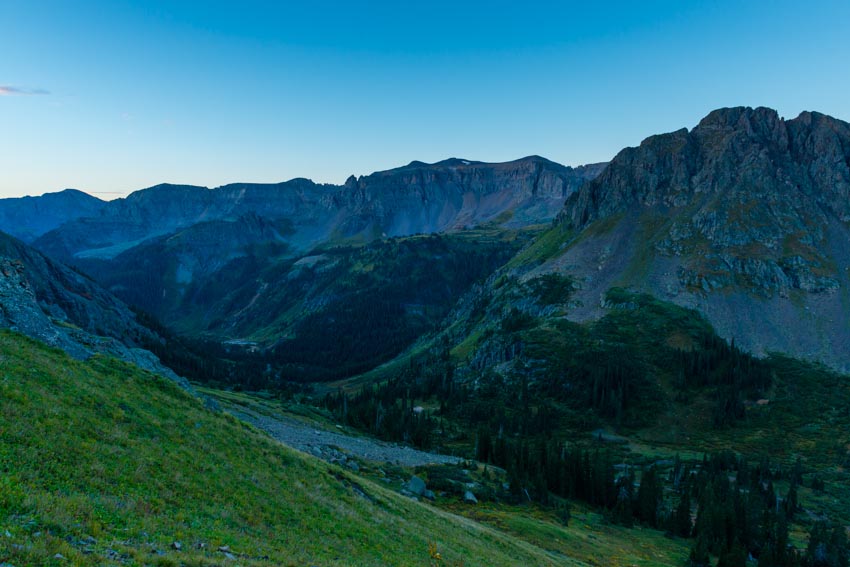
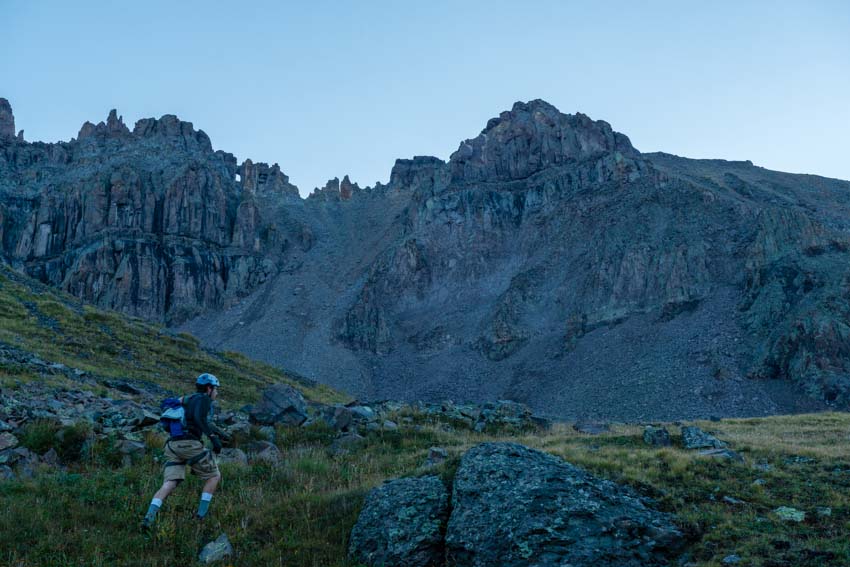
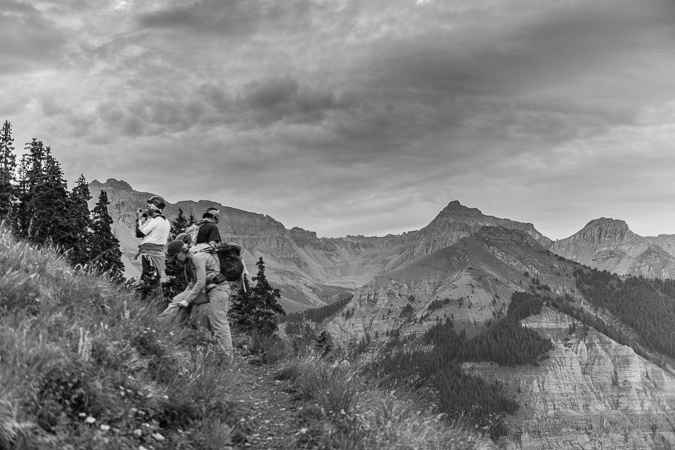
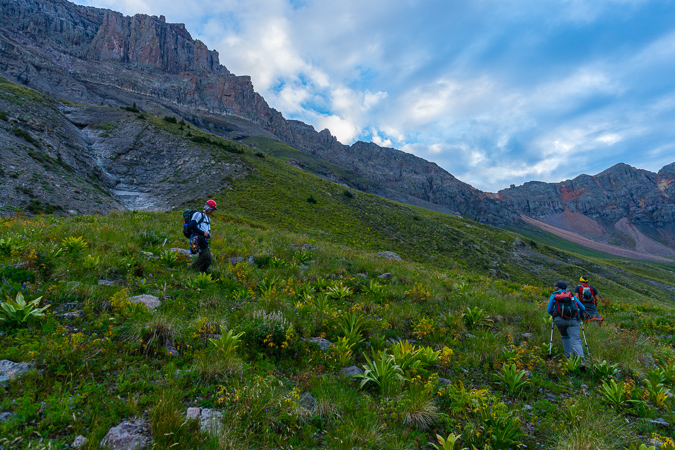
The rain did not subside and the wind increased in its fury through the night, rushing down through the trees in a cyclical pattern every 30-45 seconds in a violent yet harmonic nature, the sounds of the wind rushing through the pine needles creating a natural cacophony both aiding and preventing good sleep. 4 AM came and went without a break in the rain or wind, forcing us to sleep in, knowing we would likely have to scratch off at least one of the peaks from our list for the trip. Unfortunately, the weather did not subside until late in the afternoon, at which point we were both wearing from a lack of both caloric intake and physical activity; however, we decided to head up towards the upper basin and if we felt up for it, a climb of Humboldt. The basin was still mostly shrouded in clouds and fog; however, the hike up was quite pleasant, the cold and musky autumn air brushing our exposed faces, reminding us pleasantly of our sense of place and time.

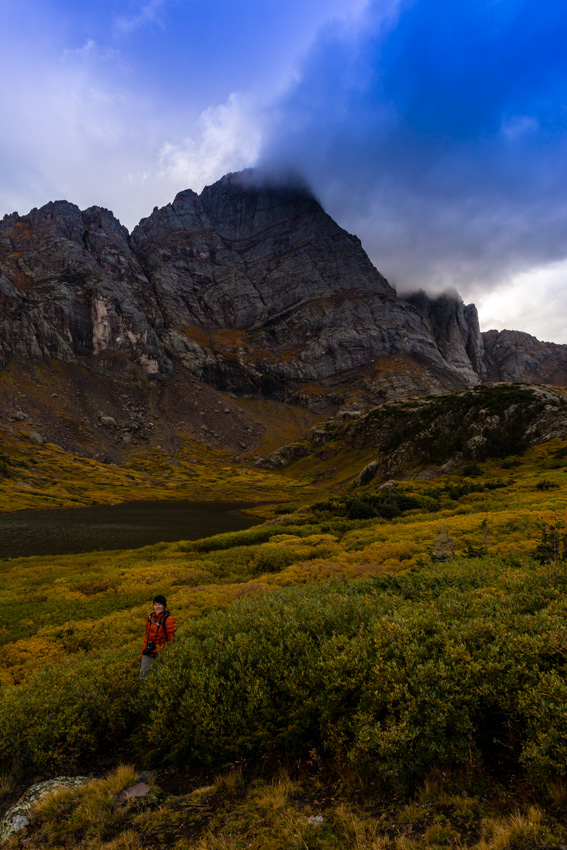
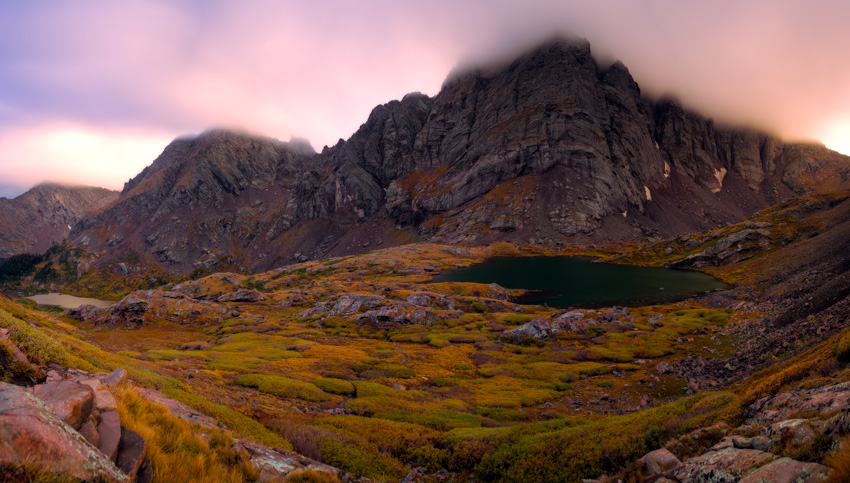
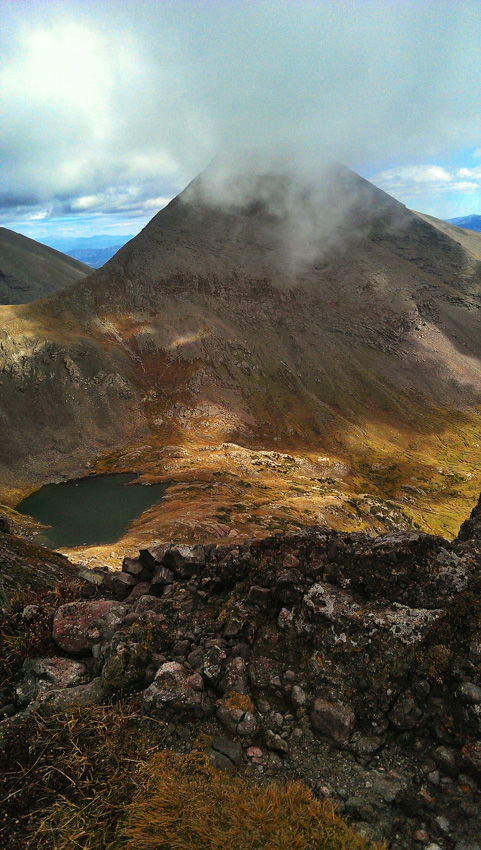
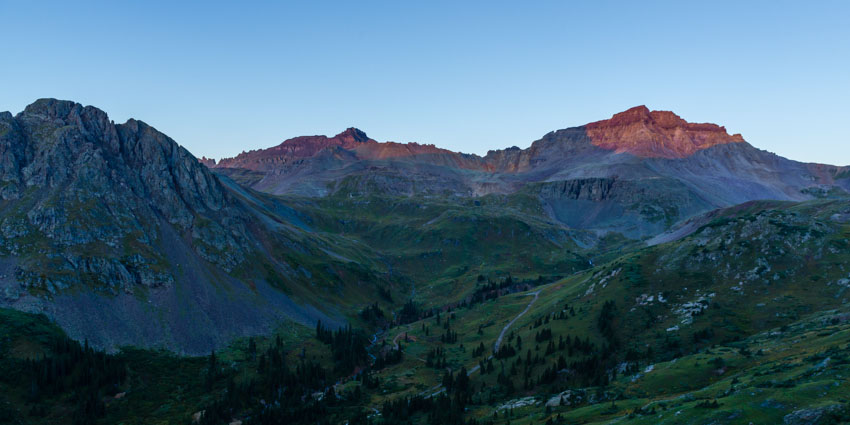
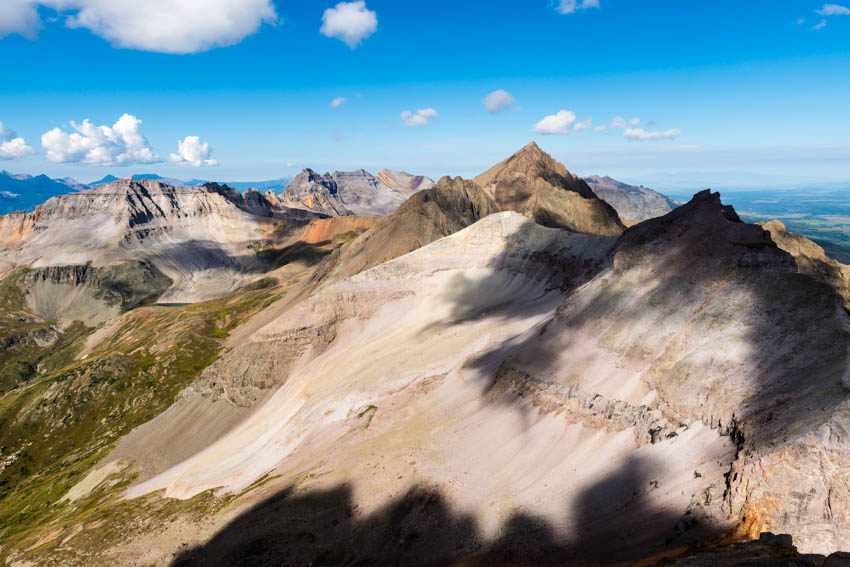
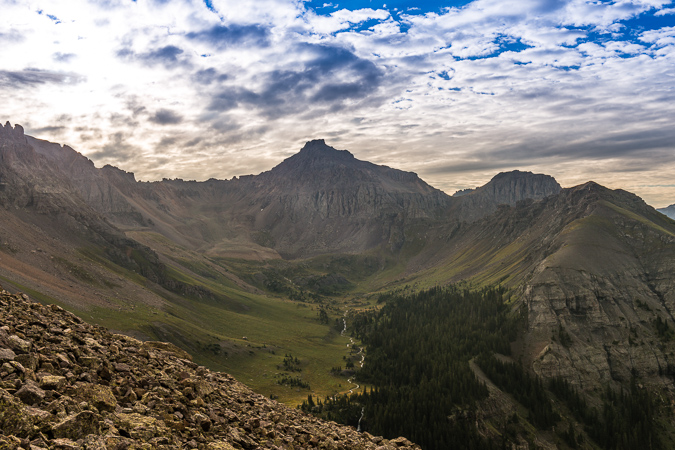
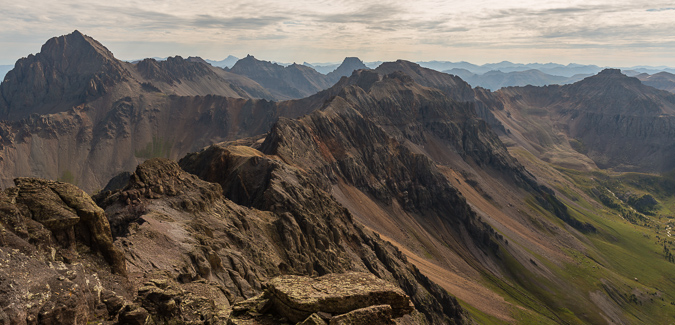
As we climbed further up into the basin, it became immediately clear to me that the conditions were not ideal for summiting Humboldt; however, the mixture of clouds, fog, and light would make for some pretty dynamic photographs from the lower slopes of Humboldt, looking down at both South Colony Lakes an out across to Milwaukee Peak, Broken Hand Peak and Crestone Needle, the upper third of which was still enshrouded in fog.
I found a perch on the side of Humboldt and waited patiently for the light to further develop across the basin from us, watching small holes develop in the clouds, revealing bits and pieces of the mountains and higher clouds painted with soft evening light.
I was completely engrossed in what was unfolding before us and was ecstatic to be there to photograph it.
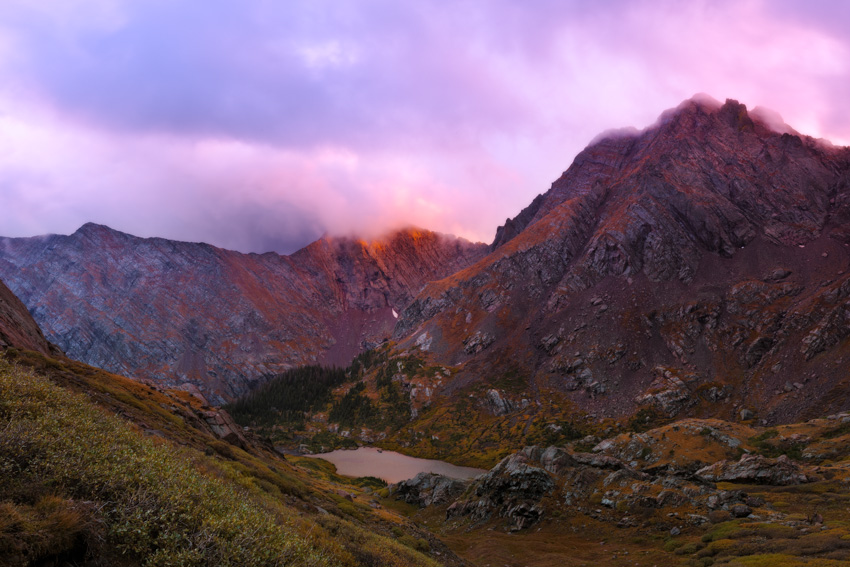
The light in the basin was pretty great, and I was quite pleased with the images I was able to take while huddling over my tripod in the cold wind.

The golden hour peaked quickly and left me with one final opportunity to shoot the light over on Milwaukee Peak and Broken Hand Peak.
After capturing the magic, we headed back down to our campsite where we were greeted with a ton of strong wind and more rain. We set our alarms for O-dark-30 and hit the sack, hoping for better weather on Tuesday... [Click Next to continue reading]
Monday night and Tuesday morning will filled with lots of strong wind, which came in predictable waves down the valley and through the pine needles above. Sleep was a hit-or-miss proposition. The alarm went off. More wind. I stepped outside the tent, no sky or mountains were visible and it was cold as hell. We decided to go back to sleep for a bit.
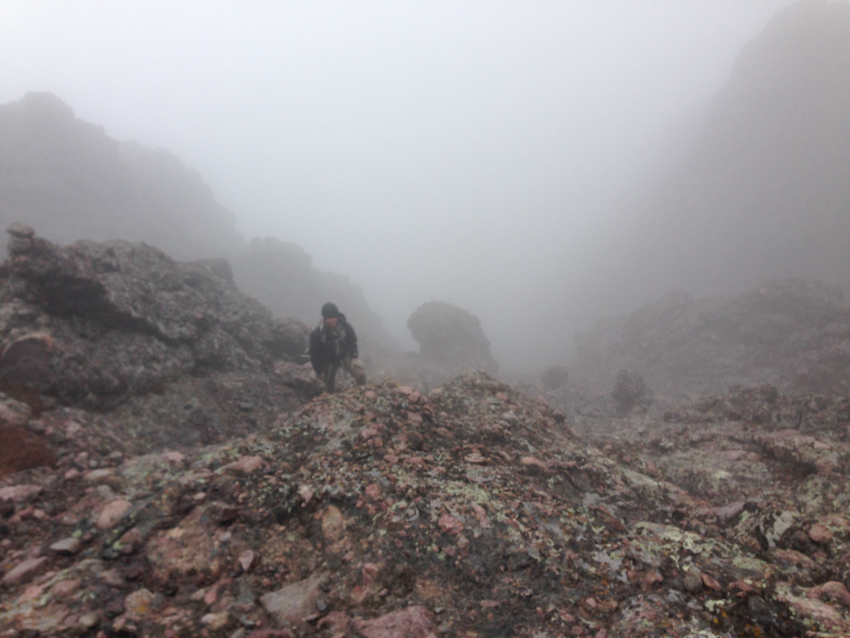
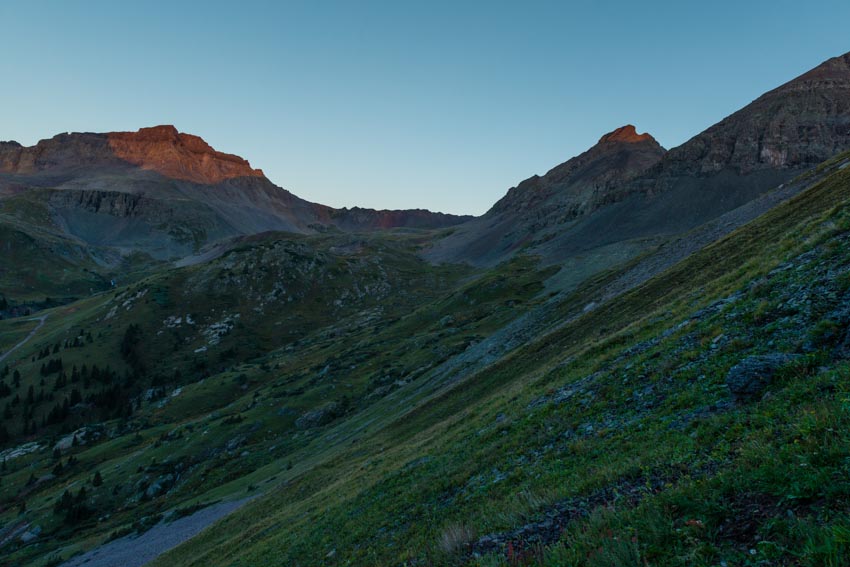
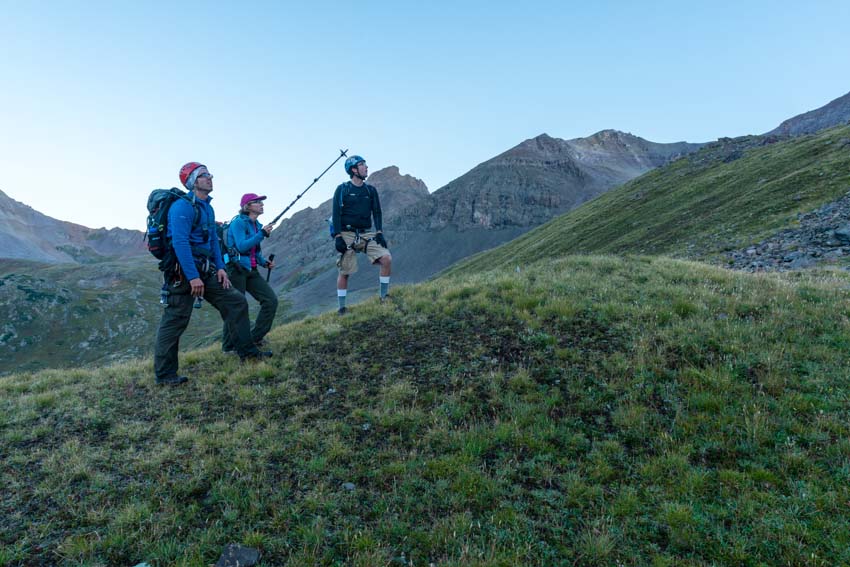
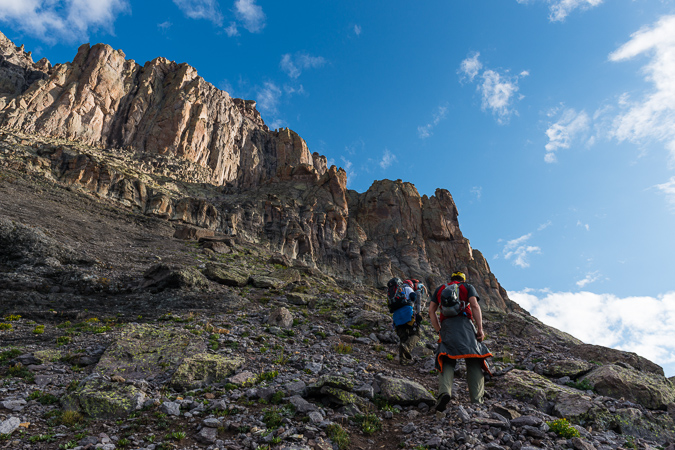
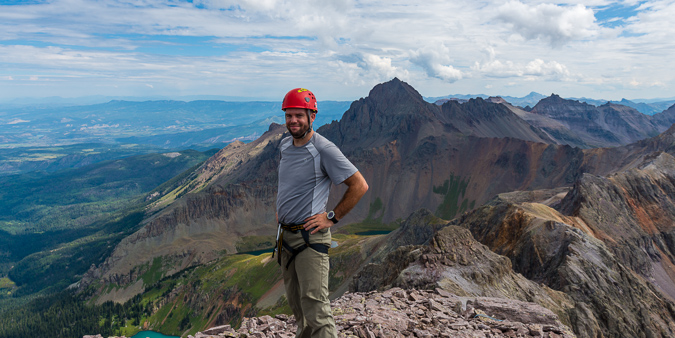
Finally, around 8 AM we got geared up and made a run for Crestone Needle. This was a very late start by our standards; however, we felt as though the weather could not get much worse, so why not give it a try. The plan was to head for the top of Broken Hand Pass and re-assess the weather from there.

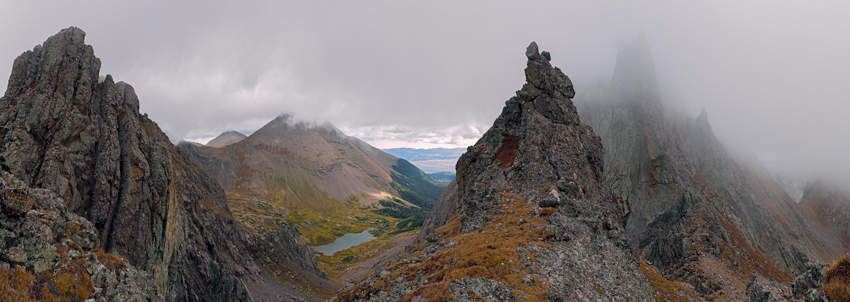
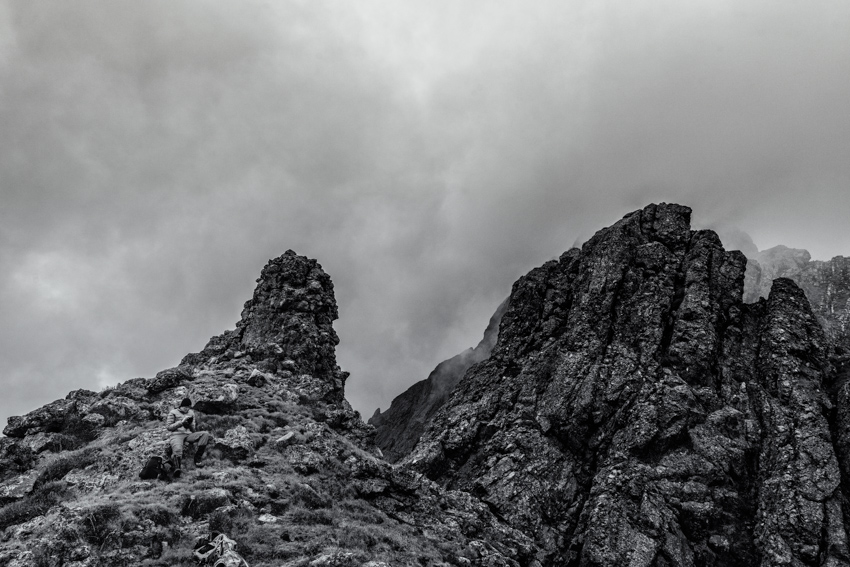
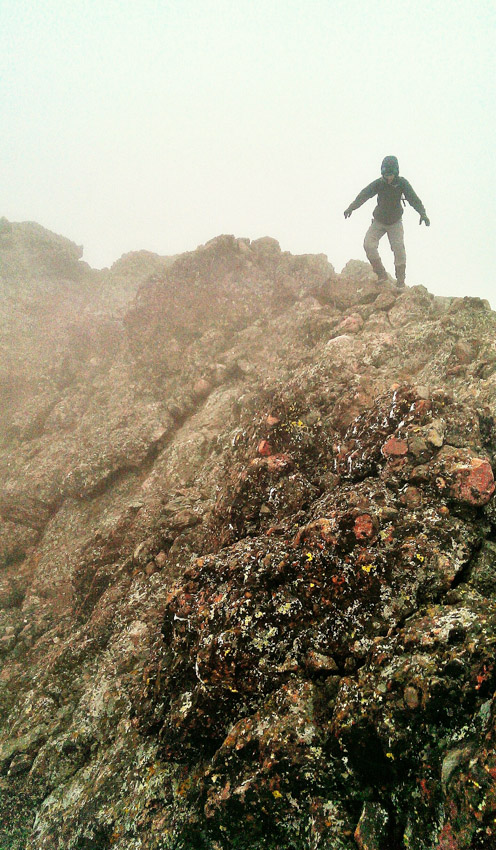
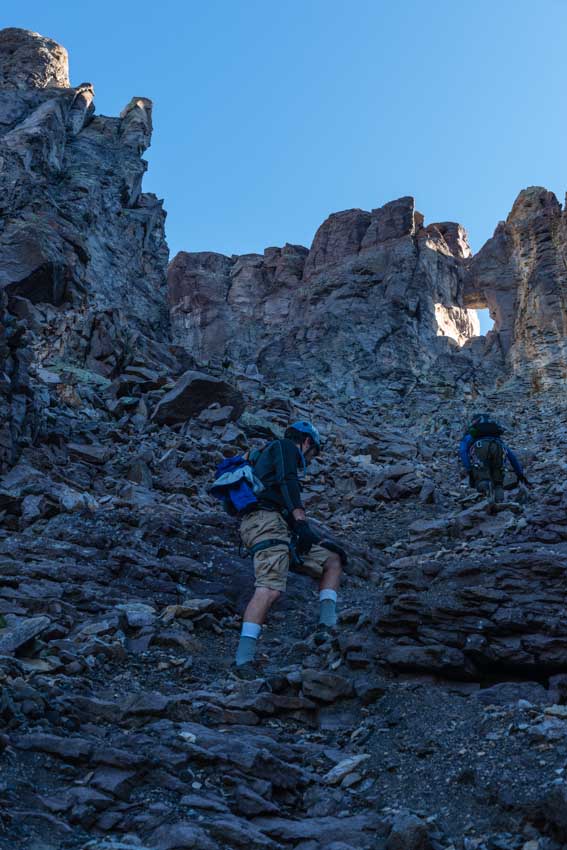
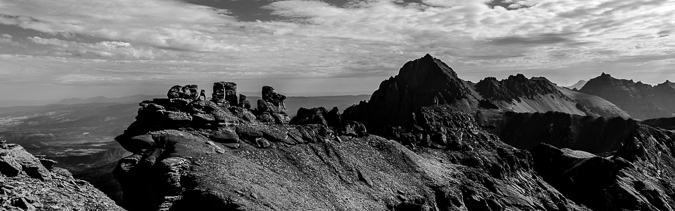
We made great time up Broken Hand Pass, stopping for nothing. Once on top, the weather was amazingly surreal as well as a little discouraging. Fast moving clouds, driven by the strong wind, were rushing from down below on the eastern side of the ridge and up and over us and Crestone Needle. It was quite a sight!
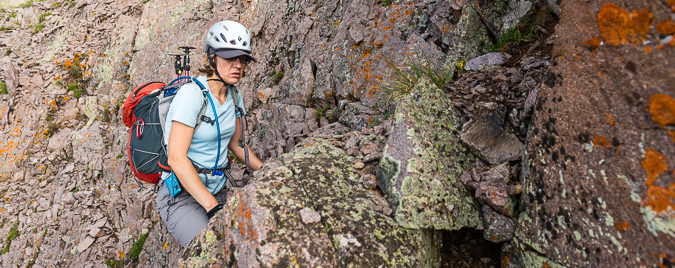
The air was thick with moisture, but at no point were we concerned about precipitation. It was chilly, but nothing terribly unbearable. We decided to press-on. Having climbed Crestone Needle once before, I was well equipped mentally for what was to come. I was confident we could find out way up and back down without incident. We had both studied the route again and had very few doubts that we could not reach the top safely.
Crestone Needle was not visible through the thick, fast moving clouds, but it did not deter us. If anything, the insane weather made the experience even more epic.
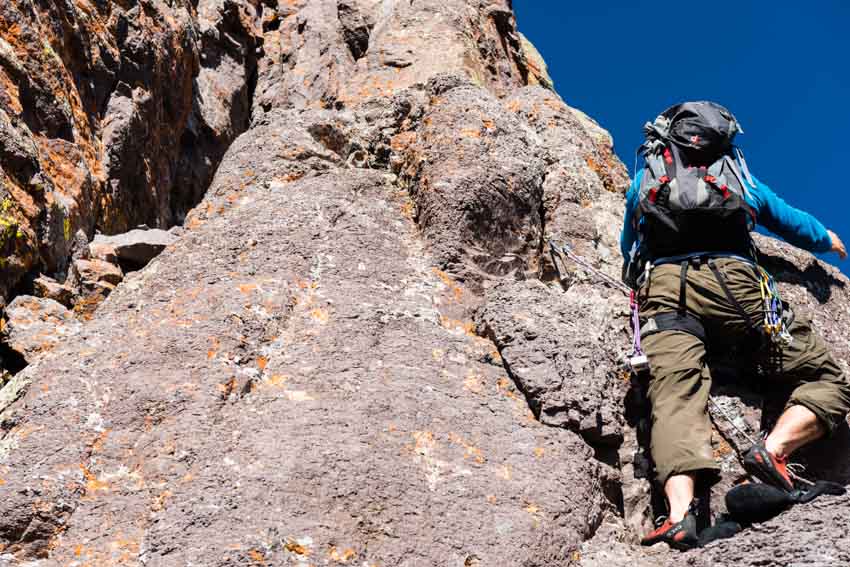
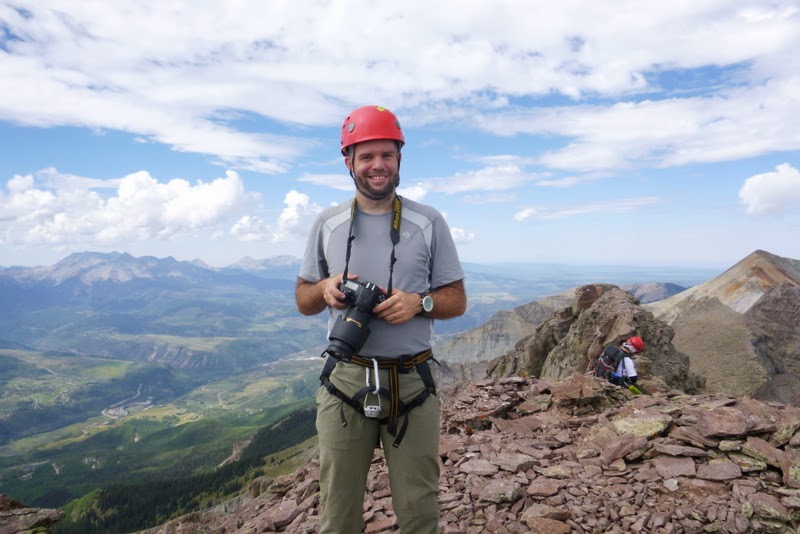
The garden of rock before us was really amazing to see again. At this point, I put my camera away to free my hands up to do the real climbing.
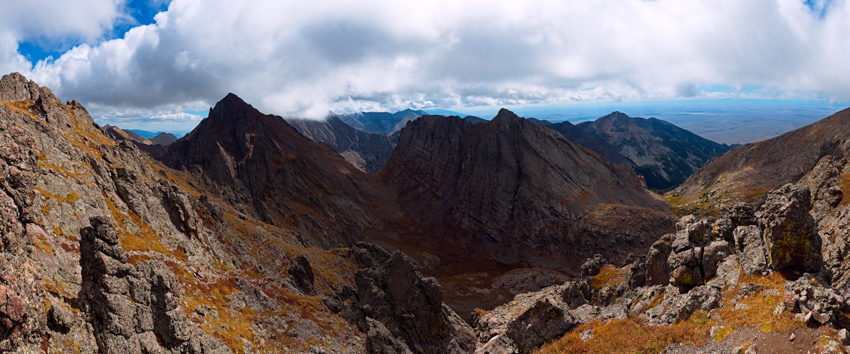
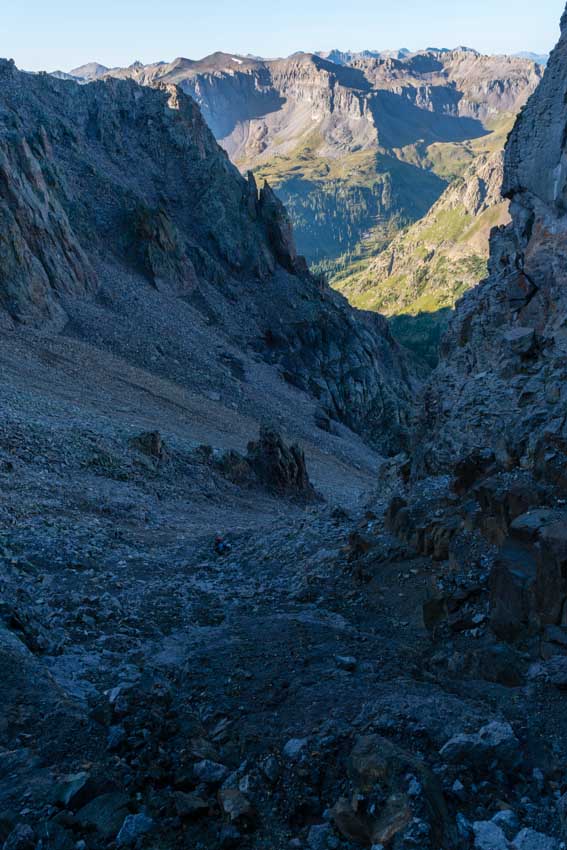
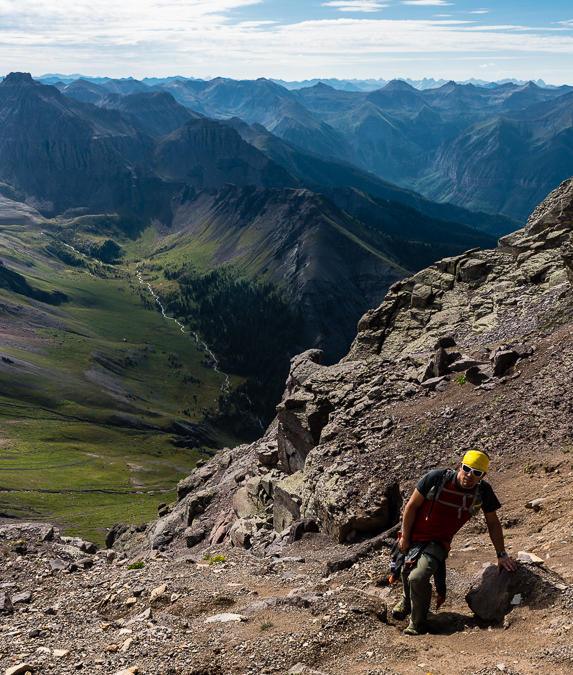
We took one last look down at Upper Colony Lake and Humboldt Peak before beginning the adventure up the fun parts of Crestone Needle.
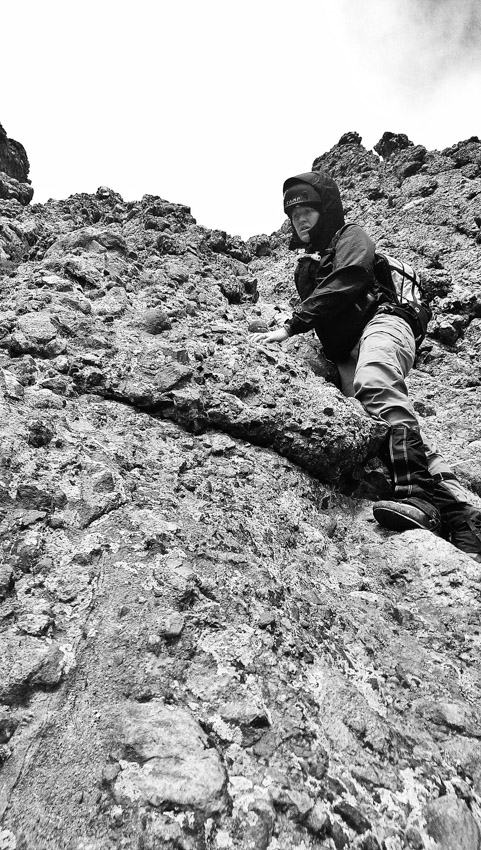
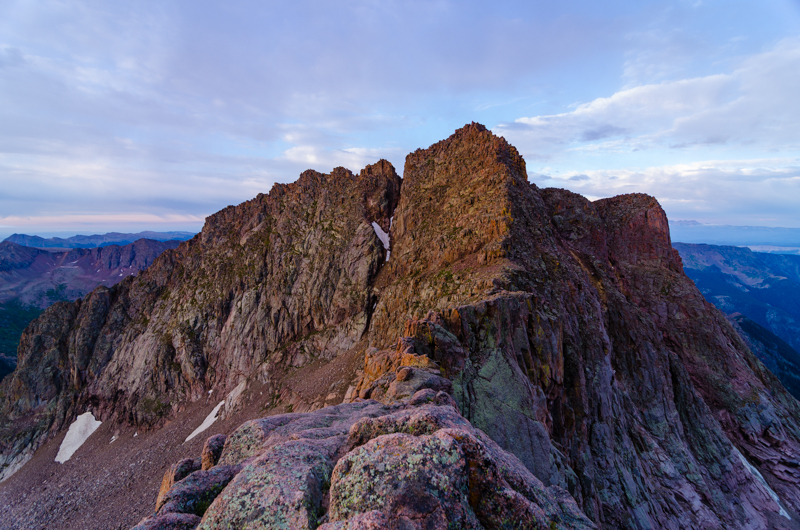
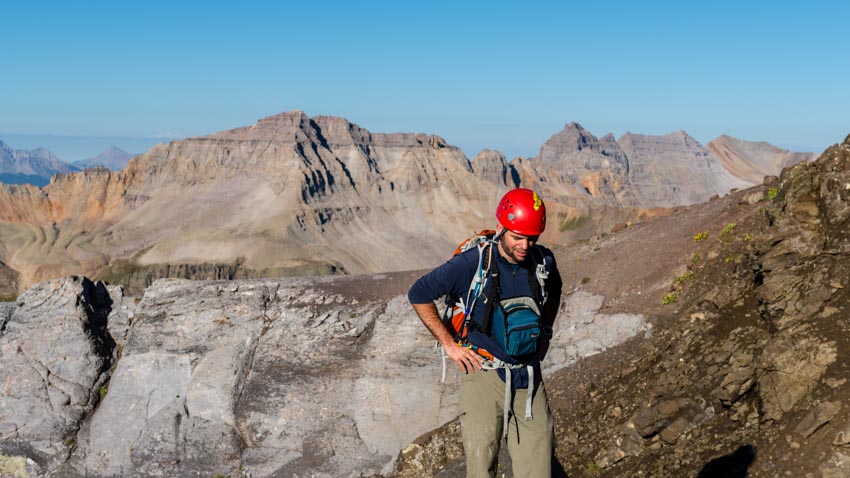
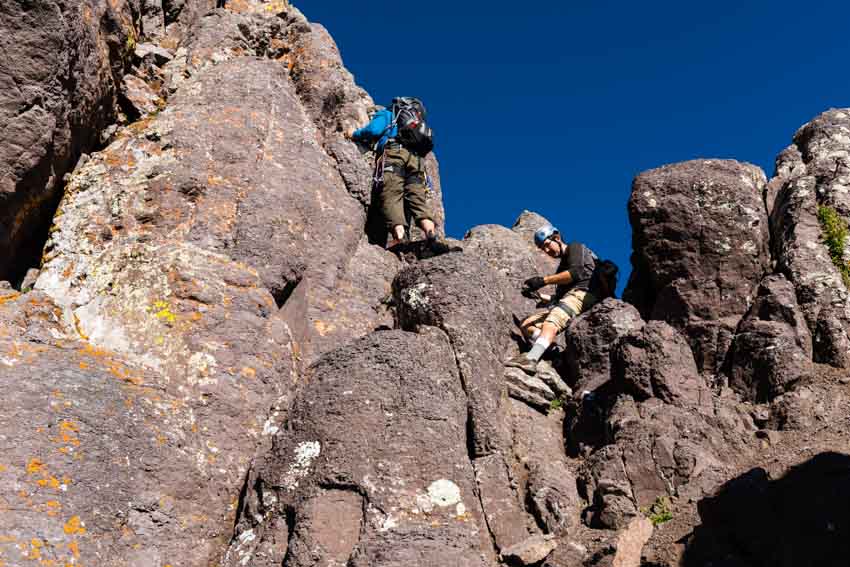
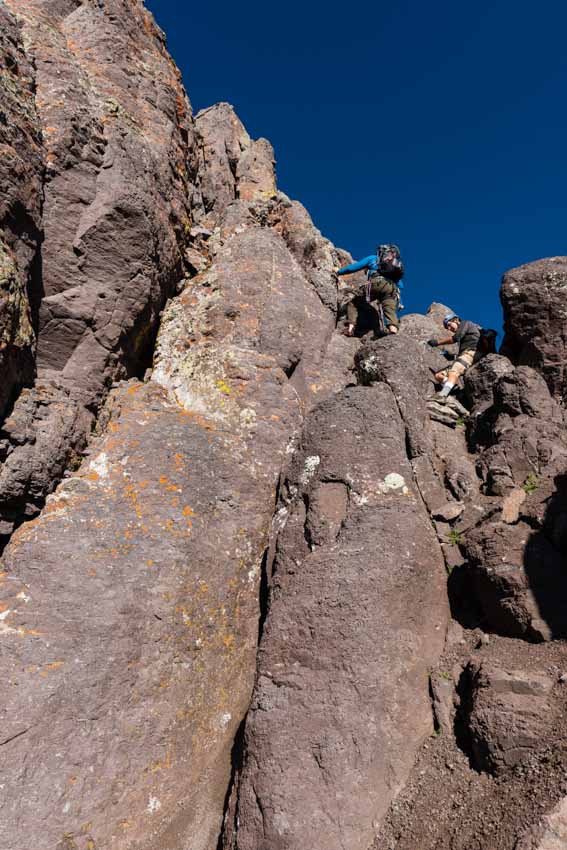
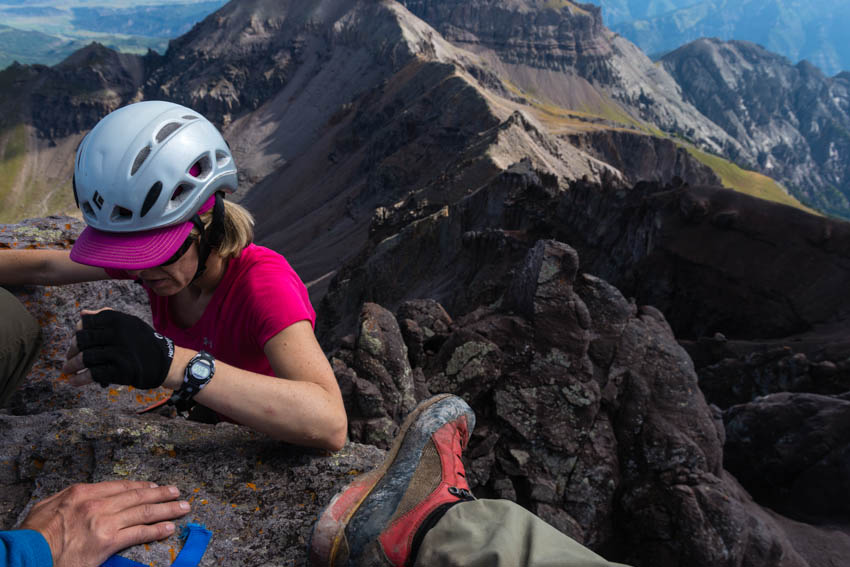
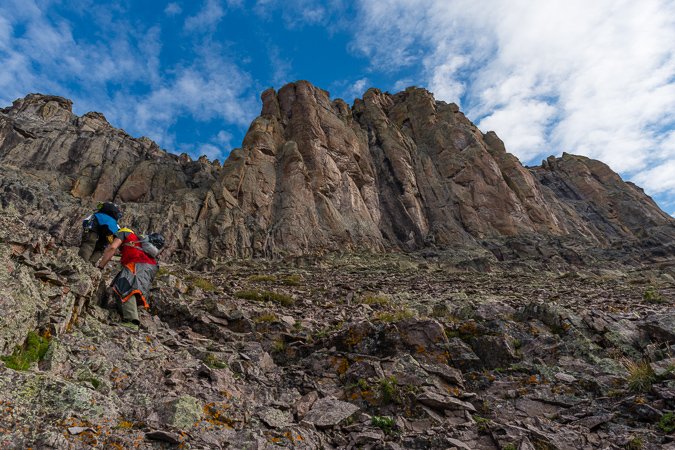
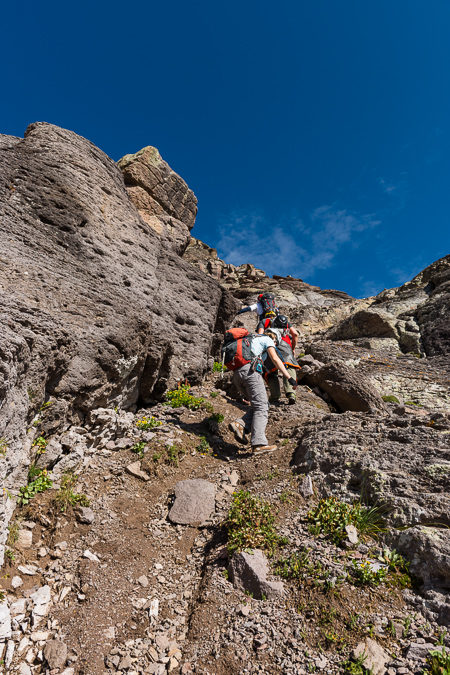
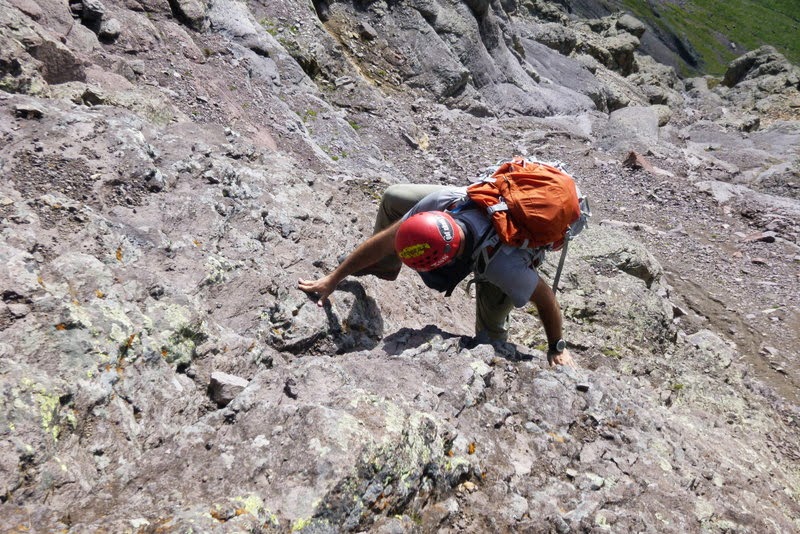
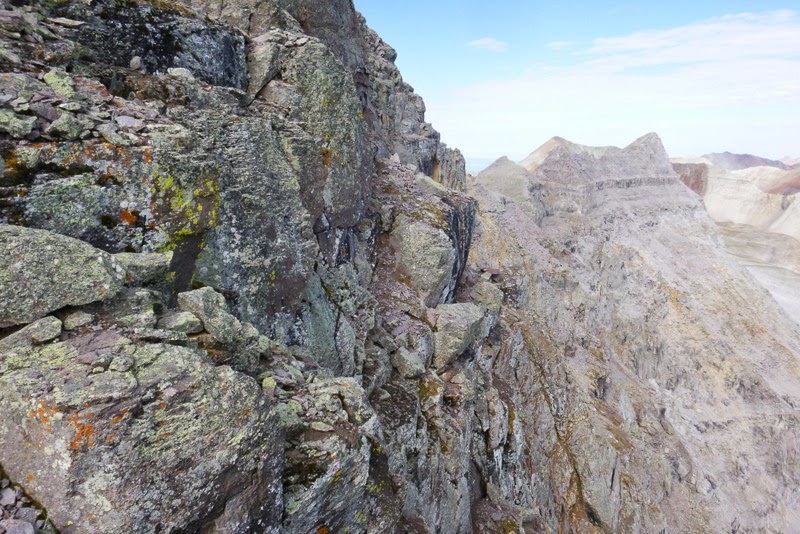
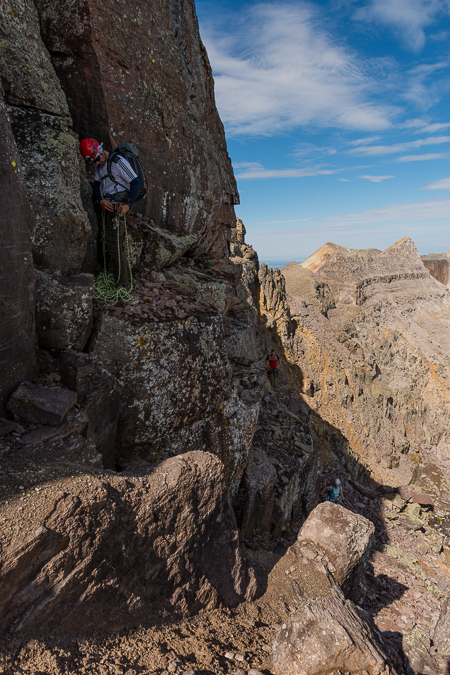
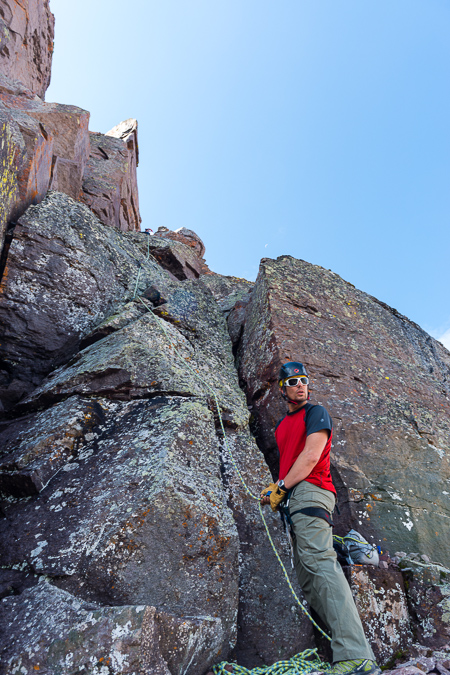
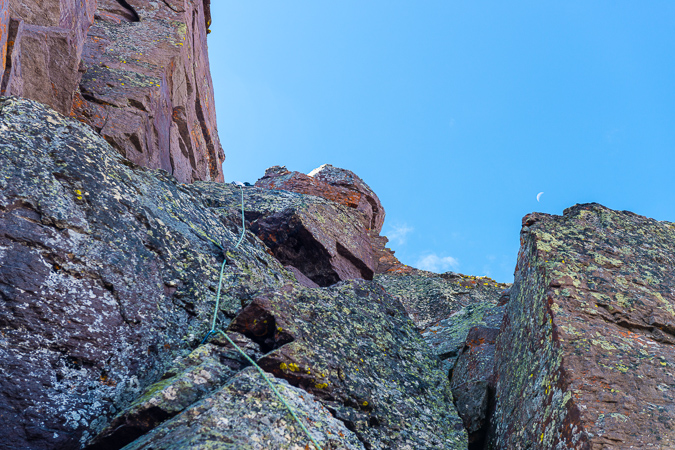
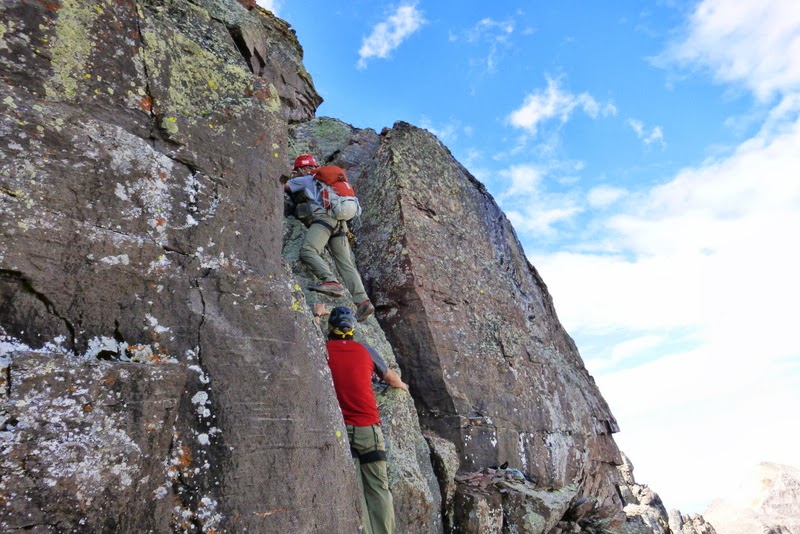
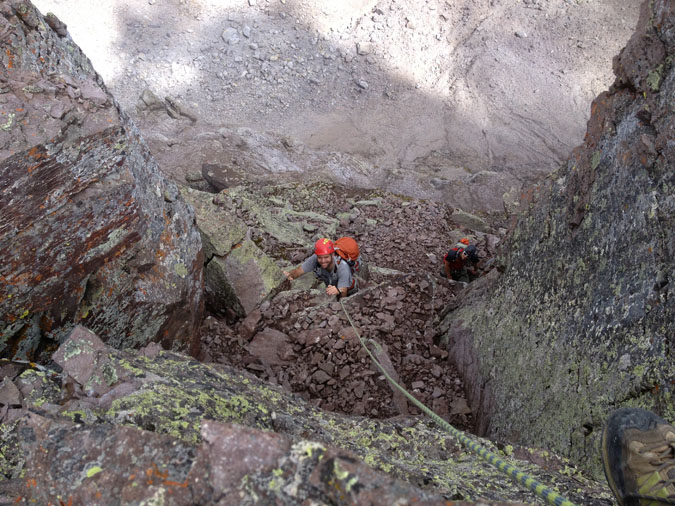
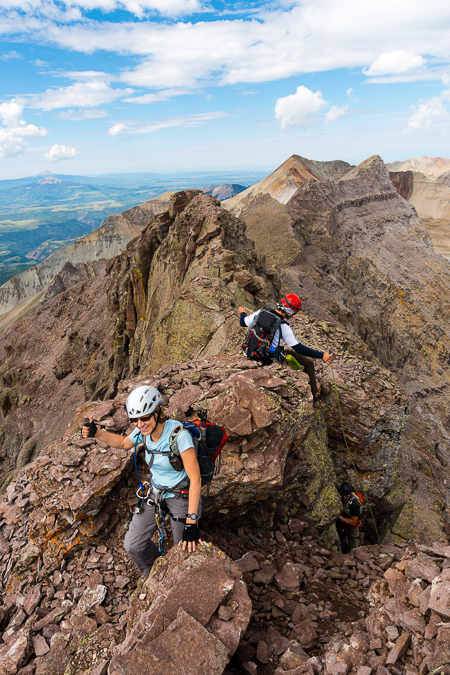
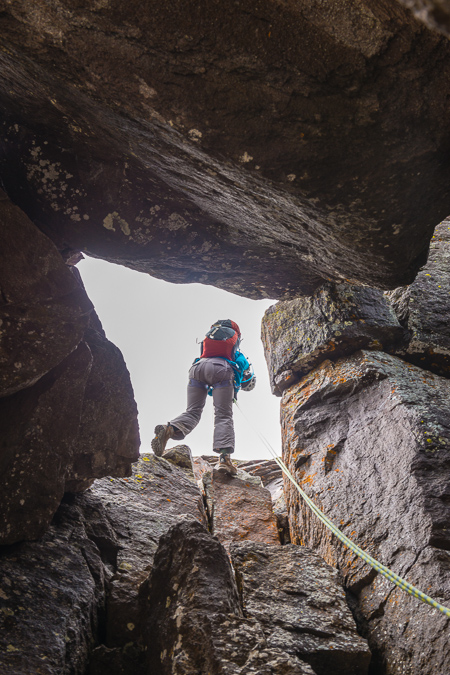
There is nothing like being on the side of Crestone Needle. Something about the quality and steepness of the rock, I immediately was swept back to 2009 when I had climbed it with Terry Mathews (RIP). Sarah and I reached the infamous dihedral which signals the typical crossing over to the west gully. We decided to stay in the east gully for the class 4 variation, which certainly did not disappoint! After Broken Hand Pass, I did not shoot a single photo with my camera on the way up, so all the photos were taken with either my HTC One or Sarah’s Iphone 5.
It was a real joy climbing this beast with Sarah with me. Having tackled many difficult peaks with Sarah in the past, including the Maroon Bells, Pyramid, Snowmass, Hagerman, and the Chicago Basin 14ers.
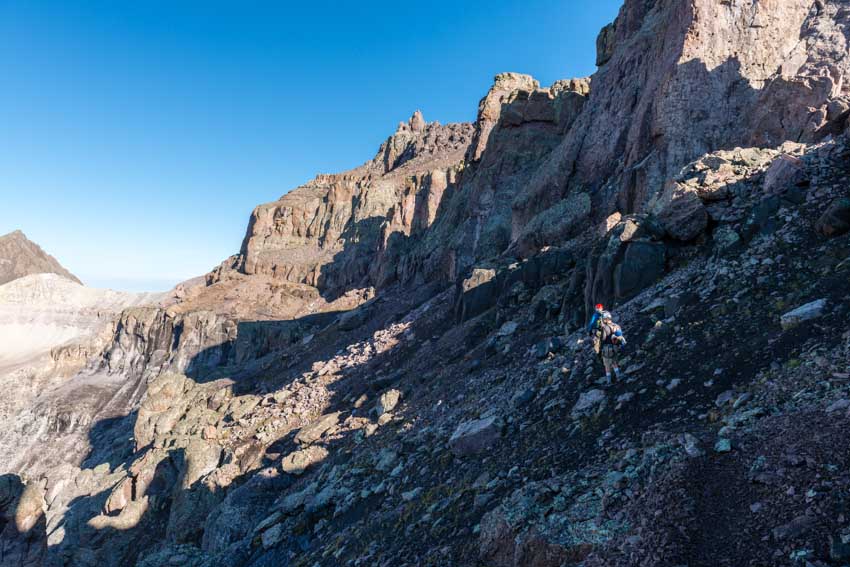
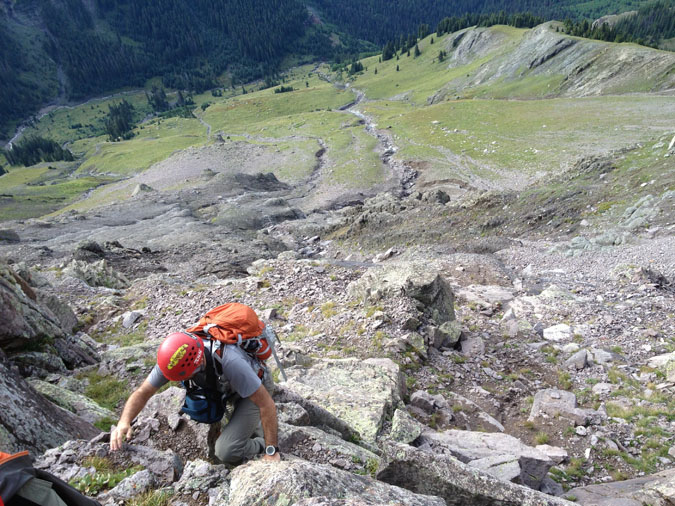
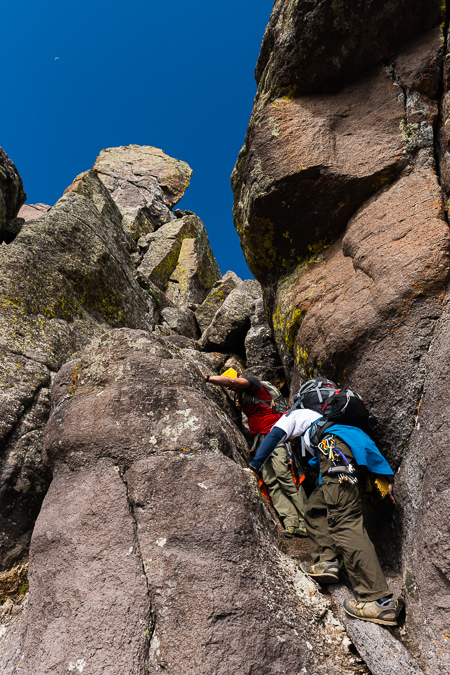
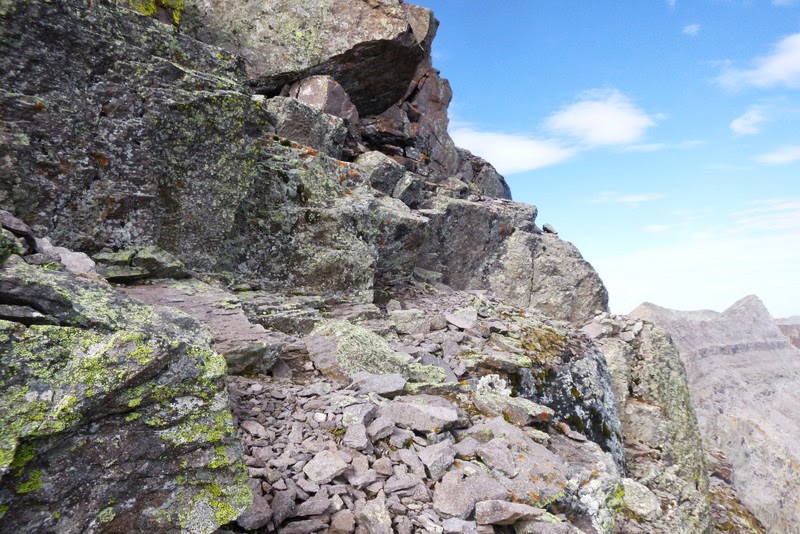
The class 4 variation up the east gully was quite a pleasant challenge on the way up, but I was getting concerned with route finding and safety for the descent. Visibility was decreasing as we climbed and the terrain was all starting to look alike.
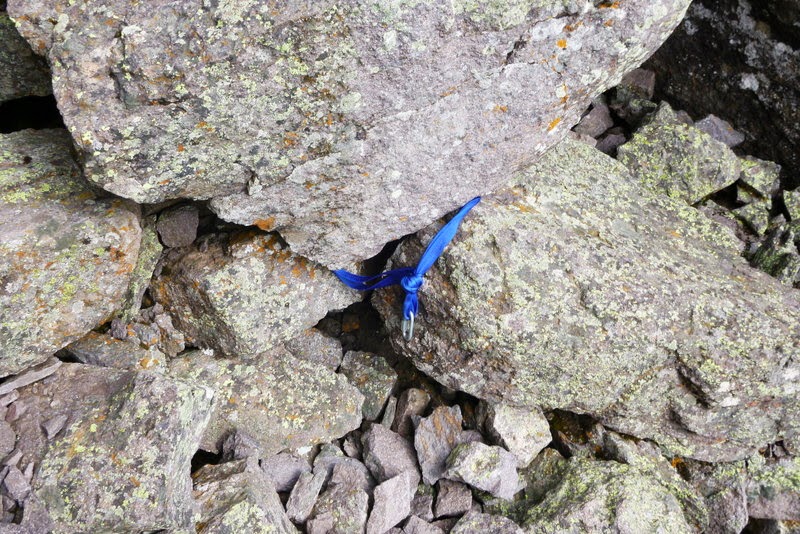
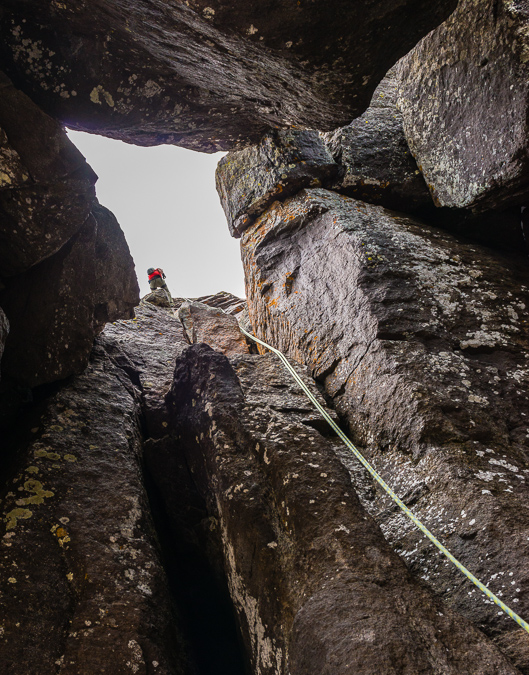
Fortunately, we were able to identify several cairns on the way up, including some duct tape on a few rocks here and there (small squares, which were quite nicely visible from above). Sarah was snapping some awesome shots of me on the way up, including this one of me negotiating the summit ridge.
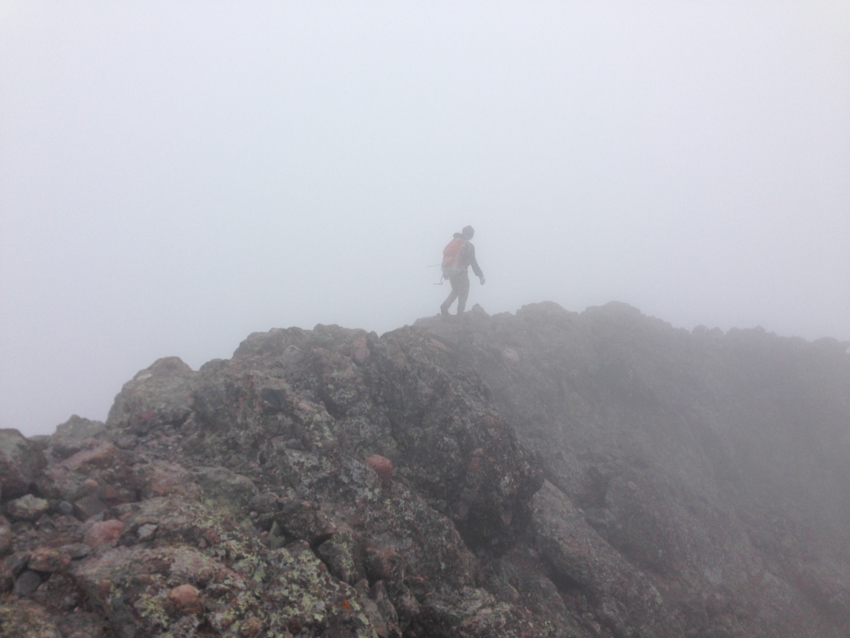
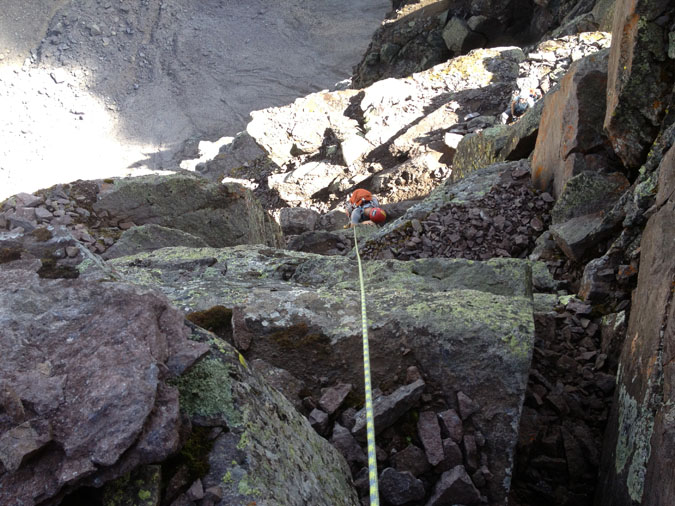
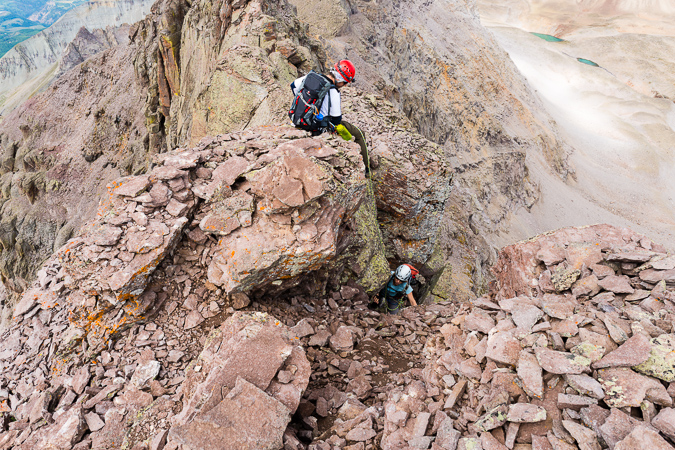
We reached the summit block in quick time and scrambled over the very skinny connecting arête to claim the summit. We had absolutely zero visibility and opted to stay there for only about a minute or so. We head right back down the way we came, following the cairns and duct tape we had seen before. The upper 200 feet of the east gully was pretty easy down-climbing; however, it got really dicey after that. We tried as best we could to stay on the route we came up on and for the most part were successful in that. It was surprisingly easy to remember the way down even though we could not see much. I was pretty happy we stayed in the east gully, as trying to find the switching point from west gully to east would have been difficult in the fog. I am not going to lie though, the climbing here was intense. The rock was wonderful, but it was quite exposed and surely a fall would have been fatal.
 |
 |
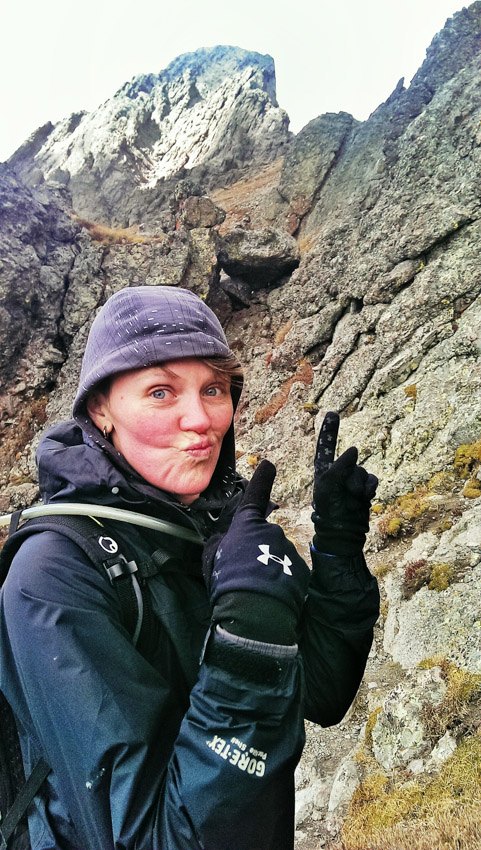
After many tough sections, we finally made it back down to the easier parts below the dihedral and made our way back towards Broken Hand Pass.
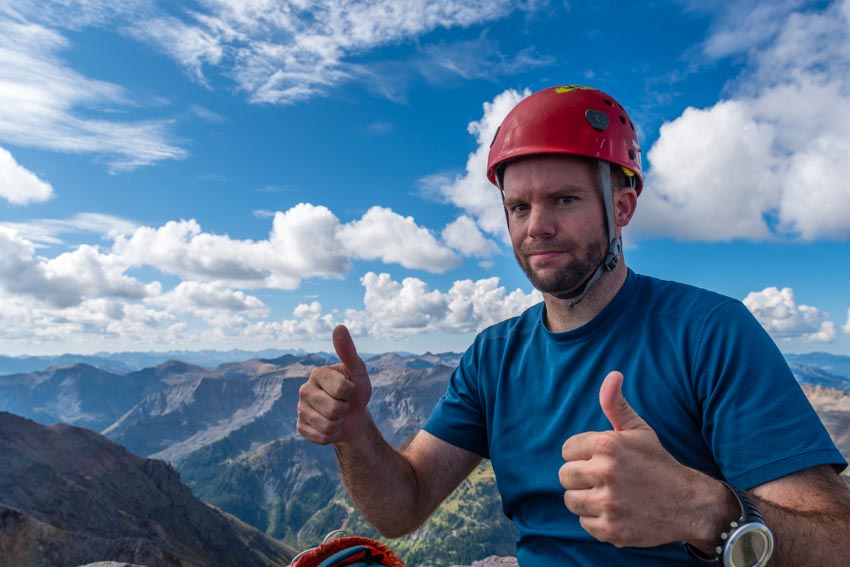
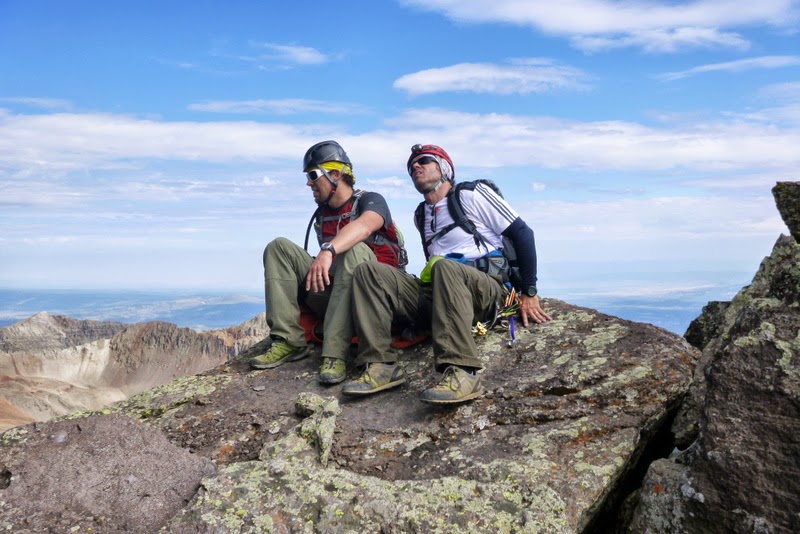
Sarah and I were quite excited about our successful climb of a beast of a mountain in whacky weather conditions.
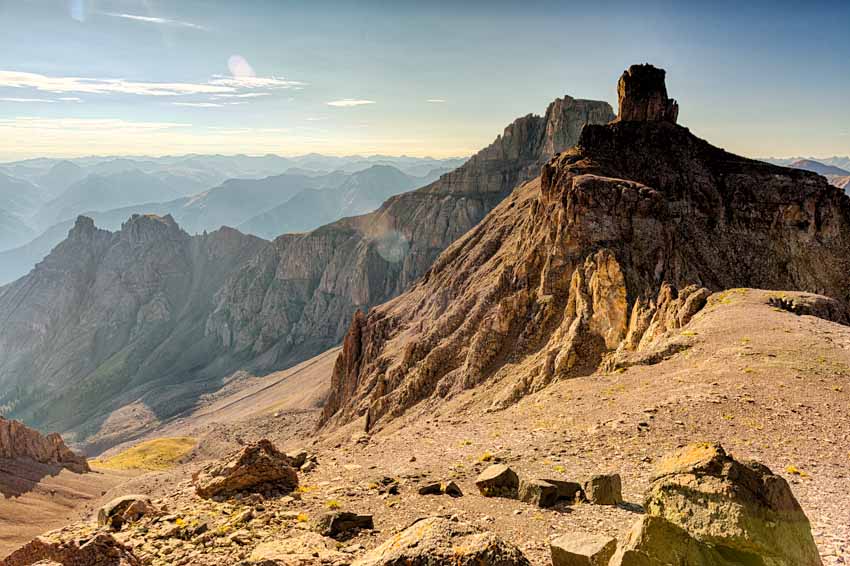
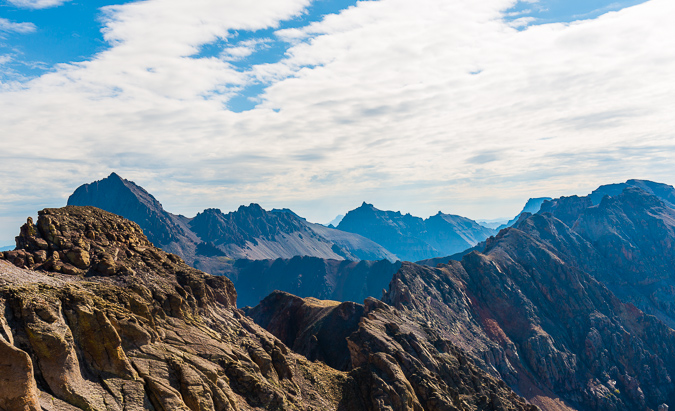
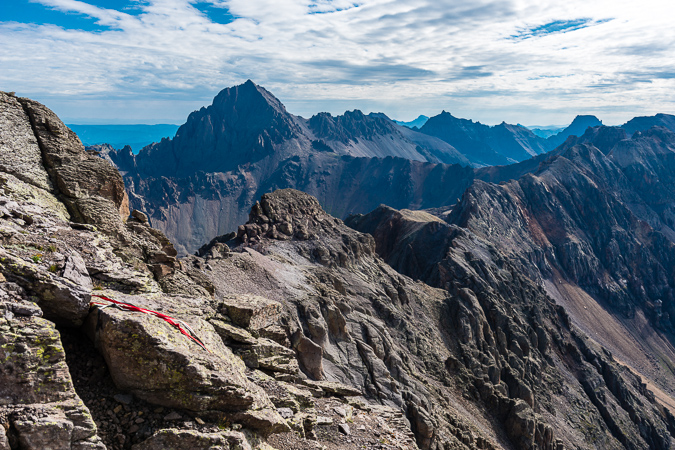
The clouds were breaking up a little and revealed all of the awesome peaks to our south and west, including Broken Hand Peak (at left).
What a rush! Just what the doctor ordered for me – an awesome day climbing in the Sangre de Cristo Mountains! On our way down Broken Hand Pass, we encountered a ton of those funky spikey flower plants called Frosty Ball Thistle, and I just had to get some photos of them with the back light coming through.
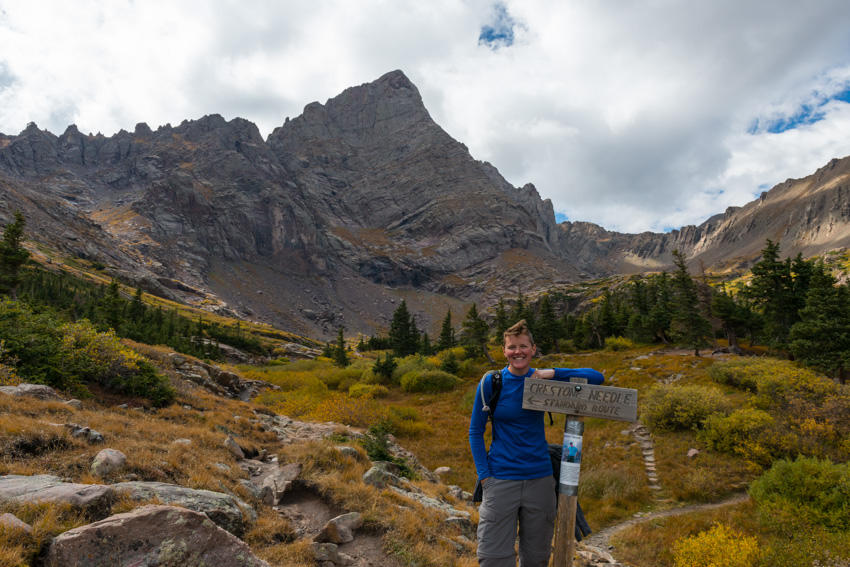
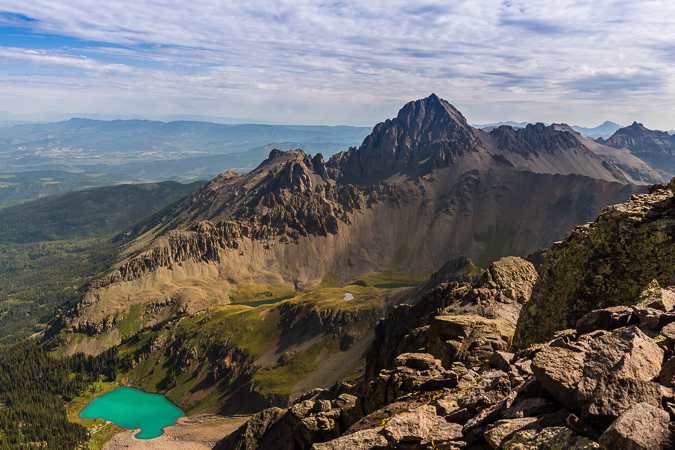
The hike down from Broken Hand Pass was totally a joy, mostly due to the amazing trailwork provided by RMFI. Upon reaching the main trail, we celebrated and enjoyed the unobscured views of Crestone Needle for the first time.
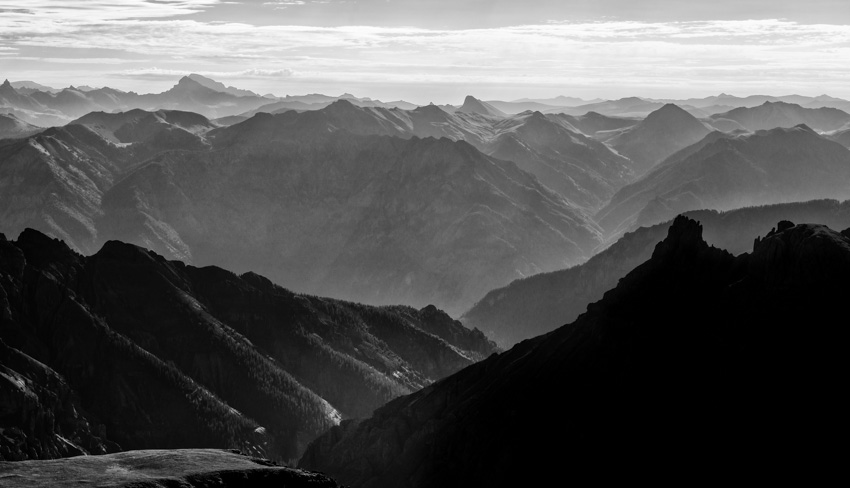
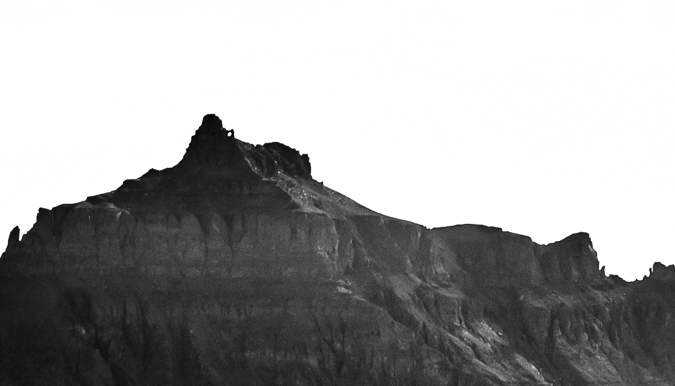
I stopped one last time on the way down to get a black and white shot of Crestone Needle, which I think turned out quite well.

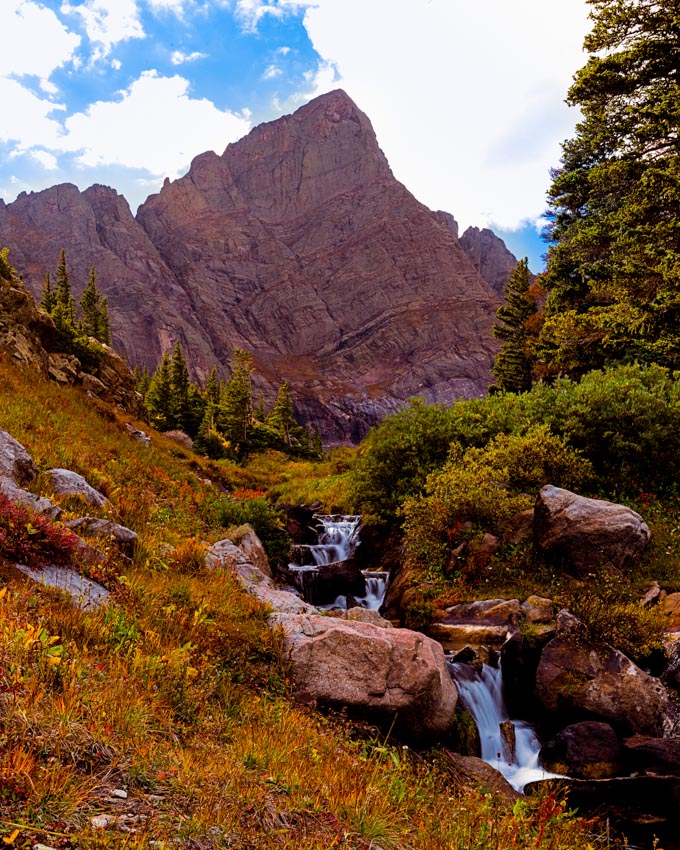
We made it back to our campsite and began to pack up. I wanted to get one more parting shot of Crestone Needle using a ND Filter, so I set it up and captured a mid-day shot of the flowing water in front of Crestone Needle.
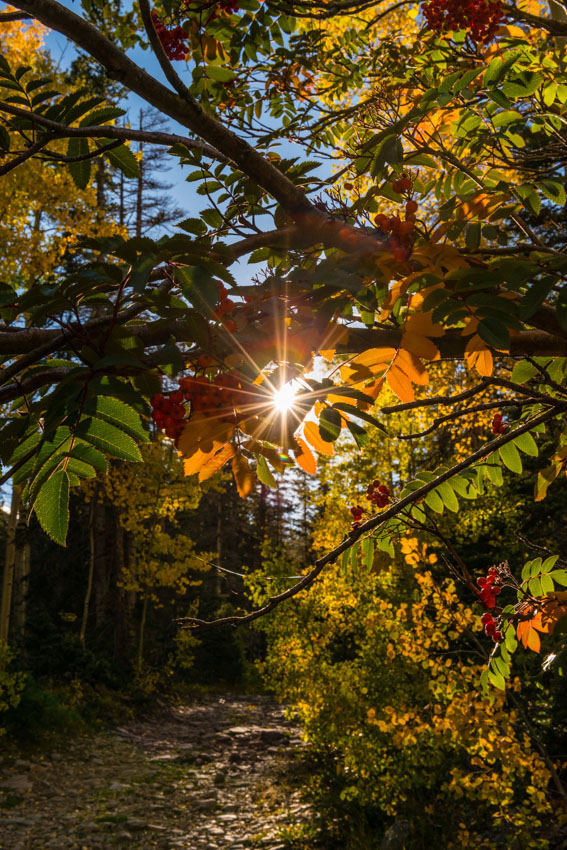
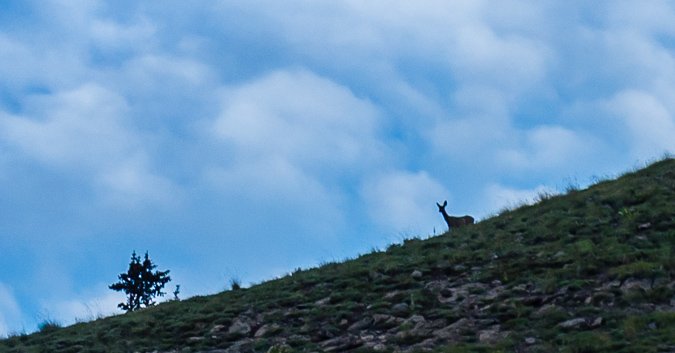
On the way out, we encountered all kinds of awesomeness, including several deer and some really friendly birds that were super photogenic and happy. What a lovely basin. I stopped one last time to get a a shot of the trees on the lower part of the trail before we go back to the car.
Upon getting back to the car, we found the bag of raisins I had left in the cup holder with a hole in it and lots of shavings around it - apparently a mouse had gotten into the vehicle and helped itself to a helping of raisins. Gross! We drove out carefully on the really horrible South Colony Basin road and enjoyed an amazing sunset over the Crestones to the west of us. A great ending to an amazing day.
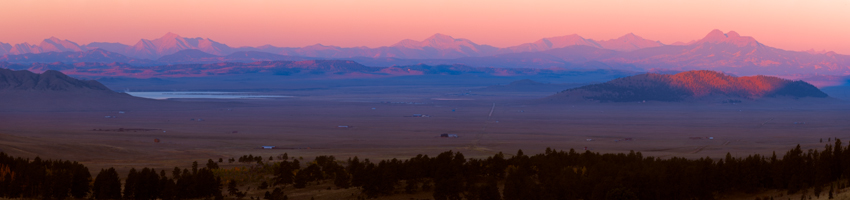
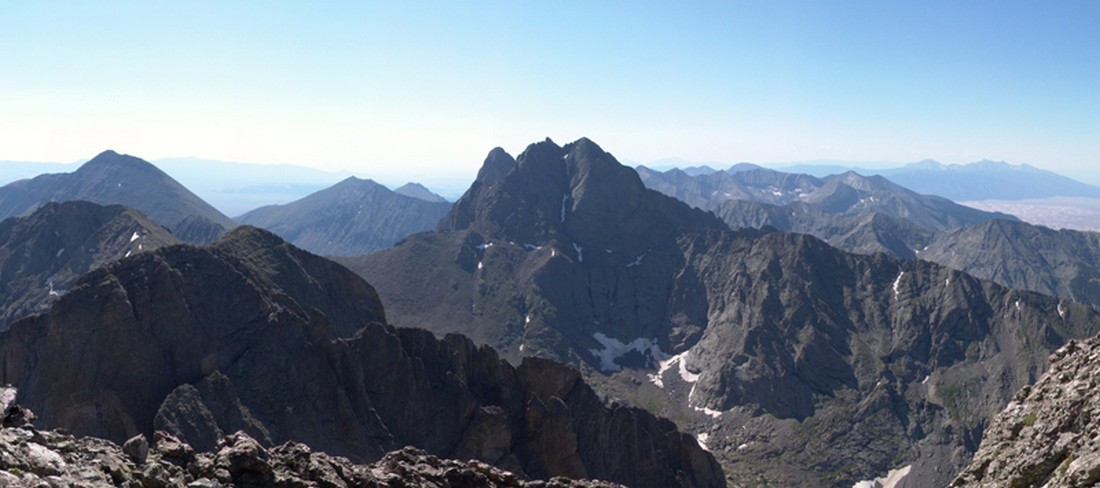
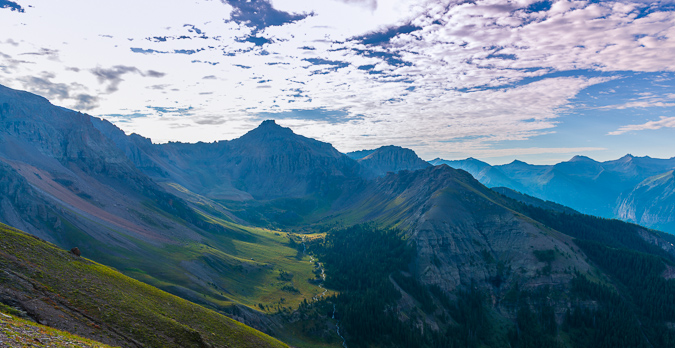
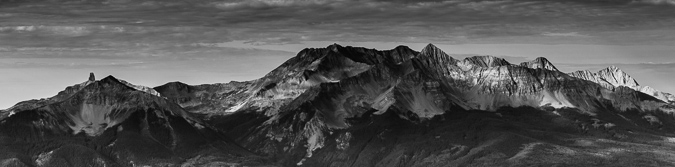
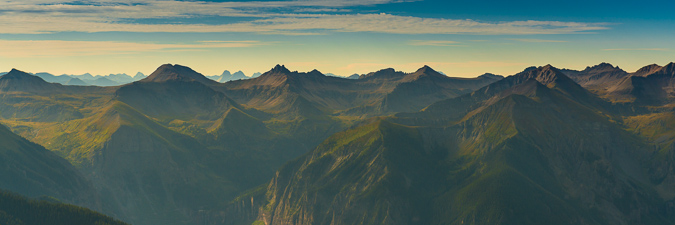
I ended the trip with a nice panorama of the Sangre de Cristo Mountains taken from Horn Creek Road just south of Westcliffe.
... [Click Next to continue reading]
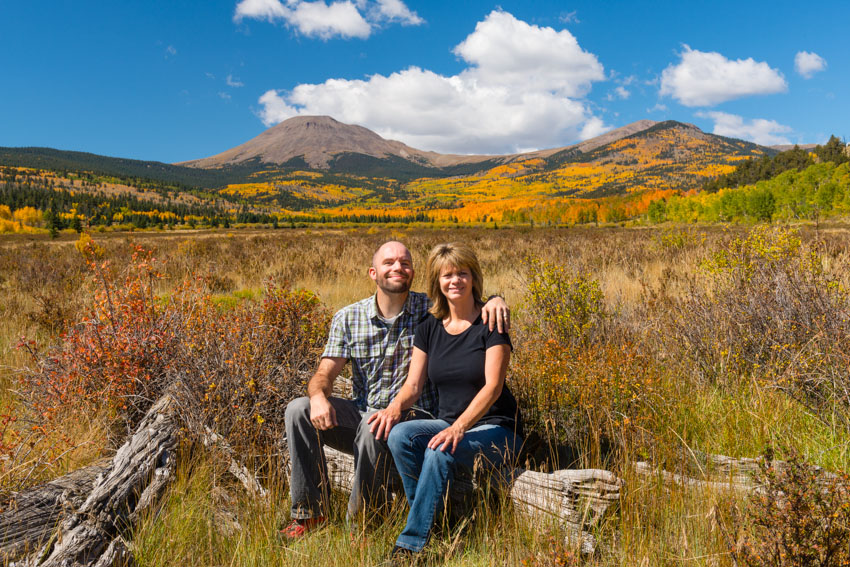
I got up very early the next morning to do a fall colors photography shoot and birding expedition with my mom. We left the house around 5 AM from Colorado Springs and made our way up to Wilkerson Pass. The early light on the peaks to the west was fantastic, although I still would have loved to have some clouds! Spinney Mountain Reservoir was a nice element between us and Mount Princeton above it. From left to right - Antero, Princeton, Yale, Columbia, Harvard and Buffalo Peaks. Awesome.
The plan was to head to the St. Elmo area south of Mount Princeton to photograph the fall colors and keep our eyes out for birds as my mom is very into birding. On the way through South Park, we located a really awesome Great Blue Heron feeding on fish in the mist above the South Platte River.
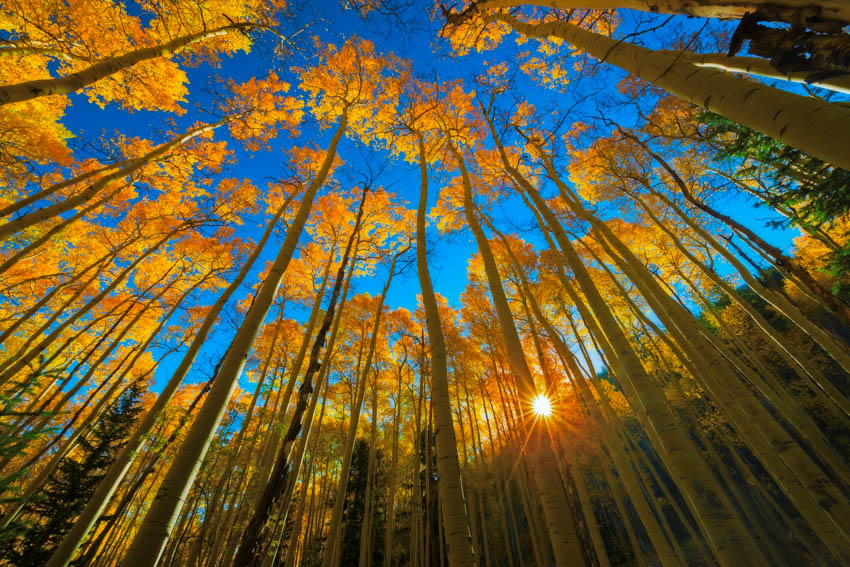
We made our way up towards St. Elmo in no time at all and were immediately rewarded with awesome color on the hillsides around us.
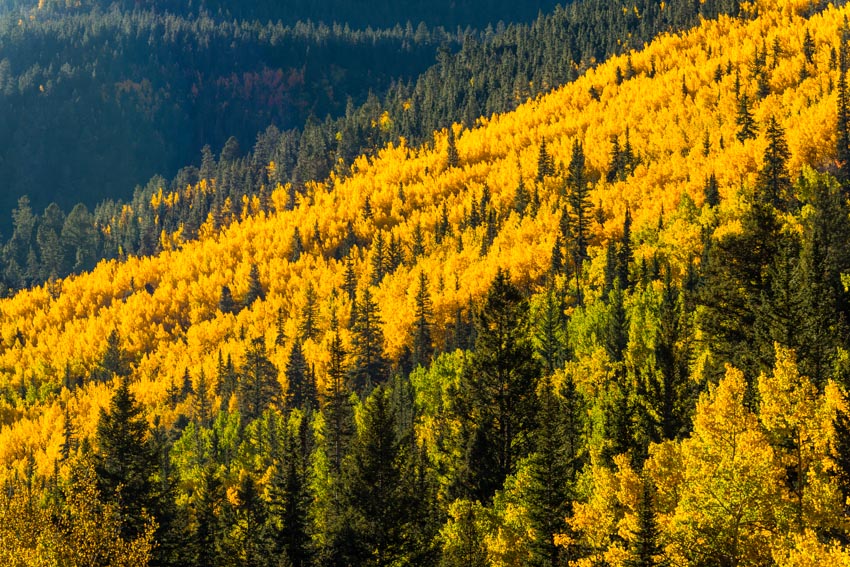
I saw an amazingly photogenic aspen grove off the road and had my mom stop the car, where I spent the next 30 minutes shooting the awesome light and color in the aspen grove.
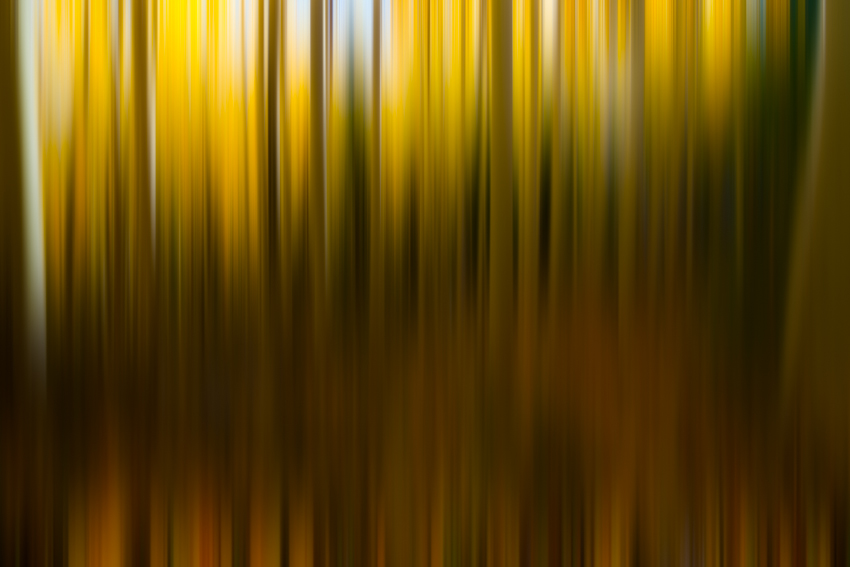
The grove afforded me some great opportunities to try out new techniques and processing concepts that I've been wanting to try, including this abstract use of motion blur and aspen trees.
I fell in love with this aspen grove, and could probably shoot fall colors in Colorado for days on end without blinking. This was probably my favorite shot of the whole trip, and I immediately made it available for print purchases (you can click on the photo to learn more about that).
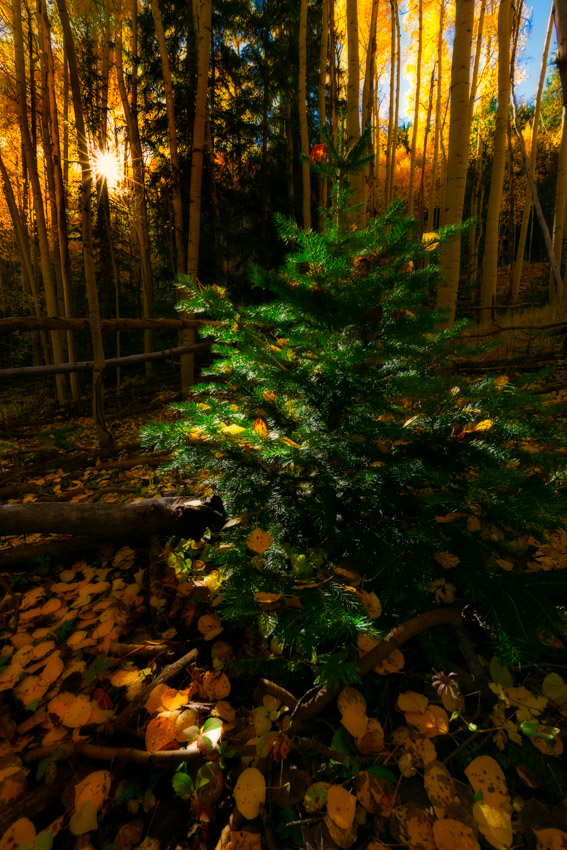
I also found this super cool pine tree covered in yellow aspen leaves that drew my attention and reminded me of a Christmas tree.
We finally made it to the town of St. Elmo and stopped for awhile to enjoy the fresh crisp air and fall colors.
I found these awesome cabins further into the town and thought they were the perfect forground to showcase the area and the fall colors.
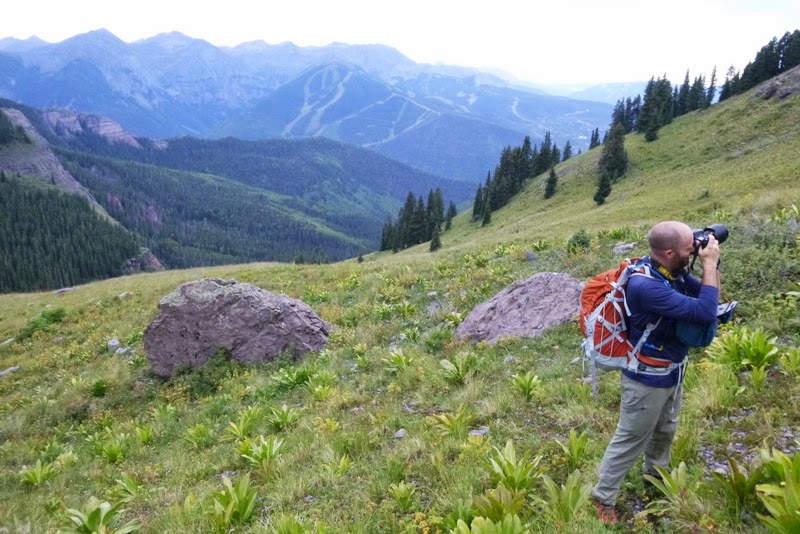
I had a good time using my 70-200 to pick out some patterns in the trees in the hillside across the way from St. Elmo, it was quite fun trying to find the best compositions.
Perhaps my second favorite shot of the day was of this huge mountainside filled with aspen trees changing colors, with an old mining structure anchoring it at the bottom of the frame. So beautiful!
I found another great aspn grove to try out another abstract motion technique as well.

My mom and I decided to leave the St. Elmo area and head over to the Buffalo Peaks area It was a nice drive up into the hills and we were greeted with many wonderful changing fall color scenes.
 |
 |
I was happy to find a nice vantage to snap off this huge panorama of the Buffalo Peaks with the changing fall colors featured prominently.
We also found the foundation of an old cabin here and it made for a nice foreground feature.
I was also happy to get my mom to get into a self-timer photo with me with the Buffalo Peaks scene behind us in the harsh mid-day sun (can't always shoot at the golden hour, right).
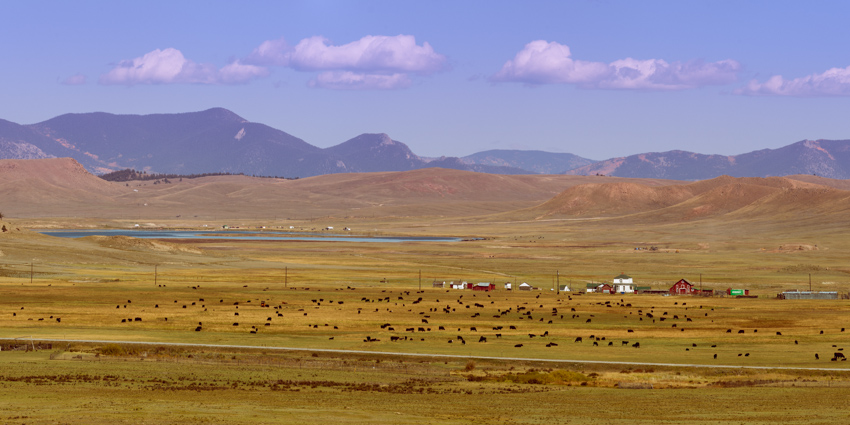
On our way out, I stopped one last time to shoot this telephoto panorama of Highway 285 and Antero Reservoir with cattle and old cabins in the scene. What a pretty day!
While our trip was not filled with epic scenes from my more favorite areas like Kebler Pass, Ohio Pass, Owl Creek Pass or anything from the San Juans, I was still pleased to get into the mountains to photograph the changing fall colors with my mom. It was a great mother-son trip and I know it meant a lot to my mom to spend th day with her. Any chance to get into the Colorado mountains in the autumn is a welcome day for me. I hope you enjoyed my photographs and trip report. I would love to hear from you on your thoughts about the trip report or the photos, or if you have any questions about my photos. Please feel free to leave a message below or to contact me. Thanks for stopping in!
Colorado's 12 Hardest 14ers to Climb
Colorado's Fourteeners (14ers) are legendary. Each of the 53 ranked peaks offers unique challenges and rewards. They are the some of the most amazing mountains in the world and have been the number one object of adoration for hundreds of thousands of Coloradoans. Indeed, according to the Colorado Fourteeners Initiative (CFI), approximately half a million people attempt to climb a fourteener each year. Climbing 14ers is a dangerous activity; however, good planning, fitness, and awareness of the potential hazards will provide climbers with good opportunities to accomplish these monsterous peaks. Each year I'm usually asked one of two questions - which 14ers are the easiest; and, which 14ers are the hardest? I decided to lay out the hardest 14ers here for you in this article. Let me know how I did based on your own experience. Lastly, it might be a good idea to arm yourself with the most up-to-date information about mountaineering accidents in Colorado. Who knows, reading about these tragic events may just save your life. Additionally, I highly recommend obtaining GaiaGPS for your phone. It allows you to see your track and location on a USGS map overlay even in airplane mode. It has saved me so many times. You can purchase it here and help support the site.
While it may make sense to simply use the only existing data available regarding mountaineering accidents in Colorado to determine 14er difficulty, my experience has been that the difficulty of a peak is more than just cold, hard facts. Indeed, Longs Peak is not nearly as difficult as, say, Capitol Peak; however, it has far more accidents due to the sheer number of inexperienced and/or unaccomplished people attempting it each year. With that being said, I'm going to use a mixture of my personal experience and some subjective ratings to present my case to you. For these ratings it is assumed that the climber is approaching via the standard route in "normal" conditions. I've intentionally left out un-ranked 14ers such as North Maroon and El Diente - assume they can be bundled with Maroon Peak and Mount Wilson, respectively. Additionally, consideration of any traverses between 14ers was not considered for these ratings.
I will rate each mountain's difficulty ranking based on four equally weighted variables:
1. Sustained difficulty: this rating establishes the peak's sustained difficulty over the course of the entire climb
2. Most difficult section: this rating establishes the difficulty of the peak's most difficult section
3. Terrain: this rating establishes the difficulty of the peak's overall terrain, taking exposure and looseness of rock into account
4. Access: this rating establishes the difficulty to reach this peak or how long it takes to get to the top
Feel free to let me know if you disagree with my ratings!
#1. Capitol Peak

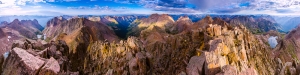
While Capitol Peak has only seen two deaths since 2010 compared to five on Longs Peak (as of August 2014), it is arguably the most difficult 14er in Colorado, as I attested in my 2010 trip report. As pictured above in the panoramic taken between Capitol Peak and K2 near the infamous Knife Edge, the terrain is rugged, exposed, loose and dangerous. Not only does Capitol Peak have some very difficult sections, it has, in my opinion, the highest sustained difficulty out of any of the 14ers. The climb up Capitol is relentless and requires mountainners to focus on the mountain's terrain for a very long period of time. There are very few breaks to be had and simple mistakes can and do prove to be fatal. Additionally, Capitol Peak requires a lot of time to accomplish and once you are past the knife edge, you are committed to at least two hours more of climbing. This makes the mountain especially mentally taxing as those are two hours straight of focused climbing on rugged terrain where you also have to keep a keen eye on the weather. Lastly, access to Capitol, while doable in a single day, usually requires an arduous backpacking trip to Capitol Lake and a very early start on a subsequent day. Let's see how Capitol Peak rates in the four domains:
| Sustained Difficulty: 10/10 | |
| Most difficult section: 9/10 | |
| Terrain: 10/10 | |
| Access: 9/10 | |
| Total: 38/40 |
#2. Mount Wilson
Mount Wilson is easily one of the most challenging 14ers in Colorado to climb - the standard route, while mostly straight-forward, has many difficult sections of very loose rock at the summit. The summit block itself has stopped many people in their tracks, just a few feet from the summit. The exposure there is intense and not for the feint of heart. Examples of this can be seen in my trip report from 2011. In addition to the tremendous exposure found on the summit block, Mount Wilson's approach from the Rock of Ages trailhead is fairly long and quite committing, with a lot of up-and-down climbing (unless approached from Kilpacker Basin or Navajo Basin). The difficult section of climbing found on the upper 1/3 of the route is difficult to negotiate and offers many challenges for climbers of all levels. The rock on Mount Wilson is extremely loose and many people have perished on the slopes between Mount Wilson and the un-ranked beast to the west - El Diente.
| Sustained Difficulty: 10/10 | |
| Most difficult section: 9/10 | |
| Terrain: 10/10 | |
| Access: 7/10 | |
| Total: 36/40 |
#3. Little Bear Peak

Out of all of the Fourteeners, Little Bear Peak is quite possibly my least favorite and least likely to be something I'd like to repeat. The approach is terrible - either a long slog on a rocky road in hot weather or an insane jeep ride over some of Colorado's toughest jeep obstacles (OK - those are kind of awesome). My ascent in 2010 was quite memorable, notably - the infamous "Hourglass" section just about scared me to death. Many people have perished in the Hourglass over the years, including one of the most memorable deaths in the past 5 years - Kevin Hayne. The Hourglass presents some very difficult climbing, with few good hand-holds and potentially fatal ice and water sections, not to mention the hazard of frequent rockfall from above. While Little Bear Peak is very straight-forward and mostly an easy climb, the Hourglass section marks it as one of the toughest mountains around.
| Sustained Difficulty: 6/10 | |
| Most difficult section: 10/10 | |
| Terrain: 10/10 | |
| Access: 7/10 | |
| Total: 33/40 |
#4. Pyramid Peak

Pyramid Peak, while not having many known fatalities, presents some truly heinous climbing obstacles, especially in wet conditions. The rock in the Elk Mountains is notoriously loose and nasty - making it very suspect in down-climbs and even more dangerous in rain or snow. The approach to Pyramid is fairly straightforward, albeit somewhat long and committing once above tree-line. The terrain on Pyramid is steep almost the entire climb and once above tree-line the mountain demands your concentration for the duration. While Pyramid is likely one of my favorite climbs of all time, it is not for a beginner climber and should be taking quite seriously. Of course, the views from the summit are to die for.
| Sustained Difficulty: 8/10 | |
| Most difficult section: 8/10 | |
| Terrain: 9/10 | |
| Access: 6/10 | |
| Total: 31/40 |
#5. Maroon Peak

The photo above was taken from the summit of Pyramid Peak looking out across the valley at the Maroon Bells and their insane stature. The whole area is steep and impressive, which comes with some inherent dangers and difficulties. The Maroon Bells have claimed many lives through the years and are certainly some of the most dangerous mountains in America. Of particular note, the traverse between Maroon Peak and North Maroon has claimed several victims and is a force to be reckoned with. Maroon Peak is a steep monstrosity full of beauty and loose rock as well as an intricate network of rocks, spires and falling rock that a blessing and a curse. Maroon Peak holds some of Colorado's worst rock and even the most experienced climbers have been subdued by the dangerous terrain found there.
| Sustained Difficulty: 8/10 | |
| Most difficult section: 8/10 | |
| Terrain: 9/10 | |
| Access: 6/10 | |
| Total: 30/40 |
#6. Snowmass Mountain

Snowmass Mountain is usually climbed in the early months of summer, when the face of the mountain is mostly covered in snow, making for somewhat easier travel up the snow in crampons; however, the rock beneath the snow is quite loose and is constantly shifting due to erosion. Indeed, Snowmass has proved to be particularly dangerous in the past few years due to these shifting conditions and has claimed a couple lives in the past 5 years. Snowmass' upper slopes contains large white boulders that look secure but are often quite loose and came come crashing down at any moment. The approach on all routes of Snowmass requires quite a bit of travel, which increases the difficulty.
| Sustained Difficulty: 8/10 | |
| Most difficult section: 6/10 | |
| Terrain: 7/10 | |
| Access: 8/10 | |
| Total: 29/40 |
#7. Sunlight Peak
Sunlight Peak is one of the few 14ers requiring class 4 climbing to reach the summit and is generally preceded by a very long backpacking trip and a steep ascent into the Twin Lake basin. Terrain in the Chicago Basin where Sunlight resides is notoriously loose and dangerous as well as highly susceptible to frequent and quickly changing extreme weather conditions. The summit block of Sunlight presents a particularly interesting challenge for climbers and many people skip the summit block altogether if there is any moisture on the rock. Many people may rate Sunlight's next door neighbor, Windom Peak, as being the more difficult of the two; however, I personally found Sunlight to have more challenging route-finding and climbing requirements. Since Sunlight is often paired with Eolus and Windom on the same day and often as the last peak climbed, it presents even more inherent danger as many climbers attempting it are more exhausted than if doing Sunlight on its own.
| Sustained Difficulty: 7/10 | |
| Most difficult section: 8/10 | |
| Terrain: 6/10 | |
| Access: 8/10 | |
| Total: 29/40 |
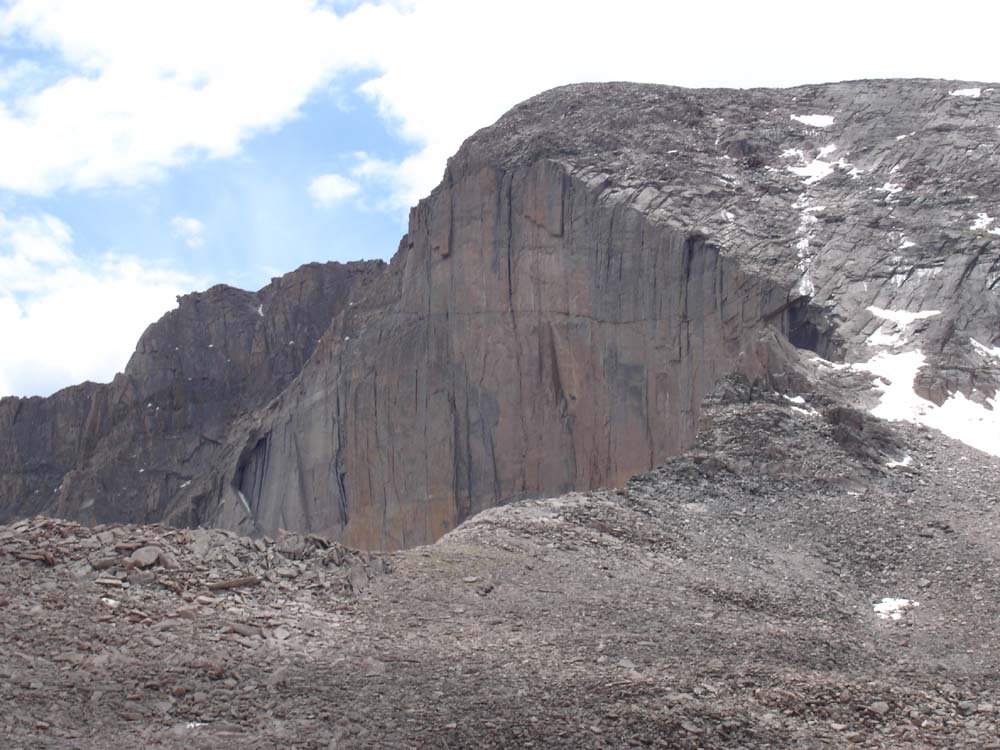
#8. Crestone Needle

Coming in at number 8 on my list of Colorado's most difficult 14ers to climb is the venerable, impressive and just-plain-freaking-awesome Crestone Needle - my favorite 14er of all. The standard route of Crestone Needle brings you up a steep approach and then plants you right in a series of difficult route-finding challenges and some of the steepest yet most solid rock there is. Even though the rock is quite solid and sturdy, make no mistake - an error in judgement would likly prove fatal, especially in severe weather conditions. Indeed, Crestone Needle has claimed many lives and is a surely one of the most dangerous peaks in the Sangre de Cristo Range. Most approachs require a backpack trip or a very early start and once above tree-line the terrain is quite extreme.
| Sustained Difficulty: 7/10 | |
| Most difficult section: 7/10 | |
| Terrain: 9/10 | |
| Access: 5/10 | |
| Total: 28/40 |
#9. Longs Peak
Longs Peak, located within the heart of Rocky Mountain National Park, is likely Colorado's most frequently visited mountain other than perhaps Greys and Torreys. This mountain's location in a National Park makes it a very popular destination by people from all over the world and it often lures inexperienced climbers on its more dangerous upper sections where people find themselves ill-equipped to complete the climb, both mentally and physically. Perhaps the most notable part of Longs Peak's approach is the sheer length of the climb, a full-day affair to be sure. A simple google search of Longs Peak deaths will just tell you how dangerous this peak really is, especially on the upper areas such as the Narrows and the Trough. Additional hazards plaguing this peak are the frequent deposits of snow and ice early and late in the climbing season that often contribute to the dangerous nature of the climb.
| Sustained Difficulty: 9/10 | |
| Most difficult section: 6/10 | |
| Terrain: 8/10 | |
| Access: 5/10 | |
| Total: 28/40 |
#10. Kit Carson Mountain
Kit Carson Mountain is one of the Sangre de Cristo giants located right by Crestone Peak and Crestone Needle. The approach to Kit Carson's standard route involves a lengthy backpacking trip and an ascent over the less impressive, albeit quite steep 14er, Challenger Point. The steep approach, coupled with a downclimb mired in confusion and difficult route-finding, makes Kit Carson quite eligible for this list. Several climbers have perished on Kit Carson in recent years, almost always due to off-route climbing.
| Sustained Difficulty: 8/10 | |
| Most difficult section: 6/10 | |
| Terrain: 6/10 | |
| Access: 7/10 | |
| Total: 27/40 |
#11. Mount Eolus
Mount Eolus marks the second of the Chicago Basin 14ers to make this list and arguably the more difficult of the three, despite my lower rating here. Eolus' "Catwalk" and steep, confusing route on the upper third of the mountain make it a top contender. The approach for Eolus is quite taxing as well and many climbers reaching the upper sections of Eolus find themselves out of energy and weakened - a terrible combination when paired with the rugged and loose terrain of the San Juan Mountains.
| Sustained Difficulty: 6/10 | |
| Most difficult section: 7/10 | |
| Terrain: 6/10 | |
| Access: 8/10 | |
| Total: 27/40 |
#12. Crestone Peak
Crestone Peak has single-handedly claimed many climbers' lives over the past several years due to the loose and difficult terrain found on the upper sections of the mountain. While the mountain's standard route is mostly straight-forward, there are certainly sections that demand one's full attention and good climbing skills in order to ensure a successful summit. Like Crestone Needle, Crestone Peak's approach is a very long day up very steep trails and rock formations, increasing the difficulty of this impressive peak found in the awesome Sangre de Cristo Mountains.
| Sustained Difficulty: 6/10 | |
| Most difficult section: 7/10 | |
| Terrain: 6/10 | |
| Access: 8/10 | |
| Total: 27/40 |
How did I do? Would you have rated them differently? How so? I'd love to hear your thoughts!
Teakettle Mountain - a legendary summit with incredible views

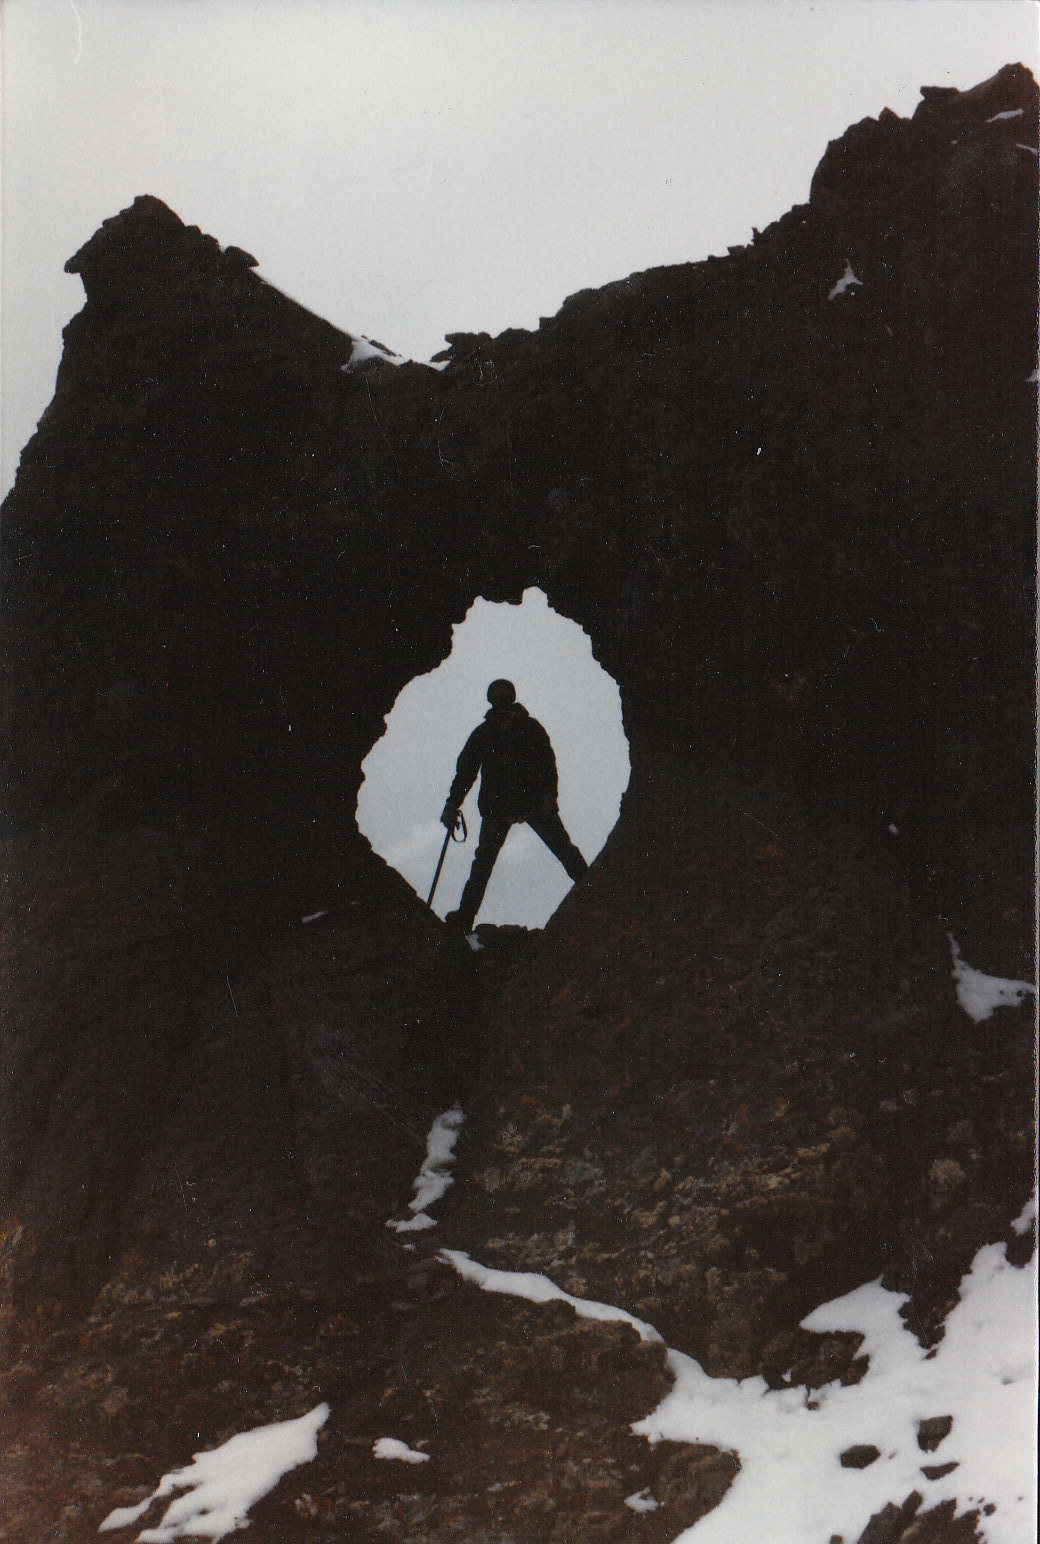
I had always dreamed of climbing Teakettle Mountain ever since seeing my dad's photo (left) of him standing in the Teakettle's handle back in the 1980's. Naturally, as a small boy, this feat was legendary, epic and awe-inspiring - surely one of the drivers behind my own quest to summit the highest 100 mountains in Colorado. So, when I received an email from Rick McBee asking if I'd be interested in climbing Dallas Peak and Teakettle Mountain, I was ecstatic. The climb up Dallas was remarkable and was probably one of my favorite ascents to date. After conquering Dallas, we were all thirsty for more technical climbing and prepared for an early morning start up Teakettle via the standard route in Yankee Boy Basin. An early morning drive to the start of the climb brought us to a small parking lot and the steep south slopes of Teakettle. Teakettle remained out of view for most of the climb, but it was always there in my mind. I had much less anxiety about Teakettle than Dallas Peak and felt quite confident after our success there; however, I knew it could still pose some significant challenges, especially on the upper parts of the climb prior to the ridge as well as the summit block. The 13,819 ft. summit of Teakettle Mountain is pretty close to the Yankee Boy Basin road as the crow flies; however, the route up takes you through some quite interesting and somewhat dangerous sections of "trail," mostly unmarked and full of loose rock and dirt.
Our group composition shifted from the prior day - we lost Ben and picked up a new partner named Brad Tucker - a good friend of Rick McBee's from Montrose. Brad was a dentist and somewhat new to climbing high peaks; however, he had done many rock climbs with Rick in the past and was a reliable and experienced climber (much more experienced at roped climbing than me).
We departed the parking lot at around 5:30 AM and bushwhacked straight up the side of the mountain, following game trails and small drainages until we reached a plateau below the huge and formidable boulder field below the ridge between Teakettle and Coffee Pot. We enjoyed views of Potosi Peak and the rising moon to the east of us on the way up the steep grassy slopes.

We were all spread out across the slopes as to not damage the vegetation on the way up - we never did find a trail on the lower section of the mountain.
lI tried to stick with Natalie Moran so that I had someone to talk to on the way up the mountain - she was full of great stories!
As we climbed up the slopes, views of both Mount Emma and Gilpin Peak were fantastic - the only thing that was missing was some clouds to make the sunrise more exciting; however, I welcomed the opportunity and chance at a storm-free day climbing in the San Juans.
As sunrise hit the valley, the views back across to the south were great. Yankee Boy Basin never seems to disappoint.
Finally, the sun hit the tips of the peaks across the way, briging new light Gilpin Peak and Yankee Boy Basin.
The sun even began touching the tip of Mount Sneffels, which looks a bit less impressive from this vantage point than normal.
As we climbed up the slopes quickly, the rest of our climb came into view - a chossy rock gully. Oh joy.
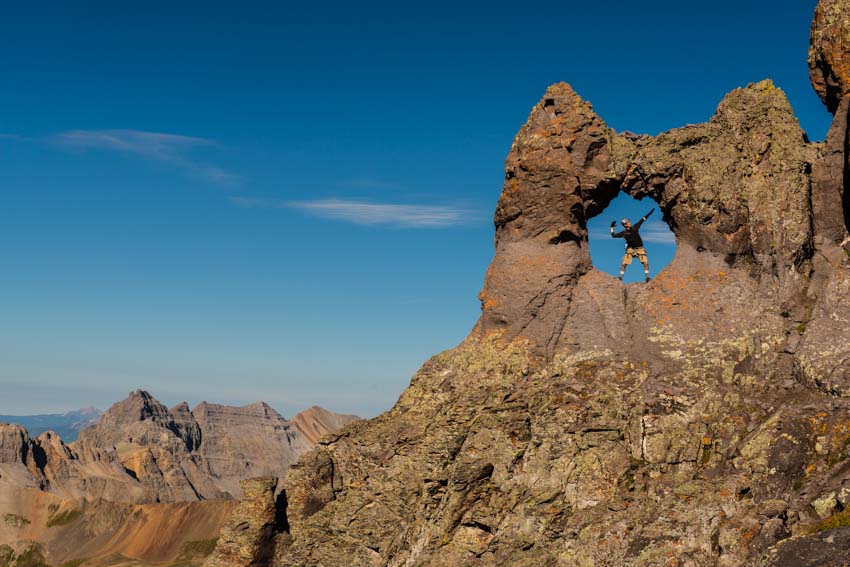
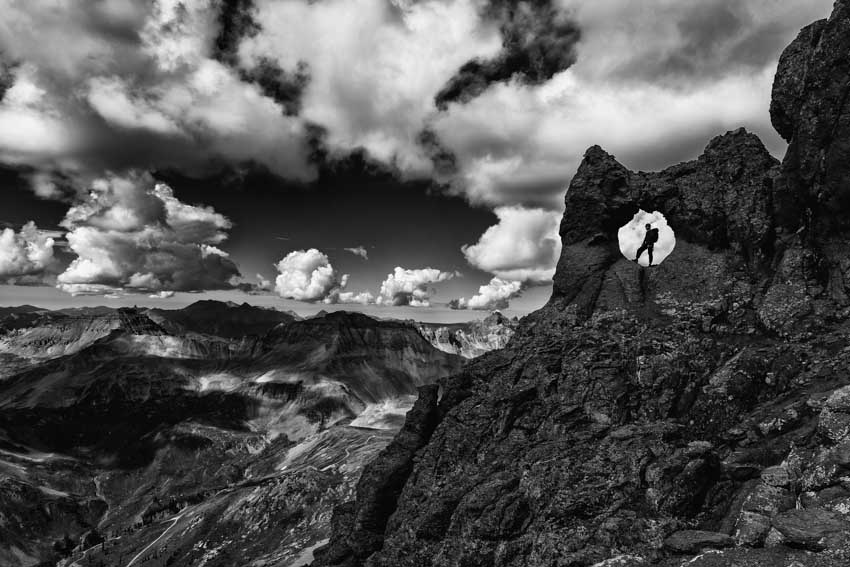
It was cool seeing the little hole in the rock, which is not to be mistaken for the Teakettle's handle; rather, this hole was just another sweet feature of the area. The goal was to climb that rock gully to the right of the hole and follow a smaller gully up to the left below the hole.
Natalie points out the route to Brad and Rick on our ascent.
As we climbed up the face, more nice light was hitting the peaks behind us to the south.

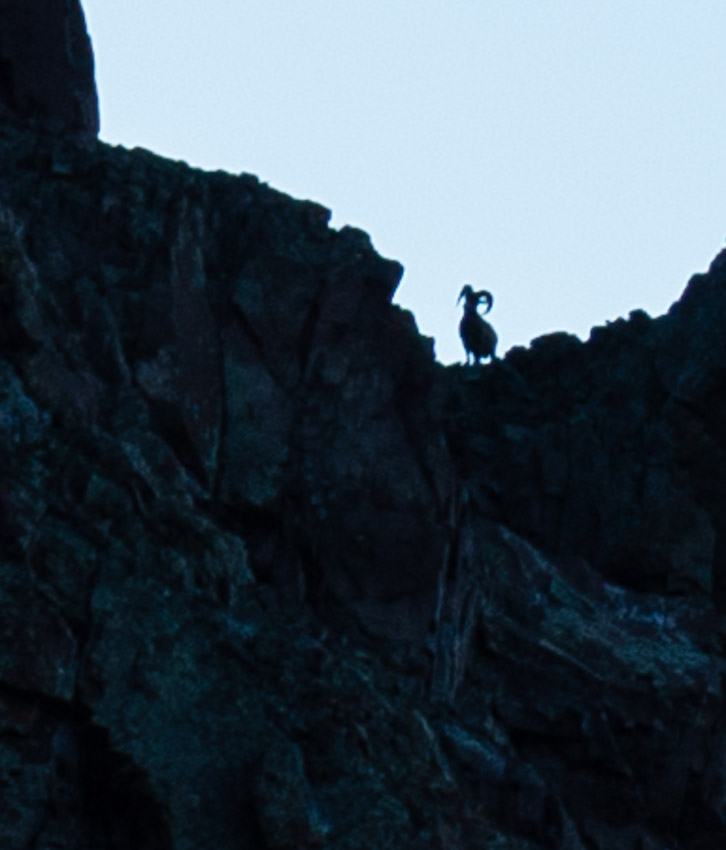
I spotted a Bighorn Sheep up above us to the east; however, I only had my 24-70 lens on me at the time, so this was as good as I could do to photograph him. He made a ton of noise as he deftly climbed the seemingly impassable terrain of Teakettle Mountain.
We reached the base of the chossy boulder gully - it looked pretty inviting - all I remember is that Natalie was thinking it would be much better to do this in spring when there was snow - I agreed. The rocks were loose and mixed with dirt and scree - a true climber's nightmare.
As we continued to gain elevation at a quick pace, Dallas Peak came into view for the first time - showcasing just how insane of a climb it really is - and how awesome it did feel that we accomplished that sucker just one day prior. It felt good to be knocking out the toughest peaks in Colorado.
The next shot is just to demonstrate how rugged the terrain around us was. It was impressive to say the least.
The higher we climbed, the more we could see out across Yankee Boy Basin. The tip of Sneffels came into view, giving some credence to my belief that it is one of the most impressive mountains in Colorado. This whole area is a sight for sore eyes.
The chossy gully was really loose and steep and at times we had to stagger ourselves to prevent rock fall injury - groups really should take caution in this part of the climb due to how loose the rocks are. We knocked rocks down continuously as we went up.
Here is another view of the ugly chossy loose nastiness we went up.
And here is a view looking down the gully and out across a sea of San Juan peaks.
Once at the top of the gully, the views really opened up and we could finally see Coffee Pot, an unoffical peak to the east of Teakettle and impressive in its own right.
As Natalie emerged from the gully, she also enjoyed the views of Coffee Pot - with Dallas Peak behind her for scale!
And of course, the selfie.
The ridge also afforded us views of Uncompahgre to the east - such an impressive view!
After enjoying the ridge for a few minutes, we decided to move on. The route took us up and over a few more small ridges and the actual mountain finally came into view - such a small little spire of a peak above us.
The trail from here became less solid but easily climbable, just not very sturdy. A lot of loose dirt and worn scree.
From the loose dirt trail, Natalie enjoyed the views, snapping off some photos with her small camera.
We finally reached the infamous Teakettle handle at the base of the technical portion of the climb and we all got a chance to celebrate from inside the handle - a San Juan classic! Brad -
Matt enjoying the views of Dallas Peak.
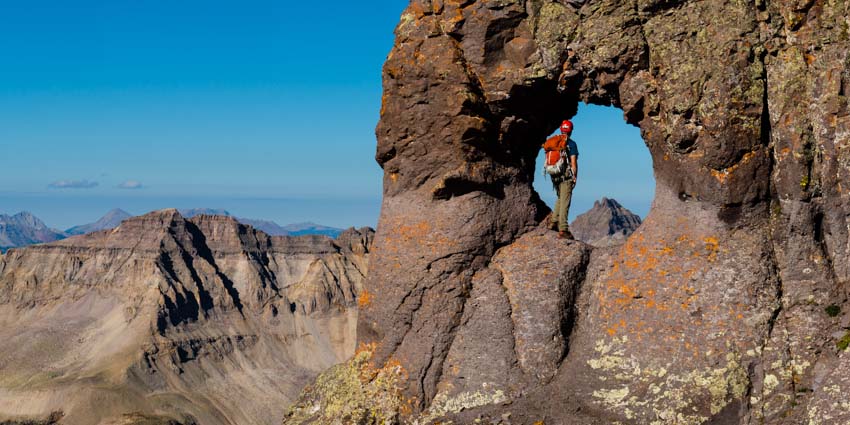
Natalie -
While we were busy having fun in the handle, Rick was prepping the climbing gear for our ascent up the 5.3 face of Teakettle Mountain.
Rick led the climb quite easily and set some bomber protection for us to follow.
Here is a view looking up the face of Teakettle - an impressive spire with lots of great holds.
I went next to last and found the climb quite challenging but highly rewarding. Not nearly as difficult as Dallas Peak or Vestal Peak by any means, but the route was harder than I was expecting. I found the crux quite exhilerating and the summit was insane! It only measured 6 square feet at best and there was room for two or three people tops. The view of Sneffels and friends was outstanding. Who else can say they carried a Nikon D800 up to the top of both Dallas and Teakettle? :-)
I stayed on top while Brad belayed Natalie from below. Here's Natalie topping out. This is seriously how big the summit is. That's my boot.
Here I am giving the two thumbs up on top. Such a strange summit - no room to even get up and move around. No 360 pano this time!
After successful summits from the whole group, we stopped to let Rick bask in the glory in the handle of the Teakettle. This shot is one of my favorites I've taken, ever. I just LOVE it. I hope you do too! This photo one grand prize at the Colorado Springs Creative Photography group's annual photo contest in 2013 and I also submitted it to the National Geographic Travel Magazine's contest a few months ago.
As we descended, we came across a few groups of people and we were all noticing storm clouds starting to build - we pondered a climb of Coffee Pot but after examination of the route by Rick and Natalie, we decided against it.
The whole party was quite ecstatic for our success - two for two. Here's Rick celebrating our conquest.
Another shot of Rick with the rugged San Juans behind him.
Unfortunately, Brad got really bad altitude sickness on the way down, which was good timing, considering the alternatives. We all helped him down the mountain as he vomited several times throughout the way out. We all really felt bad for the guy, but he was a real trooper! Natalie surely did not let it get her spirits down in this shot of her.
And this final image - hopefully not my last photograph of myself on the side of a Colorado Peak. I've since moved to Portland, Oregon and won't have many opportunities to climb in Colorado. I do have two trips planned this year, but my days of 20-30 peaks in a season are probably over. I'll continue to write about my adventures here in the Pacific Northwest, and I've begun recruiting other writers to keep this site alive, including Regina Primavera. If you are at all interested in contributing and getting trained, and want to reap the potential benefits - fame, fortune, experience (hahaha). Seriously though, let me know! Until next time...
2013 Colorado Mountaineering Deaths - A Review
2012 Colorado Mountaineering Deaths - A Review
Climbing Dallas Peak - Roped Up Above Telluride Colorado
August 30, 2013
Distance: 11.5 miles (according to GPS)
Elevation: ~5,700 ft (according to GPS)
Time: 10.5 hrs (4.50 am to 3.20 pm)
Team: Rick McBee, Ben, Matt Payne and Natalie Moran
I suppose I never dreamed of climbing Dallas Peak. First viewing it's full stature from the summit of Mount Sneffels in 2010, I was immediately struck by how intimidating the peak appeared and how overwhelmed I was with a sense of fear and surrender. I'm pretty sure my exact words were, "F*!$ that!" :-)
Fast forward three years and a few climbs later and my attitude towards difficult mountaineering feats has shifted quite a bit. Peaks like Dallas are a now a hearty and welcome challenge in my quest for the highest 100 mountains of Colorado. Ever since reading about Dallas as a boy, I've been fascinated with the technical aspects of how to summit it. When you're a kid, everything looks a lot harder than it really is, and this is especially true of mountains. My mountaineering hero, my dad Ray, never did make it to the top of Dallas, having deferred his quest for the highest 100 for a middle-aged devotion to my baseball career, which surely made him father of the year multiple years running. Knowing Dallas was never completed by Ray made it even more magical and impossible in my mind, just as I had thought of Vestal's Wham Ridge before I also completed it successfully in 2010. Exacerbating my Dallas Peak magical thinking was its extremely short-lived climbing history. The thing has quite simply not been climbed a whole lot. As Rosebrough puts it:
"Interest was renewed in Dallas Peak in 1976 when Spencer Swanger made a solo climb of the peak, which was the last of the hundred highest peaks in Colorado which he had not climbed. Swanger felt that of the nearly 300 climbs he had made, 'perhaps Dallas had been the toughest.' Indeed, only two ascents of Dallas have been recorded before Spencer Swanger's, Don McBride and Everett Long in 1934; and Stuart Krebs in 1956." - Robert Rosebrough - The San Juan Mountains - A Climbing and Hiking Guide.
So, when I received an email from Rick McBee about climbing Dallas and Teakettle on Labor Day weekend, I immediately responded with a prompt "I'm all in." Rick and I became acquainted with each other last year when he sent me a message after I completed the 14ers. He purchased several of my photographs for his company after seeing my shots from my Pyramid Peak and Maroon Peak trip report. I knew Rick as a fellow 14er completer and a very awesome dude. He had also named another accomplished mountaineer, Natalie Moran, as being a part of the climbing party, so my confidence in our success was very high. I had heard great things about Natalie from other 14ers.com members and so I felt great about our odds. The plan was to meet at the Mill Creek Trailhead above Telluride on Thursday night and climb Dallas on Friday morning. After Dallas Peak, we'd head over to Ouray and climb Teakettle Mountain on Saturday. Both mountains demanded the use of ropes and a keen ability for rappelling, neither of which being things that I am an expert in. I warned Rick of this and he assured me it was not a problem at all.
I debated a great deal as to which camera lens or lenses to bring for this trip, knowing I would be doing some technical climbing and quite a bit of tricky maneuvering on shaky terrain. I eventually decided to bring the heavier yet versatile Nikon 24-70 f/2.8 attached to my D800. Strapping the camera and lens to my chest vis-a-vis my Lowepro Toploader would not be too difficult, and I could always opt to throw the camera bag into my backpack for the roped sections. Note and shameless disclaimer: those are affiliate links above, so if you like to shop at B+H and want to help keep the site running, please consider using them.
The drive to Telluride was totally uneventful minus some construction on Highway 50 between Gunnison and Montrose. My last stint through Montrose led me to a Denny's which was not exactly the most vegetarian-friendly establishment. I regretted not doing more research, again, and opted for a trip to Subway before heading to Telluride from Montrose. The trip began well, as I caught up on my email while eating dinner to learn I had won tickets to see Bill Burr at the Pikes Peak Center. Woohoo! A good omen indeed. Per usual Centennial procedure, I consulted Gerry Roach's "Colorado's Thirteeners" book for directions on how to find the trailhead. The description provided by Roach was quite accurate, taking me up an un-marked road exactly 1.9 miles east of the Highway 145 turn-off for Telluride. So far so good. My Subaru Forester made it up the hill without incident and I found both Rick and Natalie's vehicles parked on the side of the road near the end of the Mill Creek Road. I parked my car and introduced myself to Rick and his friend Ben, who was joining us for Dallas. Natalie was already fast asleep in her Forester. I decided to sleep next to them in front of my car, so I would have to test the sleepability of my Forester another night. The stars were out, but only for a brief moment as clouds rolled into the valley.
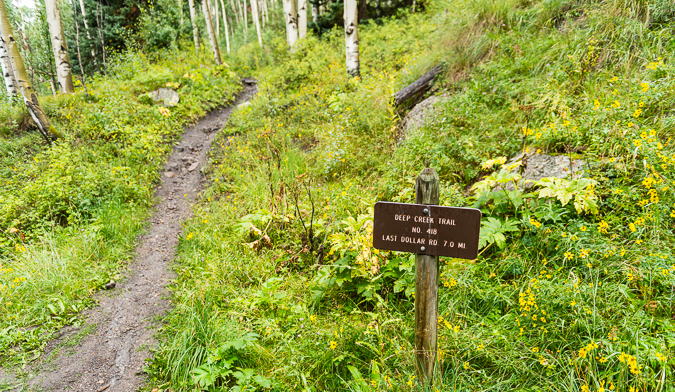
We all woke up at 4:30 AM for a 5 AM start. I introduced myself to Natalie, after having exchanged several private messages with her over the past couple of years on the 14ers.com forum. I knew that Natalie was from Russia, so it was quite awesome to hear her accent. You see, as my wife will attest, I have a thing for accents. They intrigue me, and I love listening to people talk with them. We began our hike up the trail and were immediately stumped by a marked split in the trail, a common occurrence when you begin hikes in the dark. Fortunately or unfortunately, depending on your outlook on the accuracy and usefulness of Roach's route descriptions, Natalie had brought a copy of the route description from Roach's book, which clearly stated to take a left at the signed trail junction, which we eventually did after some debate. Here's a photo of that trail junction taken later in the day on our waydown, which is clearly marked as the Deep Creek Trail.
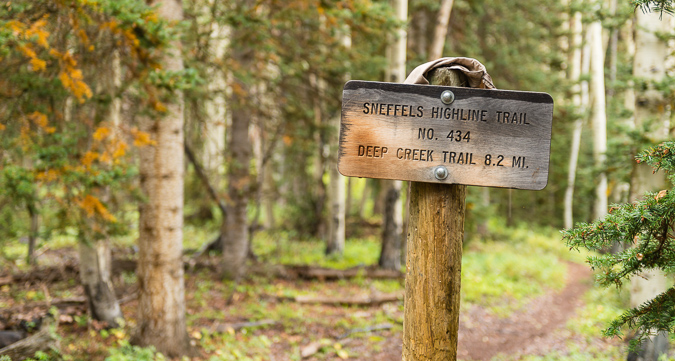
From this junction, Roach writes that you need to hike another .7 miles through three switchbacks to a meadow at 10,000 ft. and then west through the meadow. For some reason we thought there would be another trail to take after finding the meadow; however, that was our misunderstanding. We found the large meadow in the dark, which continued west and then north. A heavy layer of clouds still obscured our views. We knew we were looking for the Sneffels Highline Trail after reaching a ridge at 10,600 ft. We found this trail without any issues as well, but were confused quite a bit in the dark before finding and turning right onto the marked trail junction as depicted below.
The views from the Sneffels Highline Trail were divine in the early morning light, showcasing amazing scenes of the Wilson Peak group to the southwest of us.

The light hitting the mountains above Telluride was absolutely sublime, and made for quite the stunning black and white image.
We followed up the trail through seven switchbacks as described by Roach and then found ourselves wondering when to start climbing up the slopes of Dallas. We found the trail quite easy to follow but often questioned our location and direction, having to consult GPS and map quite often before agreeing on our next course of action.
As the trail wrapped up and around the southern flank of Dallas, views to the north and west continued to wow us as the morning progressed. We were making great time, taking minimal breaks. I tried to stay back a little so I could get some good photos of the route heading up and of our awesome party.
Rick and Ben were setting the pace and keeping us on the right path, with an occasional team discussion about our next moves. Man, it was great having competent mountaineers on this trip. Rick was a strong leader, and Ben was a true champ.

The sky was pretty overcast most of the morning, but that did not stop the sun from lighting up the San Juan peaks above Telluride, across from us to the south.
We continued up the Sneffels Highline trail and enjoyed our views to the south very much. It was a very calm morning, and we were holding onto hope that the weather would improve and that our day would be marked with success on Dallas.
After losing a little elevation and crossing a small creek, the trail wraps around to the south and west and then across a large grassy area below Dallas, where we began eye-balling our route up to the first cliff bands on Dallas' southern flank, shown as a white band in the photo below.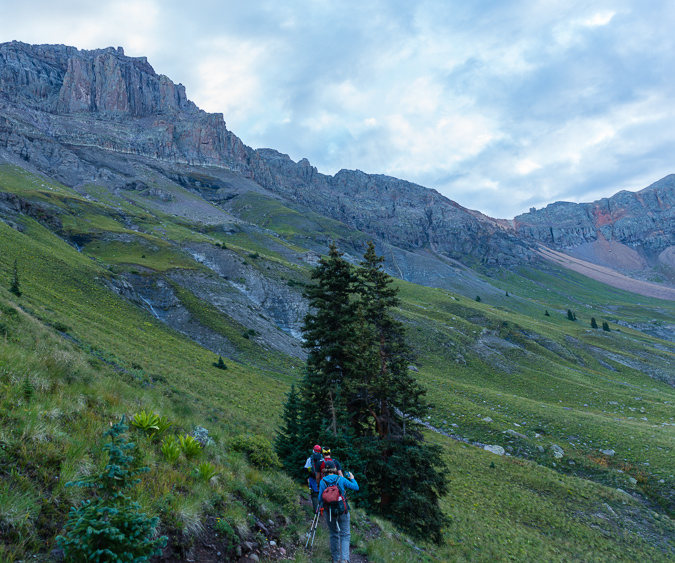
We left the trail at stream coming down from Dallas and fanned out to ascend the very steep grassy slope up to Dallas' cliffs.
As we climbed, a deer was seen above us on a ridge. I did not have a telephoto lens with me, so this is heavily cropped from the D800 (about 100%).
Natalie sneaked a photo of me taking that shot. It was great having some people other than me taking photos!
Telluride was still looking great in this photo of Natalie as we continued up the steep grassy hillside.
And of course Lizard Head, Mount Wilson, El Diente and Wilson Peak (left to right) looked amazing across the valley from us.
Ben volunteered to take a shot of me heading up with my camera, with the great light behind us. Thanks Ben!
Mount Emma was also looking amazing as we ascended to the cliff bands, with early sun behind.
The lower section of this part of the climb was pretty straight forward, albeit rather steep. There was good rock and grass to grip with our boots, and the larger rocks were quite avoidable through here. We found this part of the climb to be relatively simple with little to no route-finding needed. There were numerous areas that had a clear trail identified all the way up to the cliff bands. We stopped a few times to catch our breath and take in the views.
We were a very strong group, so stops were not very frequent. Also, for not climbing together before, we were quite friendly and the group's conversations were very enjoyable. Rick carried the rope while I did the heavy lifting with the camera. Ben and Rick wore their harnesses all the way up, while Natalie and I opted to leave those in our packs until they were needed later.
We continued up the easier section without any issues. When we reached the first set of cliff bands, we were a little unsure where to go until some cairns revealed themselves to us and the route up past the cliff bands to the left became obvious. Also, the climbing become much more exciting as we entered some very fun class 3 sections of rock ledges.
Here's a shot of me heading up the class 3 section, taken by Rick. You can also see the general area we came from, having left the trail about where the trees end near the bottom of the rock gully far below.
As we continued up the lengthy class 3 section, the light below Mount Emma improved, illuminating the awesome stream coming down from above.
We found the climbing in this area to be very fun and enjoyable, with only the occasional loose section of rock. Natalie was a wicked climber and did a wonderful job of surveying the route.
Dallas was quite imposing as we reached higher and higher to the base of the peak.
And damn, the light over on the Wilson's was spectacular in the early morning sun.
The terrain got a little more tricky as we kept heading higher on the southern flank of Dallas, forcing us to find fun and entertaining routes up the mostly solid rock. Here's Natalie powering up one of the final sections of this part of the route.
Once up to the end of the cliff band, the route evened out quite a bit and lead us to the west to a notch referred to as 13,000 ft. notch. Rick led the way.
The route heading up to the notch was very straight-forward, we just followed the cliff band and up a boulder field on a very well-established trail.
A look back on the route we took up to the notch.
As we rounded the corner a bit, the route to the notch became even more apparent - stay as far left as possible without climbing straight up a wall.
We stopped just below the notch to enjoy the views.
The frequent rain over the past few months really greened-up the mountain-sides. Vestal and Arrow were just coming into view in the distance (left middle).
A look back at the Wilson Peak/Mount Wilson massif shows the trail we followed up to the notch.
As we reached the notch and rounded the corner to head up the west face of Dallas, Sneffels and Teakettle came into view, filling us all with a sense of excitement and glory.
Once the notch is reached, the fun begins. We immediately began working our way up a fairly obvious route towards Dallas' summit towers above through loose dirt and rocks.
Teakettle was looking quite awesome. I was savoring it already. I was wishing I had a longer lens to get a nice zoomed-in look at the handle of the kettle, but a super-cropped shot from the 24-70 would have to do.
 Climbing up this section was pretty straight-forward, but quite loose. I could see this being a challenging section if there was snow on the ground still or if significant rain had happened prior to the climb. There seemed to be a feint trail all the way up to the class 4 section on the west face. The trail led us up this loose gully that was directly against the face of the peak, and then over some ledges to the west.
Once over the ledge system we reached what was clearly the class 4 section. To our left was an impassable chimney and to our right was a huge drop-off into the basin between Dallas and Sneffels. We worked our way up to the base of the class 4 section and mentally prepared for the steep rocks that awaited us above.
Finding the class 4 section was not hard, but locating a route up it was quite the challenge! I love class 4, personally, so I was very happy to find this section, as I had mostly forgotten about it from the route descriptions I had read. A look back down where we came up showed just how steep the west face was, but it was certainly nothing too hard, in my opinion.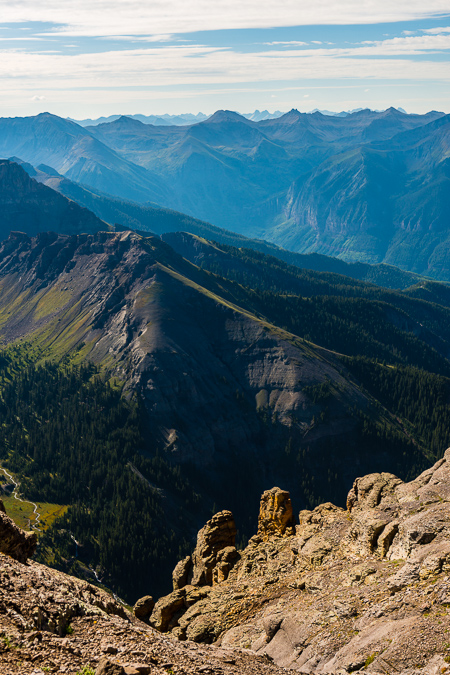
Approaching the class 4 section was not hard, but it was strewn with a lot of loose garbage.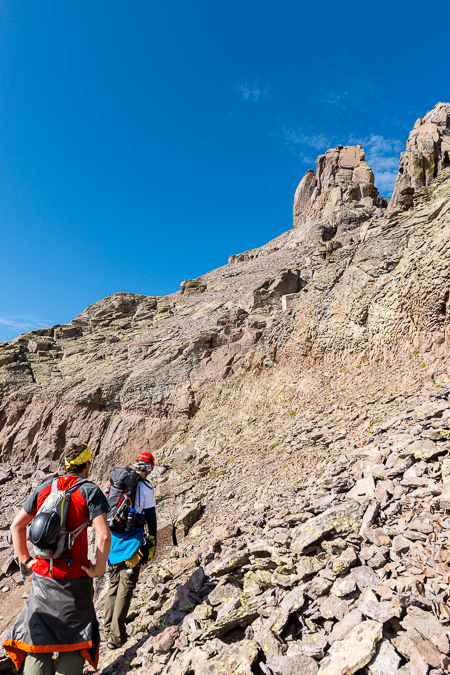
I kept my position as caboose and Natalie fired off some shots of me coming up the class 4 section, which I found to be quite exposed but very solid.
I continued to enjoy the views of Sneffels as we continued up the side of Dallas.
We found the class 4 anchor station, which we figured some people used to rappel down the class 4 on the way off the mountain.
At this point, the route became looser and steeper, but nothing overwhelming in nature. We followed the loose scree up to the first crux below the summit towers.
A look back towards Sneffels revealed some awesome hoodoos on the ridge. What a cool geologic playground.
Almost to the first crux, Ben and I stop to revel in the San Juan glory behind us.
We reached the first crux, which was quite obvious and marked at its base with a cairn. This chimney looked very challenging and I was wondering how I would get up it with my camera on my chest.
Thinking that would not work out so well, I opted to put my camera bag away and head up the same way as the rest of the group. The chimney was low class 5, for sure.
I found ample but difficult handholds on the left side of the chimney and worked my way up to the first ledge seen just above Ben's yellow bandana above.
From this ledge, the route becomes a little less obvious, and the footing is somewhat unstable due to the slope of the rock you are standing on; however, I decided to head to the left through an awkwardly diagonal weakness between rocks.
We did not rope up for this short section, but I think some parties might benefit from a rope at this spot for some added security and peace of mind.
Natalie captured a photo of me coming up the small chimney from above. 
A view from above, shot by Rick:
 |
 |
Here's another view looking up from the bottom, showing the general line you take to reach the top of the chimney.
We also found an anchor at the top of the 1st crux and figured it was used to top rope the chimney. Photo by Natalie.
Once past the chimney, we were a little perplexed as to where to go next. Ben and Rick study the route in this photo from Natalie.
The route was not obvious at all. Roach describes down-climbing from here, but we found no such need or desire. The only way that looked even do-able was a ledge system going up and around the north face of Dallas, which had dramatic exposure as seen in this photo snapped by Natalie. Would you downclimb here? No - thanks though Roach.
Following a lightly worn area of rock up a small series of ledges proved to be the best bet.
At least the views were still holding up.
We found it difficult to find the summit pitch, but some sleuthing by yours truly discovered a dirt gully leading up to a ledge which was at the base of the summit pitch, which looked quite challenging. Rick set-up his rope and got down to business as soon as Ben arrived to belay.
Here is another view of the dirt gully leading up to the summit pitch.
Rick placed only one cam for protection before reaching a belay ledge about 30 ft. above. Our route went right over the first boulder and then up to the right.
After watching Rick tear up the face to the belay station, I took one last look over at Sneffels and Blue Lake before mentally preparing for the ascent up the face. Rock climbing is not really my area of expertise, with only a few other forays into the alpine roped climbing arena in my past. Ben ensured I was tied in correctly and helped clean some mud off my boots.
Natalie got one last photo of me before my first alpine ascent in several years. Adrenaline started pumping.
A look up revealed my route. Nothing too crazy, right? That's Rick perched up there with the white hat barely showing. Oh, and hey, an appearance by the moon.
Up we go into the crazy class 5 crux. I found it pretty tough in muddy mountaineering boots, but managed to find some solid footholds with the help of Ben's finger pointing out some spots for me to try. Photo by Natalie.
A patient and watchful Rick watched from above. I'm not sure if I should be happy or disturbed he got photos of me while belaying. All is well that ends well. All joking aside, Rick was an awesome leader.
Once up the 1st big boulder, climibing became quite a bit easier.
After I unclipped, Rick threw the rope down to Ben.
Ben topped out with ease and enjoyed the views of Sneffels while Natalie roped up.

Natalie made it up to the belay station without any issues and Rick continued up the route. We found the next section to be a bit easier.
Rick went first and got to the top within about a minute. He setup a belay and I went 2nd, deciding to clip in for added security. The final section was exposed but there was a lot more handholds and footholds to choose from and it felt very low class 5, perhaps class 4. I reached the top of Dallas and was overwhelmed with joy. What an amazing climb! Natalie came next, and I was able to document her topping out beneath Rick's "meat anchor."
Natalie was just as excited to get to the top as I was.
The views from Dallas were expansive and incredible. Blue Lake was awash in light. This panorama is pretty huge. In the full resolution version, you can see all of the buildings at Telluride and make out people on top of Sneffels. Click on it to go to my photography gallery.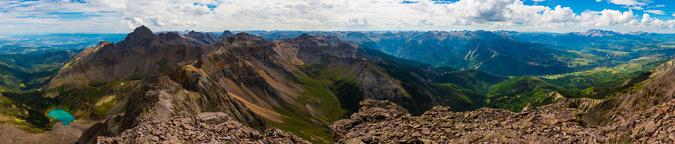
I was all smiles on top of the world. Only 18 more Centennials to go!
Natalie got a great shot of me after I fired off my summit panorama.
After enjoying some lunch and watching the storms build to the west, we decided to get a group photo and prepare for the rappel off the top.
Rick set up the rappel and everyone gave me a needed refresher on rappelling. Rick went first and I went second. Setting up the rappel for this was a bit tricky. Natalie let me borrow some cord to anchor myself to the anchor and then I got onto the final ledge and roped up. We had about a 90 foot rappel off the west face of Dallas, which contained some interesting rappelling features. First of all, as soon as you step off the edge, the rock inverts and you're off to the races. Second of all, you have to aim for a hole between a giant car-sized chockstone below, about 60 ft down. Natalie got an awesome shot of me moving into the first part of the rappel.

I think the rappel was even more heart-pumping than the climb up. Don't get me wrong, I really enjoy rappelling, but it had been at least two years since my last rappel and I was hanging off the side of a huge mountain. Amazing stuff.
Once I popped through the hole below, I was ectatic. I photographed the others coming down through - here's Natalie.
Our fearless leader awaited us below.

Another view of the hole we rappelled through, this time Ben coming down.
After the rappel, we head down pretty fast. I took a nice tumble on the class 3 section on the south slopes and got a few cuts, nothing too crazy. We made it down to tree-line just as rain began to move in.
We reached the infamous meadow that Roach refers to and I decided to get a parting shot of Dallas above.
Back at the parking lot, we conspired for our plan of attack on Teakettle for the following day.
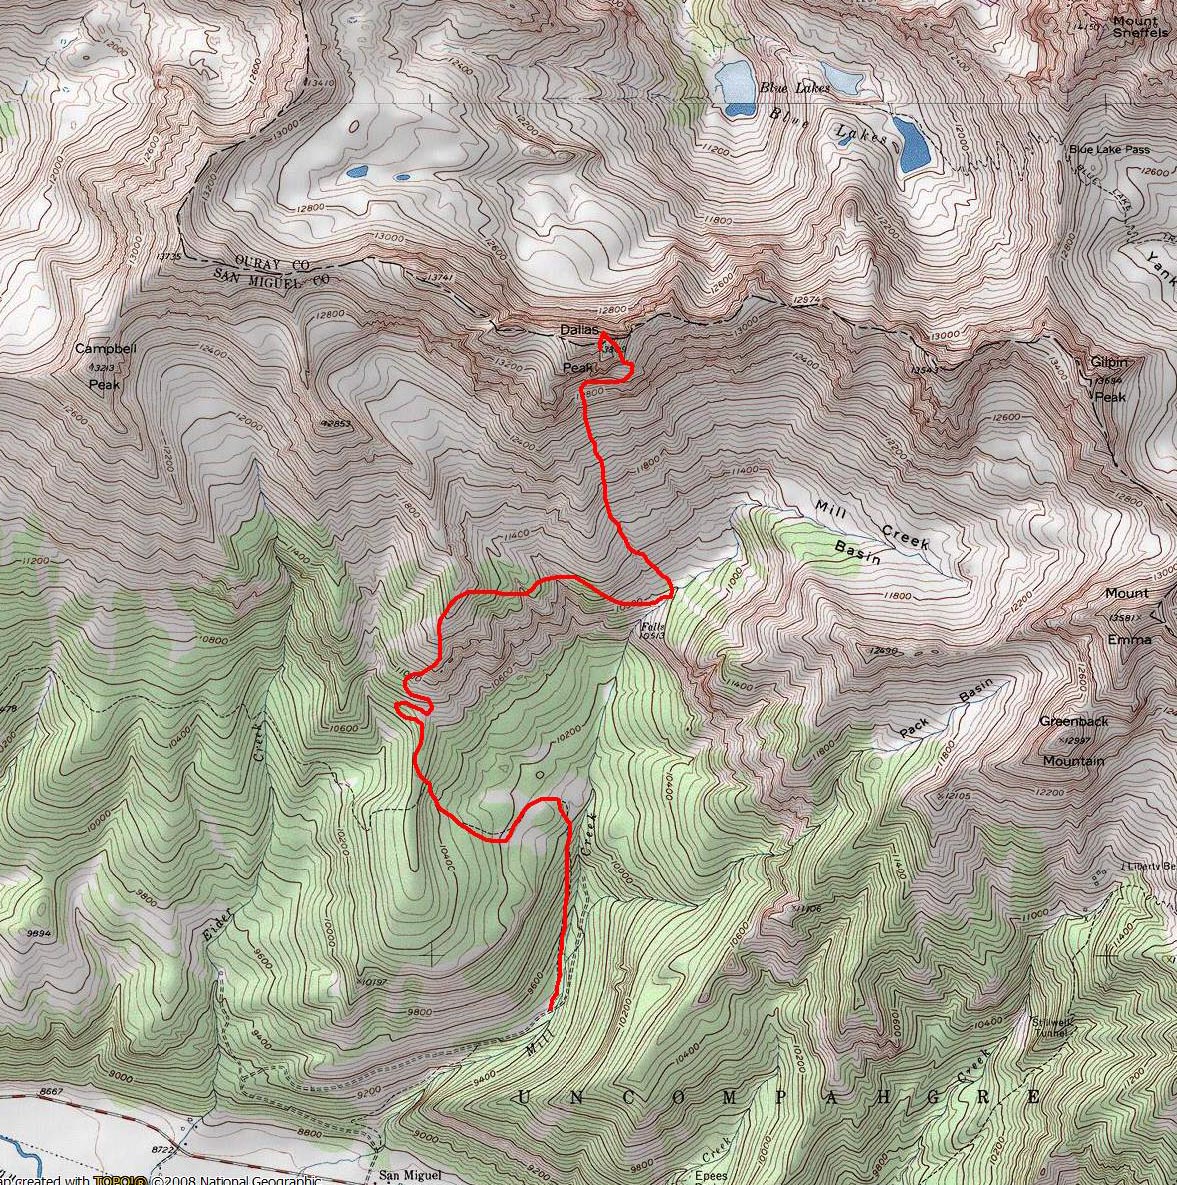
Overall, I would rate Dallas Peak as one of the hardest Centennials (highest 100 mountains in Colorado). The long, steep approach coupled with the challenging route-finding and intense class 5 climbing as well as the bomber rappel make this one of the most demanding peaks in Colorado. So far, I think Dallas would be rated as the hardest mountain I've climbed to date. As far as route-finding goes, don't rely to heavily on Roach. We found his descriptions somewhat lacking, especially on the upper section of the route after the 1st crux. Study our photos carefully and you should have no problems finding your way if you should choose to attempt Dallas. I would highly encourage other climbers to use Natalie's GPX file and reference her trip report as well. Here's a map and a rough hand-drawn route to reference as well.
For more information on travel and lodging in and around Telluride, check out this site, full of great information.
Lastly, I want to thank my amazing climbing partners, Rick, Natalie and Ben. These three were amazing to climb with and I could not be more happy with how our climb went. Next up, Teakettle...
Perseid Meteor Shower at Ice Lake Basin and a climb of Vermillion Peak
When the dates for the 2013 Perseid Meteor Shower were released, I knew I wanted to schedule some time in a very remote location to capitolize on the opportunity to capture as many meteor shower photos as possible. I did a little research and took a look at my remaining Colorado Centennials that were left to climb and enthusiastically declared that the Ice Lake Basin would be the perfect location. I knew that the trip would be amazing for a photographer, but perhaps boring for someone that is not into photography. I reached out to my friend Ryan Fonkert to see if he would be interested in joining me on a tour-de-Ice-Lake-Basin to shoot the Perseids and to climb Vermillion Peak. Without any hesitation he said he would join me.
Photographing meteor showers has only recently been something I've wanted to do, and my first successful foray into that realm of photography was back in December 2012 for the Gemind Meteor Shower, where I was able to come away with this photo:

Ice Lake Basin has long been on my radar as a location to visit. Ideally, I wanted to visit the area during the peak of wildflower season due to the idyllic photograpy opportunities afforded at the upper Ice Lake. Unfortunately, the Perseid Meteor Shower falls in mid-August, so this time would have to mostly be a scouting mission for wildflower-style photos.
Ryan and I carved out a chunk of time on our calendars to coincide with the Perseid Meteor Shower peak; we went with Sunday, August 11th through Wednesday, August 14th, knowing the Perseids would peak on Monday night, but also allowing us some flexibility in case of weather or other uncontrollable variables. We made preparations to spend three nights at 11,000 ft and higher, with weather forecasts showing significant rain and/or snow. Sunday afternoon we gathered at my house and departed for the long journey from Colorado Springs to Silverton via Highway 50. I was particularly excited for this trip for a billion reasons, one main reason being that Ryan and I had a ton of interests and world views in common. We were both atheists, both photography geeks, both vegetarians, and both fairly liberal in our political beliefs (don't hold it against us). It was going to be great to be able to chat about all of those awesome topics while camped in one of Colorado's premeir backpacking destinations.
We stopped in Montrose for dinner and wound up at Denny's. How sad for two vegetarians. I'm going to have to do more research before the next time I pass through Montrose needing food. The waitress looked at me really oddly when I asked her to withhold the giant sausage that came with my breakfast skillet, but the food was decent enough and the high sodium would probably be a benefit for the hike in. Since both Ryan and I were mostly heading in to do major photography work, our packs were insanely heavy. I was carrying a similar load as to what I had taken up Grizzly Peak a few months prior, with the additon of a couple more lenses and some large filters for my Nikon 14-24 lens.
Ryan and I were able to reach the turn-off for the South Mineral Creek Trailhead, located just two miles north of Silverton on Highway 550 at around 9 PM. We opted for the short-cut along the Clear Lake Road as described in Roach, which shaves off about a mile and a half total for the hike in and out of the Ice Lake Basin. We loaded up our packs (mine was just over 60 pounds) and head out. We were immediately greeted by the loud and insane waterfall described in Roach, which was highly enjoyable to cross beneath in the dark with 60 pounds on my back.
Here is a full list of photography equipment that I brought on this trip and the approximate weight of each item. I purchased a new tripod and ballhead for this trip alone, because my other tripod, while solid, was quite heavy. The new tripod and ballhead weighed less than half as the old setup, which helped some on weight, no doubt.
| Item | Weight (lbs) |
| Feisol Tournament CT-3442 Tripod w/ Photo Clam Pro Gold II Easy PQR Ballhead | 3.3 |
| Nikon D800 DSLR w/ Kirk L-Bracket | 2.8 |
| Nikon 14-24 f/2.8 Lens | 2.0 |
| Nikon 24-70 f/2.8 Lens | 2.0 |
| Nikon 50mm f/1.4 D Lens | 0.5 |
| Nikon 105mm f/2.8 D Micro Lens | 1.5 |
| Fotodiox Wonderpano Filter Kit w/ 5-stop ND filter & 6x8 grad ND for Nikon 14-24 lens | 2.0 |
| Nikon 300mm f/4 D Lens | 3.0 |
| 1.4x Teleconverter | 0.5 |
| Total | 17.6 |
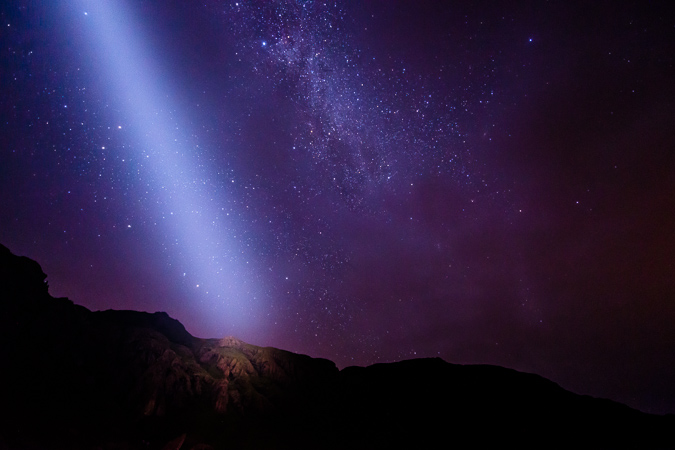
The skies were quite clear on the hike in and we were thinkng we would be afforded some great opportunities to capture some meteor photos on the very first night; however, mother nature had other thoughts in mind. The hike in was quite uneventful until we reached what we believed was the lower Ice Lake Basin. I took out my very bright Brinkman light, which I use for light painting of distant foregrounds for astrophotography. The light was able to show us the area and we headed towards the very upper section of the lower basin. After some wandering in the dark, we stumbled upon an amazing campsite right next to the creek and a huge waterfall nestled at the very edge of the basin. The campsite was equipped with a ready-made bear-bag tree and someone had even salvaged some old mining equipment to form a nice metal bench next to the fire-ring, which we never did use. We setup our camp in the dark quickly so that we could venture out to photograph some meteors; however, by the time we finished setting-up, clouds had already moved into the basin, obscuring our view of the stars above. I was able to get one kind of cool photo of the night skies the first night while utilizing the Brinkman light to illuminate a distant mountain-top to our north east.
After a failed attempt of photographing the night sky, we decided to hit the sack and see what the next day would bring. We awoke pretty early and the sky was already filling with dark clouds. Sure enough, the sound of thunder came early, around 9 AM and we were more or less stuck to our camp area for the duration of the day. Not that we were complaining though, Ice Lake Basin is a pretty great place to be "stuck" for the day. We had pockets of sunshine and decent weather, so we kept going out around the basin for short photography hikes and then back to camp when weather became nasty. This yielded both Ryan and I many opportunities to capture some great images, especially of the ubiquitous waterfalls that were in the lower basin. It was one of the most awesome places I had ever camped, and I am eager to return, no question.

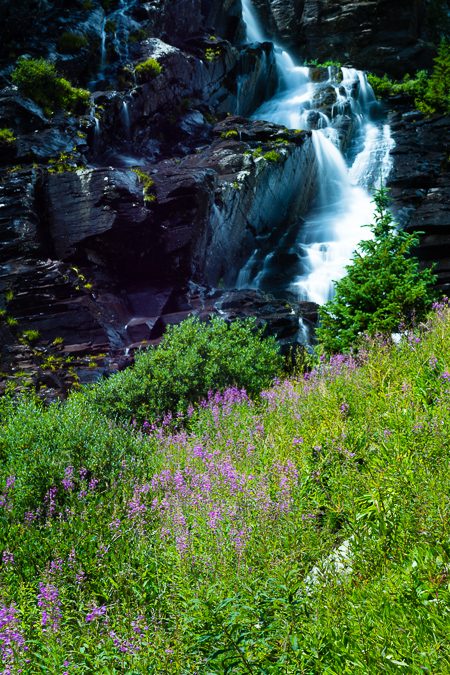 As I mentioned before, our campsite was nestled against the headwall of the upper basin and was directly below a huge series of waterfalls that terminated in a huge field of wildflowers. It was really quite the scene and kept our minds off of the occasional thunder we would hear above. I took advantage of my 9-stop ND filter for taking photos of the waterfall and enjoyed the challenge of the changing light. There were endless opportunities to take photos of the waterfalls and I think I could have probably spent an entire day looking for a better composition or angle. I know Ryan came away with some real stunners too.
Ryan ventured off across the basin to photograph his own waterfalls while I tended to the huge one behind our campsite.
I tried a variety of spots near our campsite and ventured quite closely to the incredible series of waterfalls that came from the upper basin just above us to the west. I don't generally processing in black and white a lot, so I decided to shoot for black and white instead of color for the waterfalls, focusing more on the available light vs. the colors in the area. It proved to be a great way to study the subject and yielded some fairly good results I think. I loved the textures and lines that intertwined between both the rocks and the moving water and really loved how the ND filter treated the scene with a silky smooth aura.
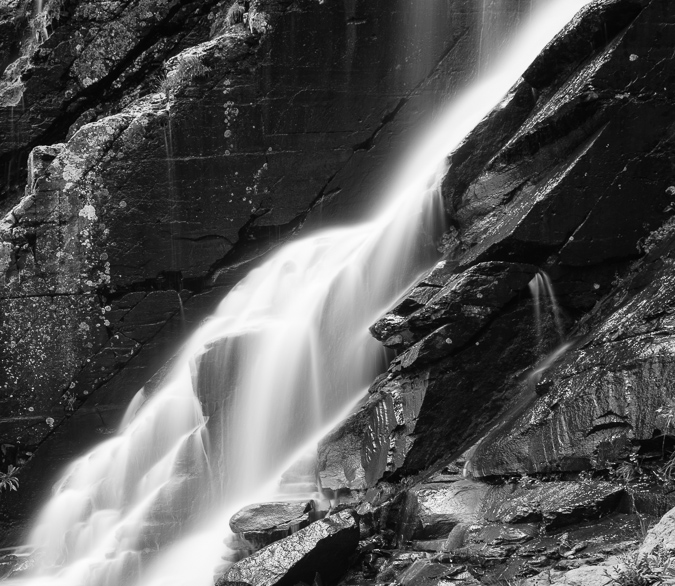
Black and White waterfalls taken with a 9-stop ND filter - a study in light and texture.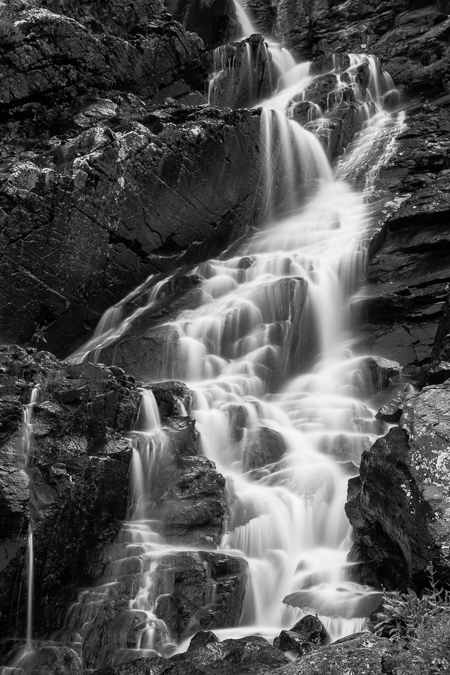
Ryan and I had a lot of time to kill due to the less-than-stellar weather in the basin, so we took turns taking shots of each other. Here's Ryan sporting his Sony and Minolta equipment and myself rocking the Nikon gear on the new tripod.
 |
 |
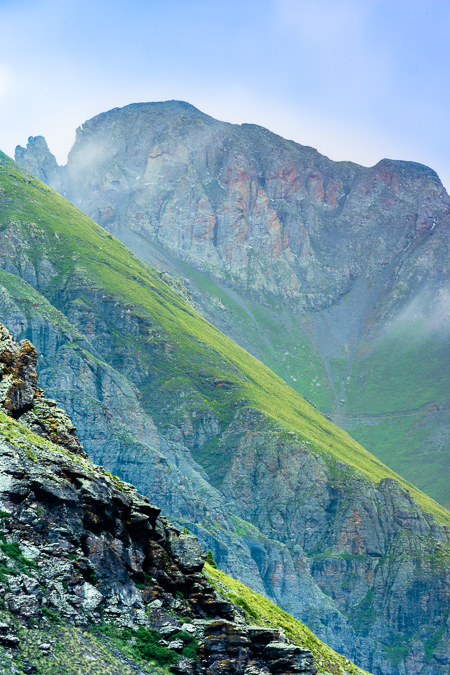
The "on again-off again" weather was both annoying and awesome. On one hand, it kept us close to camp, but on the other hand, it kept bringing in some interesting light and photography subjects to keep us busy. The heavy moisture in the air had created a lot of cool fog-like features in the valley below. Water vapor would rise up from the valley and up into the mountains across the valley from us. As we watched the weather continually change, the temperature kept fluctuating as well, keeping us on our toes and in and out of various layers. It also gave us some opportunity to widdle down on the over-abundance of food we both brought into the valley with us.
Even though the peak of wildflower season had passed, I was quite impressed with the quanitity and quality of wildflowers in the lower basin. I spotted all kinds of amazing flowers, including the Indian Paintbrush, Rocky Mountain Columbine, Mountain Bluebells, Parry's Primrose, Rose Crown, and more. I felt pretty happy to have brought the 105mm macro lens as I'd always wanted to get a nice macro shot of an Indian Paintbrush, so I ventured off to find the best one near our campsite. I found a few good subjects close-by and captured a few decent shots of one.
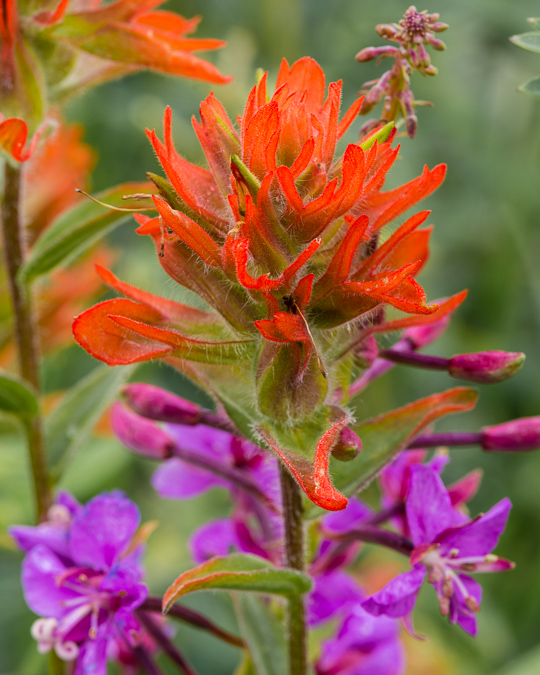
As the light shifted and the day progressed, I kept my eyes on a huge field of purple wildflowers up the hill from us. The sun shifted perfectly and I ran up to get some photos there. I was even lucky enough to get a rainbow in the photo, which was a huge bonus, no doubt. The field also looked out into the distance at one of the more impressive peaks of the area - Sultan Mountain.
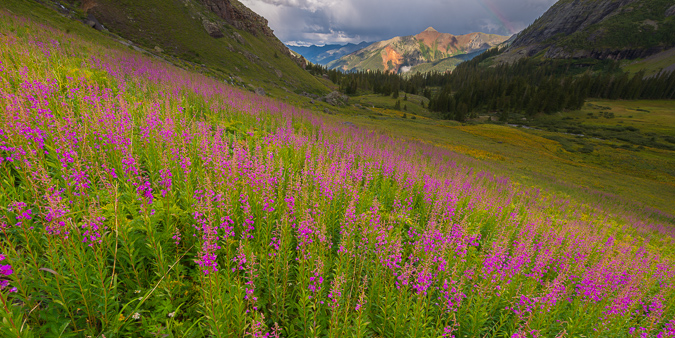
As the storms passed over, I grabbed a self-photo from the wildflower field. What a peaceful place.
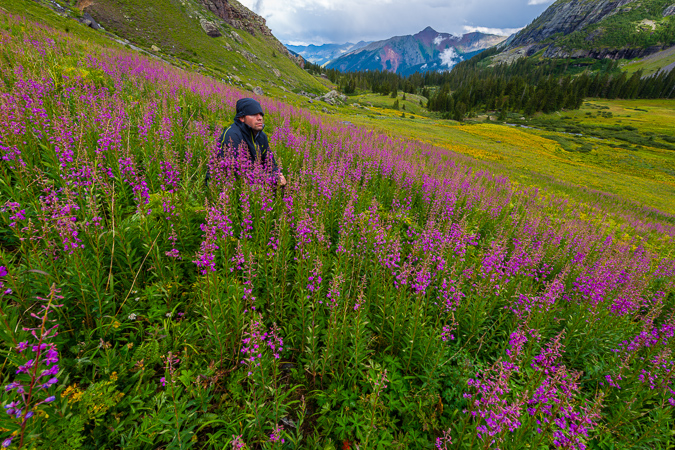
At this point, Ryan joined up with me from the area he was photographing from near the huge string of skinnier waterfalls across the basin from our campsite. He told me I could probably get some awesome shots over there with my ND filter, so I headed that direction, but not before he fired off a hero shot of me carrying my gear.
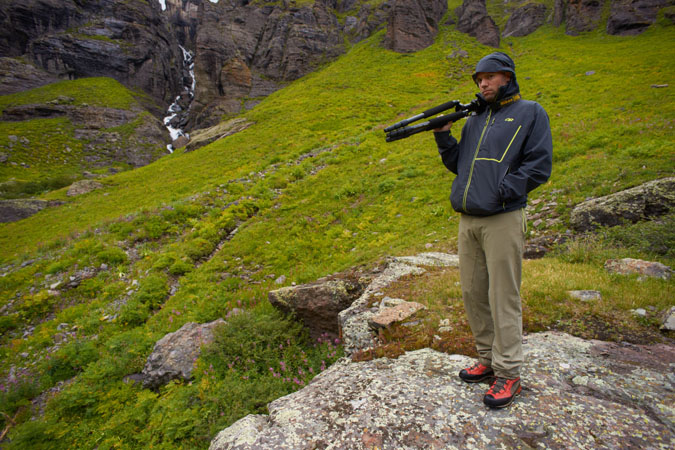
I headed on over to the fast-moving waterfall system up the hill from us and found some amazing scenery there - wildflowers galore with a raging waterfall, including more of those purple flowers and some Columbine as well.
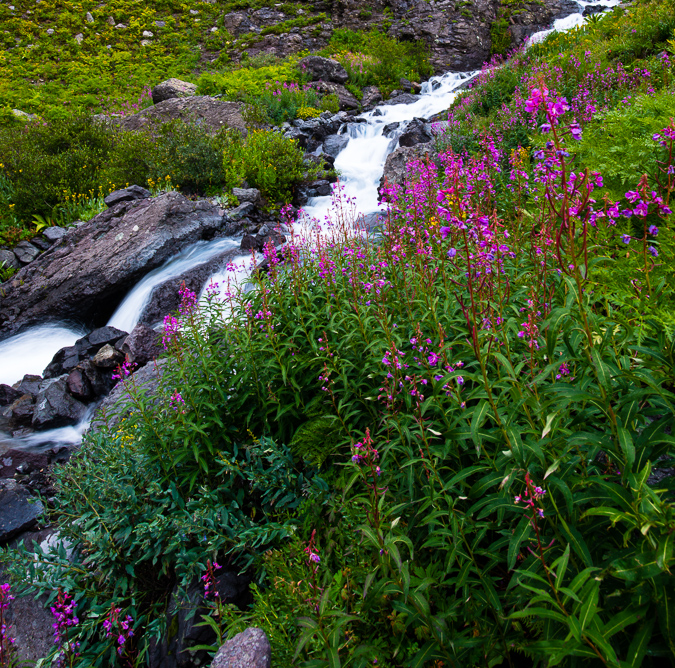
I had to climb onto a really precarious island with cliffs and waterfalls on each side to get this shot of these magnificent Columbine.
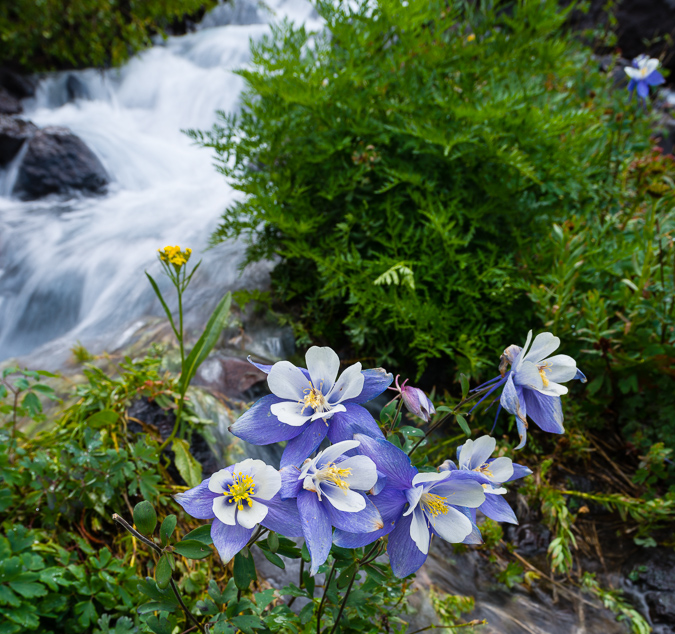
I headed on back down towards camp and noticed the light continue to improve through sunset. I decided this would be the perfect opportunity to finally get to use my Fotodiox Wonderpana Filter system for the Nikon 14-24. As you may or may not know, the Nikon 14-24 is probably the best full-frame wide angle lens you can get, but it has one major flaw - it is unable to take filters since the lens hood is built into the lens. To compensate for this, you have to get elaborate and complicated filter systems if you want to use filters on this amazing lens. Filters are pretty important for certain applications like the highly dynamic light at sunrise or sunset, where the sky is very bright but the foreground is dark. To adjust for this, you use what are called graduated neutral density filters which basically are dark on top and clear at the bottom, allowing you to expose for the foreground and still get a perfect exposure on the brighter sky. This worked out pefectly for this sunset shot I took from the stream.
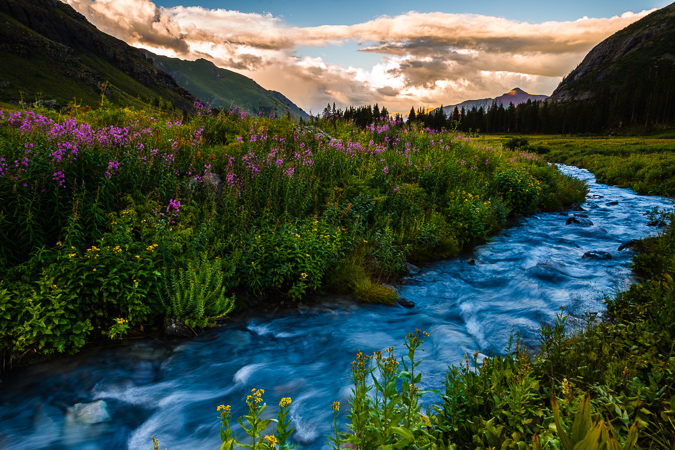
After getting some dinner and packing some of our things away, we kept a close eye on the clouds above, knowing that this second night would be the peak of the meteor shower. The clouds began to clear out, so we decided to head up into the upper basin and find a good spot to get shots of the Perseids. The hike up to Ice Lake from our campsite was pretty easy and finding the lake was no problem at all, even in the dark. As we set-up for our photos, we began to get nervous as the clouds began to return and we could see lightning in the distance to our north and west. Not good! Either way, I wanted a few shots from this area at night, so I set-up my tripod and got a few photos. The moon had not quite set yet but was behind some clouds, which made for a wicked silhouette of Golden Horn.
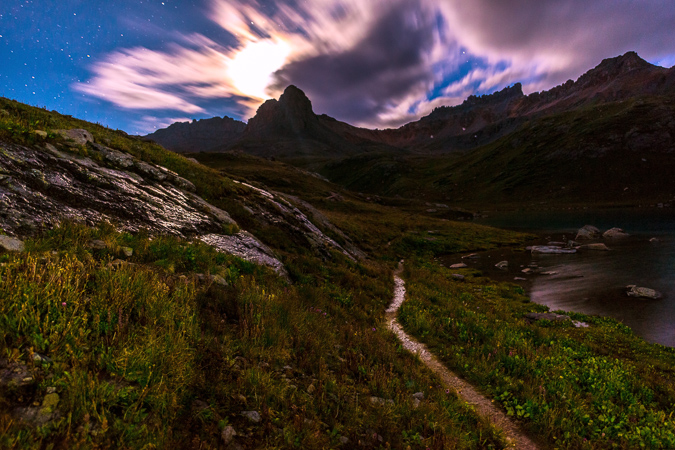
Additionally, the Milky Way made a brief appearance as well with the moon lighting up the passing clouds above.
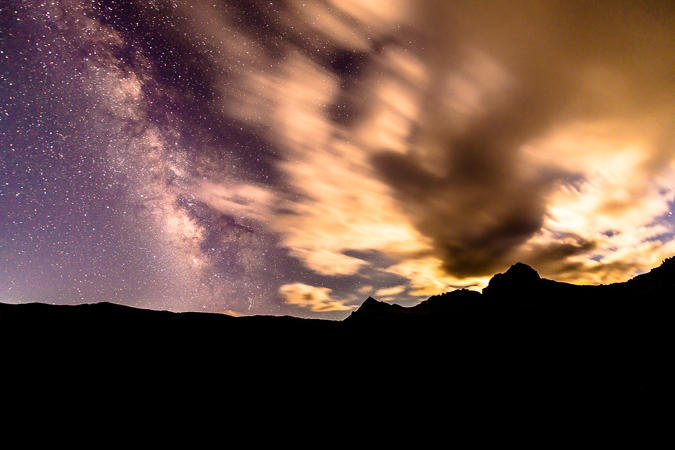
Having seen some lightning and not really knowing how our luck would last, we decided to make the safe decision and head back down towards our campsite, which was very frustrating. I was hoping to setup at the shores of the lake for my meteor shower photos, so I was a bit disappointed; however, about halfway back down from the upper basin we noticed that the clouds had decided to dissipate, so we found a safe and acceptable spot with a nice clear view to the north and east where the Perseid Meteor Shower was radiating from. We setup our tripods and started the fun of doing a long series over several hours to capture as many meteors as possible. The moon was still high enough to light up the foreground too, so it made for a fairly decent spot to get the meteors from. I was quite pleased with my results, netting 19 meteors in total.
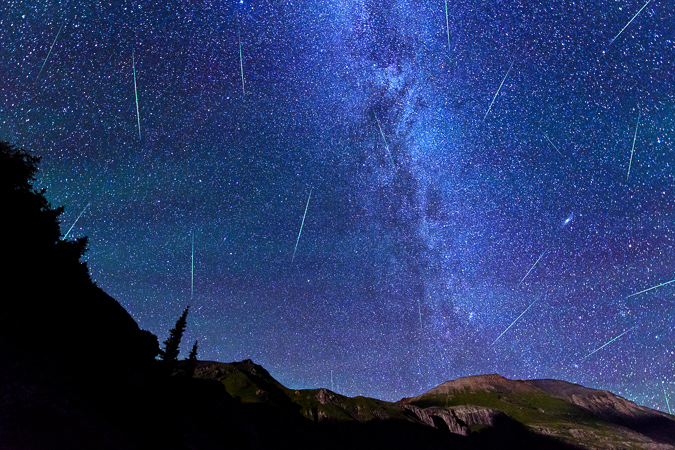
After freezing our butts off for a couple hours, we began to pack up our things, but not before I attempted a vertical panorama from horizon to horizon of the Milky Way. Before I was able to get this shot, I noticed that my lens was covered in condensation, which was a real bummer. I wondered how long it had been this way. I went into my camera to see and only a few shots were ruined. The temperature change from having the camera in my chest pack during the hike up and the very cold night must have caused the condensation - lesson learned!
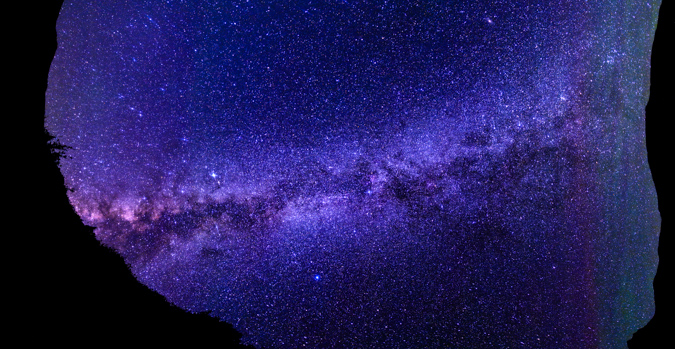
We head back down to our campsite without incident (other than some super cold toes) and went to sleep, prepared to attempt Vermillion Peak in the morning.
We got up a little later in the morning than I'm normally used to for summit attempts, but we were up really late taking photos of the meteor shower. It is always a challenge for me to balance my desires for mountaineering and my desires for photography. While they make quite a synergistic pair, they also sometimes compete with each other, mostly because of the time factor. We made it up to Ice Lake and were blown away at the beauty of this magnificent lake. I've never seen a bluer lake in all of my life.
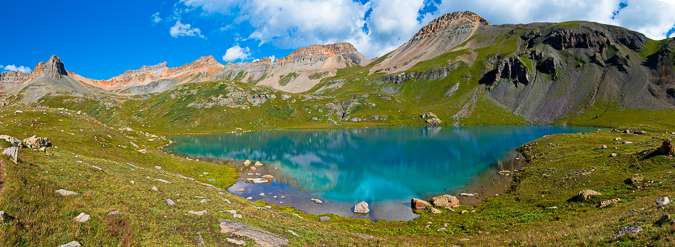
I already knew I wanted to come back to the lake another time of year and get sunrise photos with wildflowers. It was just the most insane spot!
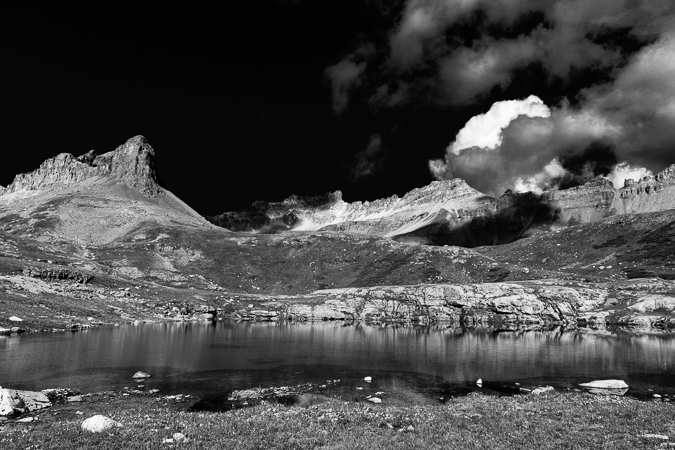
We found another small lake on our way up towards Vermillion and it was surrounded by wildflowers, including this nice Rose Crown as seen in the bottom left corner. Golden Horn made a nice reflection in the lake, and we could finally begin to make out Vermillion behind it.
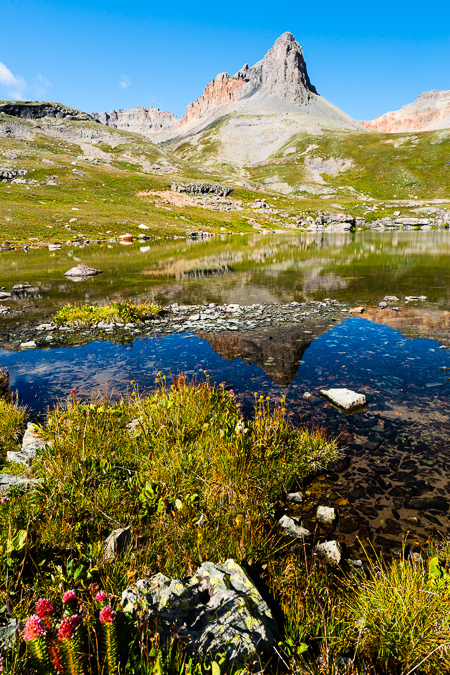
The trail ascended up into the upper basin towards Fuller Lake and the views back down at Ice Lake were intense. I was still blown away by the blue hues in the lake.
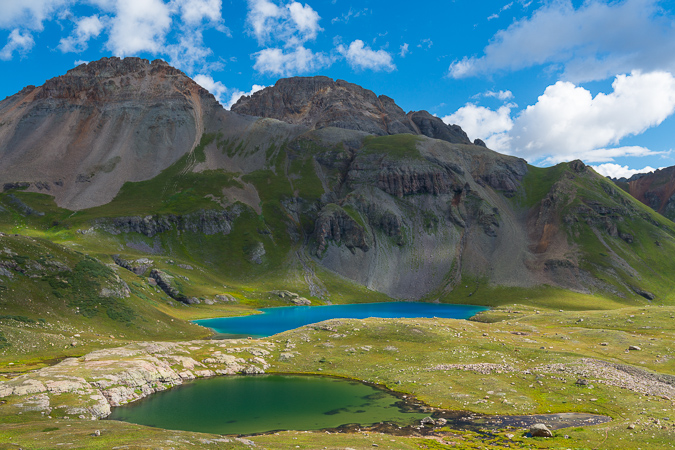
Climbing further up the trail provided some great views of Golden Horn, which demanded a great deal of respect. The naming of Golden Horn was quite apt, as the sides of it were quite golden indeed.
 |
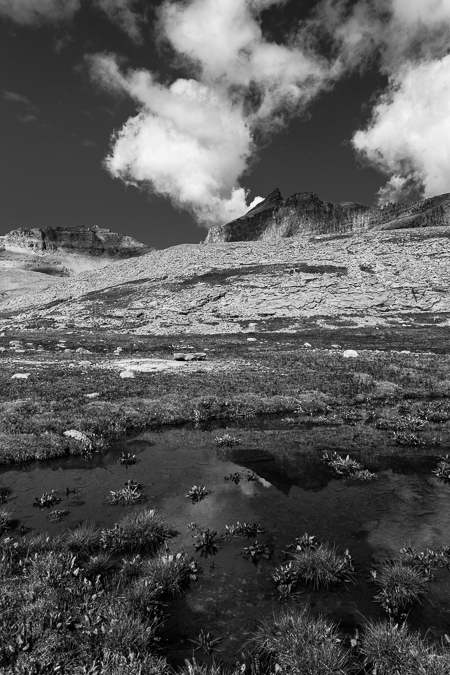 |
As we got further up the basin, we found yet another pond with Fuller Peak (left) and Vermillion (right) towering above. In addition, there was a really interesting building up there, or at least the remains of one. We speculated as to what the purpose of the building was, settling on the thought that it was probably used up into the middle of the last century for miners.
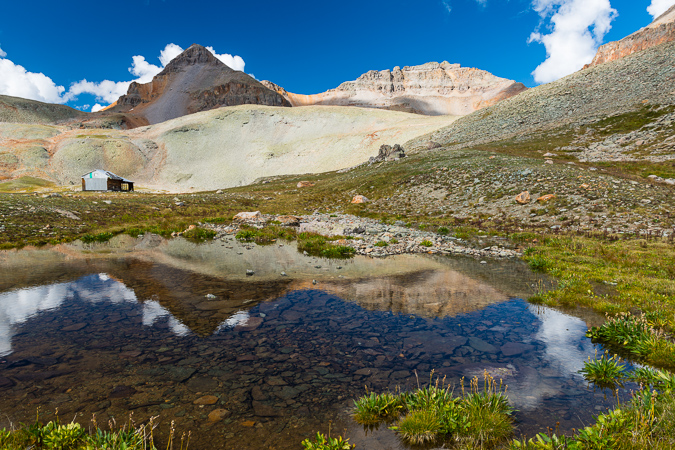
The building was in pretty good condition, with an intact roof and even some old bed springs still inside.
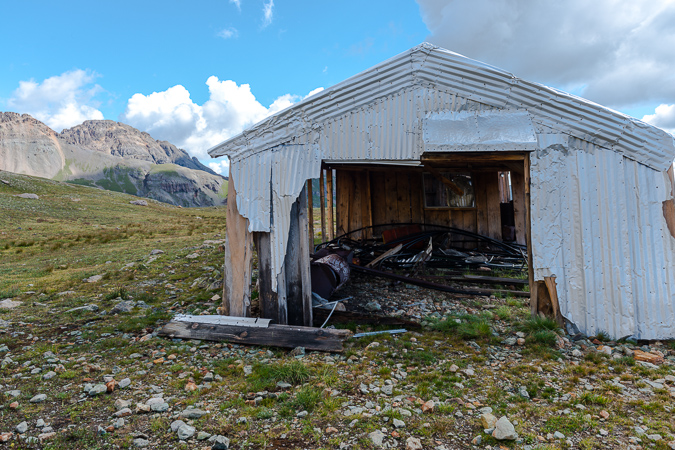
A look back over at Golden Horn revealed that weather seemed to be moving in, but it still seemed pretty spotty. We noted the weather and kept moving up the basin, weaving up a short boulder field above the structure to find a nicely worn trail with numerous cairns.
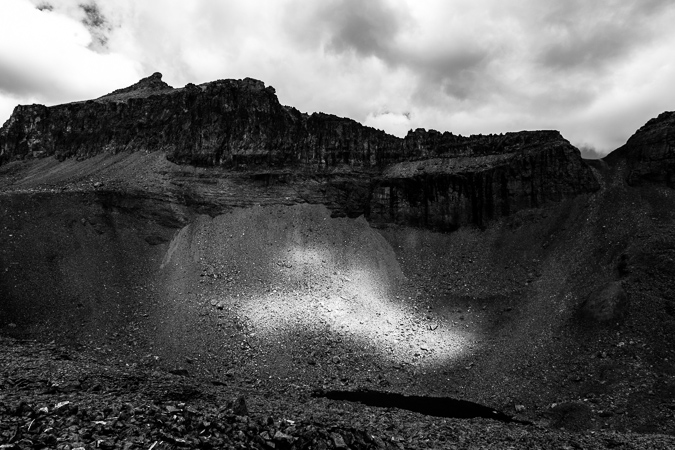
We could make out the nicely worn trail heading up to the saddle between Fuller and Vermillion, and kept heading in that direction.
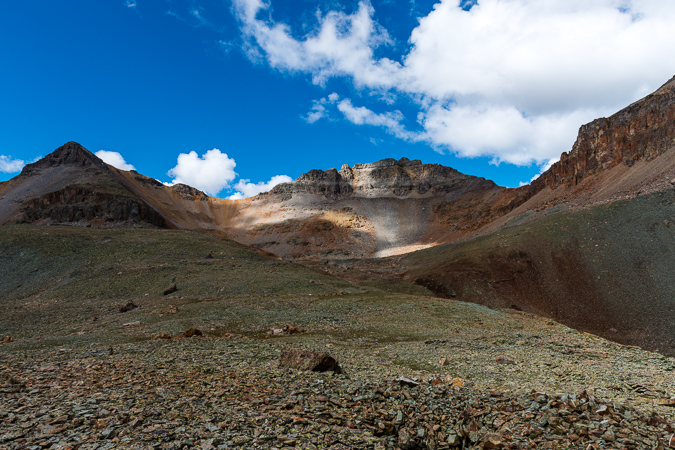
The trail brought us up a nice rocky bench towards Vermillion and was a very pleasant hike up. The clouds continued to hold, so we kept on trucking. A look back at Ryan showed I was keeping a pretty good pace. Ryan indicated to me to keep going at my own speed, so I did.
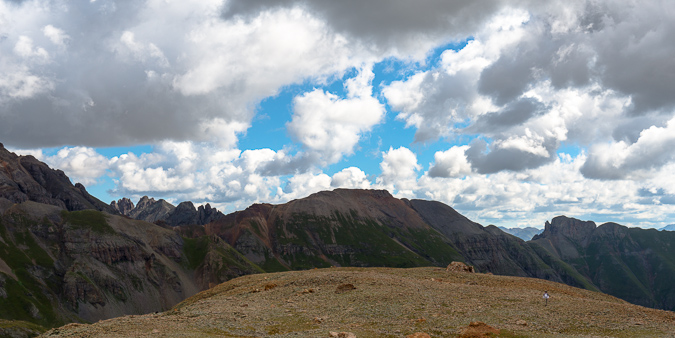
We reached a small stone fortress near the end of the trail and stopped to put on some rain gear as light graupel had begun to come down. The weather still seemed OK but I must admit I was getting a bit nervous. We continued up and lost the trail at the base of Fuller, so we began to weave across a large loose boulder field, which proved to be a huge pain in the butt to cross.
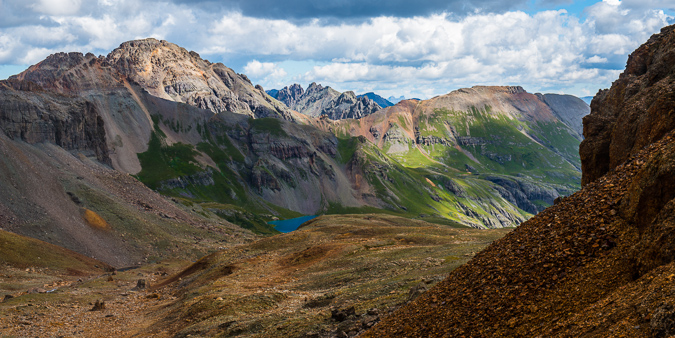
Once we were able to get through the loose and physically rigorous boulder/scree fest, we found ourselves looking down and across at the proper trail. Oh well! We made our way across the boulders to the trail without any issues.
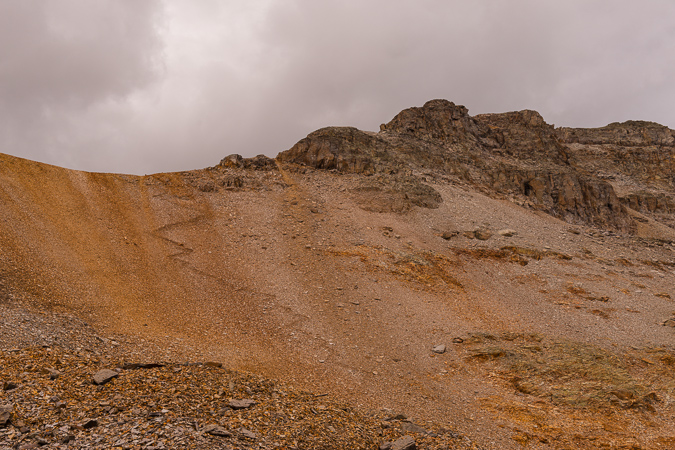
I was able to quickly make it up the saddle - my legs were feeling really great despite the lack of recent climbing I had done this year. From the saddle, I could easily make out a lot of mountains in the area, including the famous Wilsons, the distant Grenadiers and a really awesome looking peak to the south west that was covered in small bits of snow from the recent storms.
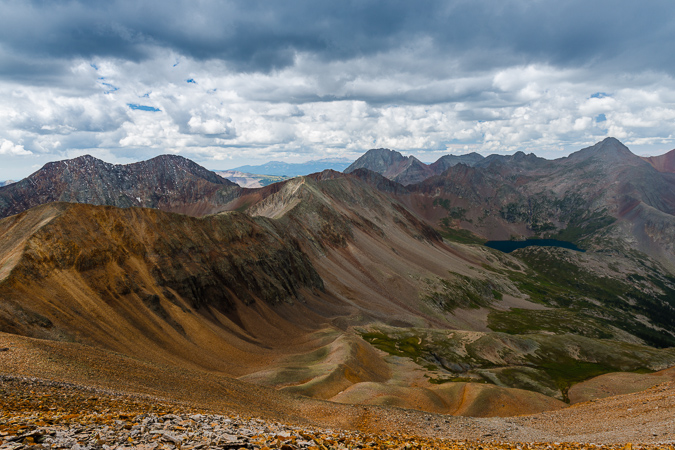
A look over at Fuller proved it was not a very long distance from the saddle, and I made tentative plans to come back and grab that peak if time and weather permitted after Vermillion. Looking back down at Ice Lake revealed Ryan's position about a quarter of the way up the trail to the saddle and all of the lakes we had passed throughout the day's journey. What an amazing view it was.
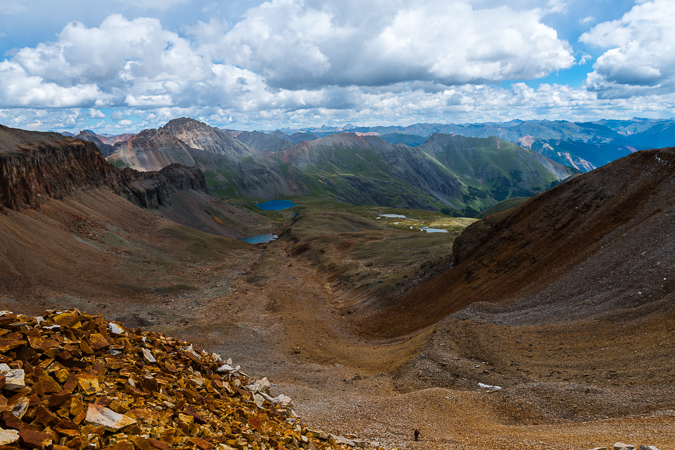
In the distance to the east I could now make out Uncompahgre and Wetterhorn, which is always a nice treat!
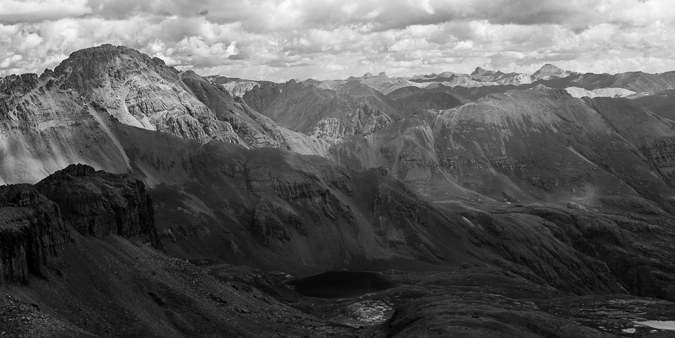
From the saddle, the trail leads up the back side of Vermillion. The trail is very well-worn and easy to follow. The rock on the back side was also very interesting.
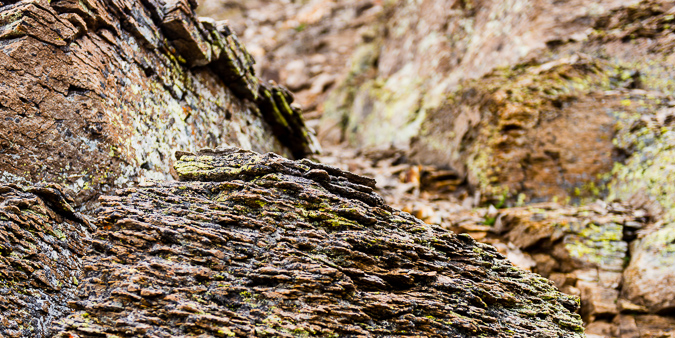
A look back down towards the saddle showed just how worn and accessible the trail really was. It was also awesome seeing the Grenadiers in the distance above the ridge.
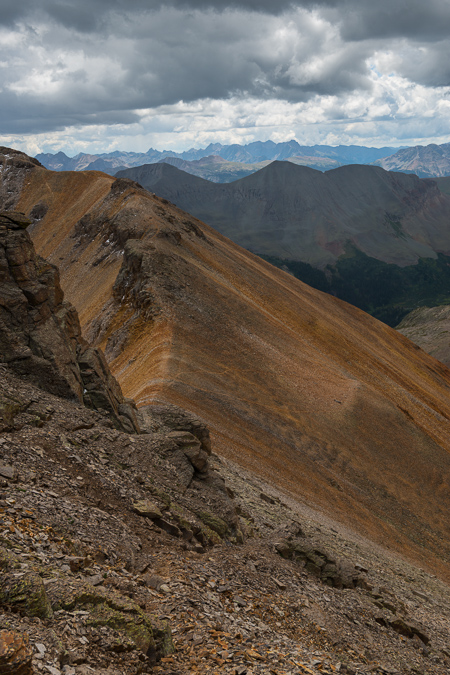
I reached an obvious end to the trail which had wrapped around the back side of Vermillion on a series of ledges and realized that it was time to head up a steep gully and onto the upper section to the summit, which was all fairly obvious to me at this point.
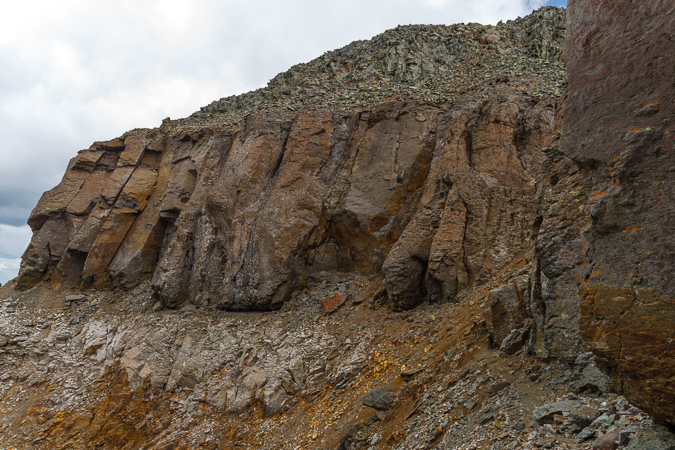
Once I reached the top of the golden gully, I looked back and down towards the awesome snow-covered mountain, which I later realized was one of the many mountains in Colorado named Grizzly.
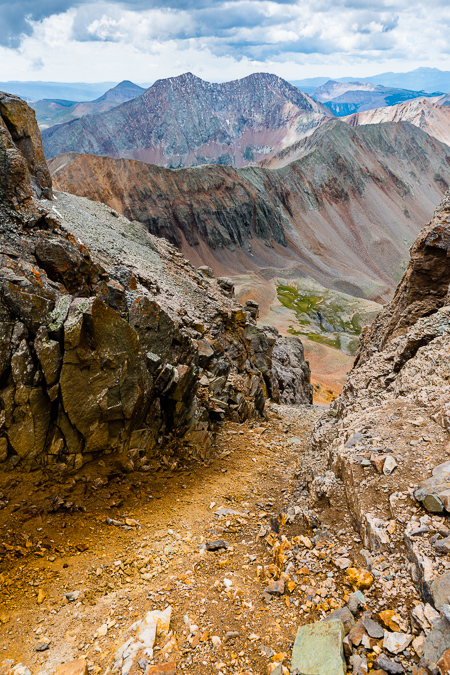
You could also make out Engineer Mountain beyond Grizzly to the south. I was able to reach the summit without any issues and was amazed at all of the green rocks on the summit. I guess it is pretty obvious why the mountain was named Vermillon.
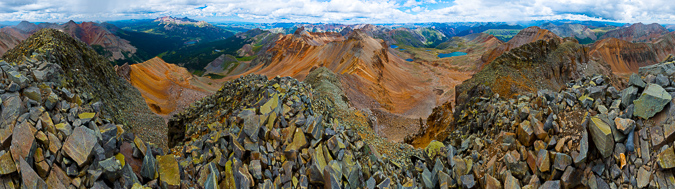
I posed for a few self-portraits using my tripod while I watched the weather nervously. The view of Golden Horn, Pilot Knob (just to my right), Sneffels (in the distance) and other notable San Juan giants was pretty killer from Vermillion.
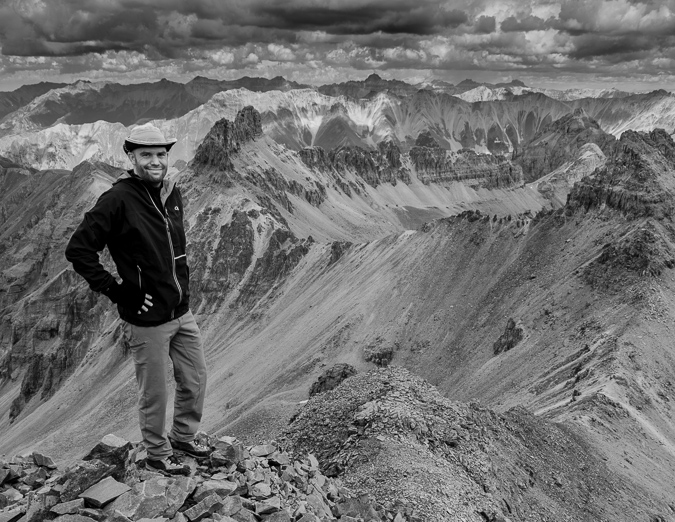
I snapped off one more set of panoramas.
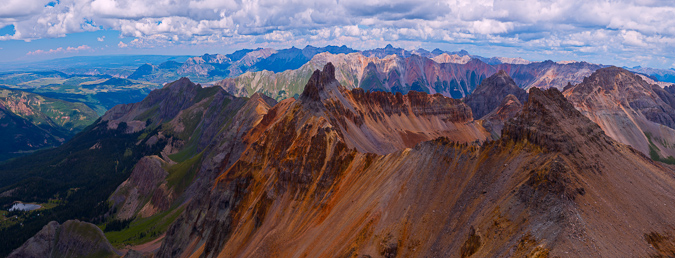
A look to the west caught my attention. Out of nowhere a giant storm had developed, with what appeared to be significant precipitation. I hastily packed my things and head back down towards the saddle. I ran into Ryan about halfway back to the saddle, where he had decided to give-up due to fatigue. The storm passed us to the south, fortunately, as seen below.
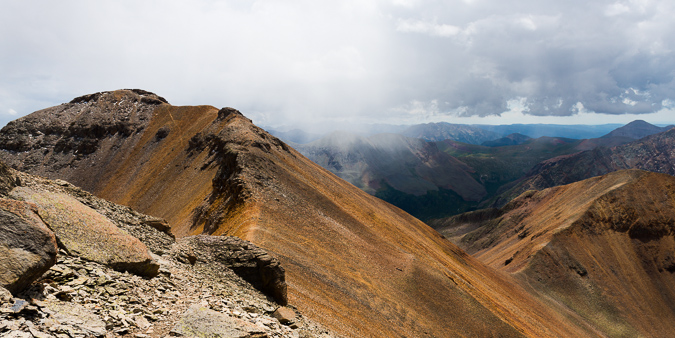
I reached the saddle fairly quickly and told Ryan I was going to head up and get Fuller really quickly. I made short order of Fully, ascending in just 10 minutes. From there, I was able to survey the basin again, with some interesting views back down towards Ice Lake and back at Vermillion.
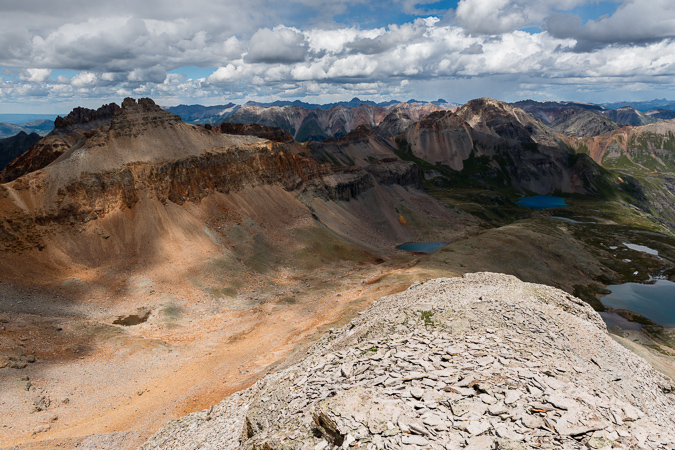
On my way back down to the saddle, I was momentarily pleased with the bright colors and contrast between the red rocks on Fuller and the green vegetation below at Lake Hope, which rested at the foot of San Miguel Peak to the west.
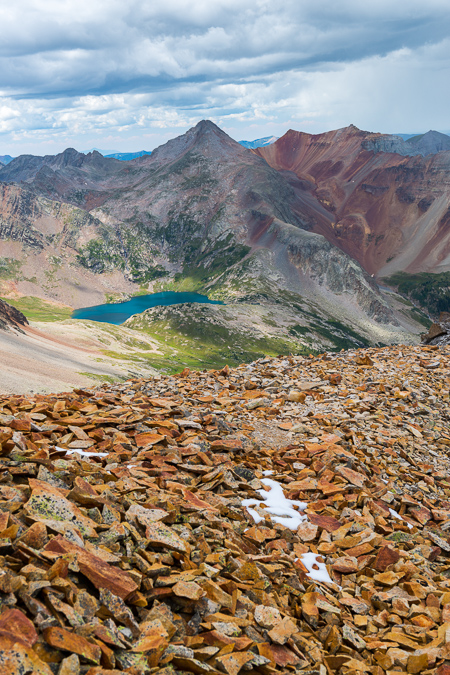
I rejoined Ryan at the saddle and we made it back over below the rock shelter that sat beneath Fuller in no time at all.
A look back at Vermillion showed Ryan and the scope of the peak we had just came down from.
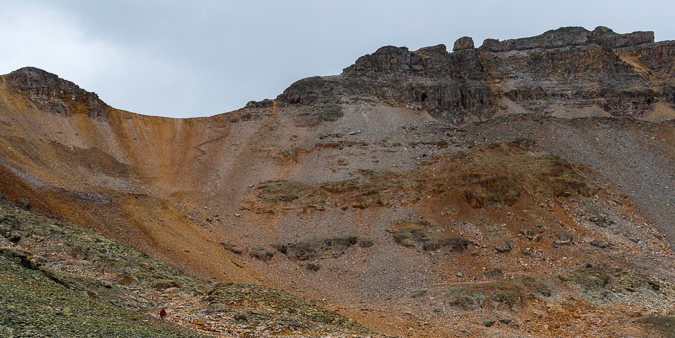
Ryan and I were amazed at just how much old mining equipment was just left up there. We saw lots of large tubing strewn about the mountain and even this handy wheelbarrow that looked to be quite old.
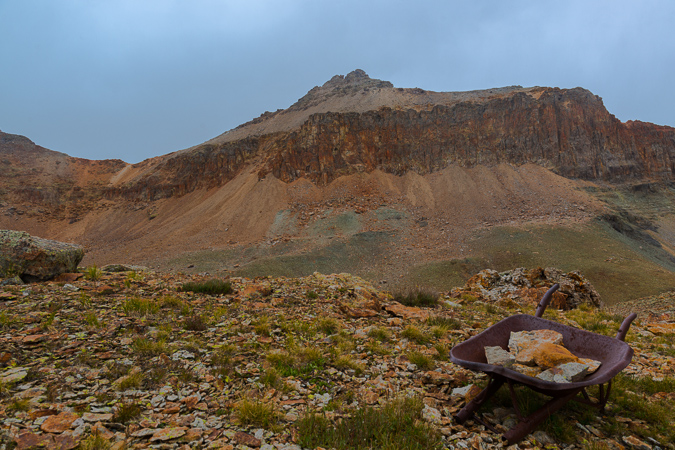
Coming down the basin was not a problem and the weather cooperated to our surprise and glee. Ryan and I took frequent stops to take photos of the area.
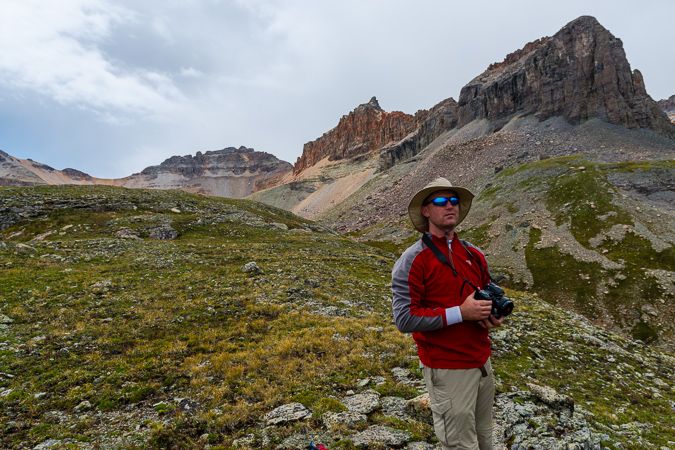
On the way down I found a very small pond with a large boulder in it that made for a nice landscape scene with Vermillion and Golden Horn reflected in the pool.
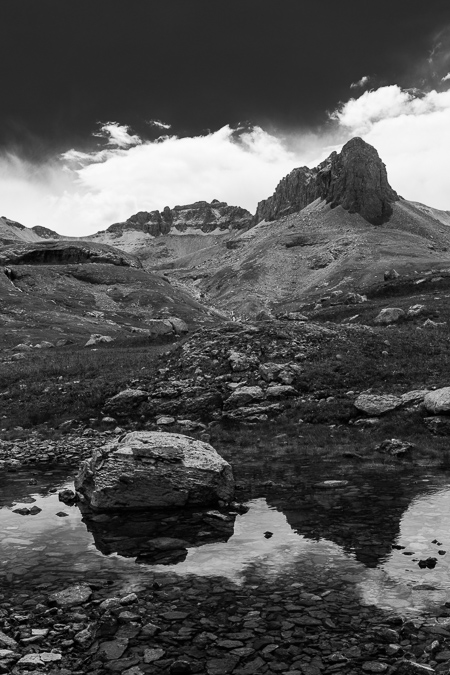
Once back down at Ice Lake itself, we stopped for some quick photos. I found some Rose Crowns and did a little focus stacking to get both the flowers and the distant peaks in focus.
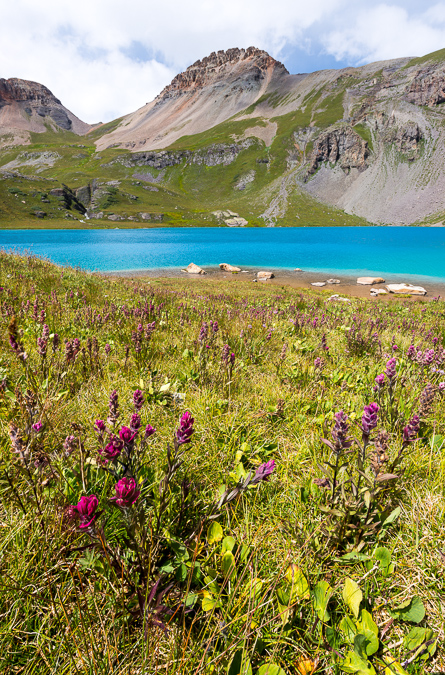
You can really see how this basin would be incredible when the flowers are at their peak. I also found some interesting rocks on the shore to photograph from, and Ryan was able to get a photo of me perched on one of the rocks preparing for a shot.
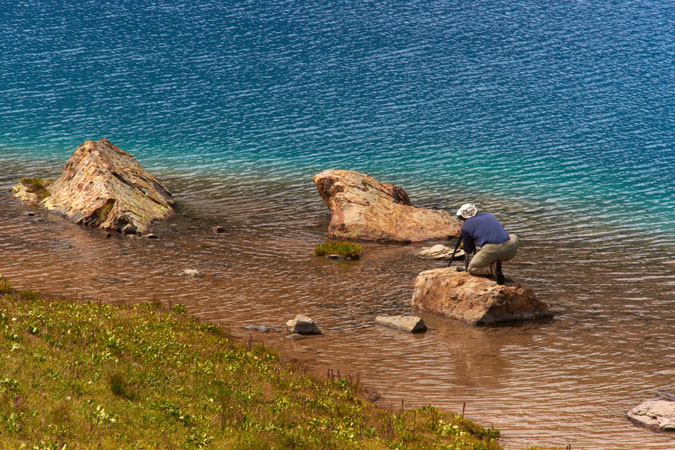
And here's the shot I was composing.
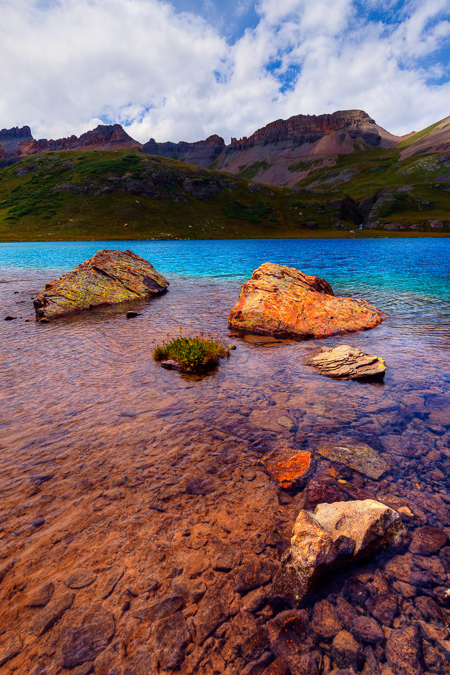
Once we finished up at the lake we head back down the trail towards camp. We found a great vantage point where we could see Sultan Mountain and the lower Ice Lake.
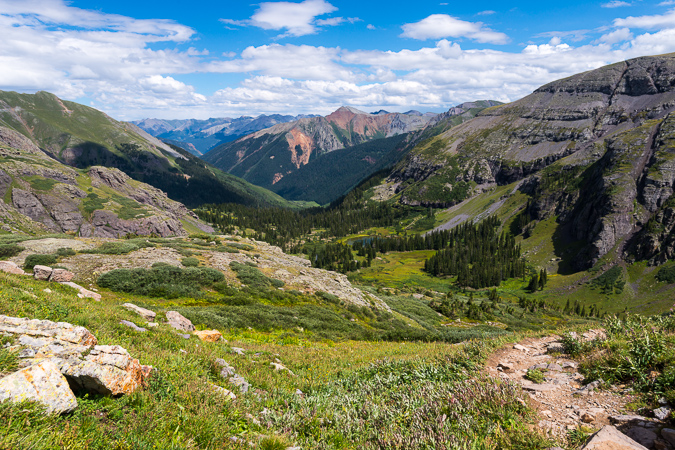
Here is a map of where we were at and what routes we took on the various days.
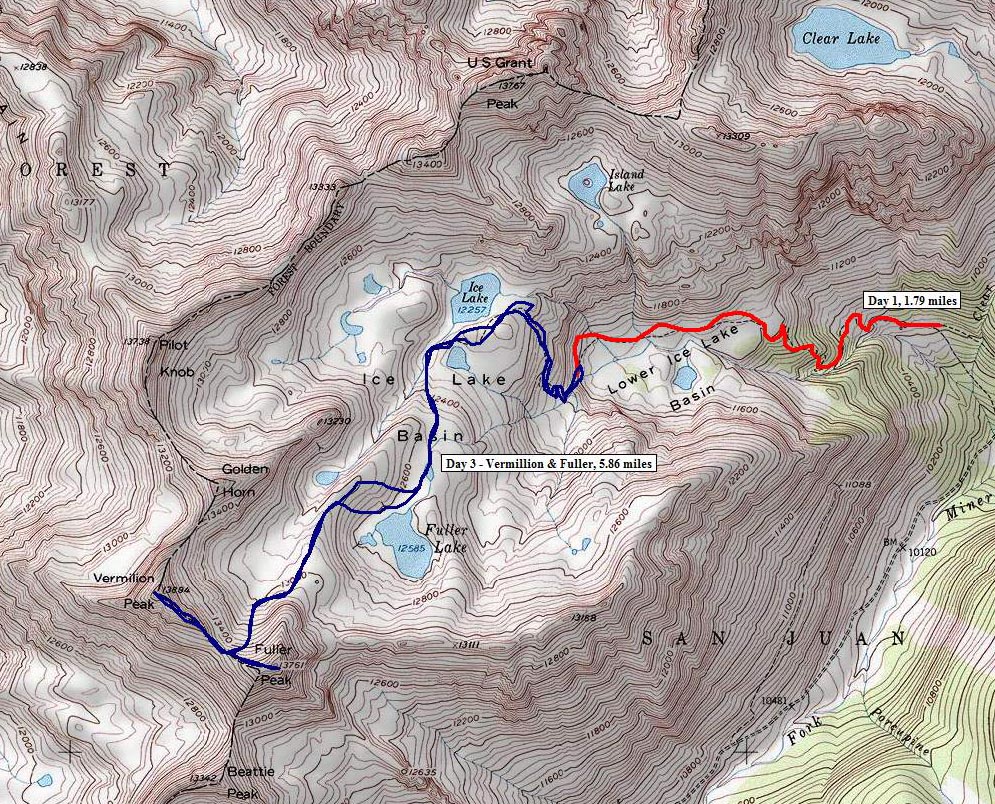
As sunset arrived in the lower basin where we were camped, I could not help but notice the great light. Sure enough, the sunset hit the clouds just right and made for a nice light show.
 Having one more night in the basin was quite the blessing. The night sky was quite clear on this last night and it made for some great star viewing. I decided to put together a few different star trails, this first one taken looking almost straight up at the sky. The stars form small looking meteors using a special processing technique.
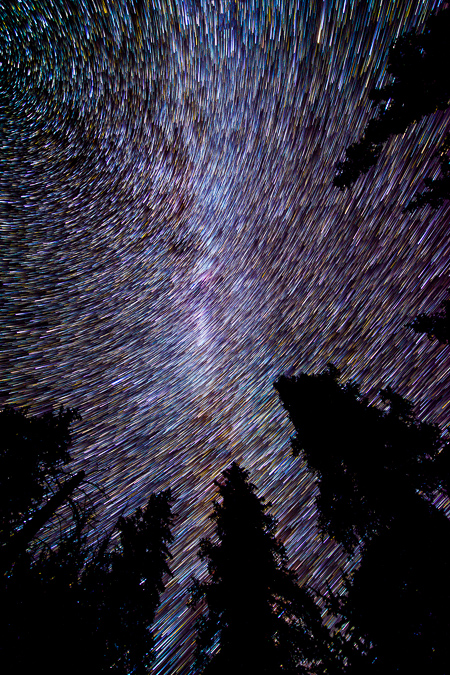
I really enjoy doing star trails with trees in the foreground. I love how the stars weave in and out of the trees.
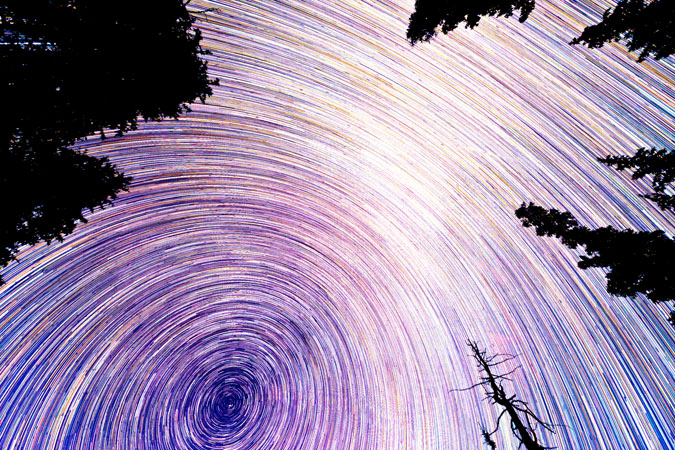
The following morning was pretty calm as we packed up. There were several marmots out and about that we could photograph while we packed and it made for a nice break between tasks.
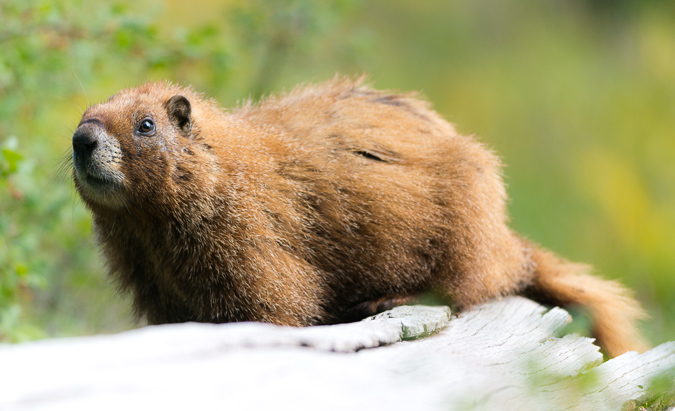
We hiked out and ran into a couple that were camped across from us in the basin. It turned out that the woman knew one of my friends that I reguarly climb with - such a small world. It was nice talking with you Becky!
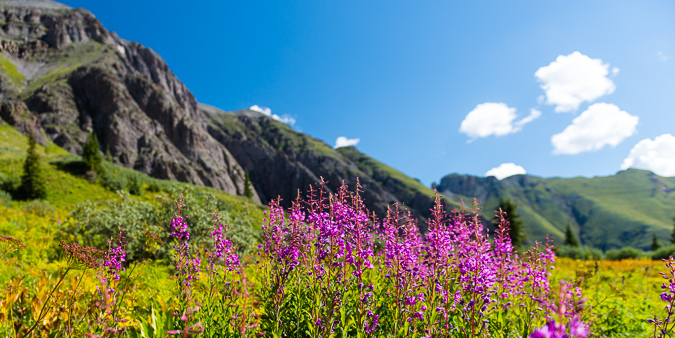
Almost back to the car and we ran into that awesome waterfall again. I had to stop and get a parting shot of it using the 9-stop ND filter.
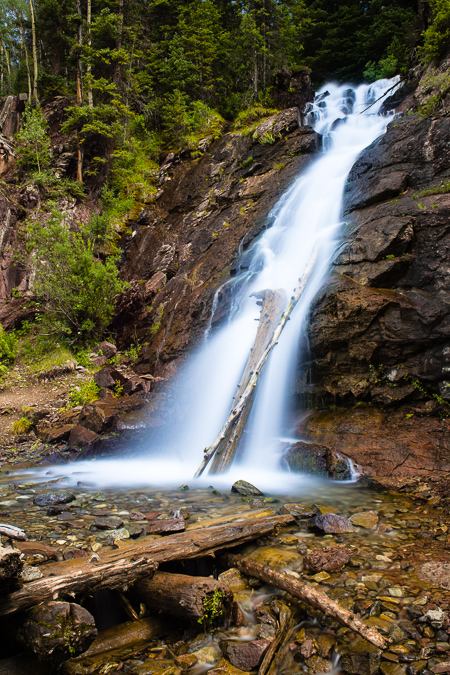
On the drive out we noticed some really cool cliff bands in the basin as well, so we had to stop to get photos of that too. It is amazing where nature will allow trees to grow.
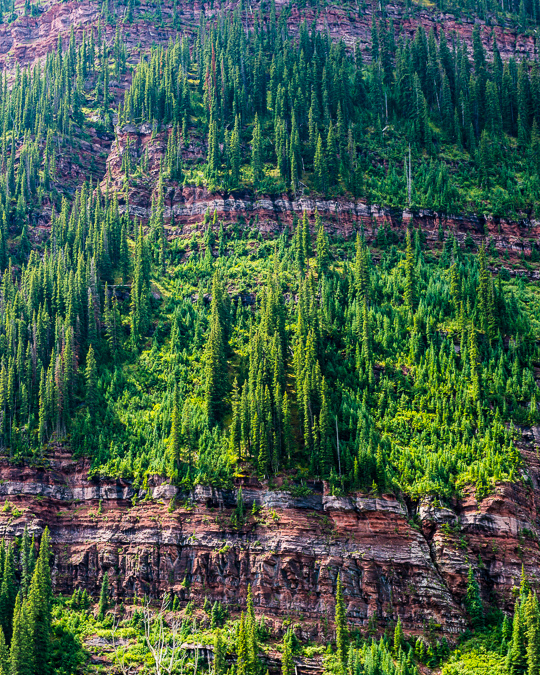
We stopped in Silverton for lunch and found a very nice restaurant called the Teller House. We were served some very tasty vegeterian burritos from their friendly staff, who filled our Odell Cutthroat Porter frequently. On the drive home, we bumped into a massive storm cell that was east of Canon City. It was one of the most impressive storm clouds I'd seen in awhile. We also learned that Manitou Springs had severe flooding while we were gone, due to the Waldo Canyon Burn Scar. What a memorable summer it had become.
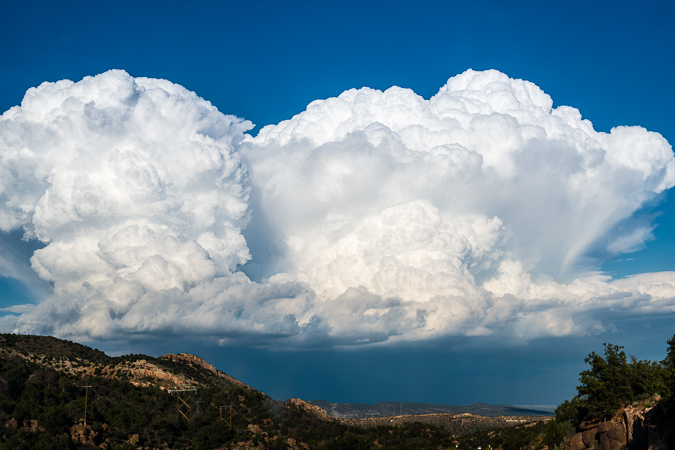
Lastly, I put together a short time-lapse video from the lower Ice Lake Basin. The first two sequences were created in-camera on my Nikon D800 and the Milky Way sequence was built using iMovie and still images. My friend Nicole Buetti allowed me to use her music for my video. Stay tuned for more time-lapse movies featuring Nicole's amazing music later this year! To hear more of her music, go check out her website!
Scaling Colorado's Highest 13er - Grizzly Peak at Sunset
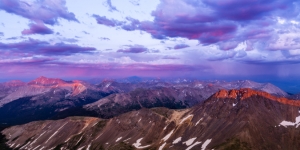
Climbing mountains in solo-mode is therapy for me. While I have often espoused a deep belief that climbing mountains solo is a safety concern, there are times when the benefits outweigh the risks. I'm not sure that this particlar climb qualifies; however, I must admit, this was a truly wonderful experience that I will never regret. I decided somewhat at the last minute to take Friday off of work and climb a 13er. Having only 20 or so Centennials left to complete my quest of the highest 100 in Colorado, I have been getting more motivated to tackle the mountains left.
Grizzly Peak had always intrigued me. It is one of the few Centennials not visible from a paved road (I am fairly confident of this) and has a very remote status. Grizzly Peak is nestled deep in a valley just west of the summit of Independence Pass between Leadville and Aspen and is the most western Centennial in the Sawatch Range. There are tremendous views of the Elk Mountains from Grizzly Peak, including Pyramid Peak, the Maroon Bells, Snowmass Mountain and Capitol Peak. Grizzly Peak also carries with it the distinction of being the highest of 7 mountains in Colorado named Grizzly and the highest ranked 13er at 13,988 ft. (Sunlight Spire is higher, but is not ranked - for more on this issue see this article).
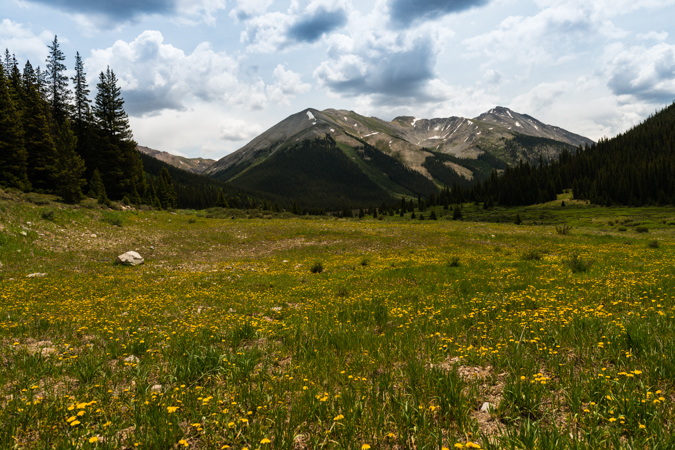
Since I would be climbing by myself, I knew I would have as much time as I needed to take photos and do some crazy photography projects from or near the summit. I chose the west route of Grizzly due to the very short length of the climb, which was very appealing for weather purposes. The plan was to drive the road to the base of the mountain Friday morning, climb the mountain, take photos of sunset from the top, and stay on the top as long as possible for a shot of the Milky Way and to do some star trails photography. According to Roach's 13er guidebook, the road is open all the way to the very base of the mountain, leaving only about 2 miles of hiking to the summit. When I reached Grizzly Reservoir, the road was closed at this point, which meant I had to add another 2 miles both ways to my hike. This was not a huge deal, but it certainly made me re-think my plan.
Being that I had nutty plans to do some extensive photography work from the summit, I packed quite heavily. I was carrying the following photography gear with me:
| Item | Weight (lbs) |
| Gitzo Carbon Fiber Tripod w/ Arca Swiss Ballhead | 6.4 |
| Nikon D800 DSLR w/ Arca Swiss Plate | 2.8 |
| Nikon 14-24 f/2.8 Lens | 2.0 |
| Nikon 24-70 f/2.8 Lens | 2.0 |
| Nikon 50mm f/1.4 D Lens | 0.5 |
| Nikon 300mm f/4 D Lens | 3.0 |
| 1.4x Teleconverter | 0.5 |
| Total | 17.2 |
I'm not especially proud of carrying all of this weight up a steep mountain, but I certainly don't regret doing it.
After I parked my Jeep near the Grizzly Reservoir campground, I head out with a pack full of camera gear and fresh legs at about 1 PM. This is not a very typical start time for me, and probably not highly recommended due to weather concerns, but I figured I would play it safe and keep an eye above for the hike in. For any photographers reading this, I decided to stick with the 24-70 f/2.8 as my walk-about lens, which worked out fairly well. The round-trip stats for this hike are 8 miles w/ 3,500 ft. of elevation gain.
The view from the road was fantastic. Lower, but very rugged 13ers adorned the valley and made for quite a nice sight on the hike in.
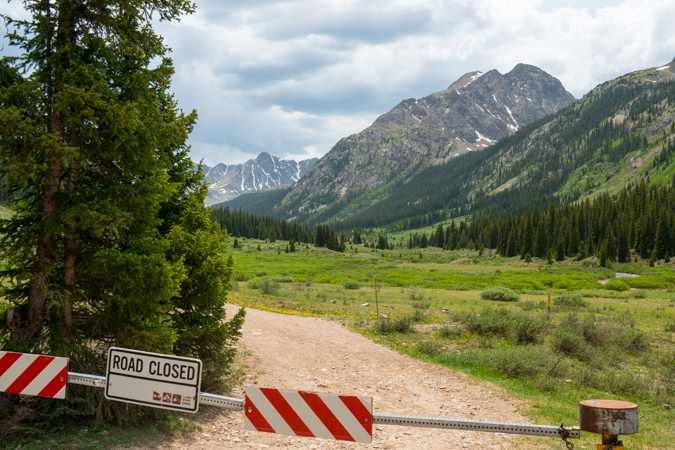
I certainly enjoyed the view but was keeping an eye on developing thunderstorms above.
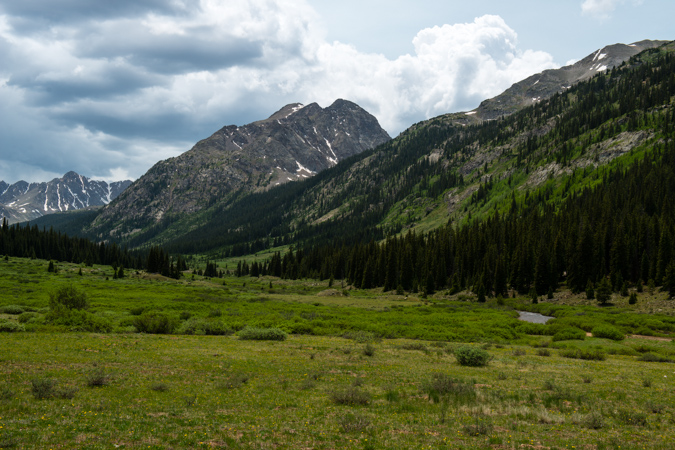
I'm usually not a fan of hiking on a road, but I could not really complain with the view I had, plus I had the Nerdist podcast to keep me entertained.
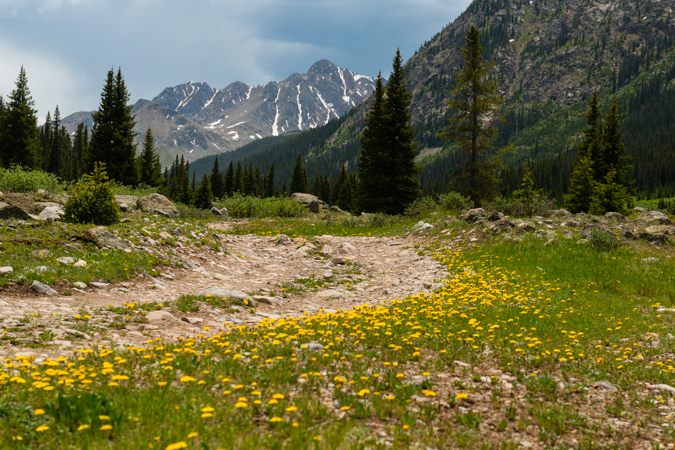
On the hike in, I was able to find some Columbine flowers growing in a small open field, making for a fun photography experiment. One thing I have been wanting to try to do is a technique called focus stacking, which allows a photographer to capture a very sharp photograph that is really the combination of multiple photographs taken at various focal points. I tried that out on these columbine flowers, which worked pretty well considering the wind was blowing (which makes focus stacking almost impossible).
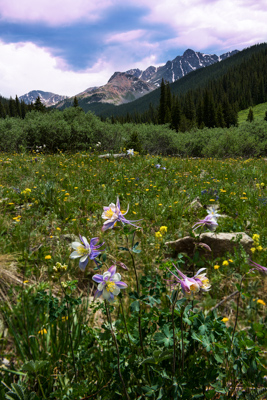
I was looking for a gully cut into the side of the mountain to my left (east), which would be my entrance point for the Grizzly Peak ascent. The mountain has no trail and is basically a steep slog up a very pretty, wild, but generally straight forward gully going up, up, up. Before reaching the gully, the rain started to come down a little, so I stopped to get a photo at this beaver pond before putting my camera away and heading up the gully.
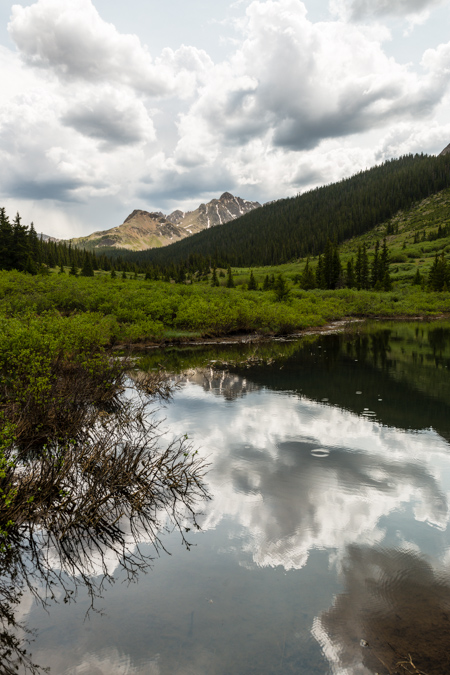
While small rain was coming down, I decided to keep my camera bag packed in my main pack to make it easier and to give me some peace of mind. As such, I was unable to take any photographs with my camera until the rain totally left and I was about a quarter of the way up Grizzly via the gully. I stopped to snap a set of photos to be later stitched into a panorama, looking west across the valley towards Truro and several un-named 13ers.
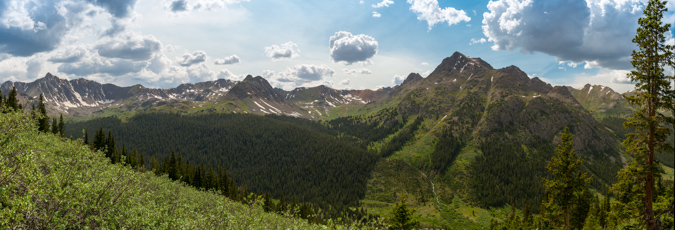
A look up at the terrain revealed just the sloggy mess I was climbing up. It was quite steep and somewhat difficult to navigate through all of the small pine trees, willow trees and rocks. I just had to pick my way up and take frequent rest breaks (I was carrying a lot of weight, haha). The Nerdist podcast of Rick Moranis made the slog a lot less painful, although my laughter probably drove wildlife away.
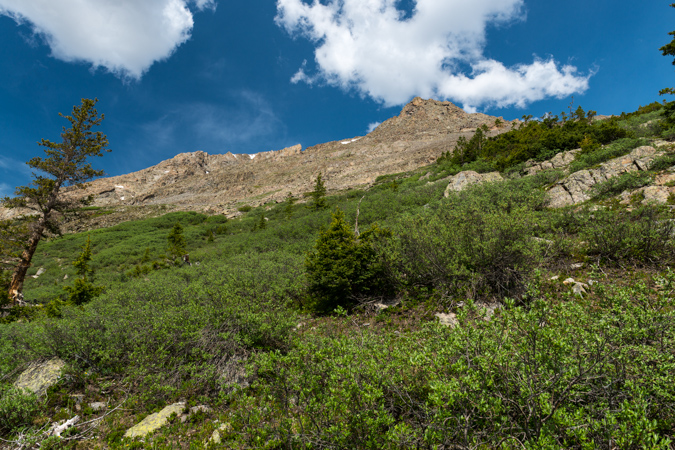
As I continued up Grizzly, the storms seemed to subside, and I was feeling a lot more comfortable about the hike up and eventual stay on the summit. A look back down the gully showed the way up and I could now see the road I hiked up from the North (right).
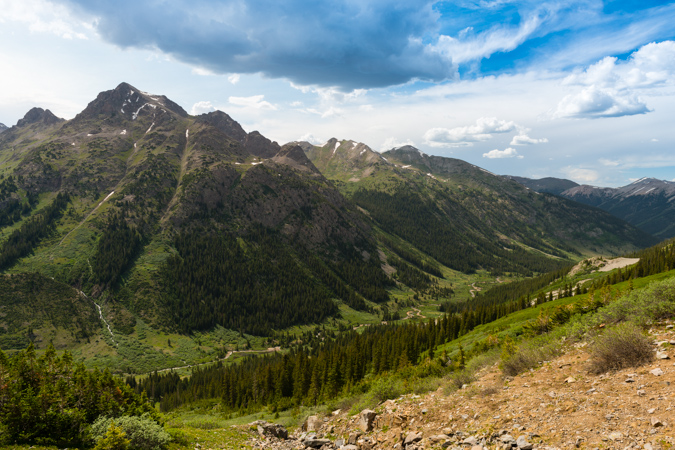
Once above treeline, the gully was pretty obvious in terms of where to go. It was mostly rock and dirt with wildflowers and boulders strewn about.
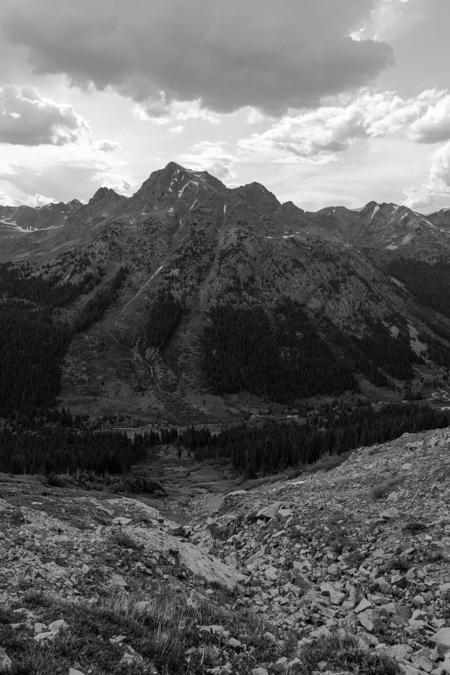
The views were pretty enjoyable in all directions. Despite some wind, I really could not complain.
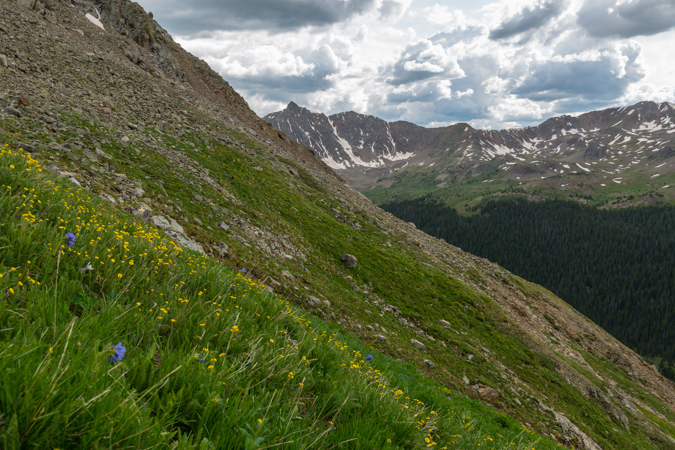
The 13ers to the west kept me looking back quite often, and the wildflowers were just too cool. They were all over the place, even above treeline, which is always awesome. I probably could have made it up the mountain in a lot less time, but I took the time to take some quality photos. This is another focus-stacked image making it so the very close flower in the foreground could be in focus as well as the distant peaks.

As I continued up, views of the Elk Mountains (specifically, Castle Peak) began to materialize above the horizon to the west beneath some virga coming from some small storm clouds.
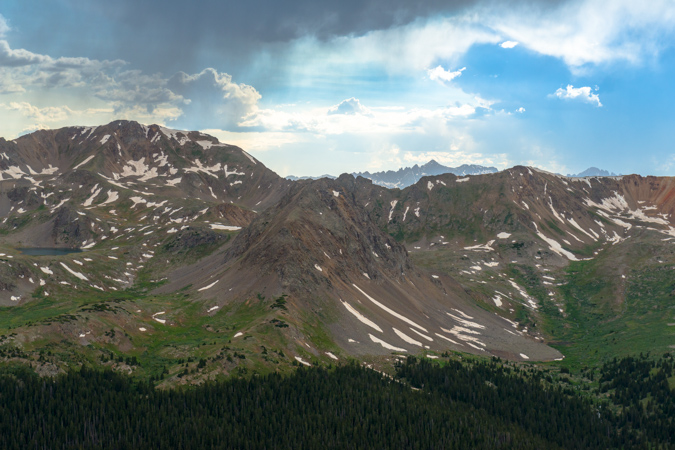
I was not worried about the weather yet - the clouds were pretty small and my new expansive views to the west indicated I should be in the clear for the remainder of the day. At this point, the climb became progressively more difficult for my weary legs. The weight of the photography equipment was really kicking my rear end and I had to take more and more breaks. The terrain was also much more difficult - not technically, but physically demanding. There were more boulder fields to contend with and the dreaded scree that takes you downhill one step for every two you take. As such, I decided to pack away my camera again so I could focus on the hike and make sure I did not fall. I finally was able to reach the saddle between Grizzly Peak and Garfield Peak as the light from the impending sunset was starting to generate some magic on the valleys below to the west and east. Seriously, if you've never done a sunset climb before, you need to - it is simply one of the most amazing experiences you can have in the high country.
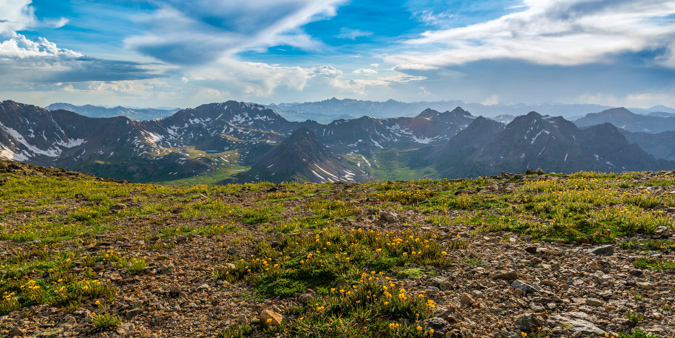
While the weather to the west was looking fabulous, the weather to the south and east was starting to look kind of nasty. I was not too concerned yet, but was keeping watch. One benefit of carrying a 5 lb tripod up a mountain is that you can do self-portraits. Here's one looking south and east towards Garfield Peak and Taylor Park (not visible).
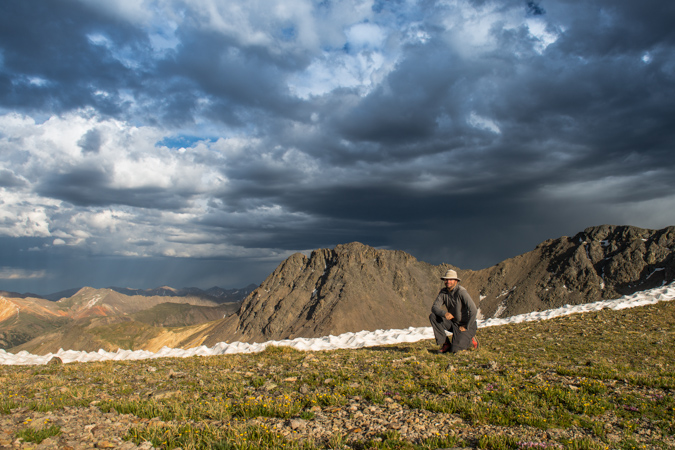
I also decided it might be fun to do a very large vertical panoramic showcasing the sky from the saddle, looking South-West-North. To the north (right) would be the summit of Grizzly Peak itself.
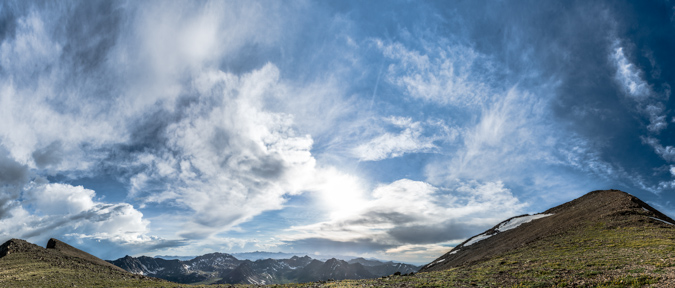
After about 20 more minutes of climbing, I was able to reach the summit of Grizzly Peak. I was greeted by an incredible view to the east and south, which included the Three Apostles and an amazing rainbow just shy of Taylor Park, where a huge thunderstorm was brewing.
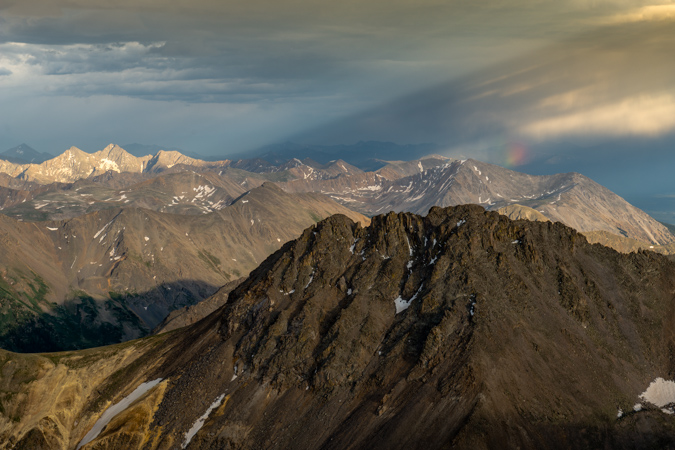
It was pretty awesome to be on top of the Continental Divide before sunset. The views were great, and that sweet rainbow stuck around for quite a long time to the northeast. The light from the sun was hitting the clouds over Taylor Park and causing some interesting streaks to appear. I signed the summit register, which was last signed by a guy I had read a trip report of from the day before. He had made a tribute to Steve Gladbach, a very accomplished and famous Colorado mountaineer who had just perished on Thunder Pyramid. I decided to also sign the book as "For Steve." I think Steve's passing weighed on every mountaineer's mind heavily, including mine. I never did get a chance to meet Steve, but we exchanged several cordial and thought-provoking messages over on 14ers.com regarding my morbid articles I write about the mountaineering deaths each year. Steve wrote a very eloquent and thoughtful post about death over there a few years ago and it always stuck in my mind. I even remember responding to his post saying that "heaven forbid you die in the mountains..." and yet - he eventually did. Steve had conquered the goals I have set for myself and I had always looked up to him, not only as an accomplished mountaineer but as a very amazing person. There are countless stories of his selfless acts and I felt a solo climb a nice tribute to his life.
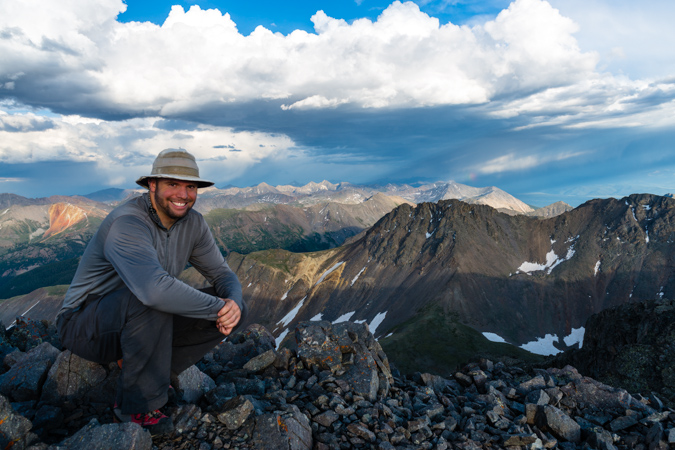
As I enjoyed the last few minutes of sunlight, I had to take advantage of my somewhat foolish decision to haul up my 300mm lens, which weighs 3 pounds on its own. I wanted to get some zoomed in shots of Ice Mountain, Pyramid Peak, the Maroon Bells and Snowmass Mountain using the 300 and a 1.4 Teleconverter, which gave me an effective focal length of 420mm.
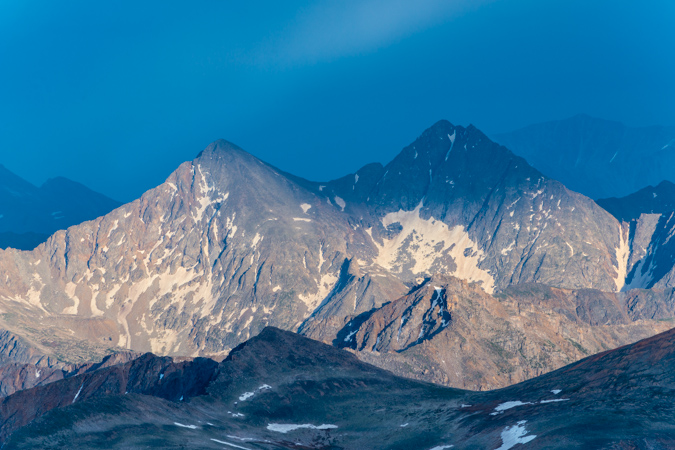
Castle and Conundrum were looking freaking awesome, with some crazy sunset light surrounding it. Thanks to Michael Colson for the correction!
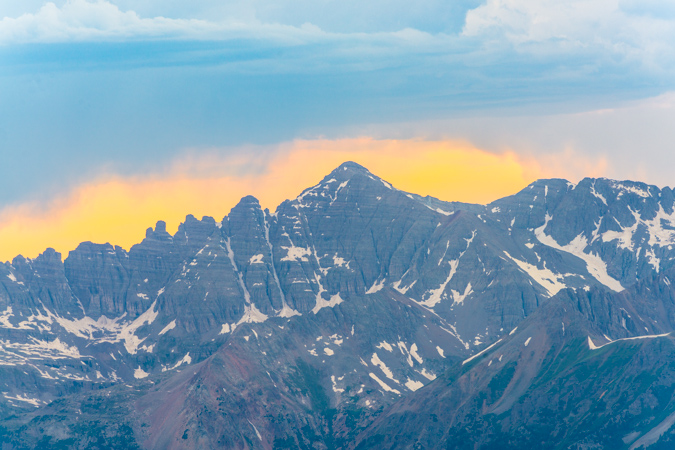
Snowmass Mountain was also looking wicked with the sunset light, giving the photo a very layered feel in black and white.
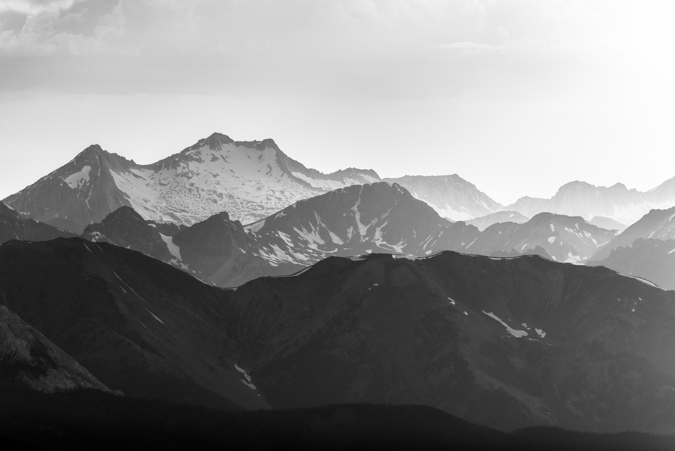
As the light continued to approach the magical photographic Golden Hour, I had some fun playing with different photos.
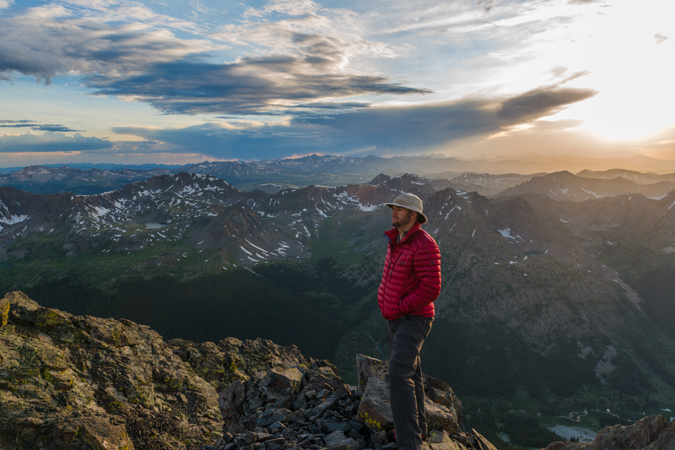
I also stitched together a massive 360 summit pano centered on the sun. This photo, being taken with the Nikon D800, is a massive file. If printed at native resolution (no loss of quality), it would span 30 feet wide. I'd love to see that. If I have time later, I'll work on an interactive 360 file so you can see this thing at a bigger resolution and zoom in.

The sun went behind some clouds but then created some nice god beams coming down near Mt. Sopris.

Then the sun reappeared and allowed me to snap off this photo which I think looks kind of like a Colorado flag.
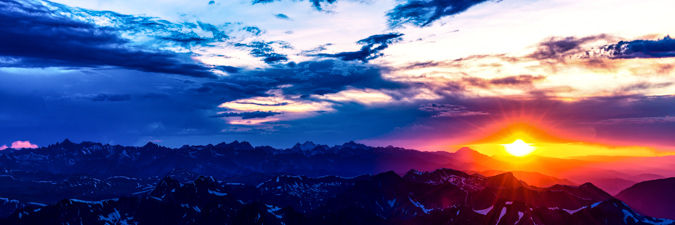
A look back to the east revealed some magic also. The light was very soft and colorful, showcasing the grand scale of La Plata Peak (left), Colorado's 5th highest mountain.

Sunset from the Continental Divide - an awesome experience. I took some artistic liberties on this next photo...
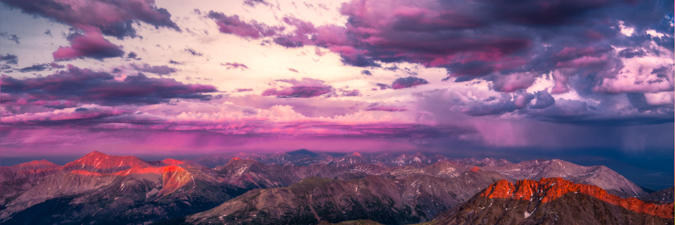
As the sun dipped below the horizon, and stood and watched the magic fade.
At this point, I had to make a decision. Watching the clouds to my east and south, I was getting a little nervous about the prospect of staying on top of the mountain to photograph the night sky. I was really motivated to do so, but I did not feel like it was a risk worth taking. While climbing down the mountain in the dark did not appeal to me, getting struck by lightning was even less appealing. I decided to pack up the gear and head down. The hike down was an adventure to say the least. It became quite dark very quickly, as there was no moon. I found myself in some sketchy spots where I had no recollection of that route from the hike in. I took my time and was very deliberate about each step. I was able to ride down a scree field a ways using some scree-skiing techniques and from there it was pretty much a boulder/snowfield/cliff/willow dodging fest. Downclimbing in the dark without a trail - not recommended - AT ALL. Hahahaha! It was certainly not the safest mountain climbing experience...
After reaching the road at 11 PM, I was rewarded with some insane views of the Milky Way. I set-up for some shots of the Milky Way and to my huge surprise, was able to also capture the Northern Lights! This next shot is a panoramic looking north-east-south. I just can't believe I got the Northern Lights - so awesome.
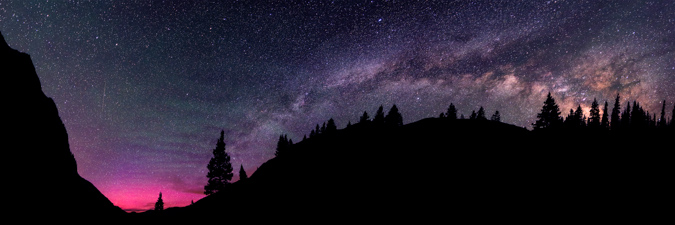
My final shot is me laying in the grass with my head-lamp, gazing into the night sky.
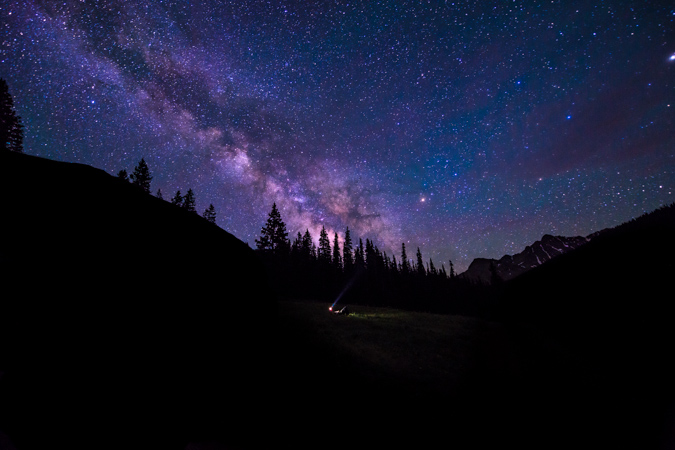
I slept under the stars at my Jeep back at the Reservoir after a long but enjoyable hike out in the dark and drove home to Colorado Springs early the next morning. What a great trip!
If you enjoyed my photos, please consider purchasing a print for your home or office. You can visit my gallery for a full showcase of my photography - if there are any photos from this trip you are specifically interested in, please do contact me.
Climbing Mount Massive - Enjoying Colorado's 2nd Highest Peak - Again
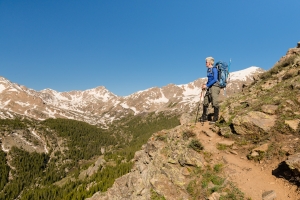
I had fully intended to climb the Centennial French Mountain this weekend, but plans change. My climbing partner Sarah and I left Colorado Springs at around 3:45 AM and reached the North Halfmoon Creek Trailhead at 6:15 or so. A pretty late start for this guy! In order to climb French Mountain, we would need to cross North Halfmoon Creek and head south. When we reached the creek, it was easily up to our waist and I had no intention of driving my Jeep through that deep of a creek crossing. A decision was quickly made to abandon our attempt on French Mountain and head up the scenic and steep Southwest Slopes route for Mount Massive. Since I had done this route back in October of 2009 (trip report here), I knew the way and was fine with repeating it, especially since my partner still needed to climb Massive. We parked the Jeep and packed up and readied ourselves for our first climb of the year. I was hopeful that I would make it to the top (you might think I'm joking) because the last mountain I had ascended was Pyramid Peak, which was my 14er finisher last year. I was also quite eager to test drive my new photography equipment, since I had not really had a chance to take it on a real climb yet. For this hike, I wielded my Nikon D800 and my Nikkor 24-70 f/2.8 lens, a heavy combination to be sure. Would the extra weight of a full-frame DSLR and the quite heavy yet amazing 24-70 be worth it? I was hoping so.
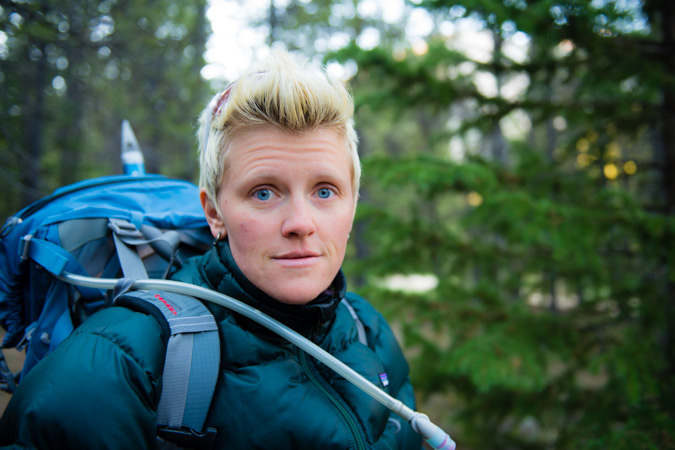
Sarah posed nicely for me so I could document the day's beginning and in turn she took a shot of me, looking weary.
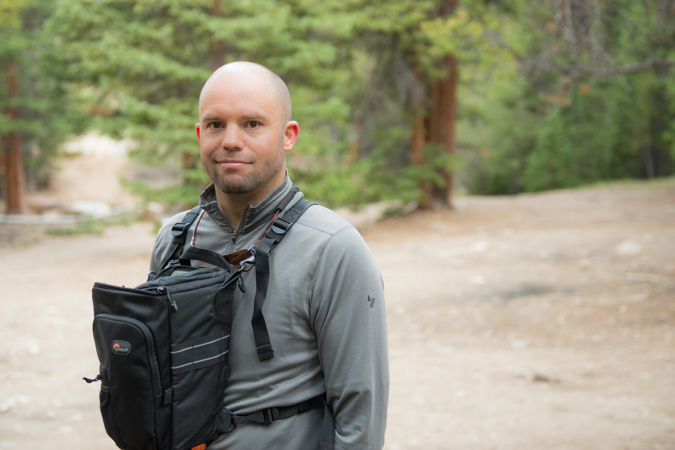
For the sake of ease, I decided to leave my tripod behind. The sucker weighs 5 pounds and I figured it would not be something I could use a whole lot on this hike. Good choice.
Sarah and I traveled up the basin towards Mount Oklahoma, which I climbed last year. I was beginning to get quite familiar with this area! Mount Oklahoma was looking quite nice and seemed to be holding quite a bit of snow as compared to last year, which was nice to see.
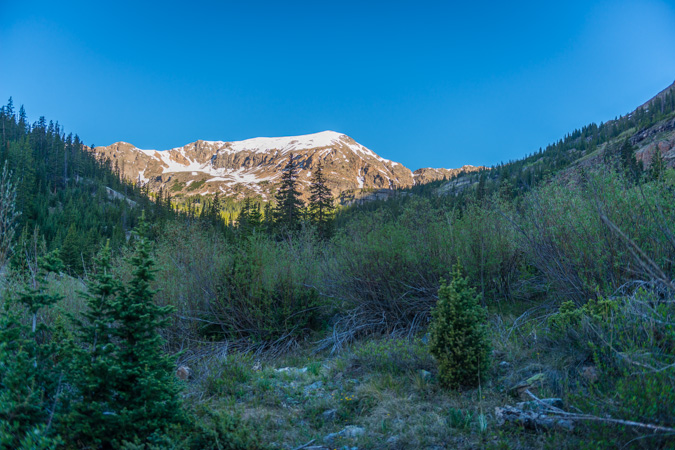
Mount Massive's south slopes are pretty darned steep but also a very pretty backdrop to the Colorado blue skies that we have been sorely missing due to all of the wildfires this year.
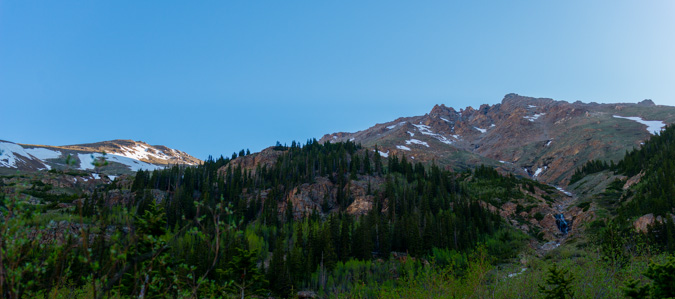
As we continued up the basin, we stopped periodically to look back up the basin that we would have gone up to climb French Mountain, pictured here.
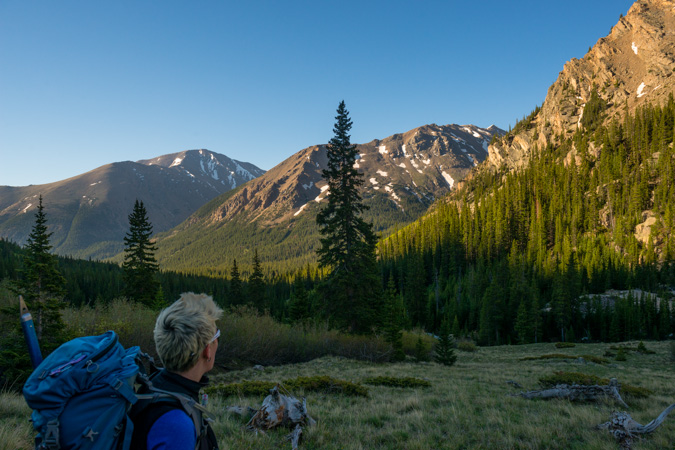
The trail going up towards Oklahoma and the turn-off for Mount Massive is very straight-forward and well- maintained. For a season starter, it was a nice change of pace.
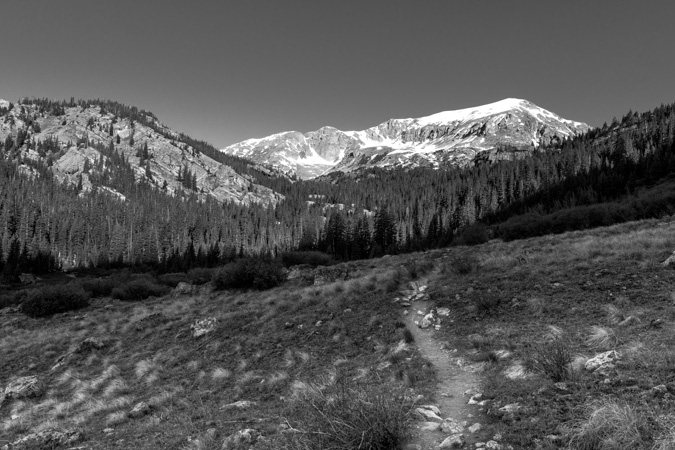
We finally reached the turn-off for Mount Massive, pictured here where Sarah is pointing up.
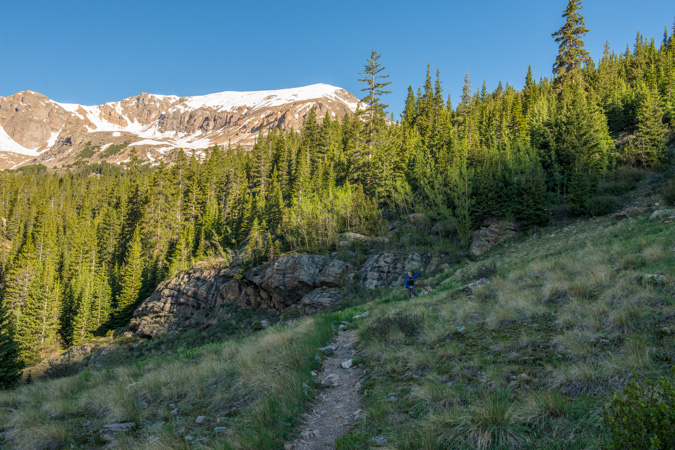
This trail gets you up Massive in a hurry, no doubt about it. It is fairly steep, but in very good condition almost the whole way up. I think that Colorado 14ers Initiative did some work on this trail some time back, and it certainly shows. The trail switches back up the side of Mount Massive several times and affords awesome views of the valley below and the awesome peaks across the way, including Colorado's highest, Mount Elbert.
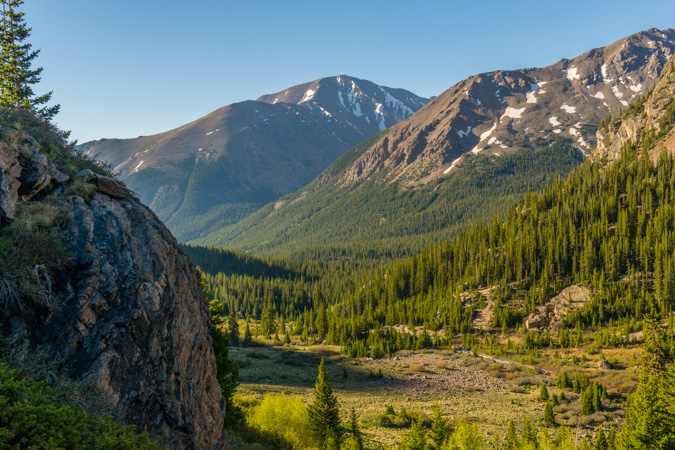
As we approached tree-line, we decided to stop for a snack and water break.

I have Sarah take a photo of me posing with my Rocky Mountain Field Institute (RMFI) water bottle. I'm a very proud member of the board of directors for RMFI. If you're not familiar with RMFI, you need to check them out! If you've ever climbed Humboldt, Crestone Peak or Crestone Needle, then you're familiar with the work they have done in the backcountry.
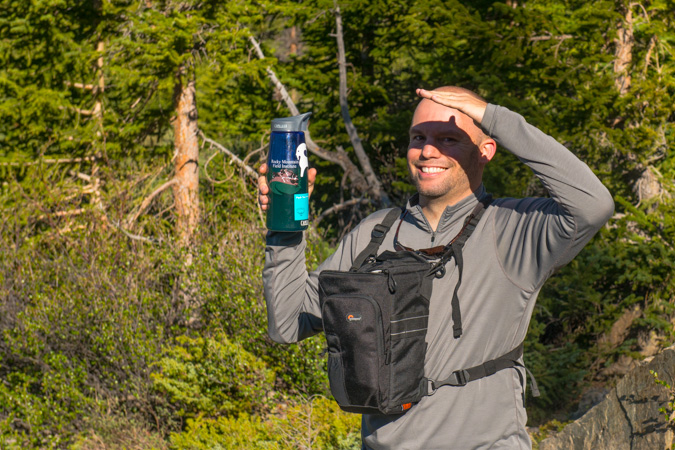
After re-fueling, we decide to keep on trucking. The trail winds steeply up the slopes and kept on delivering us with awesome views to our south of Deer Mountain and Mount Champion.
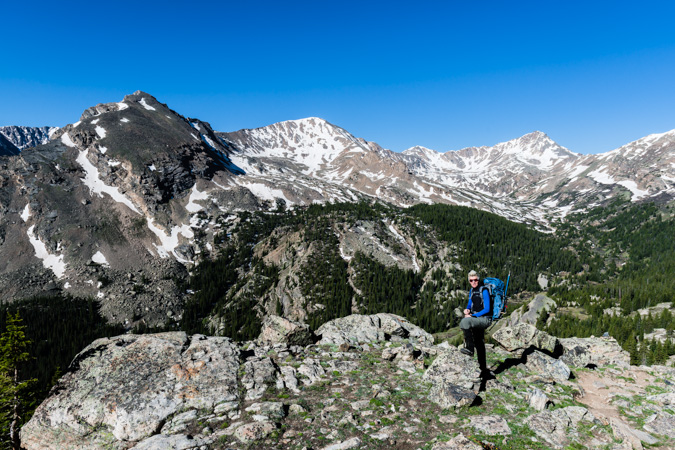
The whole valley below made for a very nice panoramic. From left to right - Mount Elbert, French Mountain, Unnammed pointy peak (but Sarah and I later dubbed this a very foul and childish name to keep up entertained), Mount Champion, Deer Mountain and Mount Oklahoma.

We took our time going up, being the first climb of the season. We enjoyed the views, the company, the conversation, the wilderness.

We were even able to locate some wildlife, albeit your normal fanfare of chipmunks and marmots.
Getting a day to spend with Sarah was awesome. She's one of the most dynamic and fun people I've ever met. Our personalities go together quite nicely. It is also great to see her in high spirits when we're hiking.
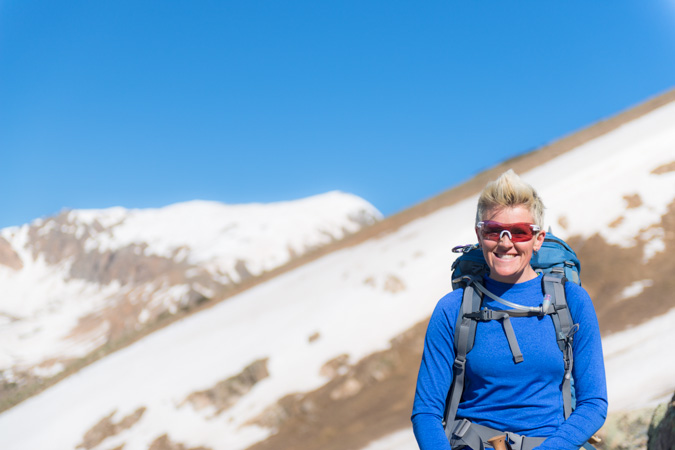
We took a lot of stops to soak in the Sawatch Range glory, and the weather was holding quite nicely.
Here's that stealth marmot. I think he thought if he layed down I would not see him. Nice try pal.
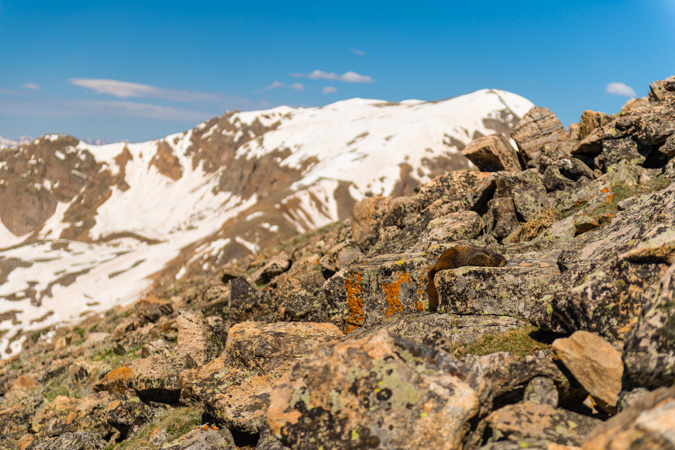
Finally the tips of the distant Elk Mountains were coming into view. They seemed like they were holding a lot of snow as well.
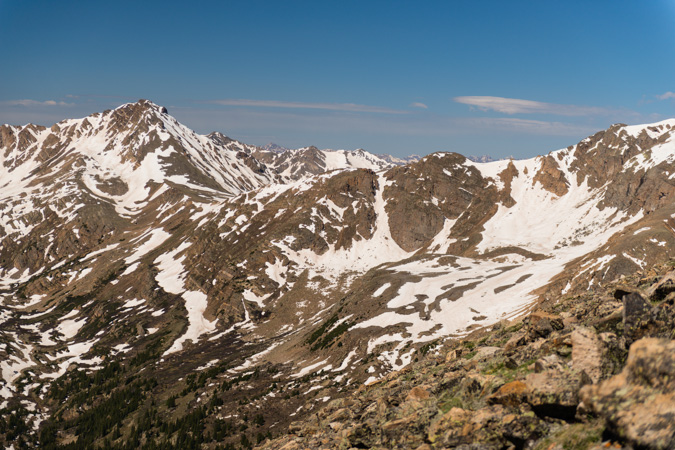
And looking back, Twin Lakes was starting to come into view.
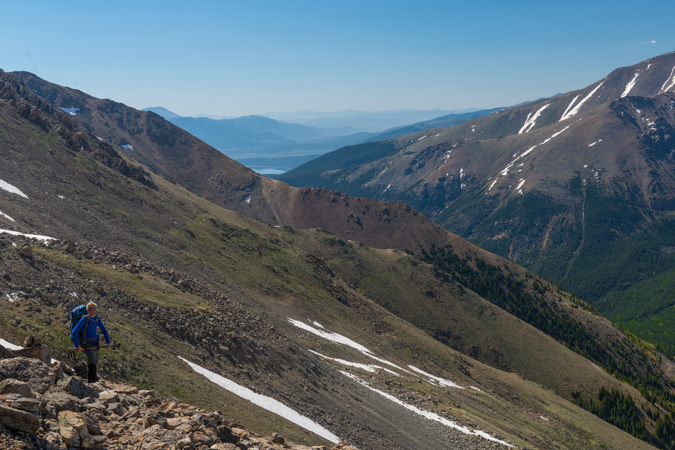
This is always my favorite part of hiking. Above tree-line, no wind, sunny day. What more could you ask for than a day like that on the side of a 14er? Sarah seemed to be enjoying the views as much as me.
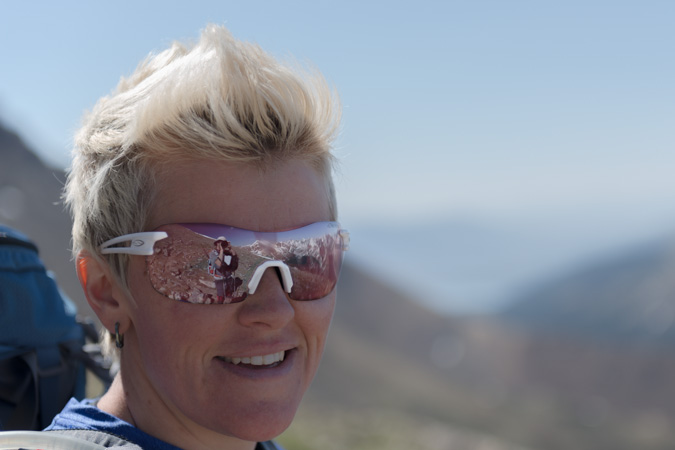
We stopped for a bit to enjoy the killer views of the Elk Mountains, which are some of my favorites. The tips of the Maroon Bells, Snowmass and Capital were poking above the top of Mount Oklahoma to the west.
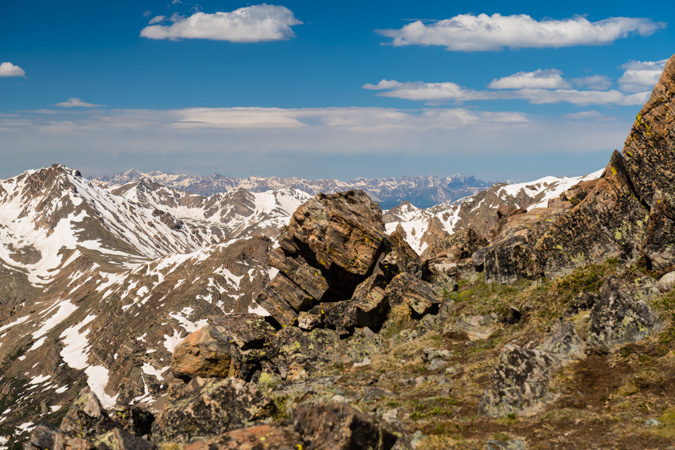
From here, the trail continues up the southwest slopes and crosses east at the ridge. The town of Leadville comes into view to the east.
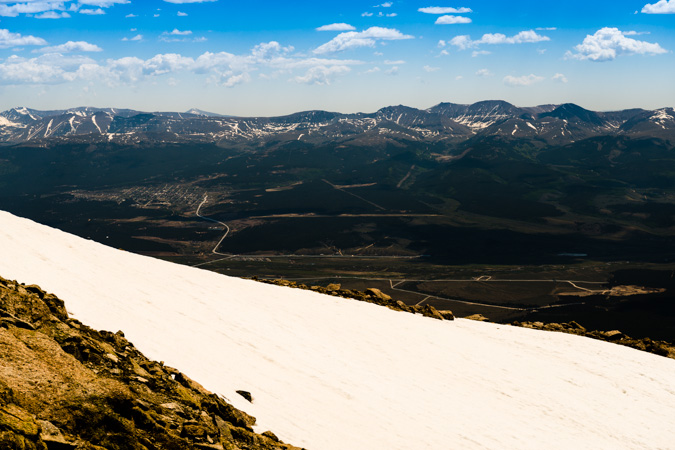
And of course the summit of Mount Massive to the north, with a lot of people coming down.
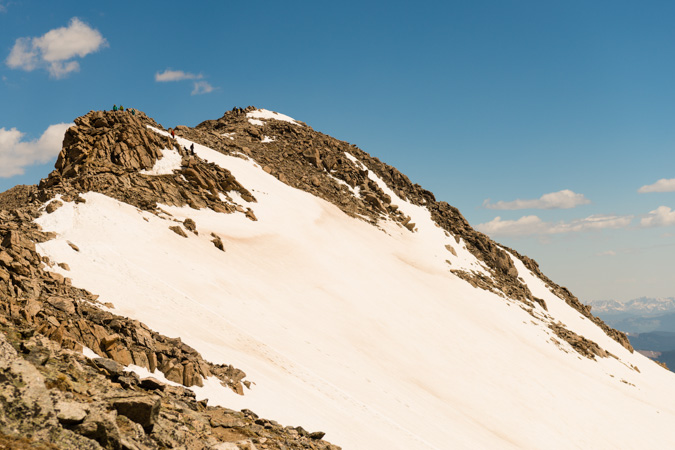
After a quick stroll over to the summit, victory was ours. We were able to almost completely avoid snow for the entirety of the hike up, minus a few snowfields below and some minor snow at ths summit. This was Sarah's 24th 14er and my 60th I think. It was awesome sharing the summit with Sarah again.
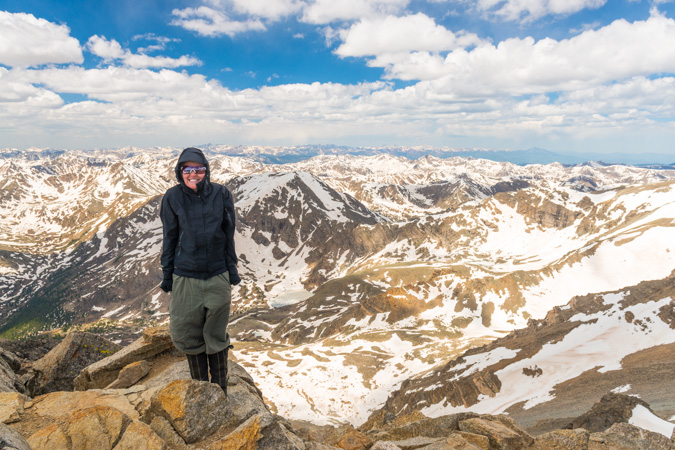
On the top, we ran into a group of gear testers from Osprey packs. We were immediately filled with envy that their job was to test the comfort of packs while hiking 14ers.
From the summit, I decided to try out some long exposure photos using a 9-stop ND filter, specifically, the Hoya ND400 77mm filter. Esentially, an ND filter is a black peice of glass that goes over you lens, which allows your shutter to stay open for a long exposure in daylight conditions. This allows you to capture photos of the clouds moving, and other awesome effects. Since I was shooting for a 30-second exposure, I would need my camera to be sturdy. To acheive this, I fashioned a flat suface out of rocks to rest my camera on.

I was also able to perform a hand-held panorama at 70mm looking west at the Elks.
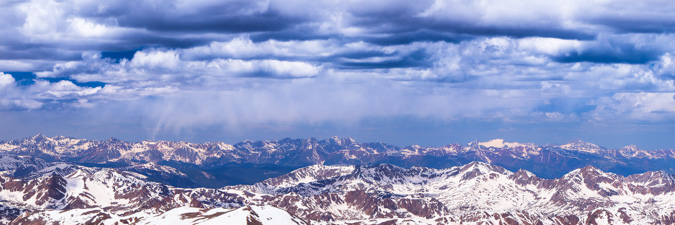
And here's a larger version looking south to north at 70mm:
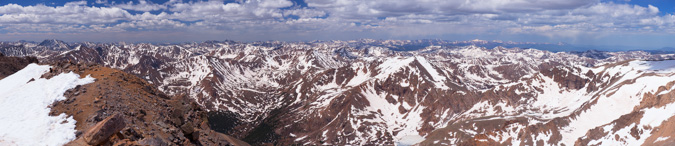
And lastly, the 360 panoramic taken at 24mm:

I had Sarah snap off a few shots of me before we head back down.
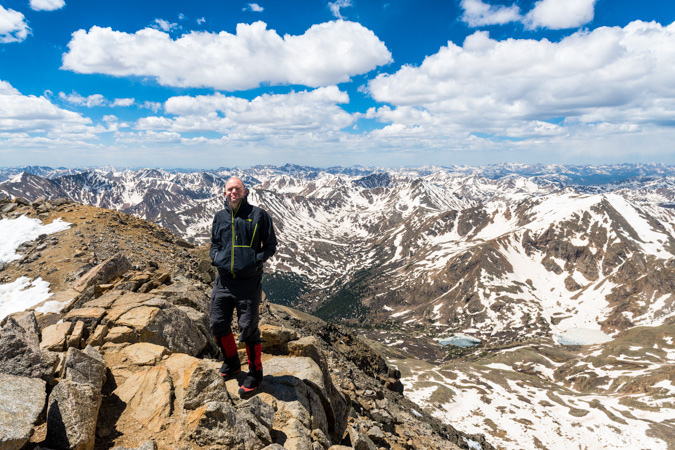
A solo gentleman joined us for the descent, mostly because he was looking for the trail, which he had lost on the way up the same route we came up. I could have sworn this guy was Taylor Lautner from the Twilight movies. A few notes about my camera and lens selection. I felt like the pairing did well. While they were heavy, it was easily mitigated by the front-loading Lowe Pro pack I used and the quality of the photos was superb. The Nikon 24-70 afforded just the right amount of flexibility in range, I rarely felt myself wishing for a longer lens. Had I saw some true wildlife, I would have loved to have my 300mm f/4 lens with me, but it would have added weight to an already heavy set-up.
After taking summit photos, we head back down pretty quickly. I wanted to travel quickly, so I put my camera bag in my main pack and did not take it back out for the rest of the hike down. Once back at the trailhead, we saw a Toyota FJ cross the stream. Go figure.
We drove back out towards Leadville and stopped to take a few photos of an amazing flower field in front of Mount Massive and an idyllic abandoned cabin. I hope you enjoy my parting shots:
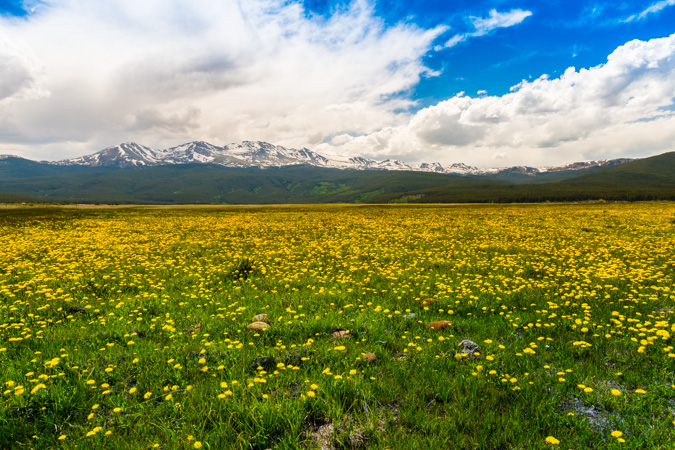
Panoramic version...
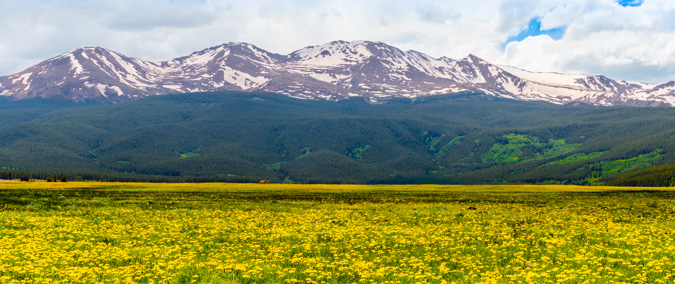
Abandoned cabin...
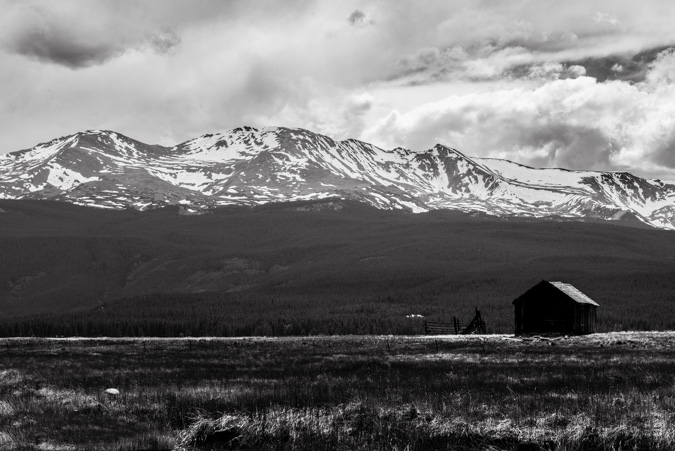
This concludes the first trip report of 2013. I apologize for the lack of updates lately. I have been quite busy working on my photography business, where I sell prints of my work. You can check it out by visiting www.mattpaynephotography.com
Mount Oklahoma - A Centennial 13er that is more than just "OK"
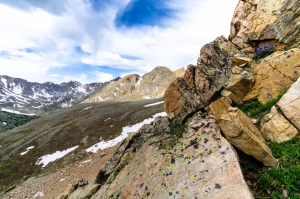
Mount Oklahoma is often forgotten by many, including myself, for a variety of reasons. There's nothing very remarkable about the look or feel of Oklahoma or the route to climb it. As Gerry Roach explains in his guidebook for 13ers, Mount Oklahoma is dwarfed by its neighbor to the east, Mount Massive, which is the 2nd highest mountain in Colorado. Despite this fact, Mount Oklahoma is more than OK - it offers solitude, unique views of mountains in all directions, and a fresh perspective on the art of "peakbagging."
Mount Oklahoma is not a mighty mountain, nor is it meek - rather, it is fairly average in stature for the Northern Sawatch Range - rising 13,845 ft. in a valley full of giants. Indeed, Mt. Elbert (14,433 ft.), Colorado's highest mountain, towers over Oklahoma to the south and east. Other higher Centennial peaks also adorn the skies nearby, including French Mountain (13,940 ft.), Casco Peak (13,908 ft.) and of course the Mount Massive massif (14,421 ft.) right next door.
Knowing that Mount Oklahoma is a fairly straight-forward and relatively safe climb, lacking anything harder than class 2 and with one of the easier levels of access for a 13er, I opted to head-out to climb it solo. While this is something I generally discourage, I felt the risk was manageable, plus my wife knew where I was going to be. Indeed, it did turn out that I did not run into a single other soul during the whole hike until well on the way back to the Jeep on the Mount Massive leg of the trail. So there it was, I left my house in Colorado Springs at about 6:30 PM on Friday evening and found myself at the North Halfmoon Creek Trailhead at 9:15 PM. There was an abundance of people up in the valley camping. Despite campsites being quite ubiquitous in the valley, I was left with no other option but to park at the trailhead and find a flat and comfy campsite within the trees. I set-up my sleeping pad and sleeping bag only and went to sleep right away.
The alarm sounded promptly at 3:30 AM and I rose quickly to get a start for the day, as I knew my wife wanted me home relatively early so that we could go to my parent's house for a father's day dinner that night. The first thing I did was take a shot of the Milky Way above the trees and above the 13,221 ft. northern sub-peak of Mount Elbert.
Click on the photo to see a larger version or to purchase a print.
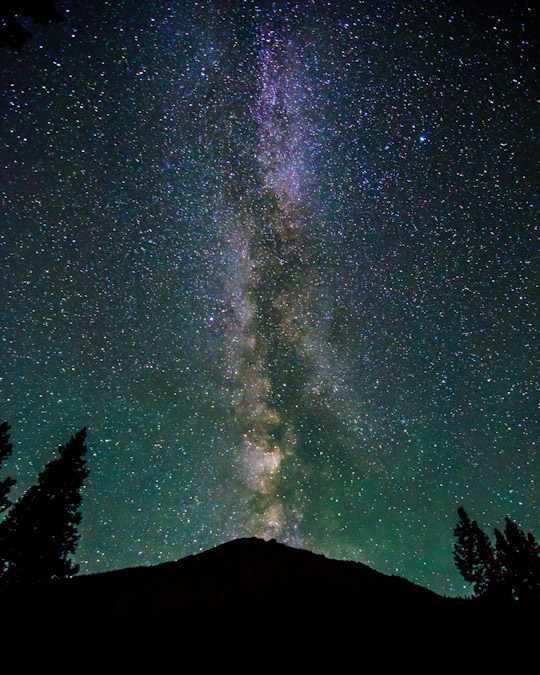
I had been on this trail once before in 2009, having been here in the cold month of October to climb Mount Massive. What I remembered of this trail was that it was very straight and easy to follow below tree-line before the turn-off for Mount Massive, so I was very confident that I could make my way in the darkness with the aid of a headlamp. Adorned with my Ipod and my favorite Celtic tunes, including Solas and Altan, I began my journey in the dark.
I also decided to bring my Gitzo tripod - which is basically an older, heavier version of THIS one, with an Arca Swiss monoball affixed so that I could get some sweet sunrise shots and summit shots along the way. While this adds a great deal of weight to my pack, the effort is worthwhile and increases the types of shots I can get significantly. I've fallen in love with this tripod and monoball combination since acquiring them both on the cheap a few months ago on Craigslist. They are hands-down the highest quality photography gear in the business. I highly recommend both for anyone looking to upgrade.
The plan was to follow the route as described by Roach, which is close to what actually happened - here is the map of my route - click on it to see a larger version.
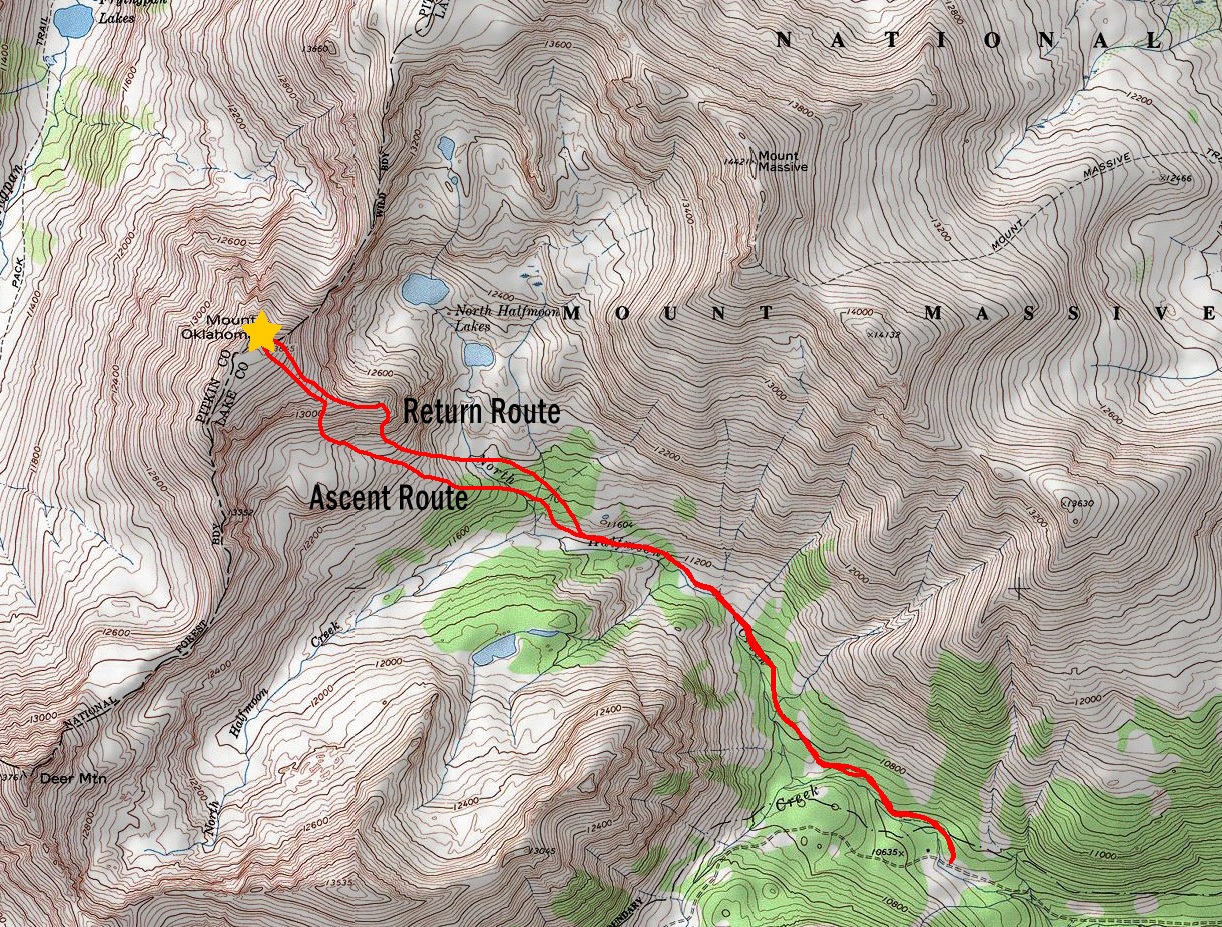
I found the trail very easy to follow, even in the darkness, minus one section where the trail meets up with a very large rock formation and crosses it. I just kept my eye out for the trail and ensured I was on track at all times. The route description for Mount Oklahoma is pretty straight-forward according to Roach. After passing the Mount Massive trail junction, continue west-northwest until the trail begins to gain elevation and head north, at which point you are to leave the trail and continue west. That's just what I did, but it was somewhat sketchy in the dark - bushwhacking through trees and logs is a great time. I quickly reached the two large stream crossings described by Roach - they were quite fast streams on a steep incline - I was very careful to cross, finding dry-ish rocks in narrow passage-ways. At this point - I began up a steep hillside per Roach's description for going up a tree-filled ridge to the northwest. Before I knew it, I had reached treeline and could make out my surroundings.
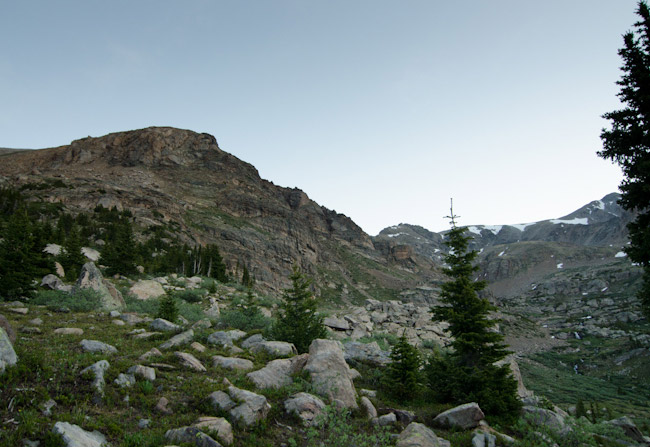
I encountered a deer at this point, which quickly ran off into the trees below. I could also make out a series of waterfalls in the Halfmoon Lakes basin below Mount Massive to my right - this was quite impressive and I made a mental note to return to those lakes someday - they seem to hold quite a bit of promise. I also was revelling in the fact that I was hiking solo in the Mount Massive Wilderness Area, off-route, while listening to great tunes and taking pictures of fantastic vistas. I really do love Colorado! Mount Oklahoma was clear as day above me, and the route seemed quite obvious from this point - go up.
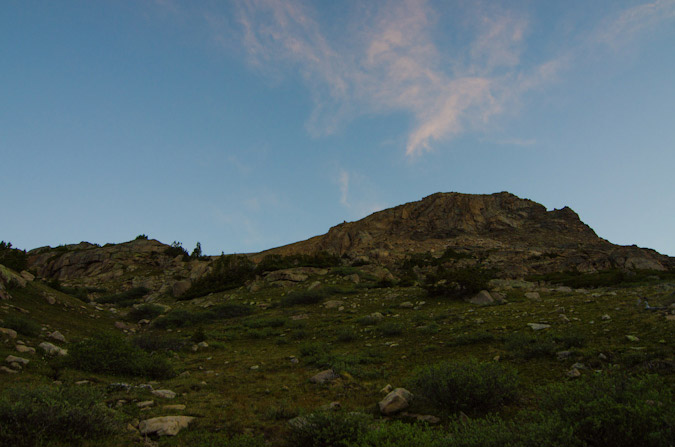
Before long, I found myself high above most of the trees just in time to witness the first light kiss the tops of Deer Mountain and UN 13,535 to the south and west. Moments like this made hauling the tripod up worth the effort.
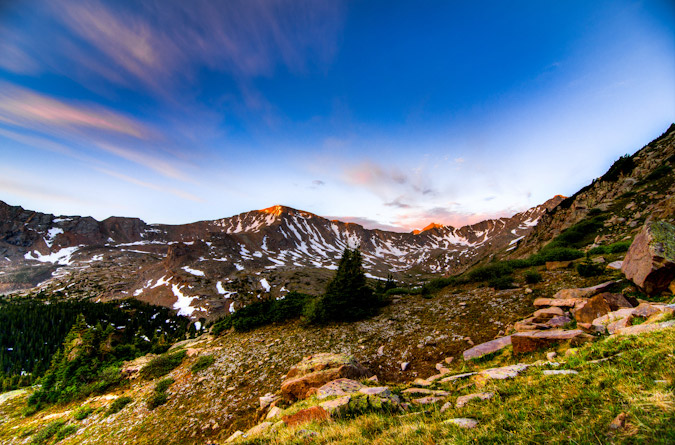
I left my pack and wandered up a little way and found an area covered with really cool looking flowers. Turns out the flowers are known as Alpine Primrose - a really quite lovely looking purple and pink flower. I took quite a few shots from this spot and processed each a little differently.
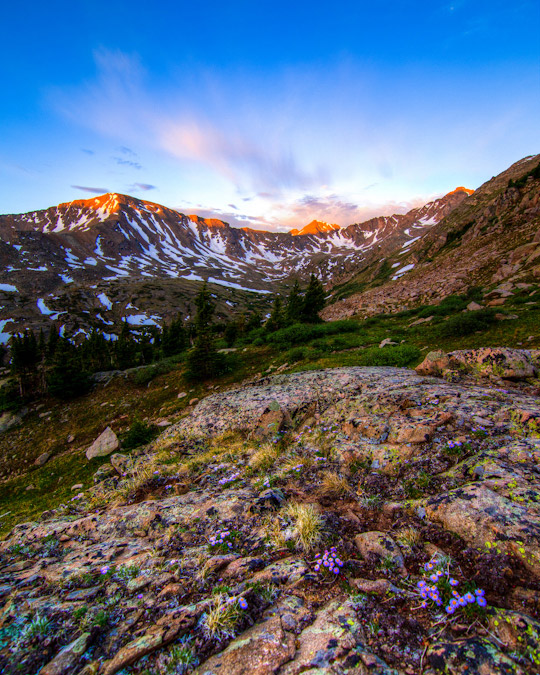
Another version from the same vantage point...
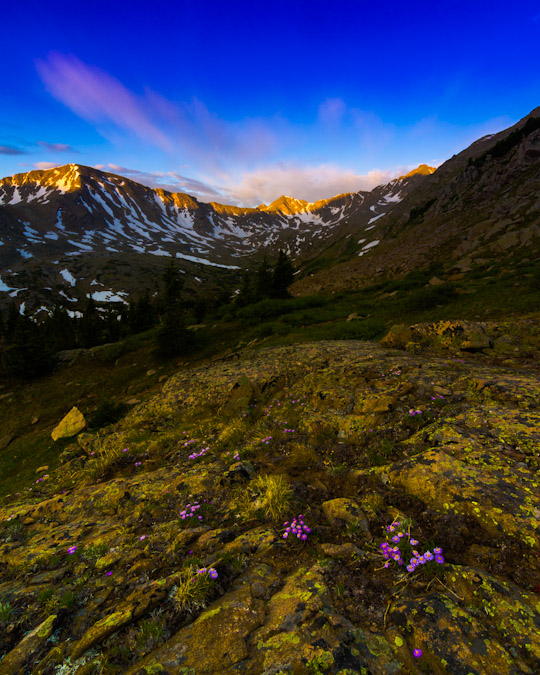
I was even able to put together an 360 degree HDR panorama, which I've not tried in a few months. I was not overly impressed with the results of this one, but I'll share it anyways.
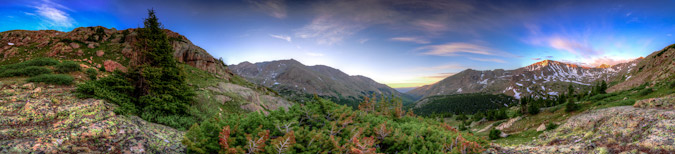
Having filled my soul with a dose of alpine sunrise, I was ready to continue on up the mountain. I followed what seemed to be a slight trail or drainage up the mountain and was aiming for an area to upclimb a grassy screefield.
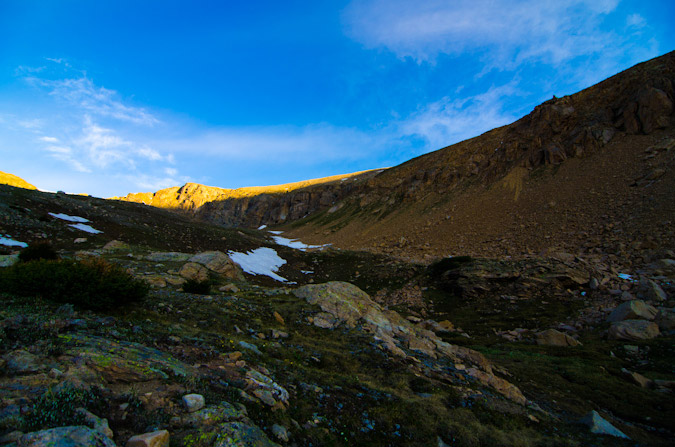
At this point I stumbled upon a small pond at the base of a small snowfield below Mount Oklahoma. It made for a very interesting reflection in the water with the sun just hitting the tops of the southern ridge of Oklahoma.
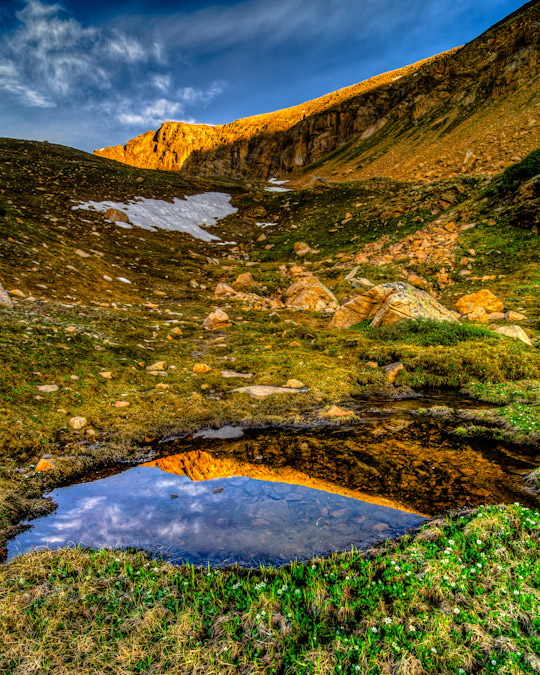
I played with a few versions of this shot, and I think I liked the HDR horizontal version the best. I know HDR is a technique with many detractors; however, I like to play with it - it keeps me entertained and thinking.
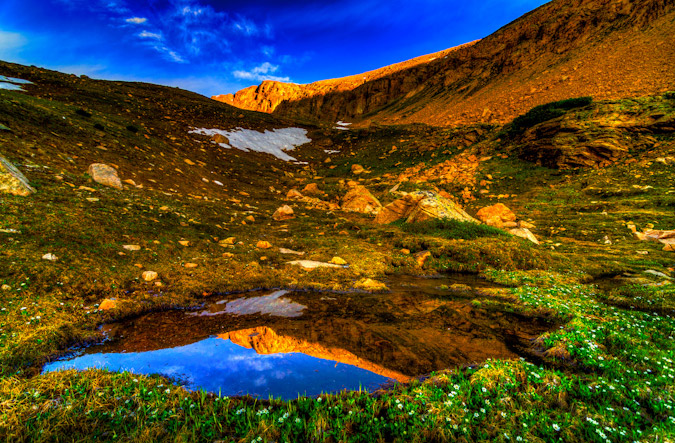
At this point, I found the grassy screefield, and it was mighty steep. I was not sure if this was the right way to go, but it looked like the easiest way up to the ridge. I plowed ahead slowly, reaching the ridge after several long minutes of gruelling climbing up this nasty section. Once up, the views were splendid.
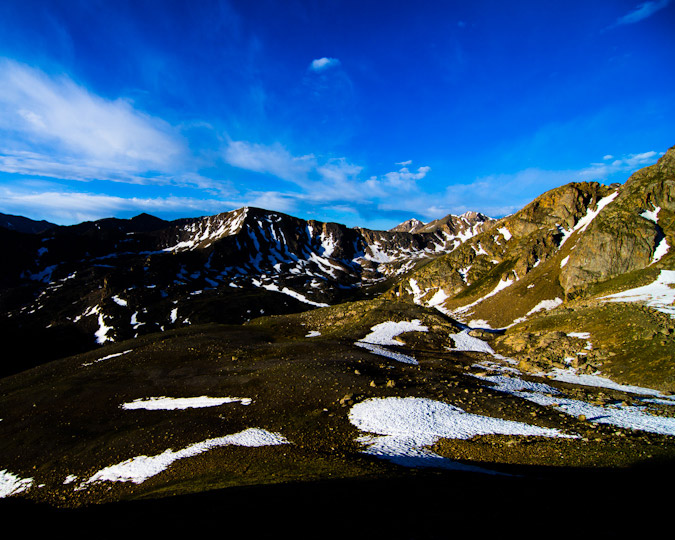
I continued to plow ahead slowly on the obvious route up Oklahoma to the north and west. As I climbed, the views improved dramatically.
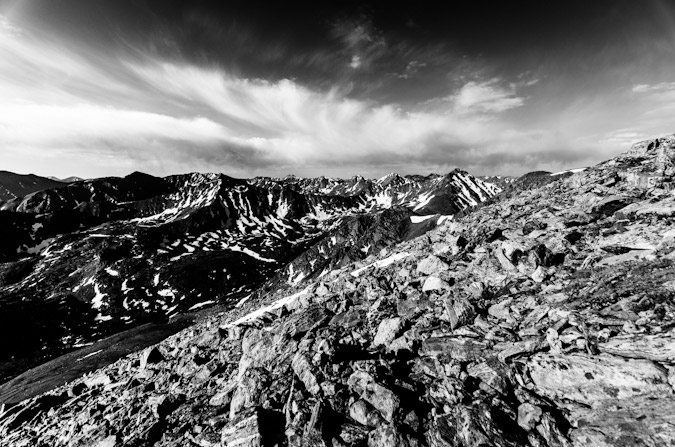
It was at this point that I began to feel sick to my stomach just like I did back in 2009 when I climbed Harvard and Columbia. I was beginning to wonder if my lack of food intake or the water I was drinking were to blame. Perhaps I did not clean out my camelbak adequately? Perhaps I was eating too dense a food (Larabars) for my stomach to handle? Or, perhaps I was just suffering from a mild case of Acute Mountain Sickness? Who knows? All I knew was that I was moving far slower than I wanted to and making progress quite sluggishly. I worked my way slowly up the boulderfield until my eye was caught by some blooming flowers which happened to be quite near the summit. I took off my pack and prepared my tripod for some photos of some flowers. Also, I could finally make out the Elk Mountains to the west, including Snowmass, Maroon Bells, Cathedral and Castle - they were all quite impressive to be sure. I fixated on small field containing a variety of colorful wildflowers and took some shots.
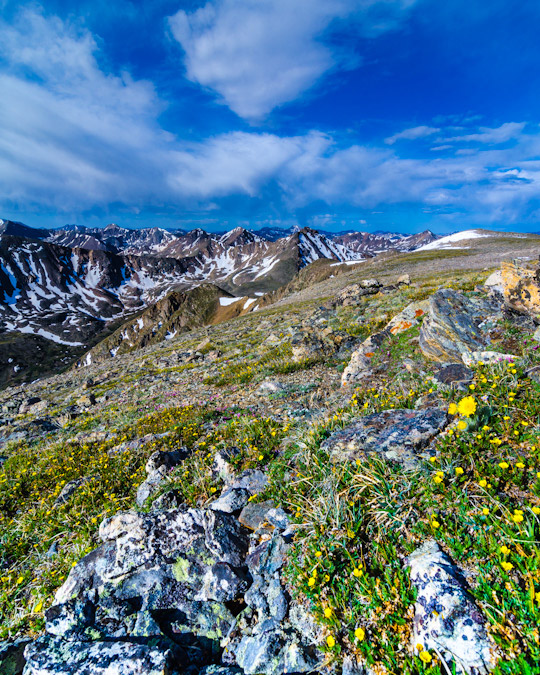
After taking my fair share of photos in this patch of flowers, I decided to move upwards. It took about 4 more minutes from here to reach the summit, which was a relief given my stomach issues, which had actually subsided significantly since I stopped to photograph the flowers. On the summit, I noticed that clouds were hitting the Elks with some light showers and that those clouds were headed this way. I had no intention of getting stuck in a storm, so my lofty goal to traverse to North Massive was out of the question. I set-up my tripod and set the timer so I could get a few shots of myself signing the summit register for Centennial #76 - only 24 more mountains to go!
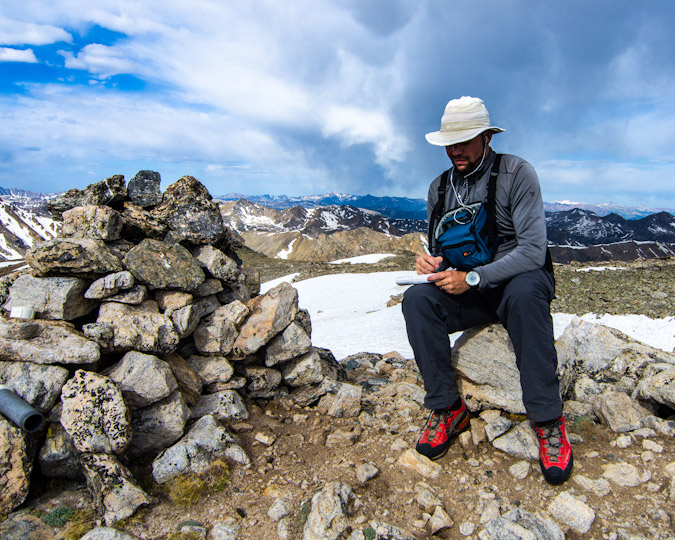
The register was quite intact and filled with many familiar names. I was happy to add mine to the list.
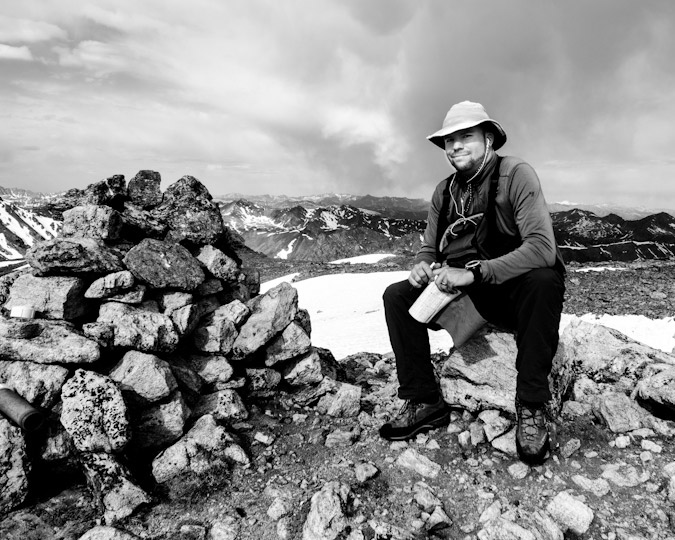
At this point I used the tripod to take some photos to later be used in my 360 degree summit panorama.
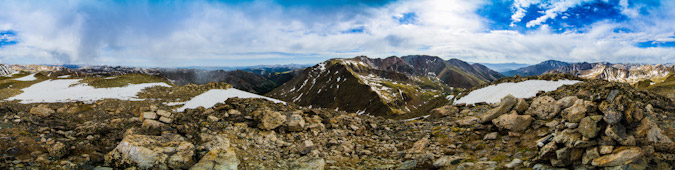
I also toyed with a black and white shot from here, framing Mount Massive on the left part of the shot.
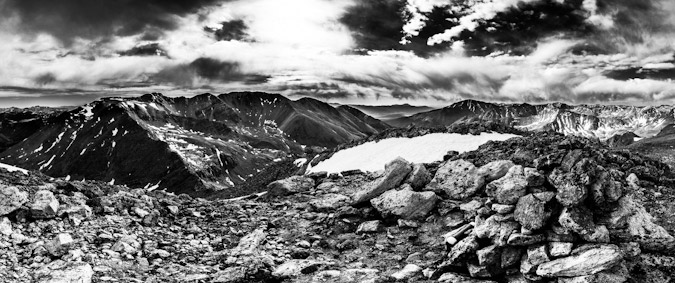
After a quick phone call to the wife to let her know I made it safely, I took an assessment of the weather. The storms rolling in over the Elk Mountains to the west did not give me a good feeling, so I decided to pack-up and head down. I decided this time to see about the small ridge that rolls down to the east of Oklahoma. Instead of going back down the grassy talus, I went down the long ridge.
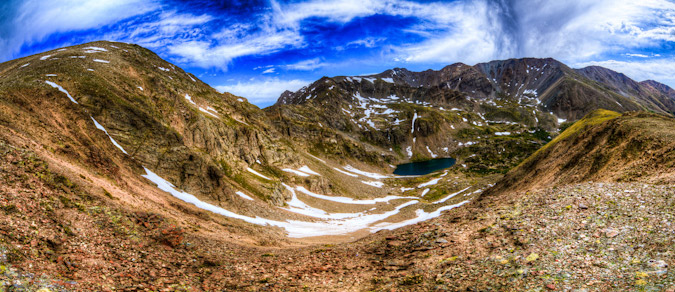
Once down, I found a great spot at the end of the ridge to take a sweet pano from - Mount Oklahoma at center with Mount Massive at right with a small storm over it.
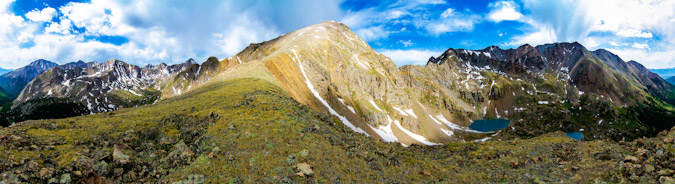
At this point, I saw a ton of cairns leading down the mountain towards the cliffs Roach warned to avoid in his guidebook. I decided to take the challenge and see where the breadcrumbs could lead me. Sure enough, they led me down the mountain's steep slopes, but it was not a terrible route, albeit harder than my ascent route (loose rock, etc).
Small storms were hitting the areas peaks, and it started snowing a little bit, but nothing too scary.
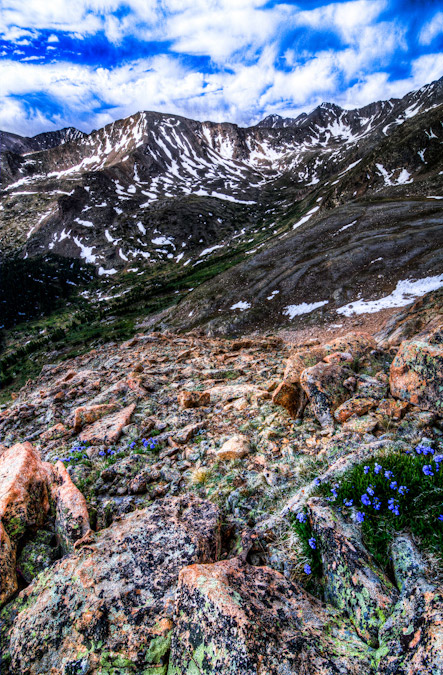
On the way down the steep terrain, I ran into some really nice flowers in a very strange spot amongst the rocks. Nature never ceases to surprise me...
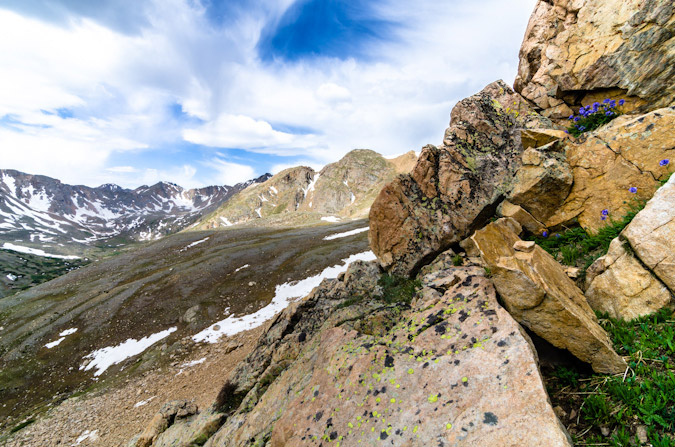
Once down the nasty part, I was back on the grassy ledges near treeline. I decided to angle my decent more northeasterly so I could hit the trail coming down from Halfmoon Lakes sooner. This turned into a pleasant bushwhack into the forest, where I stumbled upon a small stream leading down from the lakes.

I found the trail again with no issues and found myself flying down the trail at a rapid pace. I reached the turn-off for Mount Massive in short order and took one last look back at Mount Oklahoma.
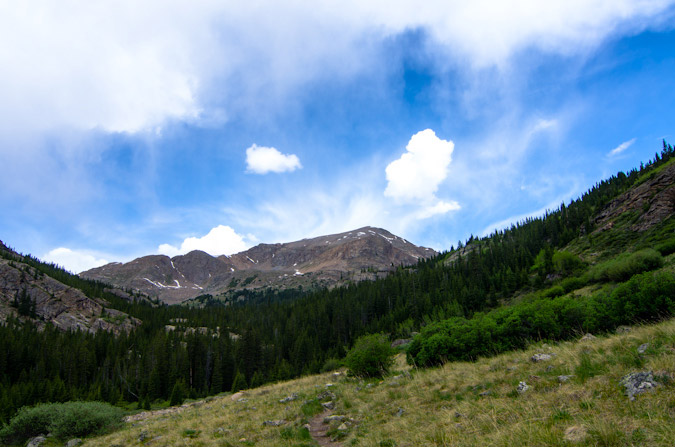
I was also pleased to see the large monument cross at the trailhead that was placed after the Blackhawk Helicopter crash in 2009 on Mount Massive.
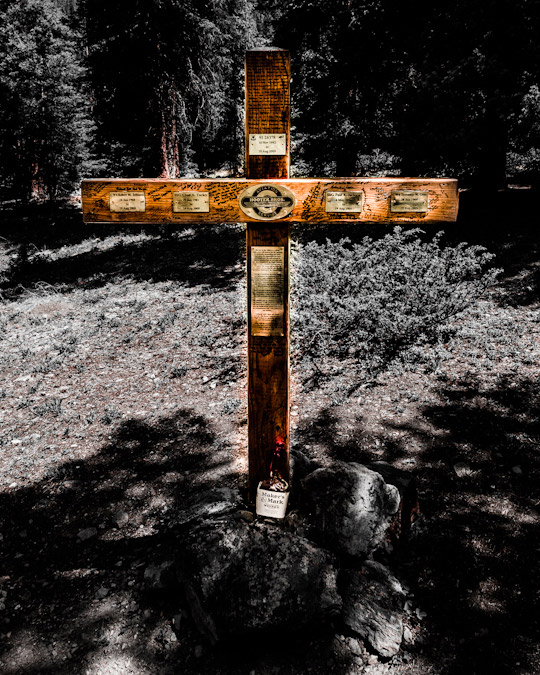
In closing, I highly recommend Mount Oklahoma as a hike that gets you away from the crowds on 14ers and still allows for wonderful views and a decent work-out. I am certainly not usually a fan of the Sawatch Range; however, the northern Sawatch Range really separates itself vis-a-vis grand views of the Elk Mountains and a seemingly more rugged feeling than the Southern Sawatch Range. I'll leave this trip report with a creative rendition of my 360 pano from the ridge - Planet Oklahoma. I wrote a tutorial on how to make these if anyone is interested.
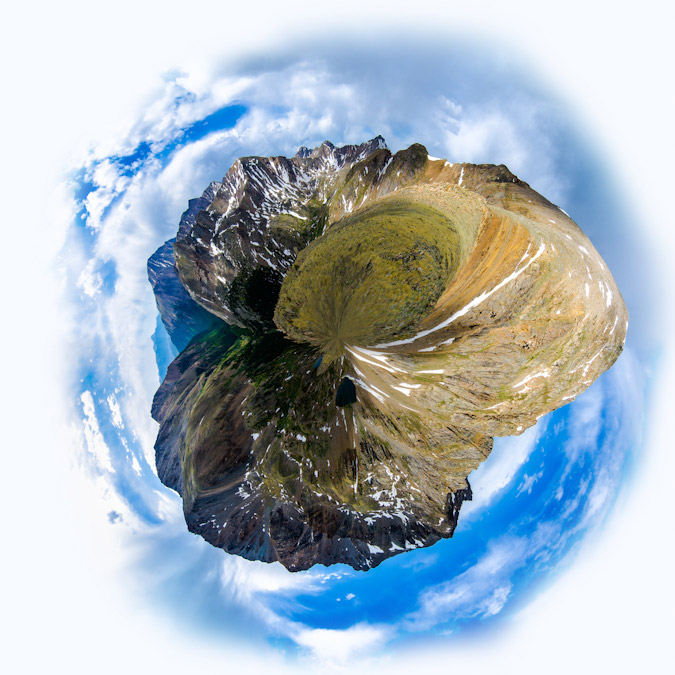
{fcomment}