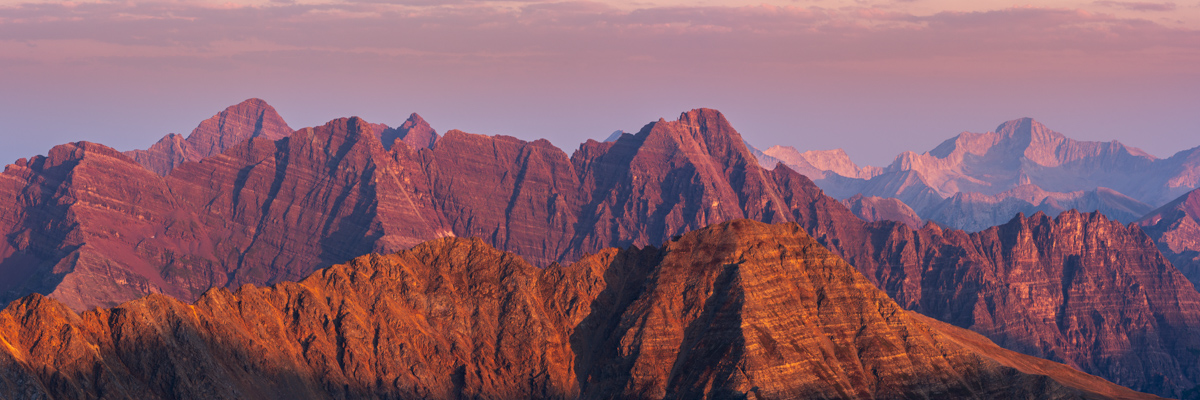
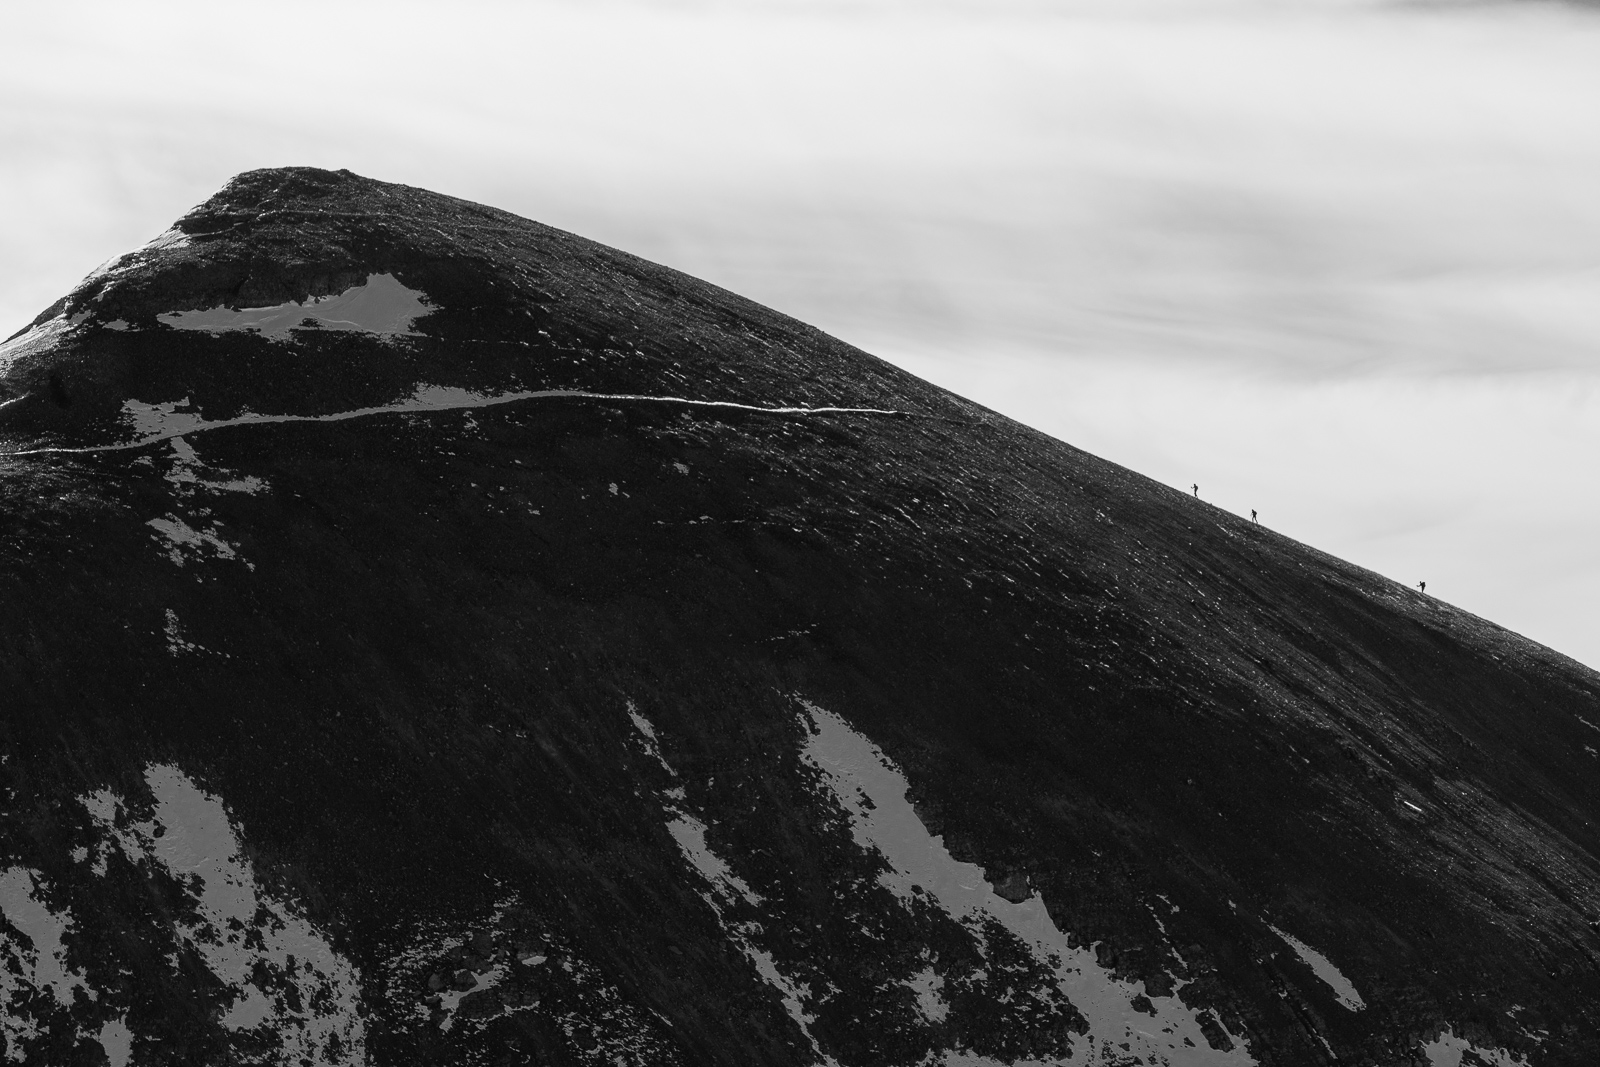
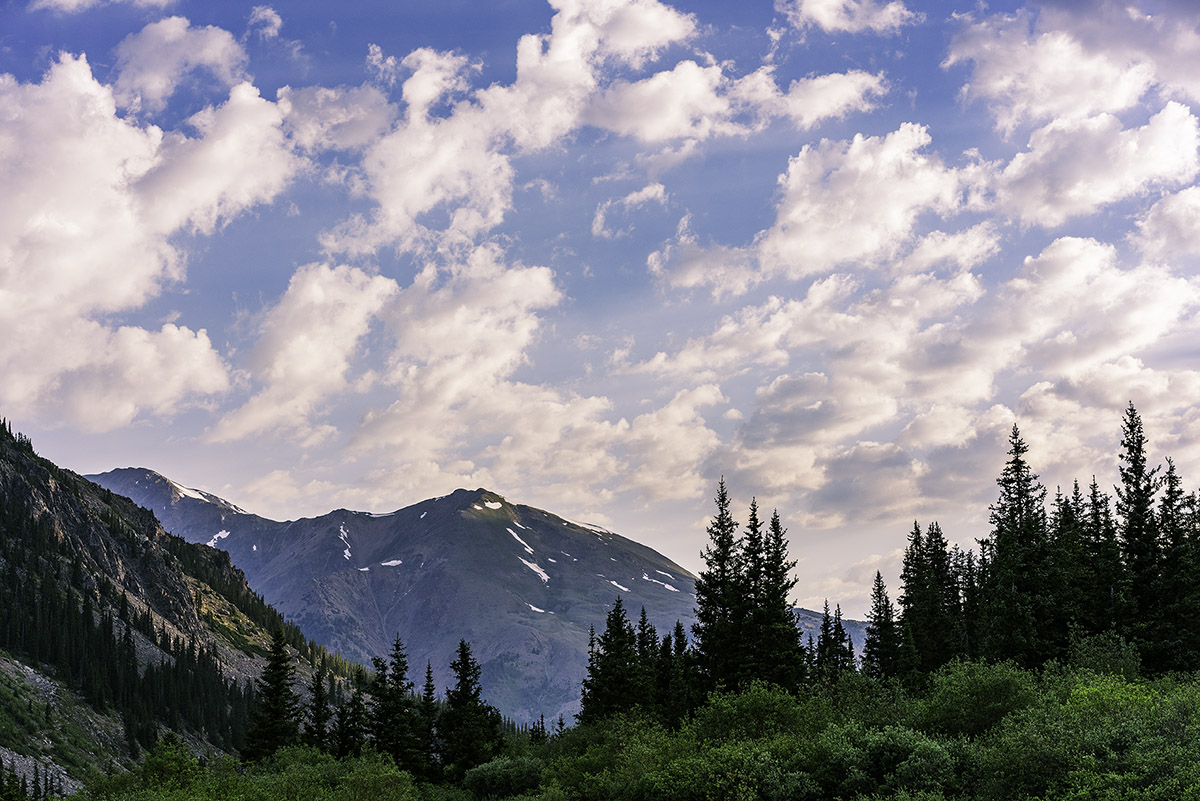
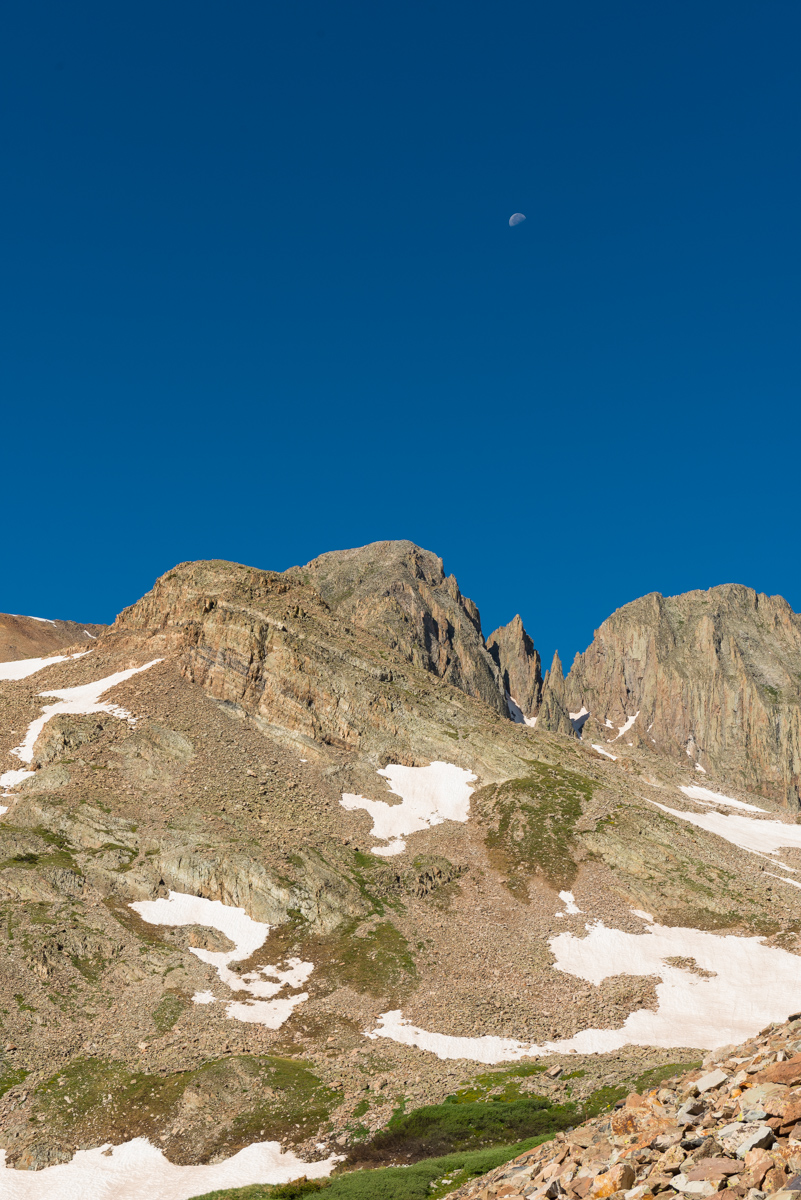
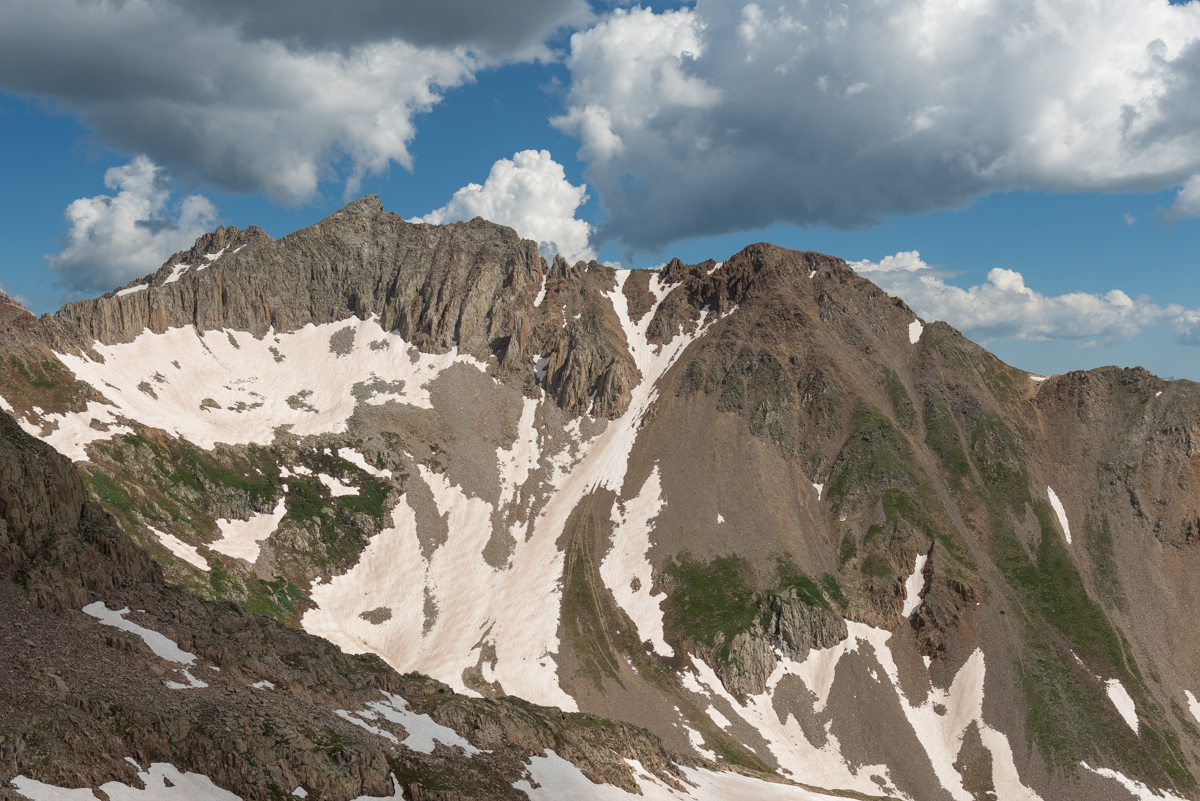
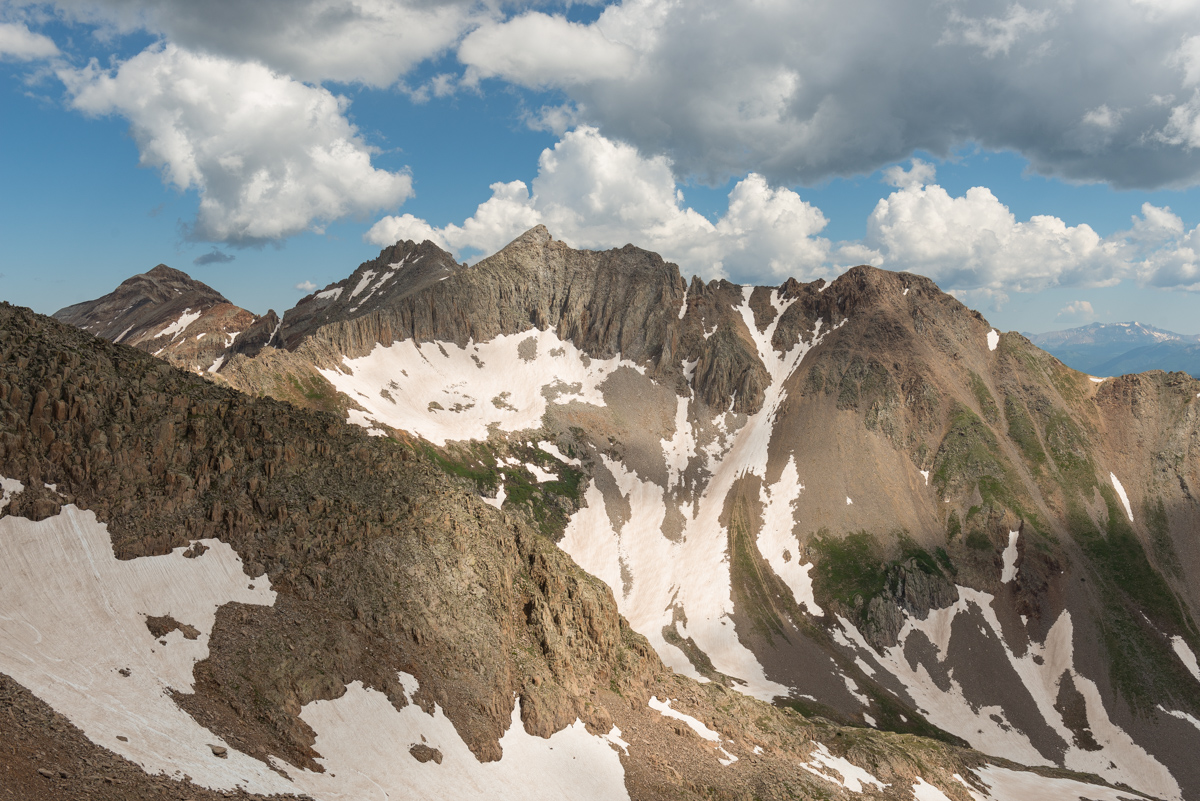
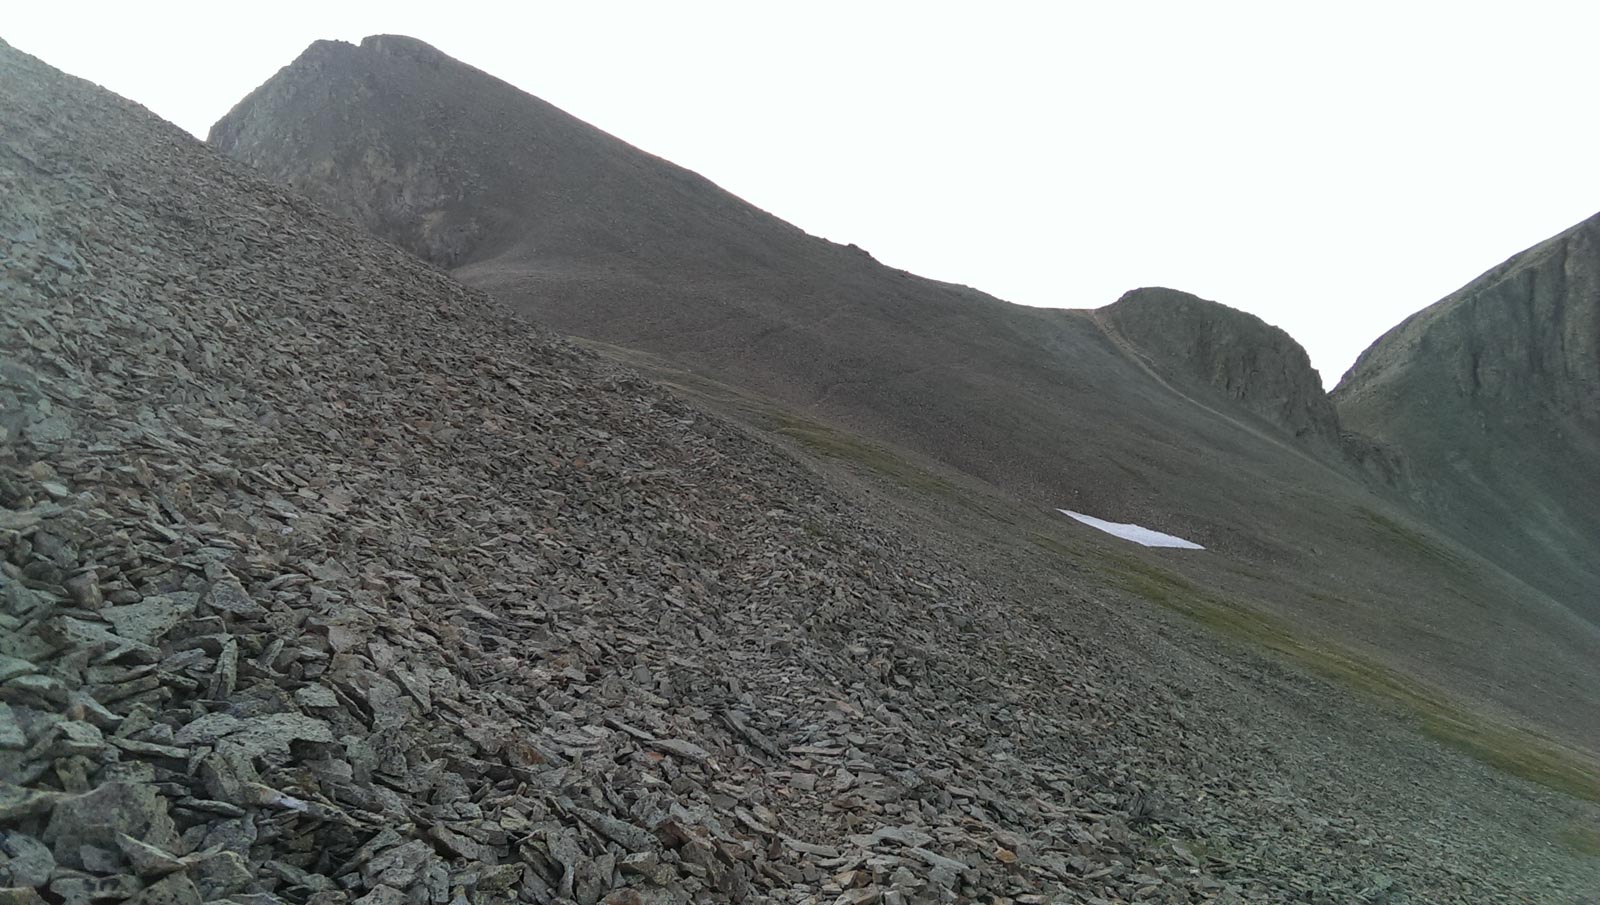
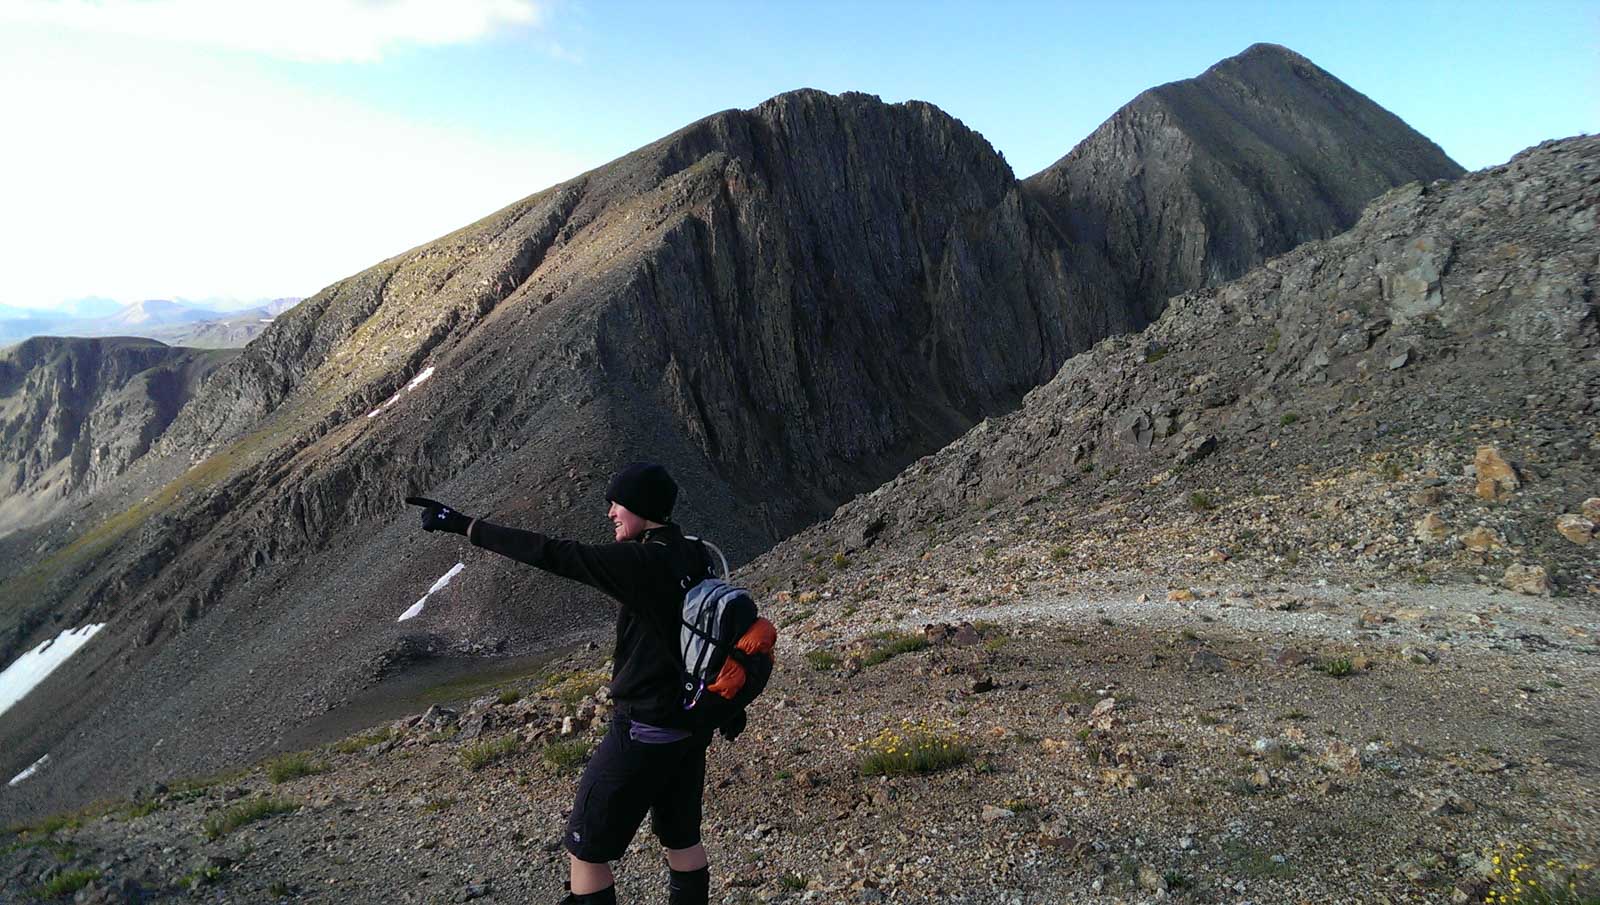
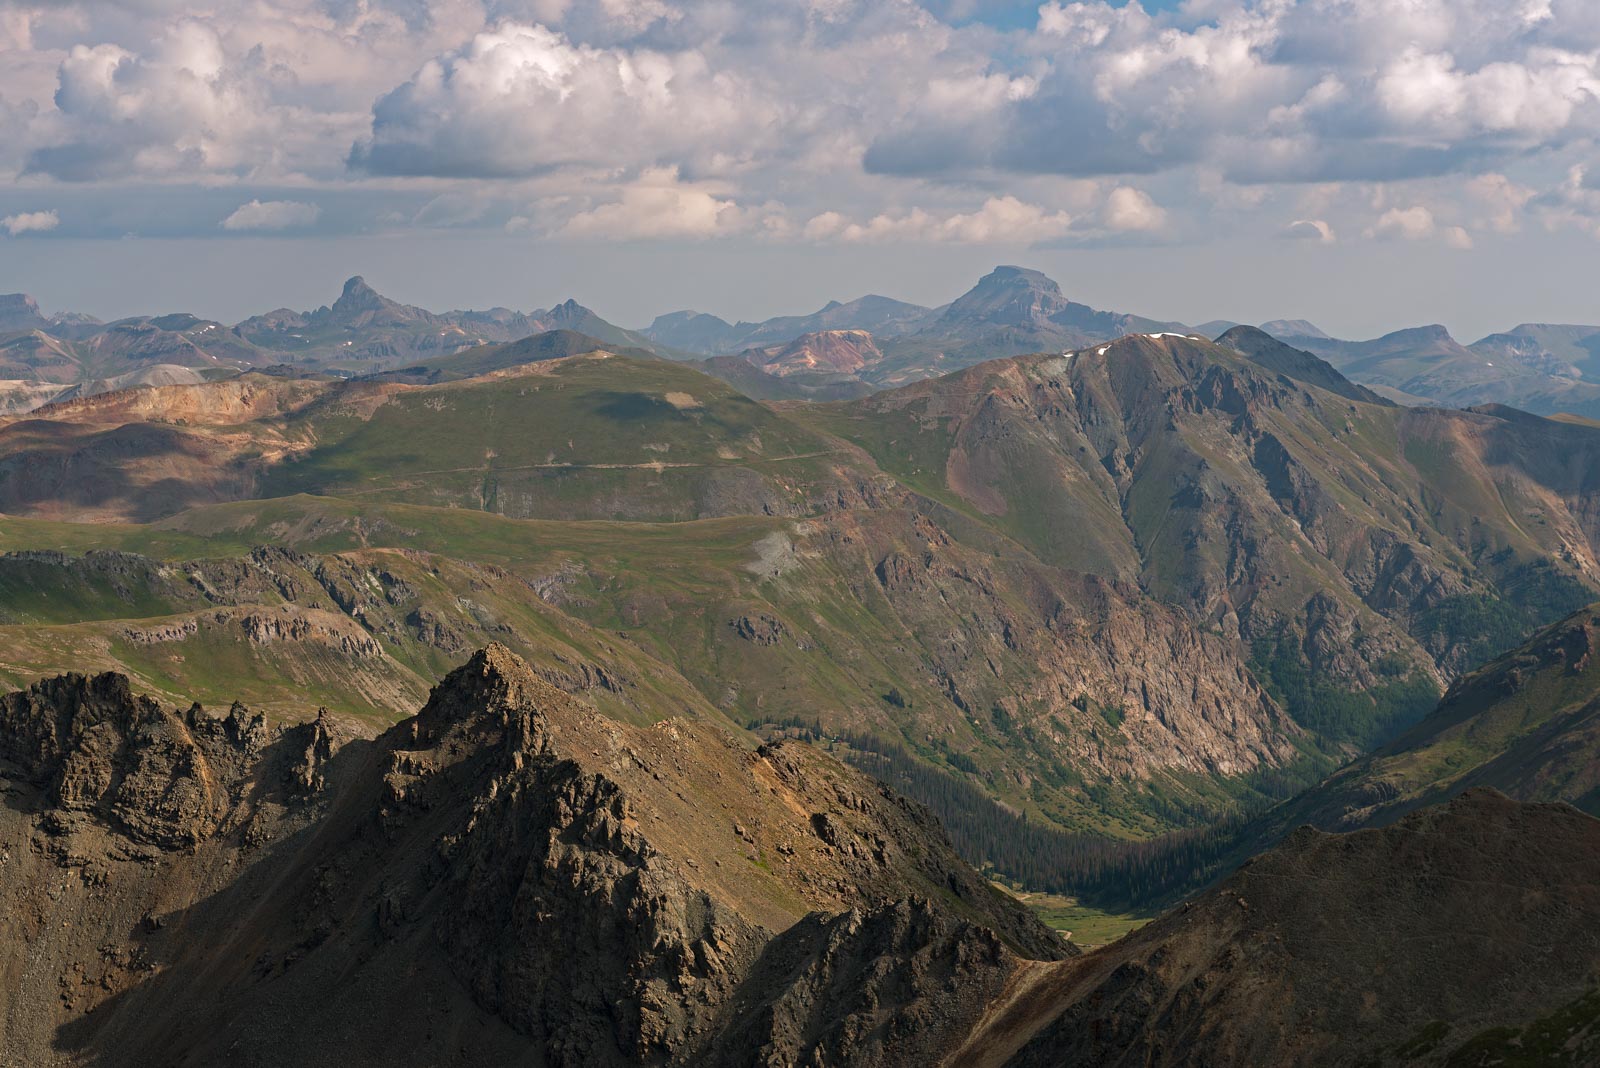
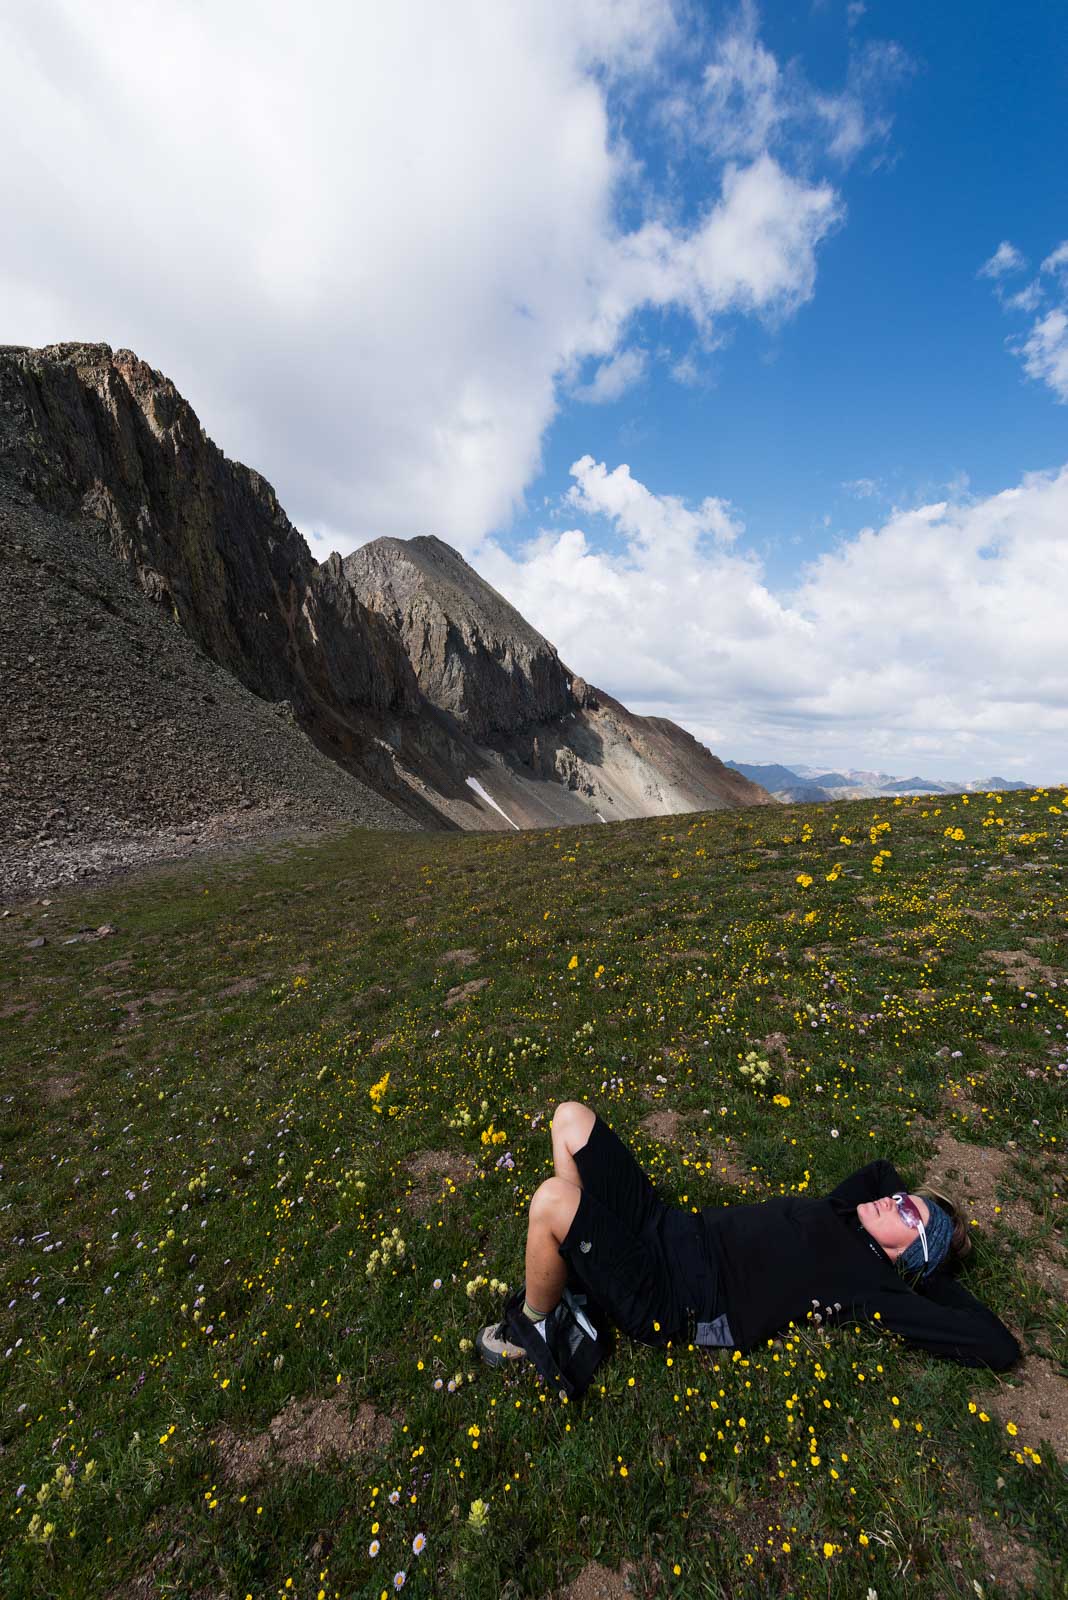
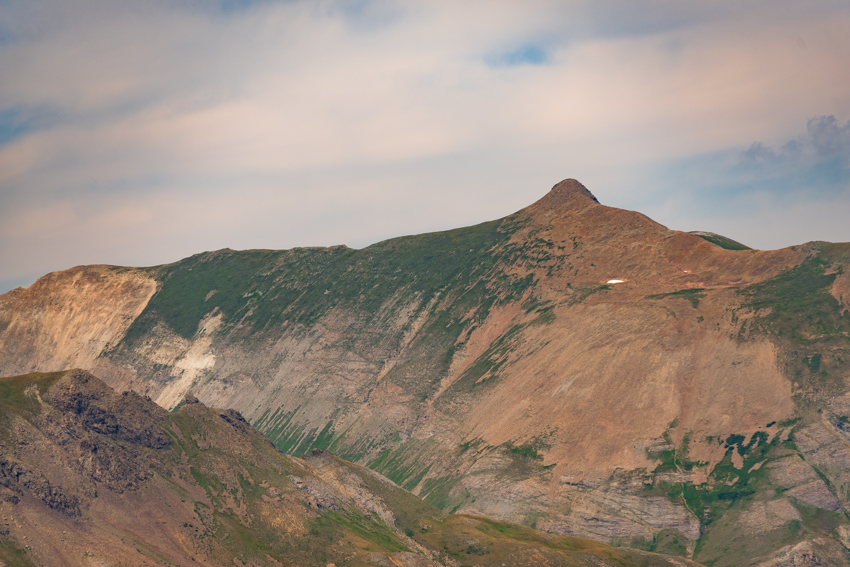
 Cathedral Peak as seen from Grizzly Peak in 2013
2018 is the year! I WILL complete the quest to climb the highest 100 mountains in Colorado! Cathedral Peak marked #99 and was only one of two peaks standing between me and my dreams. I set off for Aspen at noon on a Saturday. My plan was relatively simple yet ambitious: Backpack to Cathedral Lake, set-up camp, photograph sunset, find a composition for the Perseid Meteor Shower, photograph the Perseid Meteor Shower, sleep (maybe), climb Cathedral Peak in the dark, photograph sunrise from the summit. Seems doable, right? I have made it somewhat of a tradition to photograph the Perseid Meteor Shower whenever I can. Last year's was a total dud due to the moon being full, so I chose not to photograph it; however, the year before I photographed it from the saddle between Pigeon and Turret, which was also ambitious (and quite rewarding). I was hopeful for a similar outcome at Cathedral Lake.
I have been dreading the climb of Cathedral for several years. Most people climb it in early summer when there is ample snow in the incredibly steep couloir leading to the summit saddle. I personally dislike snow climbing, but also did not have high hopes for climbing up that gully when it was all hard dirt and rock; however, I needed this peak and so it was on!
As always, you can see and download my full route and GPS tracks over on the incredible app, Gaia GPS, which I use on my iPhone to plan, track, and follow my routes on these trips. It is absolutely invaluable and worth every cent. I personally love that you have full access to all USGS topo maps and National Geographic Trails Illustrated maps as well. You can use the app while in airplane mode and even save maps for offline use. To get a nice discount on the application, follow this link and you'll also support my efforts to keep this site running.
My full stats for this particular climb, which included summiting Cathedral Peak (13,943 ft.):
- Peaks climbed: 1
- Miles hiked: 8.5
- Time: 5 hours, 23 minutes
- 3,987 ft. elevation gain
For this trip, I decided to pack quite a lot of camera gear (by the way, these are affiliate links and using them helps me pay for this site and to bring you better content):
- Sony A7R2 Camera
- Sony 12-24 f/4 lens
- Zeiss Loxia 21mm f/2.8 lens
- Sony 55mm f/1.8 lens
- Sony 70-300 FE telephoto lens
- Feisol Tournament 3442 tripod
As usual, I used the beta from Gerry Roach's High Thirteener Guidebook. I was still using the 1st edition of the book; however, his new edition is available on Amazon after many years of waiting - rejoice!

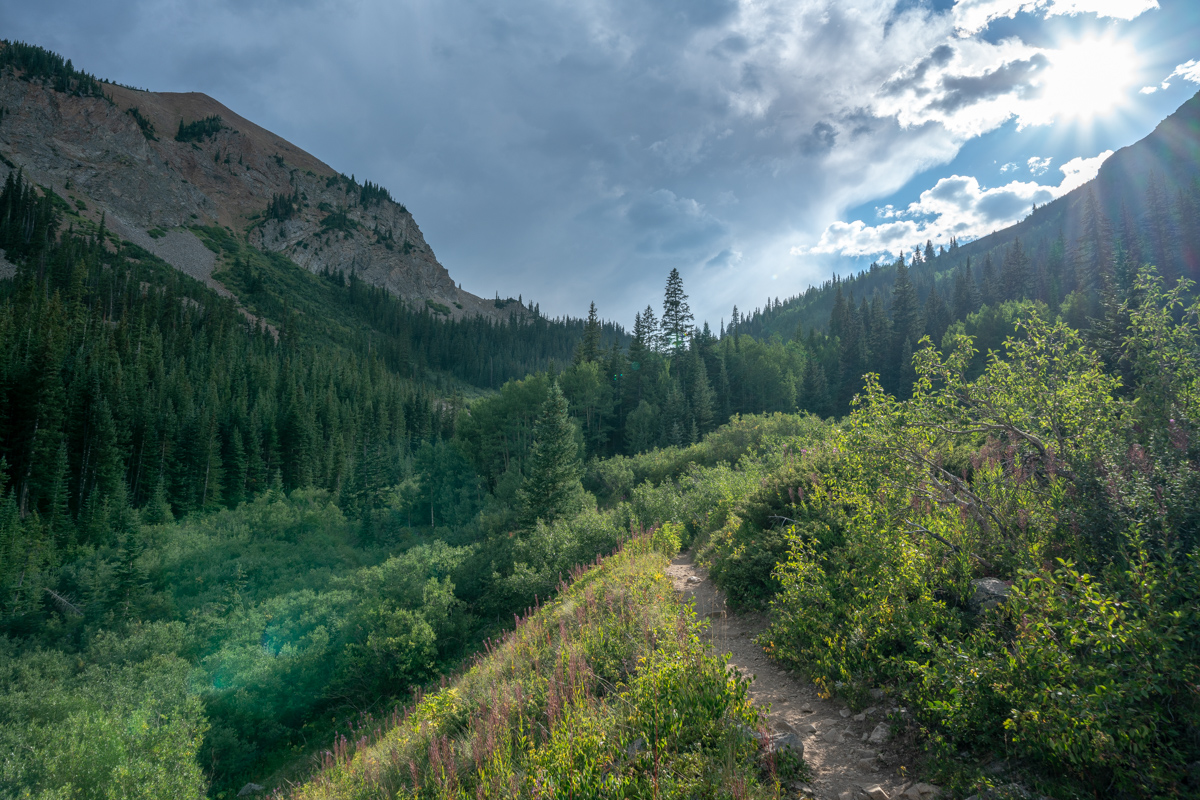
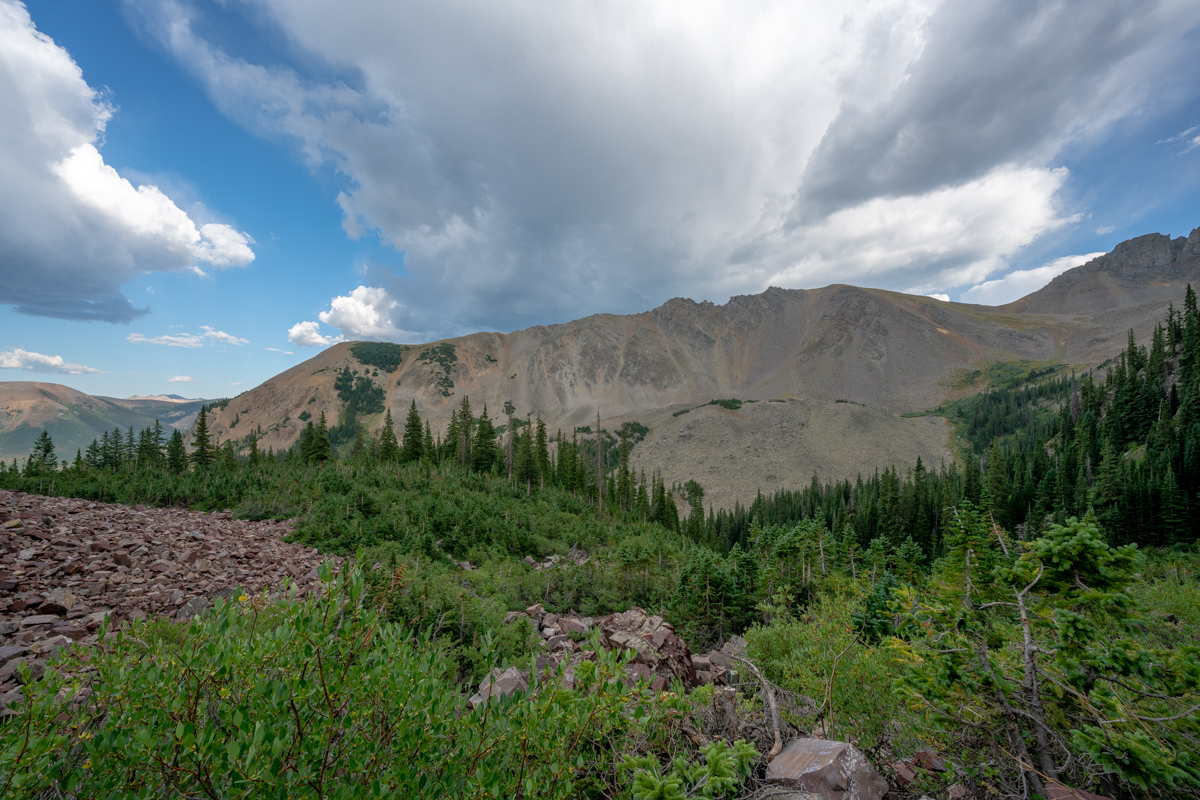
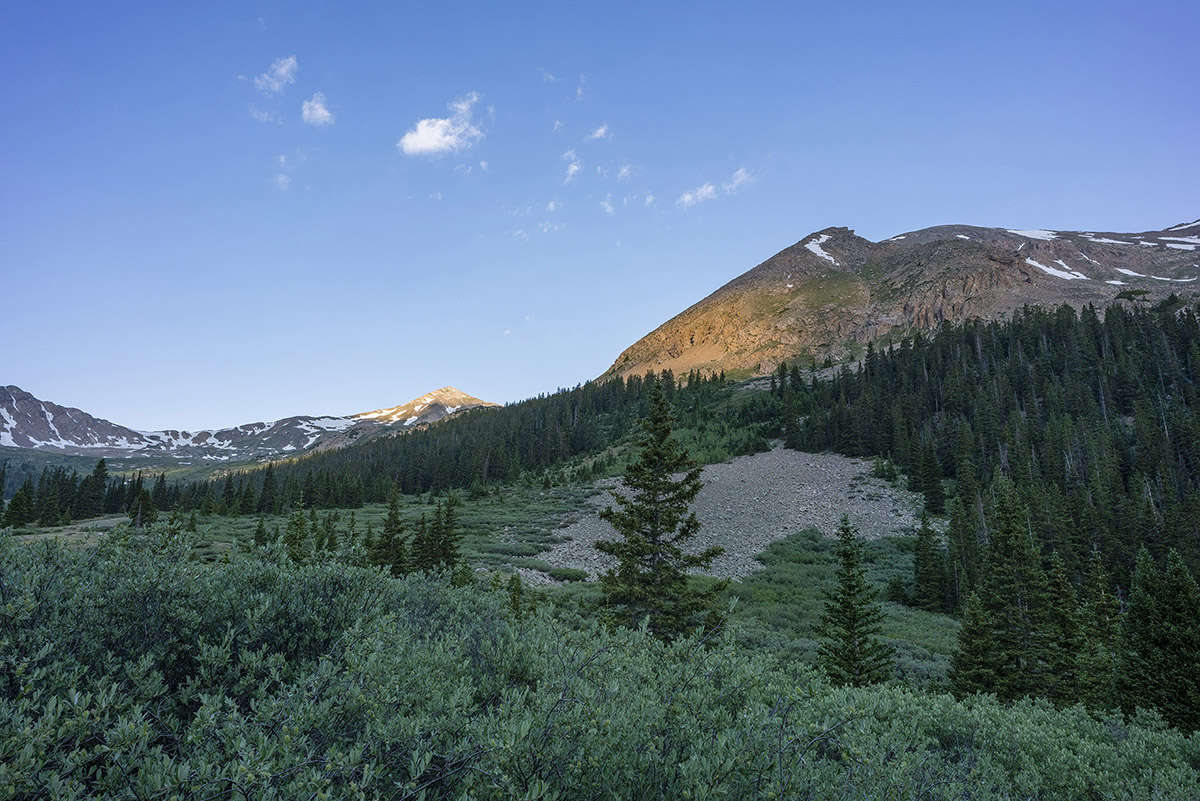
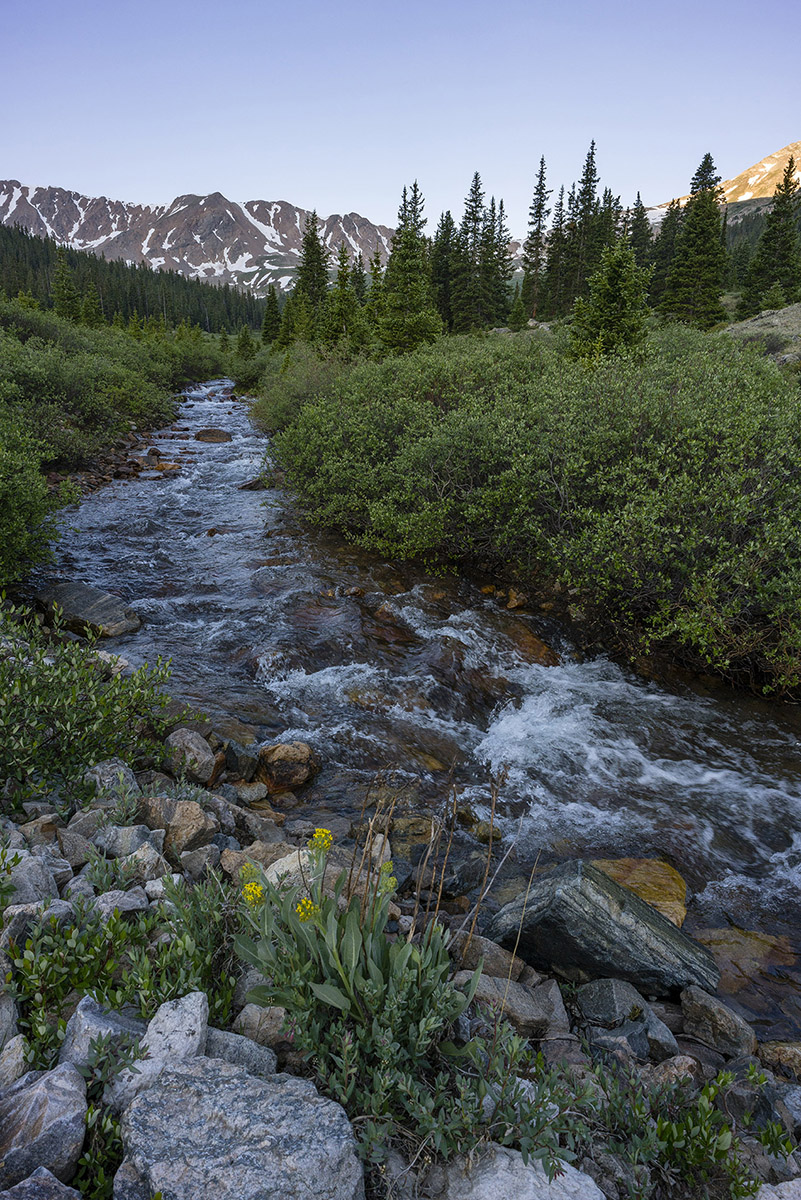
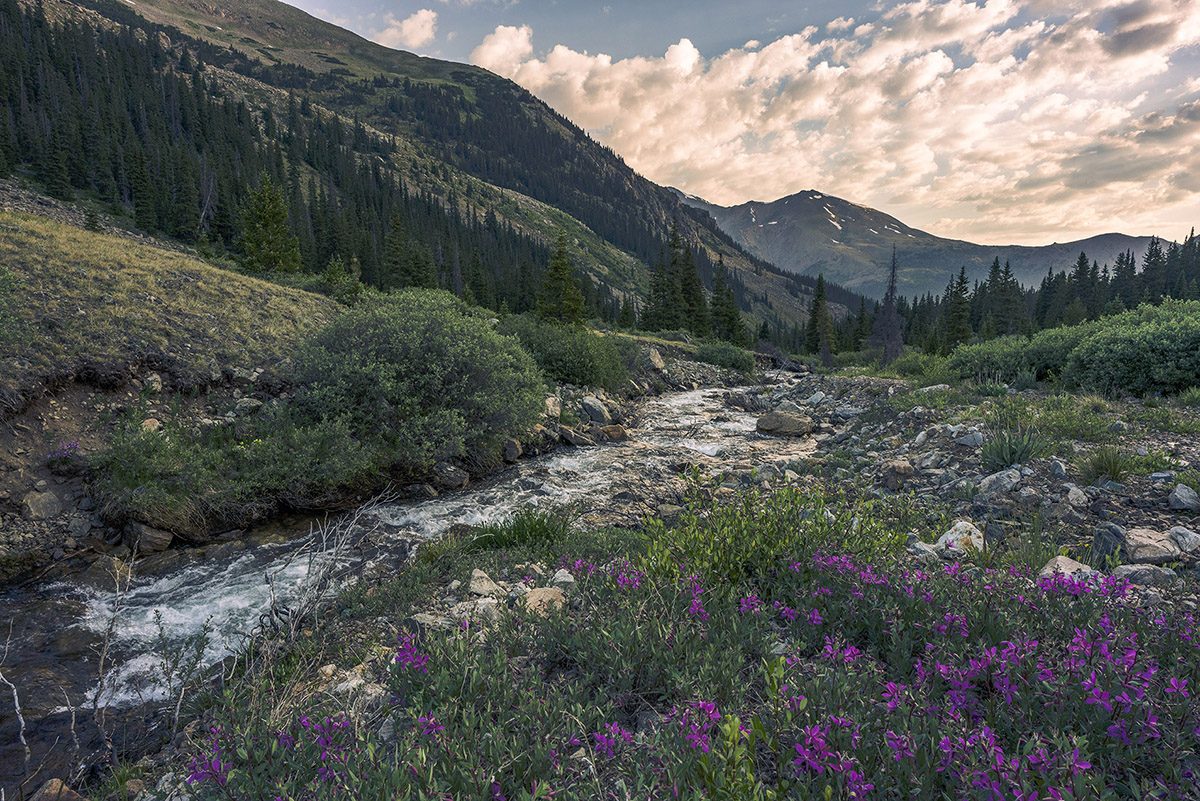
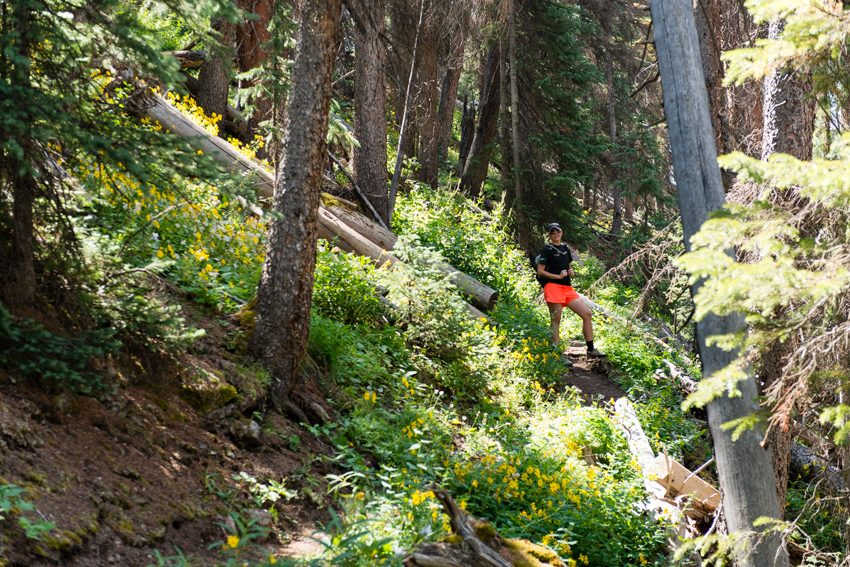
I reached the Cathedral Lake Trailhead at 5 PM. It was not very full and that made me smile. I embarked up the steep trail which Roach describes as unrelenting and pretty much did not stop until I reached the lake. The hike is steep but the trail is great and the scenery is wonderful as well.
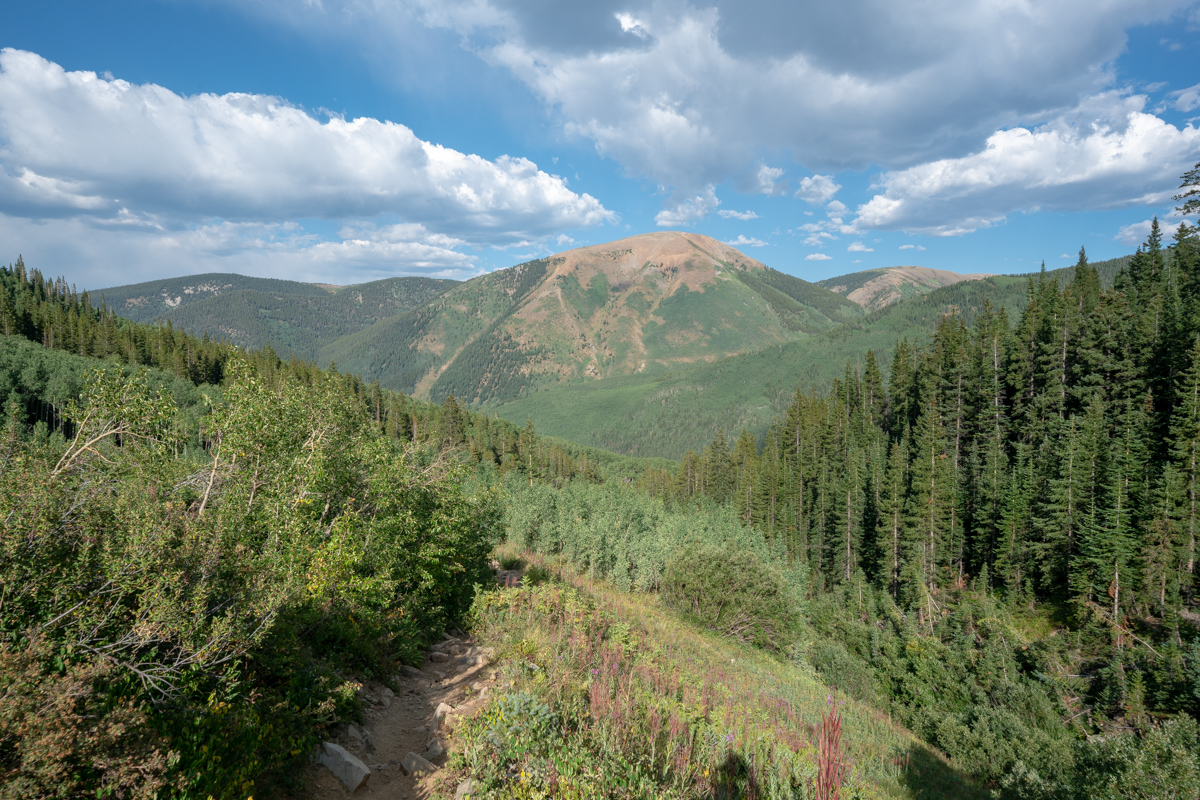
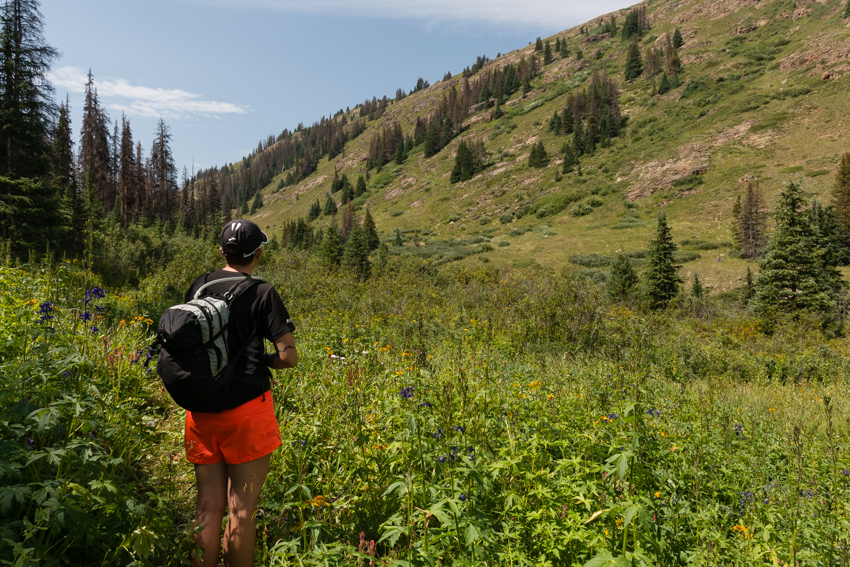
As you climb the trail, the view opens up quite a bit across Castle Creek to reveal Ashcroft Mountain.
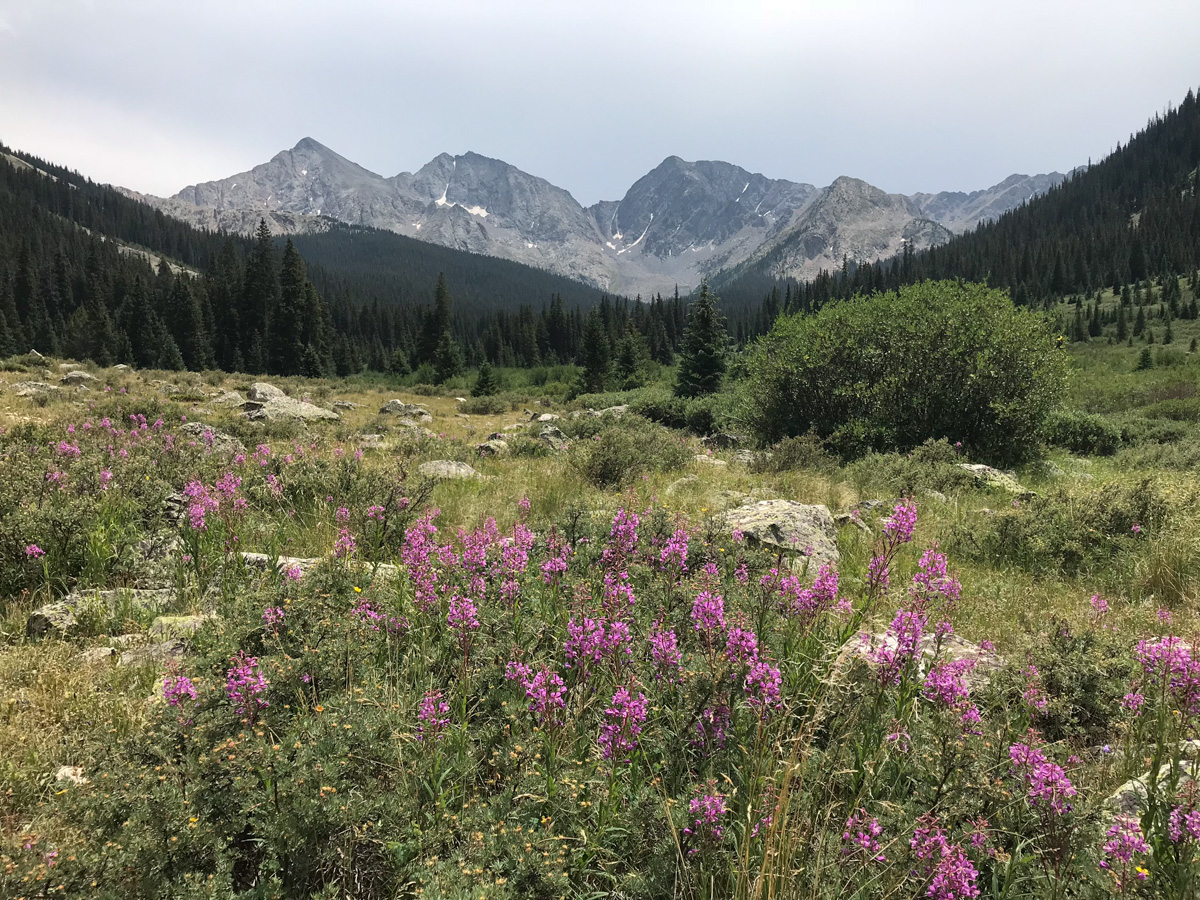
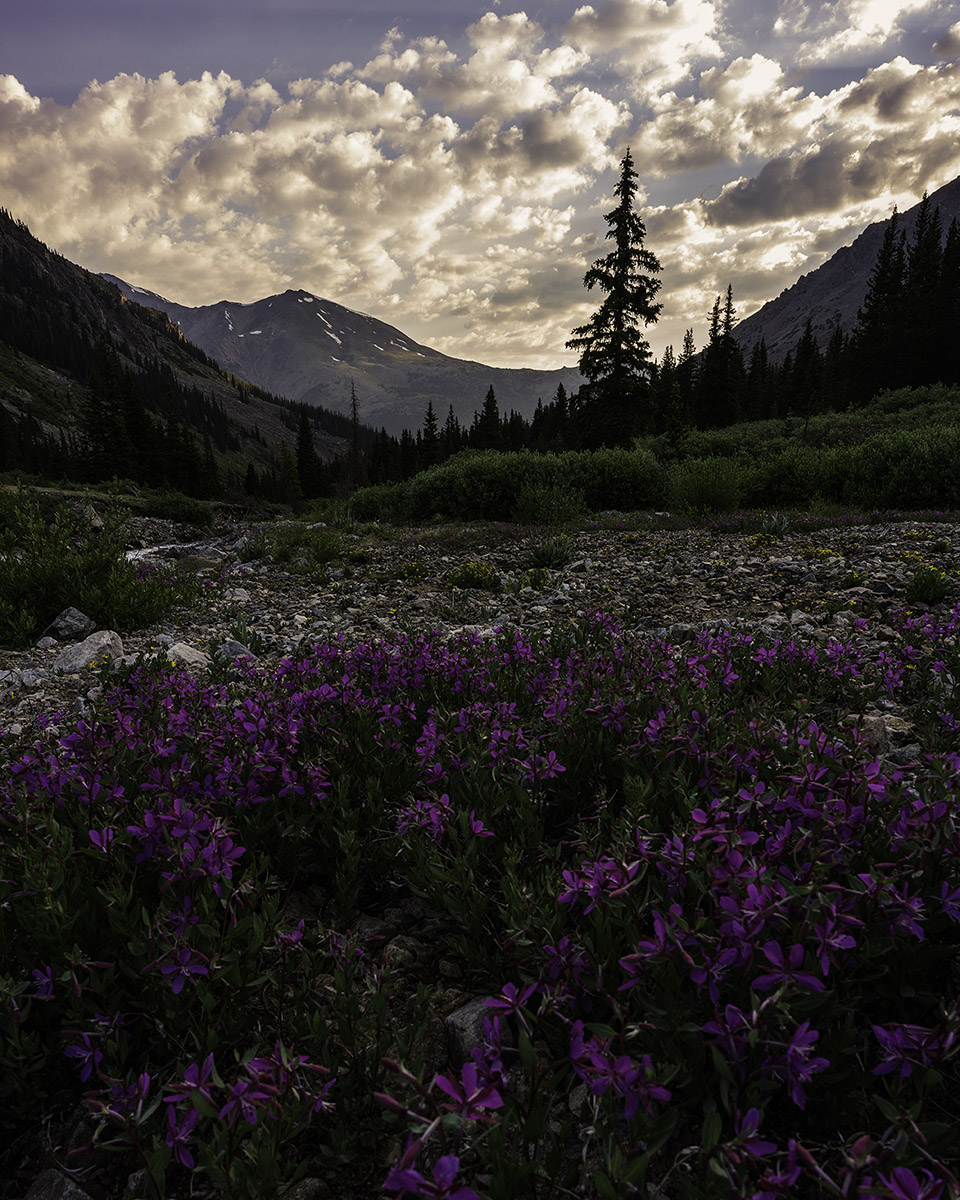
The fireweed had all grown super tall and looked really eerie.

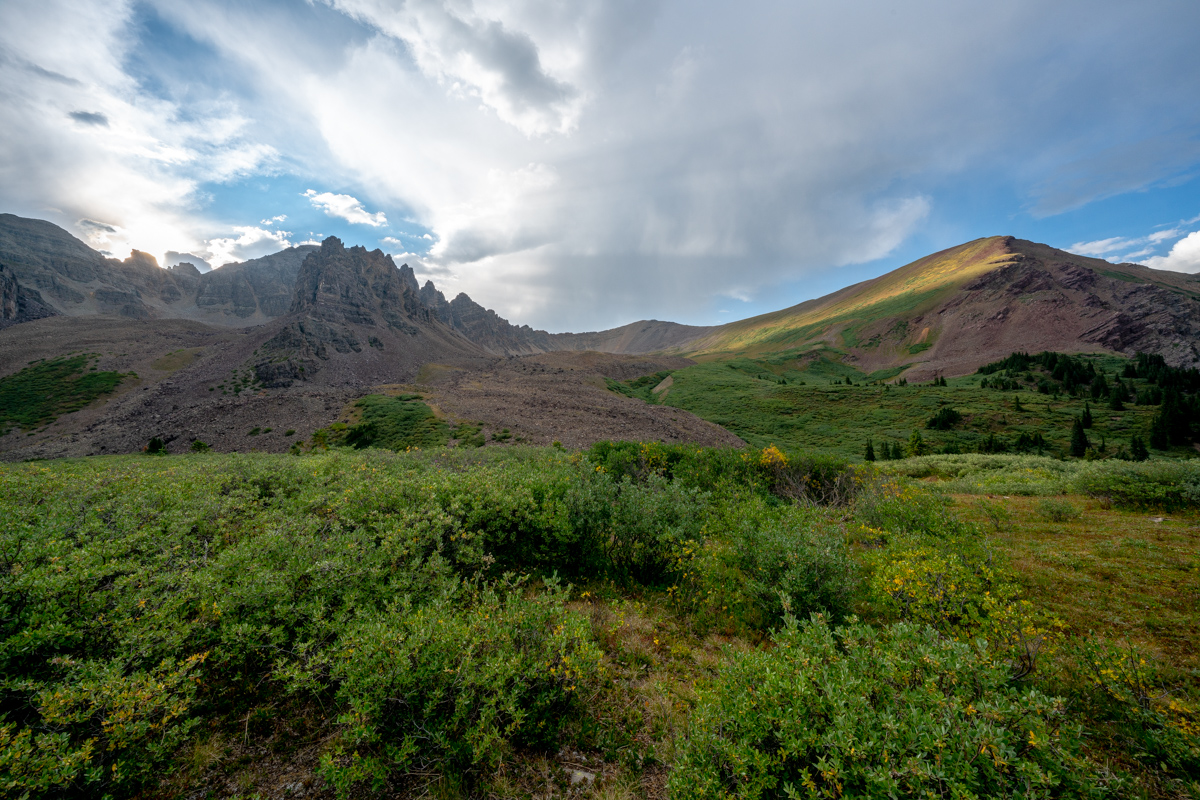
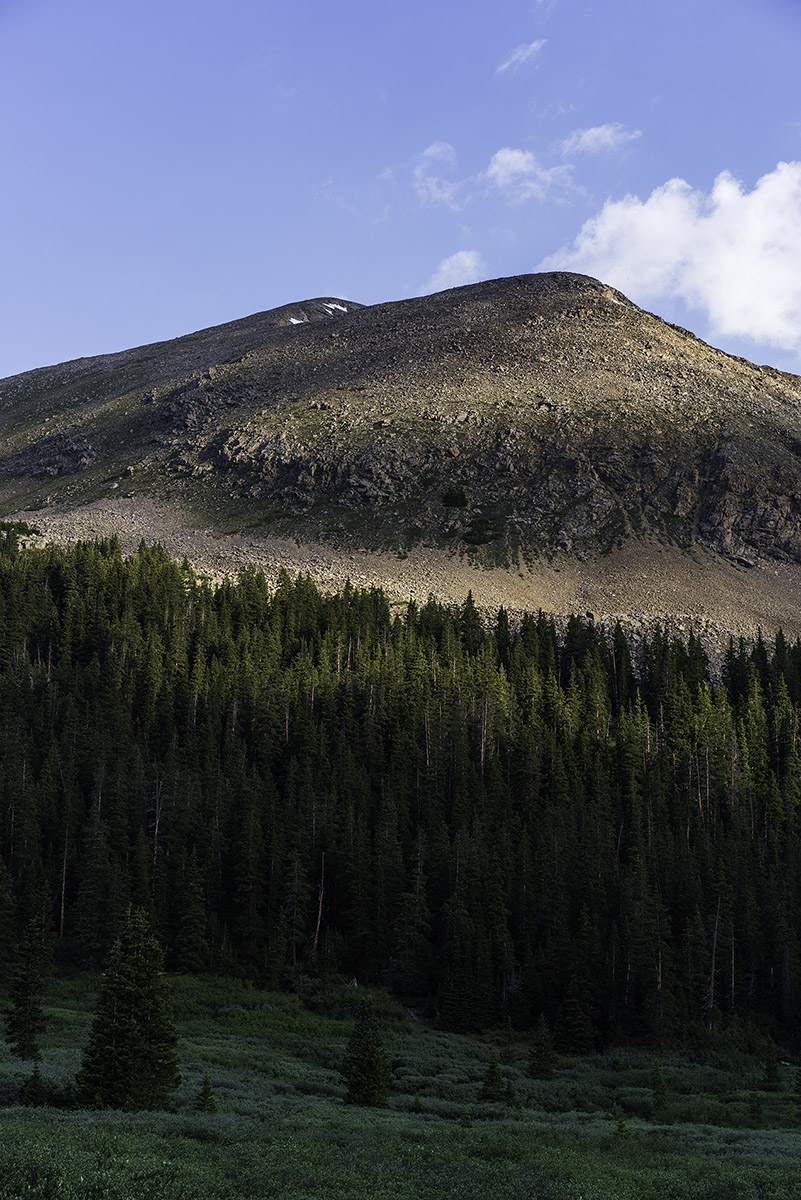
As I continued up, the eastern flanks of Malamute Peak began to reveal themselves.
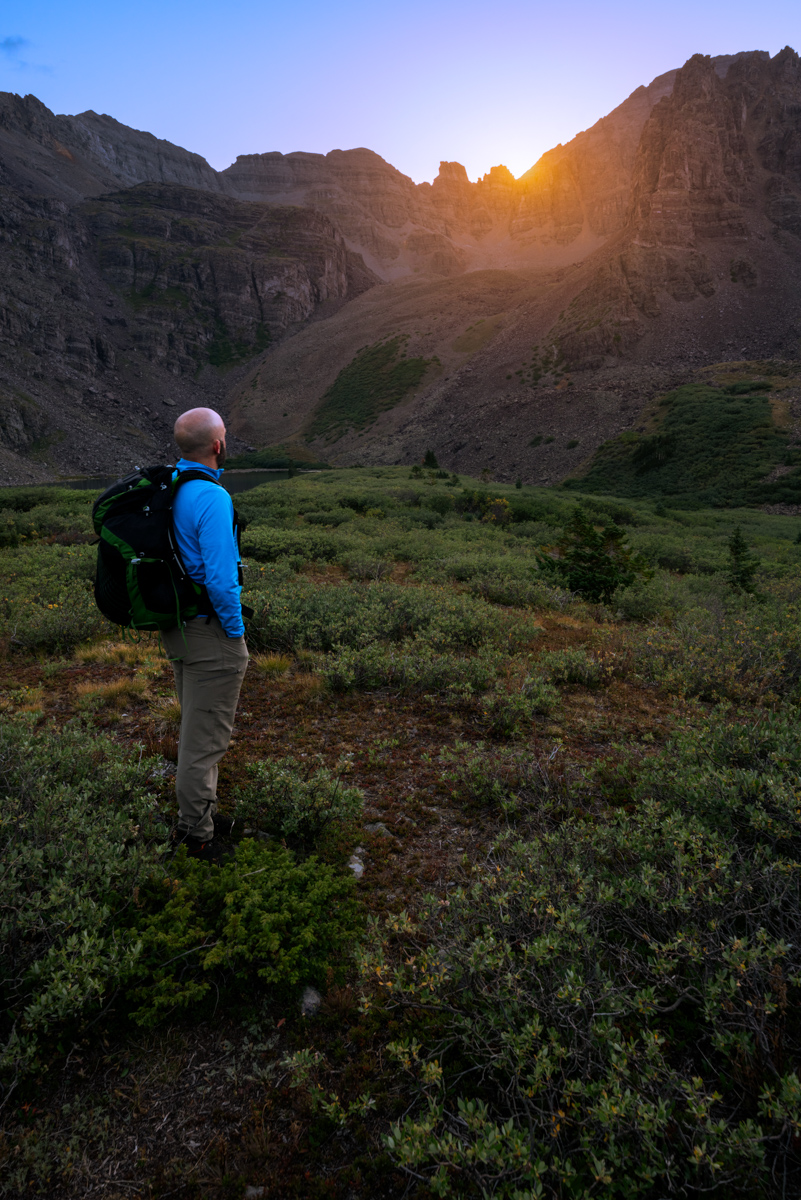
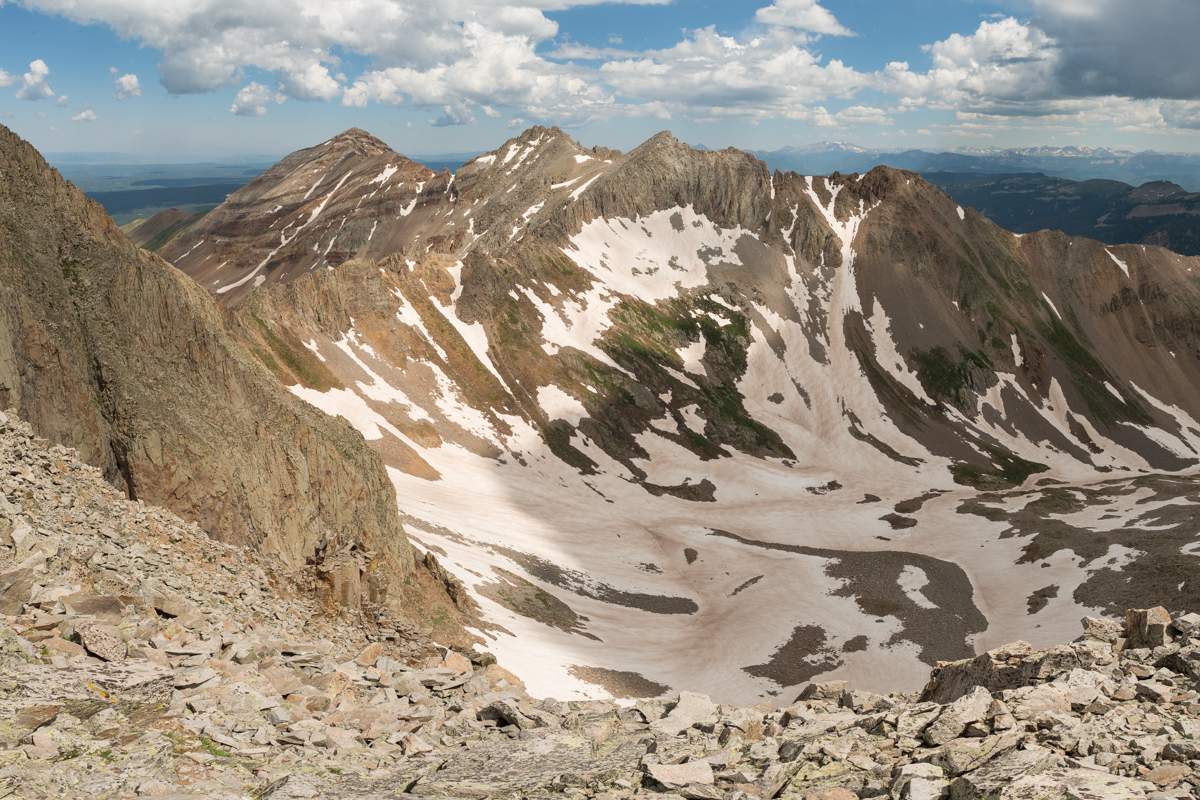
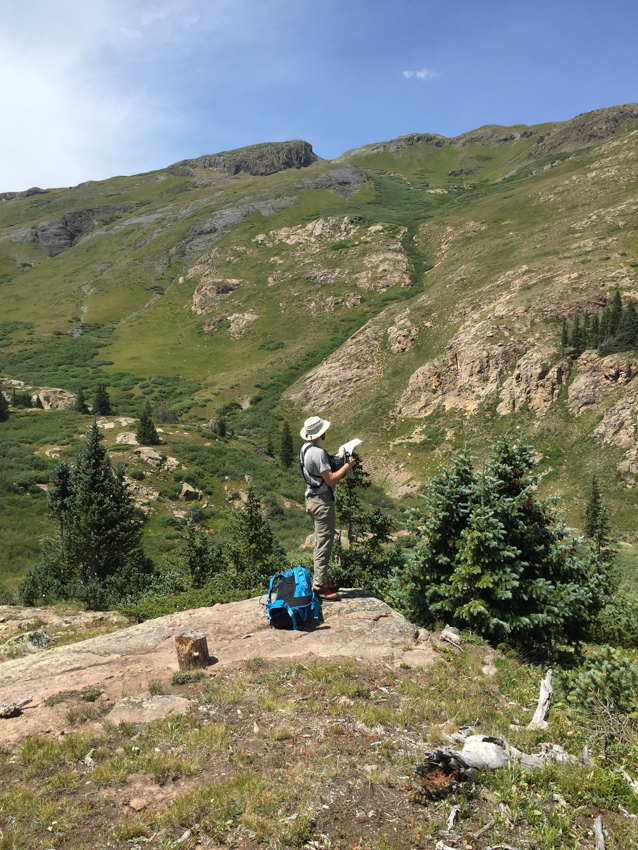
The area just before the lake has ample camping and some great sites near the stream. I opted to find a spot a little higher up near some small trees with a wonderful view of Cathedral Peak (center) and Leahy Peak (right).
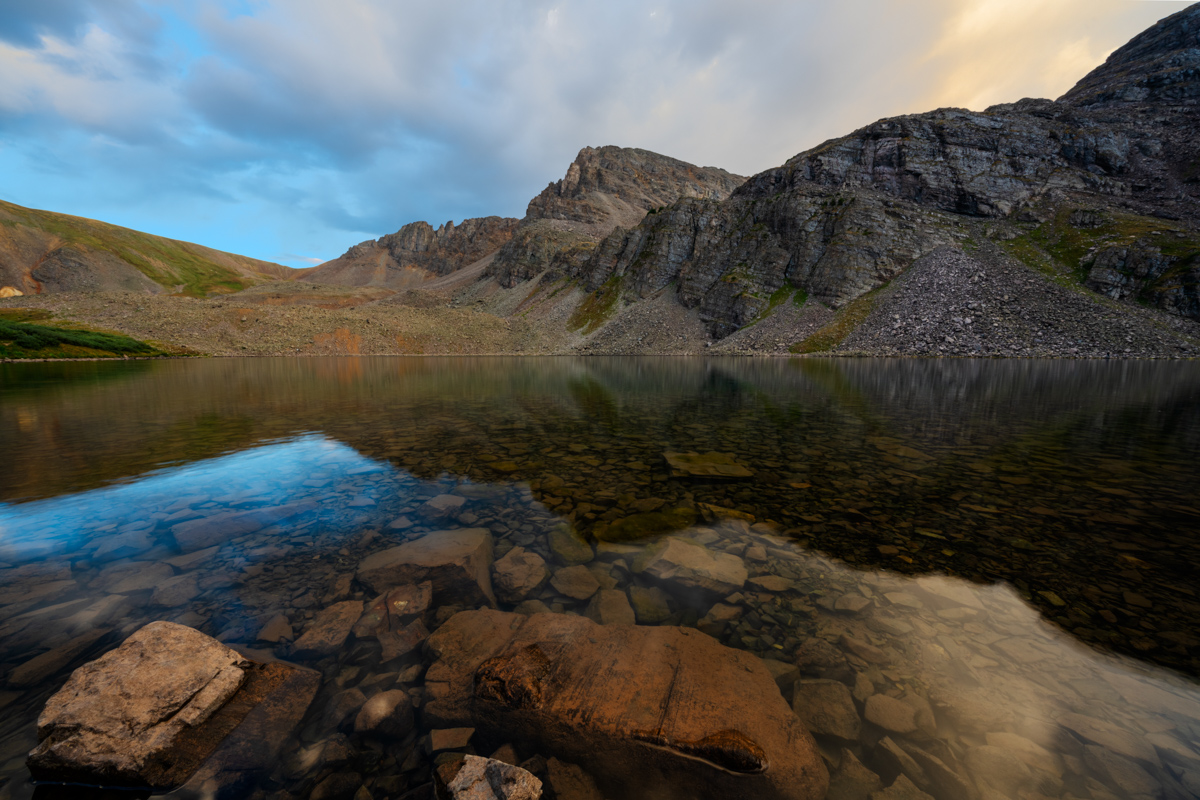
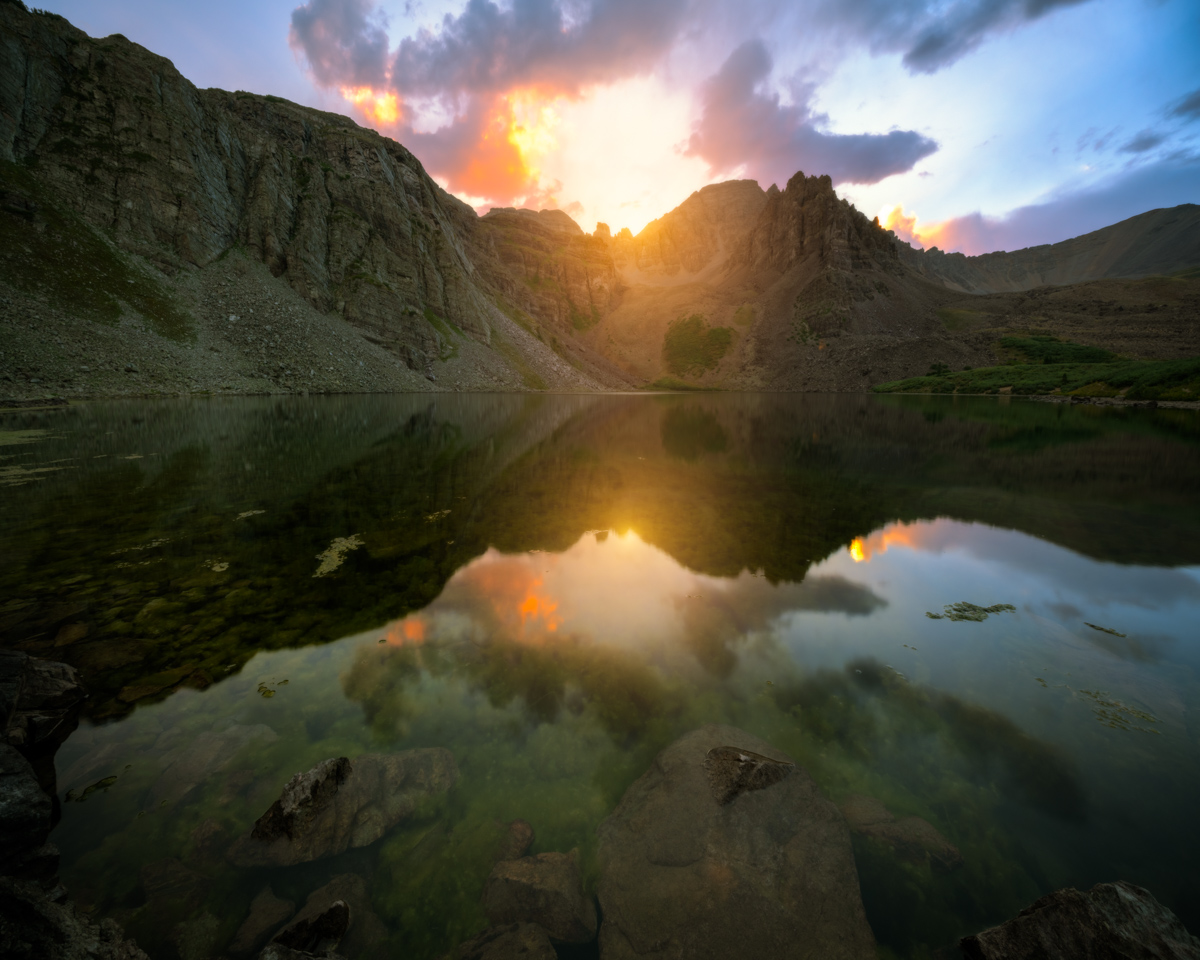
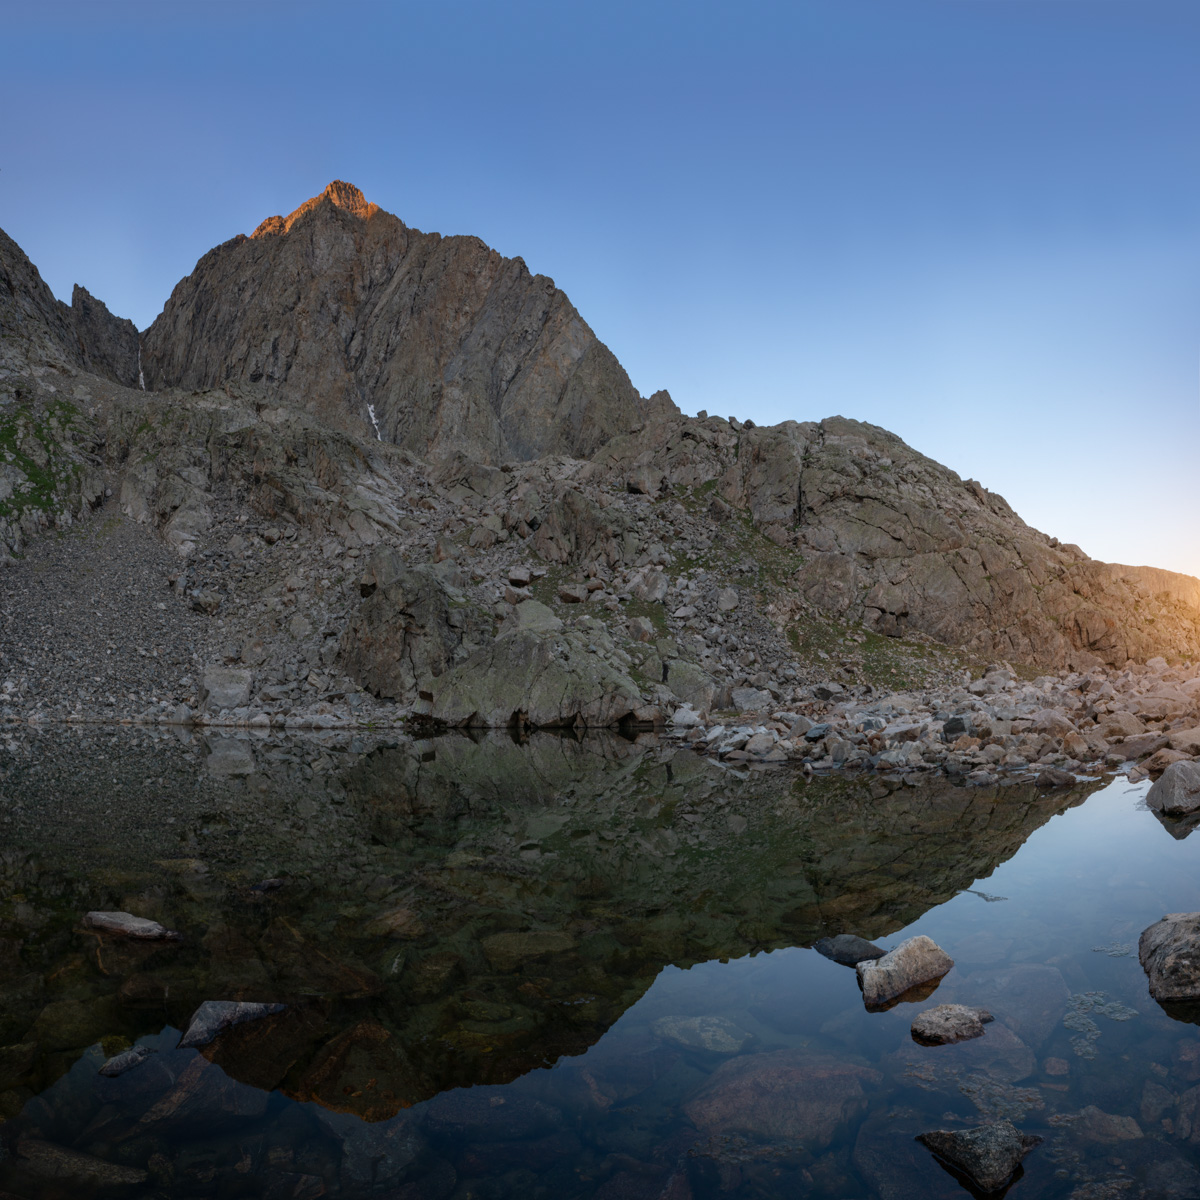
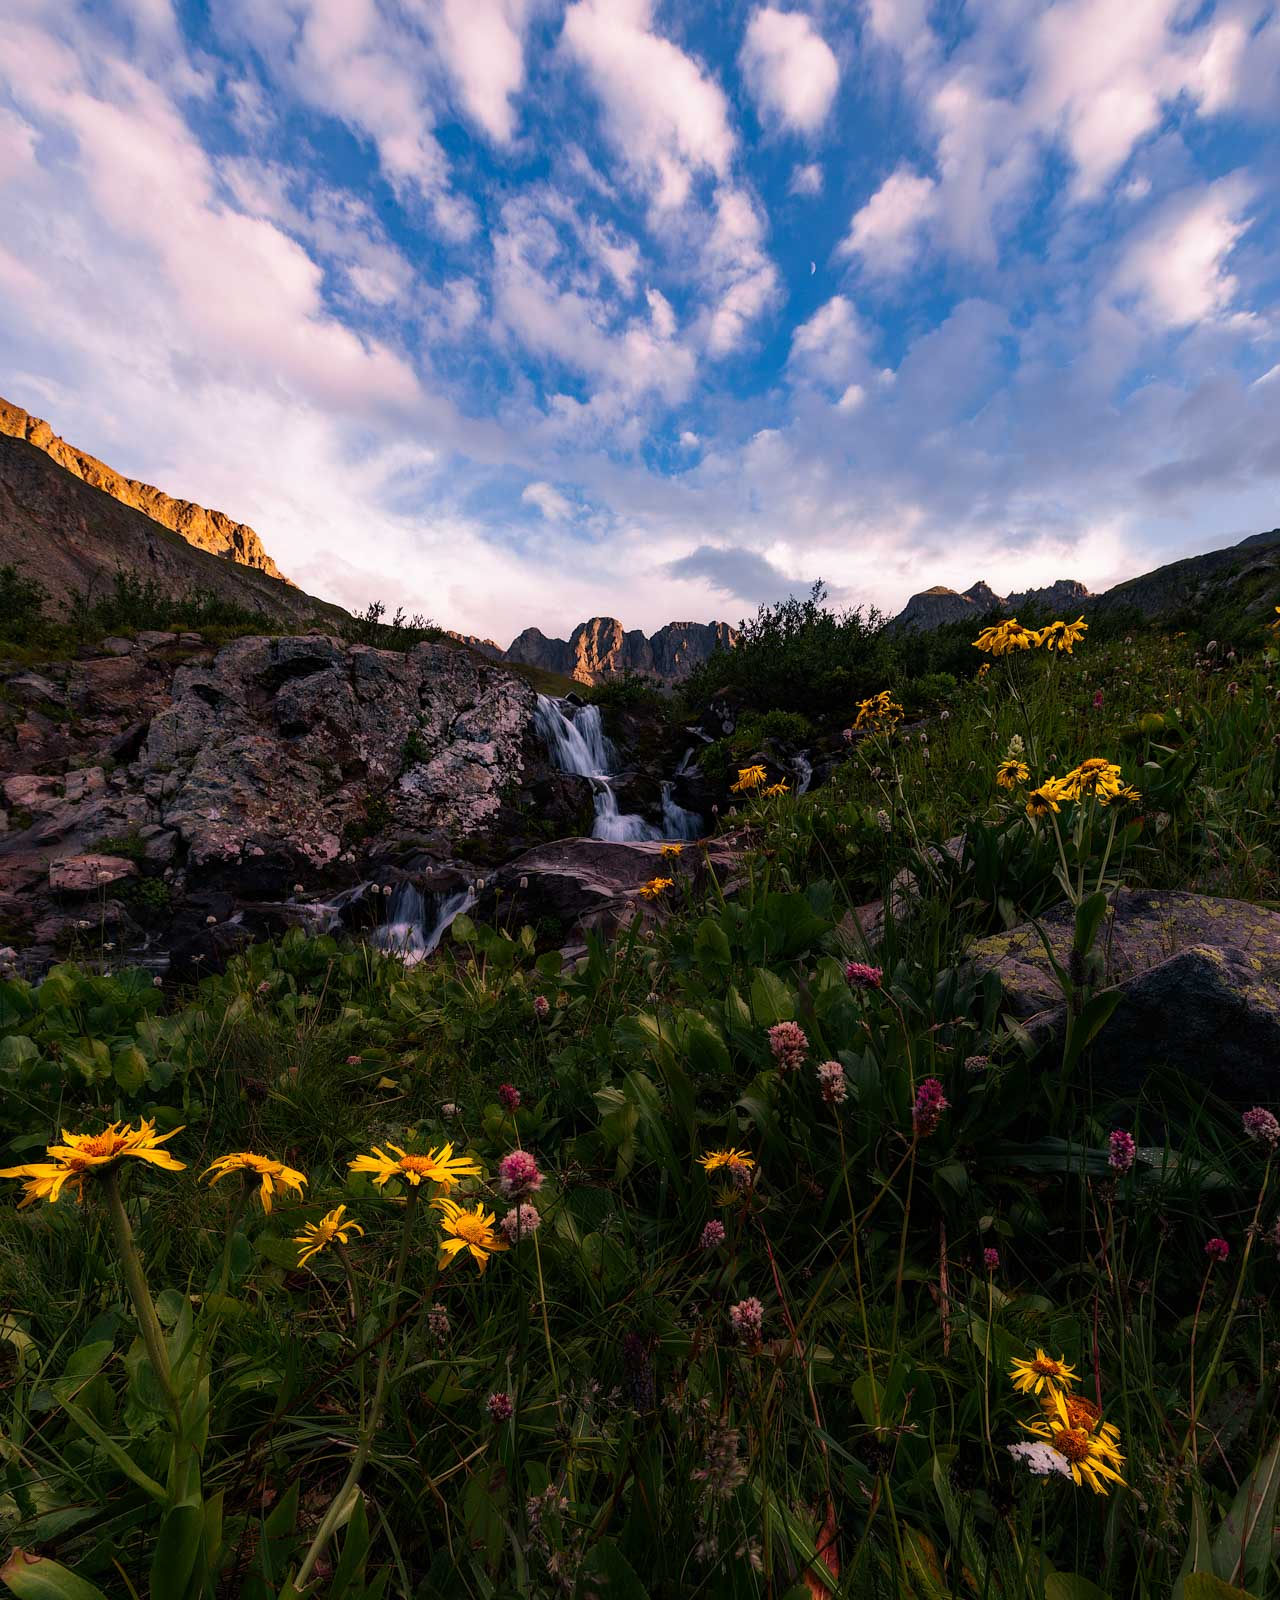
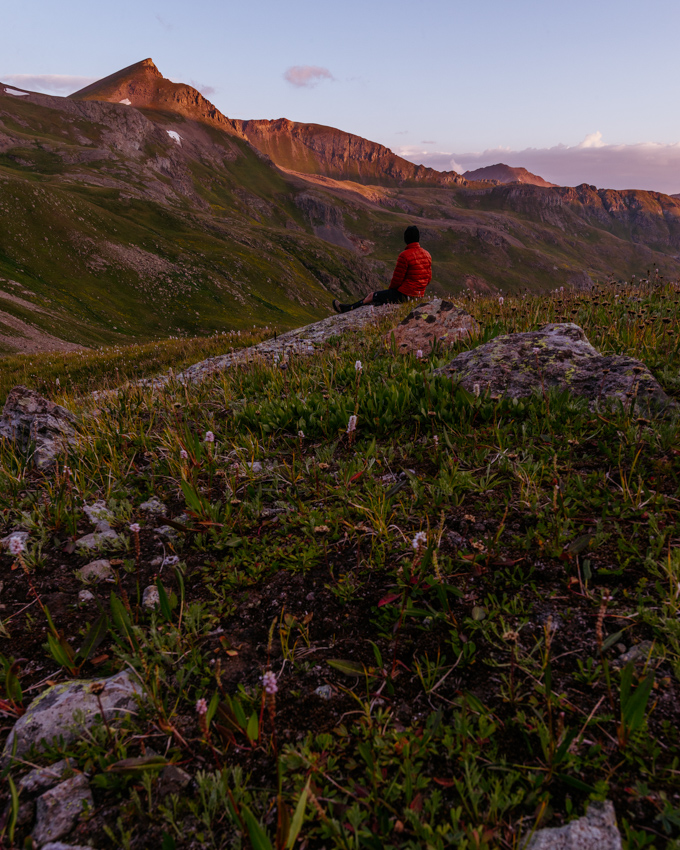
I set-up my campsite at 6:30 PM and began hydrating my dinner. Knowing I would need a good hour for it to hydrate, I hiked to the lake and found some spots to photograph the sunset from. It was really pretty and I was the only person up there except for a fisherman, who left shortly after I arrived. Being the only soul around at a high mountain lake is equal parts scary and serene.
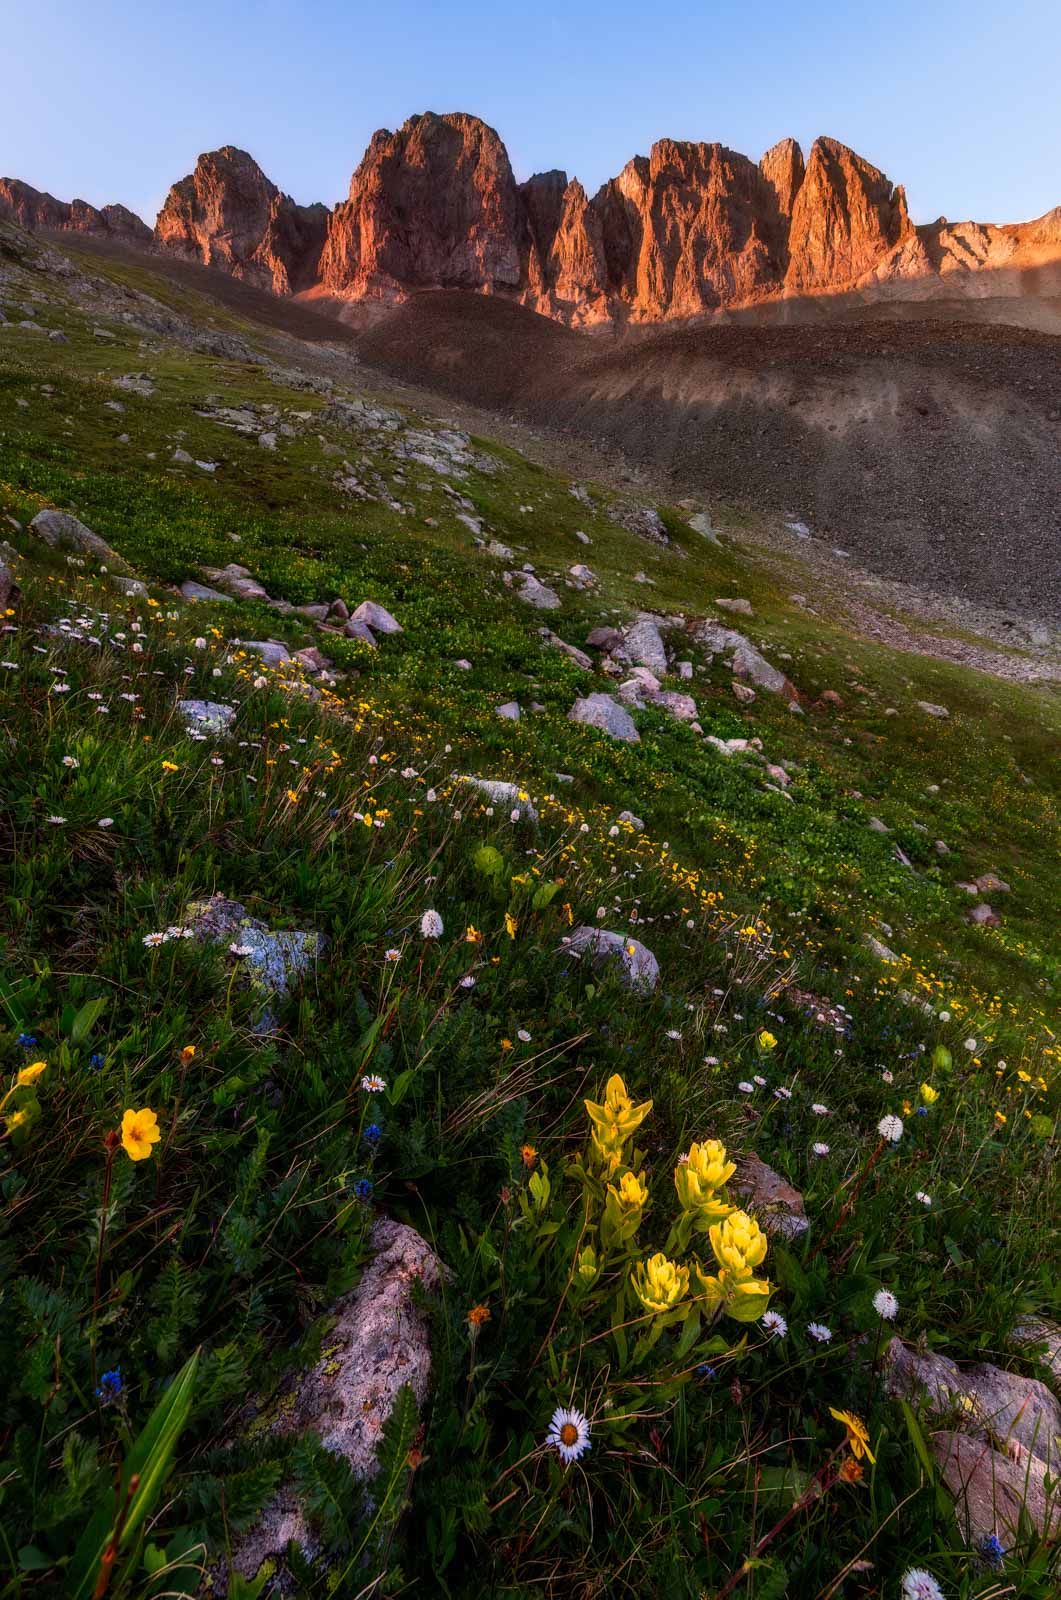
The sunset looked like it would open up over Cathedral Peak, so I repositioned myself on the eastern shore for some great shots of Cathedral Peak.
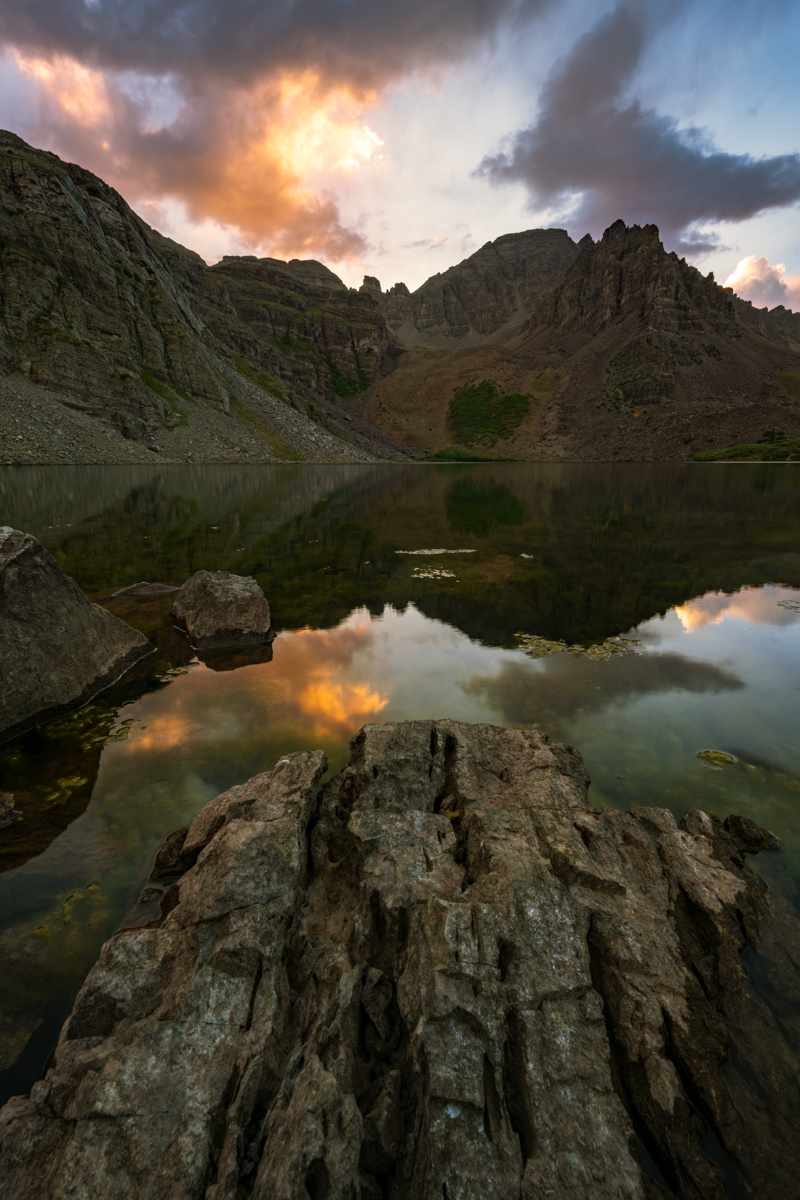
The light was bright, intense, and really colorful.
I decided it was time to go back and get ready for bed. I enjoyed one last gaze at the parting light before bed.
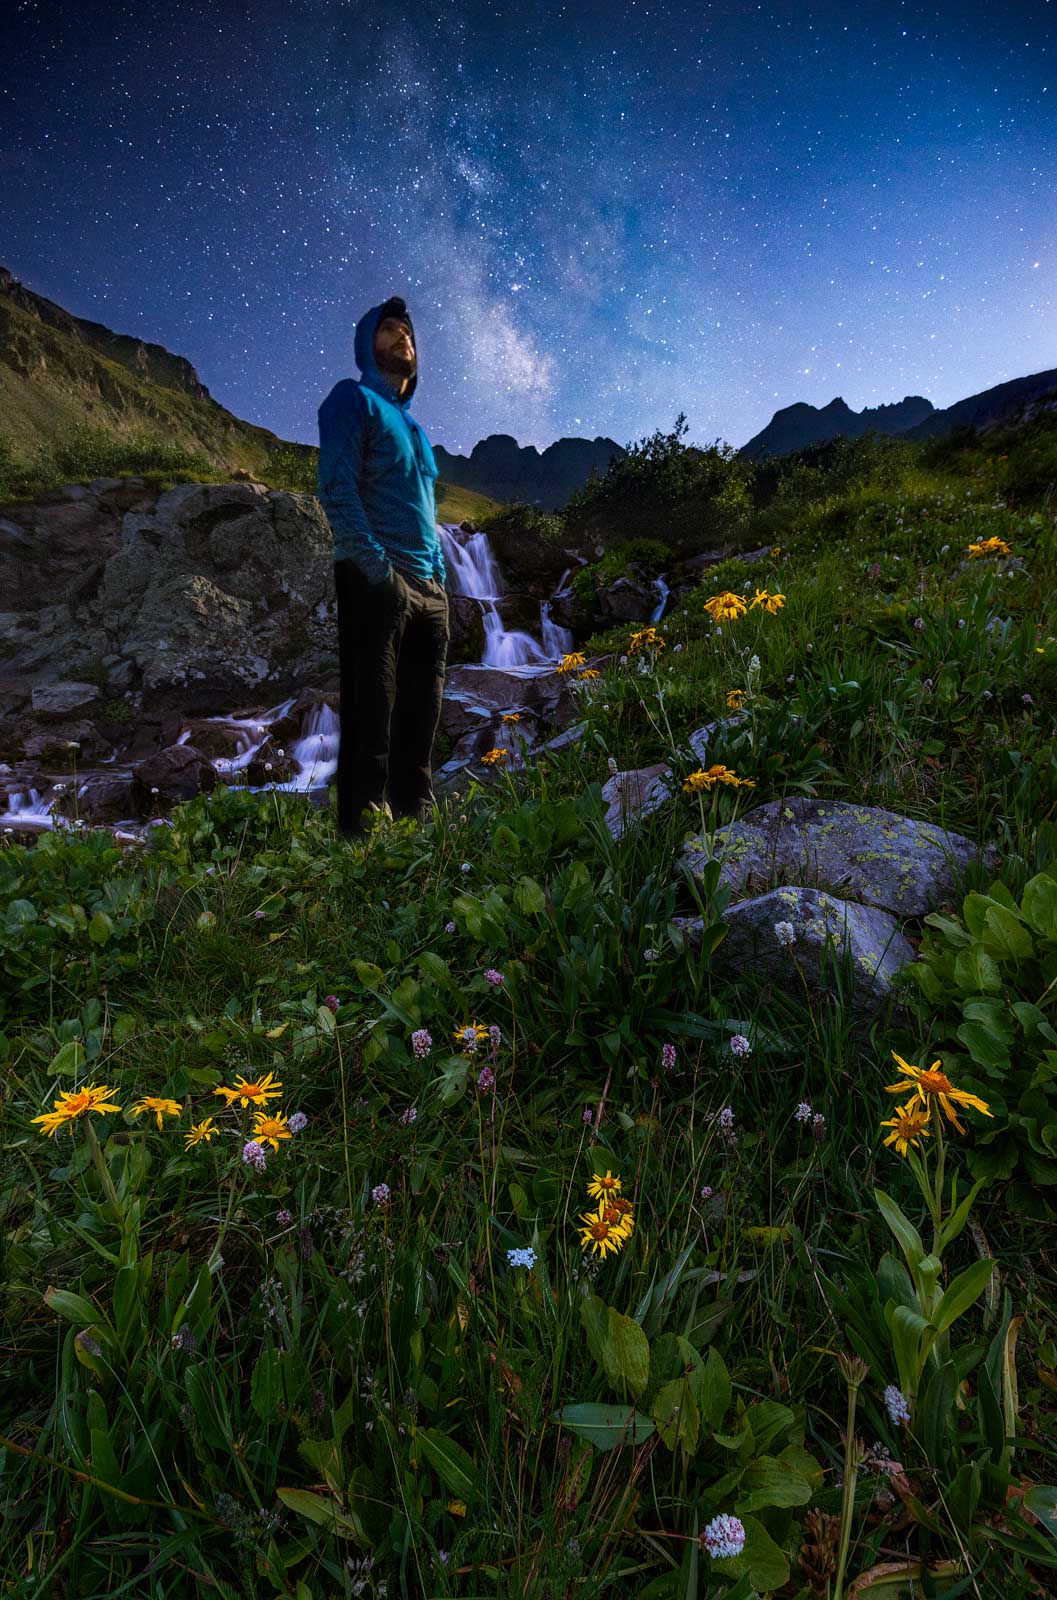
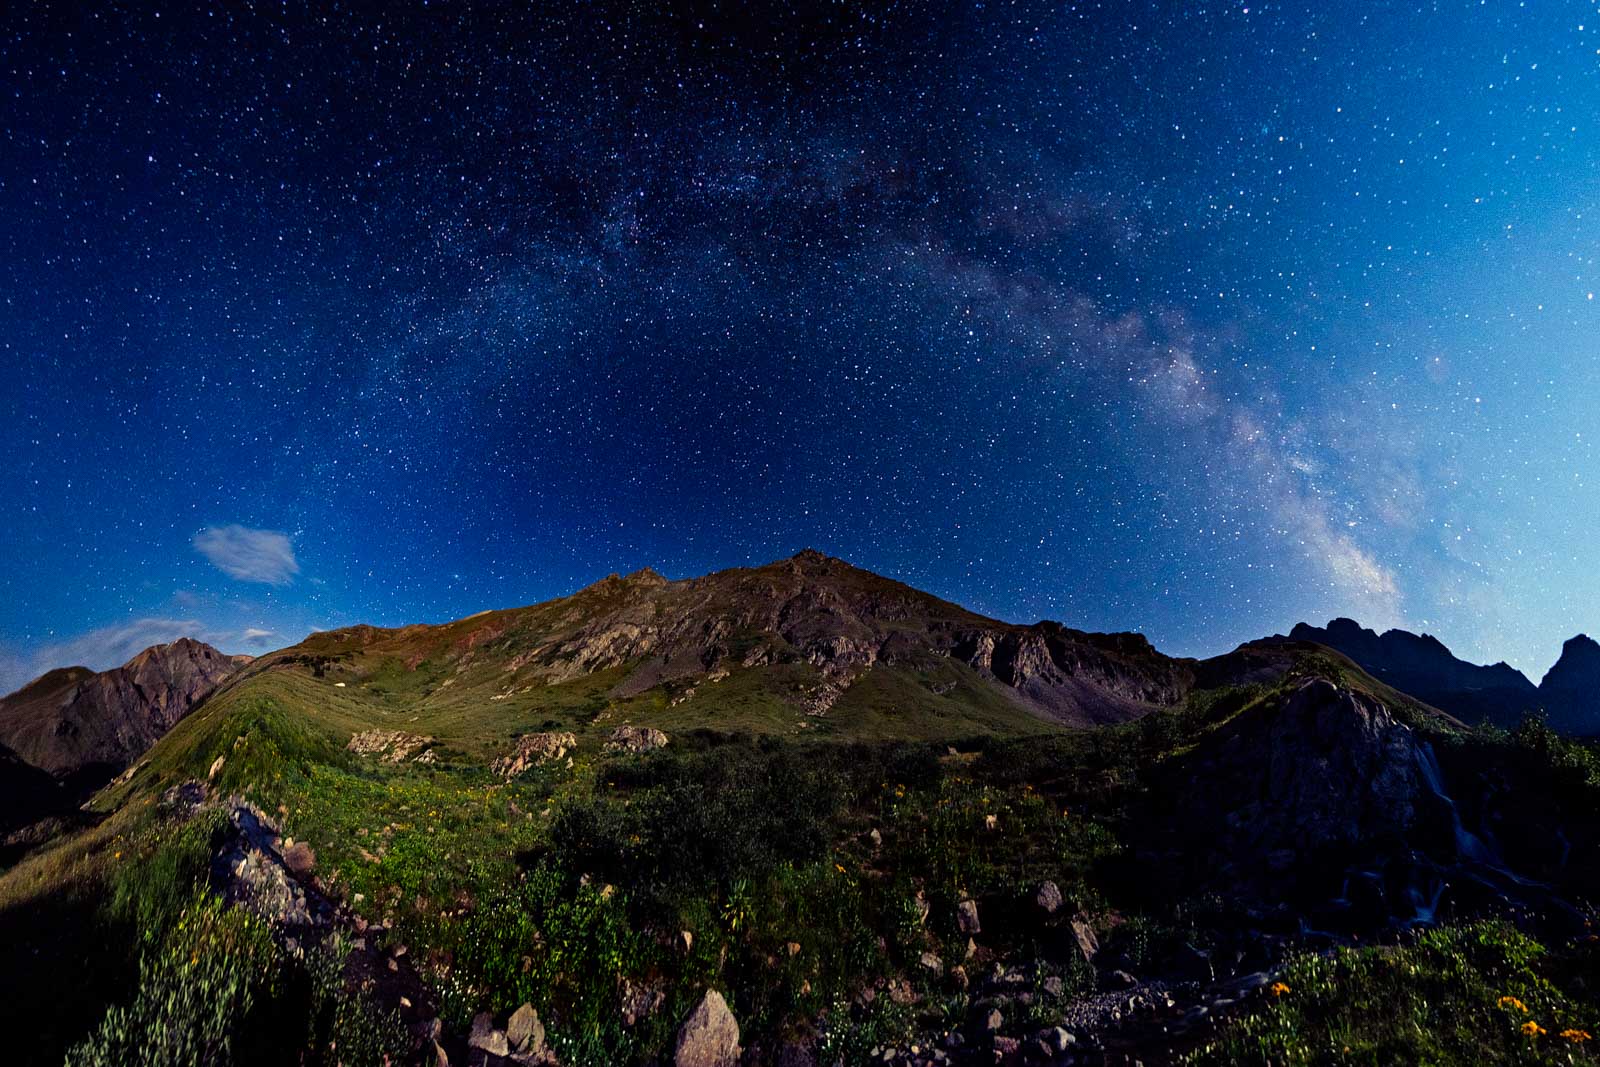
I set my alarm for 1:30 AM so I could photograph the Perseid Meteor Shower. I ended up waking up at 11:30 PM to some strange sounds (maybe just wind). I decided to get up and set-up my camera for the Meteor Shower. The Milky Way was ablaze to the south and I was loving it.
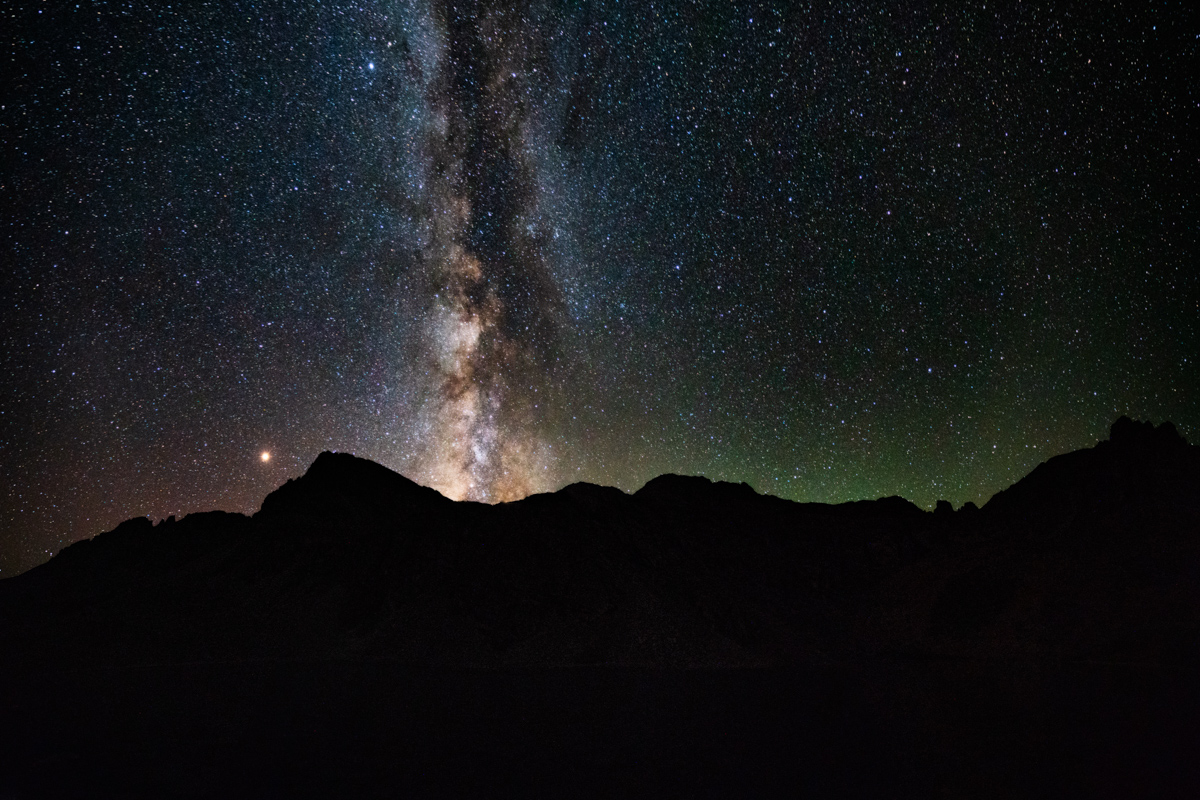
I found a nice compositon including Cathedral Lake and the Milky Way and set-up my camera to shoot on a time-lapse automatically every 31 seconds. I lay on my back and watched the meteors for about an hour or so - it was one of the best displays of the Perseids I could remember. Huge streaks across the sky. It was pitch black - no light from cities, no moon. I decided to leave my camera there all night and get some sleep. I wanted to shoot sunrise from the summit of Cathedral.

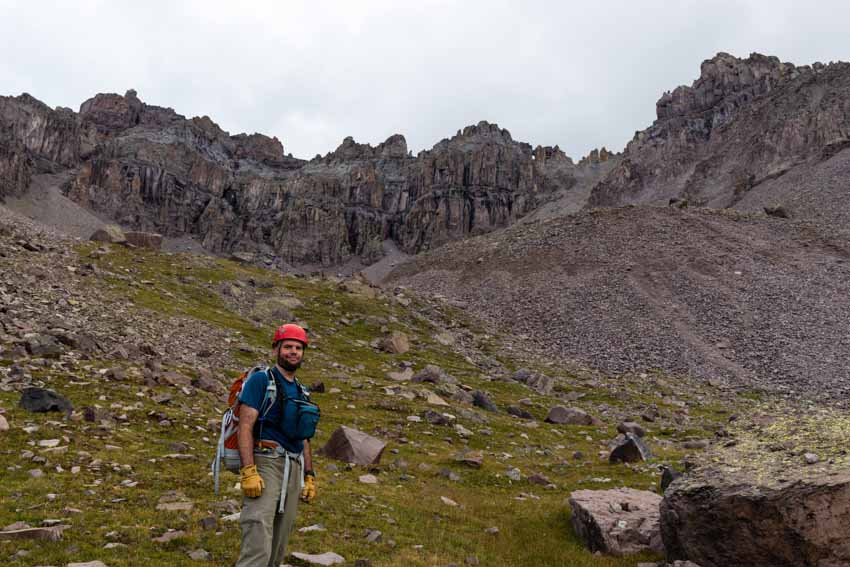
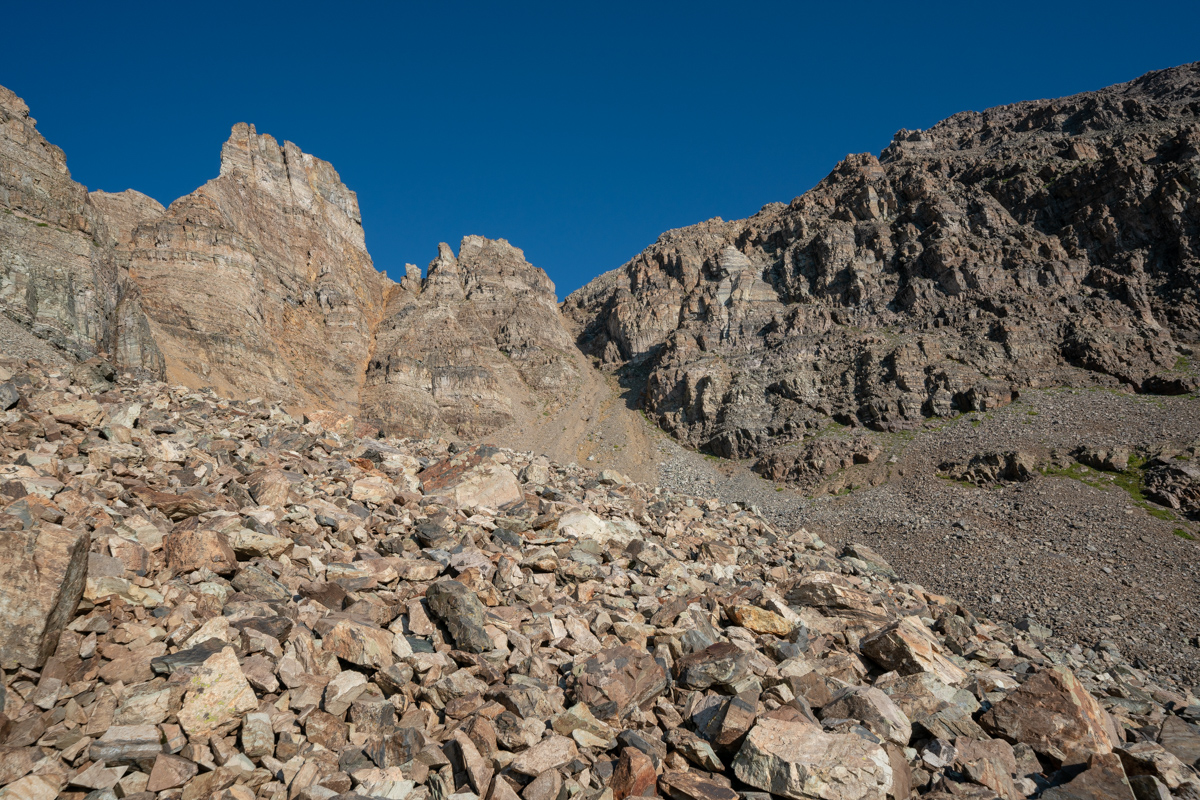
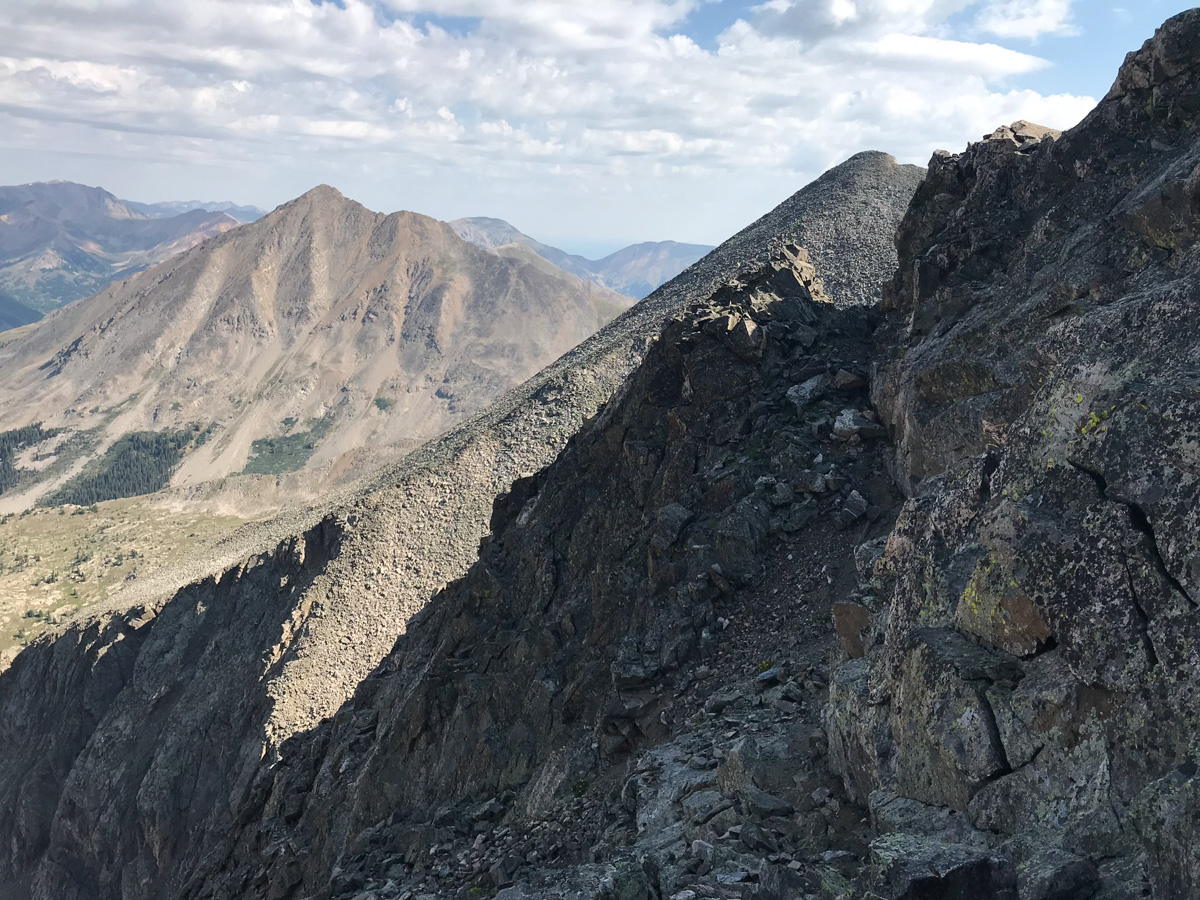
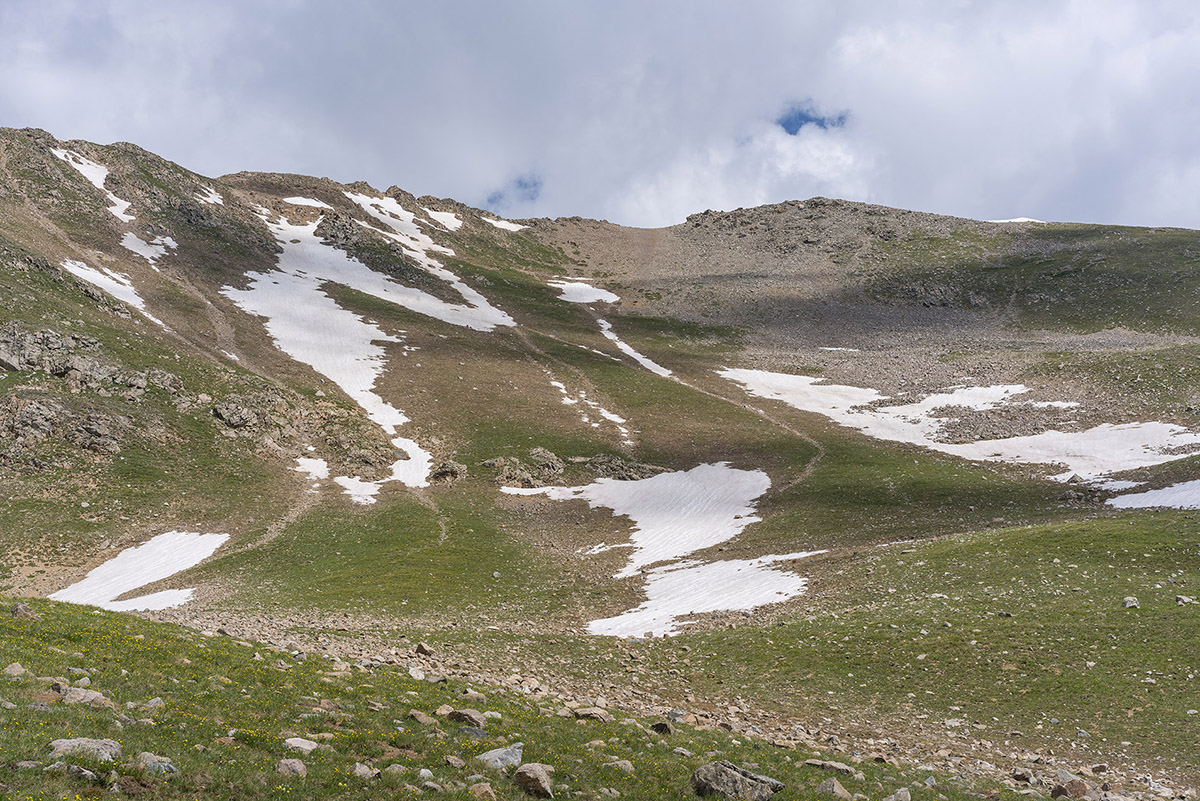
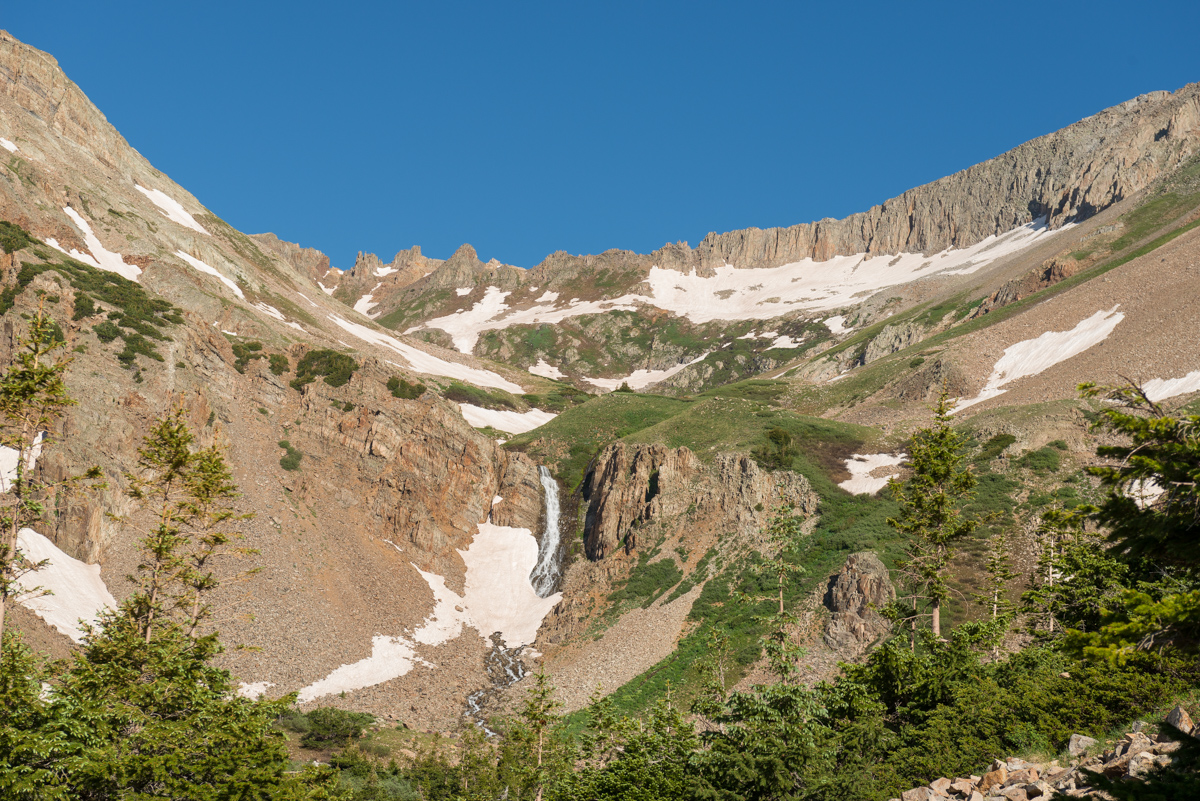
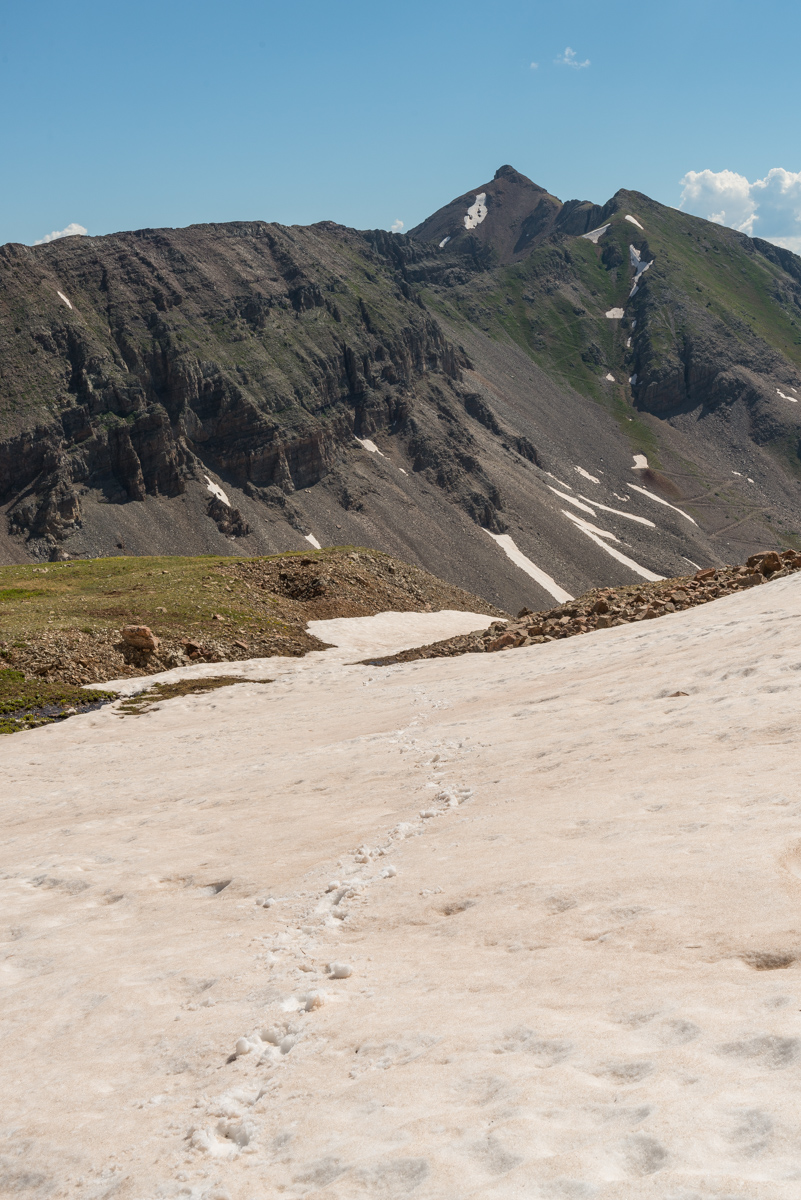
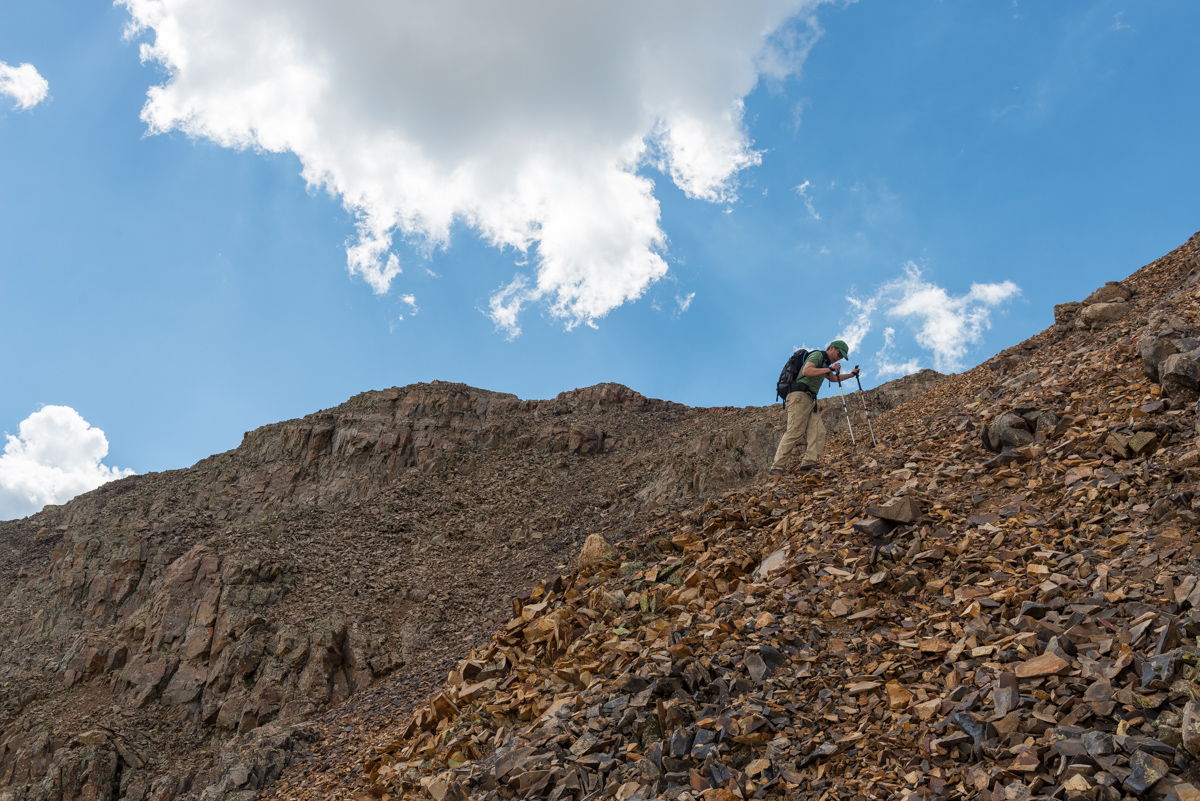
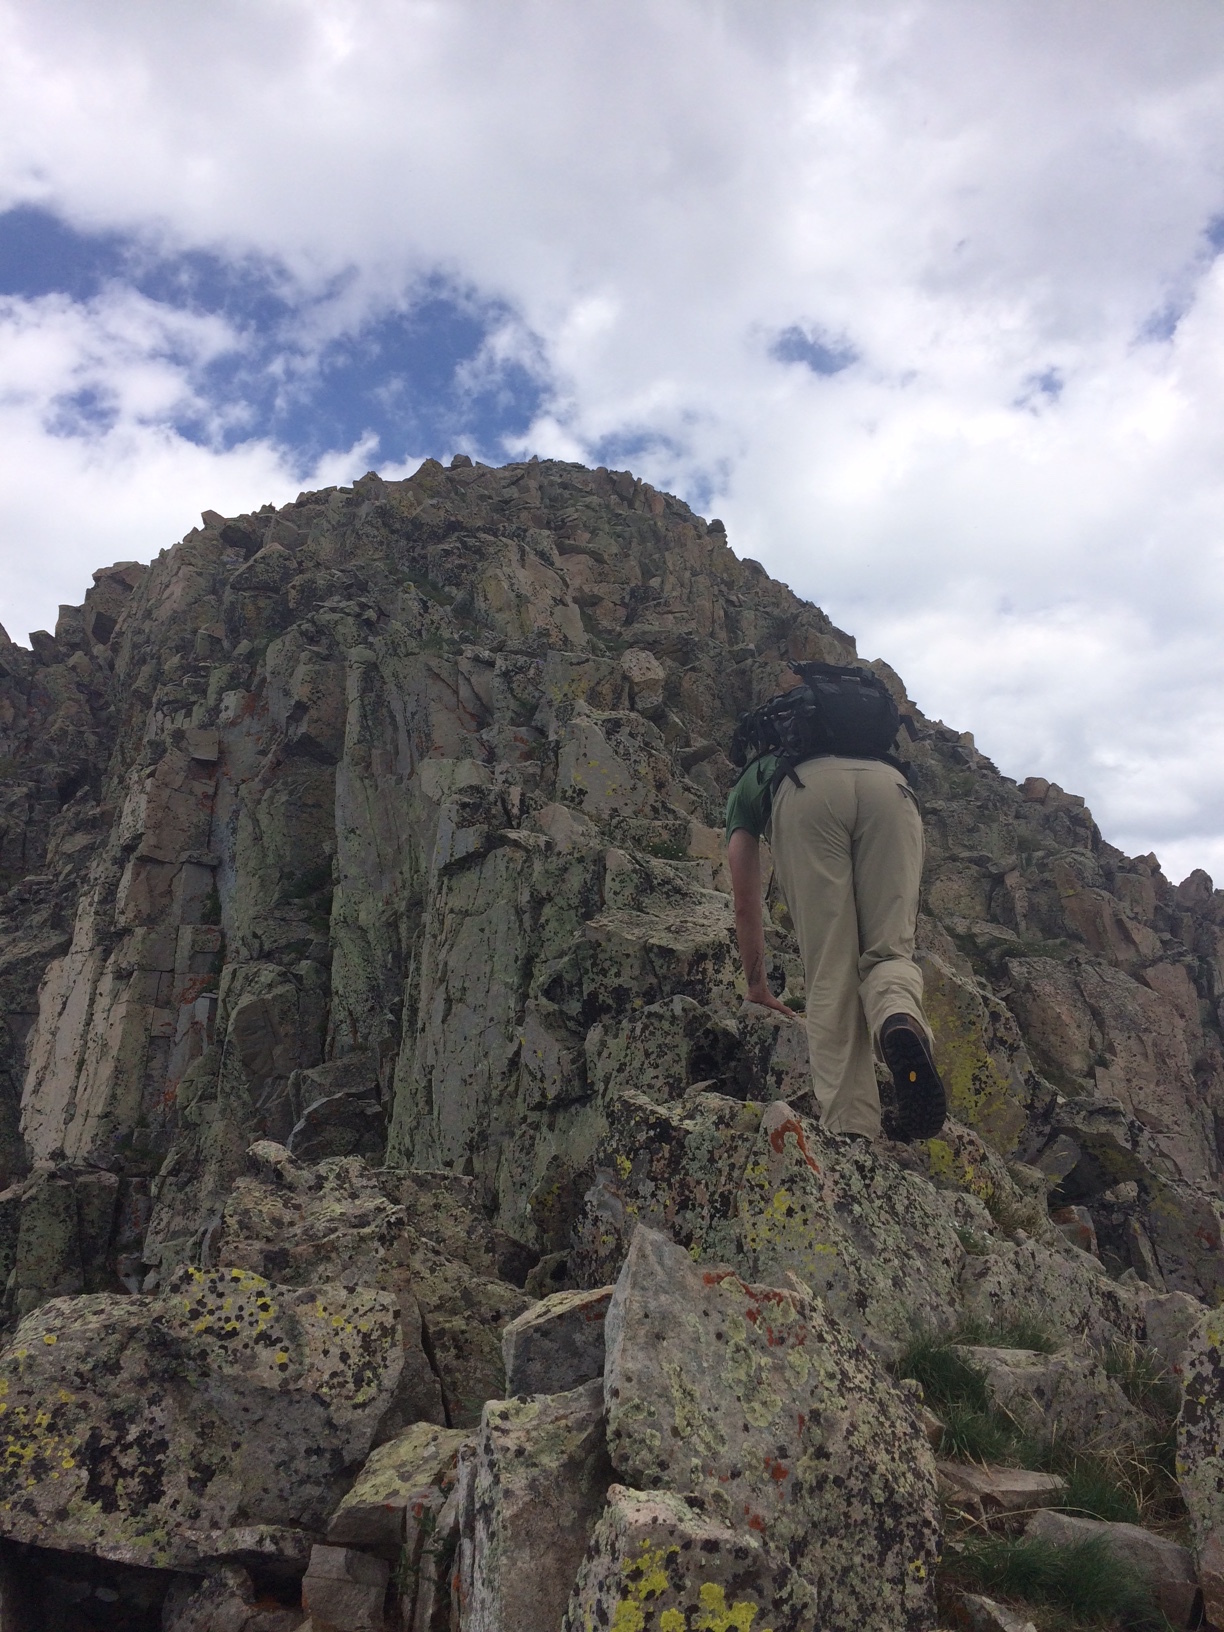
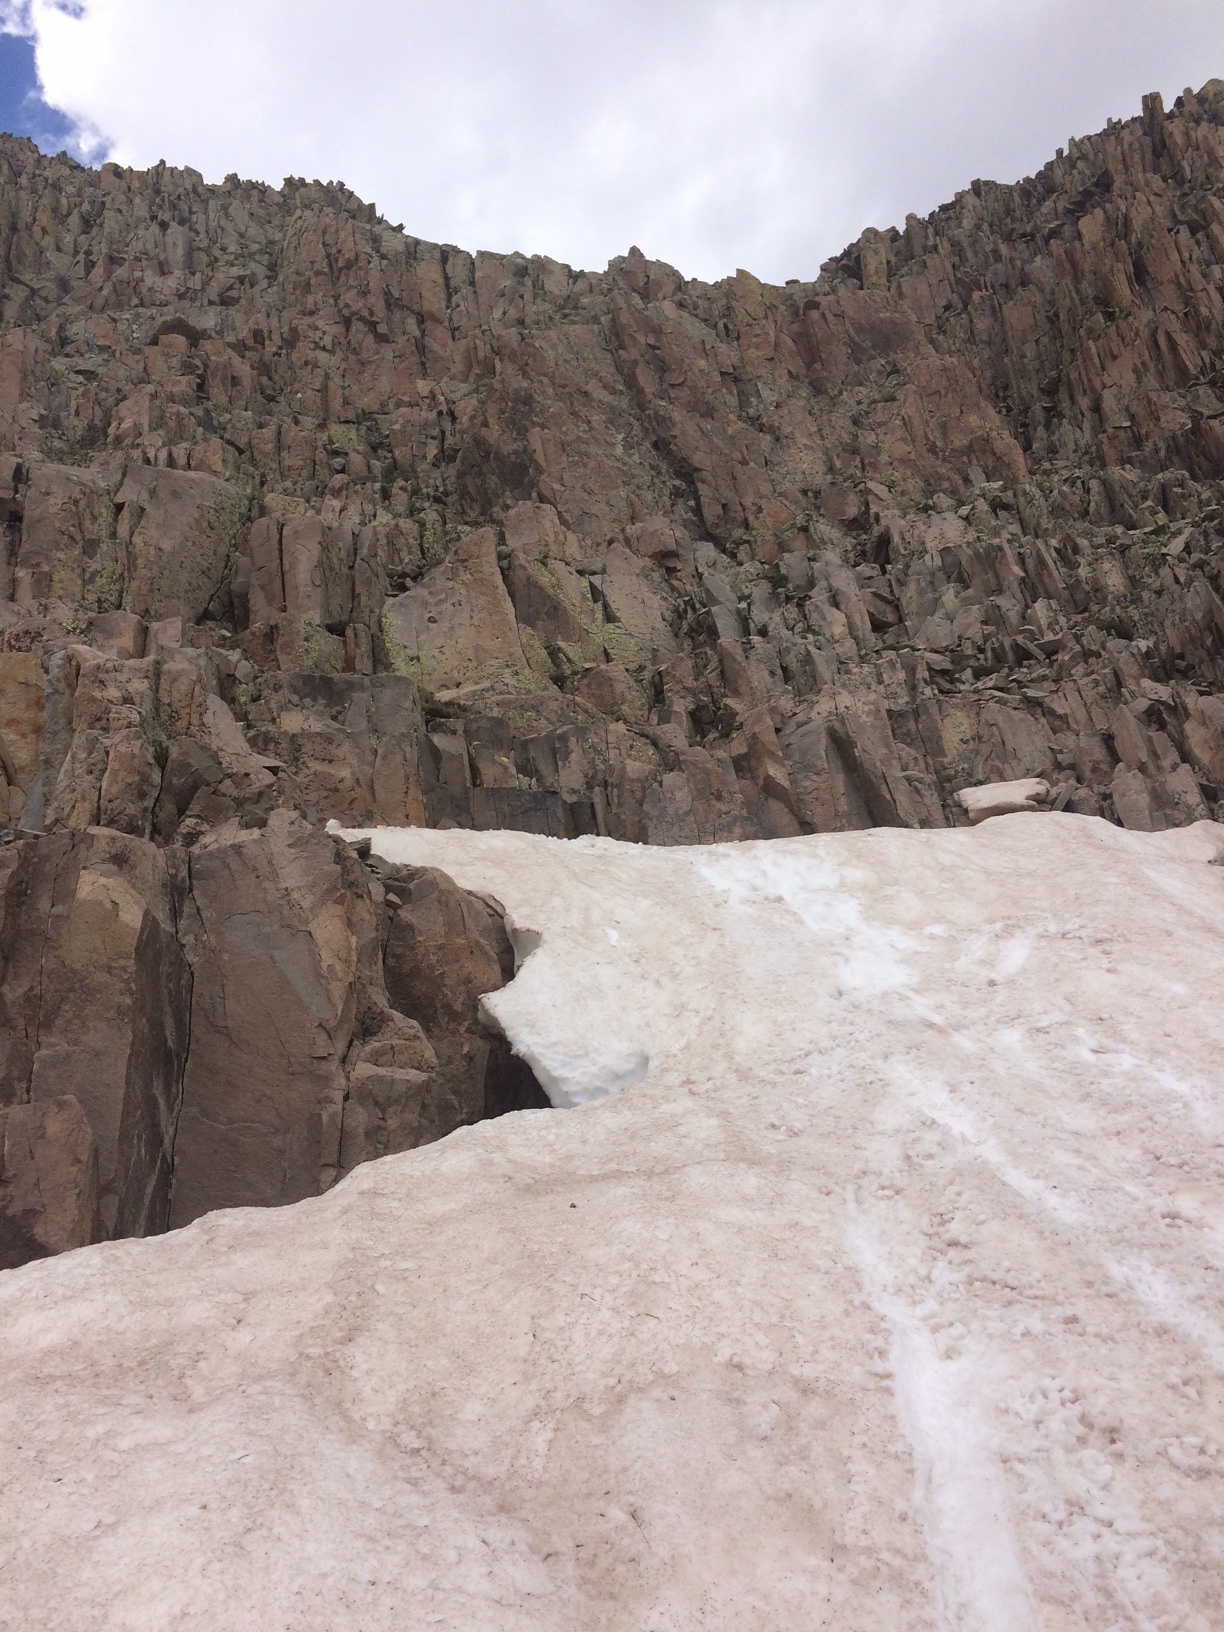
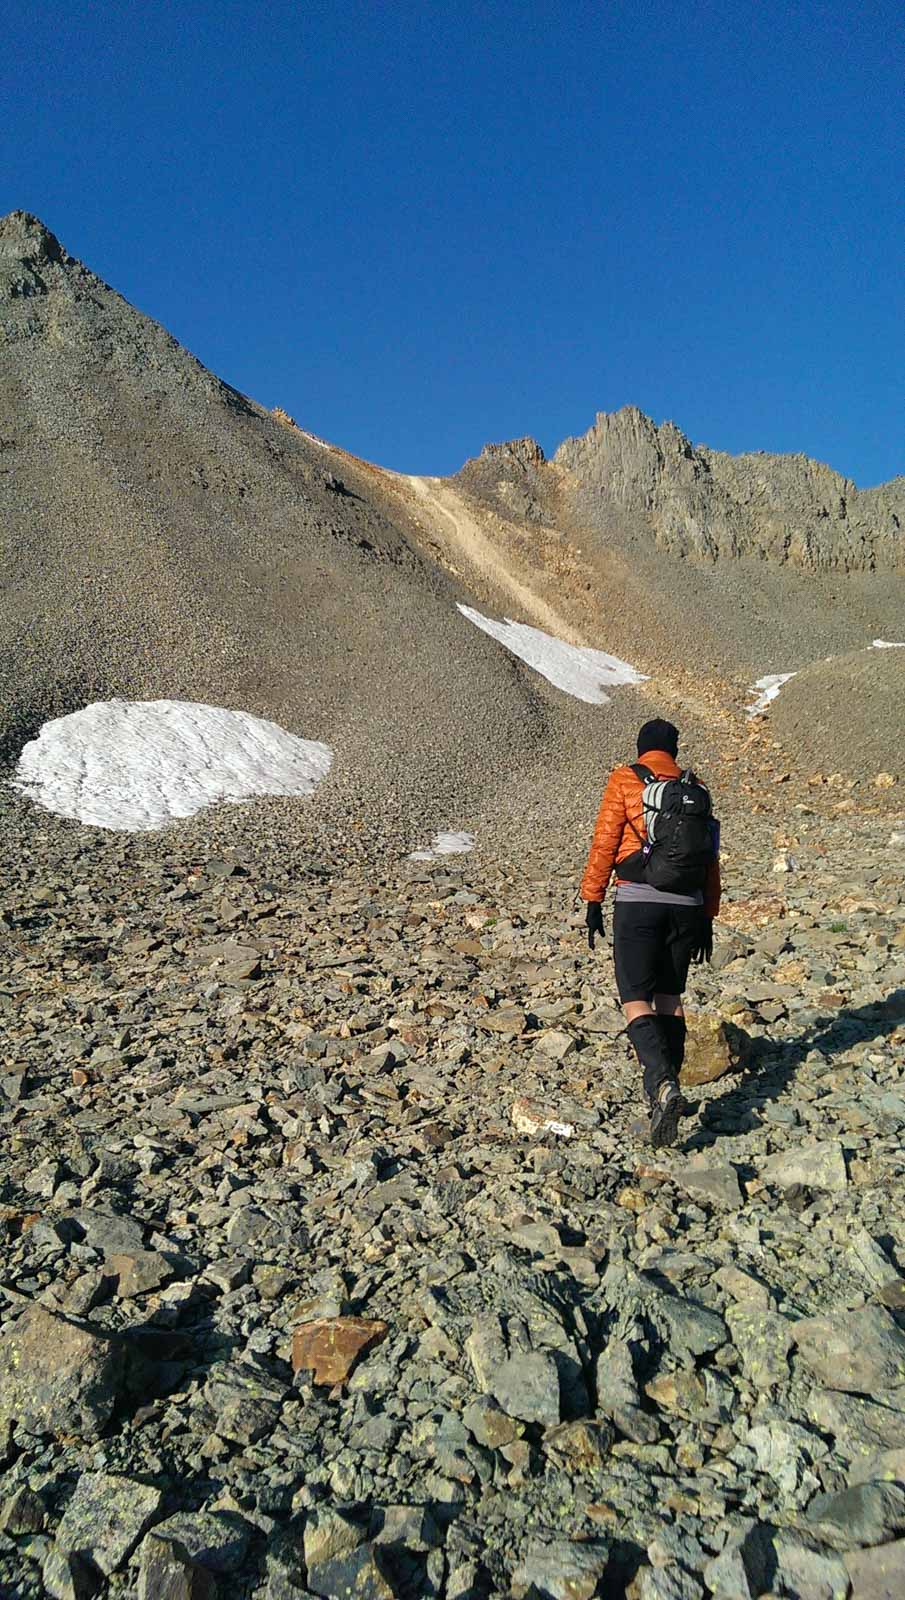
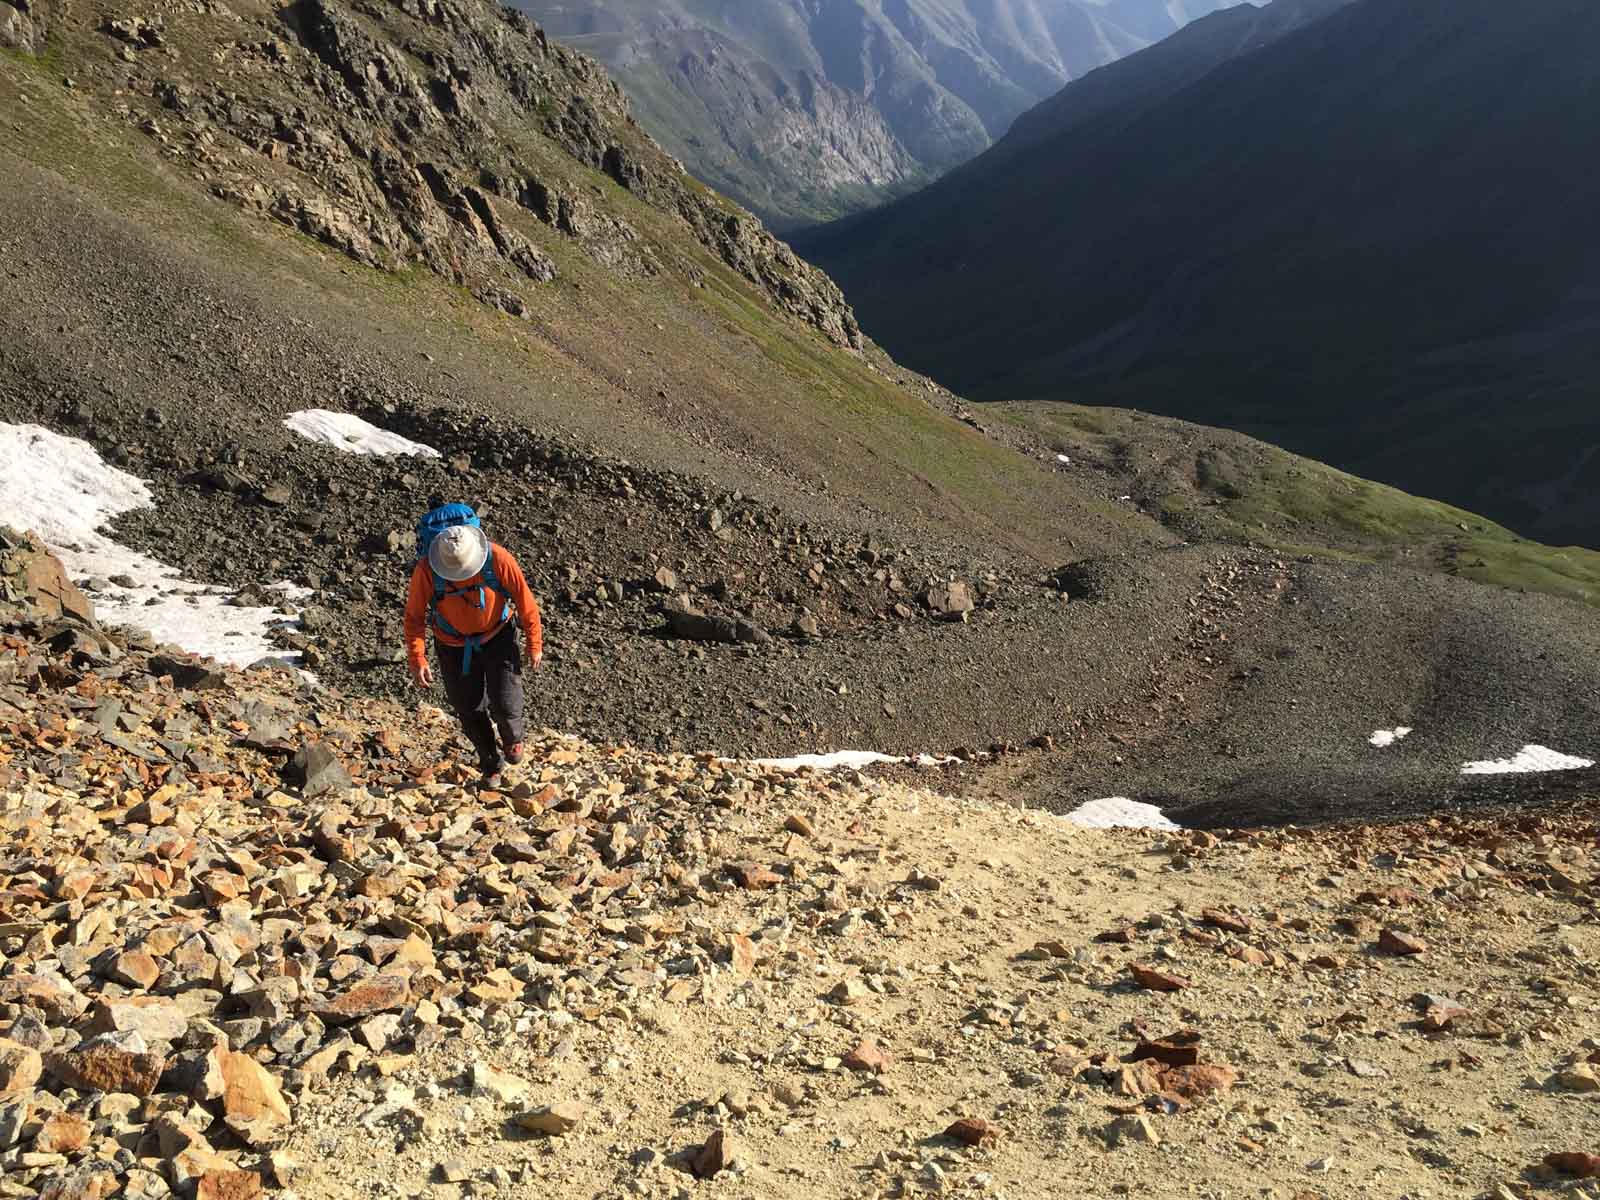
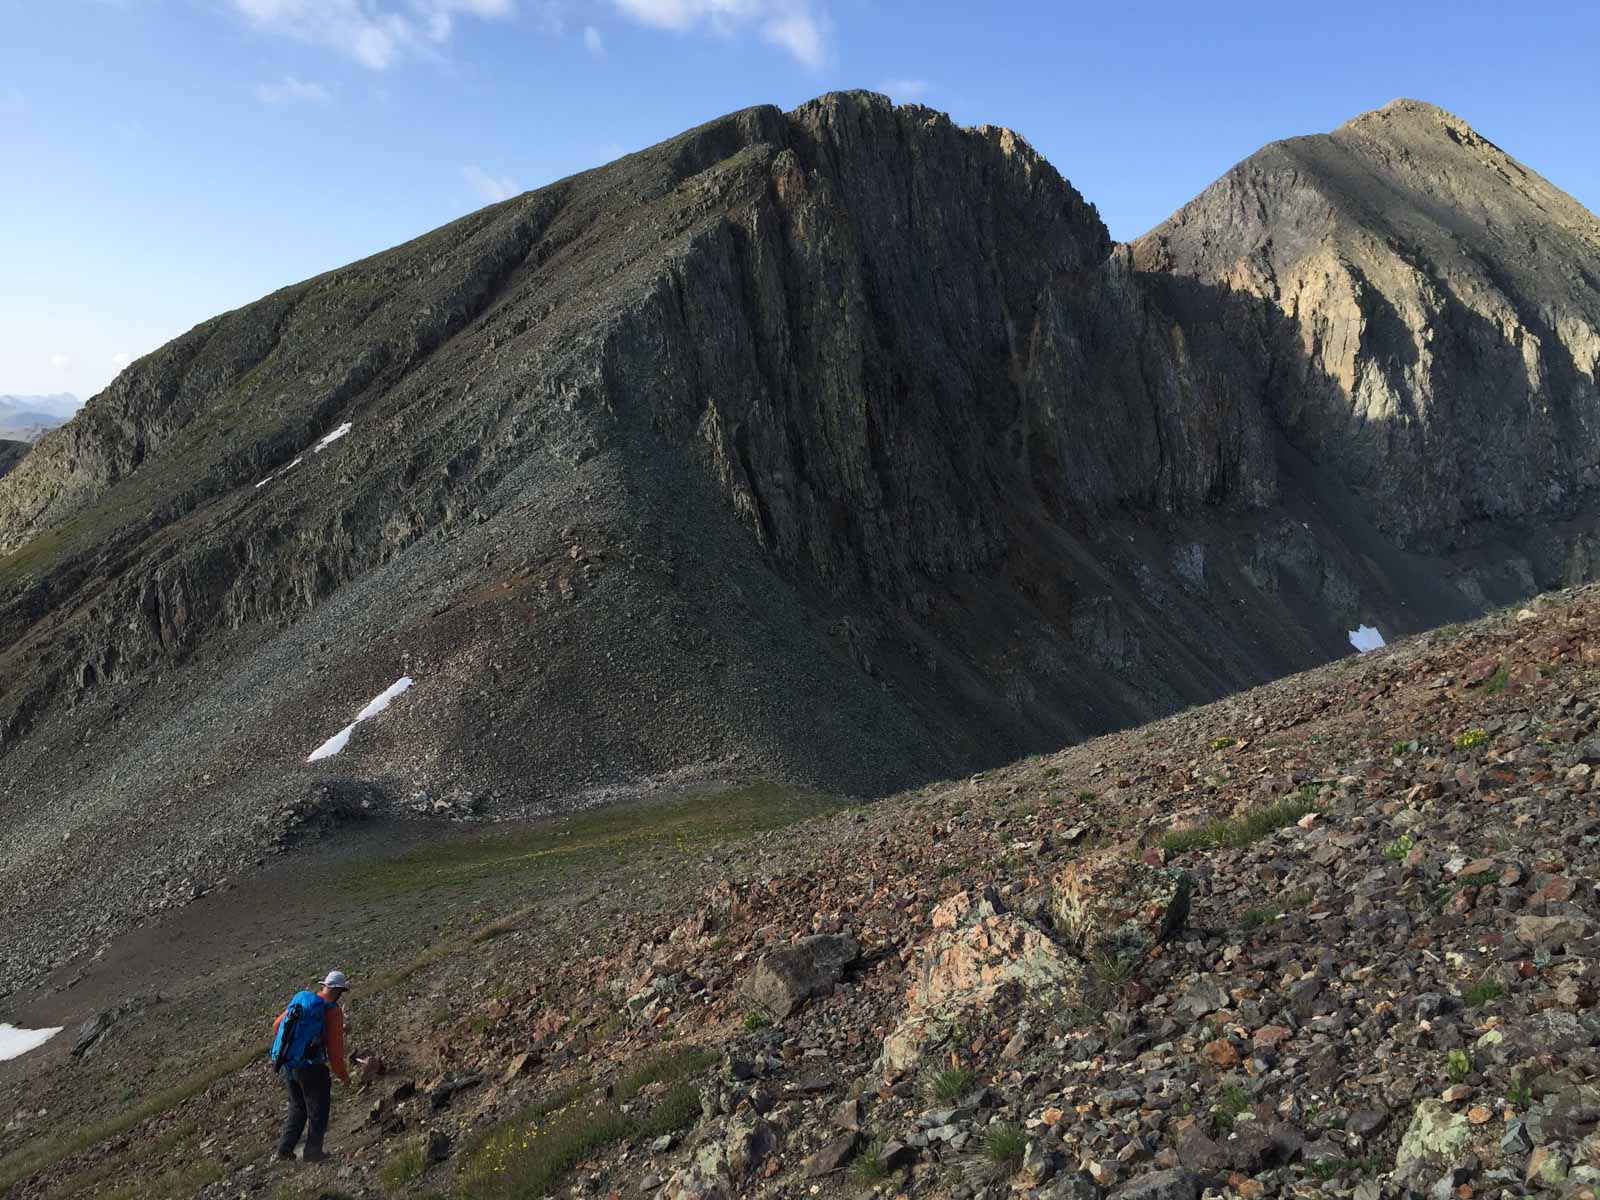
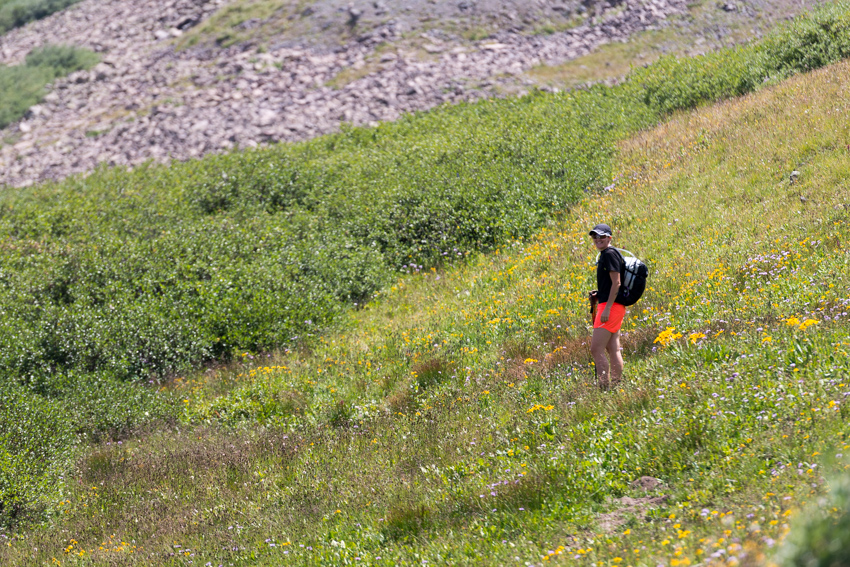
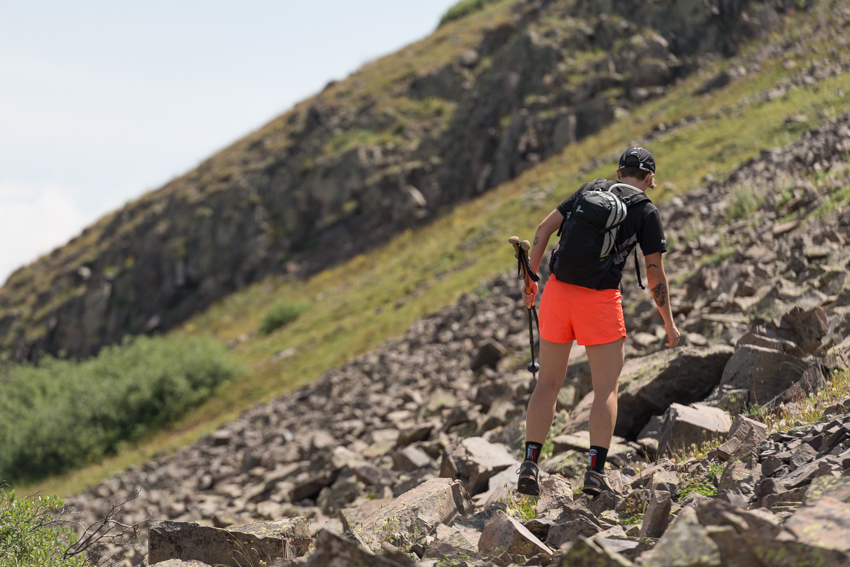
I got up at 3:45 AM, found my camera again, packed it up, and began my journey in the dark up Cathedral, following the description in Roach's book. I was not able to find the "mining trail" he describes until about 500 feet of elevation gain above the lake. I bushwhacked up a steep grassy slope and encountered the great trail heading west. I followed cairns all the way to the base of the infamous gully, where I watched the beginnings of sunrise. The gully itself was atrocious. It was some of the nastiest terrain I can ever recally climbing up. Class 3 loose dirt and rock. Maybe snow climbing would have been fine after-all! Oh well, I suffered up the steep gully and made great time.
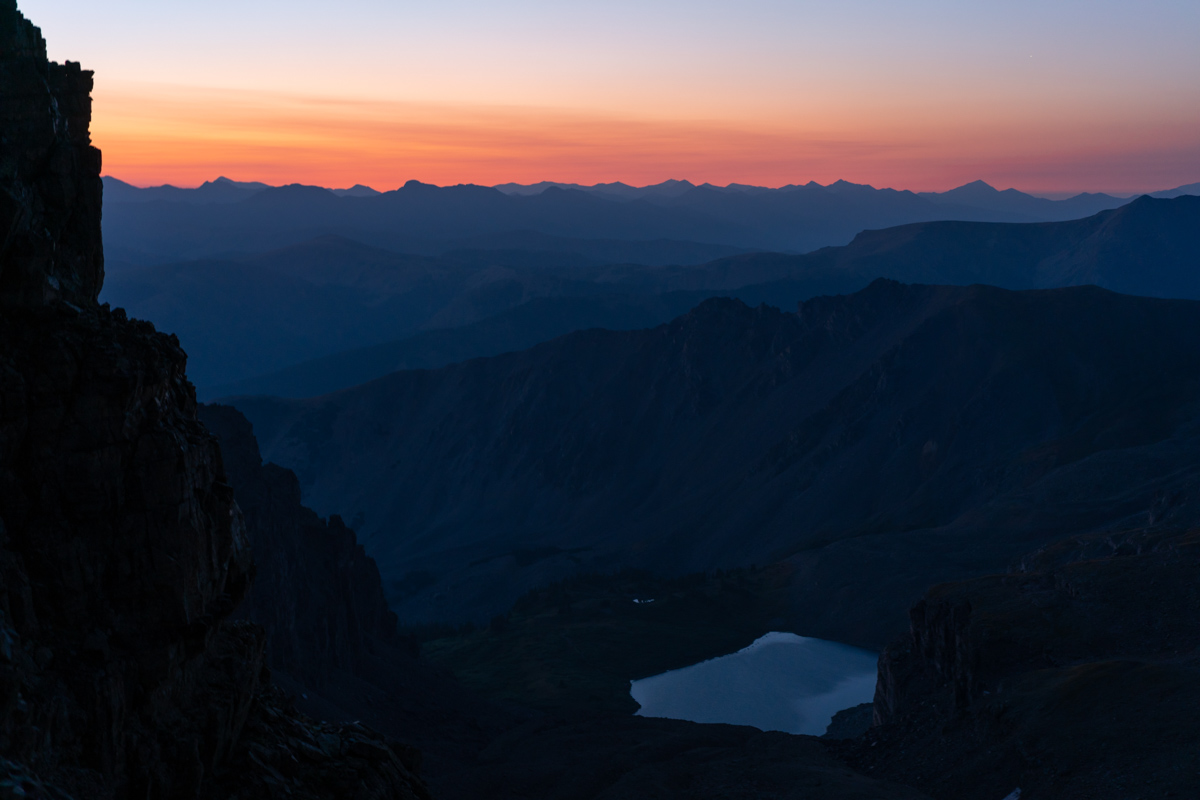
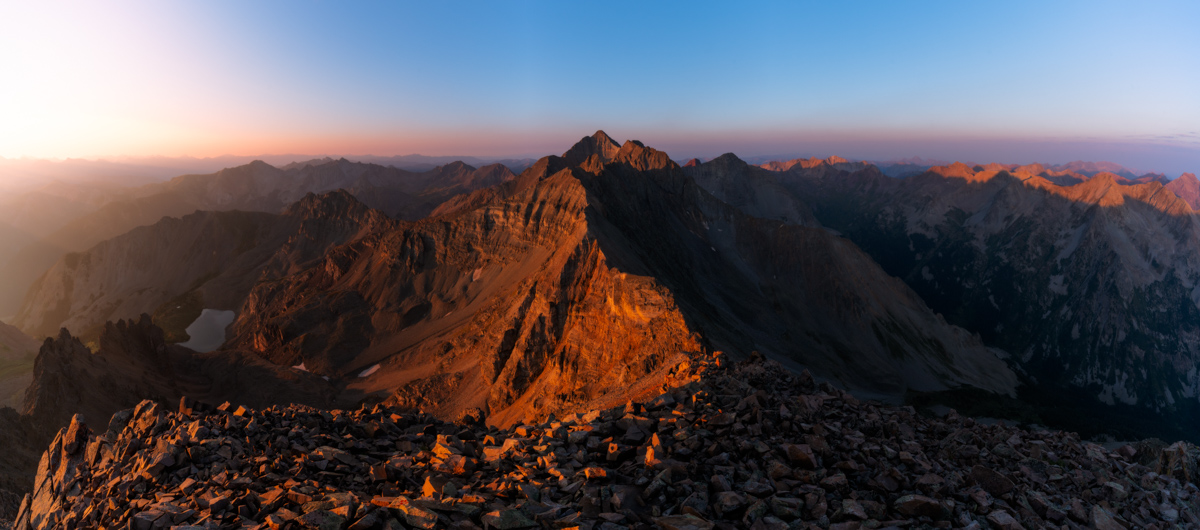
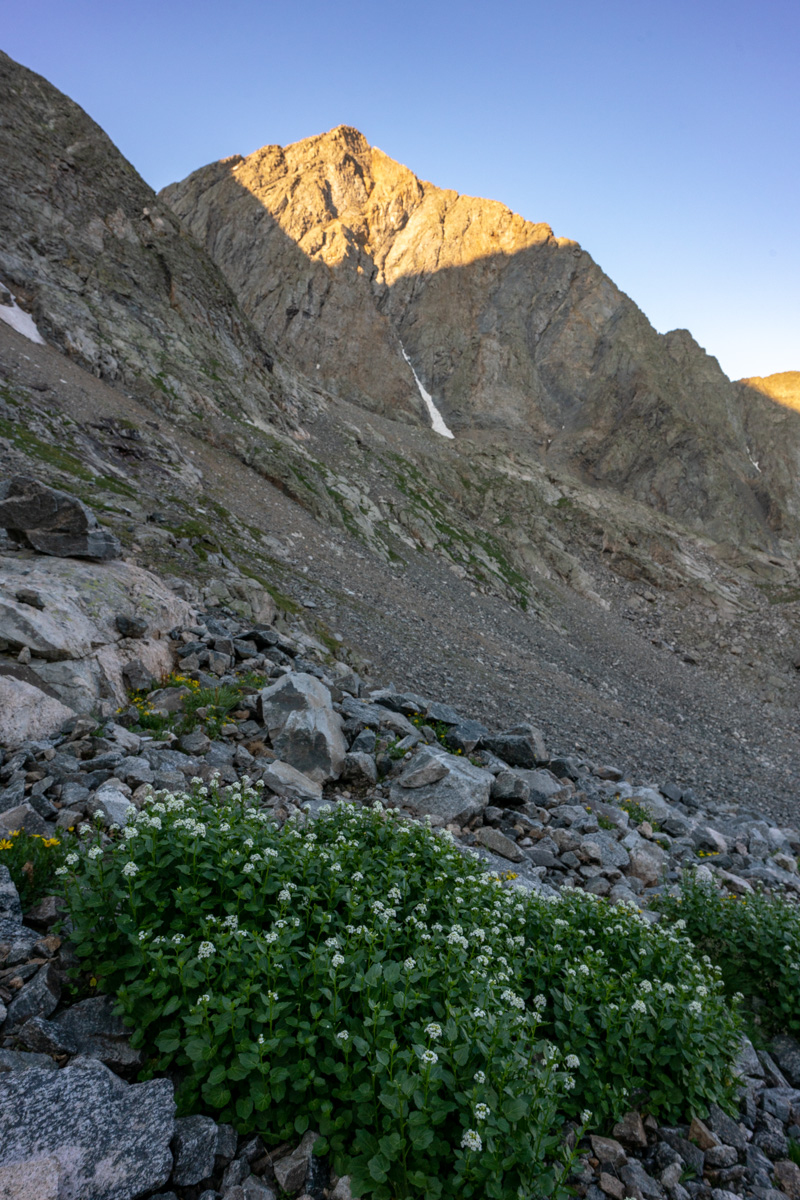
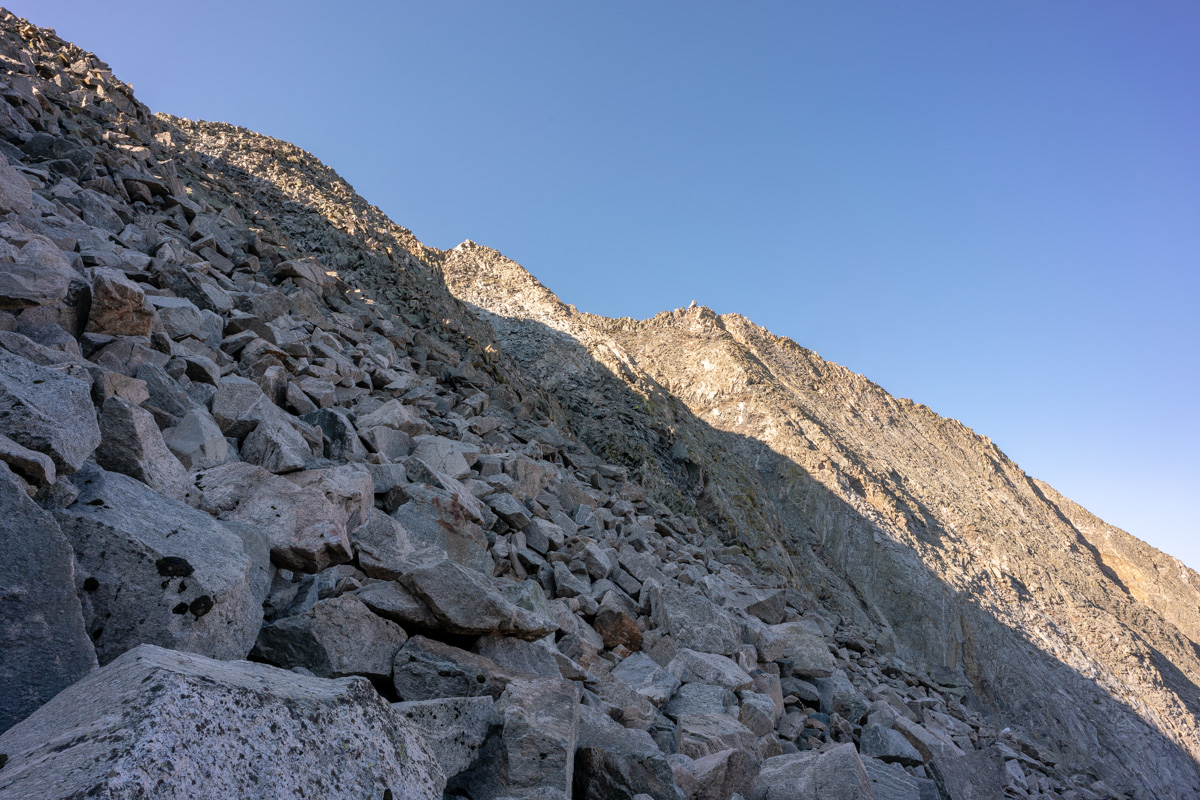
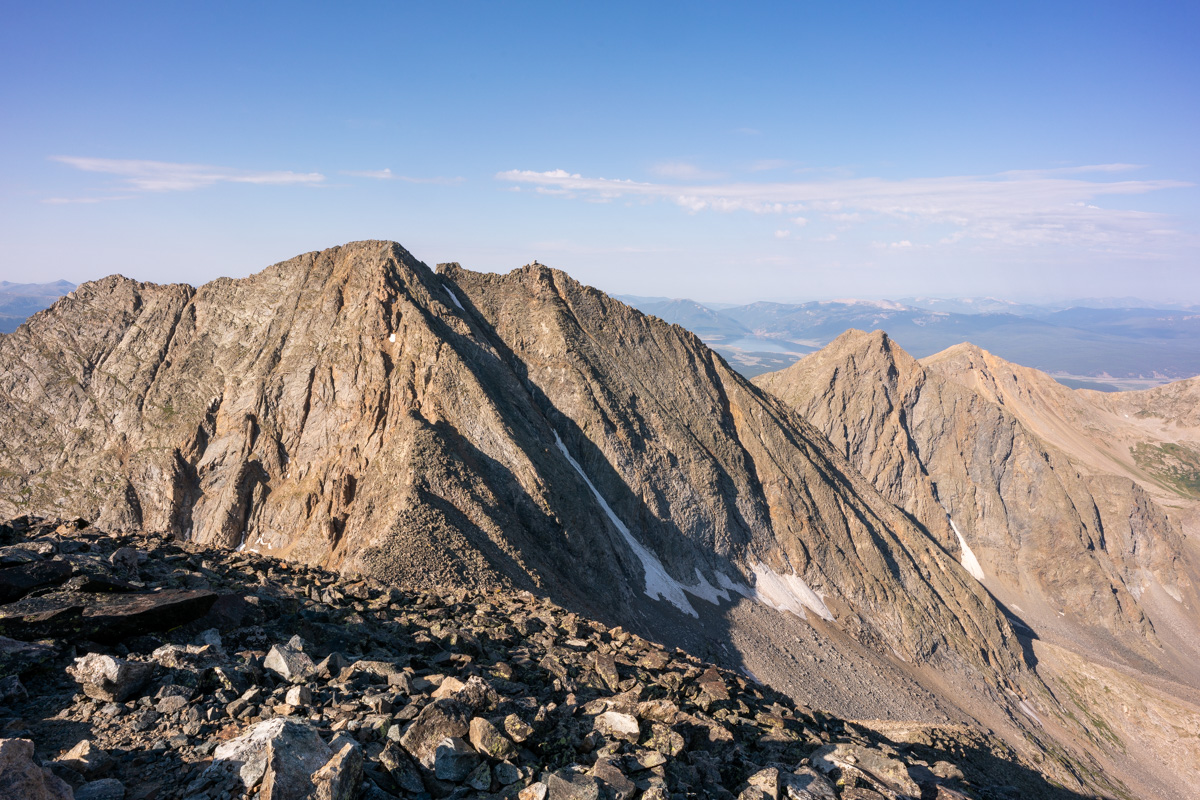
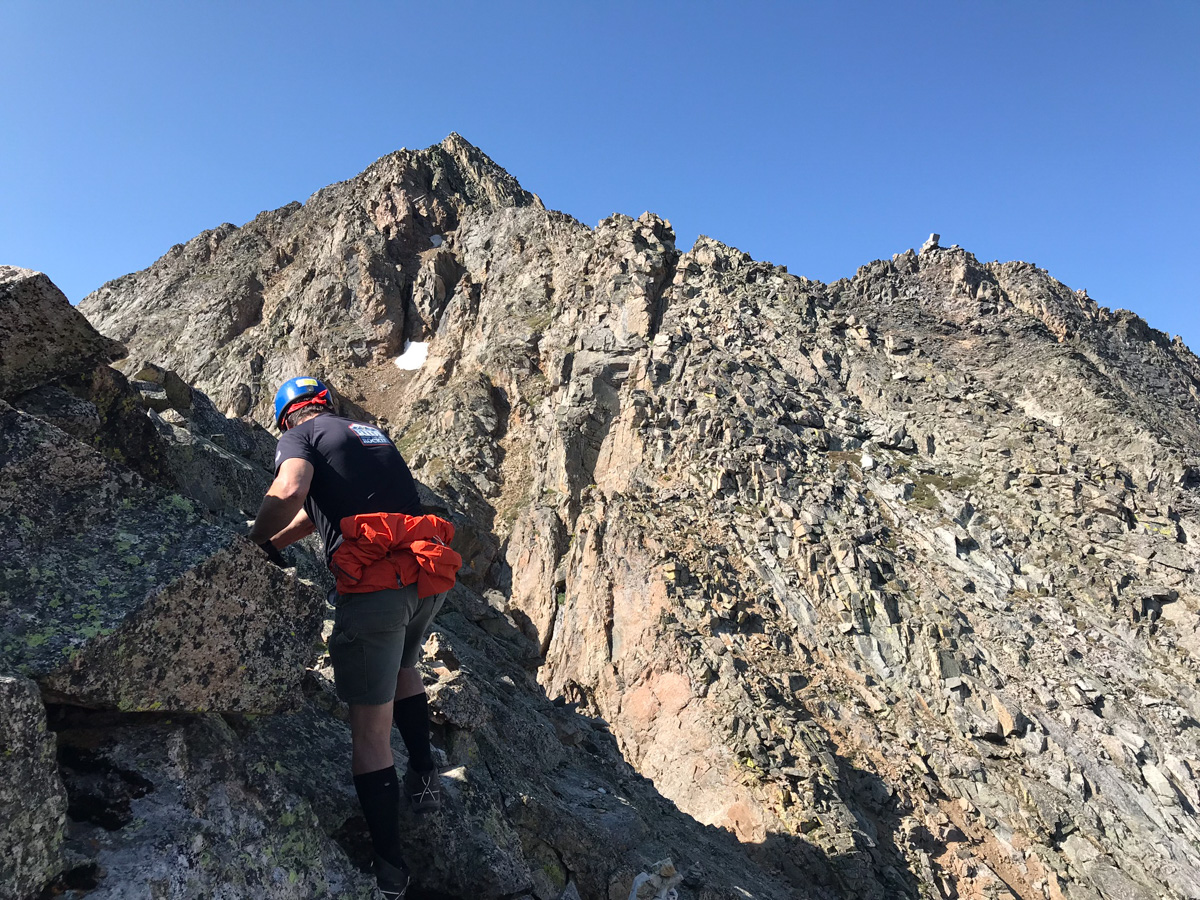
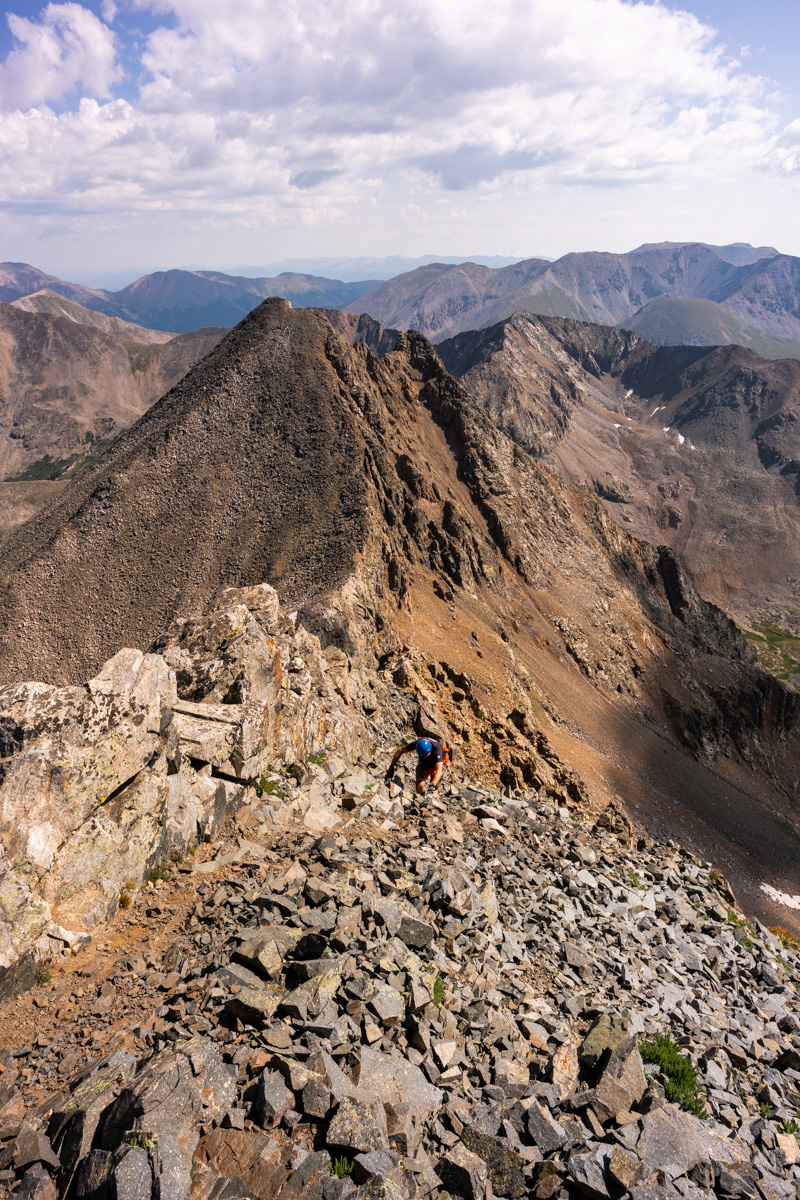
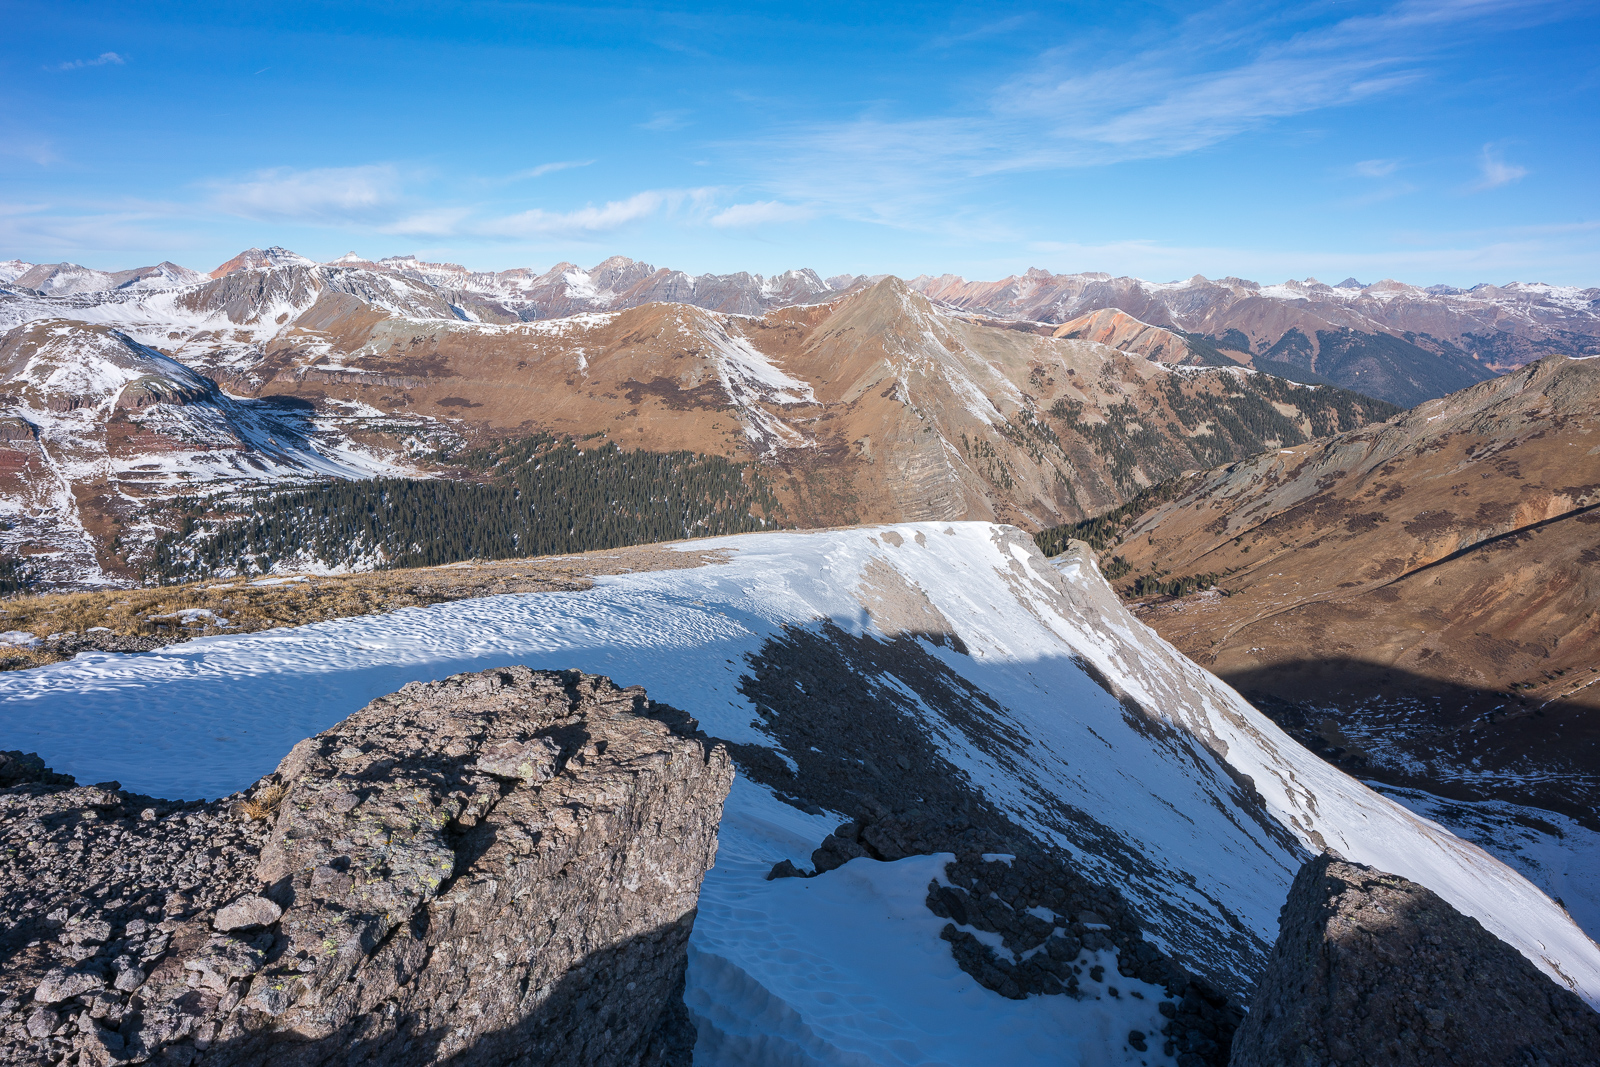
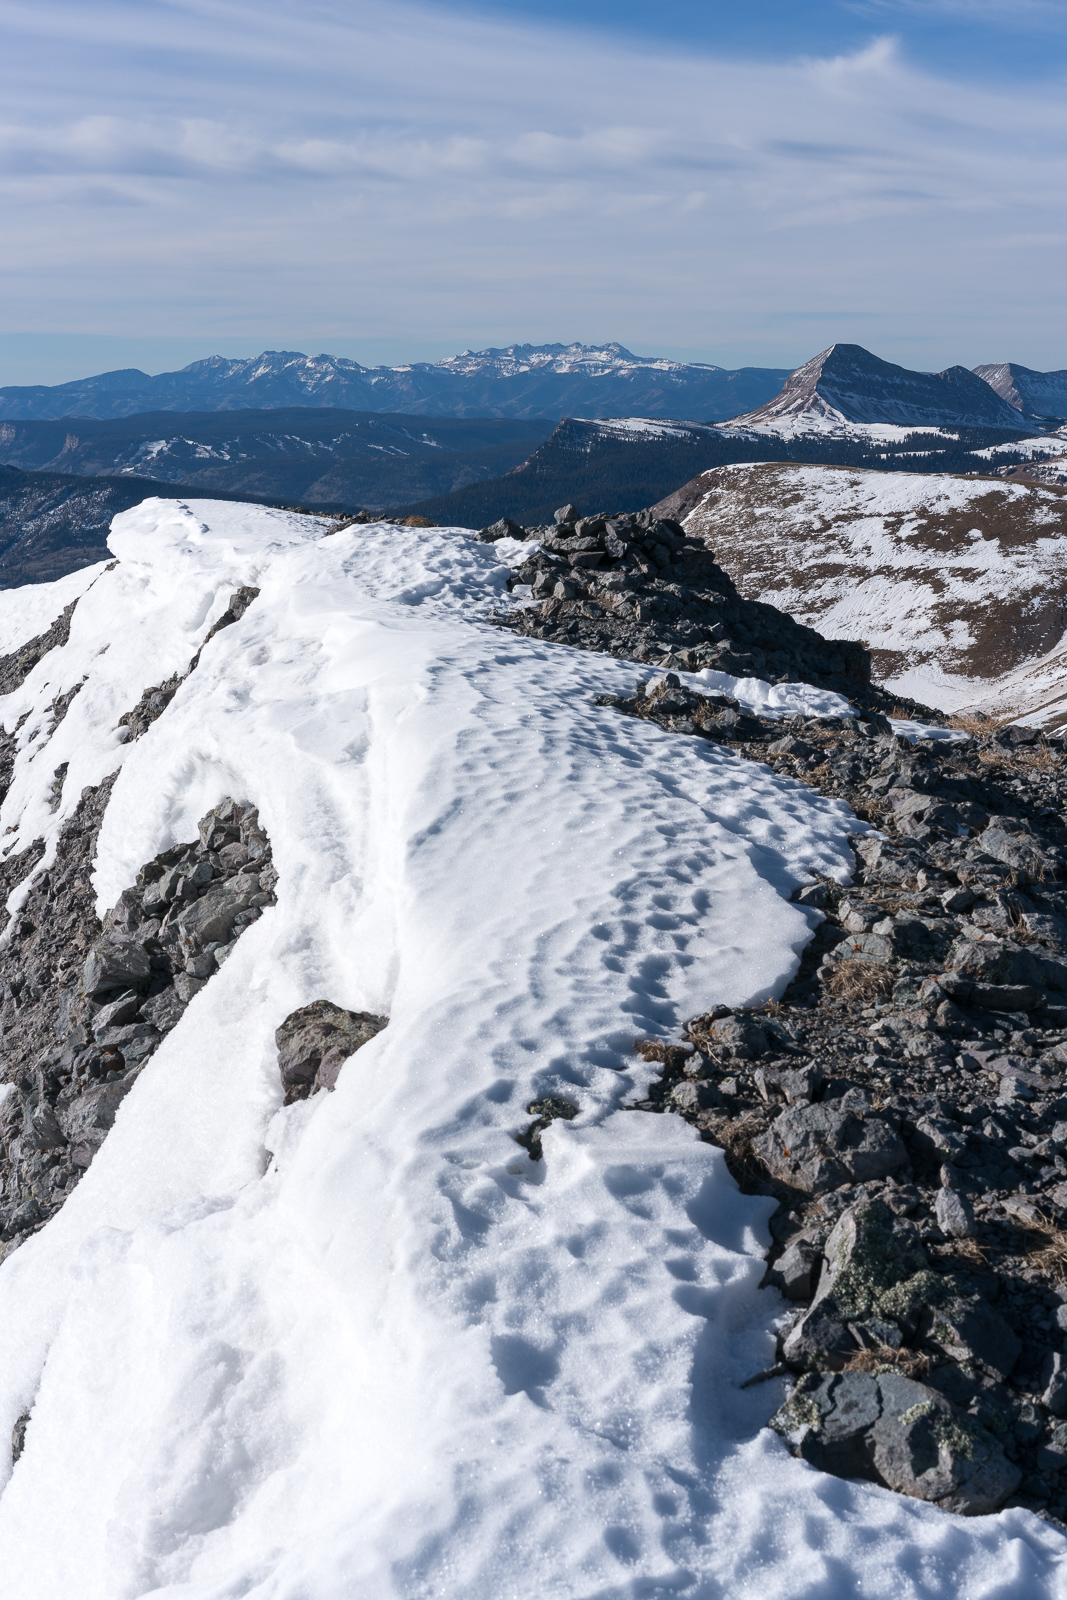
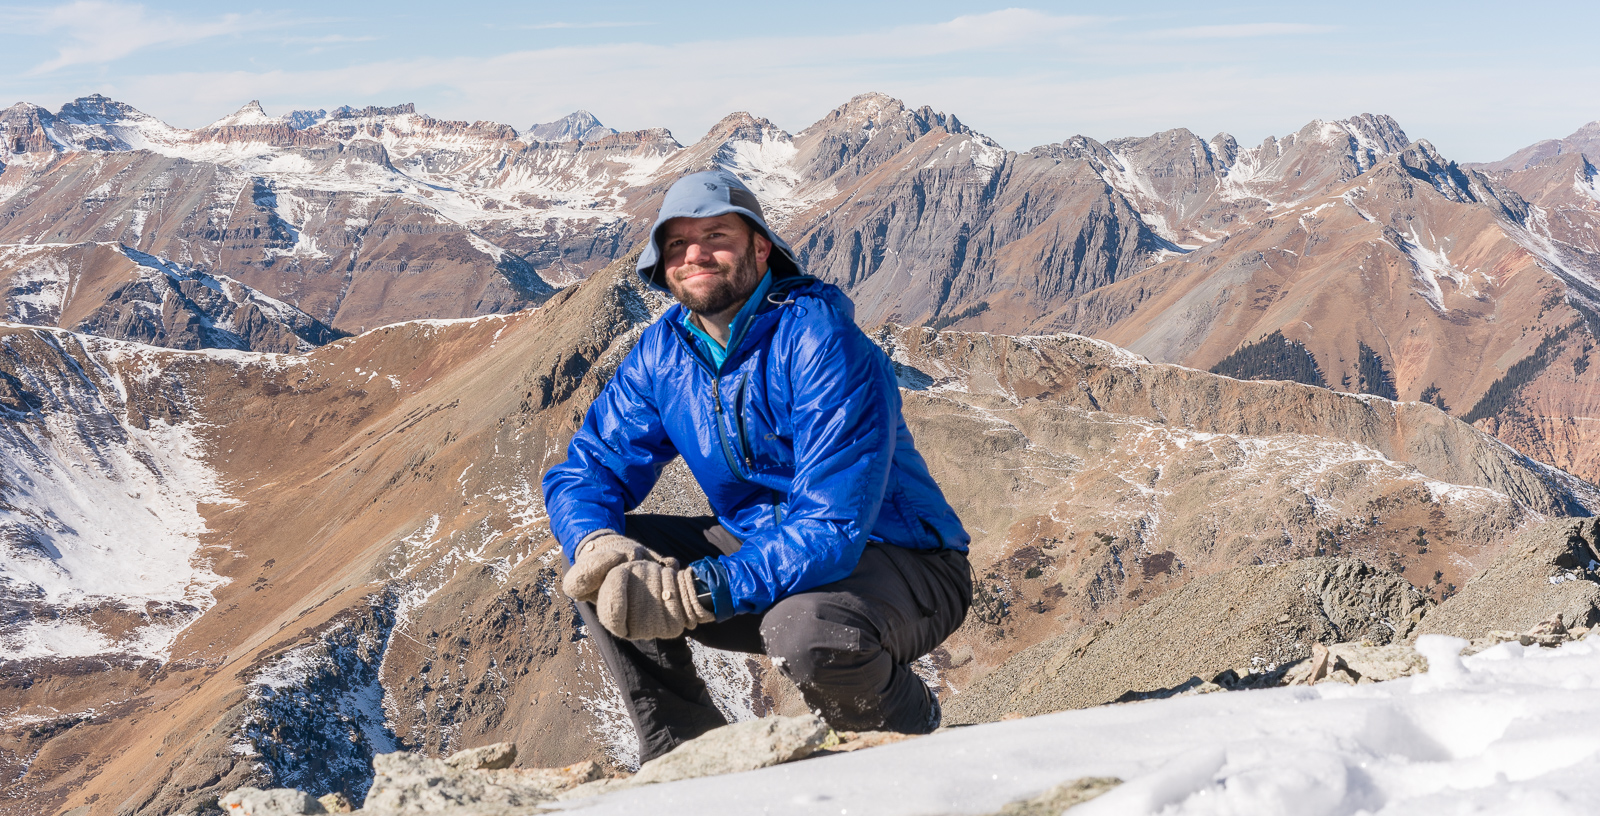
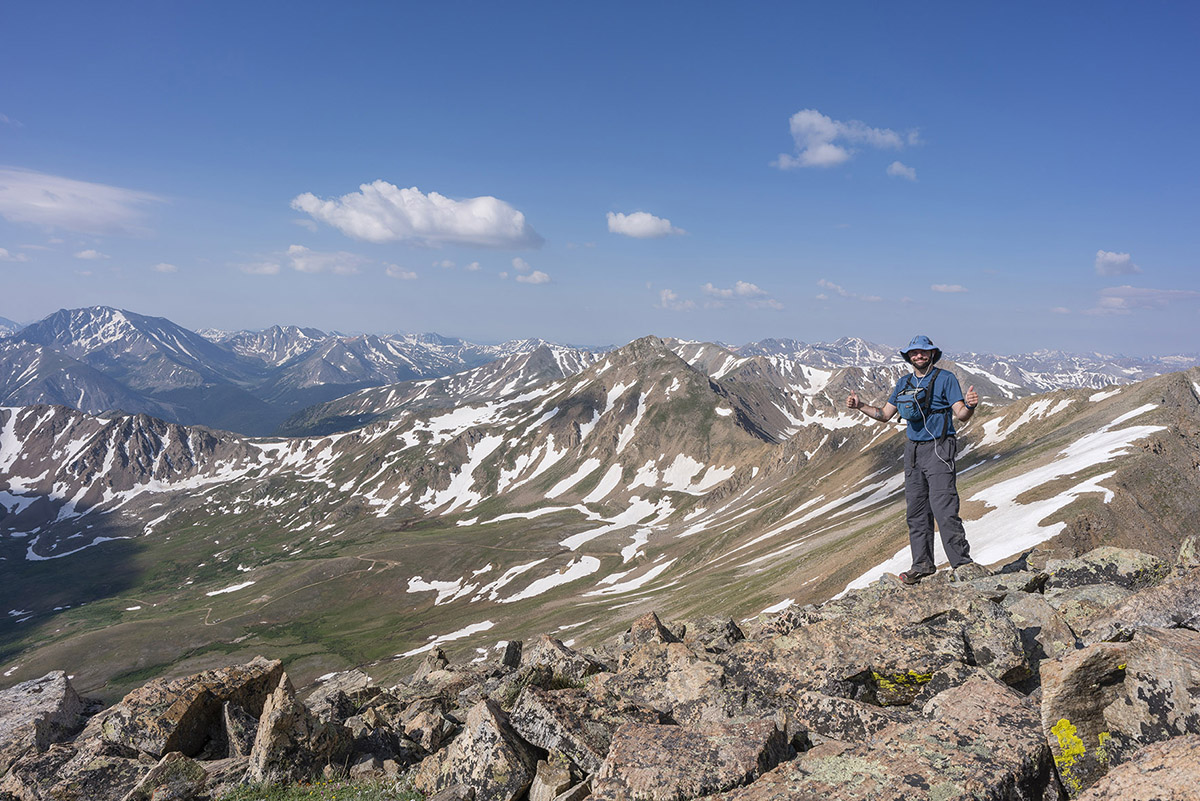
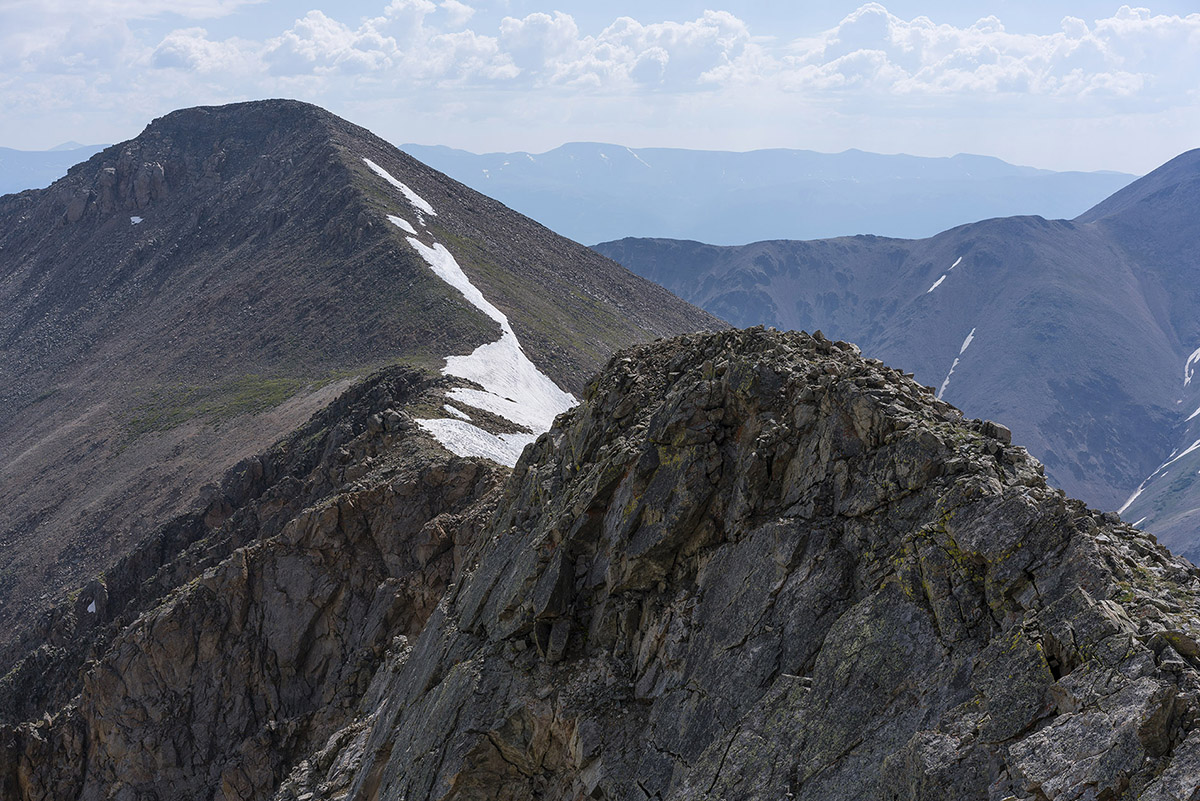
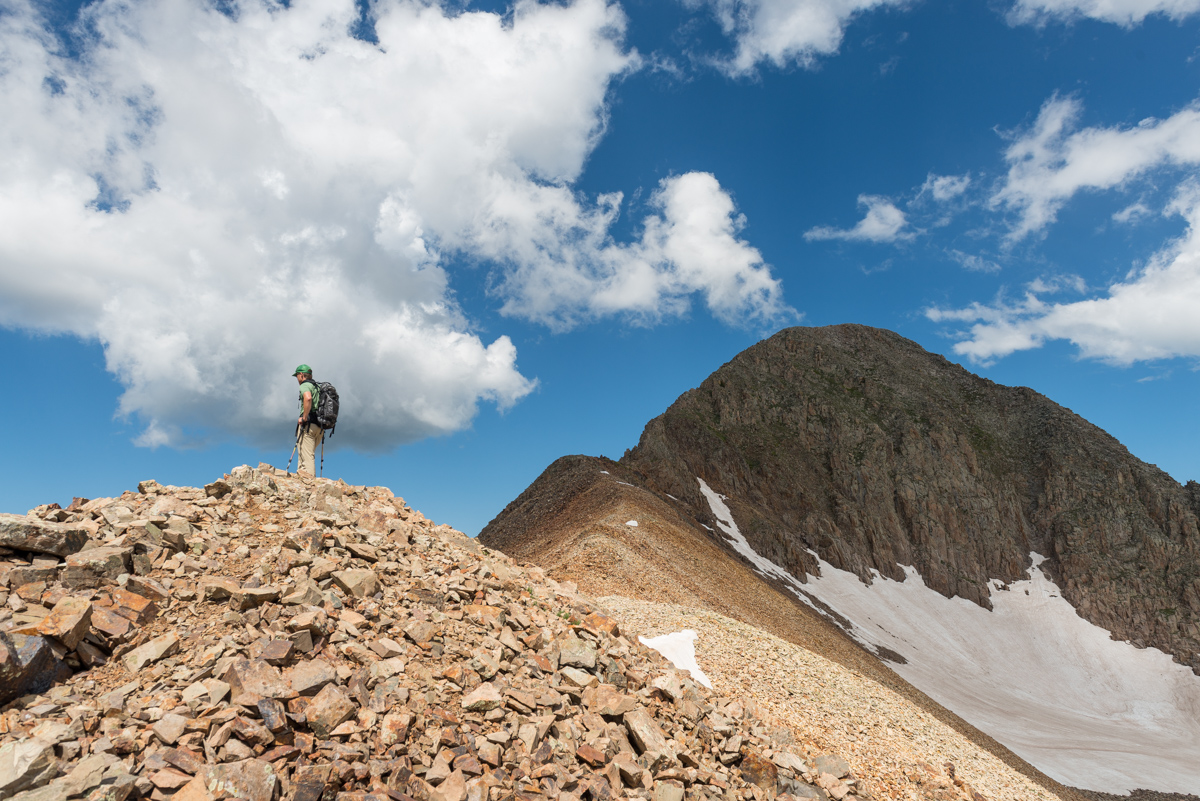
The terrain between the saddle and the summit was pretty interesting. It reminded me of Vermillion Peak or Hagerman Peak. It was loose in spots but relatively easy to find good solid holds. Some care was needed to ensure a good route up, but all-in-all I did not find it overly difficult to ascend. I reached the top just in time for sunrise, which was glorious to say the least!
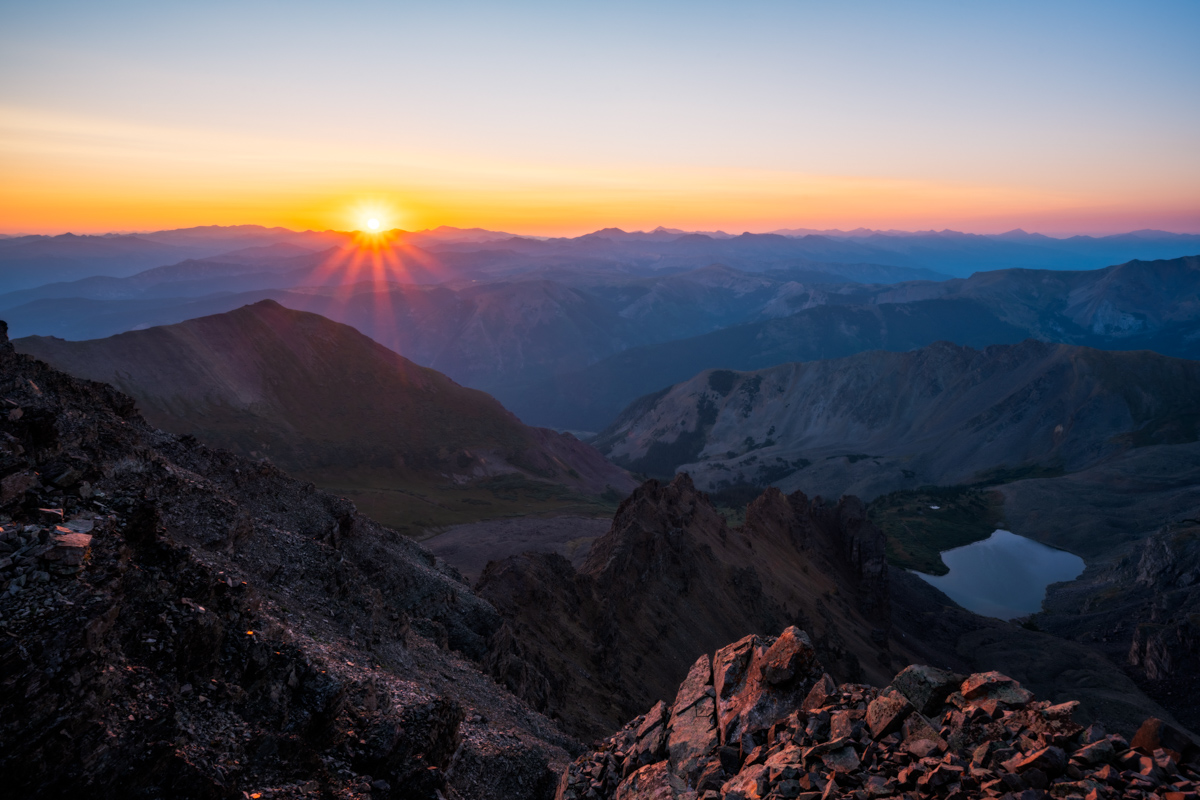
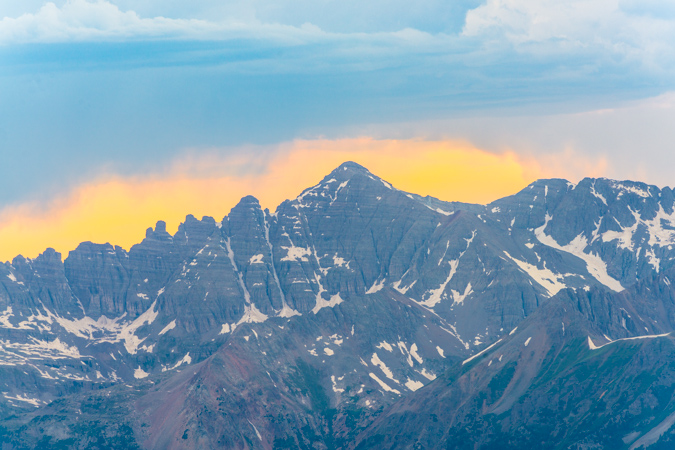
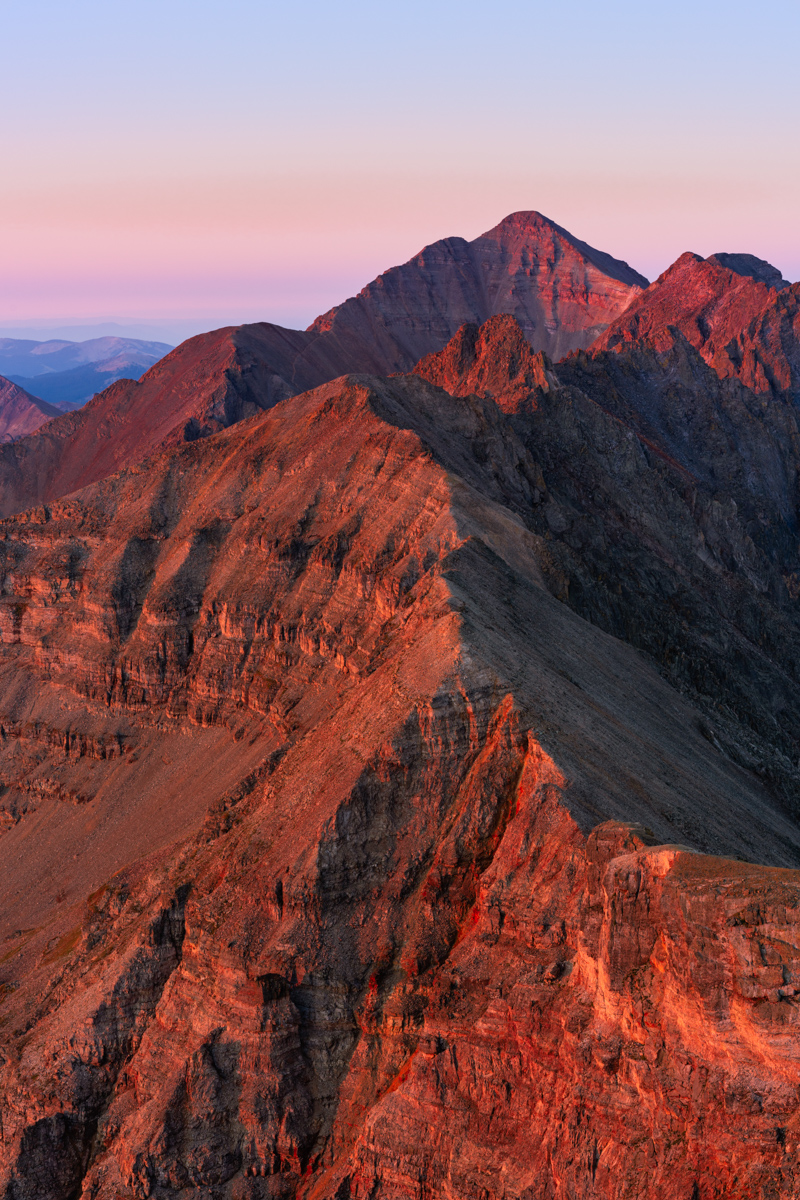
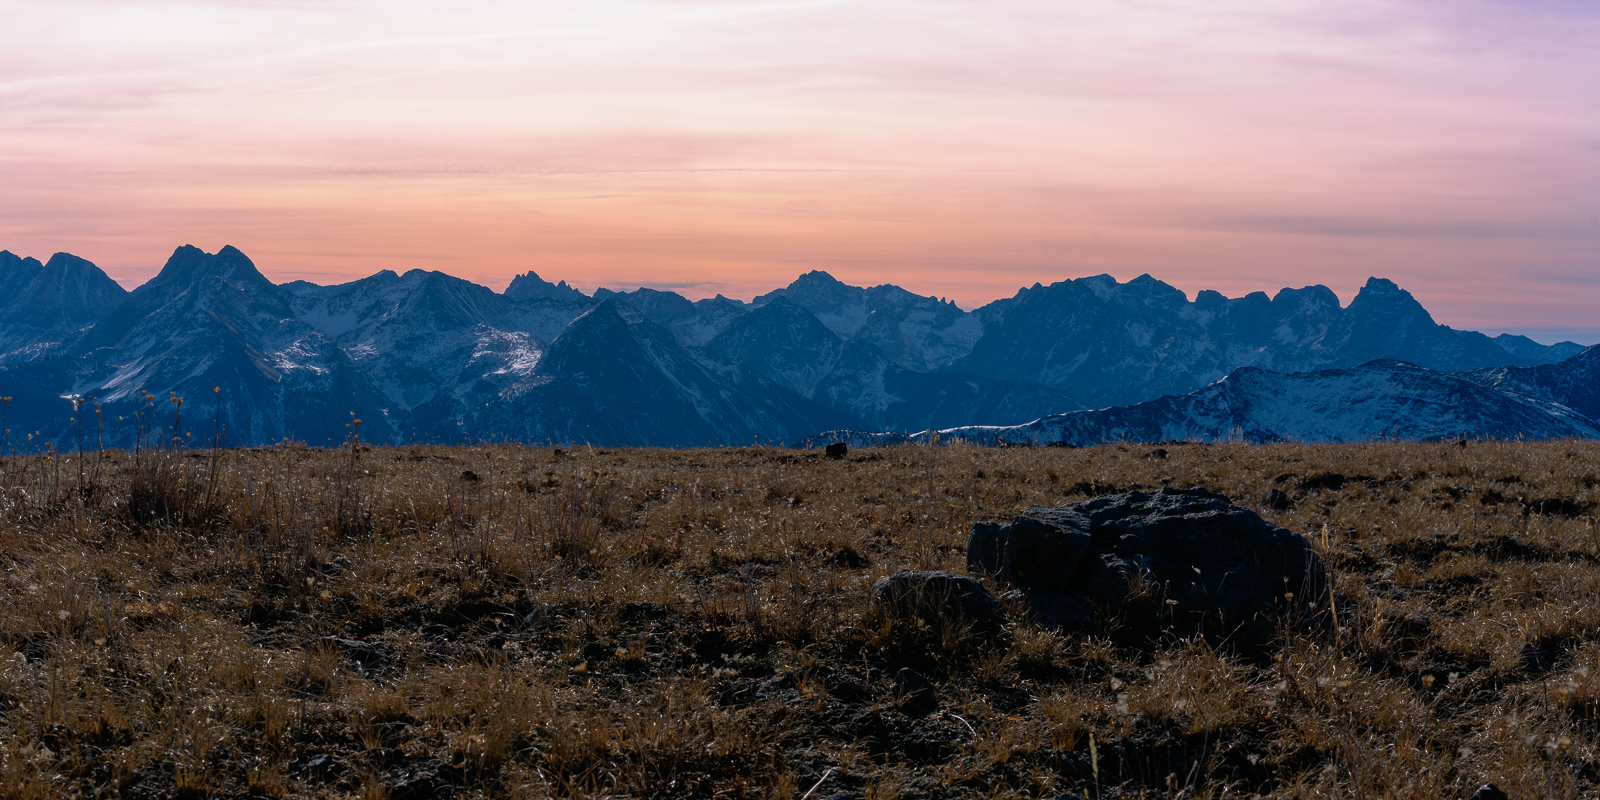
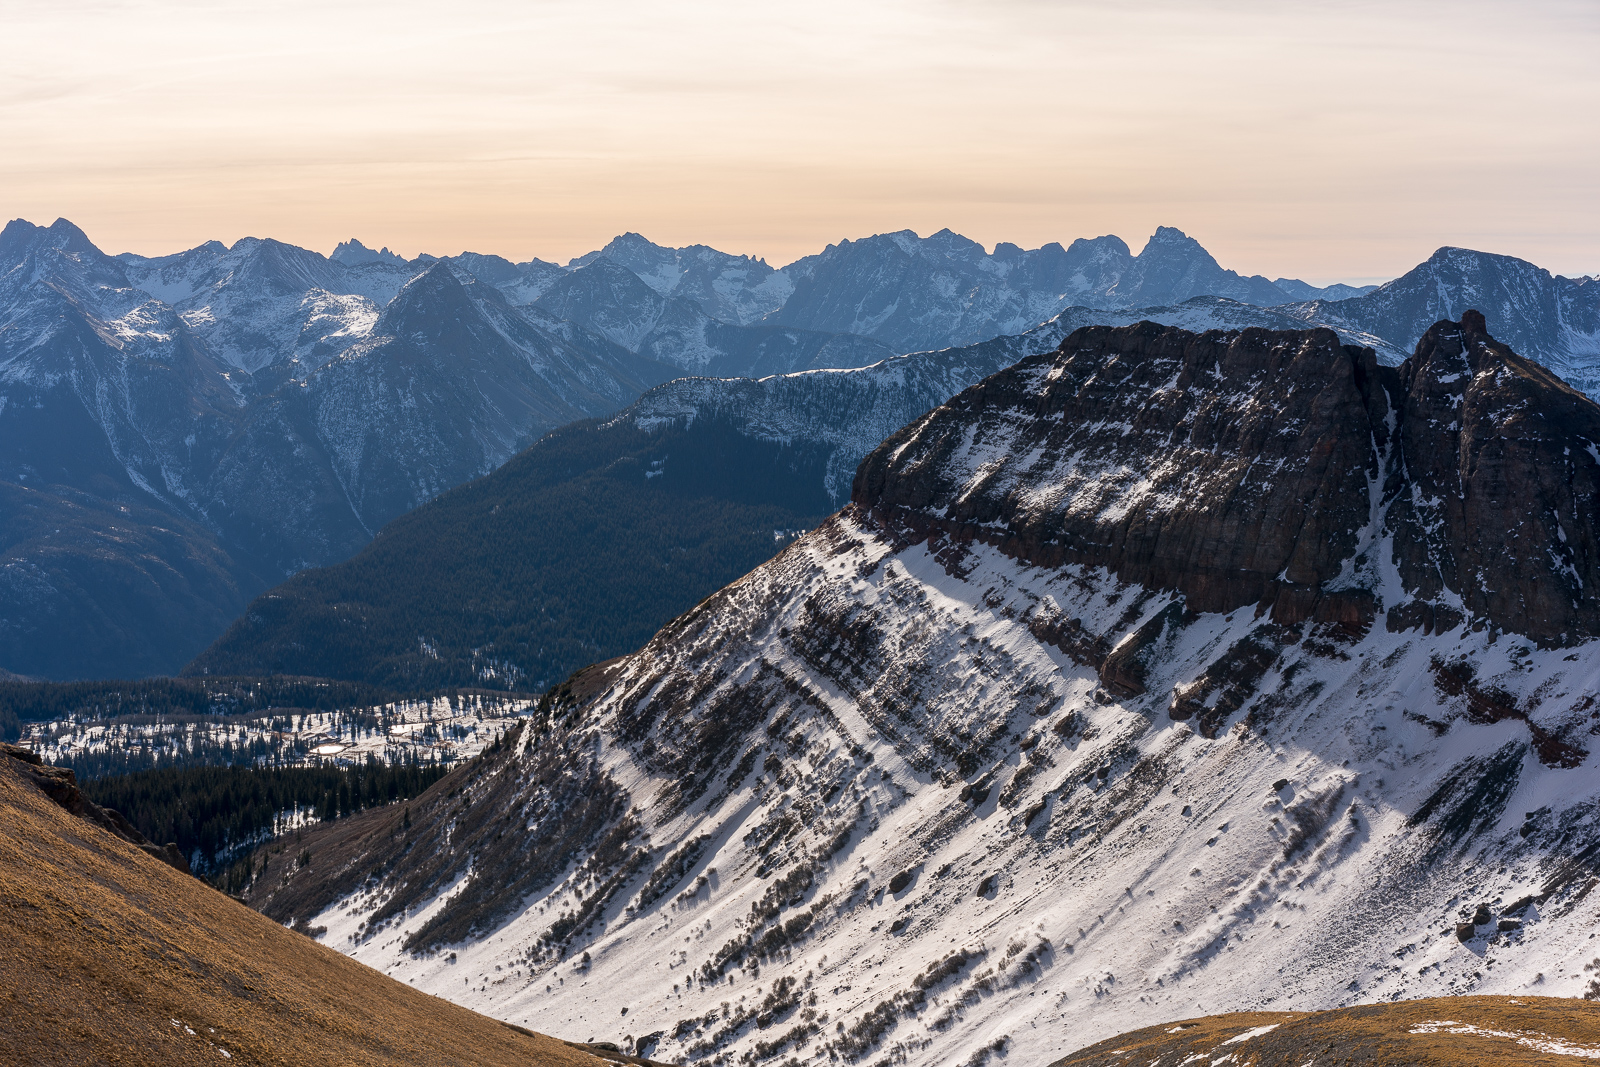
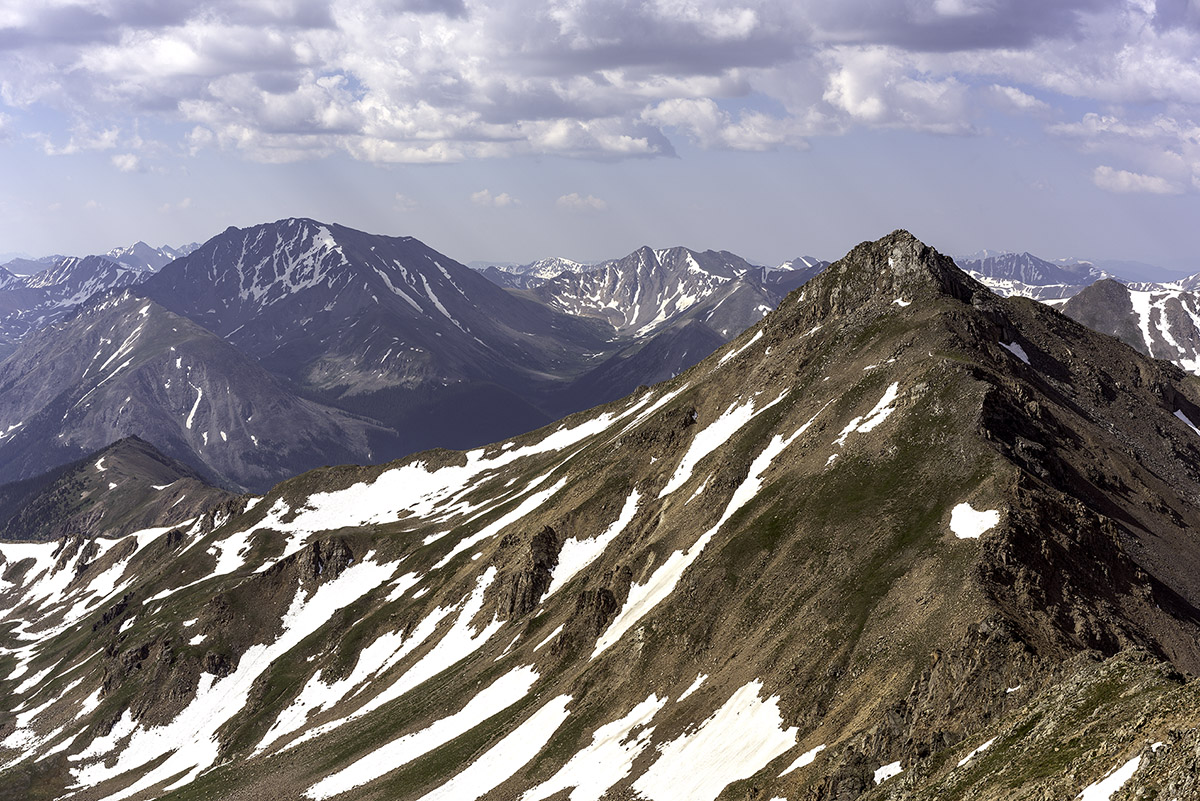
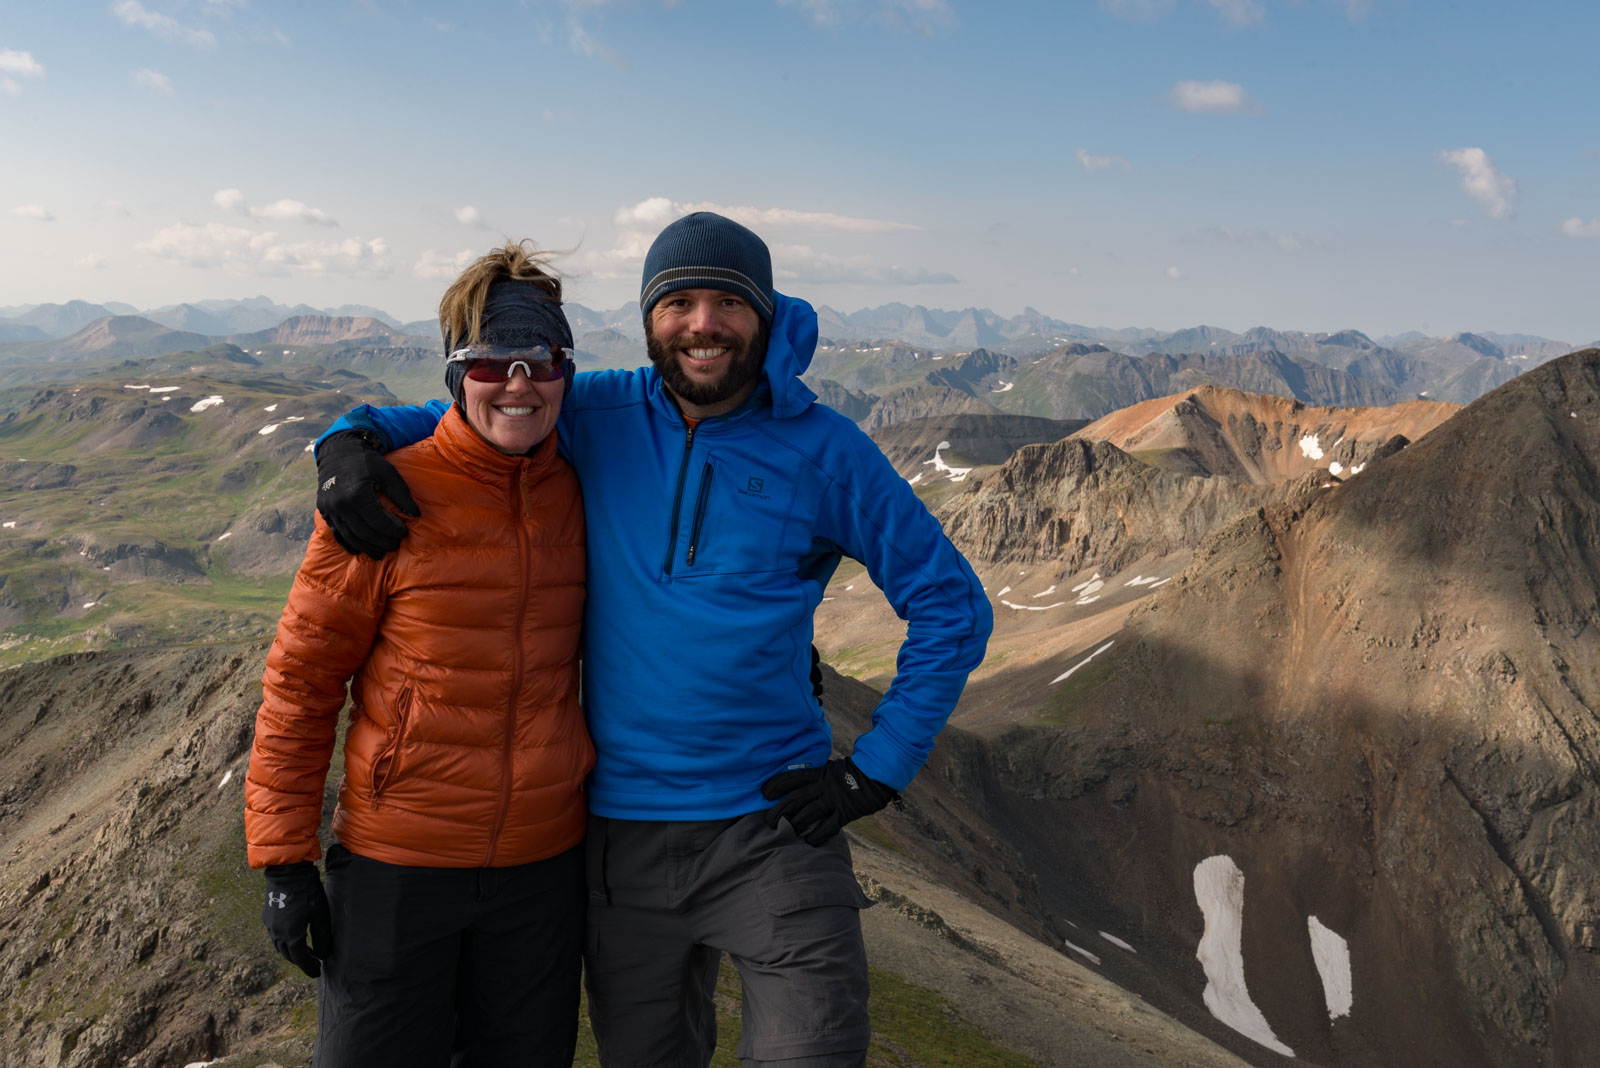
I was so focused on the Elk Mountain 14ers to my west, including the Maroon Bells, Pyramid Peak, and Capitol Peak that I had forgotten about Castle Peak to my south. I caught it in the corner of my eye and my jaw dropped. Castle never looked so good in the early light. So much red!
Of course the Elk Mountain 14ers looked amazing as well.
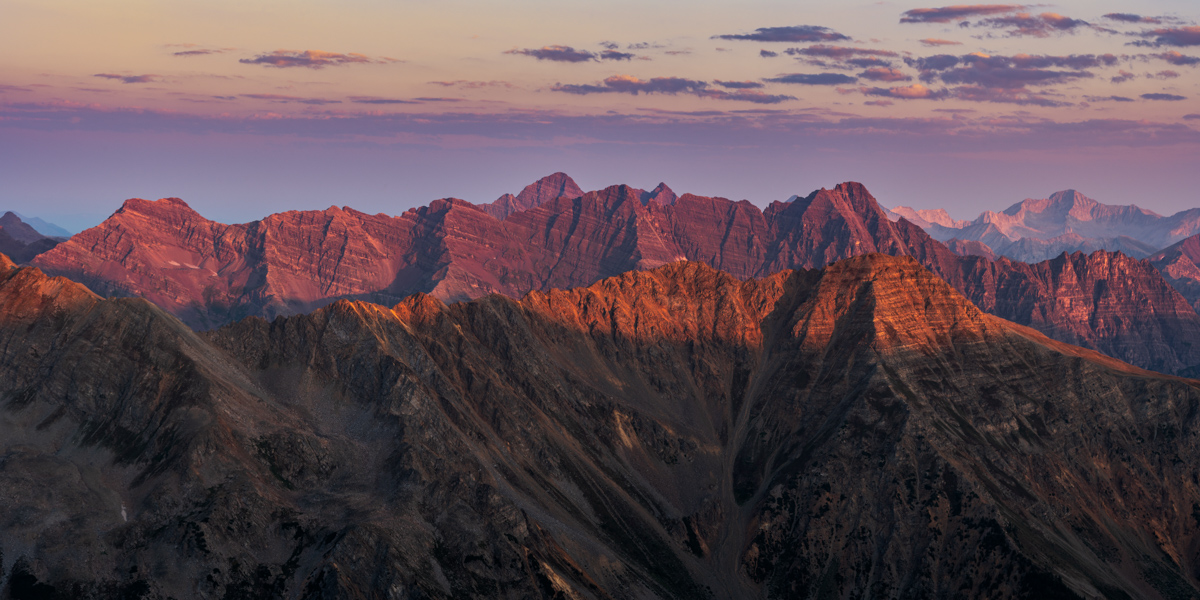
This telephoto rendition showcases all the great peaks, including, from left to right, Maroon Peak, Thunder Pyramid (my last Centennial), North Maroon Peak, Pyramid Peak, and Capitol Peak.
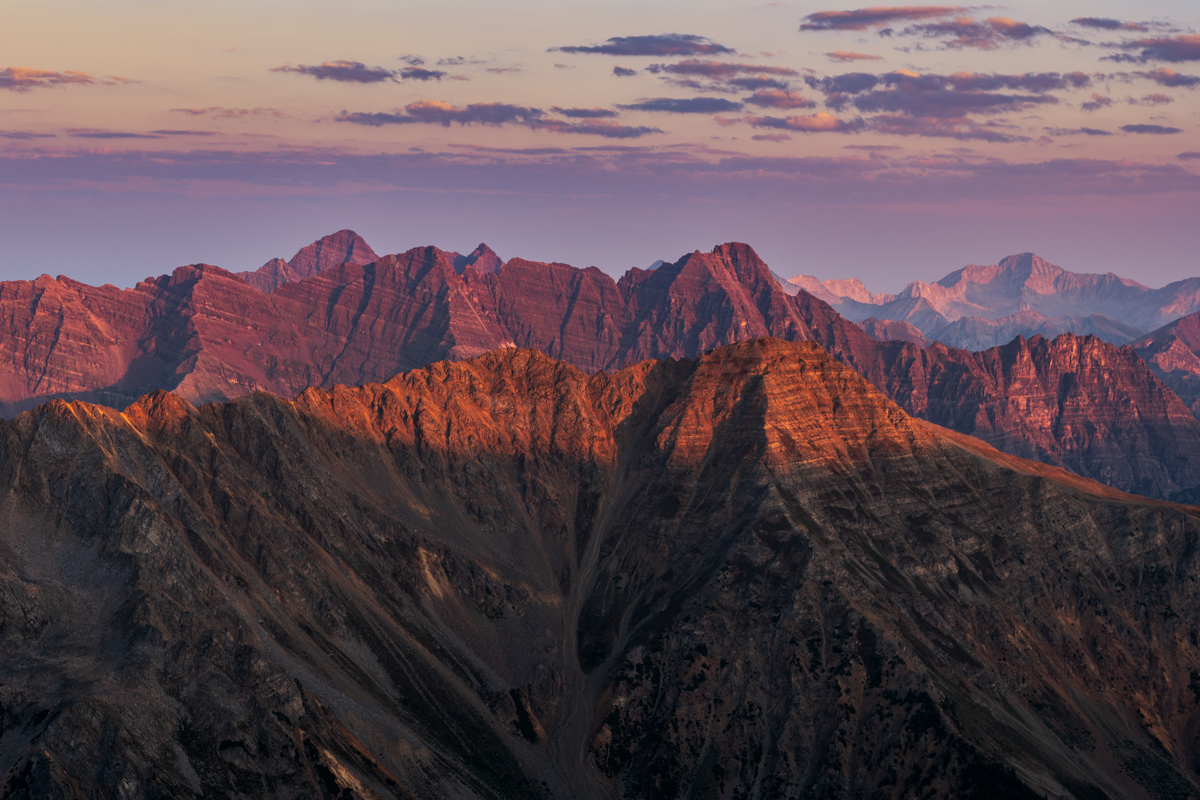
It was a magical display of light and might.
It was maybe not the most incredible display of color that I remember, but it was a damn good sunrise, and I was proud to have photographed another sunrise from the top of a Centennial.
The clouds and haze from the California wildfires added some interesting dynamics as well.

#99 was in the bag! Next up - Thunder Pyramid!
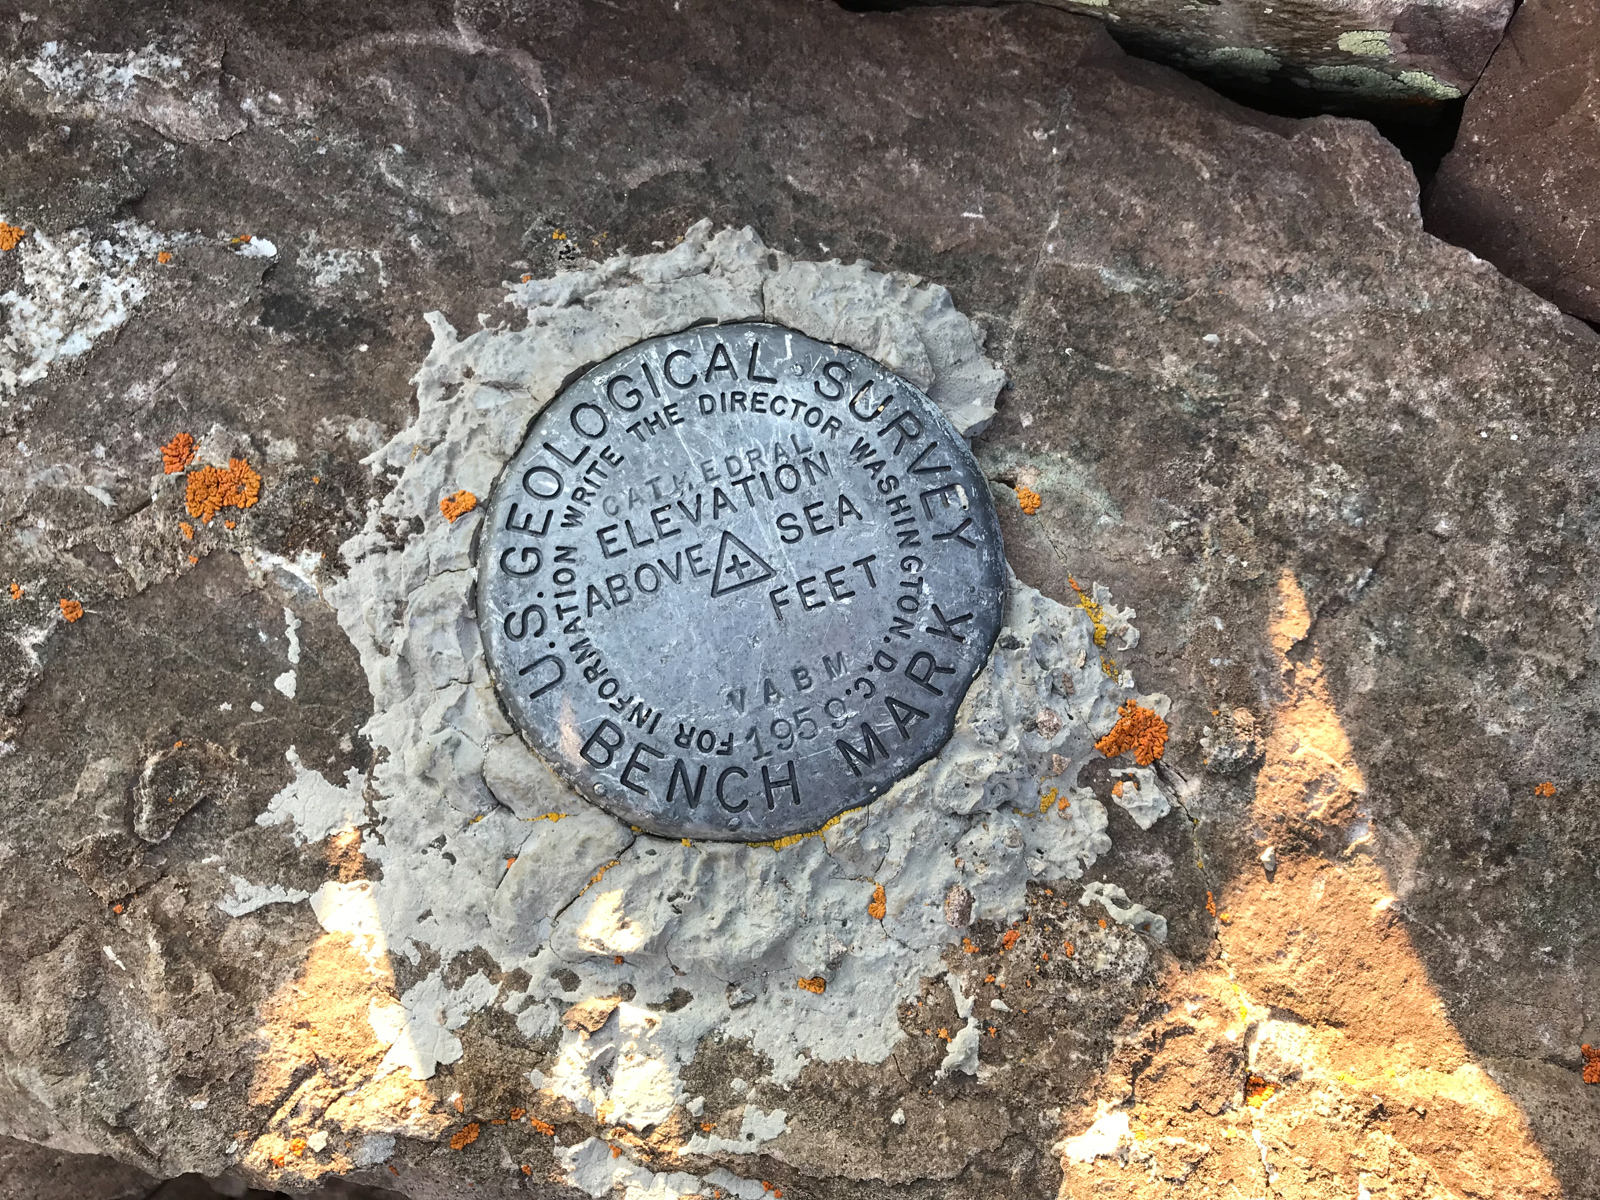
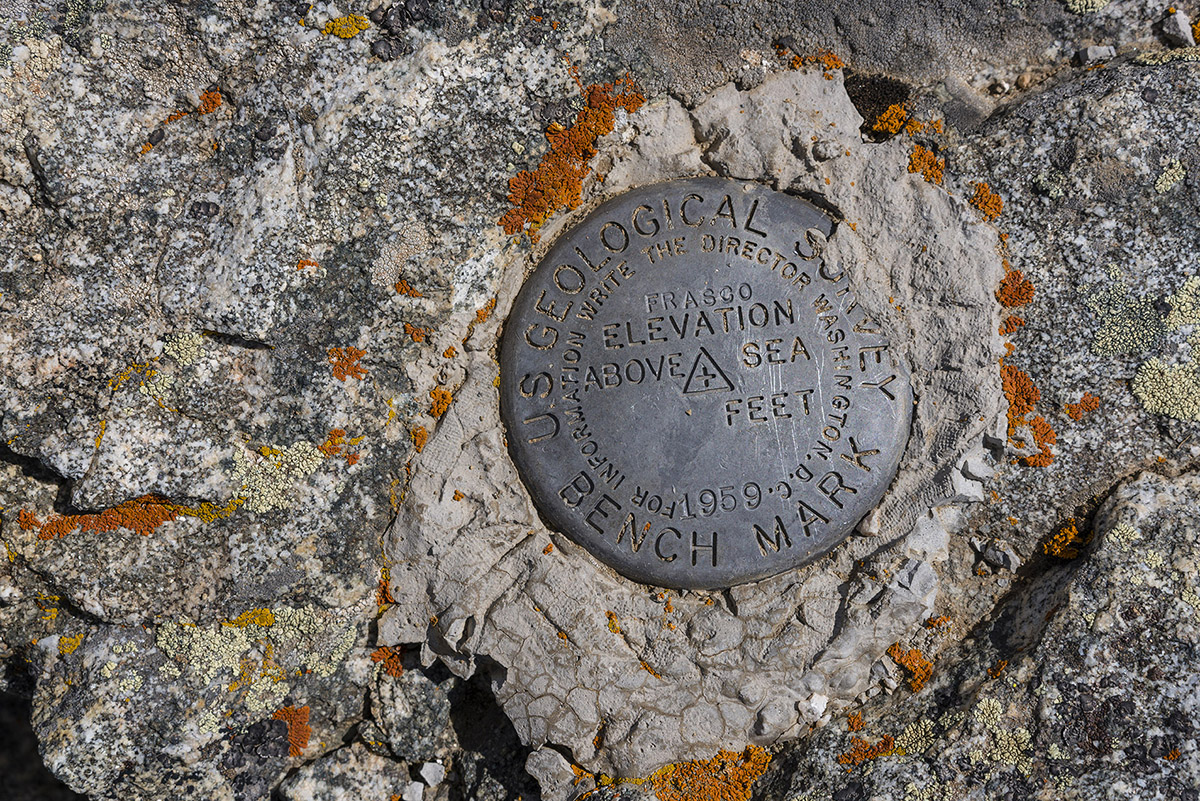
The Cathedral summit marker, looking great after 59 years.
I did not spend a ton of time on the top. I let my friends and family know I had made it to the top and then I made my way down. I reached the gully again in no time and prepared myself for hell.
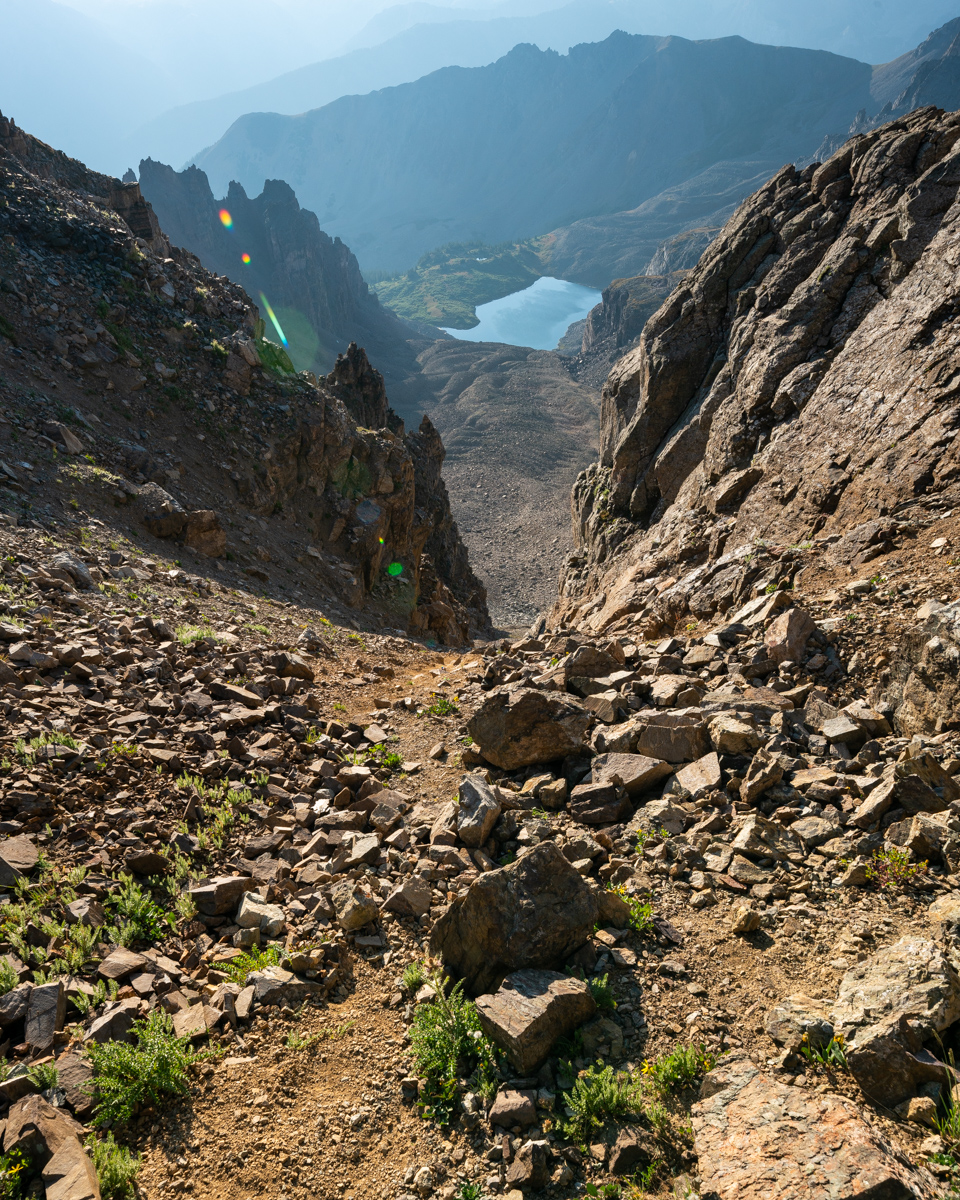
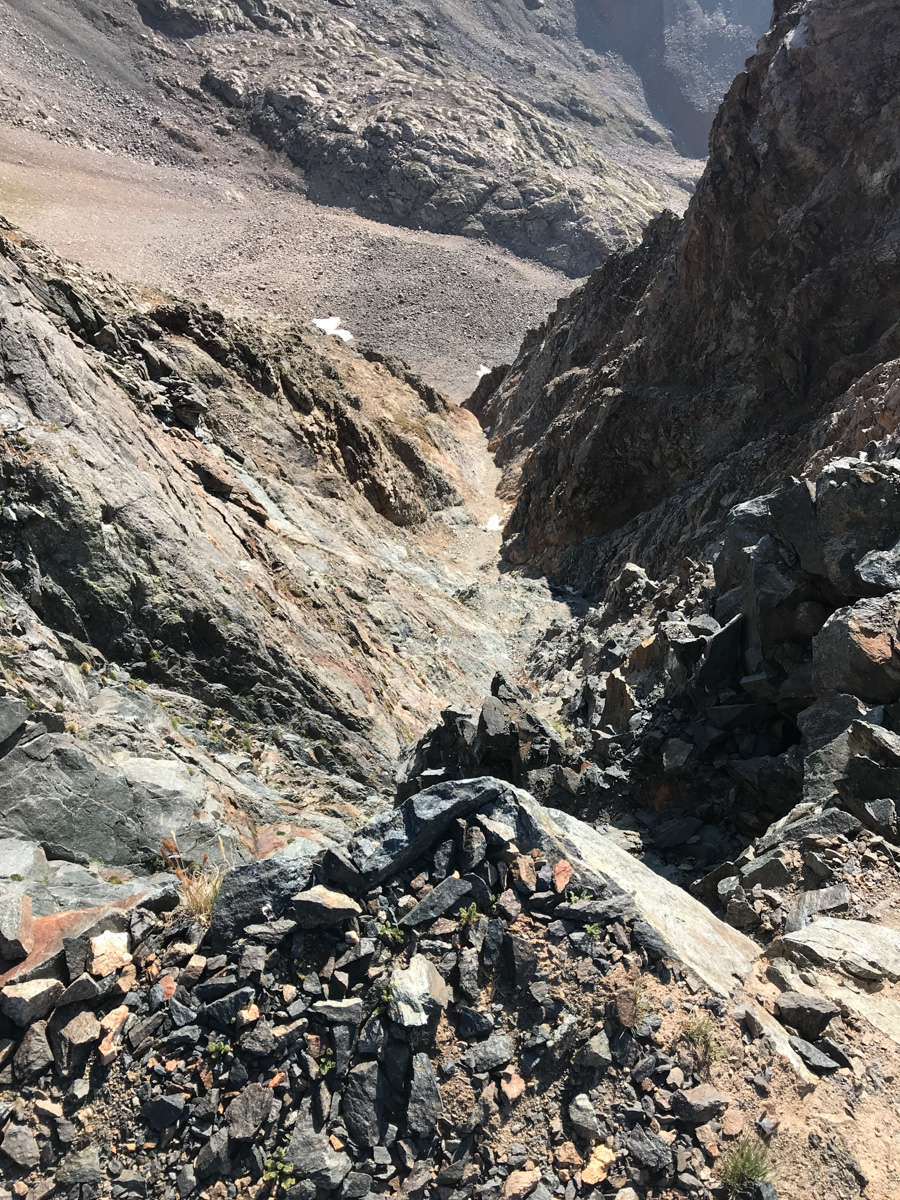
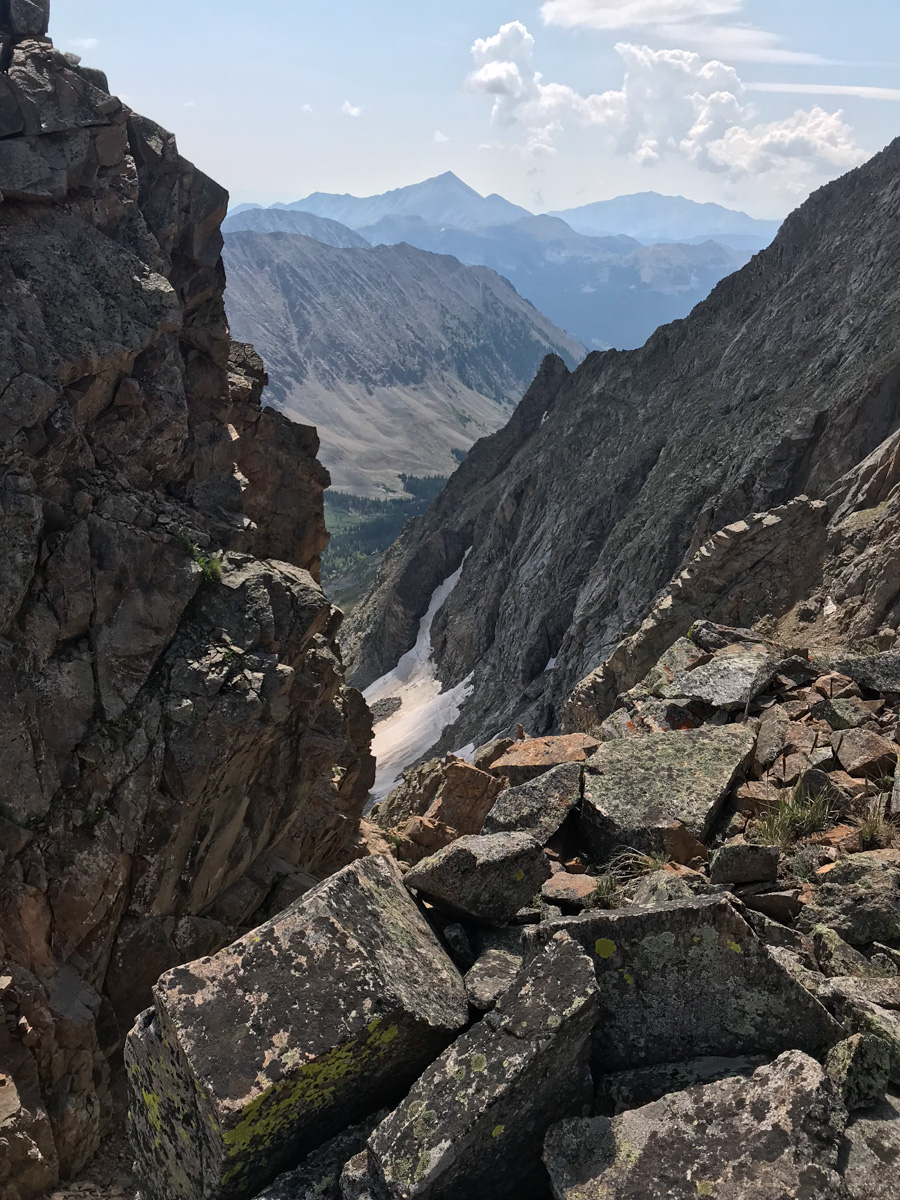
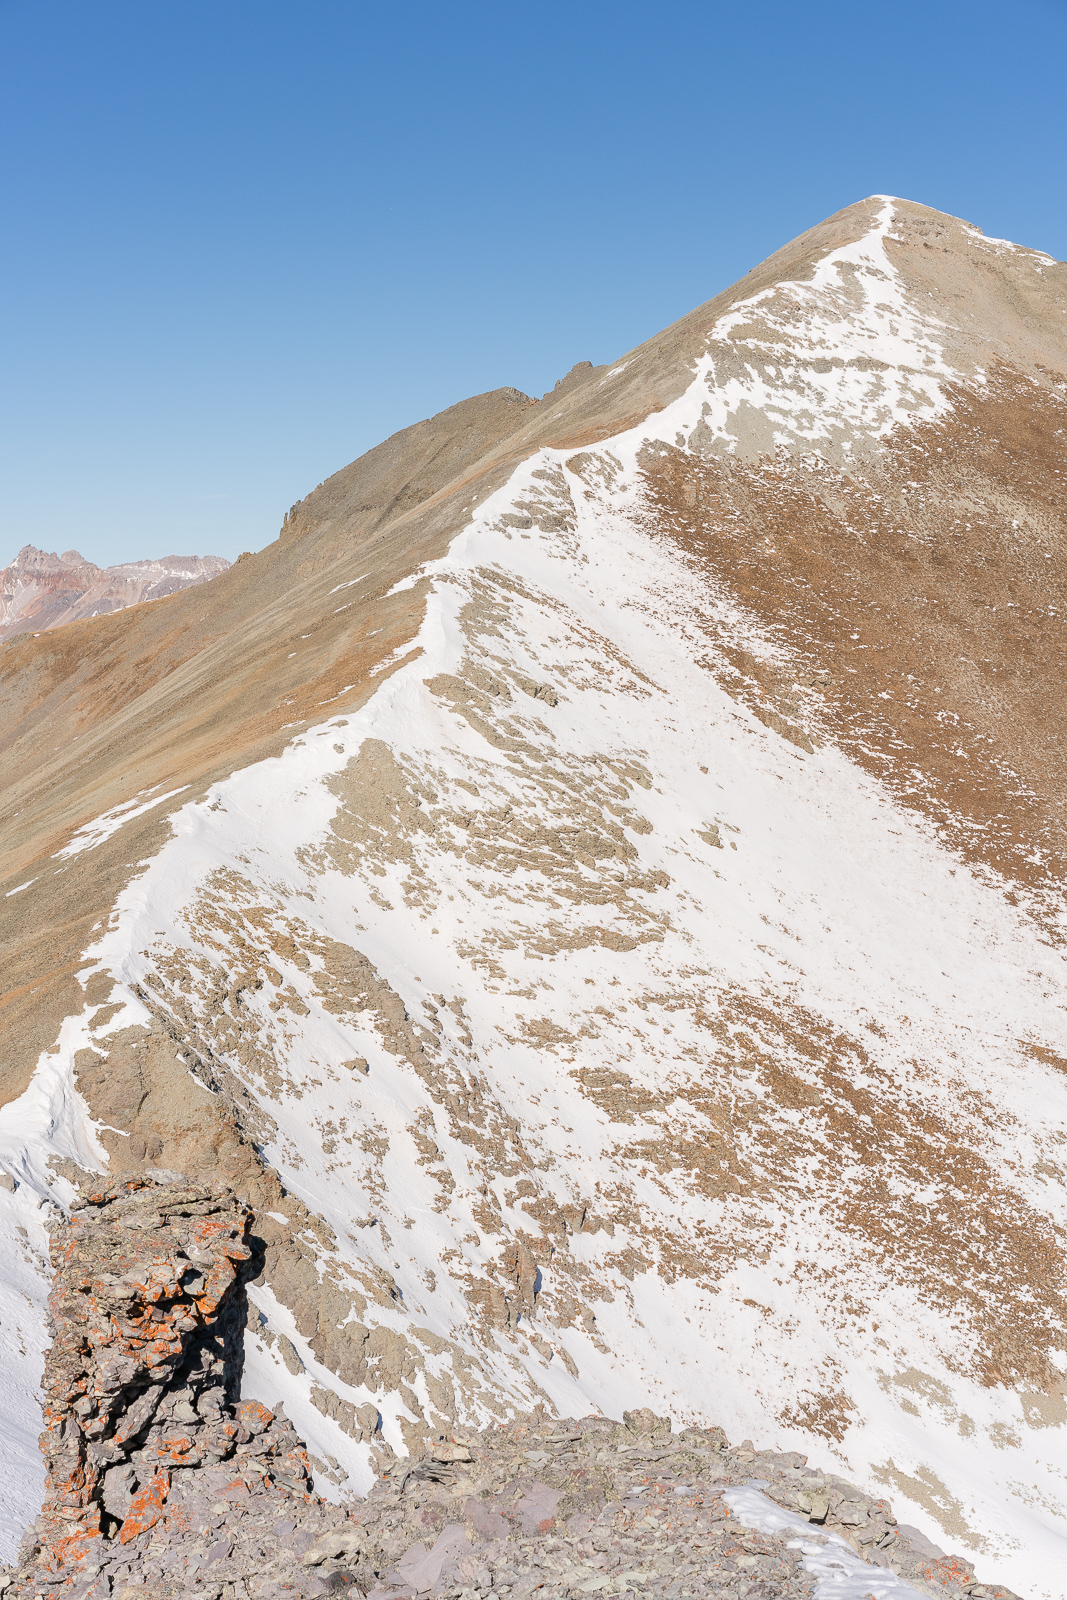
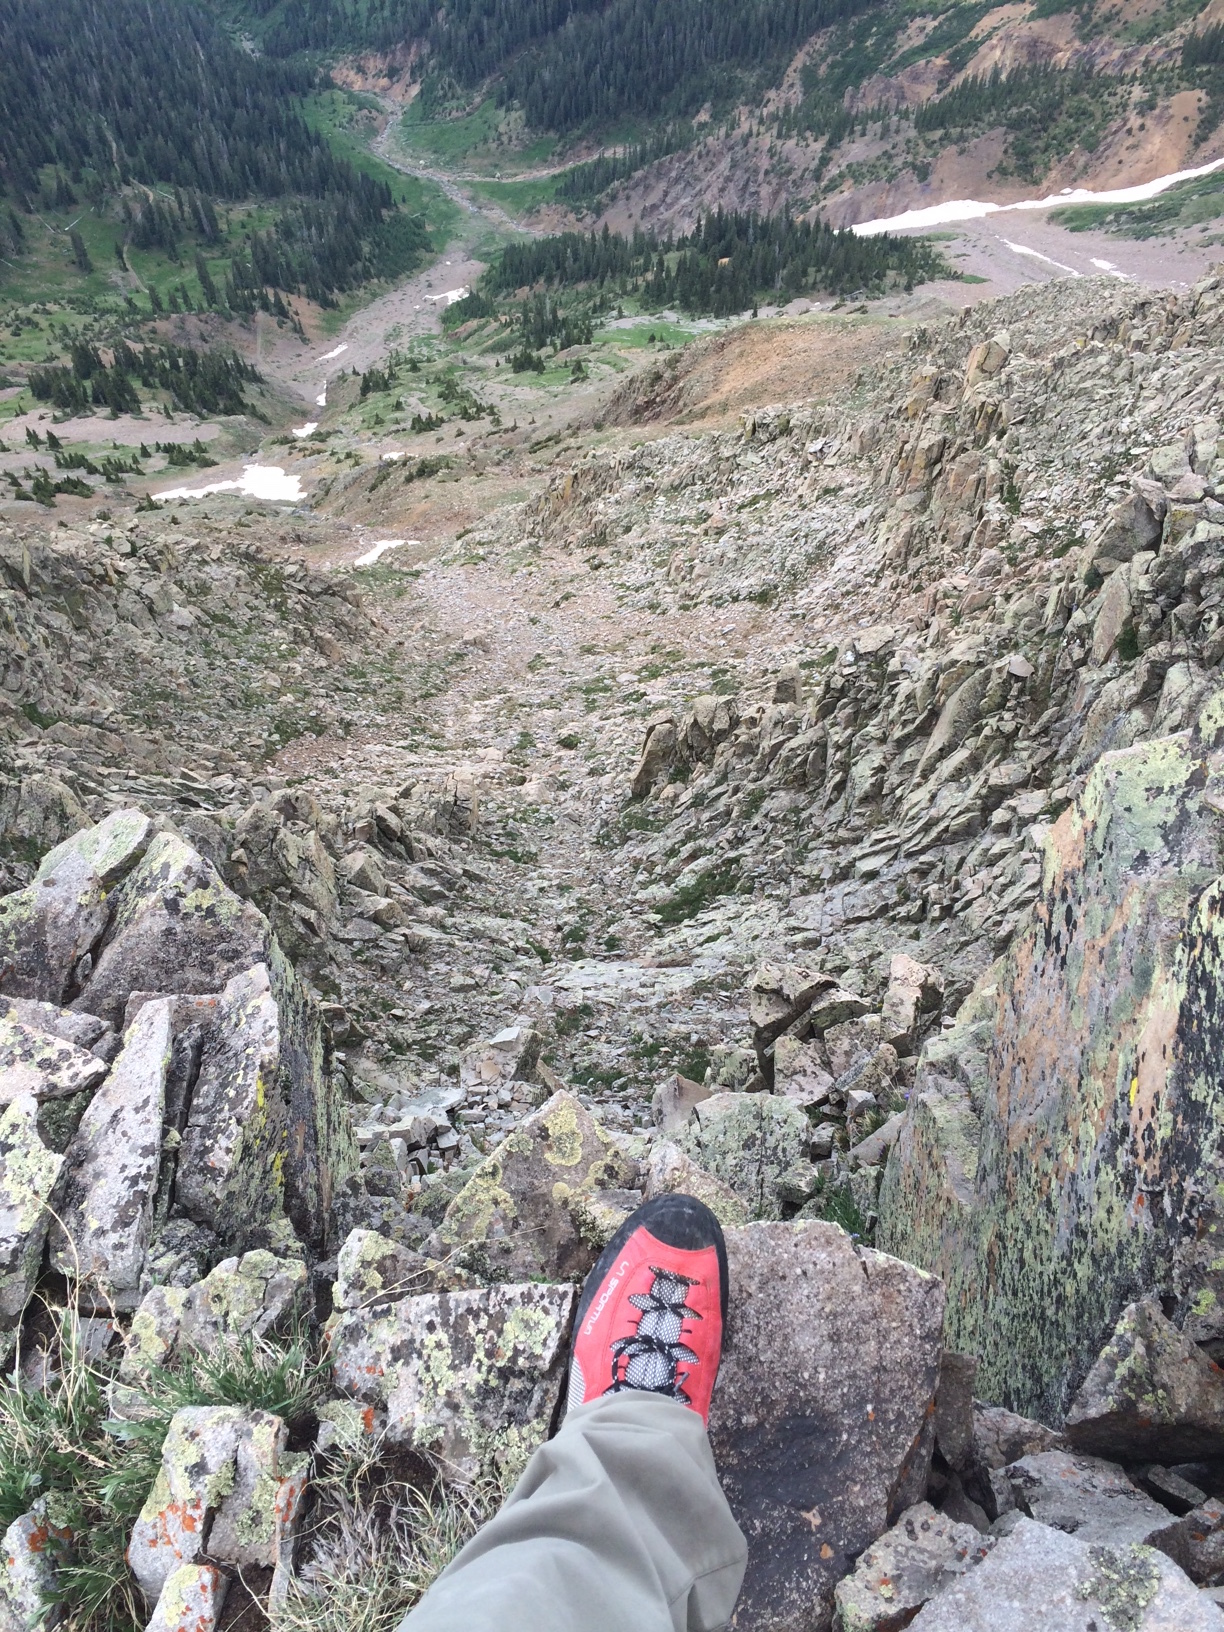
This next photo is looking back up the gully from just a little ways down. It was so steep, loose, and nasty.

More from the nasty gully, to give you a good sense of what it is like when dry.
I finally reached the bottom of the gully and my feet were sore. What a nasty spot. I don't recommend it.

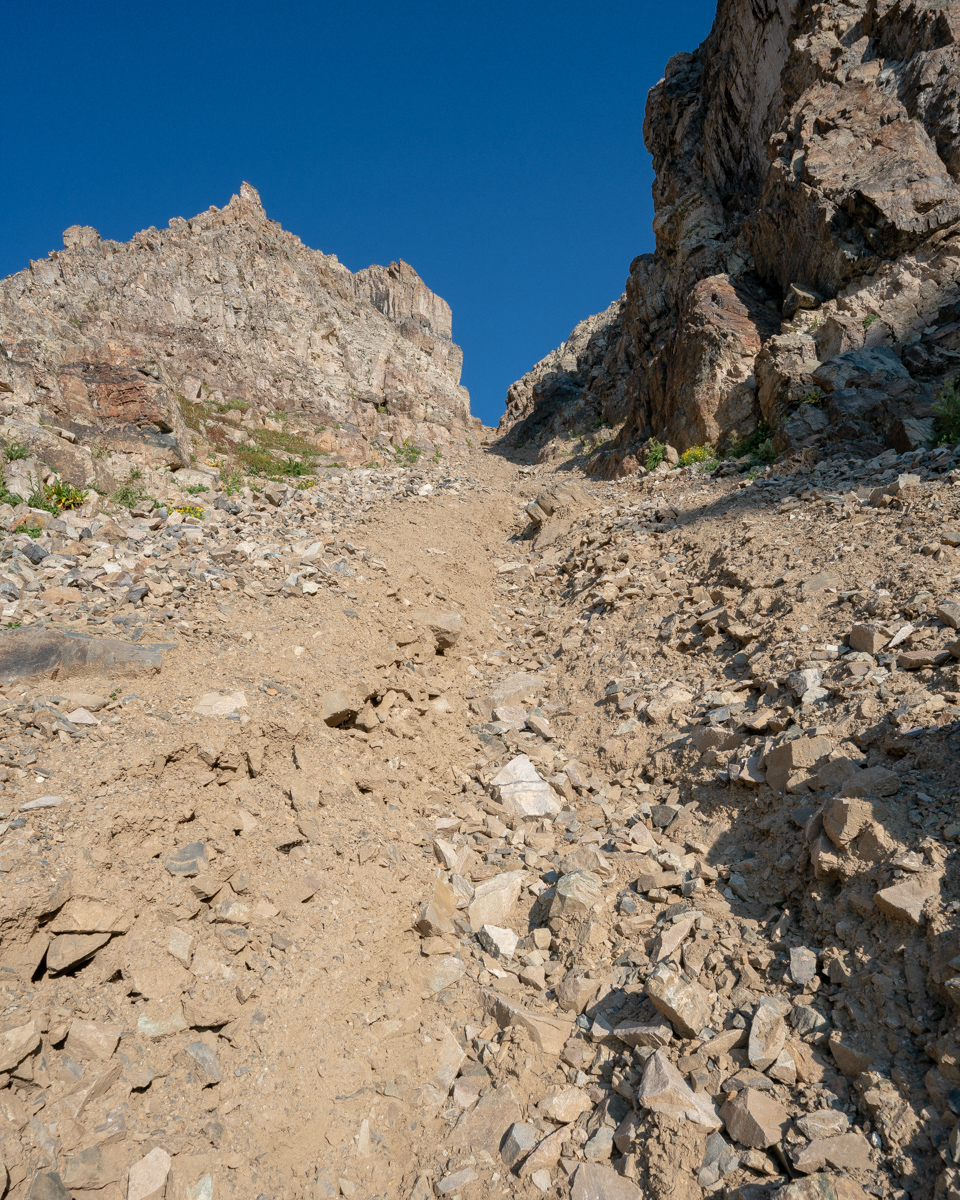
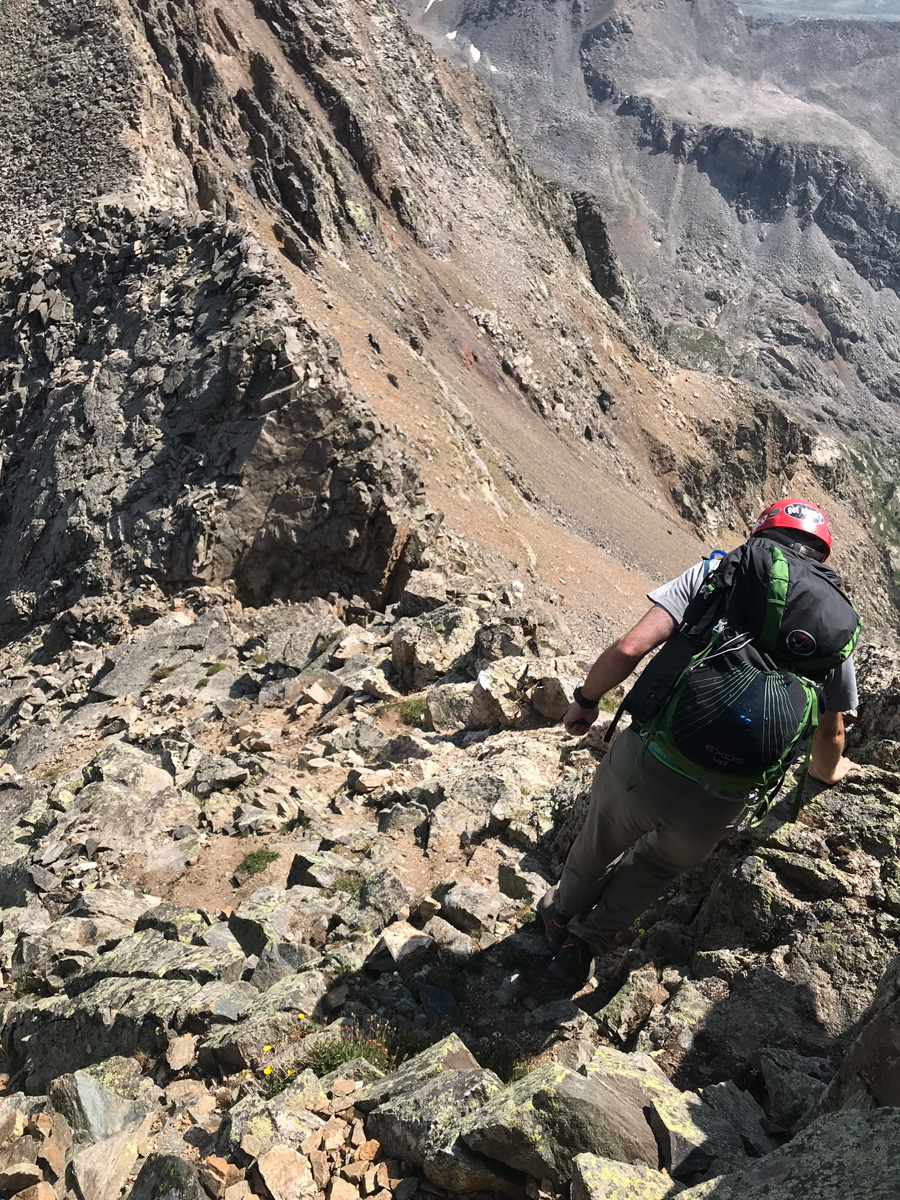
The next photo shows the highest cairn I was able to locate before the gully, in case anyone needs a good marker for their climb. Going down from here was pretty easy on a well-marked trail on precarious but mostly solid rock and boulder.
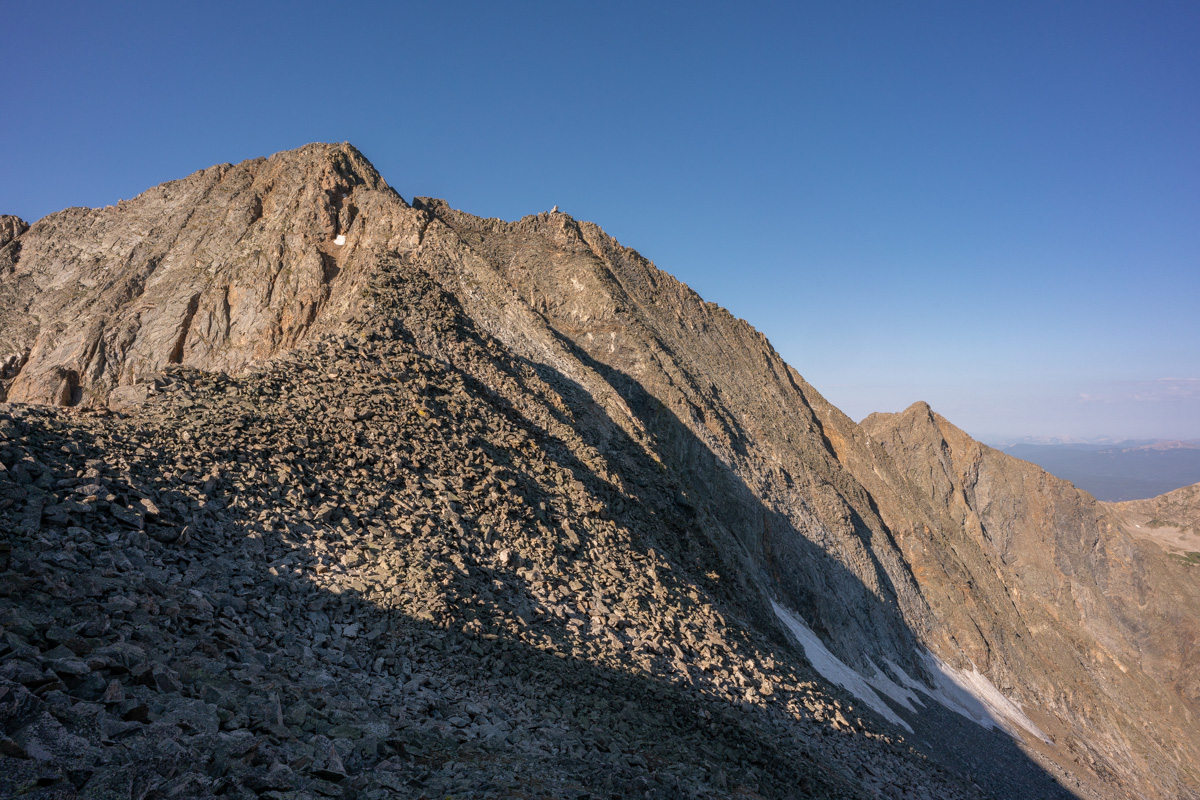
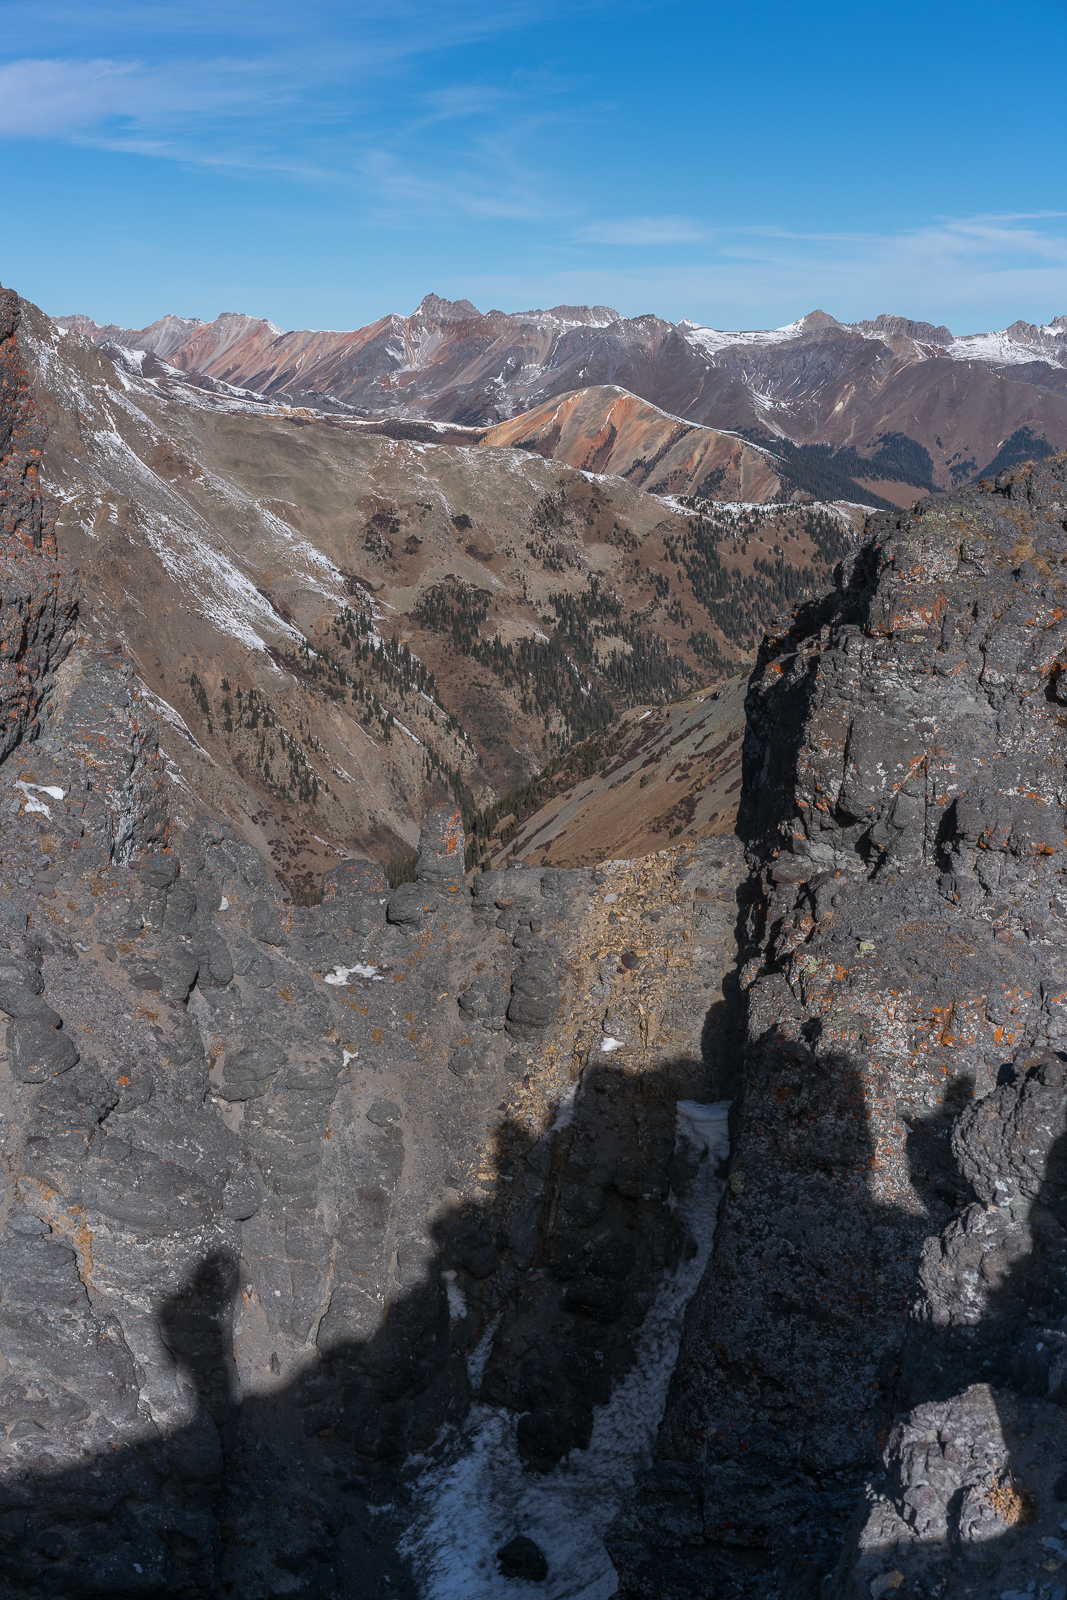
Here is a look back towards the start of the gully.
And another view of the gully from a little lower.
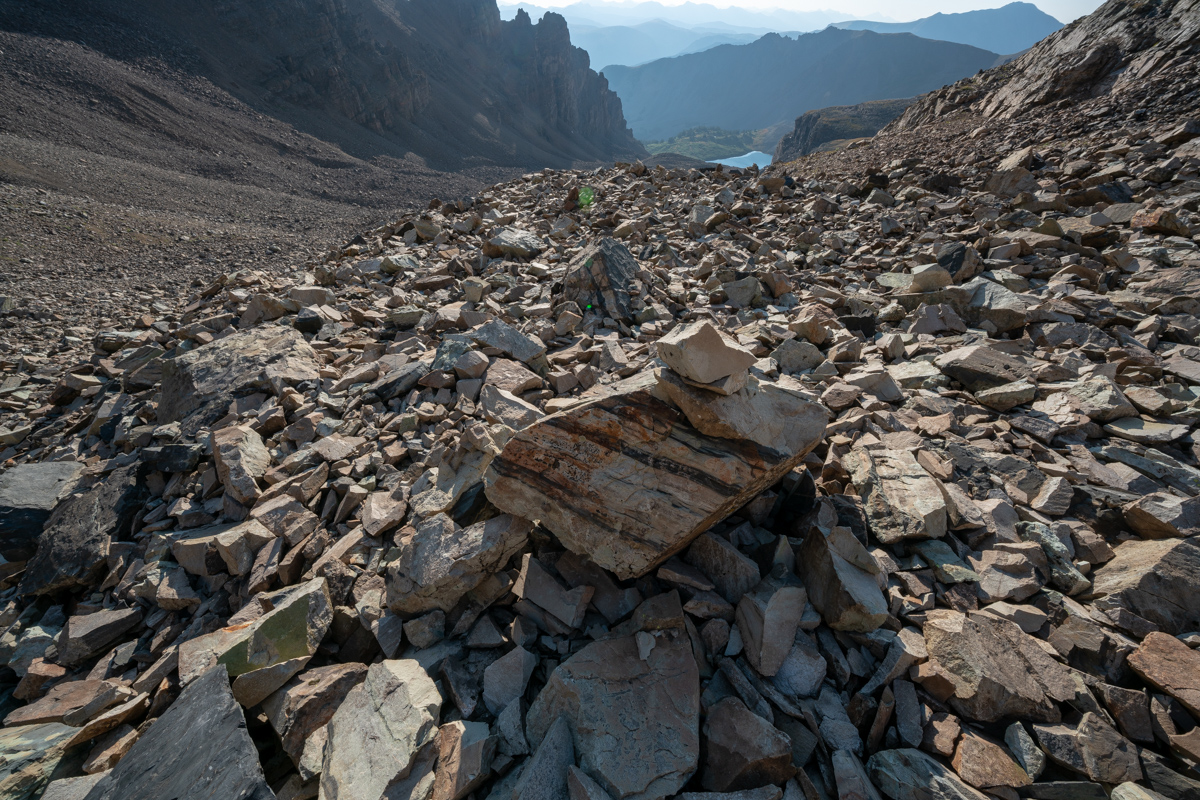
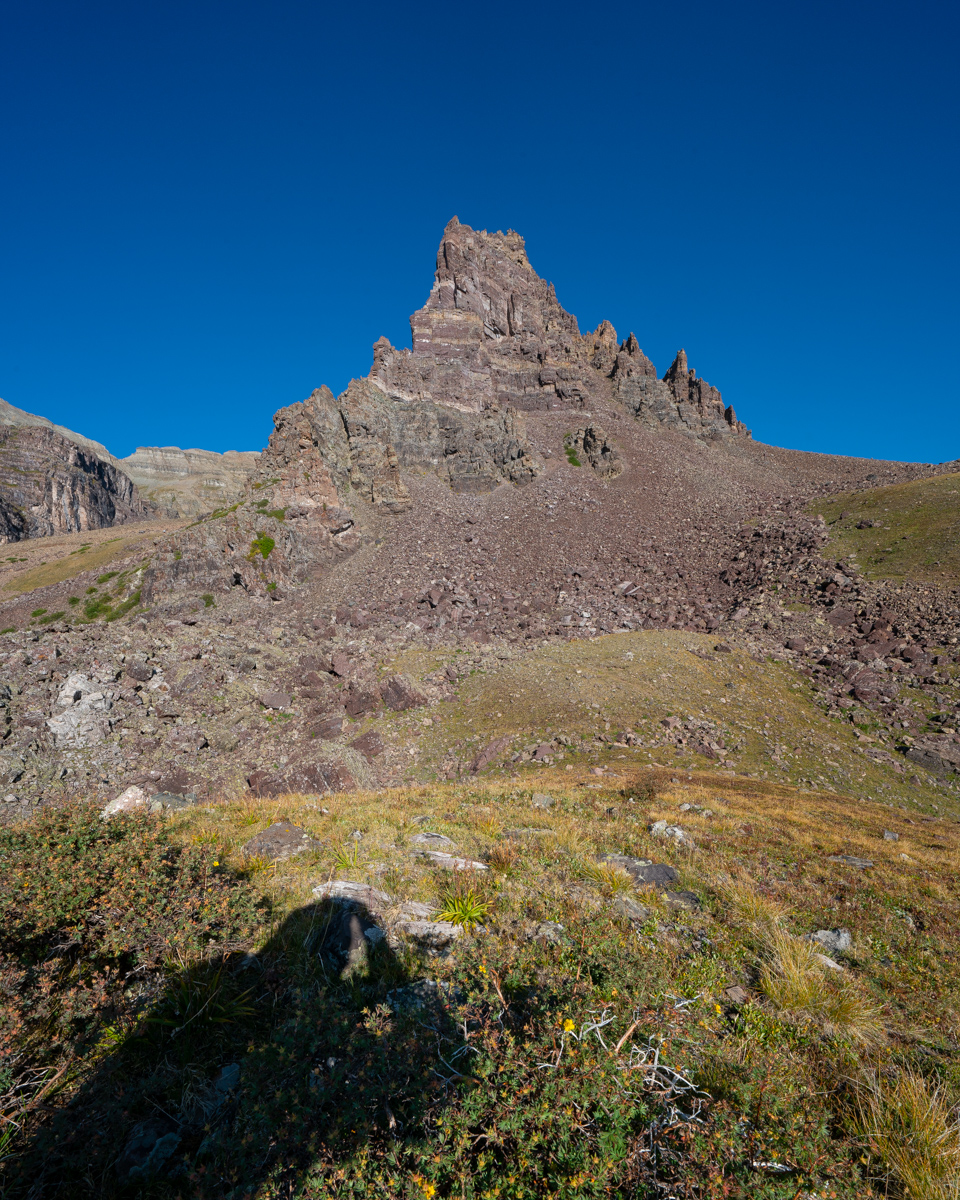
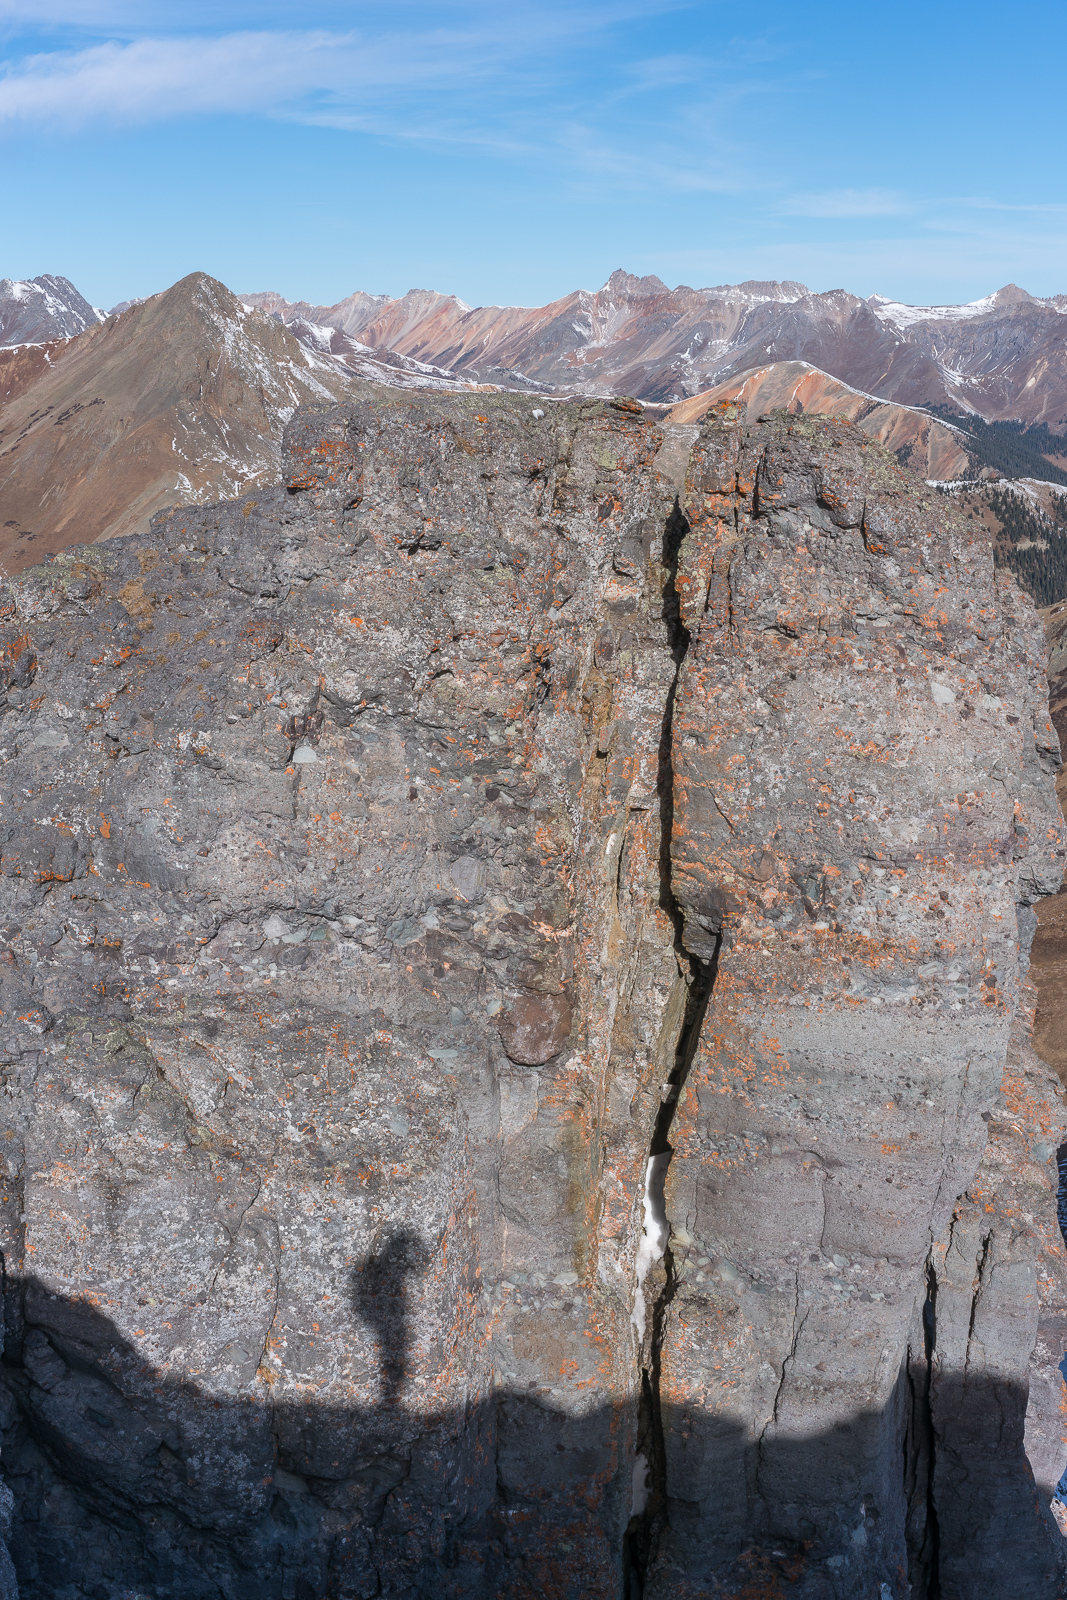
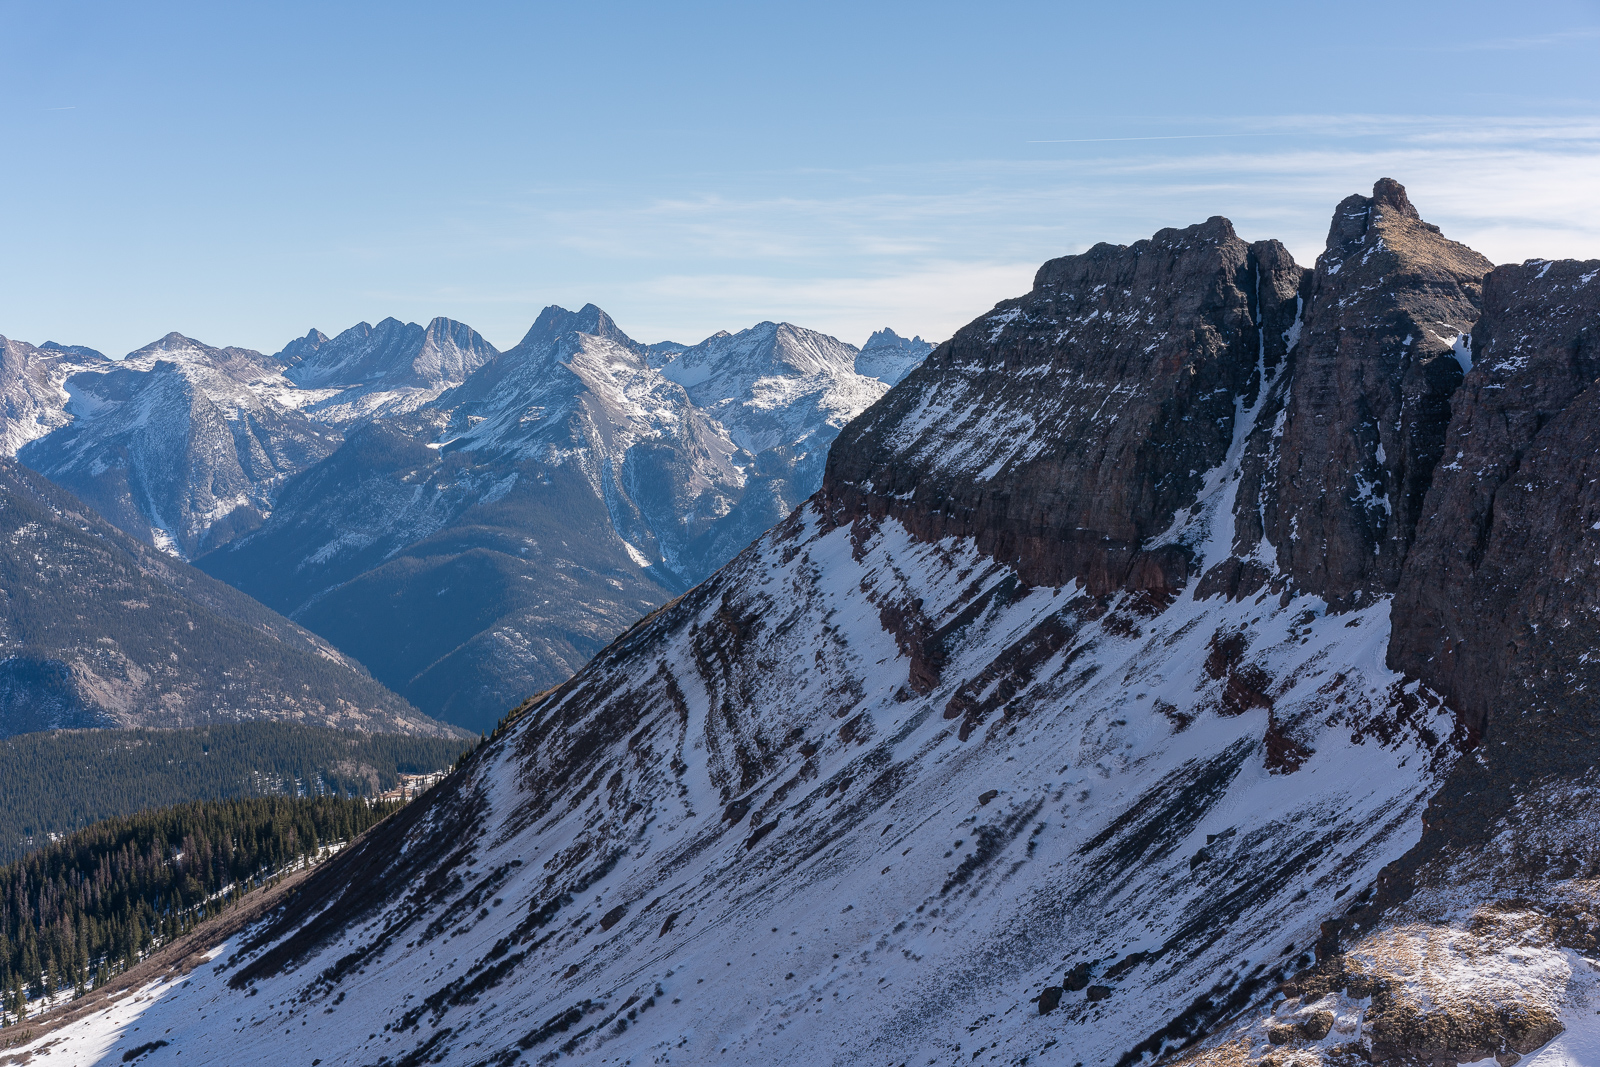
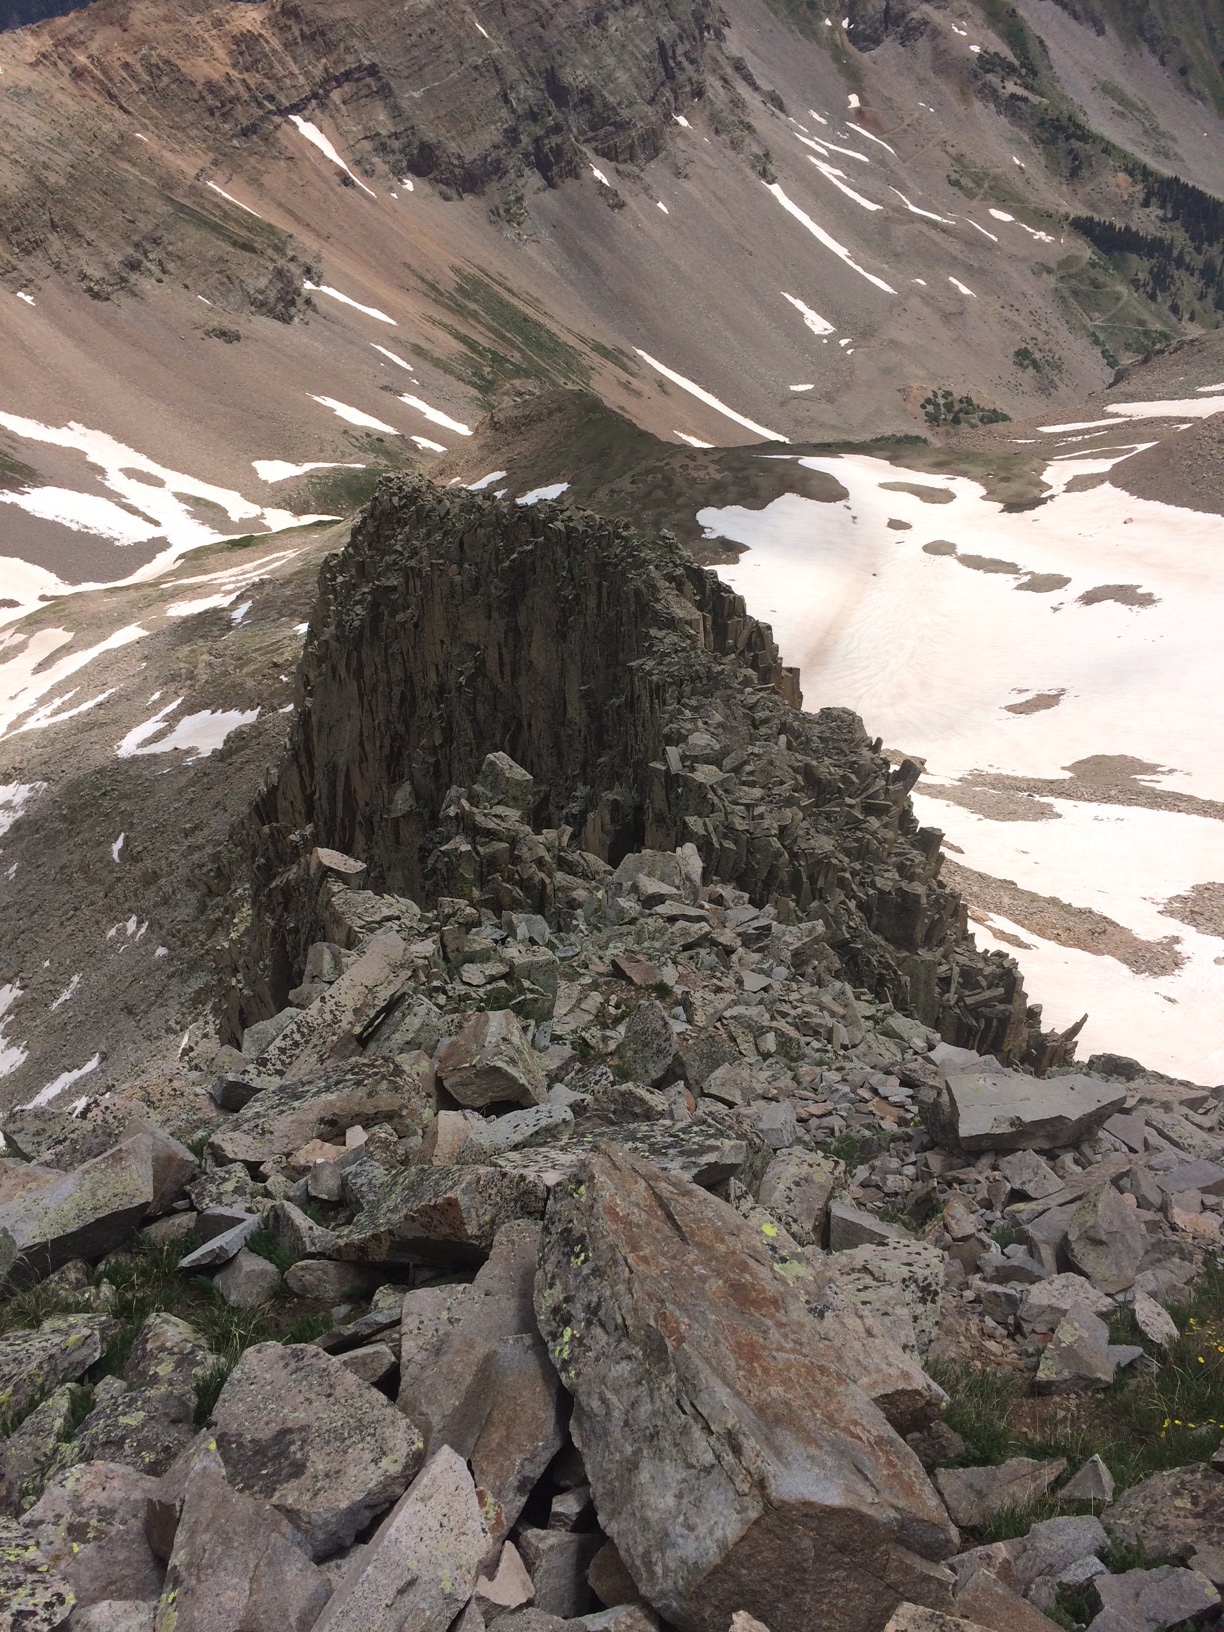
I loved the castle-like rock formations here, they were really cool to look at.
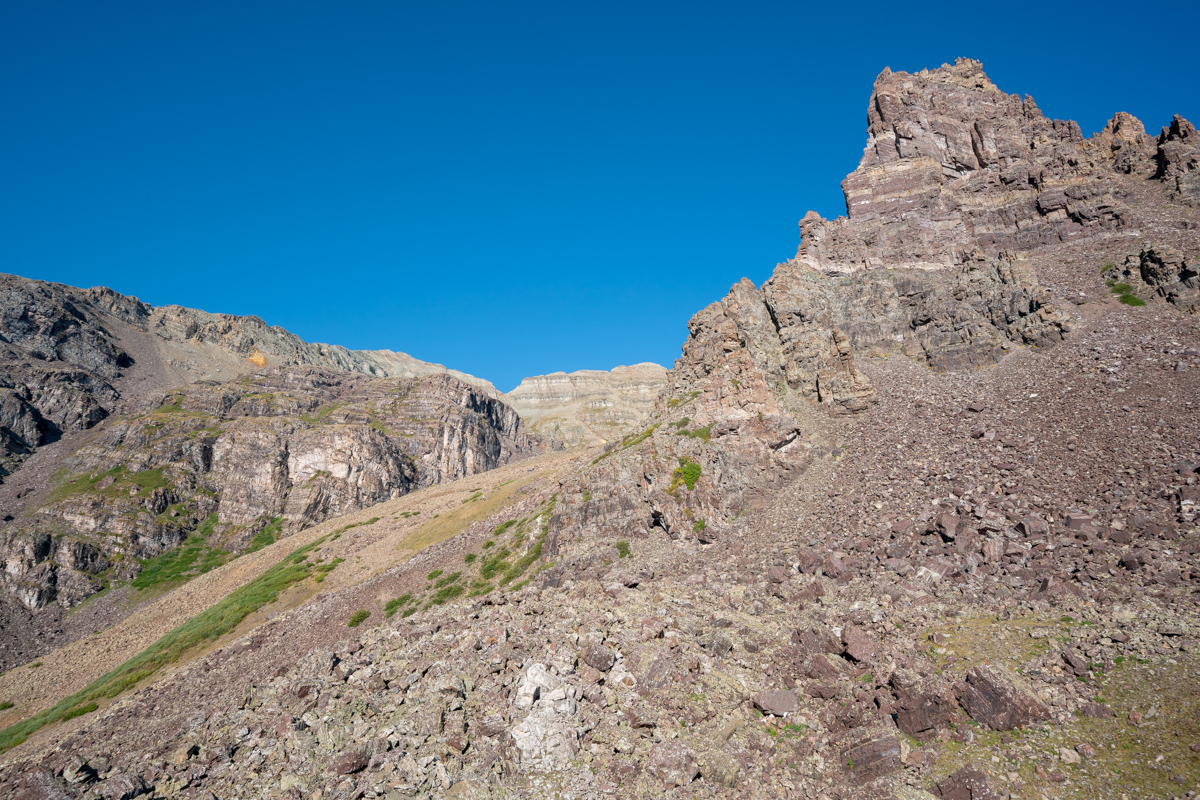
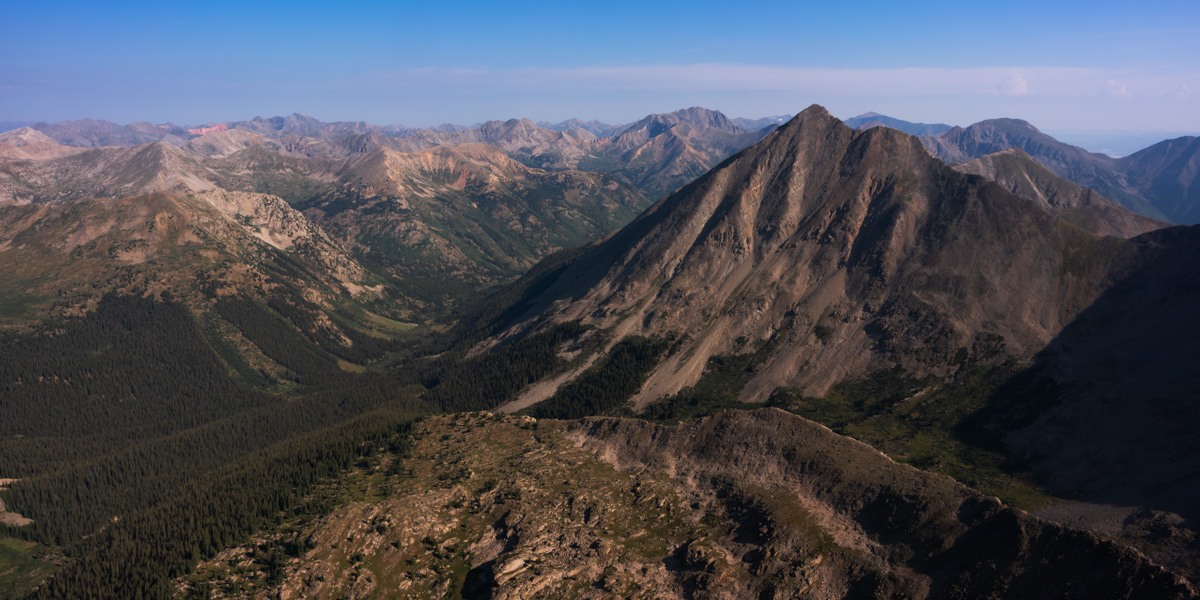
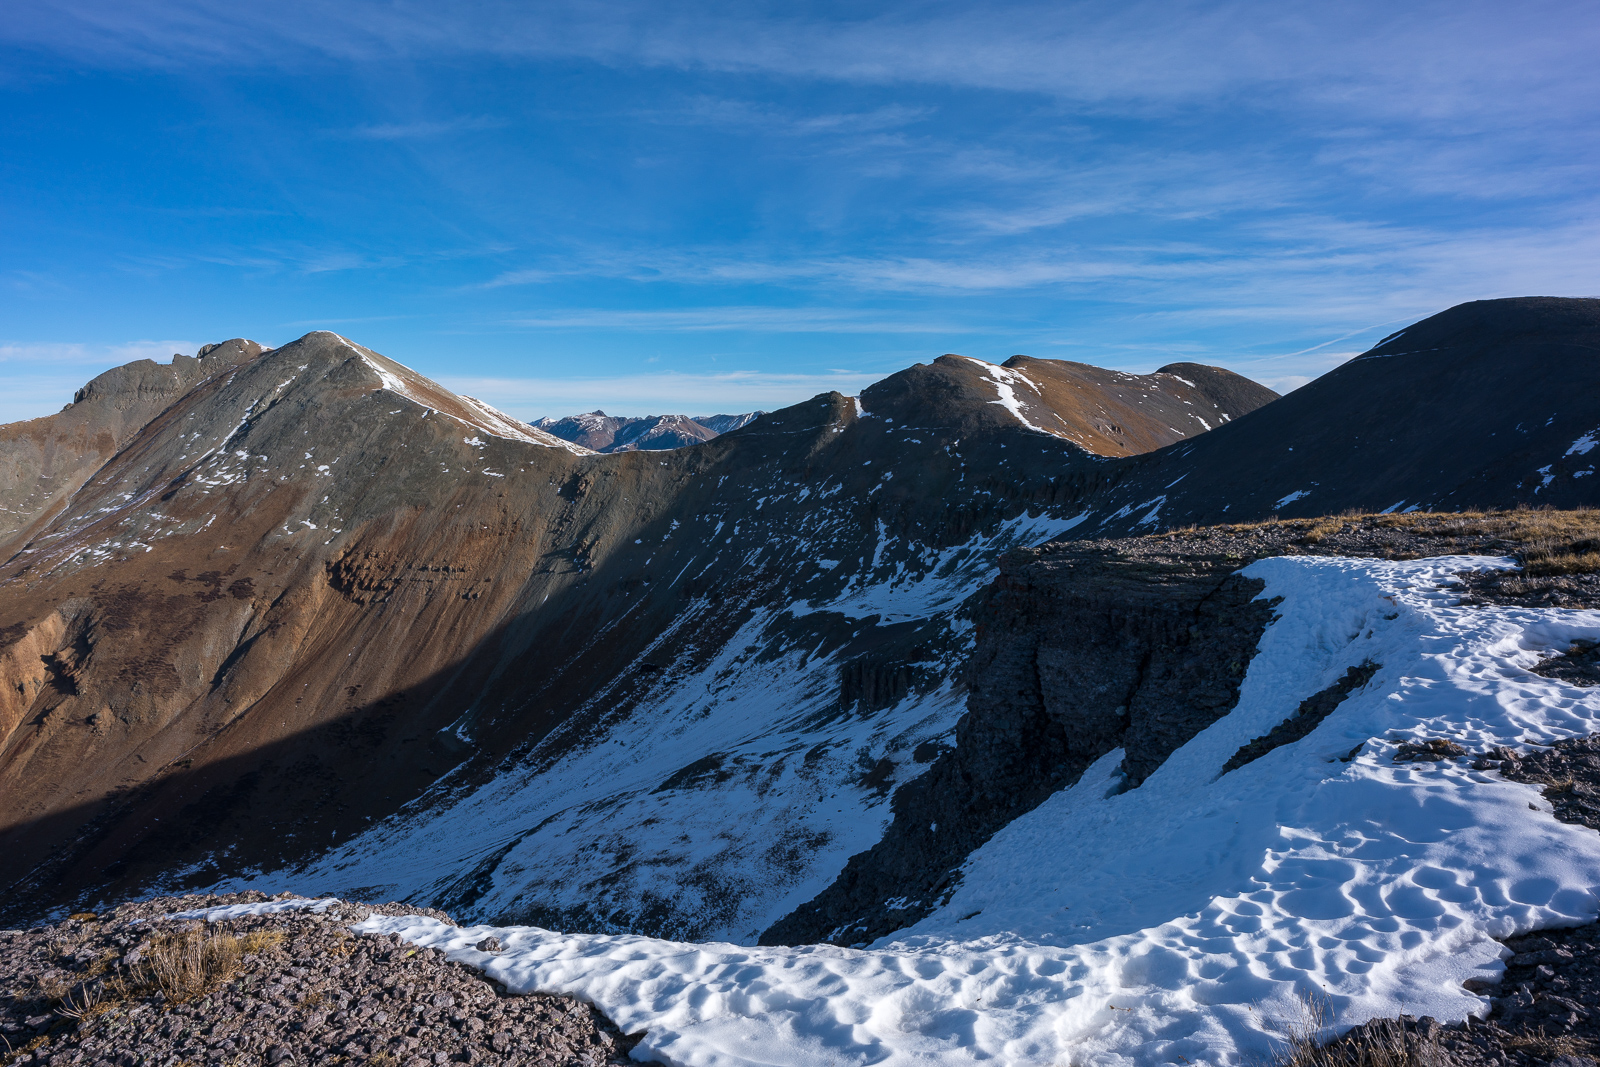
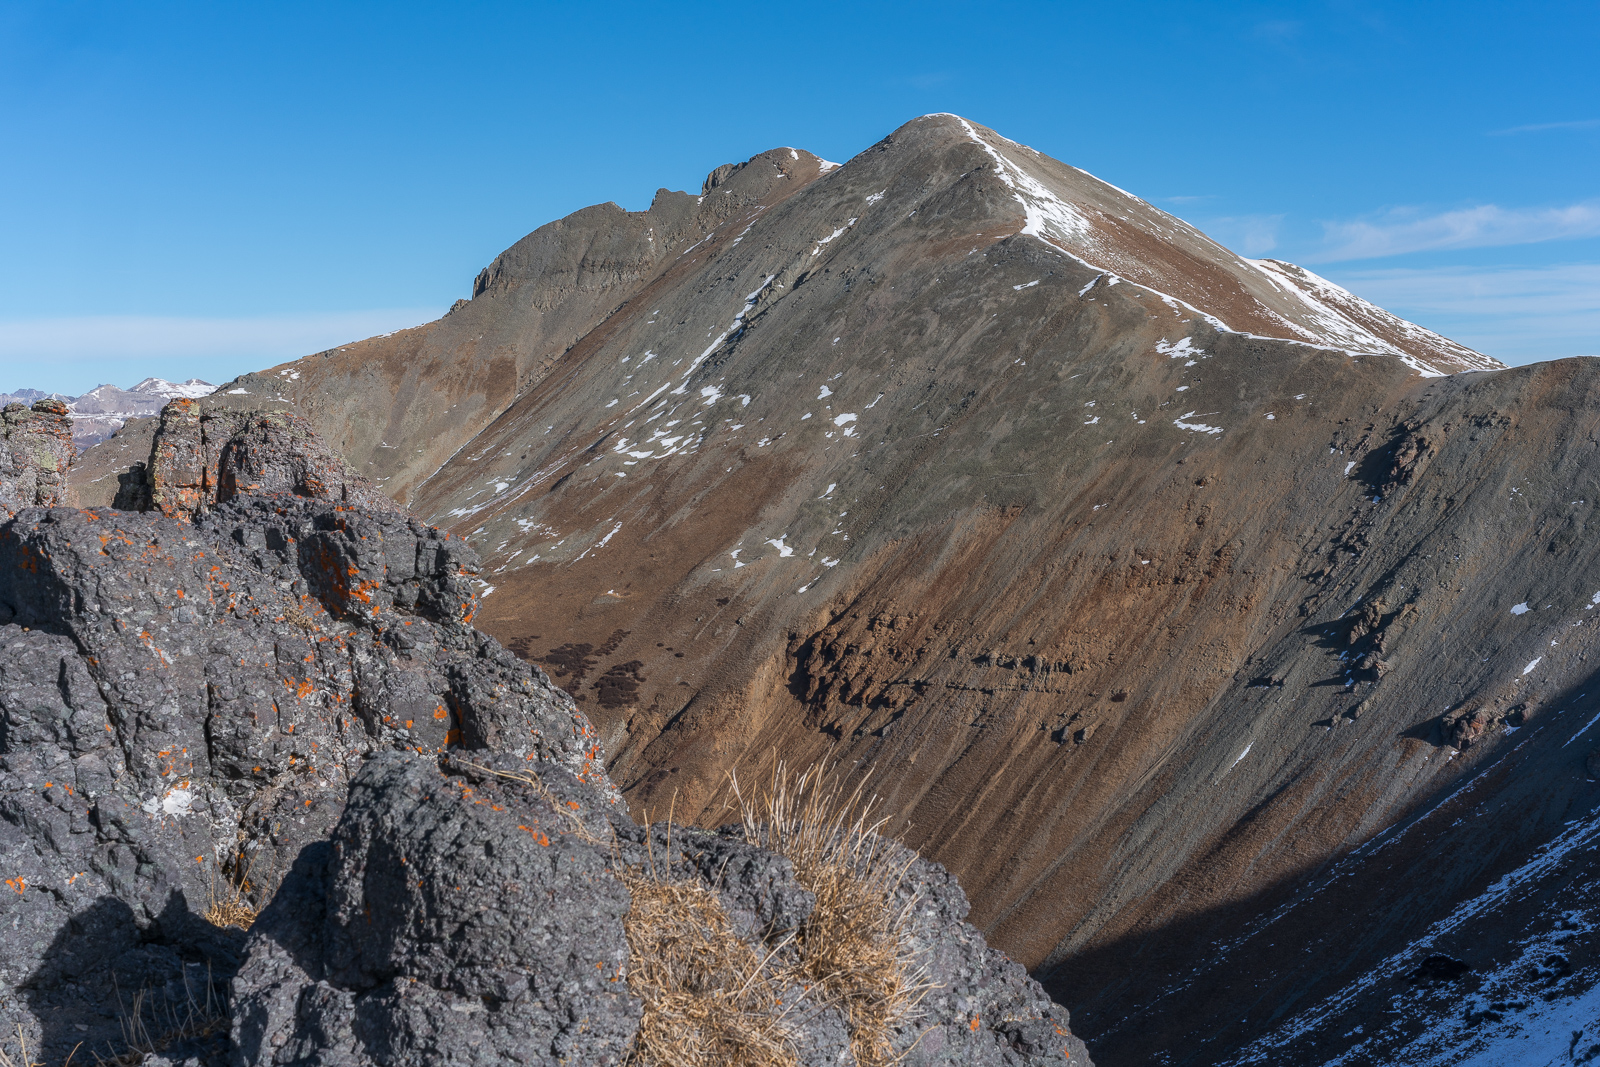
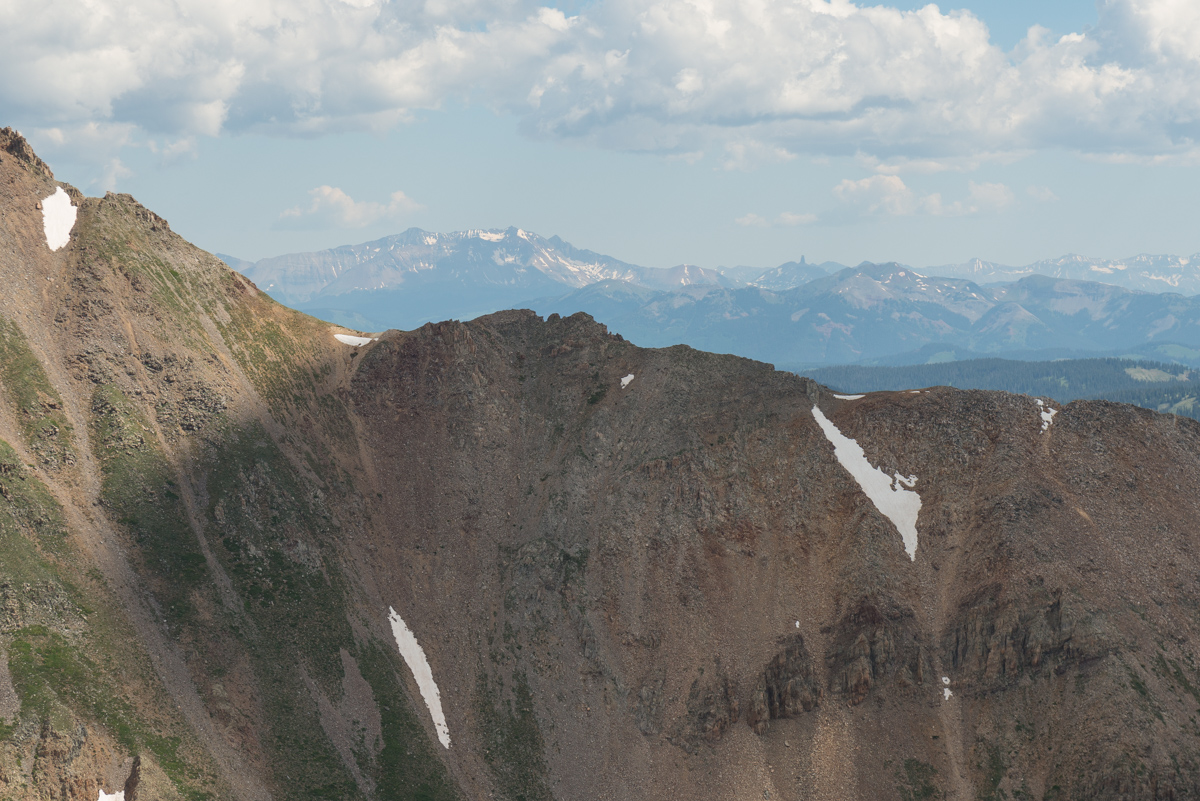
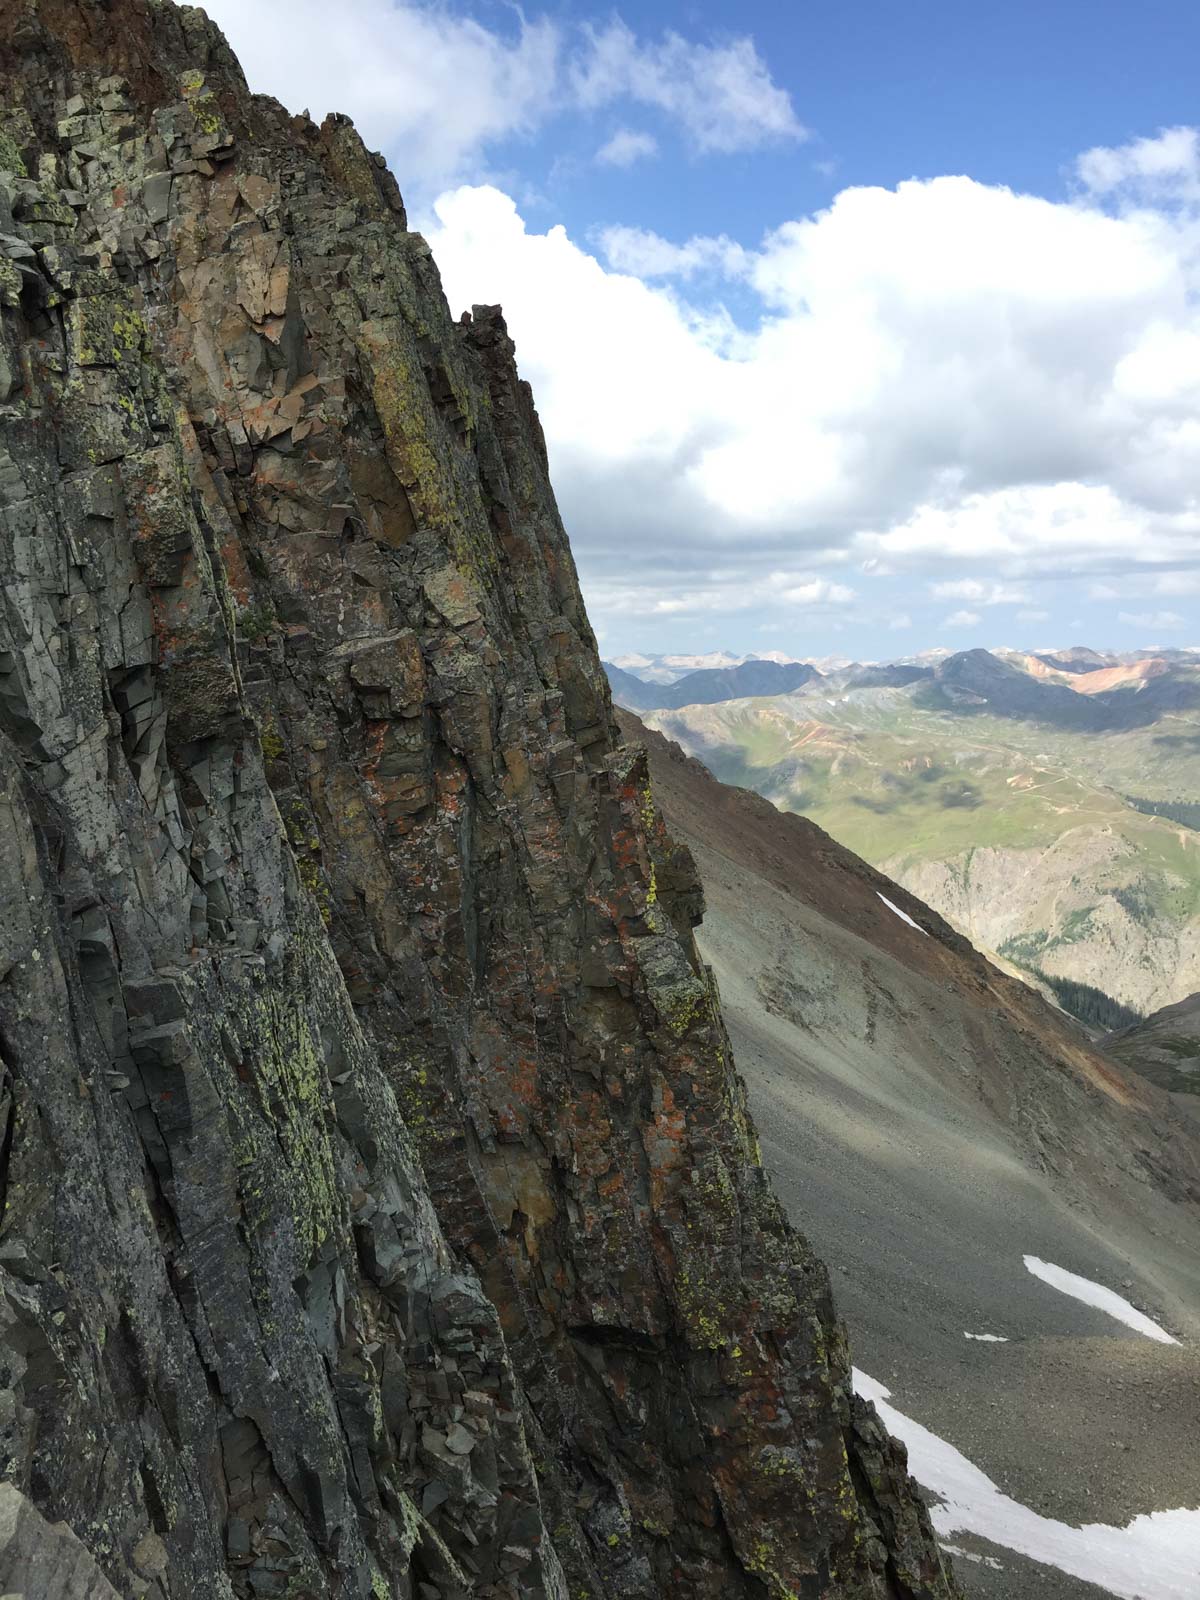
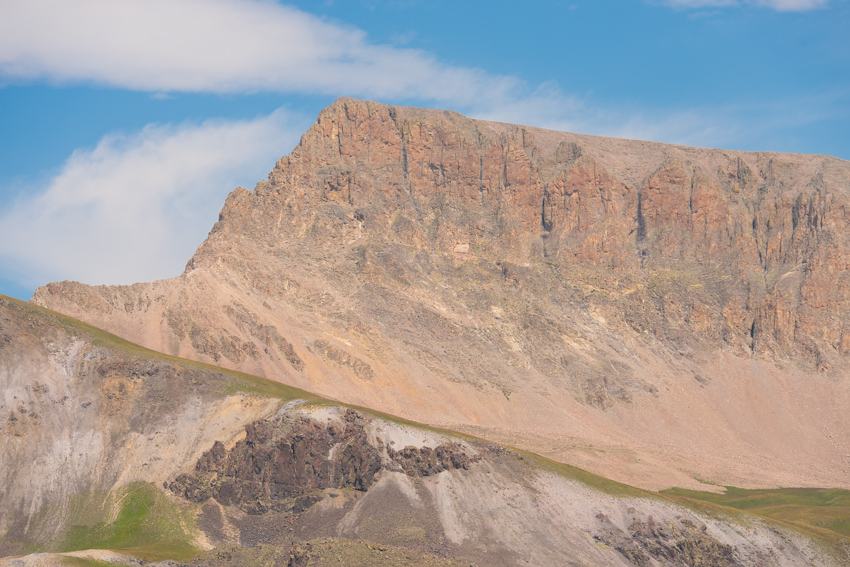
The eastern wing of Cathedral was especially impressive, towering over the whole area like some sort of watchman.
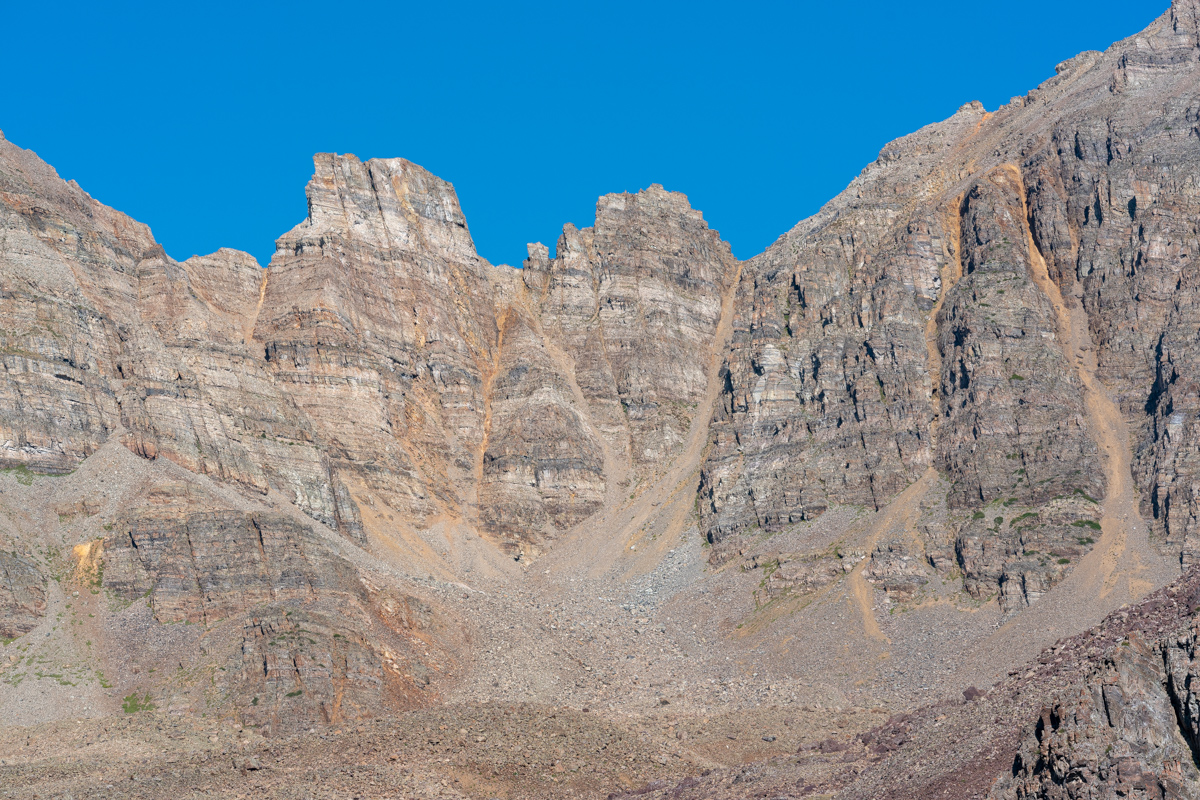
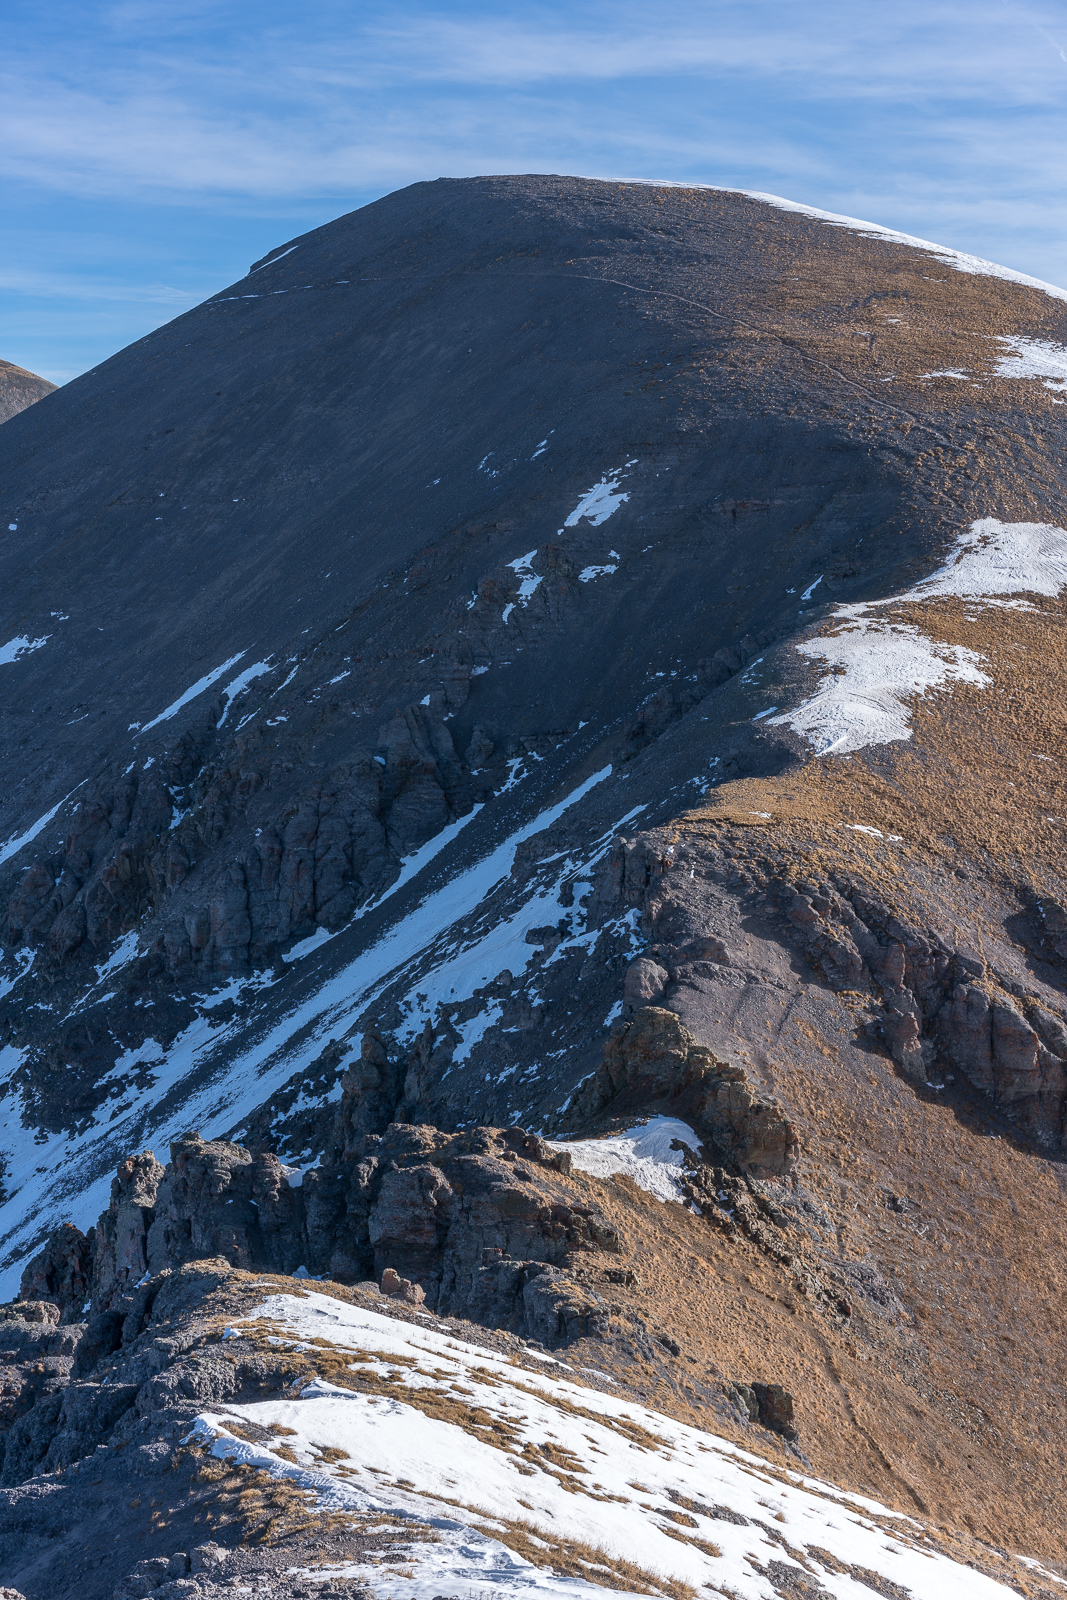
I made it back to my campsite at about 9 AM. I felt great about my time and my legs and feet were feeling strong still. The next photo shows a zoomed in view of the gully (right of middle) and shows just how crazy steep it is.
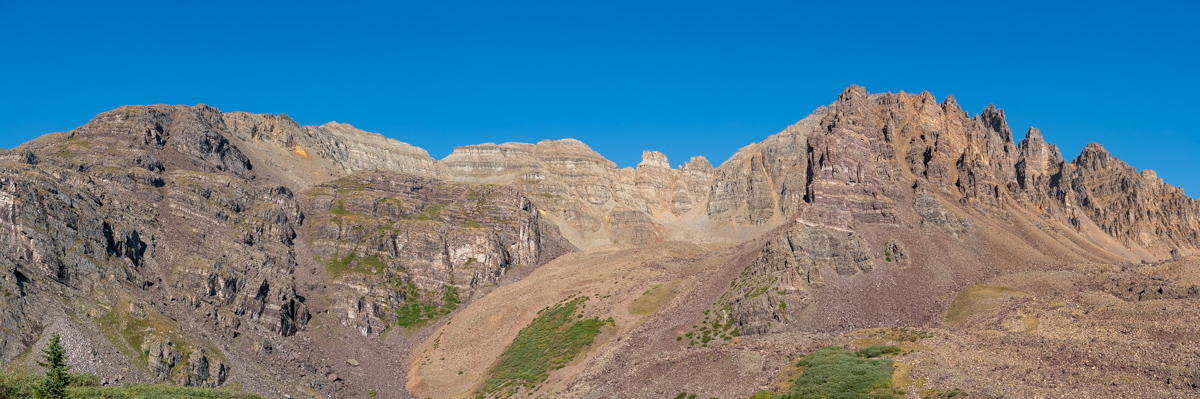
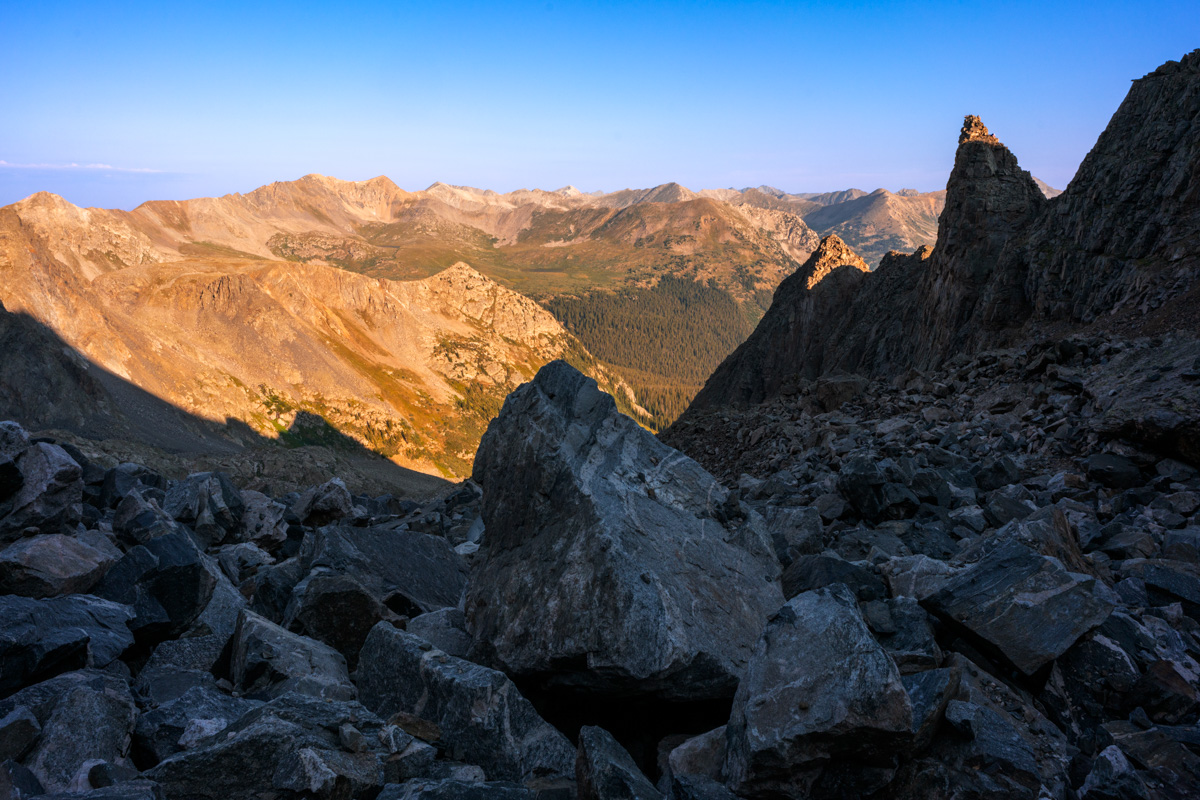
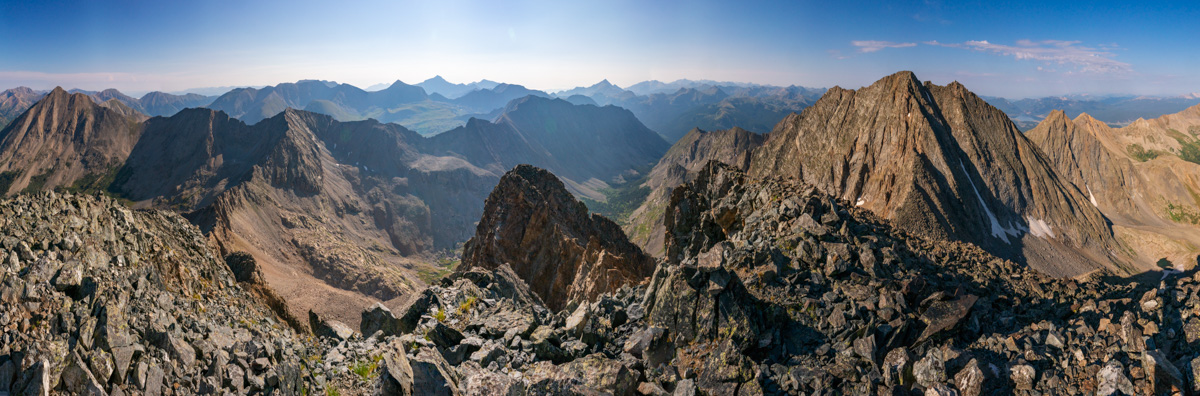
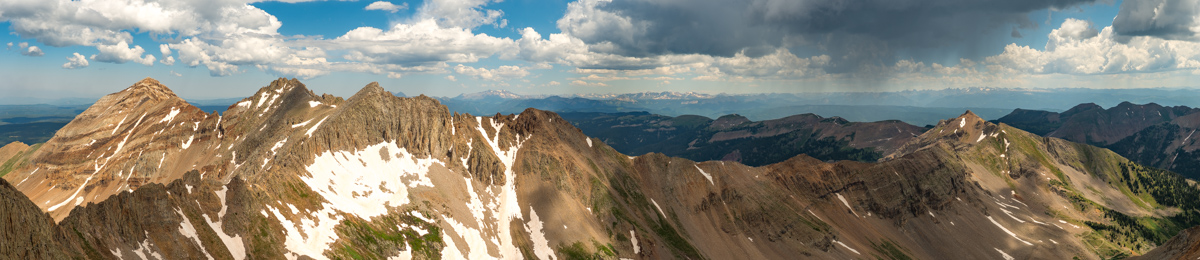
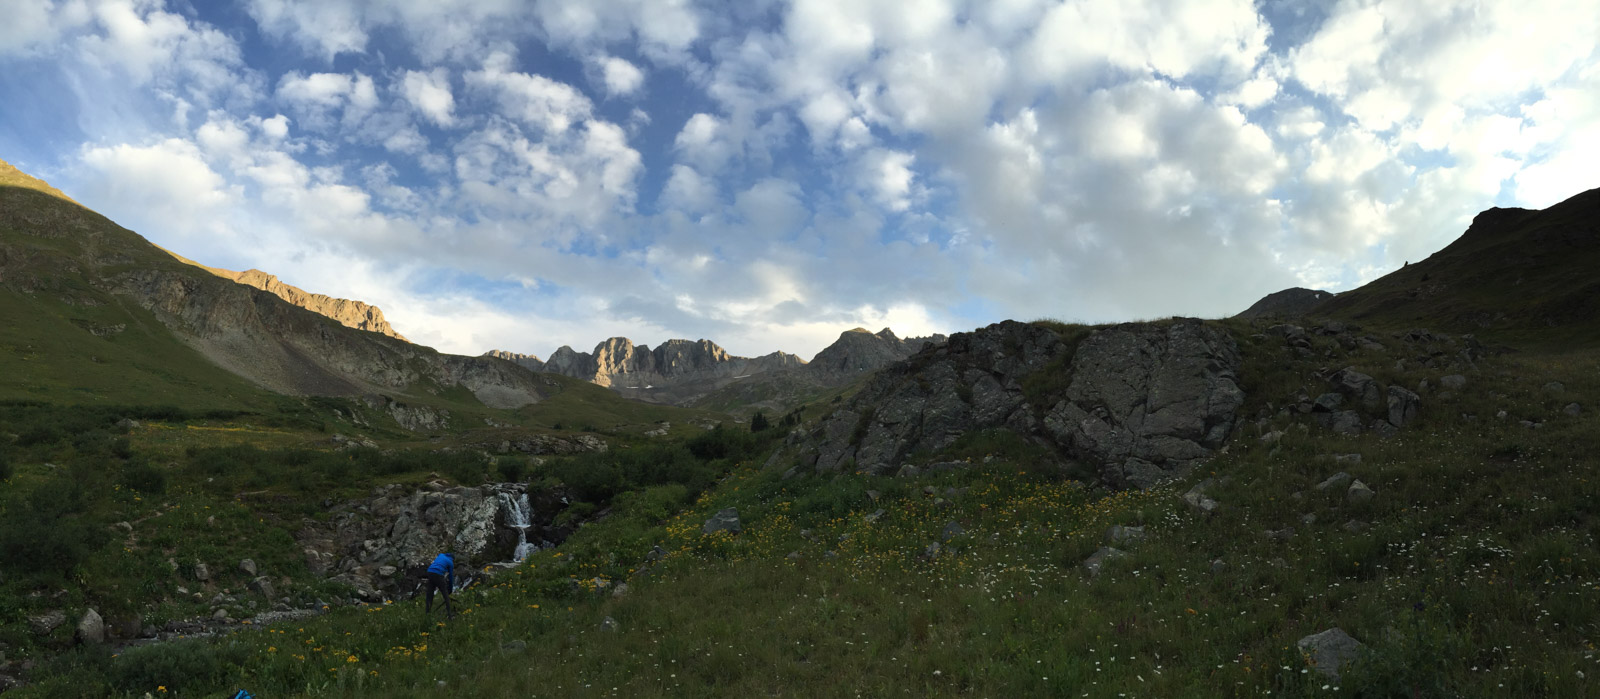
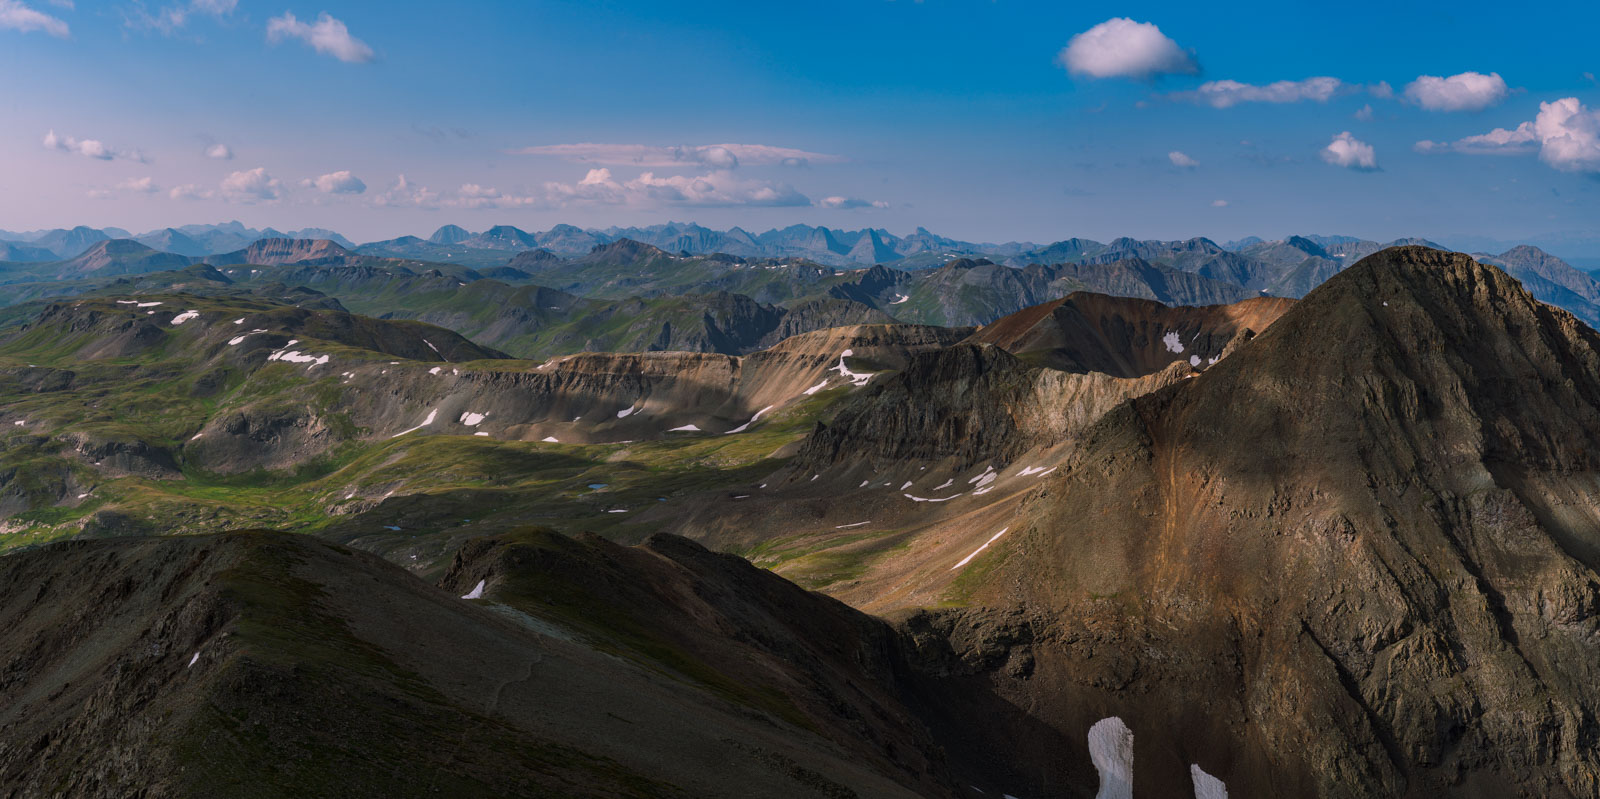
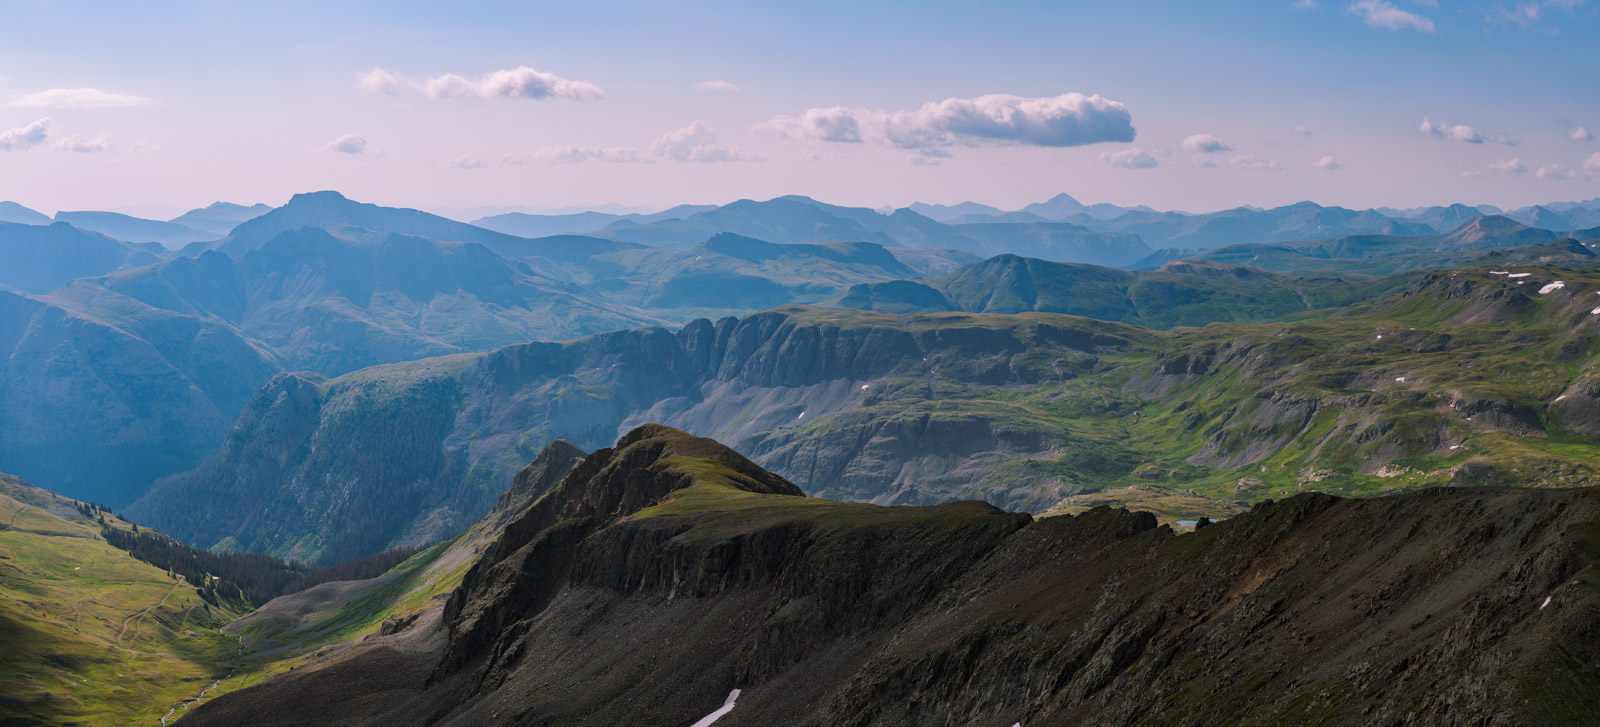
I took one more parting panorama of the area from camp to remember the day.
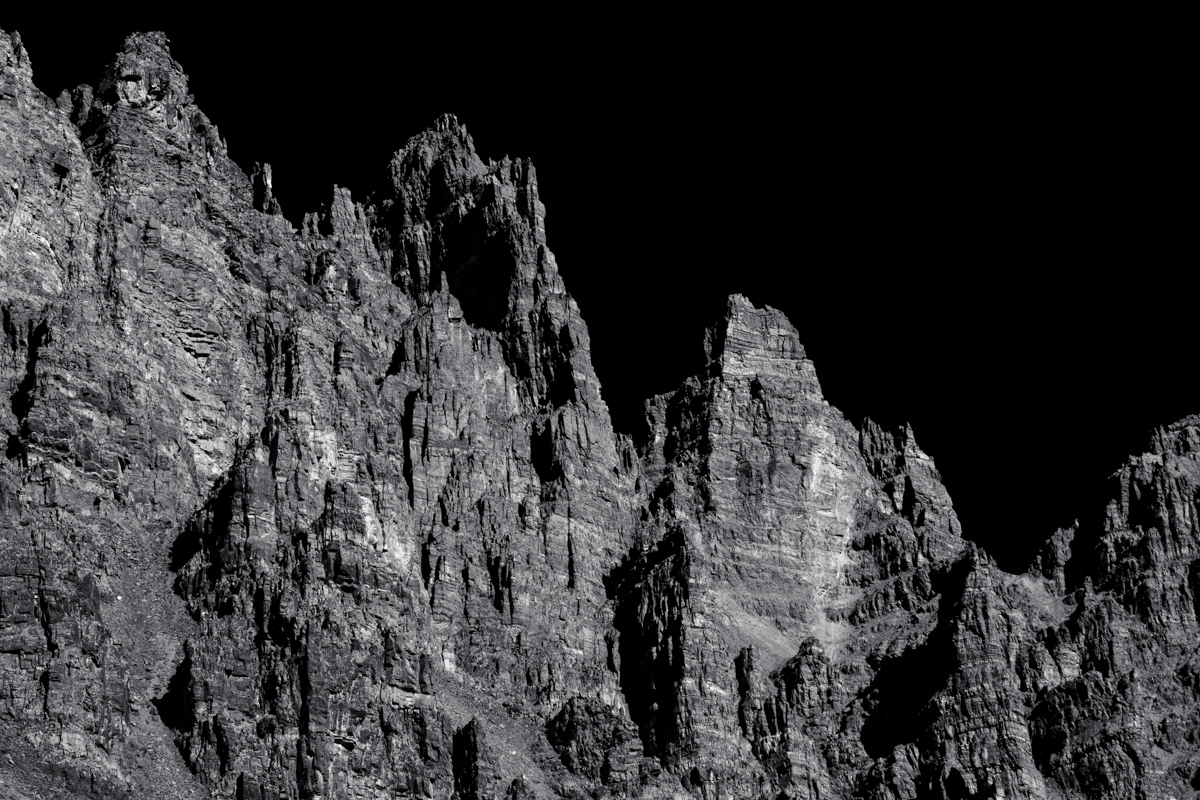
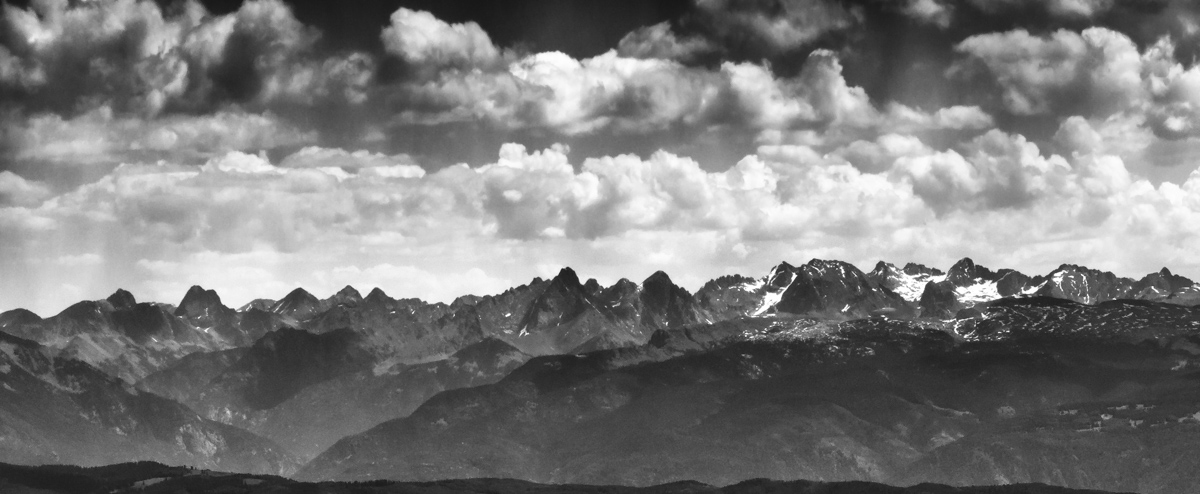
I could not help but get a telephoto black and white shot of the pinnacles east of Cathedral - so impressive!
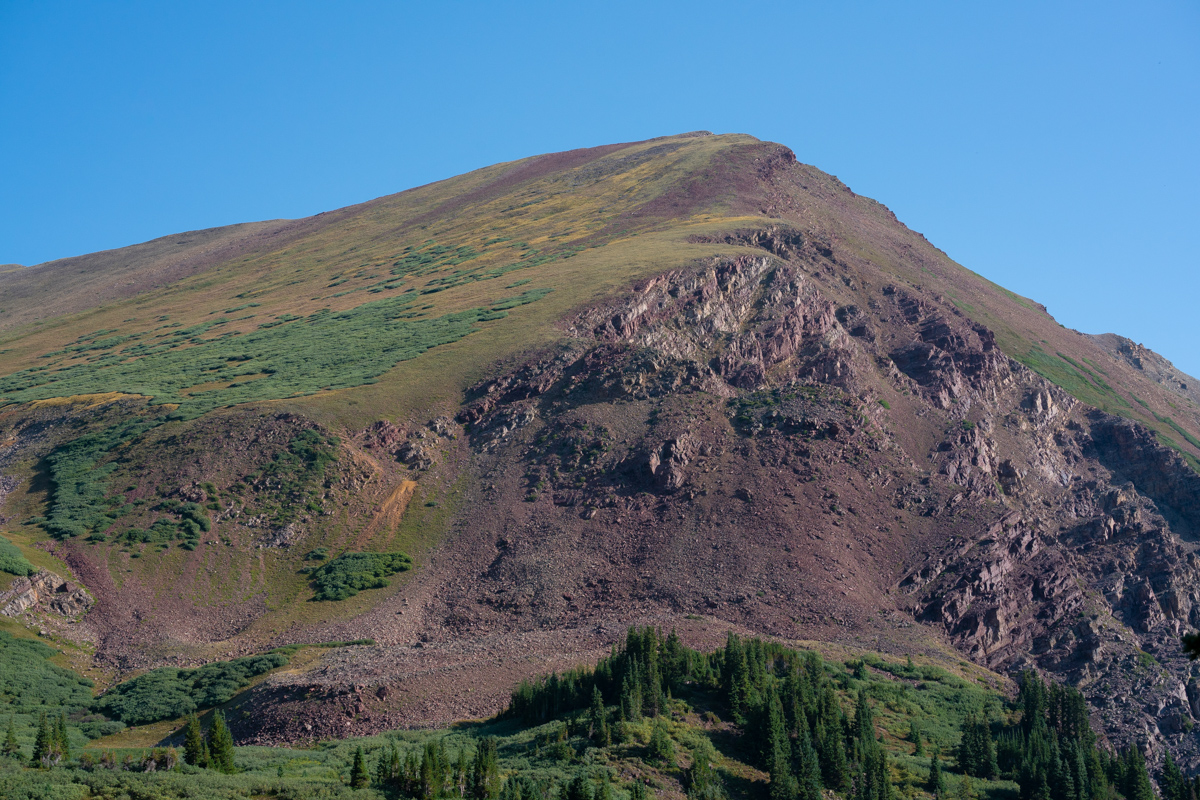
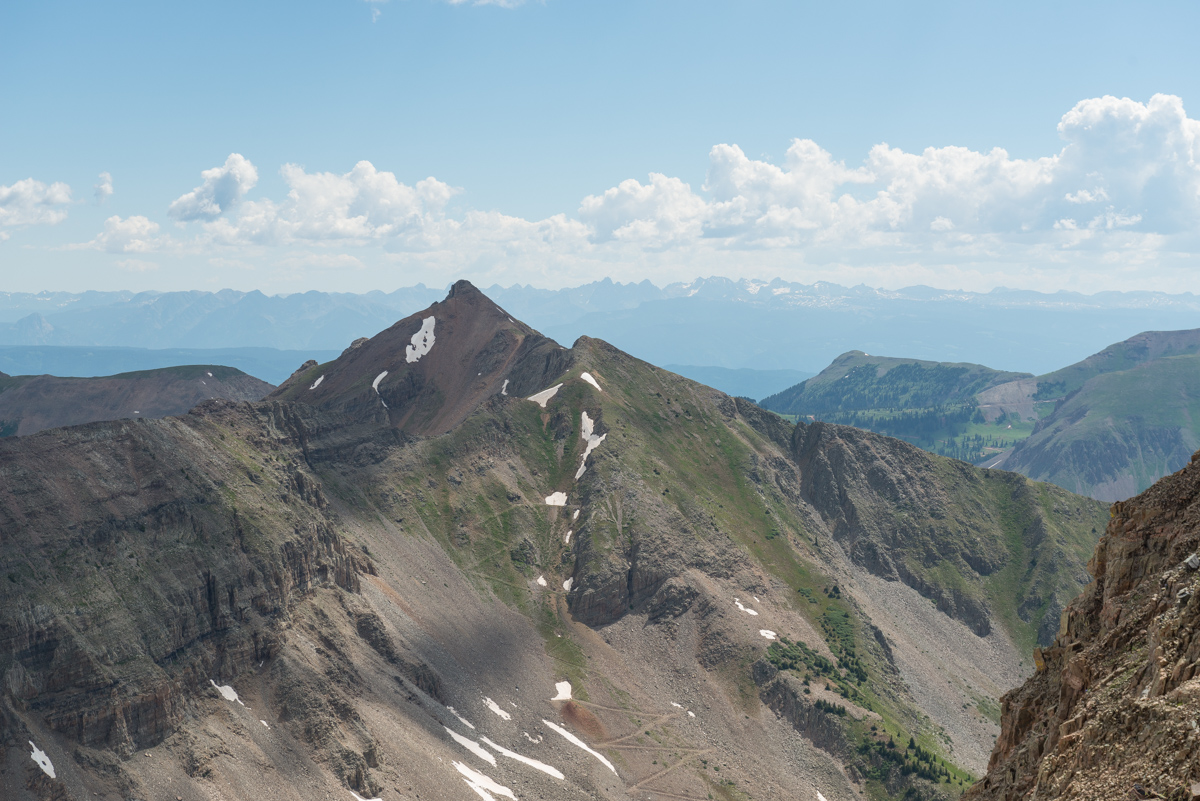
Farewell Cathedral! Your eastern friend Leahy Peak looks way more inviting! =)
Thanks for reading. I hope you enjoyed my photos and description. One more to go!
North Apostle and Ice Mountain as seen from Grizzly Peak in 2013.
2018 will be the year that I finish my lifetime goal of climbing the highest 100 mountains in Colorado. Or at least that is what I keep telling myself to stay motivated! Having climbed Dyer Mountain back in May, and Silverheels, Buckskin, and Stewart earlier in June, I found myself faced with only four mountains left to complete my goal: North Apostle, Ice Mountain, Cathedral, and Thunder Pyramid. Having Fridays off of work most of the time, I was faced with some options in terms of climbing - I could leave Friday from Durango, find a camp-site, climb on Saturday, and then drive home; or, I could do something stupid. I went with stupid. My friend Silas (featured in many trip reports here) was climbing Capitol Peak the same weekend and I really wanted to climb that again with him. I decided I would try to squeeze both climbs into one packed weekend, at the last second. So, I packed my car with both backpacking and car camping stuff and left my house in Durango after work on Thursday at 8:30 PM to drive to the trailhead for the Three Apostles. I ended up arriving at the trailhead at 1:00 AM and slept in my car until 3:45 AM, at which point I left the car and began my journey on almost no sleep. Huge mistake...
I've been eyeing the Three Apostles for years. I first admired their incredible stature when I was much younger on camping trips with my parents around Winfield. I remember one particular year going on a camping trip with my parents and my friend Jeremy where we hiked up into the upper basin and could see the Three Apostles - they looked intense! My next foray in seeing them up close and personal was in 2010 when I climbed Huron and Browns with my friend Mike Vetter - I recall being quite impressed with the peaks then as well. My latest encounter with them was watching the sunset from the summit of Grizzly Peak to the northwest of the Three Apostles and seeing a huge rainbow over Taylor Park. That was awesome! That particular trip, I hauled a huge telephoto lens up to the top with me and shot North Apostle and Ice Mountain at sunset. Good times!
As always, you can see and download my full route and GPS tracks over on the incredible app, Gaia GPS, which I use on my iPhone to plan, track, and follow my routes on these trips. It is absolutely invaluable and worth every cent. I personally love that you have full access to all USGS topo maps and National Geographic Trails Illustrated maps as well. You can use the app while in airplane mode and even save maps for offline use. To get a nice discount on the application, follow this link and you'll also support my efforts to keep this site running.
My full stats for this particular climb, which included summiting North Apostle (13,860 ft.) and Ice Mountain (13,961 ft.):
- Peaks climbed: 2
- Miles hiked: 10.8
- Time: 10 hours, 34 minutes
- 3,657 ft. elevation gain
For this trip, I decided to pack quite a lot of camera gear (by the way, these are affiliate links and using them helps me pay for this site and to bring you better content):
I found the trail going up to the Three Apostles to be very straight-forward. I followed the decent trail beta from Gerry Roach's High Thirteener Guidebook. I was still using the 1st edition of the book, which I'm told has some route errors for this mountain; however, his new edition is available on Amazon after many years of waiting - rejoice!
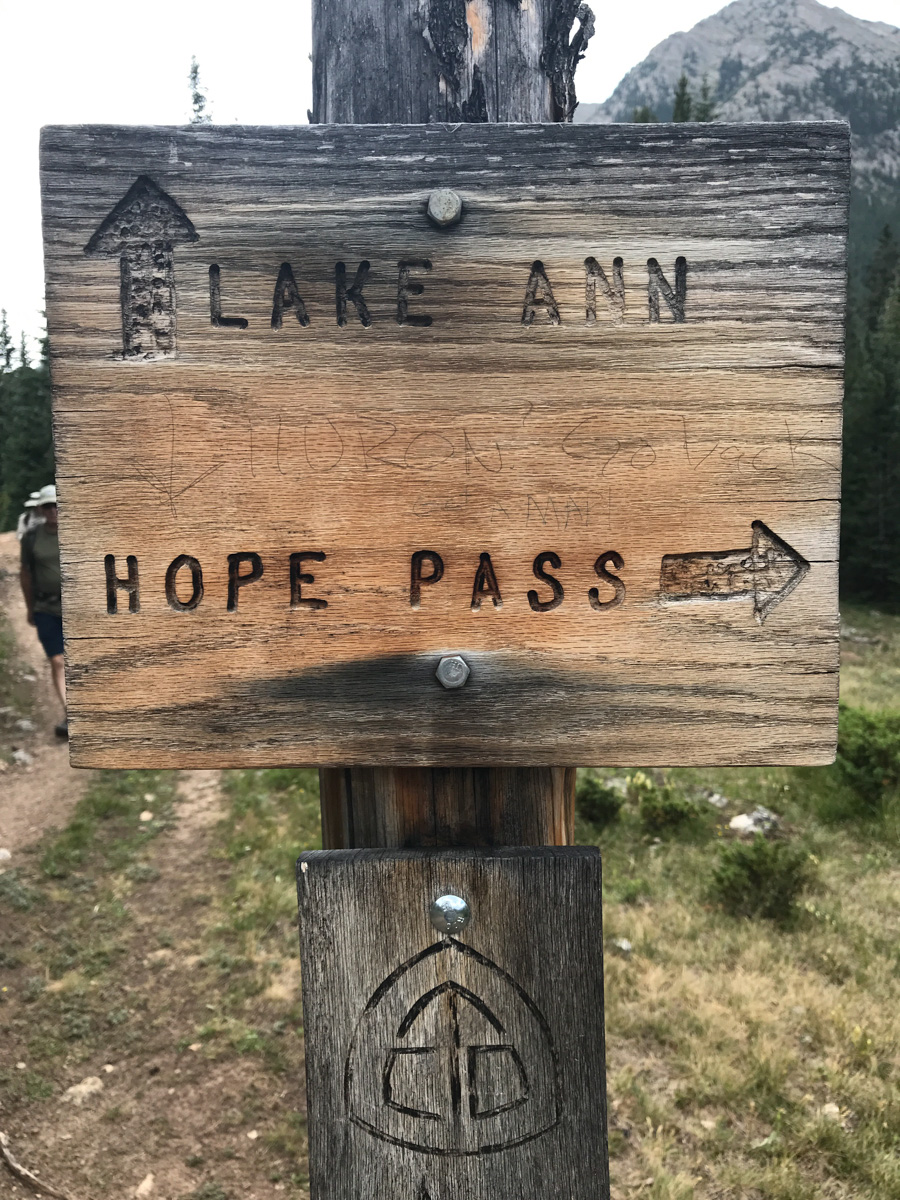
The trail follows the same trail as Huron for a while; however, there are several branches off of the trail to keep note of. Generally, you keep going straight. There are two signs before you are officially on the Trails Illustrated Apostles Trail 1445. I took a picture of one of them on the way down as seen below. I especially enjoyed seeing someone pencil in that if you were at this particular sign, and were climbing Huron, you had gone too far. That's how you know you're on the right trail for the Three Apostles. Having departed my vehicle at around 4 AM in the dark under a full moon, I had optimistically hoped to shoot sunrise from the summit of North Apostle (or nearby). Due to having almost no sleep, this proved impossible. Once I hit treeline, I found my pace slowed significantly.
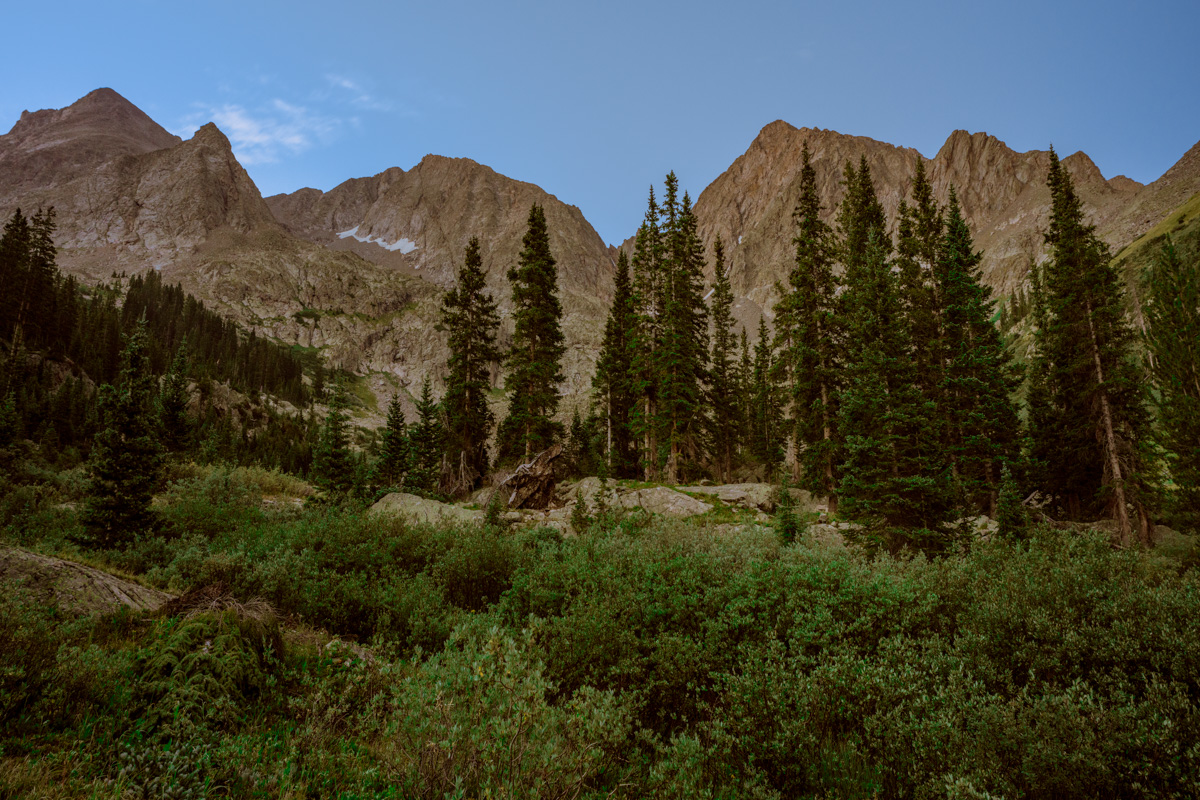
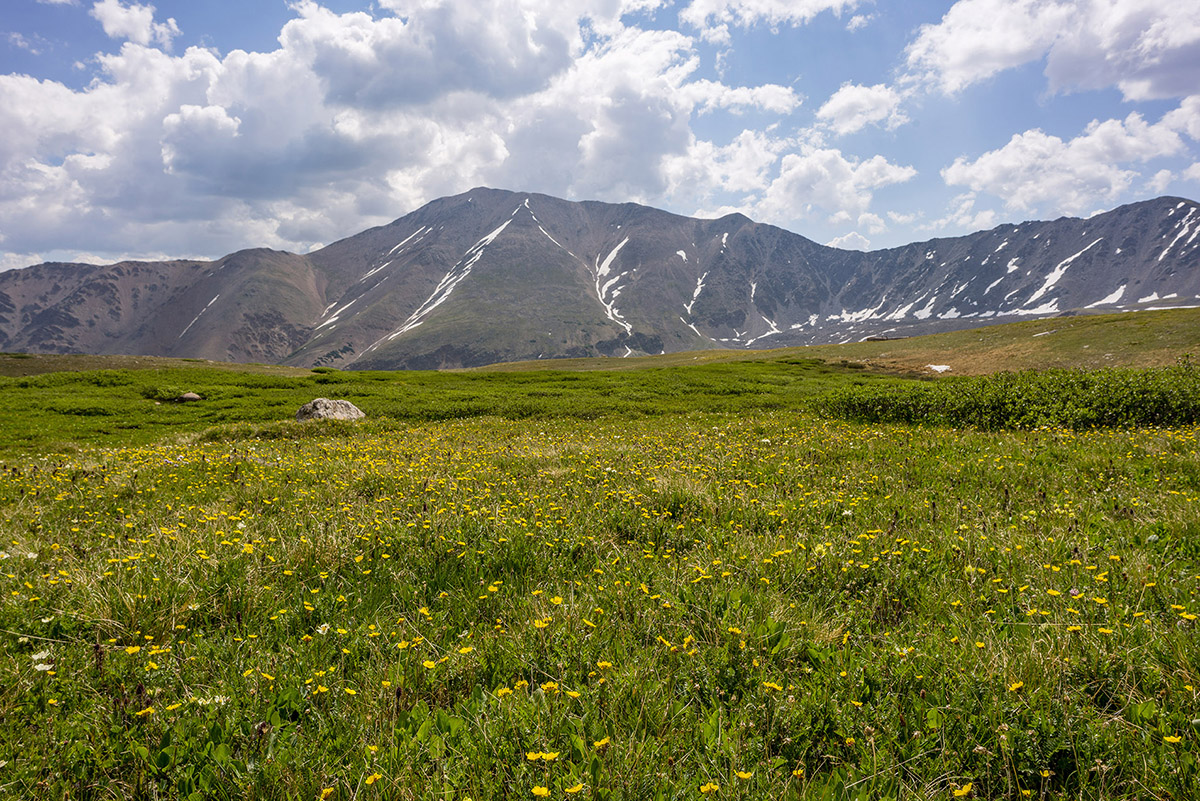
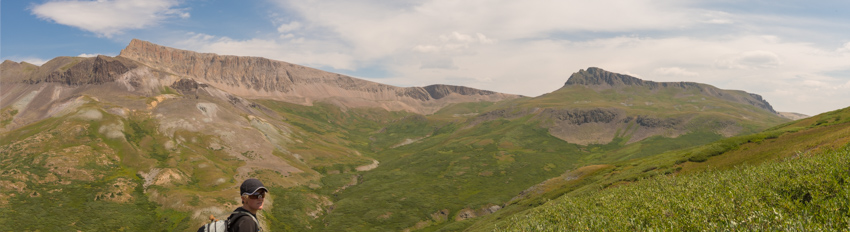
I reached treeline at about 5:30 AM and the scene really opened up above me. You could make out the Three Apostles easily. It was at this point I realized I was not going to be able to shoot sunrise from the top. Oh well, there were not any clouds anyways, so it would have been a boring image. Having followed the Roach route description as opposed to the 14ers.com route description, I was aiming for a high lake below West Apostle and Ice Mountain. I figured that would be a fantastic spot to get some sunrise shots as well. The trail petered out after treeline and so I was forced to bushwhack through some willows which were quite wet still. Huge mistake again. Have I ever said how much I hate willows? After reaching the end of the willows, I followed the weakness in the drainage east towards a huge cliff band below North Apostle. From the end of there, I followed a steep dirt and rock slope south towards the base of the lake described by Roach. On my Gaia track you can see my ascent as the most southerly part of the route as opposed to my descent which was a little north of the lake.
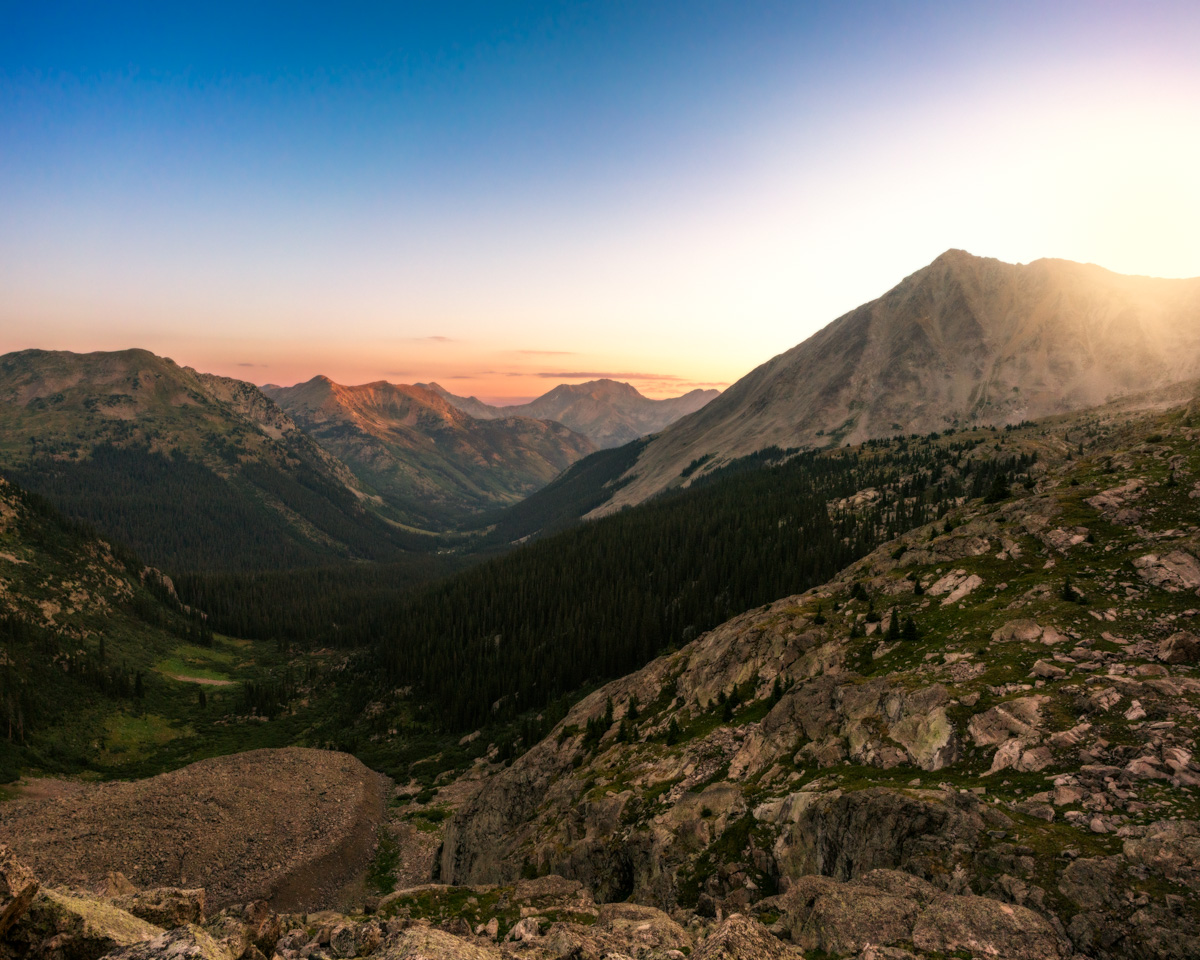
Above the dirt and rock slope, I found myself in a strange spot. There was a huge rocky and cliffy section between me and the lake. I could try to go around to the south or cut across the rock face for some fun scrambling. I chose the latter and it was fun. I would not recommend this section if it were wet; however, it was fun to navigate and climb on. It was easy class 3 / hard class 2. A good warm-up for Ice Mountain for sure! Having reached the lake, I looked for some spots to take shots at sunrise. There were not a ton of options or time, so I found myself looking north towards La Plata and Huron.
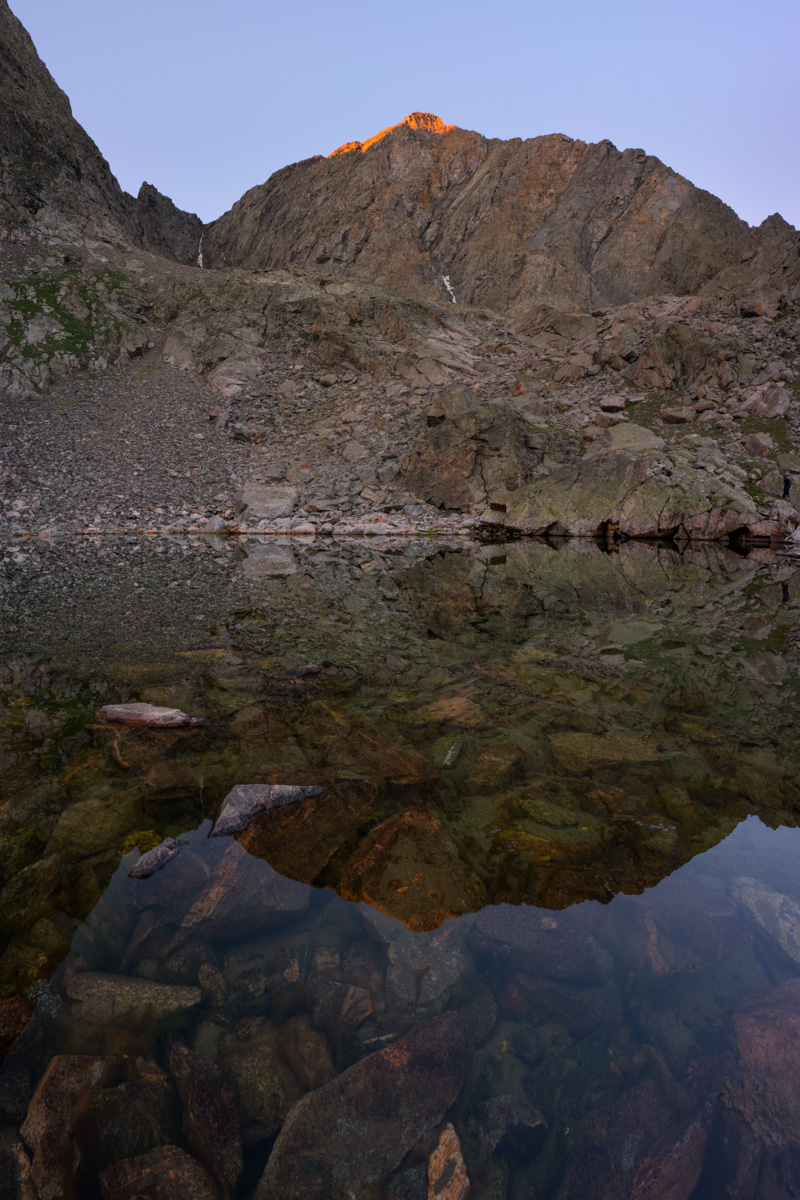
The early light kissed the tip of West Apostle above the small lake and made for a very fun scene to shoot with the Loxia 21 lens. I was wishing for a wider lens for sure, but nothing a two-row panorama stitch could not overcome. The waters were crystal clear and quite still.
I spent some time enjoying the lake and snacking to regain some strength. I was really feeling the fatigue from the lack of sleep and was hopeful that food and water would help.
The light over on La Plata was pretty great too - accentuated by some pretty purple flowers on the ground between the huge boulders that were strewn about below the Three Apostles.
I wanted to take one final shot before leaving the lake and found a nice reflection of the lower sections of North Apostle, which were these awesome cliff bands and spires. Good stuff.
The path up from the lake seemed to be pretty straightforward. I just followed the grassy and rocky slope up near the creek coming down from snow-melt. The slope contoured up towards the base of North Apostle. It seemed that there were two ways to go - through a notch in some rocks next to the south wall of North Apostle or around the notch and around. I chose the notch.
West Apostle in early light
As I climbed up, I stopped to admire the running water under the boulder field. There's something about that experience that always brings a smile to my face. Sometimes the most simple things in nature are the most relaxing and impressive.
I continued up towards the notch below North Apostle and looked back to admire the early morning light that was shining on Harrison Flats to the west. The whole area just looks amazing from here.
As I climbed, there was a lot of rock fall happening on Ice Mountain, caused by mountain goats, likely disturbed by me and my huffing and puffing. I call them jerks in the video, but I'm joking. It should be noted that these goats could pose a huge safety concern for anyone doing the snow climb route of Ice Mountain, so beware!
The rocks above the notch and below the North Apostle / Ice Mountain saddle were absolutely horrific. They were huge boulders, many of which were loose, on steep terrain. Special caution should be taken while climbing to the saddle.
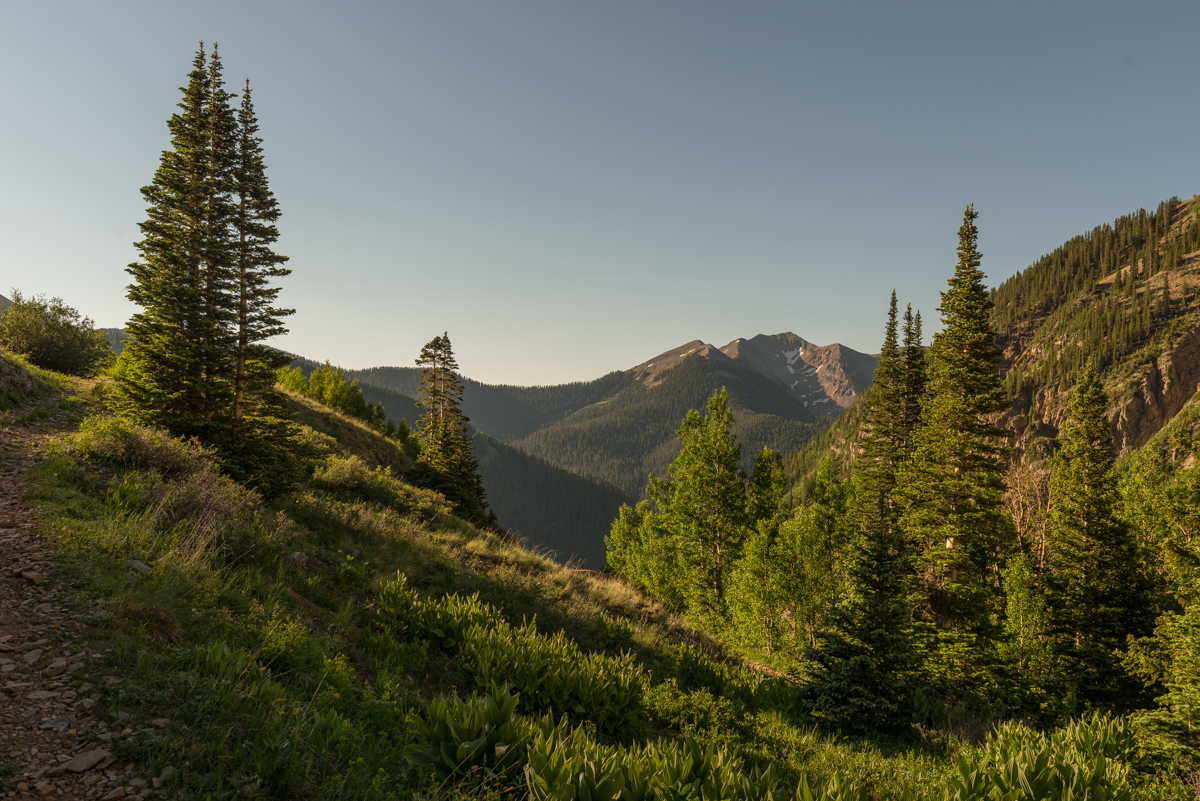
Upon reaching the saddle, a good view of Ice Mountain avails itself and caused me to take pause. It looked really gnarly from this vantage point. Paired with my exhaustion, this view was pretty demoralizing. I was not sure I was going to be able to finish Ice Mountain on this trip. I kept climbing up to North Apostle.
The route from the saddle to the top of North Apostle was quite simple and pretty fun, all things being equal. The east face of North Apostle was pretty intense to look down on. I would hate to take a fall here.
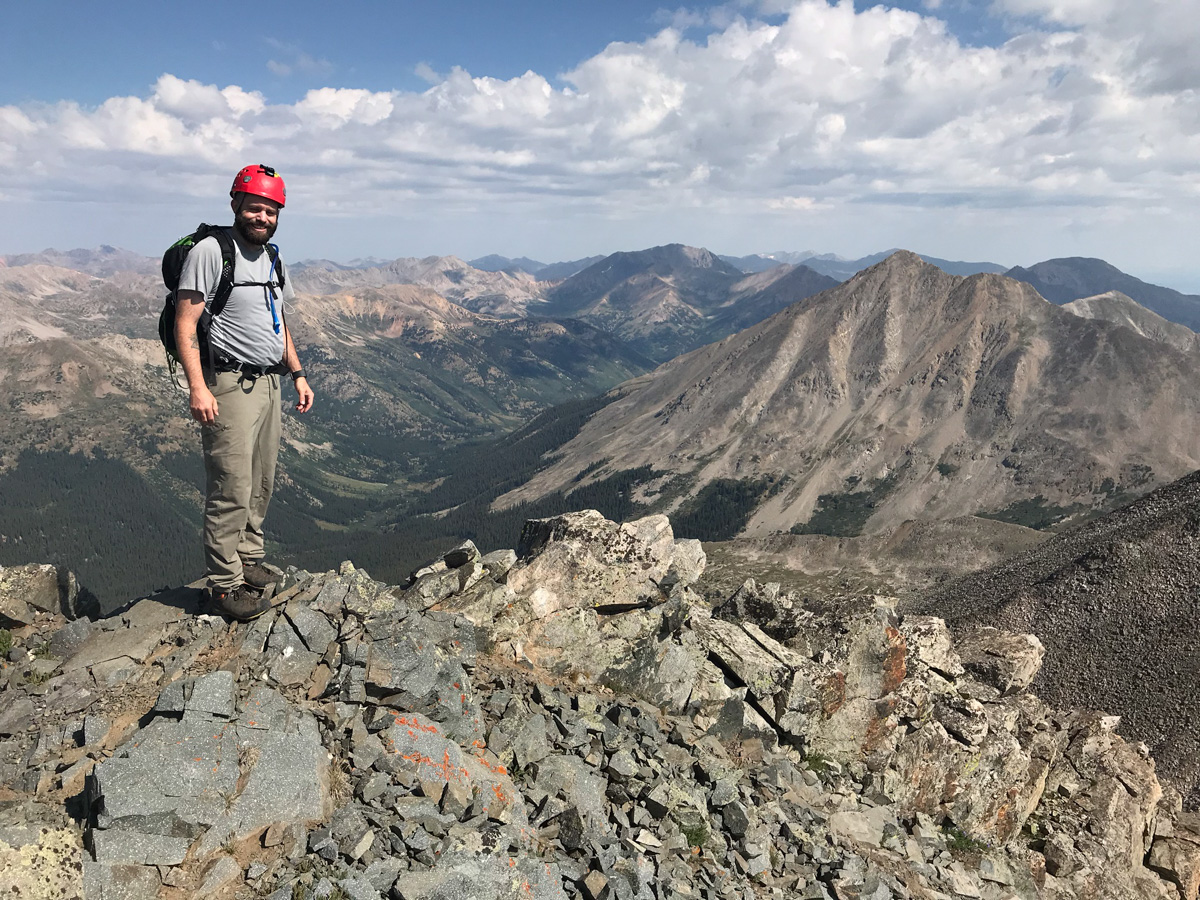
I reached the summit of North Apostle at 8:30 AM and was really tired. The views though - they were amazing. Huron was quite impressive from this vantage point.

I let my friends and family know I was safe on top of North Apostle and took a panorama with my wide angle lens. Huron at far left, Ice Mountain at far right. Lots and lots of 14ers in between.
Huron and La Plata looked really fantastic from North Apostle, and I wanted to make sure I showcased Huron in at least one shot, with the huge valley below it.
I head back down towards the saddle, eyeing Ice Mountain's impressive and dangerous stature the whole time. I was one part excited and one part nervous. The route looked really intense from this spot; however, mountains always look harder than they are...
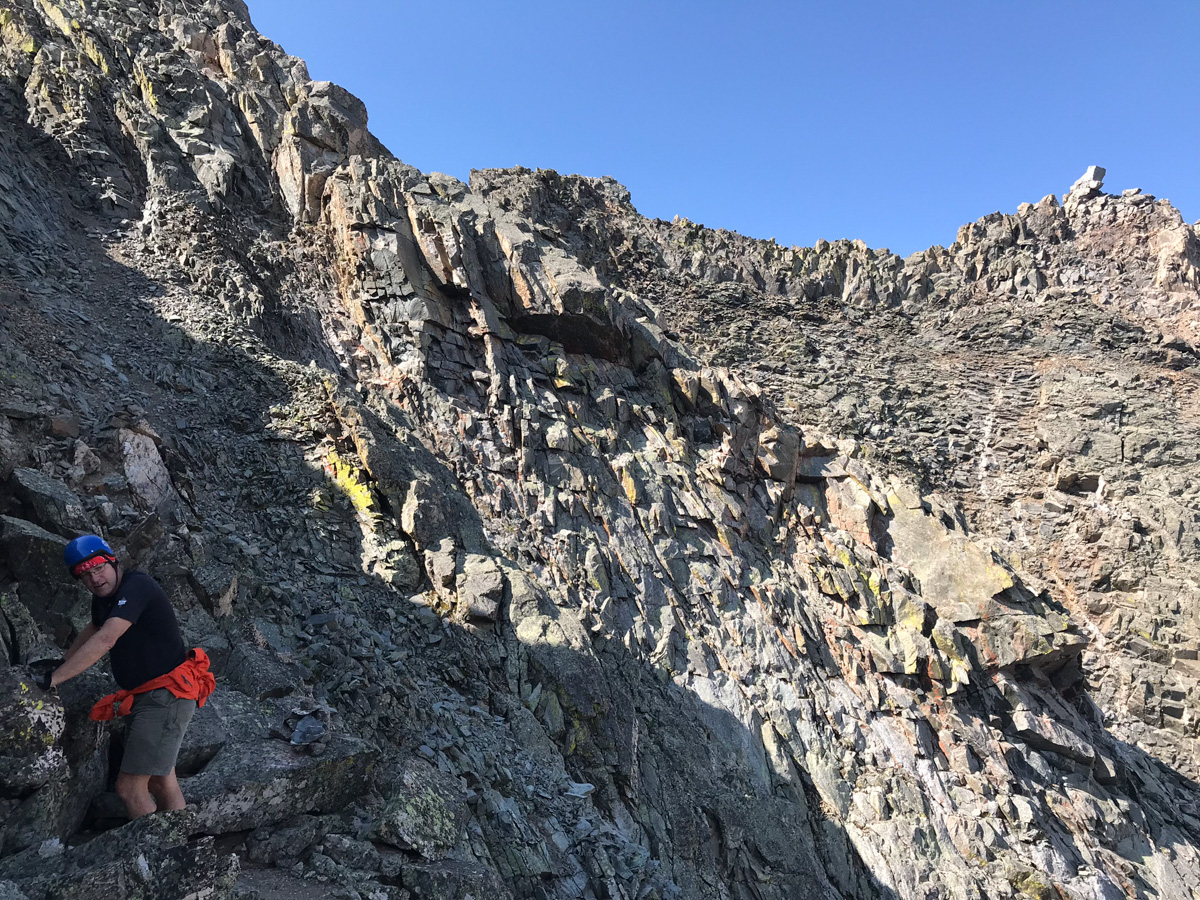
About halfway down the saddle, I ran into a gentleman named Dempsey Andrews from Denver. He asked if I was planning on doing Ice Mountain and I said that I was. He offered to allow me to join his group - himself and two other gentlemen that were waiting for him on the saddle - Kyle and Jerry. I was excited to run into a group that was also doing Ice Mountain and said I would join them, absolutely! Jerry planned on hanging out on the saddle so it was just Kyle, Dempsey, and I for the ascent of Ice Mountain. They were great climbing partners. Dempsey is an English as a Second Language teacher and Kyle is a financial advisor. Dempsey used to do high alpine rescue and so I felt like we were in good hands for the climb. Fortunately, Dempsey had downloaded the route description from 14ers.com which was very clear to follow compared to the one I found in the 1st edition of Gerry Roach's book. Dempsey lead us up, following cairns the whole way. It was surprisingly excellent rock and a ton of fun.
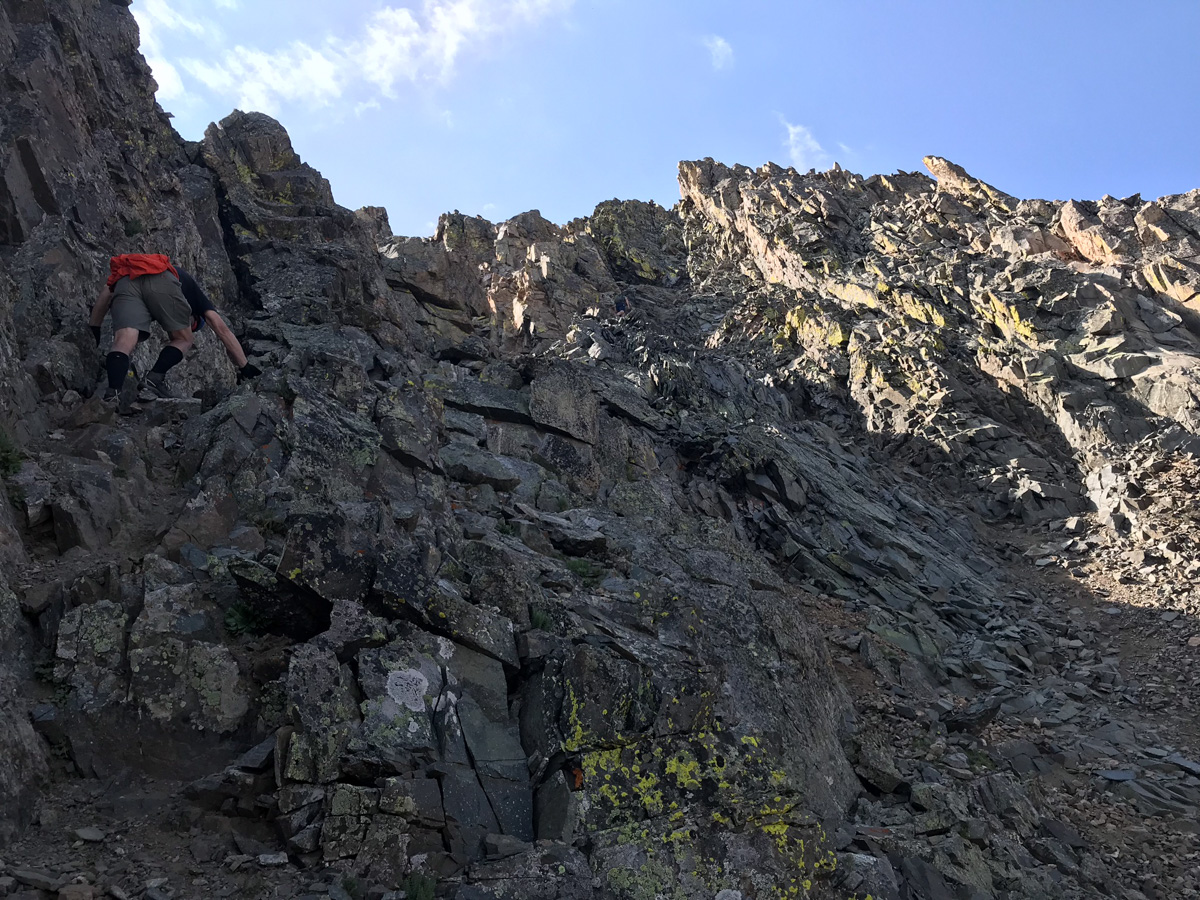
I found myself taking the rear most of the way up and as you can see above, care was needed to plot our route on loose rocks and boulders. We mostly followed the ridge and then found a nice set of gulleys to climb up towards the end.
The final section of the route before the summit was very difficult class 3 / easy class 4 and reminded me of the Wilsons in the San Juans. There were good foot and hand-holds to be found, but each needed to be tested for stability. We kept our distance between climbers and played it safe.
All in all I really enjoyed Ice Mountain's route here. It was pretty easy to follow and offered up numeous challenges that were fun to tackle.
Kyle ascends the final pitch of Ice Mountain
We reached the summit at 10:00 AM and enjoyed the views. It looked like the weather would hold up for us to get down safely, but we knew that the clouds appeared to be forming some of their awesome lightning jam.
I got a cool shot of Kyle on the very final section before the summit - what a mountain! We enjoyed the summit views, called loved ones, and head out. It was a short stay. The downclimb for the 1st section was facing in and quite slow.
As long as you take your time on the downclimb, it should not be too bad. It is very steep and loose though, so great care should be taken on each step.
As you can see above, the terrain is nasty but really awesome to be in. These are the types of peaks I long for each year. Ice Mountain does not disappoint if you seek exposure and a challenge. We did encounter a small amount of rain above treeline on our way down and some lightning was starting to strike nearby; however, we were able to avoid the storm for the most part. We took a blend of my route up and their route up for our path down and I found it to be very solid - we stayed high and went into the trees southeast of the willows and avoided the willows altogether. Finding the trail again was easy with Gaia GPS and the hike out from here was completely uneventful.
When the forecast in late November calls for sunny skies and temperatures exceeding 60 degrees, there are two thoughts that immediately come to mind: "climate change is real," and "maybe I should go climb a mountain!" Both Grand Turk and Sultan Mountain have been on my radar for many years, ever since I saw them for the first time from Ice Lake Basin in 2013. With the abnormally hot weather we have had in Southwest Colorado this autumn, I figured a quick 45-minute drive to the trailhead at Little Molas Lake would be a great way to spend a Sunday morning after a week of induldging on Thanksgiving leftovers. I also decided to make a stop at Molas Lake to see if I could get a decent photograph of sunrise from there. This turned out to be a great decision, as the clouds were fantastic. The lake was covered in very thin ice, making for a very interesting reflection!

I decided to more or less bushwhack up into the basin between "East Turkshead Peak" and "West Turkshead Peak" from Little Molas Lake. My full GPS file and route are available on Gaia GPS, which is an amazing program! I highly recommend it to anyone with a smart-phone. It is better than a stand-along GPS unit (let's admit it, you all carry cell phones) and is usable in airplane mode. Amazing stuff. You can purchase it here and help support the site.
For this hike and climb, I decided to bring my full compliment of prime lenses and my telephoto lens. I have to admit, my camera gear is so much more manageable now that I am shooting with a Sony mirrorless system. I love it. Camera and lenses used:
- Sony A7RII body (amazingly light and incredible image quality)
- Zeiss Loxia 21mm f/2.8 (amazingly light, sharp, and portable lens)
- Sony Zeiss FE 55mm f/1.8 ZA (amazingly light, sharp, and portable lens)
- Sony FE 70-300 f/5.6-6.3 telephoto (pretty light for the focal length, decently sharp)
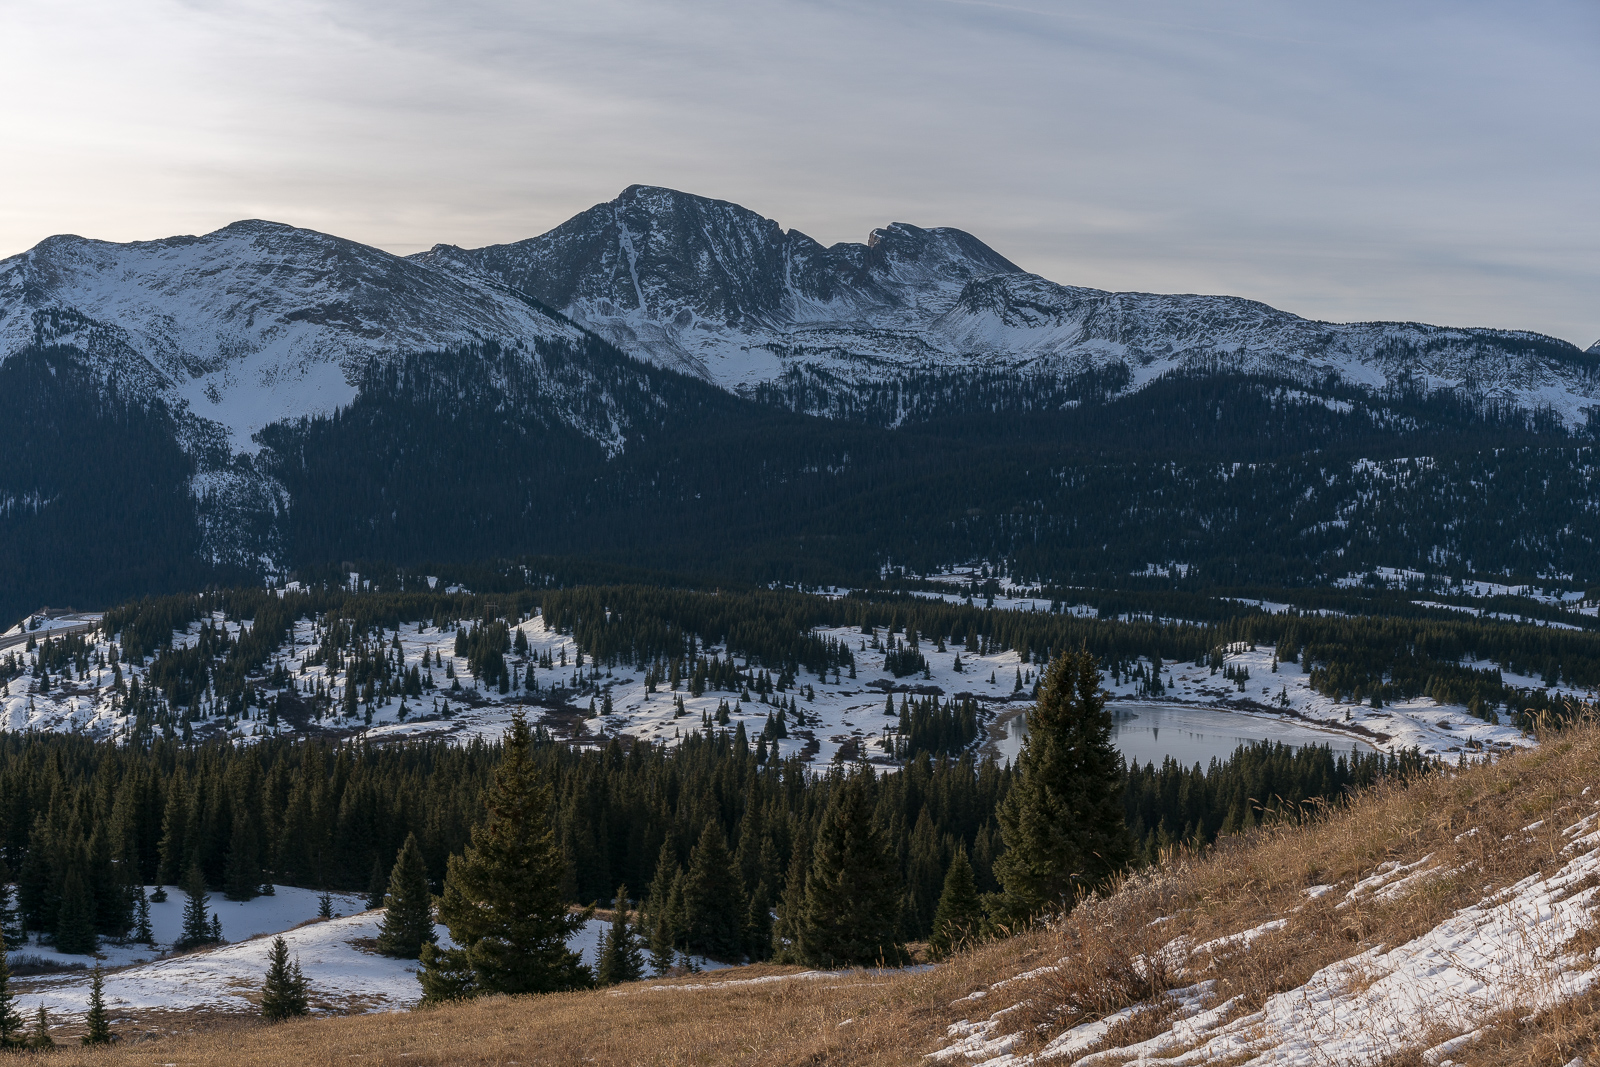
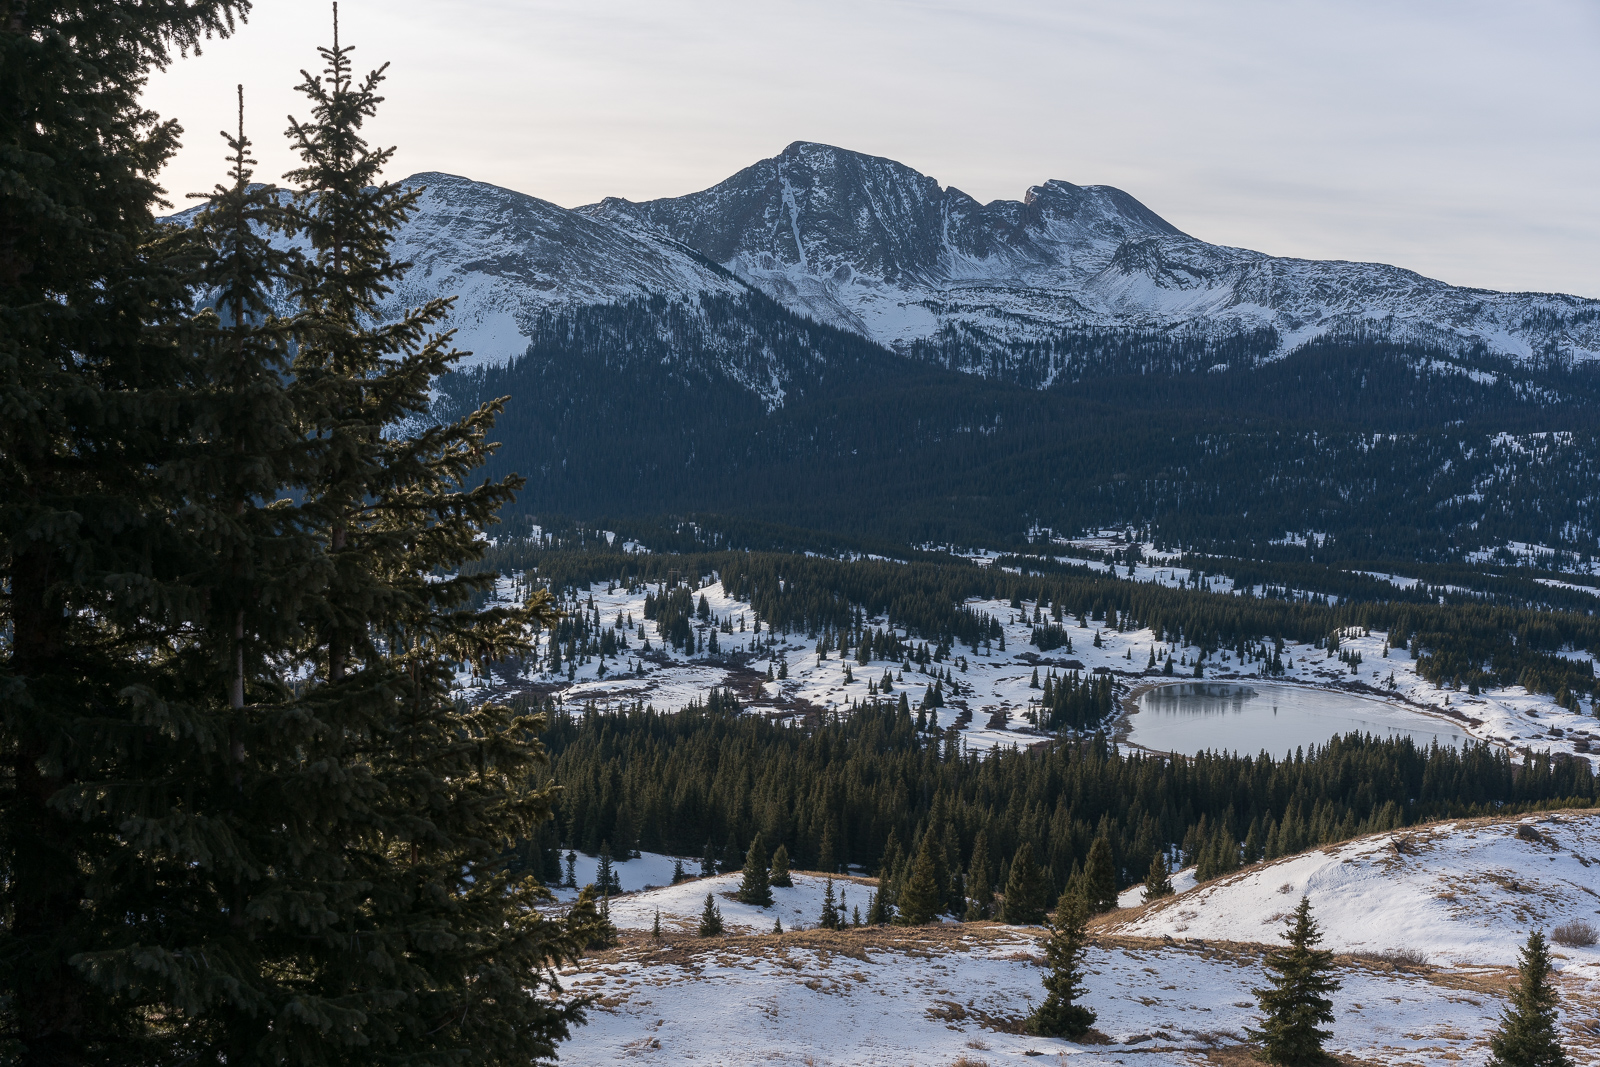
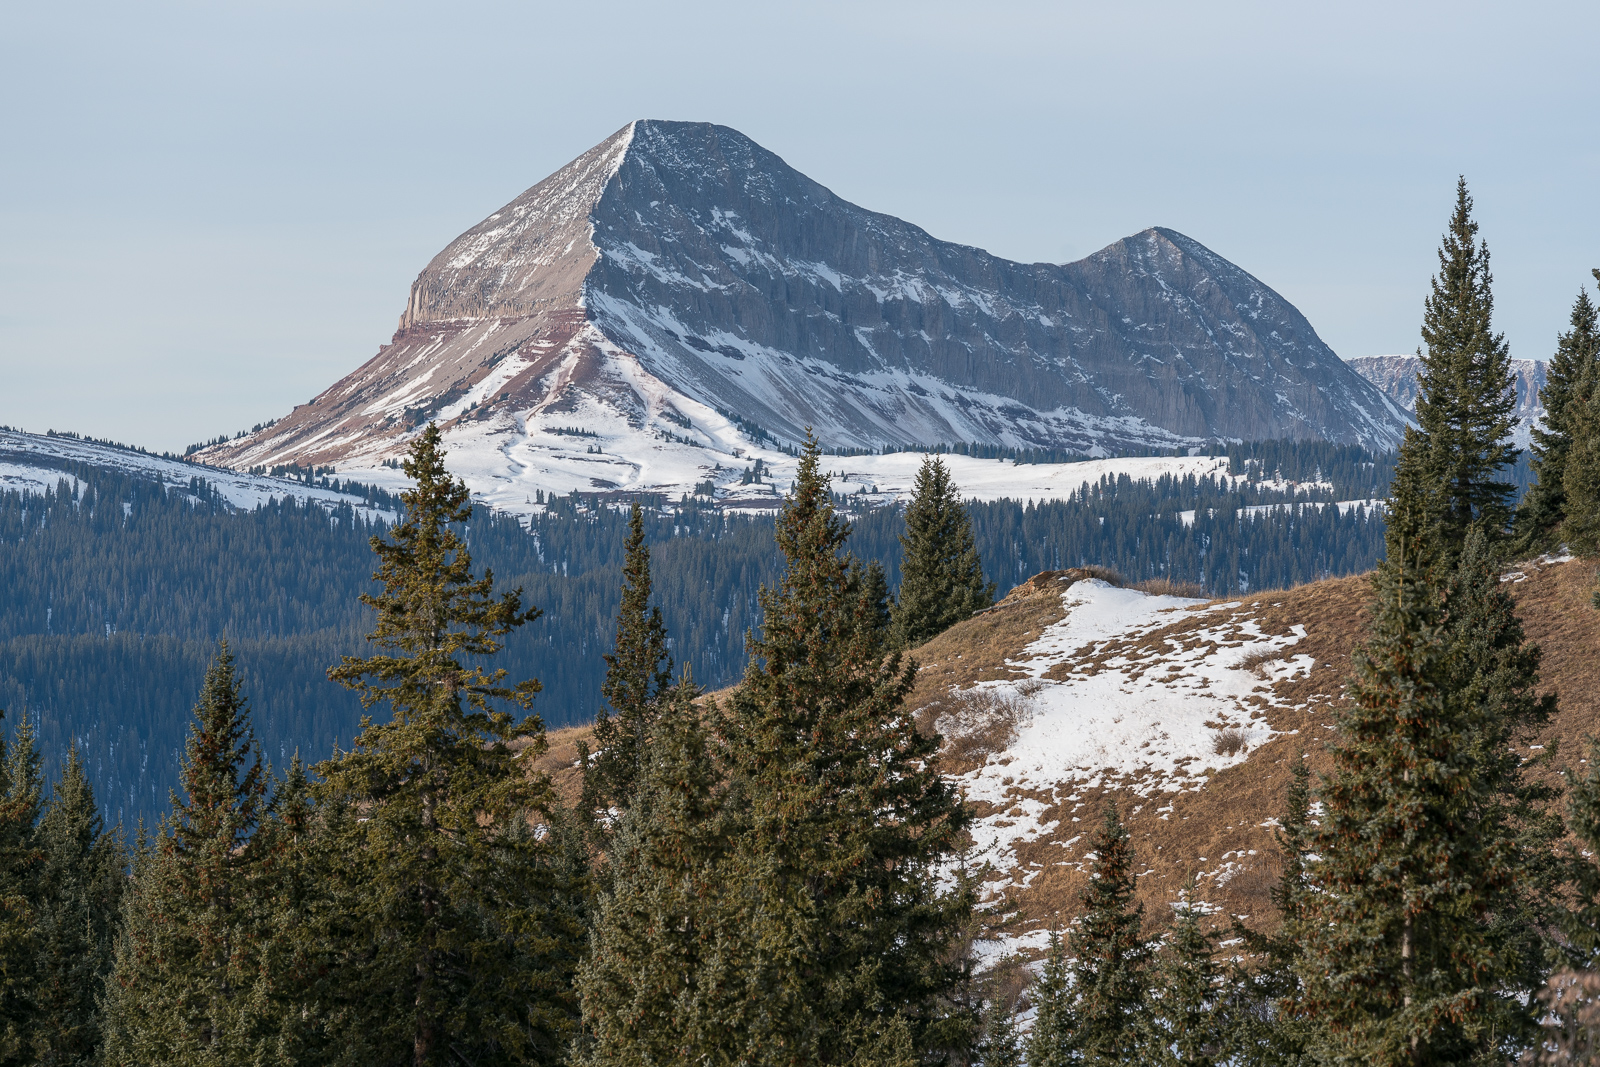
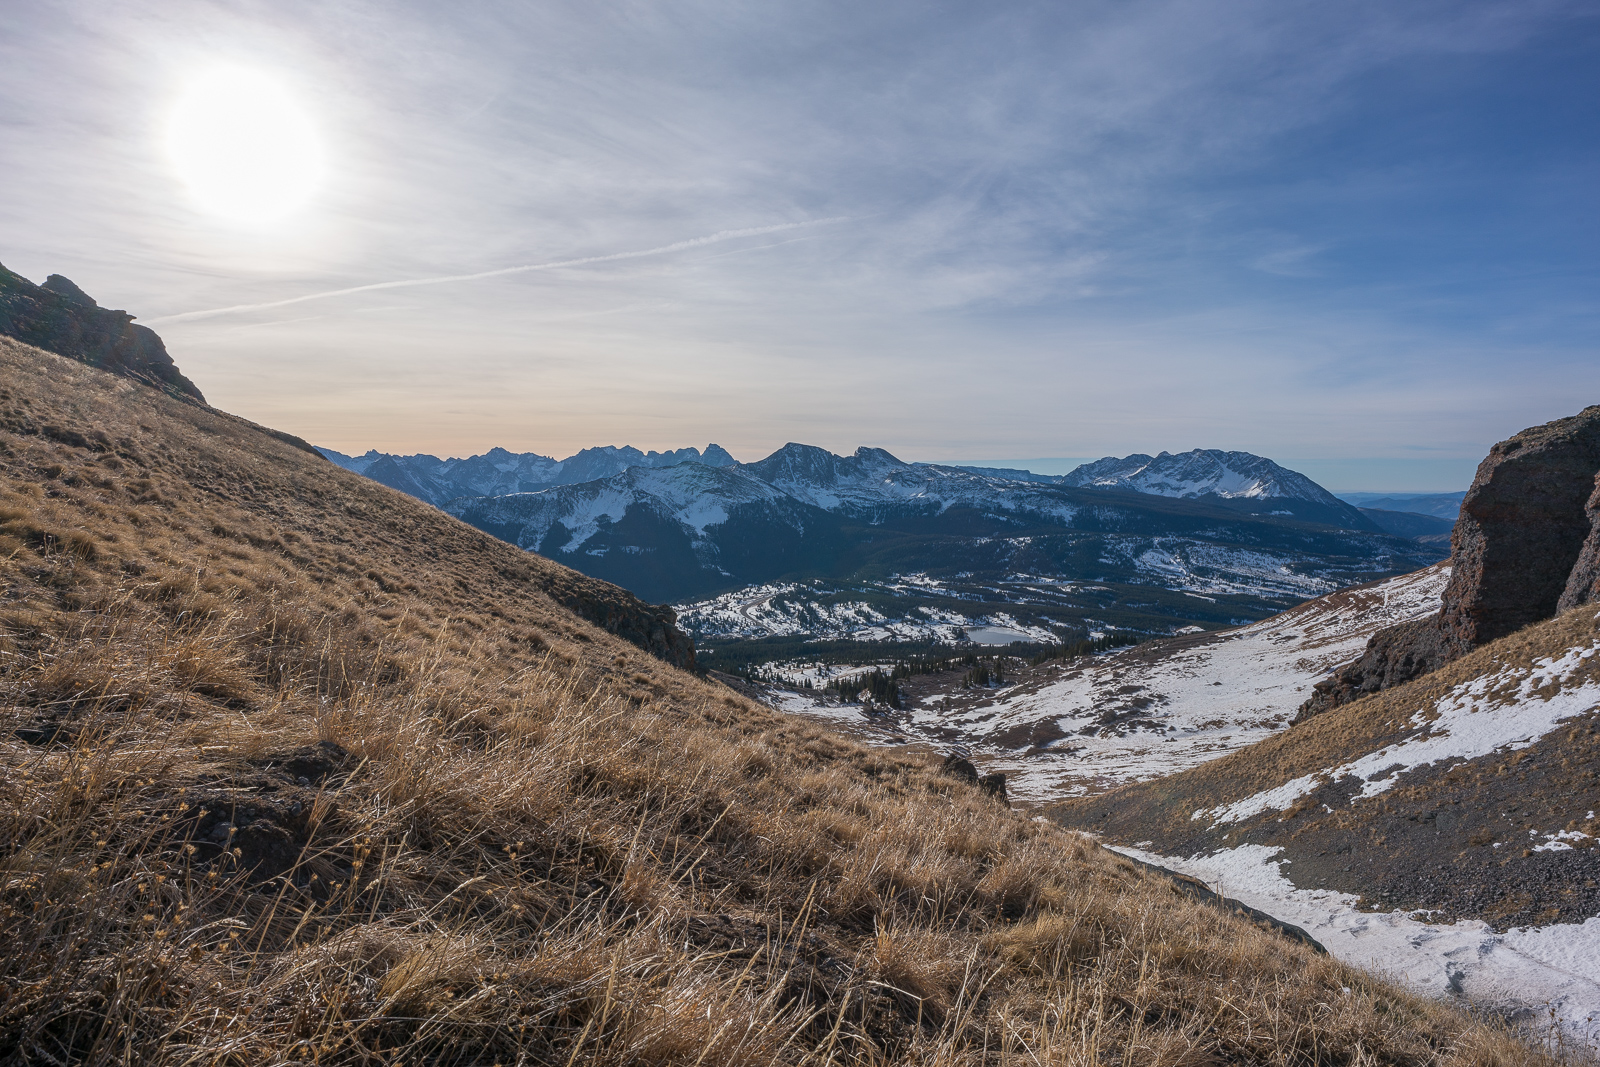
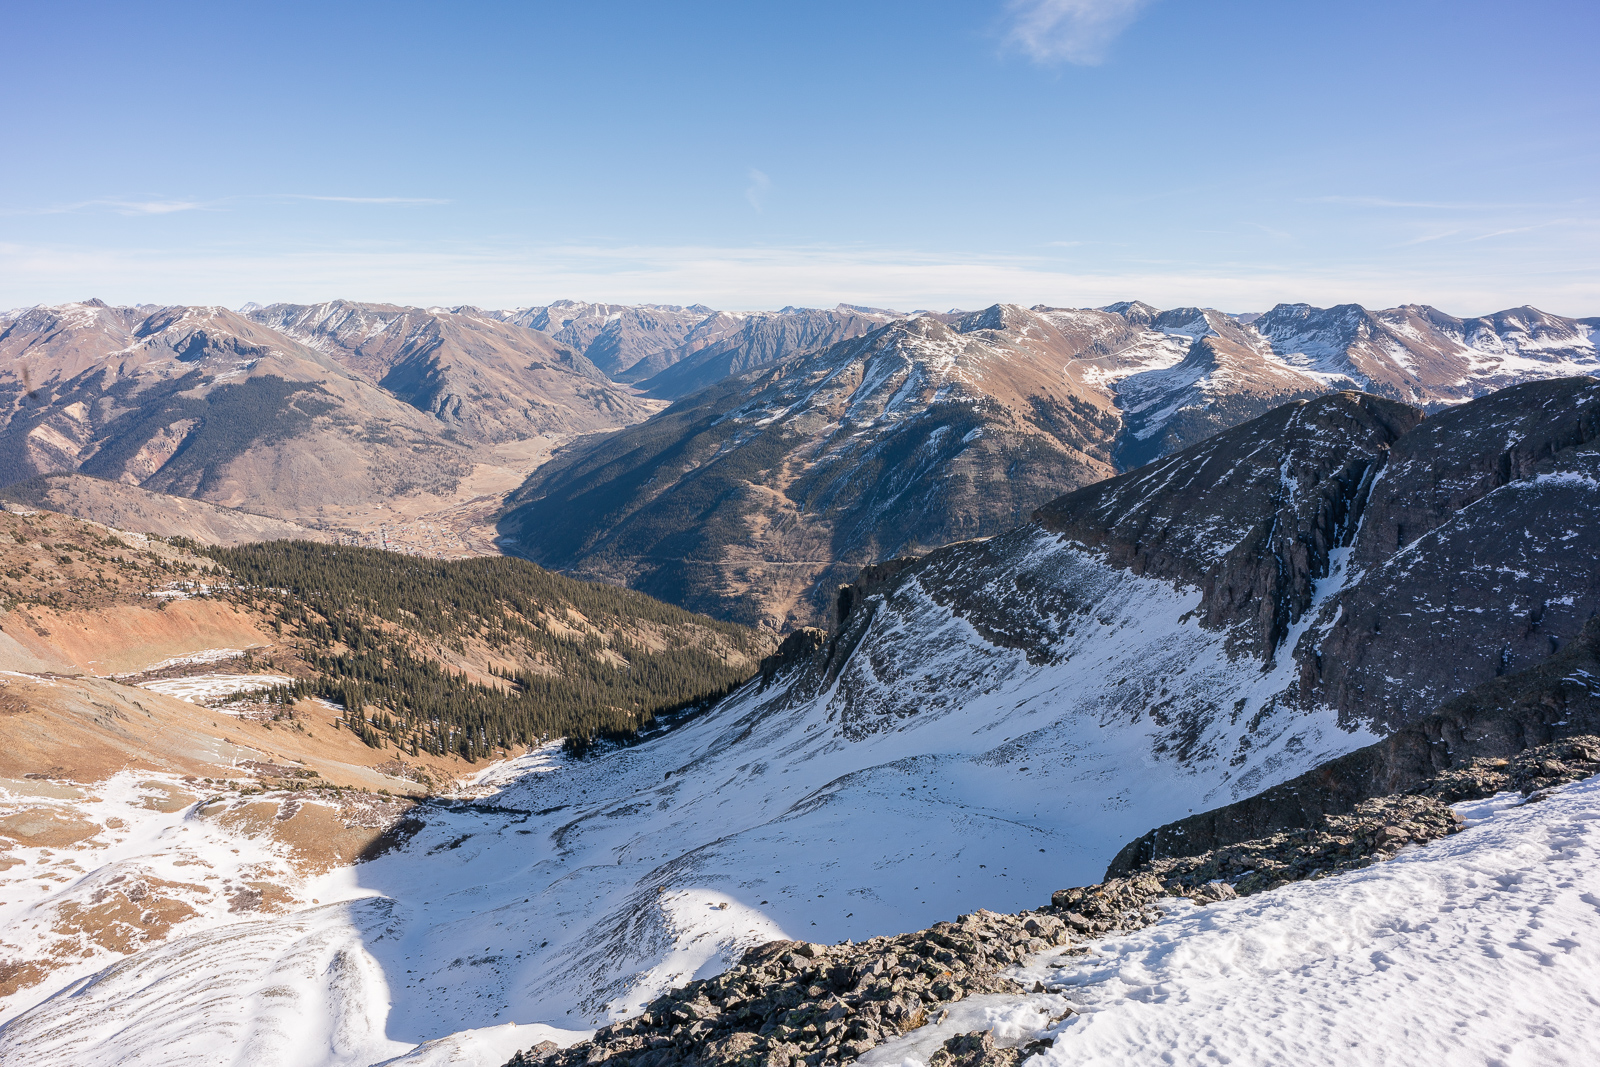
As I hiked up into the basin, the views just got better and better over time and did not let up. I was quite happy to have chosen this route. Snowdon Peak rose above Little Molas Lake behind me in a grand display of early winter.
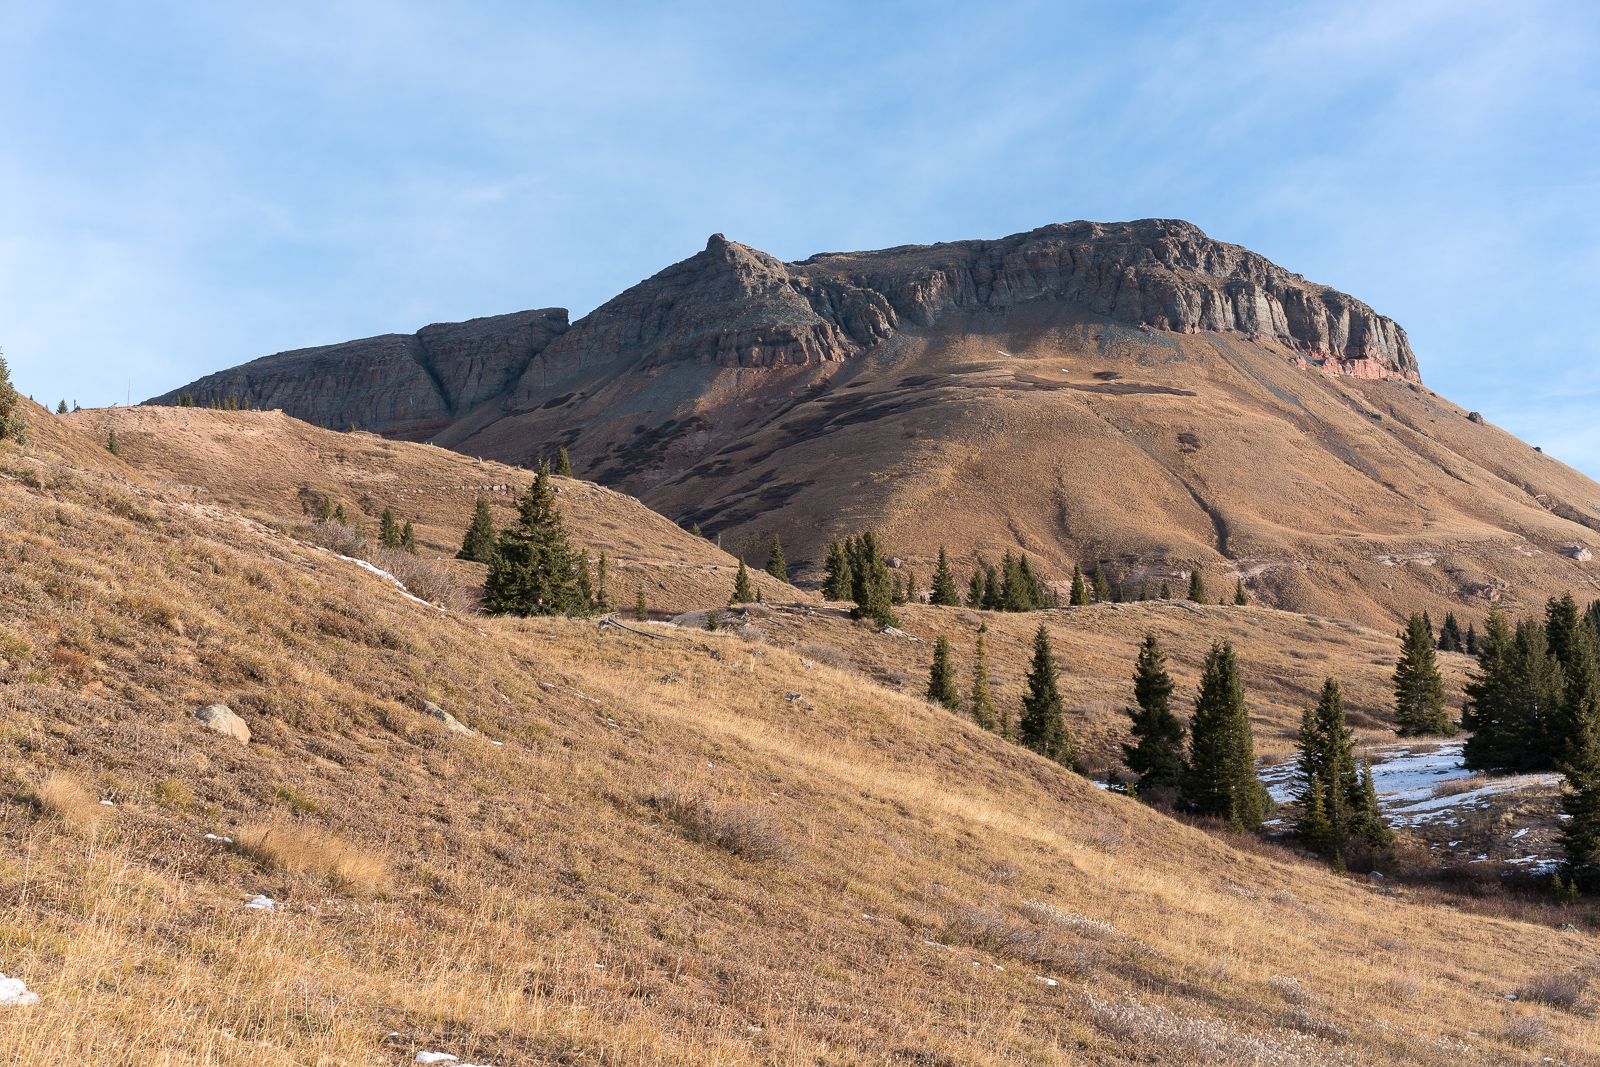
East Turkshead Peak, which is seen from Molas Lake, marked the right half of my passageway.
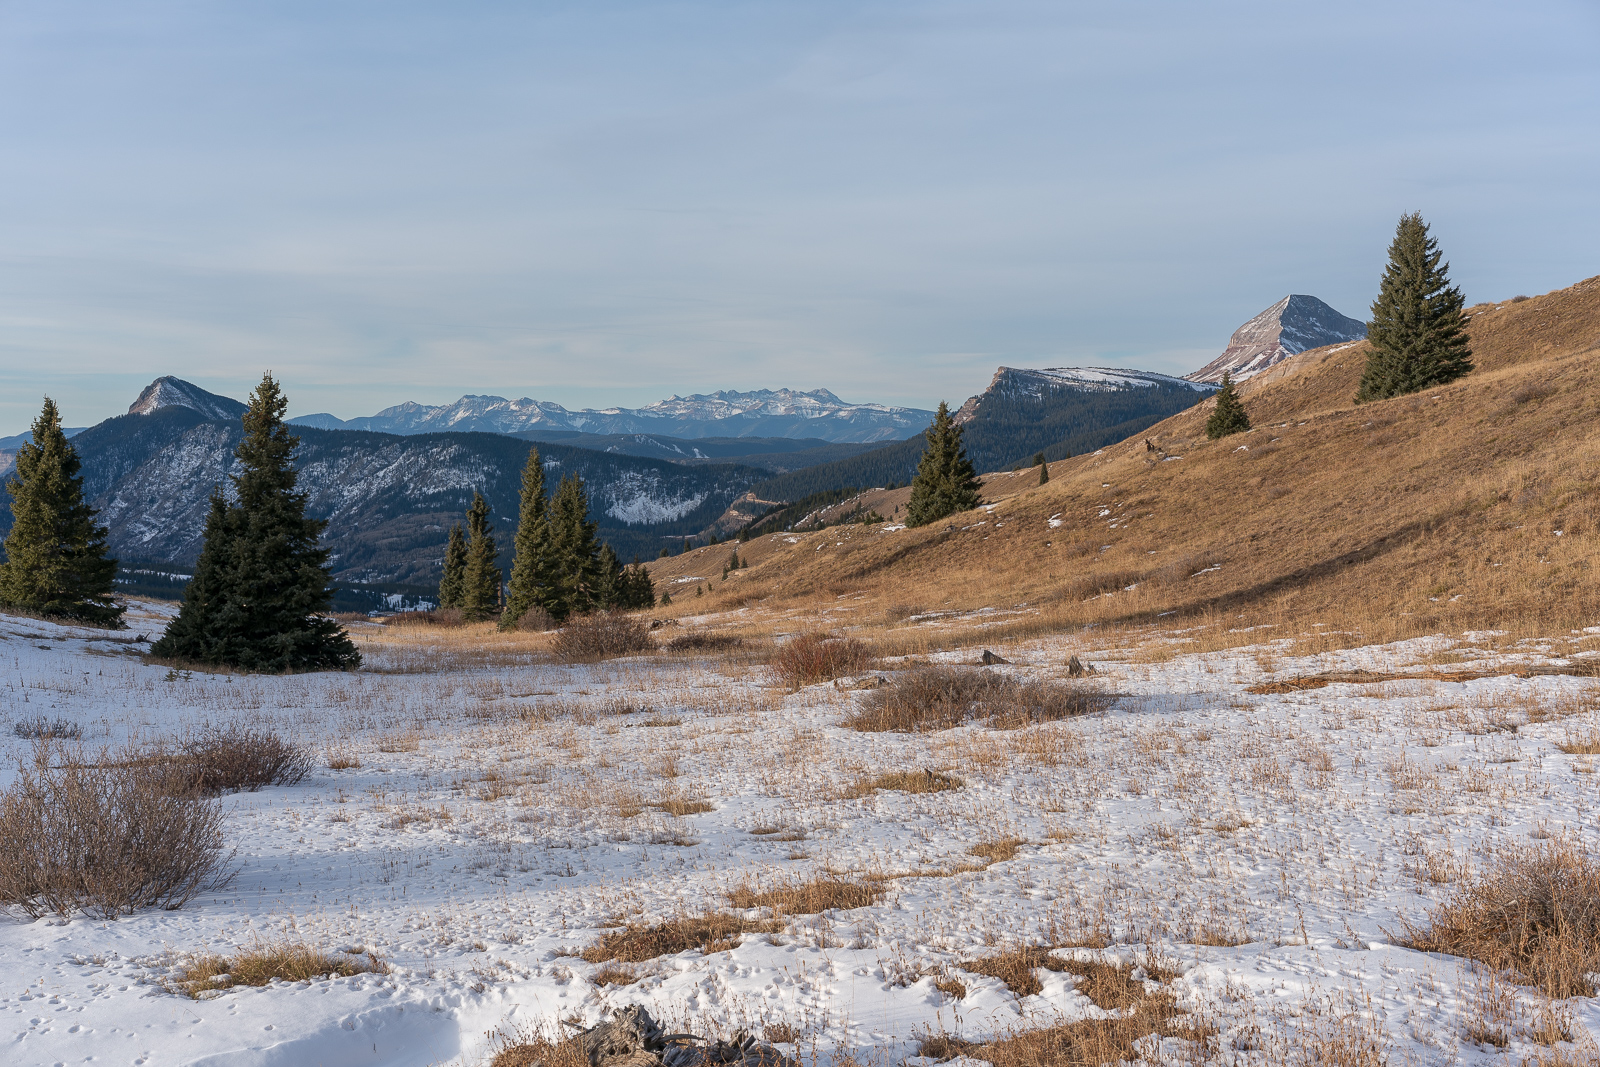
Finally, the La Plata Mountains and Engineer Mountain came into view as well.
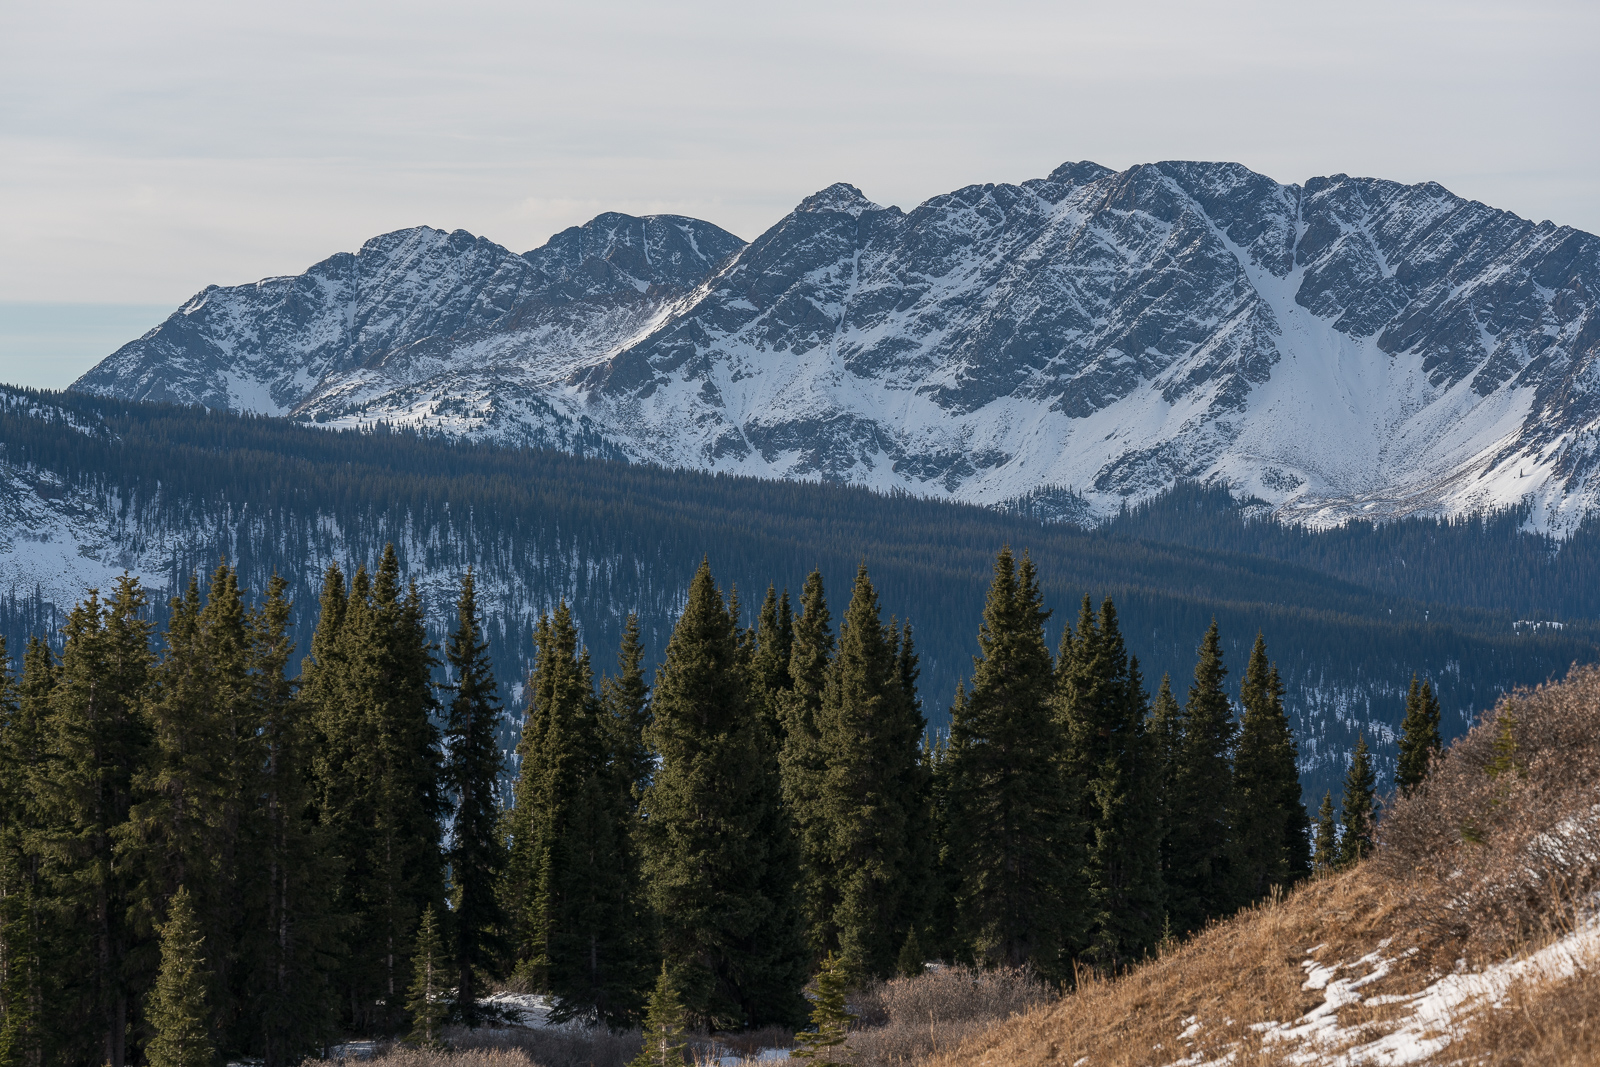
The Twilights were looking pretty amazing too from this area.
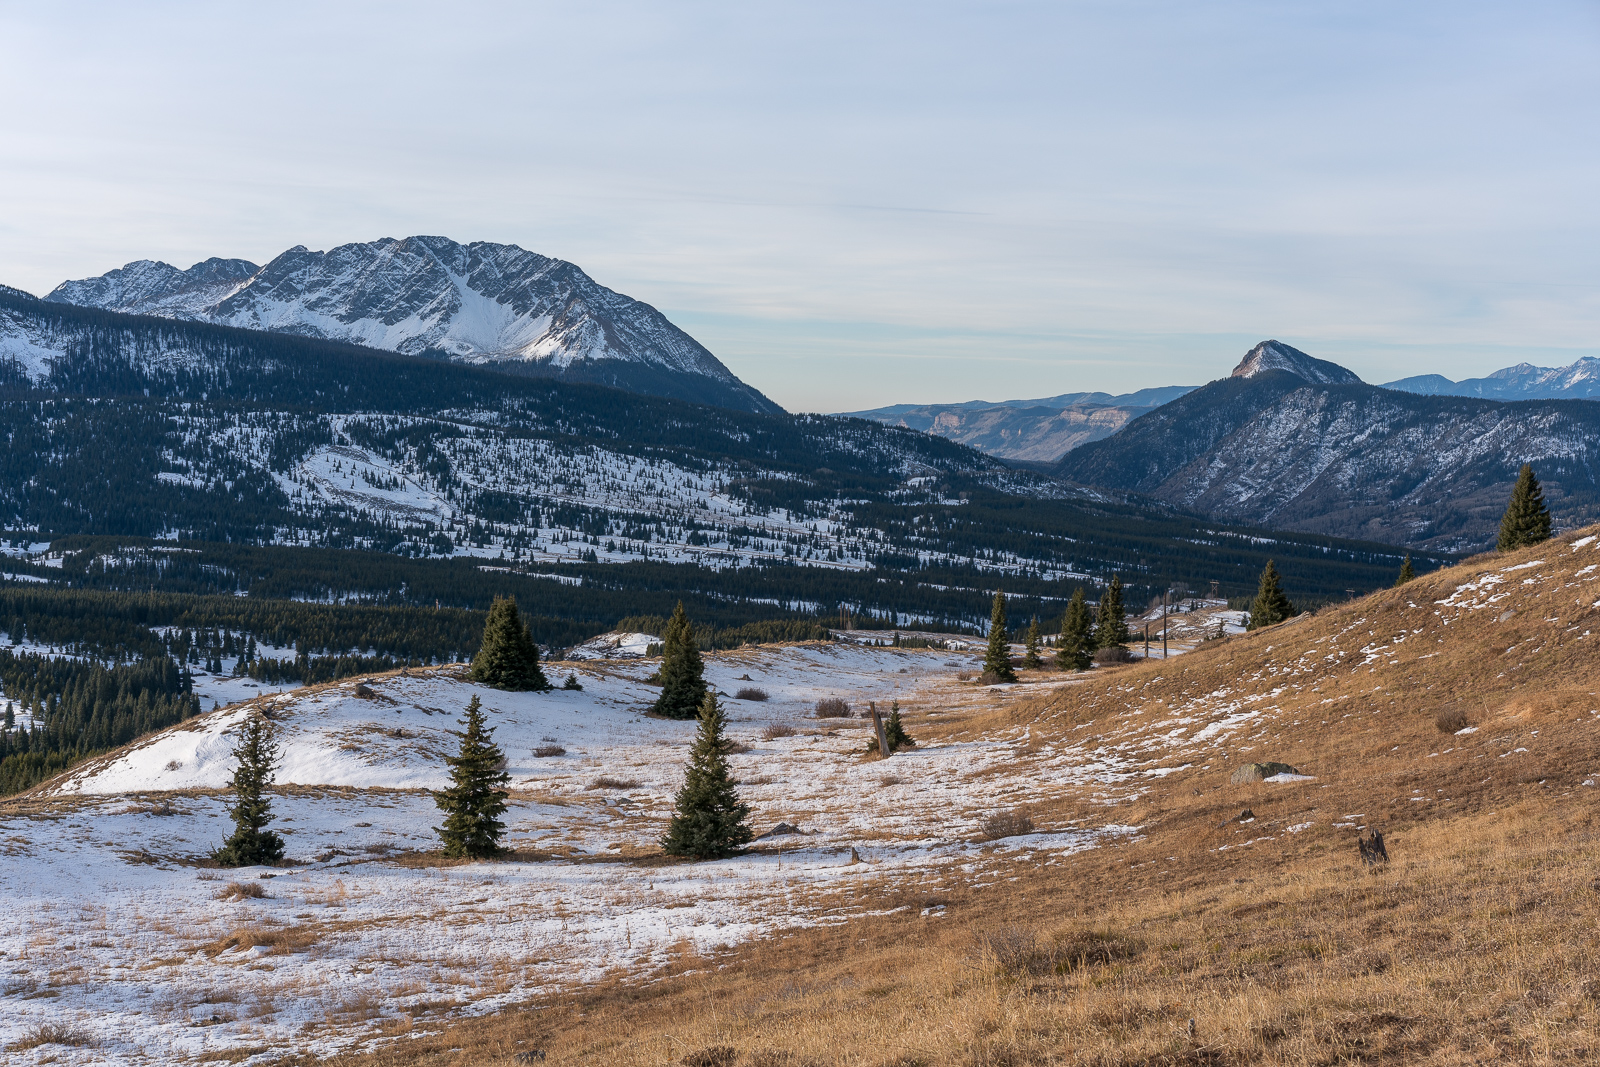
Snowdon demanded my gaze on a frequent basis.
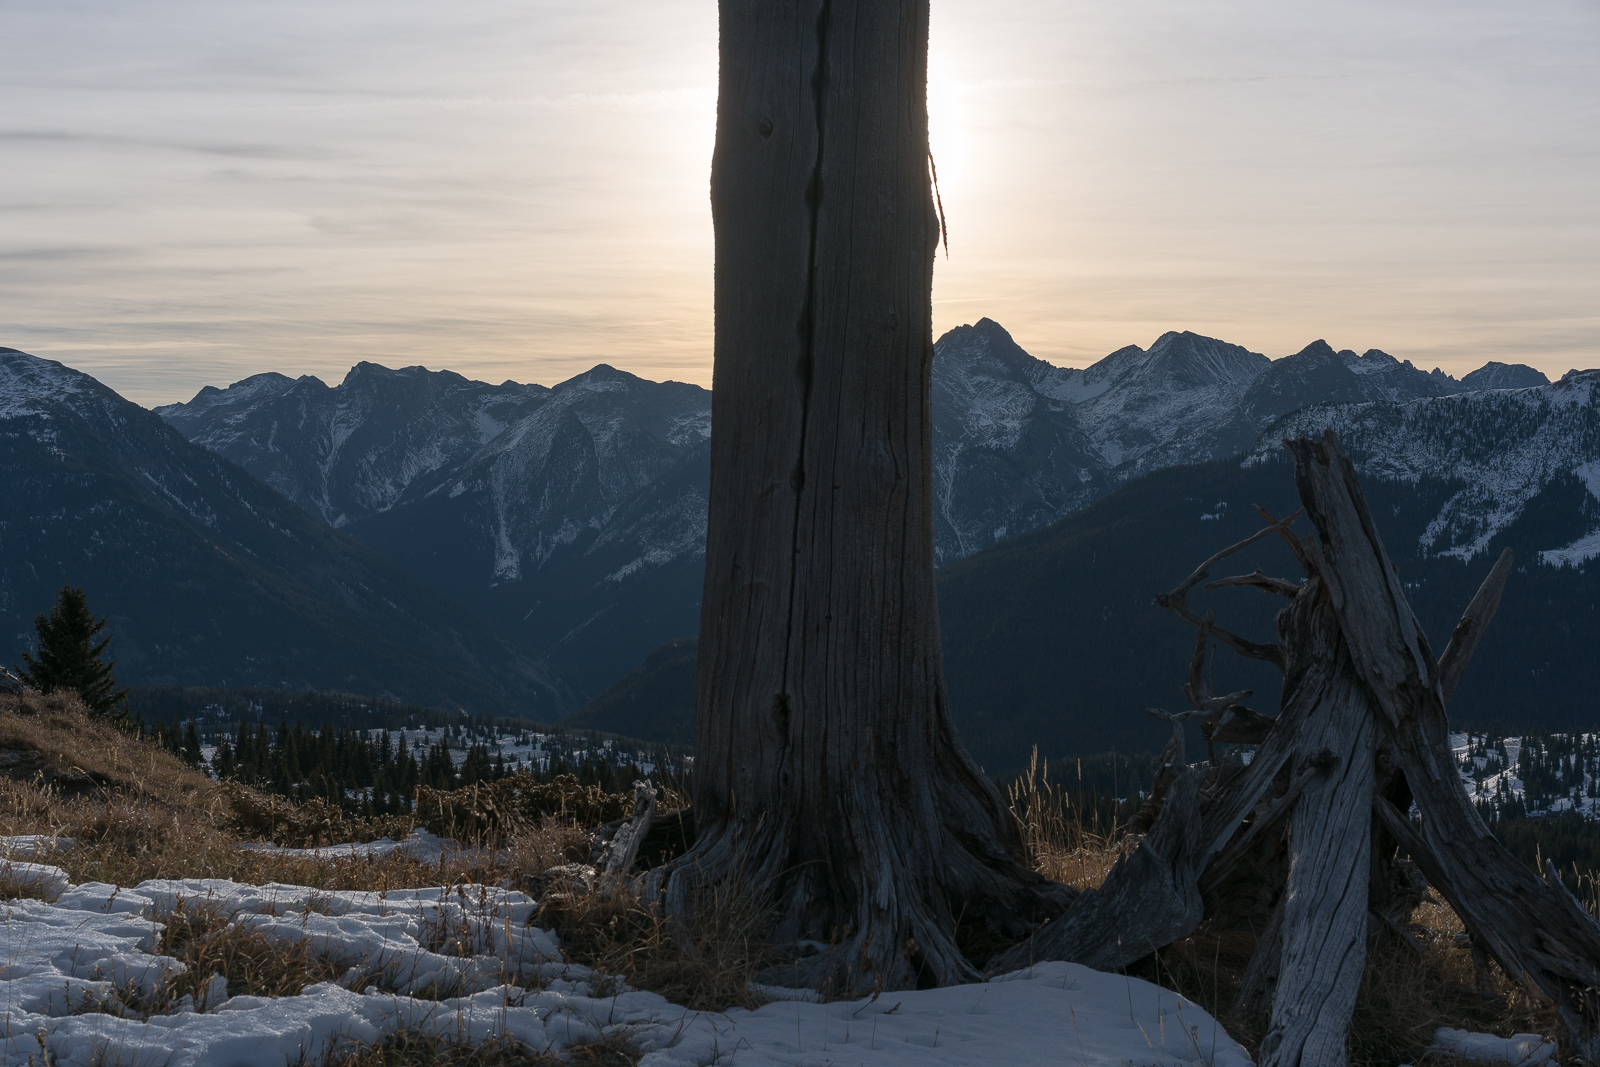
This lone dead tree caught my interest so I framed it with some mountains.
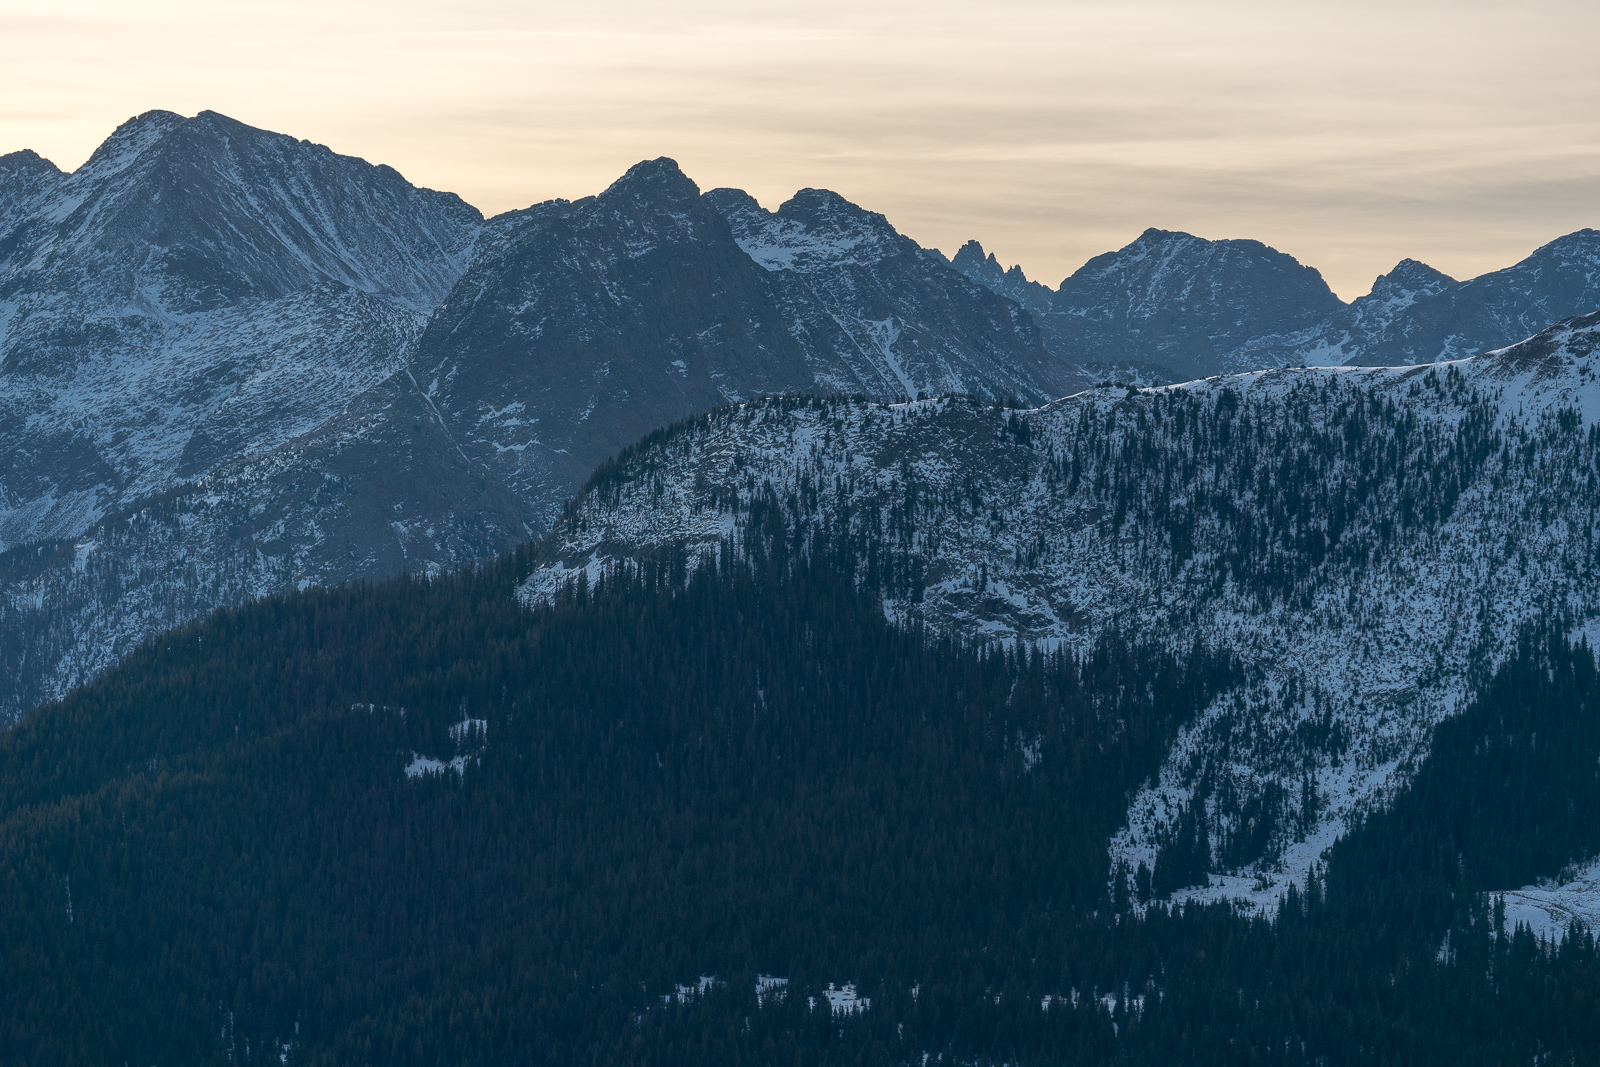
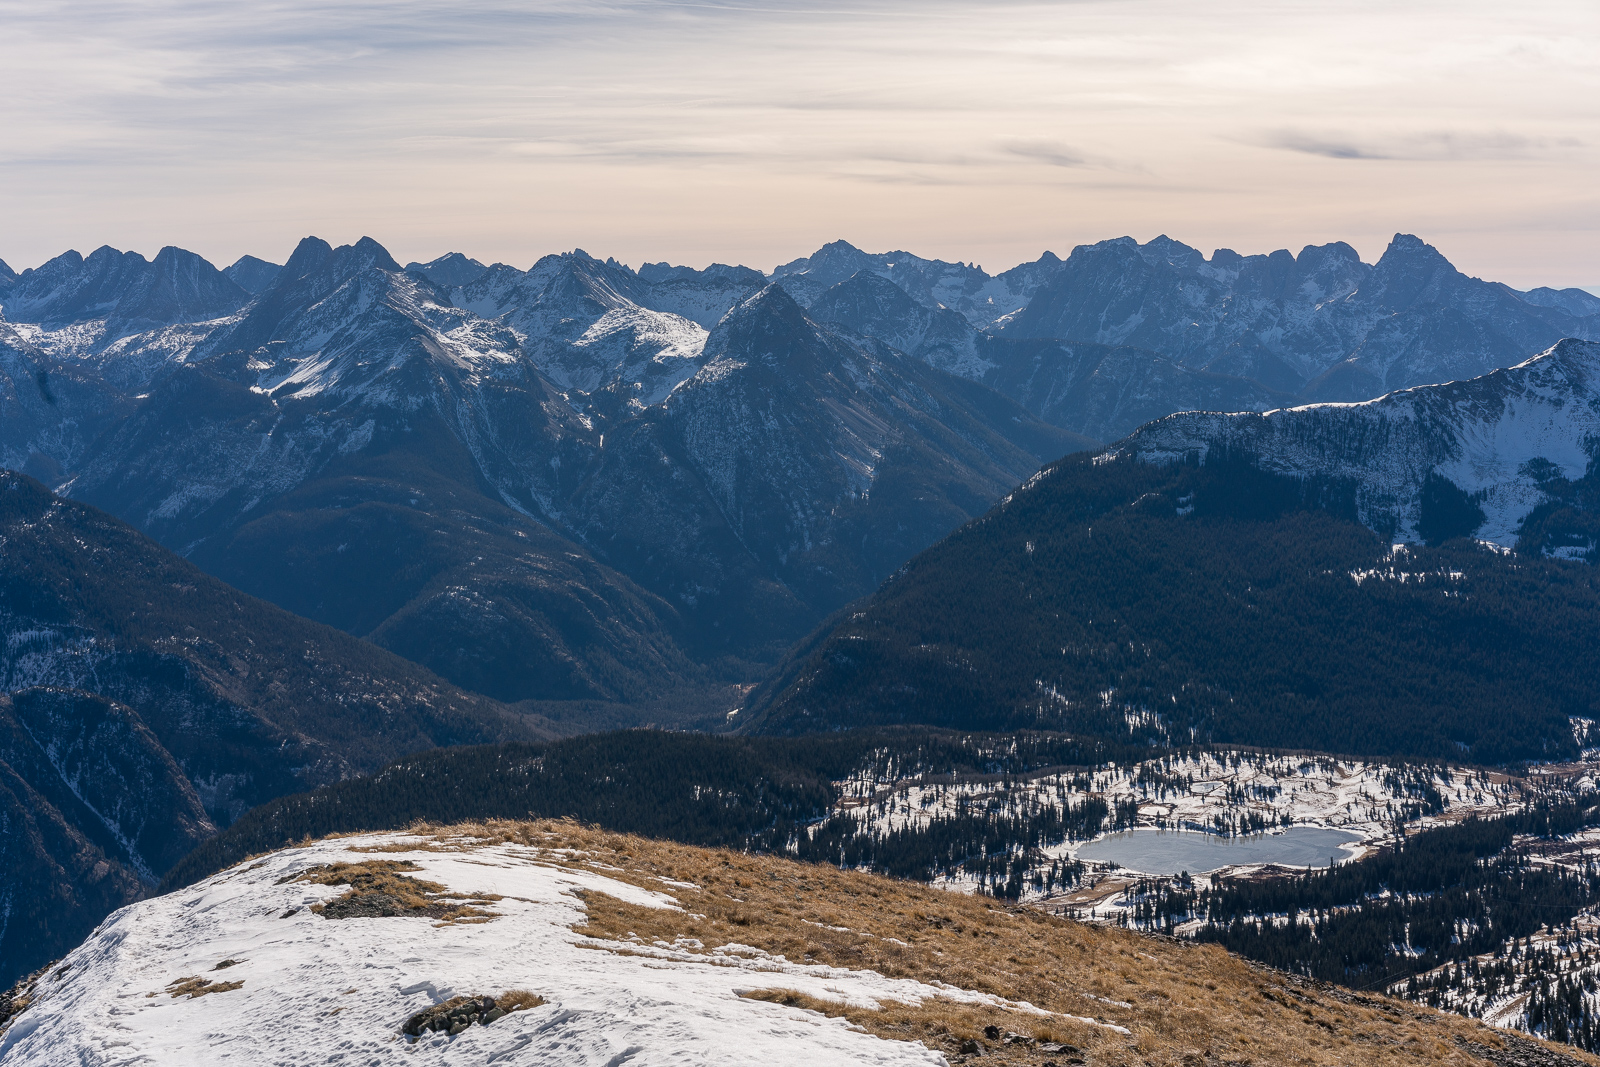
I never get tired of looking at the rugged Needles of the San Juans.
My telephoto lens allowed me to get nice close-up shots of the La Platas too.
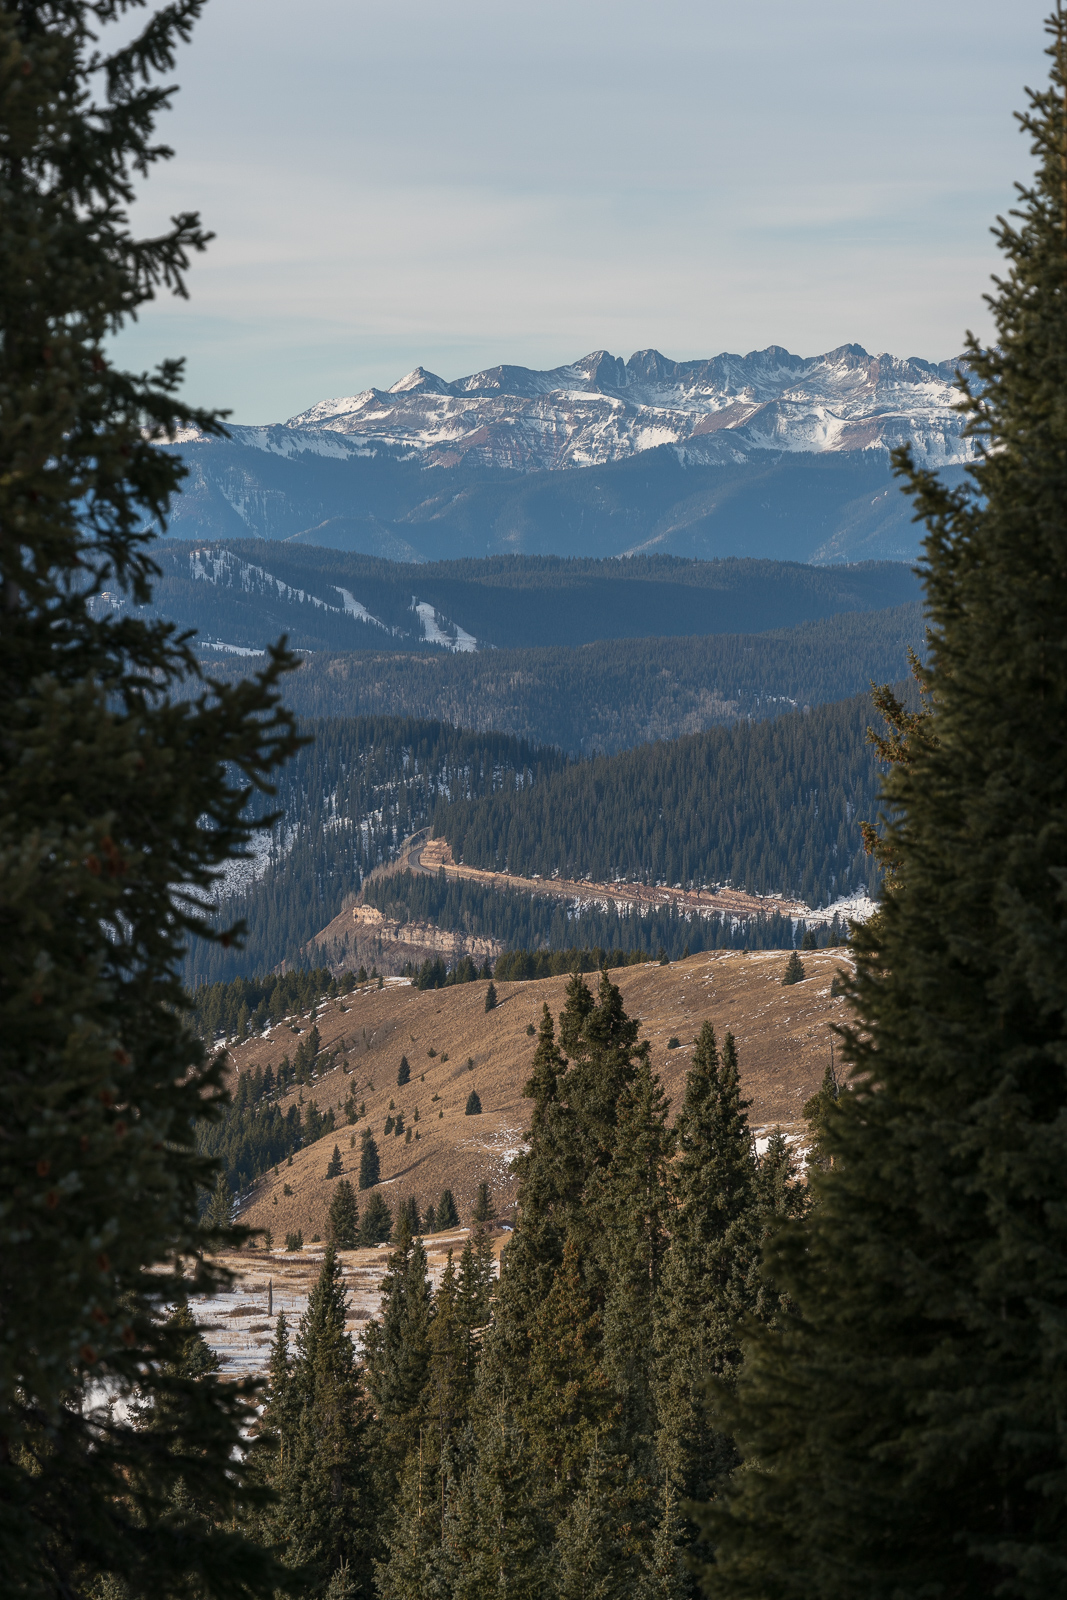
And Engineer Mountain...
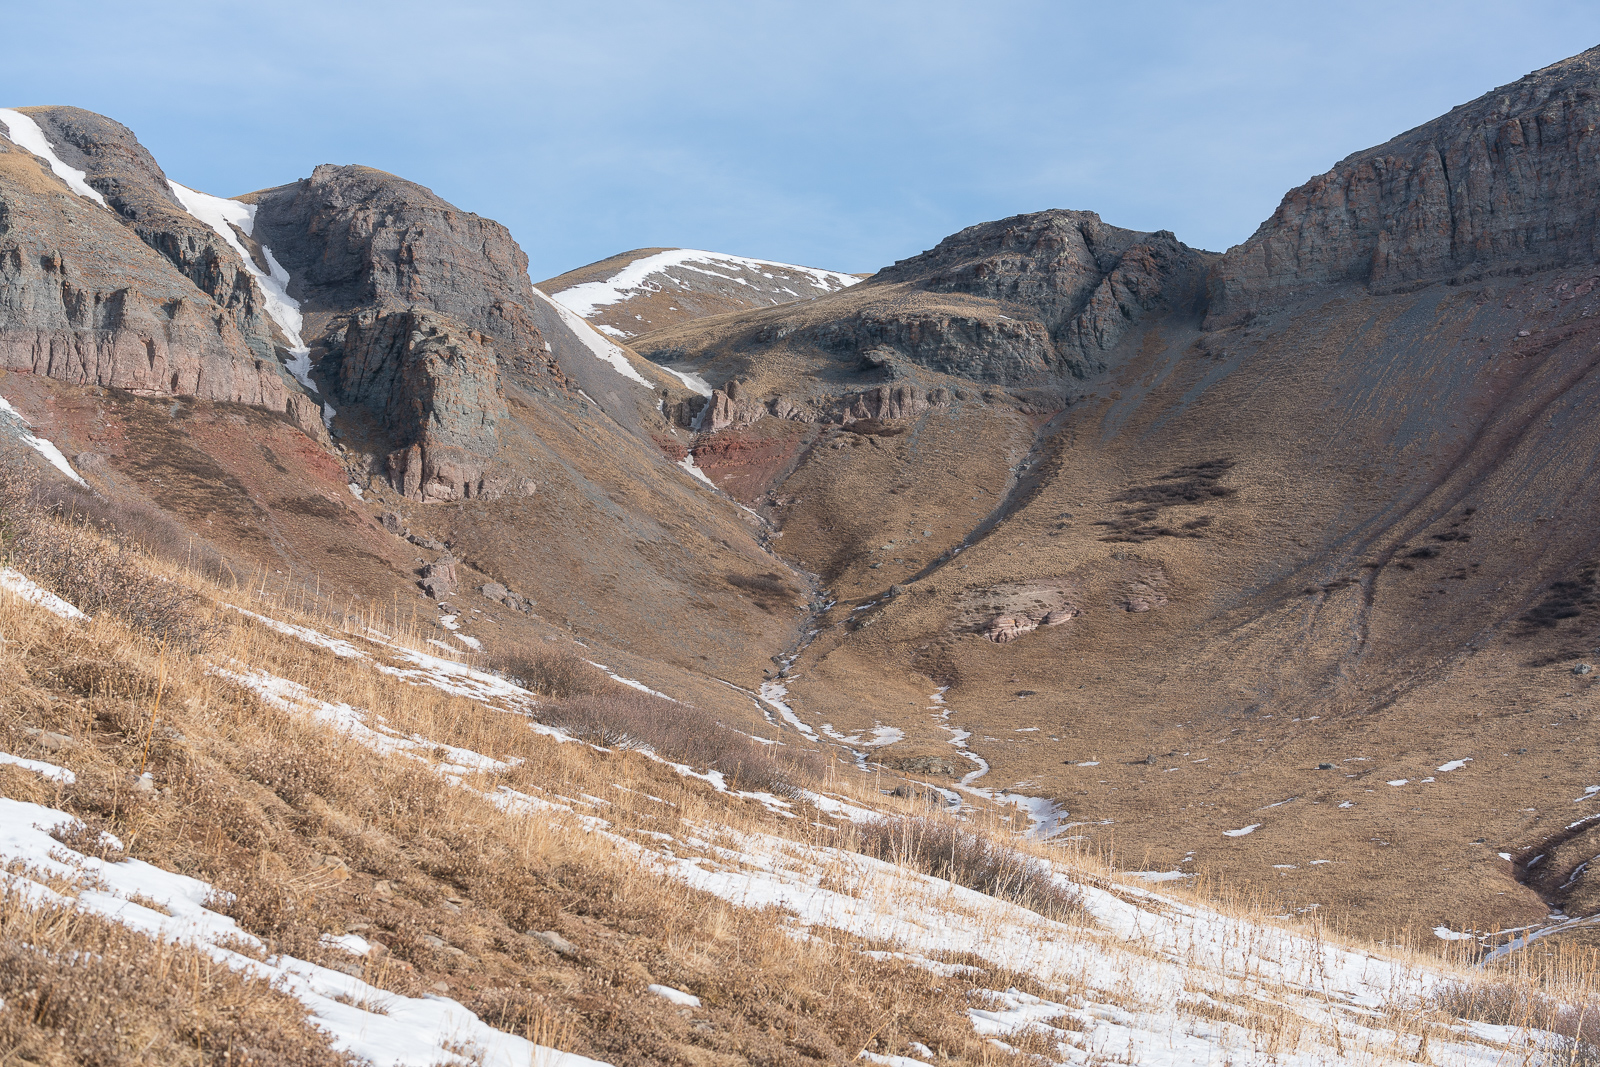
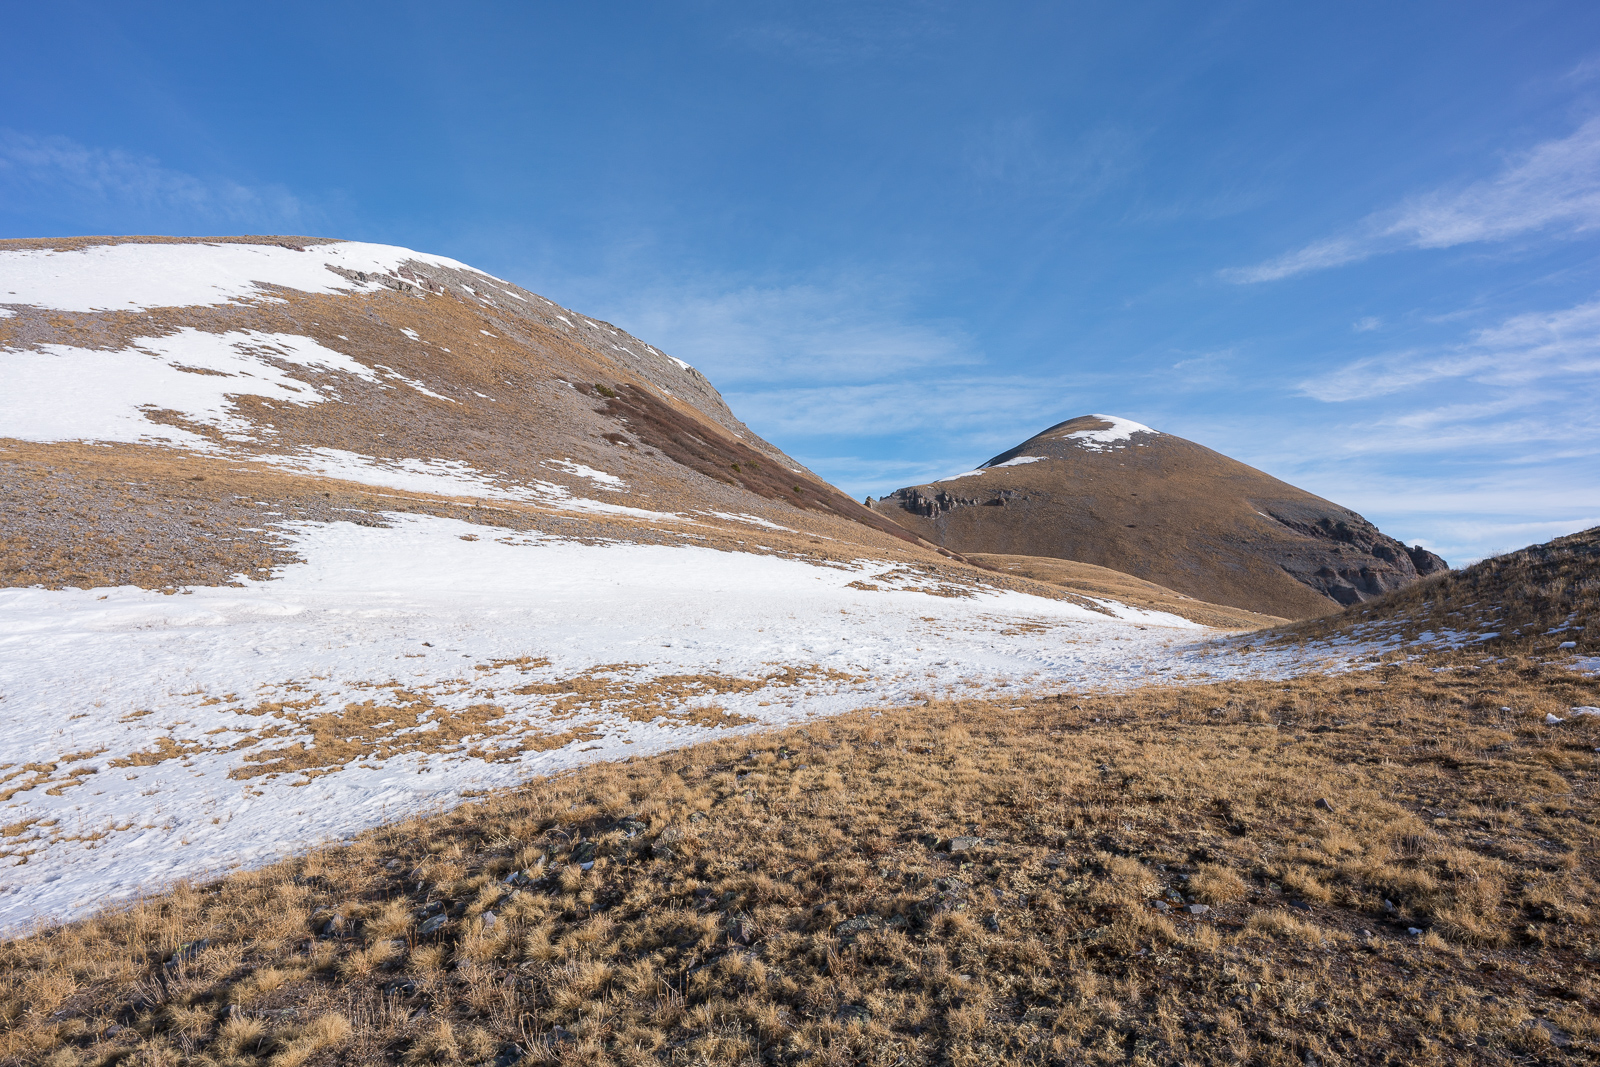
Below is a view of the route I took up into the basin. Pretty much straight ahead between the two rugged peaks.
A low blanket of clouds pretty much stayed in place all day, making for some interesting lighting conditions.

The patterns in the snow and rock on the Twilights was mesmerizing.
And of course, the Grenadiers, how could I forget about them? They almost made me trip over a rock so many times. I can't stop looking at them.
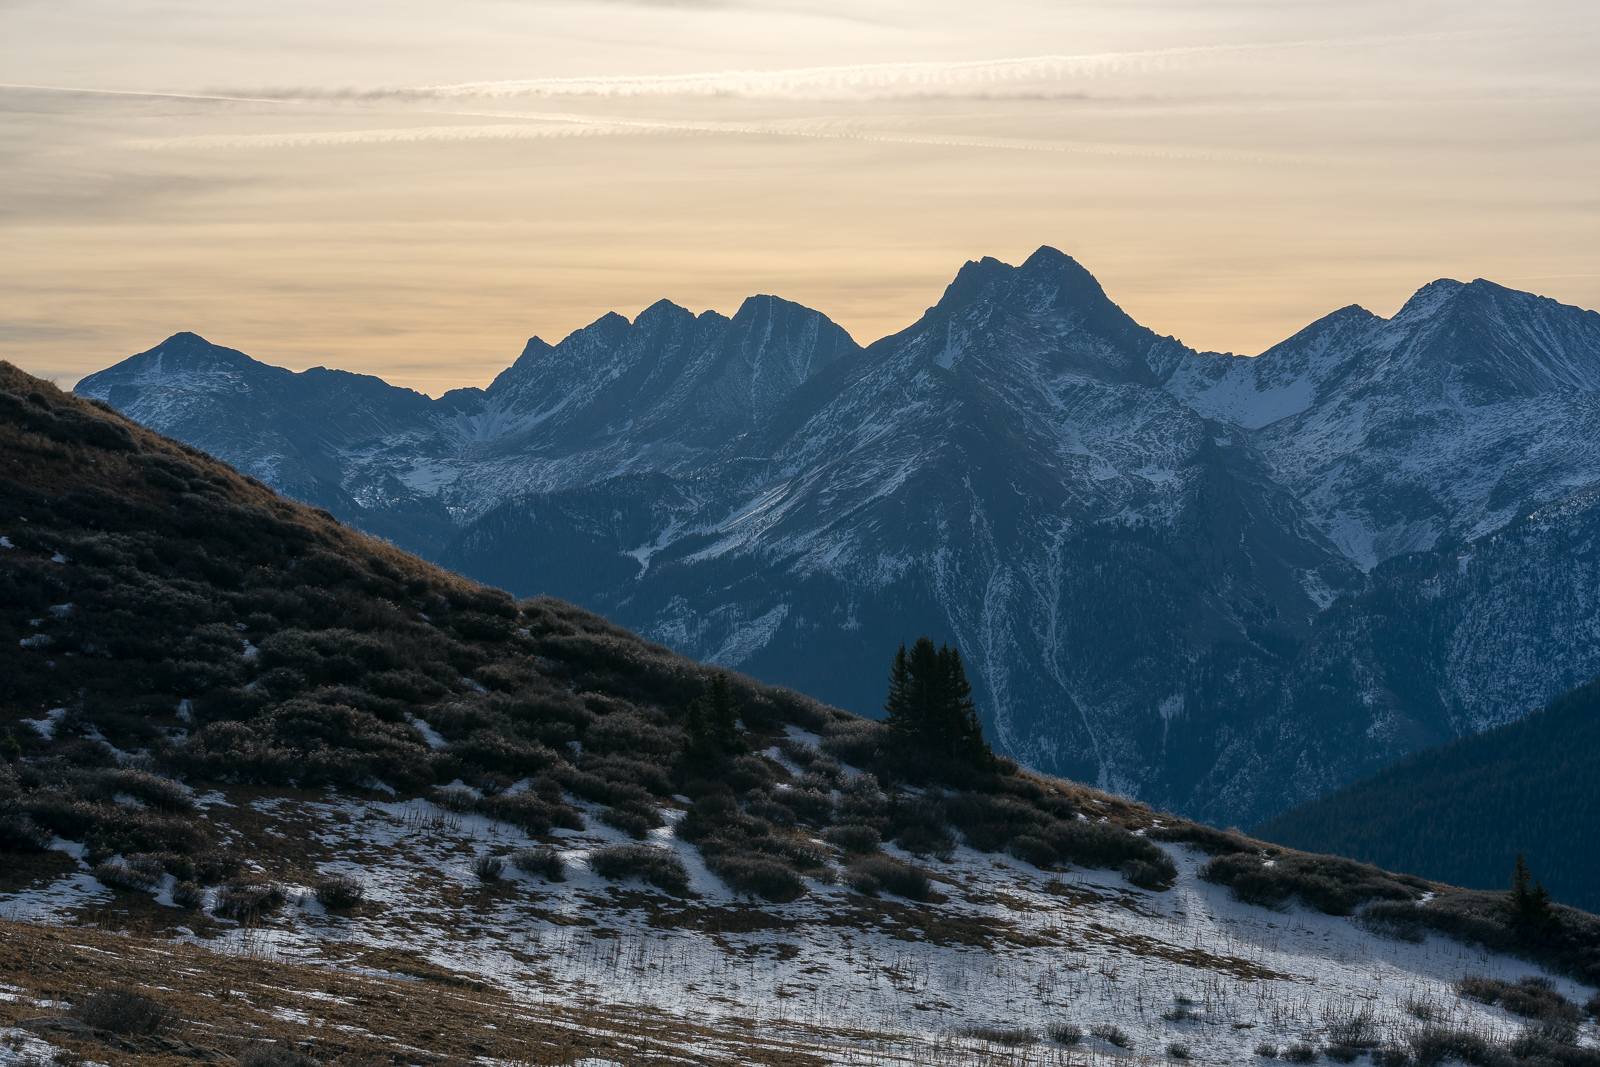
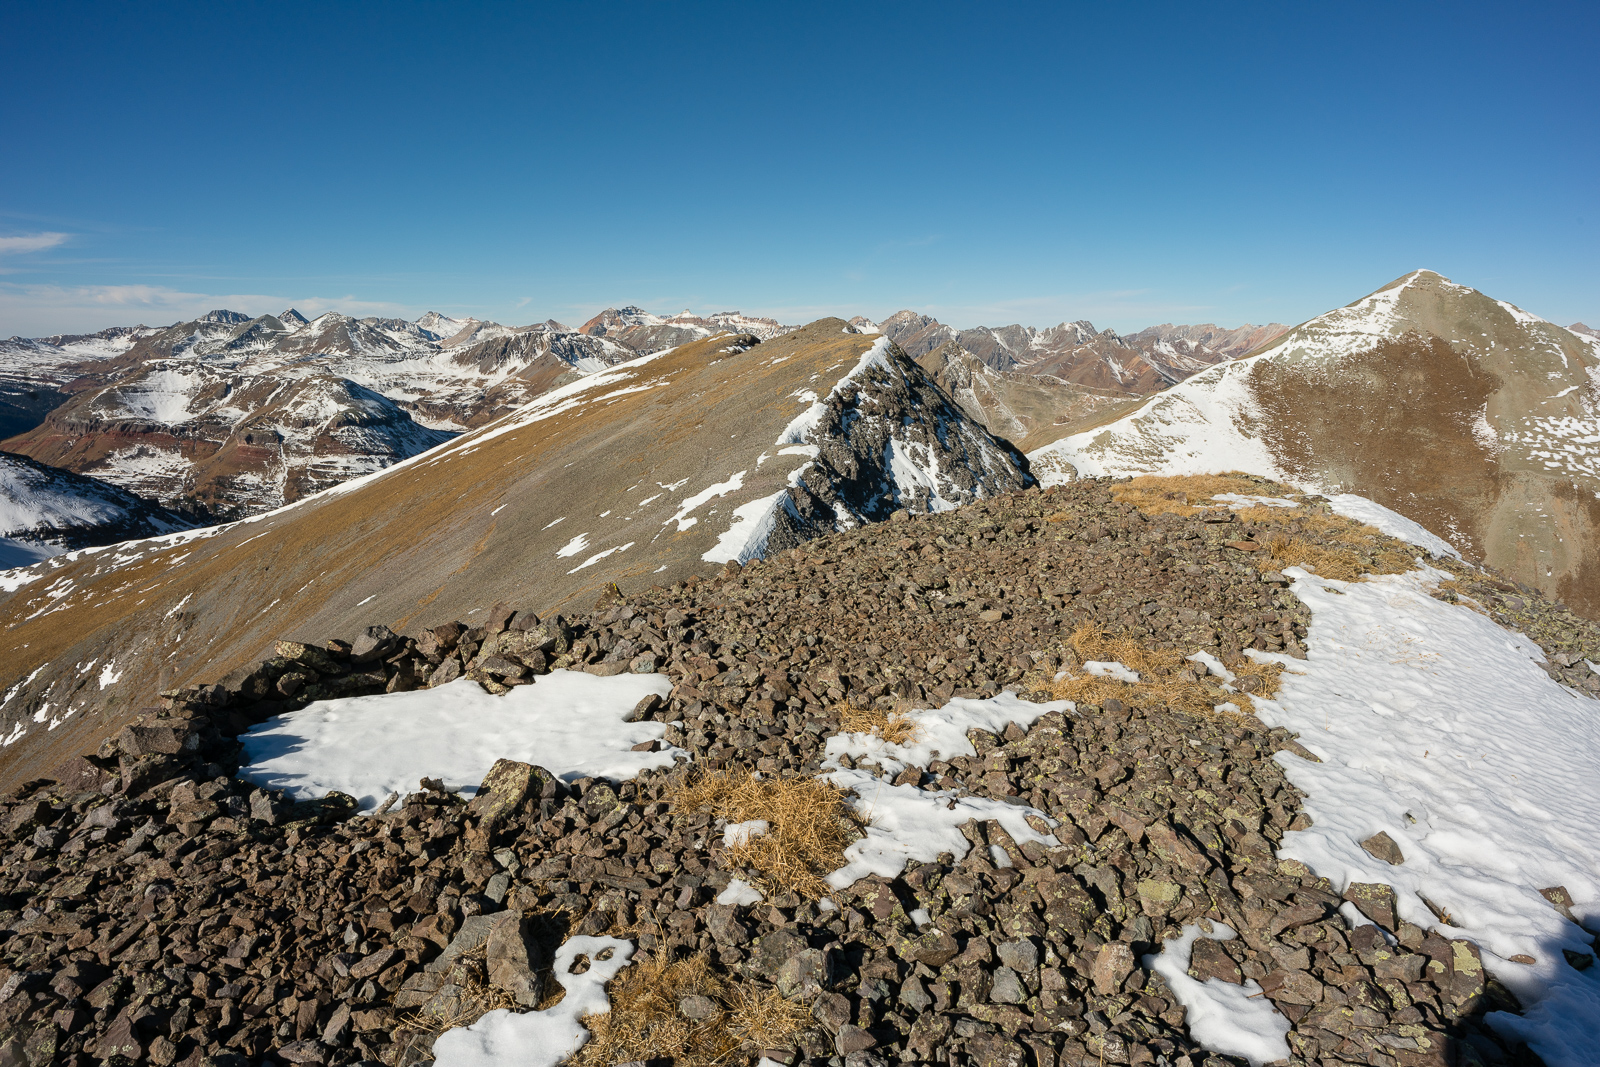
The route was pretty straight-forward, with a small trail going all the way up into the saddle. I decided to take my first rest and eat some snacks and enjoy the view south across towards the Twilights and the Needles, including Pigeon Peak and all her friends.
From here I had to make a decision. I could take the direct route and bypass UN 12,899 (seen left below), or go over it. I decided to go up and over it.
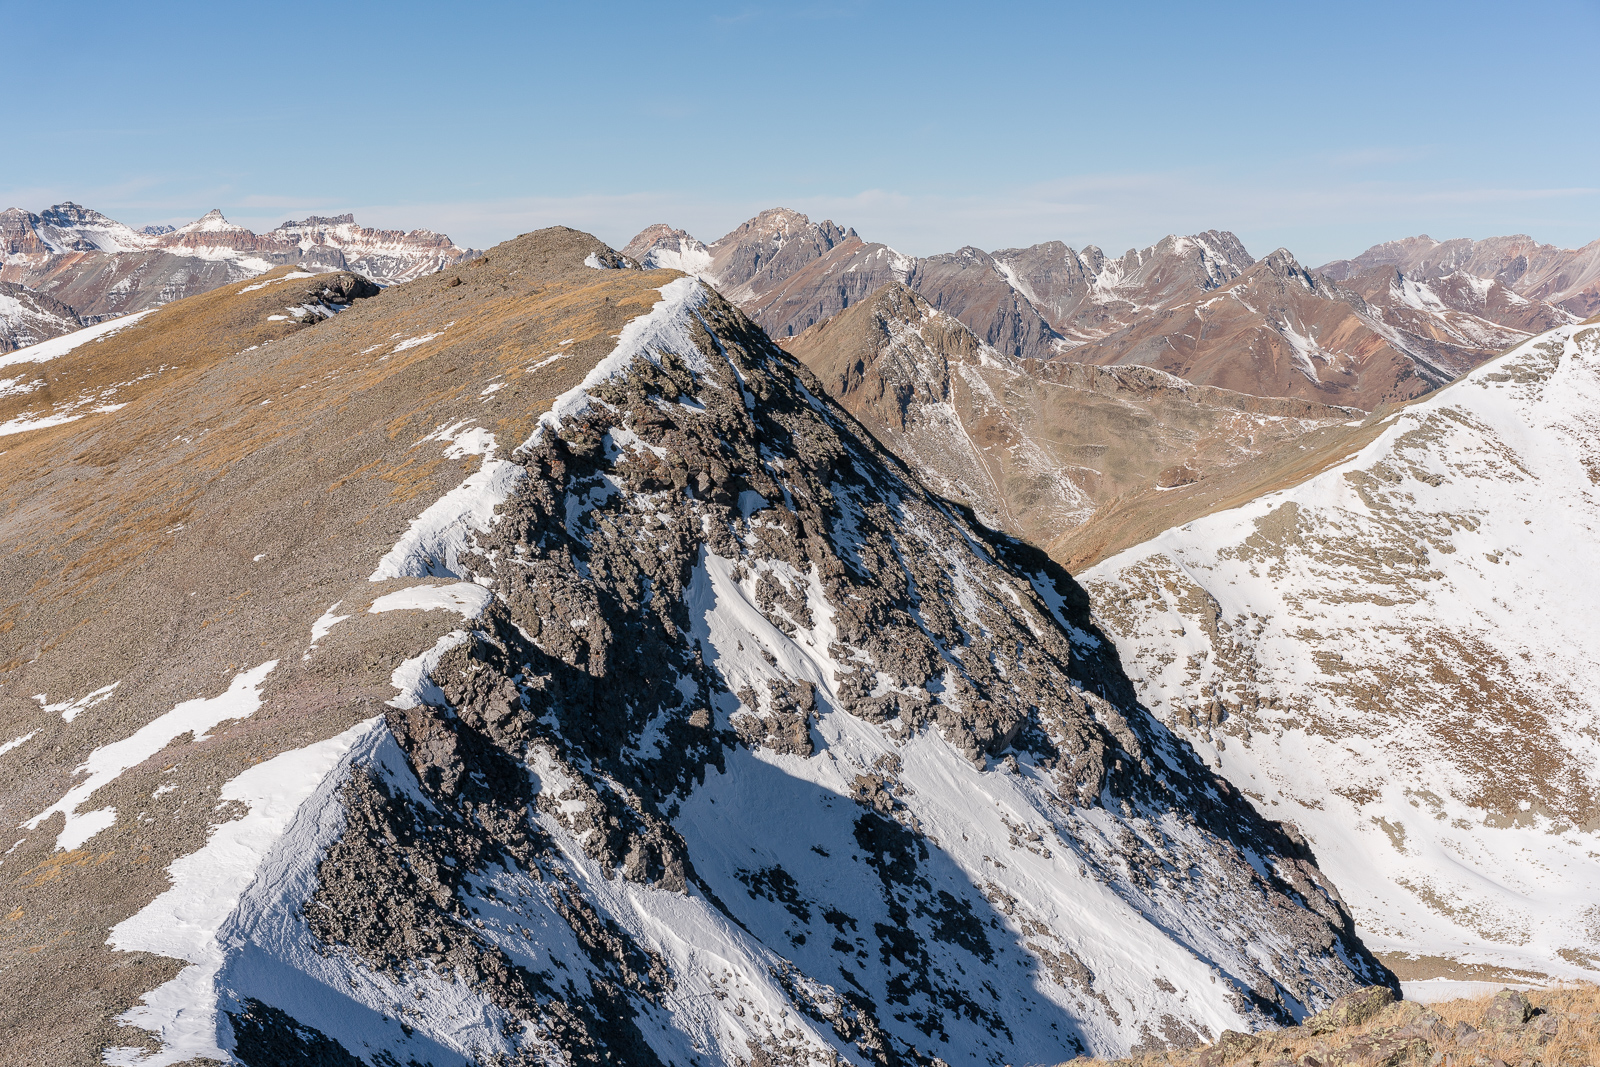
East Turkshead Peak dominated my view for much of my ascent of UN 12,899.
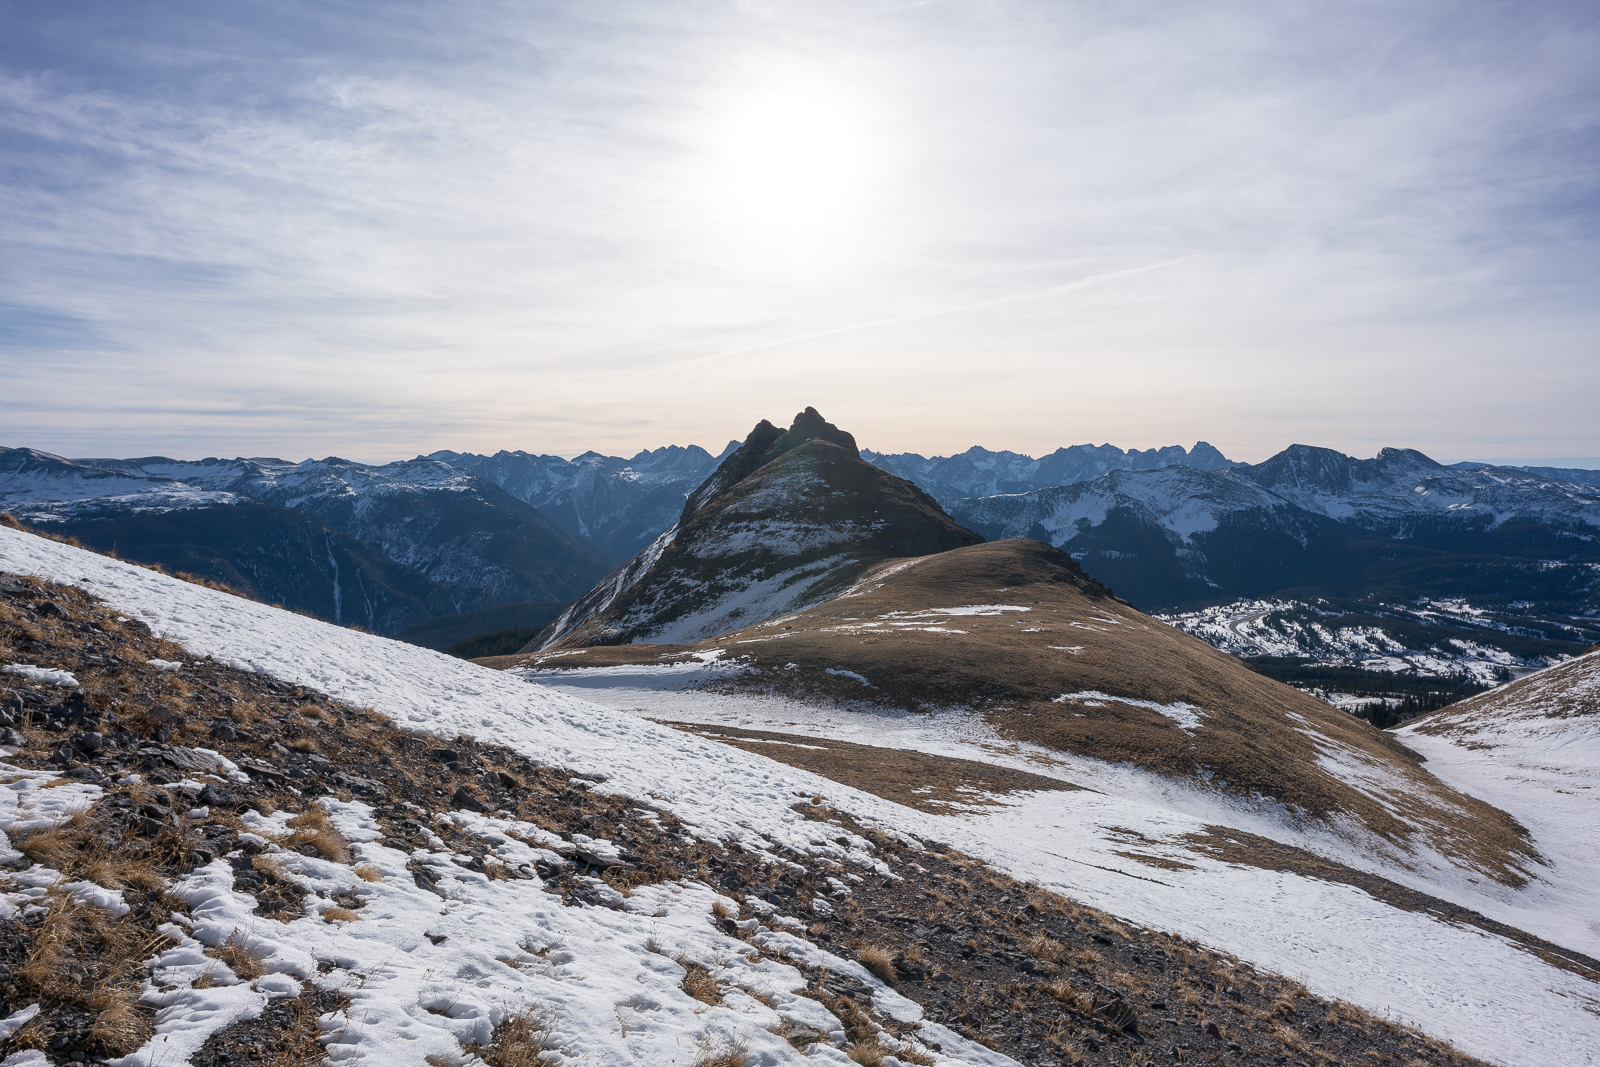
From this slopes of UN 12,899, I could pretty much make out every major peak in the Weminuche Wilderness Area.
But then, as if I could not be any happier with the view, the line of sight to the west opened up, revealing all of the Ice Lake Basin 13ers, including Vermillion, Golden Horn, Pilot Knob, and U.S. Grant. What a great view from UN 12,899!
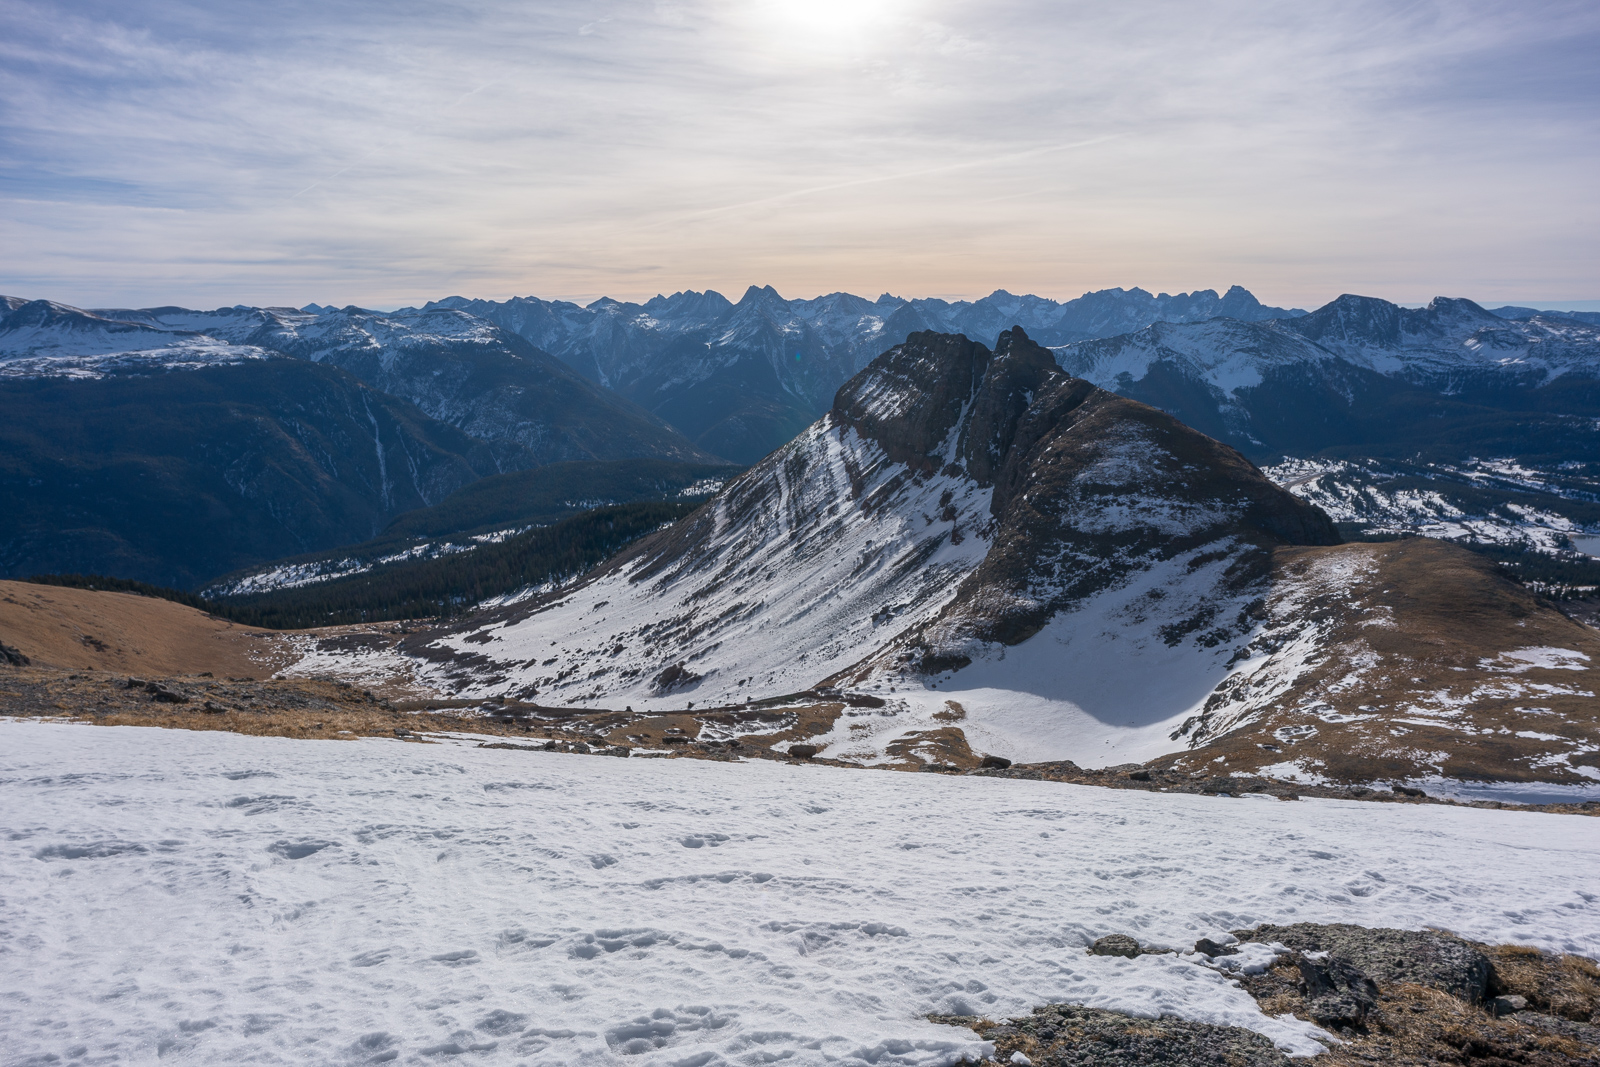
I could also see the remainder of my route for the day and how much further I had to go to reach Sultan. It was expansive! The plan was to hit Grand Turk and then head over the Sultan (left), but I also noticed Spencer Peak (right) was another possible target. Why not?
One last shot of the Needles from 12,899 was in order before heading over to Spencer Peak. I laid down on my stomach to get this one.
All those Ice Lake 13ers were looking mighty fine too...

It appeared that most people bypassed Spencer Peak to get to Grand Turk, based on the trail I could make out on the west slope.
More awesome views of Pigeon and friends...
I found some interesting vantage points along the way over to Spencer which made for fun shooting of my shadow.
Sultan still dominated the horizon.
More shadow play.
I reached the summit of Spencer Peak in no time and enjoyed the views of Engineer from there.
Looking down at Grand Turk from Spencer revealed another trail that bypassed Grand Turk altogether. I decided to head down and then go up Grand Turk (and I hit all of her sub-summits too).
Perhaps my favorite photo from the hike, I really liked the way the snow lit up in the early morning sun, sparkling in interesting patterns, all leading up to a view of Pigeon Peak and the Grenadiers.

Reaching the saddle between Spencer and Grand Turk made for a fantastic view back at Spencer, which looked quite large from this vantage.
I reached the summit of Grand Turk pretty quickly and gazed over at Sultan, which still looked like it was a long ways away!
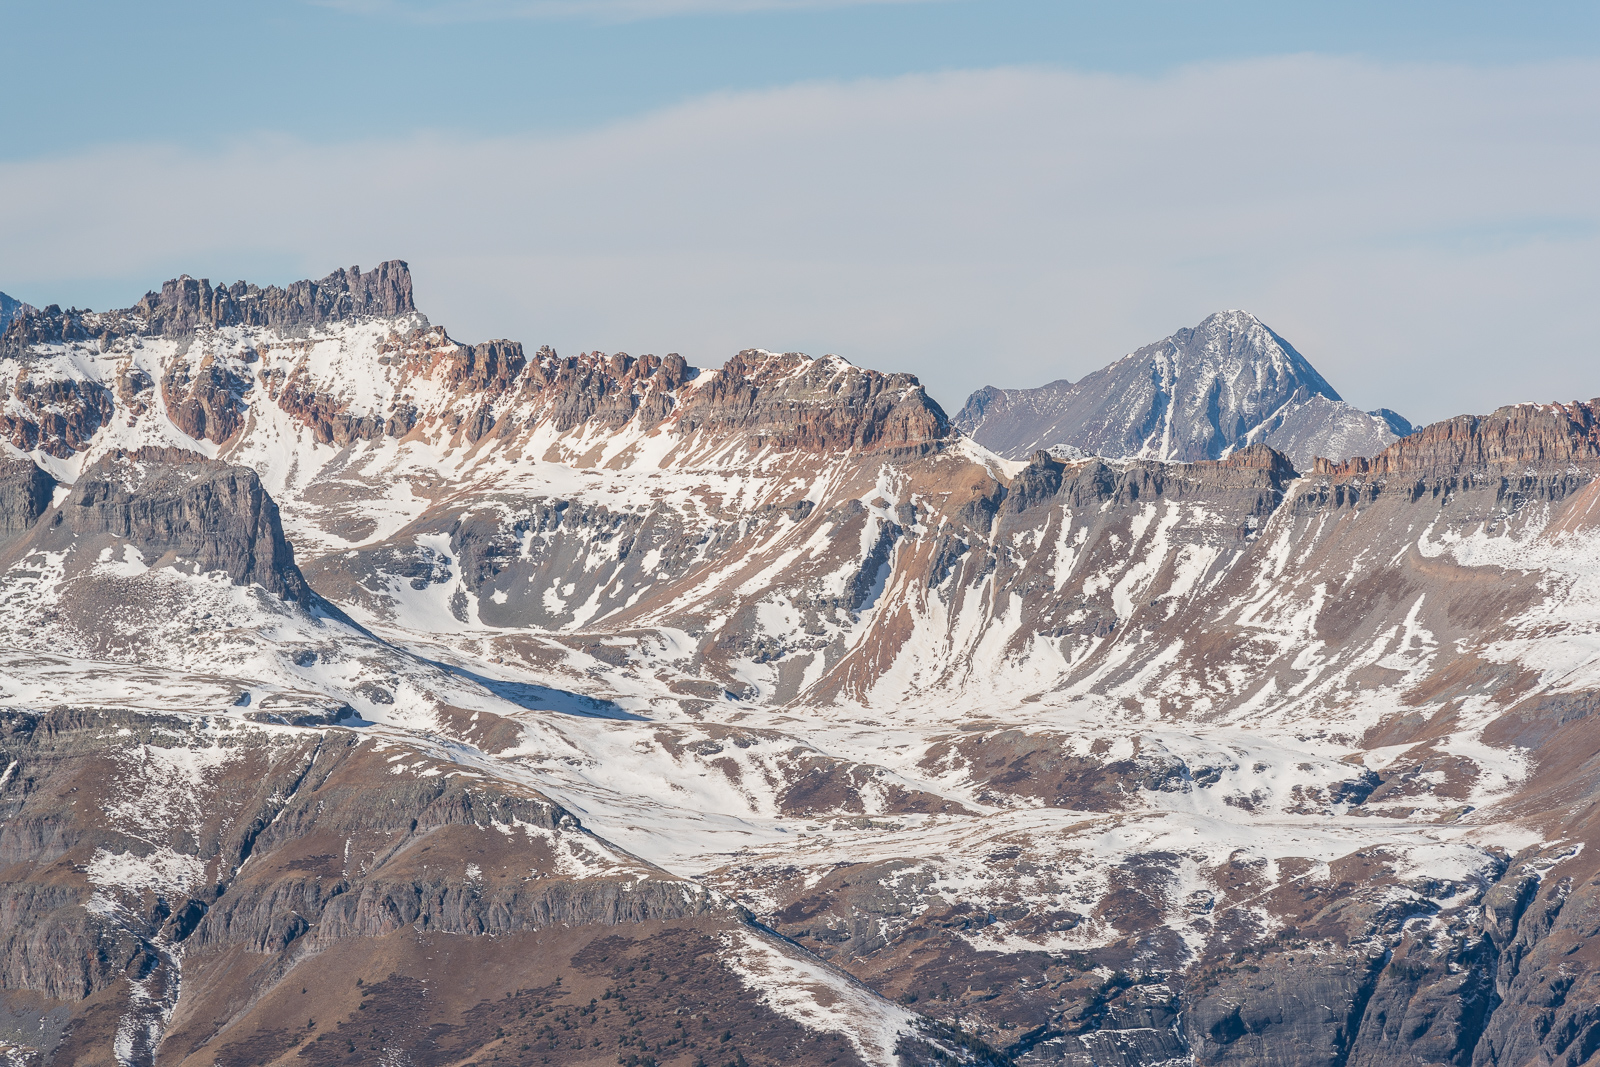
There was a nice view of the town of Silverton from Grand Turk, which had many notable 13ers and 14ers in view above it, including Half Peak, Jones & Niagra, Handies, Whitecross, and even the tip of Uncompahgre poking out.
From the eastern-most summit of Grand Turk, looking back across the various sub-summits of Grand Turk and the Ice Lake Basin 13ers made for an impressive vantage and composition.
Grenadiers! :-)
It's just a sea of peaks up here.
Off to Sultan. What a steep slog. Not bad though. She has an impressive stature.
On the way up Sultan, I took many breaks to take shots of the surrounding peak, including Engineer Mountain.
And this tight zoom of Vermillion, Golden Horn, and Pilot Knob...
I was alone most of the day, but about half way up Sultan, I noticed some climbers cresting the ridge between UN 12,899 and Spencer. I enjoyed photographing them with the telephoto lens from my vantage points.
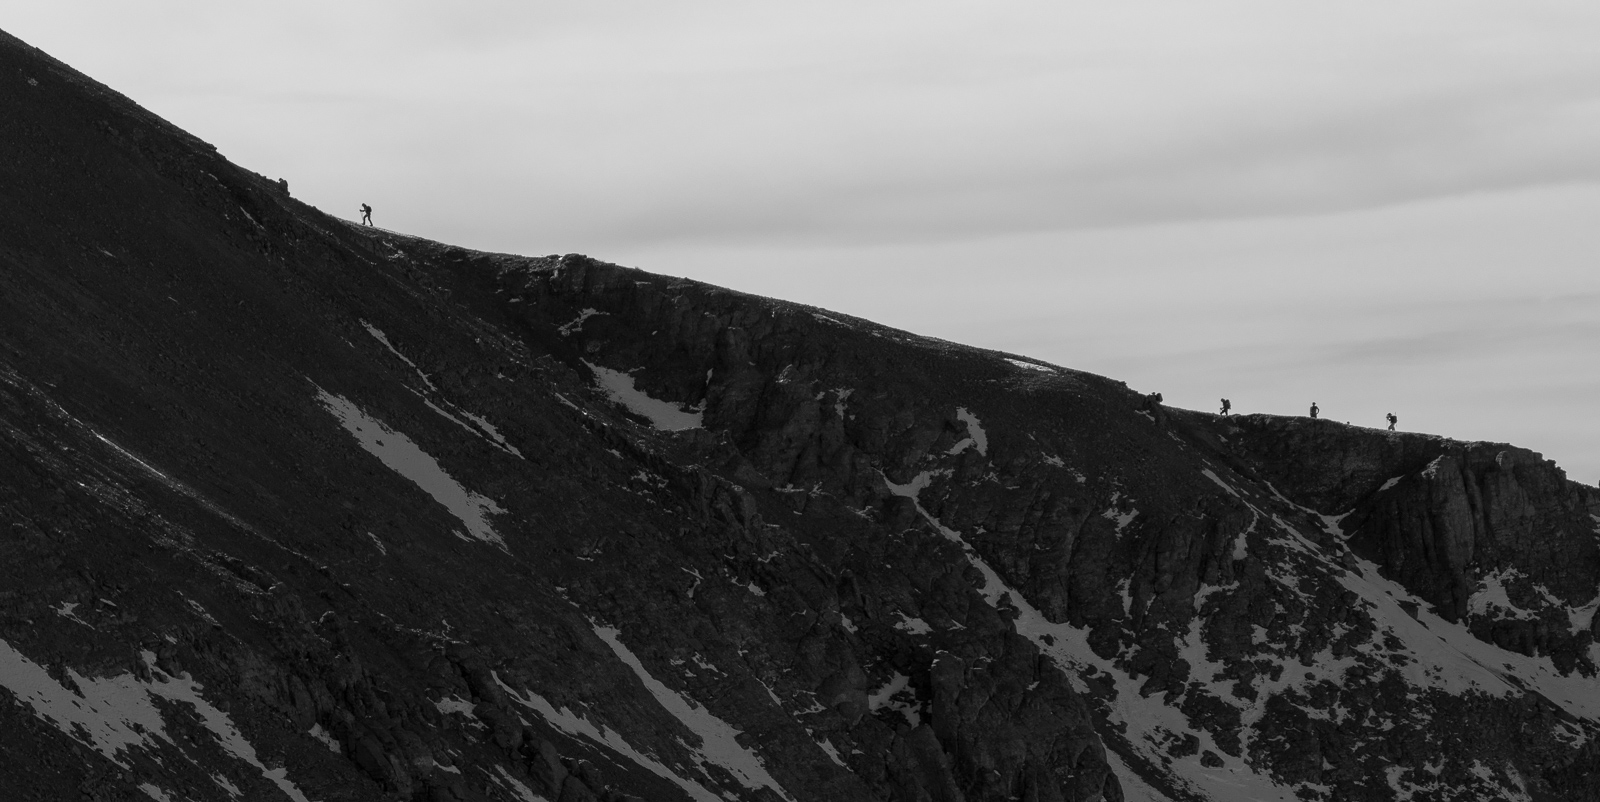
Here they are ascending Spencer.
And no doubt, enjoying the reward of the summit on Spencer.
Another favorite shot from this climb. A tight zoom on Vermillion, Golden Horn, Pilot Knob, and U.S. Grant. I've done 2/4 of those so far.
A tight zoom of the Grenadiers was in order too.
Pilot Knob and the top of Wilson Peak.
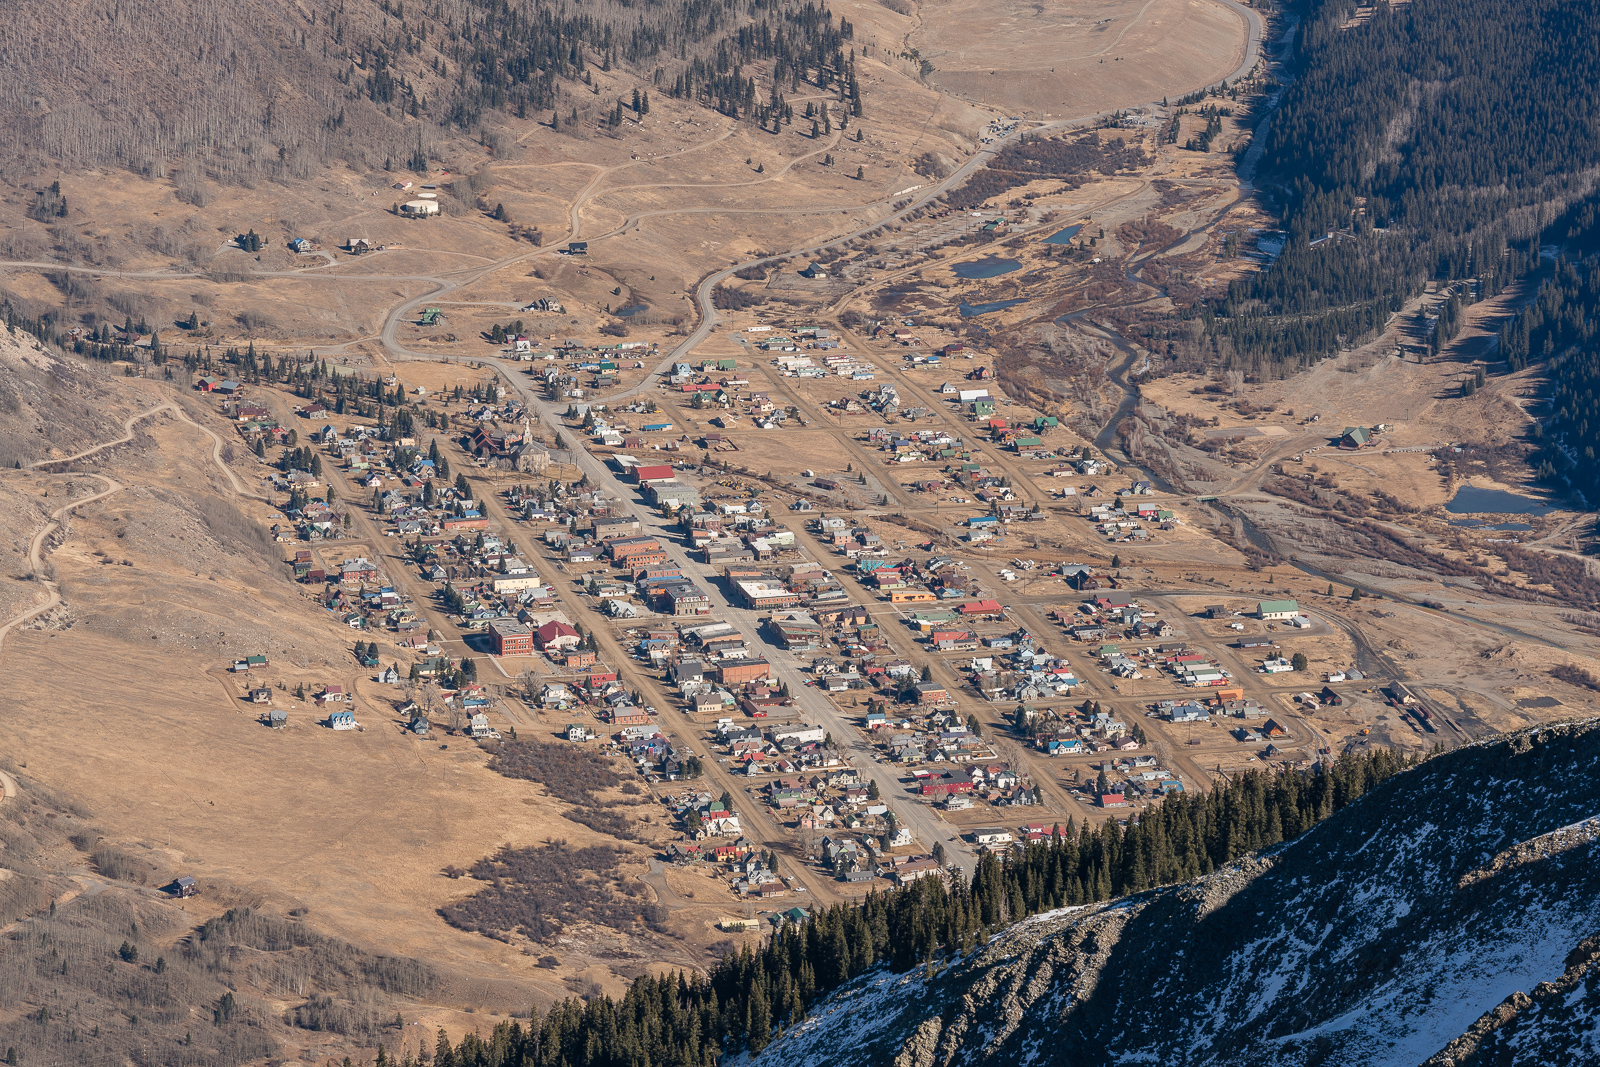
How about a tight zoom on Silverton?
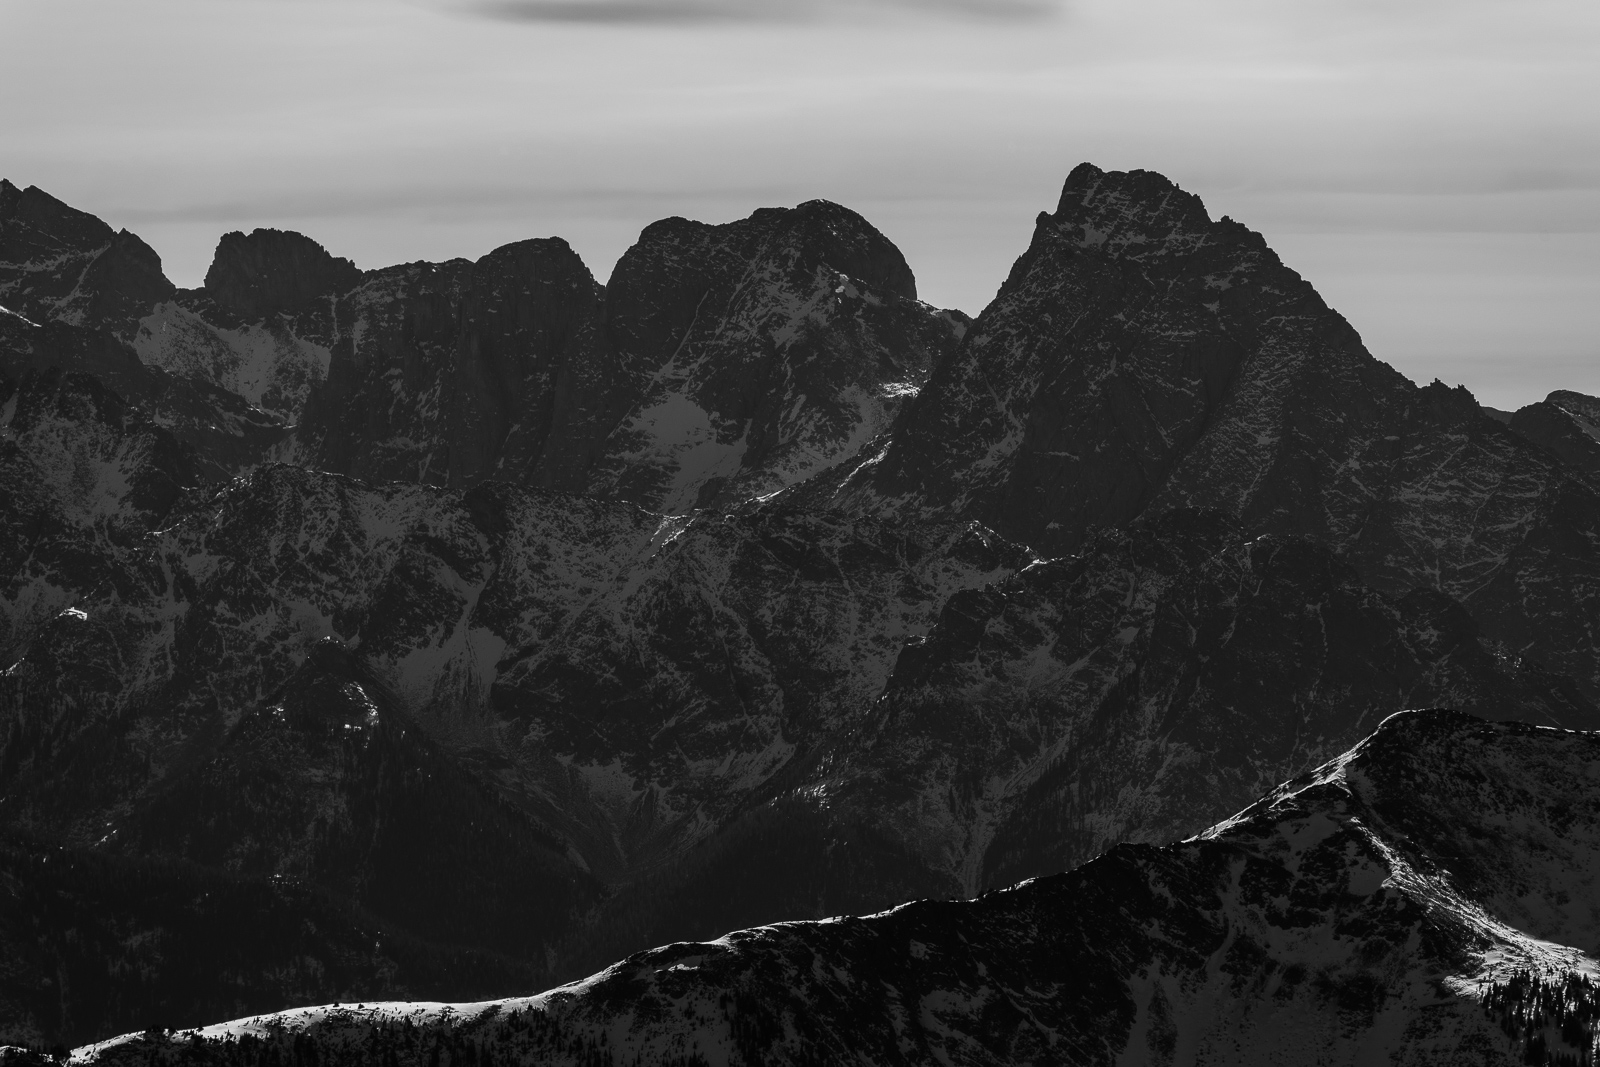
Or Pigeon Peak in black and white?
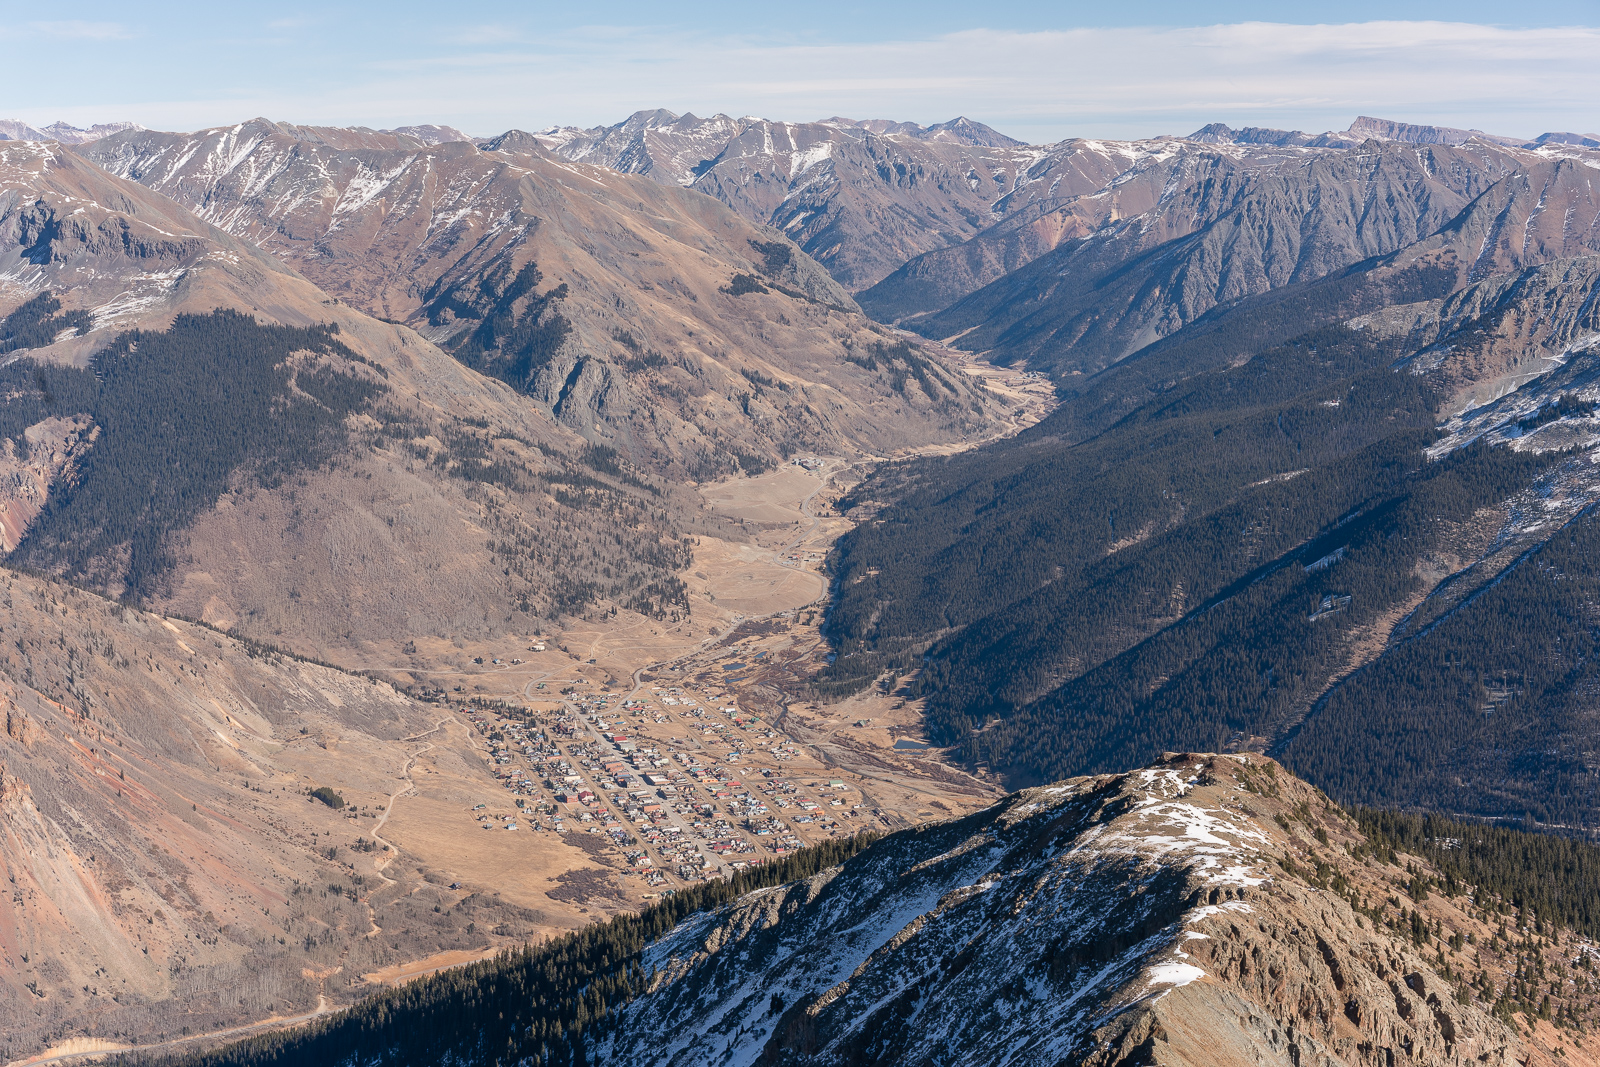
Over and above Silverton...
And of course the obligatory self-timer on top of Sultan.
After spending a few minutes on top, I decided to head down so I could catch the Broncos game (what a disgrace they are this season). On the way down, I caught a nice shot of Pigeon framed by Spencer Peak and Grand Turk.

I made really great time down and stopped only a few more times to take photos. I loved the striations in the rock face of East Turkshead Peak which led into the Grenadiers.
And that was it! A lovely local hike and climb of two very dominant 13ers above Silverton, with the addition of the easy UN 12,899 and Spencer Peak. I hope you enjoyed this one? As always, feel free to reach out if you have any questions! Climb on!
This article highlights various concepts relating to mountaineering safety in Colorado.
Table of Contents

Photo by Terry Matthews (RIP) - Matt Payne wielding an ice axe to safely get down from Crestone Peak
If you're reading this article, chances are you are a climbing or hiking enthusiast that just flat-out loves the Colorado mountains. If you're like me, you were hooked the first time you reached the summit of a mountain, and each time you reach the top of a new one, the urge to conquer another mountain and experience all the great feelings that go with climbing grows even stronger. We start to set goals for ourselves. Typically, we start by stating we are going to climb all the 14'ers, then the top 100 mountains in Colorado... and before you know it, you are making plans to climb Denali! Unfortunately, we all have to start somewhere, and most of us were not born with all of the knowledge required to climb mountains safely. With over 500,000 people attempting to climb a 14'er in Colorado each year1, the odds of accidents, fatalities, and close-calls has increased steadily over the past decade. Despite the growing popularity of this activity, the fact remains that mountaineering in Colorado can be extremely dangerous - in fact - many people have indeed died attempting to climb mountains in Colorado. Several factors contribute to this fact, including ill-preparation, poor judgement, psychological factors and nasty weather. The purpose of this article is to provide the reader with as much information as possible so that readers can reach the summits safely, again and again. It is important to note that this article cannot ever and will never be an exhaustive documentation of every possible safety precaution. I hold no responsibility for your actions while climbing.
I'm a numbers kind of guy - numbers paint a picture for me. And when it comes to mountaineering fatalities, the numbers are pretty clear - mountaineering in Colorado is dangerous. Sure, most of the time, people are able to get up and down safely, without incident. However, without the proper precautions, mountaineering can be fatal.
According to Accidents in North American Mountaineering2 by The American Alpine Club, mountaineering accidents and fatalities are steadily rising in Colorado. Due to a sharp increase in the popularity of mountain climbing since the 1950s, more and more people are climbing mountains, many of whom are unprepared and new to the activity. In fact, this book shows that there have been over 700 fatalities in Colorado alone during the past 40 years. In Mark Scott-Nash's book, Colorado 14er Disasters - Victim of the Game, many of these fatalities are discussed.
Additionally, according to the Colorado Department of Public Health and Environment3, climbing and hiking are the most fatal recreational activities in Colorado, with 37 fatalities between 1996 and 1998; this only accounts for falling deaths and the actual number for all types of deaths is much higher.
Fortunately, death is preventable if climbers and hikers gain an understanding of the causes of death and learn to take precautions and make decisions that help to prevent death from occurring.
Matt Payne on top of Crestone Needle - with helmet securely attached!
The possible causes of death for mountaineers are numerous; however, we're going to focus on the most common ones:
1. Hypothermia: Surprisingly enough, hypothermia is one of the most common causes of death for mountaineers. This is very preventable with good preparation and suitable gear. If you can stay dry and stay warm, you will survive. Long gone are the days in which hiking with a cotton t-shirt and jean shorts is acceptable attire. Quite simply, cotton kills. It does not dry out very quickly and it does not repel moisture. Get some synthetic clothing and make sure your hiking boots are waterproofed with Nikwax or lined with Gore-Tex. Backcountry.com sells everything you would need to survive. Gear alone won't prevent death, however.
2. Falling: Many deaths in mountaineering occur due to falls. While this is most common on steeper mountains, such as Little Bear Peak, Maroon Peak, or Capitol Peak, serious injuries are fairly common even on the most seemingly easy 14'ers. Oftentimes, inexperienced climbers will stray from established routes, or underestimate the difficulty of a climb. When this happens, the likelihood of an accident increases. Additionally, many injuries and accidents occur as the result of fatigue. Even the most experienced climbers can become weary at high elevation, and by the end of the day, muscles weaken and concentration can fade. Oftentimes, fatalities and serious injuries occur during these states of physical and mental weakness, further strengthening the need for caution and self-awareness.
3. Acute Mountain Sickness: Acute Mountain Sickness or AMS occurs when people ascend to higher elevations at a rapid pace and are not acclimated to that elevation. According to Medline Plus4, Acute Mountain Sickness is "brought on by the combination of reduced air pressure and lower oxygen concentration that occur at high altitudes. Symptoms can range from mild to life-threatening, and can affect the nervous system, lungs, muscles, and heart." I've personally experienced mild AMS on many occasions at high altitude. Symptoms include nausea, difficult breathing, tachycardia (rapid heatbeat), and exhaustion. If gone untreated (if you stay at high altitude for long periods of time while experiencing symptoms), AMS can develop into coma, High Altitude Cerebral Edema (HACE), and High Altitude Pulmonary Edema (HAPE).
AMS can affilict even the most experienced climbers and hikers; however, the ailment is highly preventable. To prevent AMS, drink copious amounts of H20, get plenty of sleep and try to acclimate yourself to higher altitude as best as you can. It is generally recommended that you acclimate yourself at least one day for every 1,000 feet of elevation gain. Obviously this is not realistic for many climbers not from Colorado, so the best thing you can do is extend your stay as long as possible and gradually increase the amount of elevation you expose yourself to over time. For more on alittude acclimation, see this great article.
4. Weather: Predicting weather in Colorado is generally difficult; however, there is one thing you can almost always bet money on: Afternoon thunderstorms from May through August are almost guaranteed on a daily basis, especially at higher elevations. Additionally, the temperature and weather conditions above 12,000 feet are almost always more severe than at lower elevations. Consequently, many people tend to underprepare for harsh weather conditions and underestimate the impact weather can have on mountaineering conditions. Some basic facts about mountains and weather:
- When wet, rocks are slippery
- When surfaces are slippery, the likelihood of falls increases
- Afternoon thunderstorms produce lightning
- Lightning tends to strike the highest object that can conduct electricity
- The higher you are in elevation, the higher your chances of being struck by lightning are
- Lightning is fatal
- Fear of being struck by lightning induces poor decision making and increases the chances of falls or poor route-finding
- Poor route finding = getting lost
- Higher elevation = colder temperatures; it is not uncommon to see snow and sleet in July at 14,000 feet
- Colder temperatures = hypothermia
Weather is undoubtedly the most dangerous aspect of mountaineering. Without proper training and preparation, climbers and hikers place themselves at substantial risk of injury and death due to weather. Weather can appear at a moment's notice, so be watchful of the clouds as you hike.
5. Dehydration: Dehydration is a fairly common occurence at higher elevation. Many hikers and climbers do not realize that the gain in elevation taxes the body even more, necessitating the need for a lot of water intake. My general rule is to drink at least 1 ounce every 15 minutes. If after 8 hours you have not drank a full Nalgene, you're probably going to experience some dehydration symptoms. The human body can only process about 16 oz. of water per hour, so drinking too much is also a problem. The fact that you are probably hiking at higher elevations increases the odds of dehydration occuring, so make sure you are drinking enough water throughout your day.
6. Avalanches: Avalanche deaths are fairly common in Colorado, unfortunately. In fact, Colorado has the most annual avalanche deaths in the United States. Frequently, mountaineers misjudge avalanche conditions or ignore warning signs and continue climbing. Avalanche conditions are not easy to detect, and there is an entire nomenclature dedicated to the subject. I do not pretend to be an expert on avalanches; however, what I do know is that one should seek out professional training and guidance before climbing in the winter and spring months in Colorado. One of the best websites which provides data on avalanche conditions in Colorado is the Colorado Avalanche Information Center (CAIC). It is a good idea to take a look at the conditions posted on that site before venturing out. Interestingly enough, people who have taken a basic avalanche class are actually more likely to perish in an avalanche than someone that has never taken a class, because they know just enough to be dangerous and tend to be overly confident in their ability to travel safely. It cannot be stressed enough that one should enroll in several avalanche courses before declaring themselves as ready to travel in avalanche-prone areas.
7. Poor Judgement: Quite possibly the most common cause of accidents and deaths in the mountaineering comumunity is poor judgement. Poor judgement is caused by ignorance, psychological factors, and just plain stupidity.
8. Physical abilities: Mountaineering is a physically demanding activity and should not be underestimated by anyone. Most beginner mountaineers are physically underprepared for the challenges of being at altitude in a foreign terrain. Even the most physically active people can be greatly challenged by the seemingly easiest of mountains. Before attempting a difficult climb, ensure that you are in peak physical condition and that your heart is operating at peak performance levels. A significant amount of individuals experience fatal heart attacks while mountaineering; therefore, it is imperitive that you have been cleared by a physician to partake in such a demanding activity. To be clear - mountaineering is extremely physically demanding - be warned!

Nasty weather moves in over Kit Carson Mountain and Crestone Peak - photo by Matt Payne
There are several relevant psychological principals that can have an impact on mountaineering safety, including groupthink, cognitive dissonance and escalation of commitment.
1.Groupthink5 is a very dangerous psychological principle coined by Irving Janus and is the primary cause of several well-known disasters such as the Challenger Shuttle Disaster, the Three Mile Island Nuclear Accident, and the Chernobyl Nuclear Disaster. Groupthink occurs when groups are highly cohesive and when they are under pressure to make a quality decision or succeed at a difficult task. Some symptoms of groupthink include:
- Illusion of invulnerability –Creates excessive optimism that encourages taking extreme risks.
- Collective rationalization – Members discount warnings and do not reconsider their assumptions.
- Belief in inherent morality – Members believe in the rightness of their cause and therefore ignore the ethical or moral consequences of their decisions.
- Stereotyped views of out-groups – Negative views of “enemy” make effective responses to conflict seem unnecessary.
- Direct pressure on dissenters – Members are under pressure not to express arguments against any of the group’s views.
- Self-censorship – Doubts and deviations from the perceived group consensus are not expressed.
- Illusion of unanimity – The majority view and judgments are assumed to be unanimous.
- Self-appointed ‘mindguards’ – Members protect the group and the leader from information that is problematic or contradictory to the group’s cohesiveness, view, and/or decisions.
For example, a group of mountaineers encounter a dangerous section of a mountain; however, none of the group members speak out about the inherent danger and the group continues on, exposing all members to a potentially hazardous event.
2. Cognitive Dissonance: Cognitive Dissonance is the feeling of uncomfortable tension which comes from holding two conflicting thoughts in the mind at the same time. For example, a mountaineer may know that their avalanche skills are only beginner at best but they also have successfully navigated many snow-fields safely. The mountaineer resolves this dissonance by rationalizing their behavior, further placing the mountaineer in danger.
3. Escalation of commitment is the phenomenon where people justify increased investment in a decision, based on the cumulative prior investment, despite new evidence suggesting that the decision was probably wrong. This manifests in mountaineering quite frequently in the following way: A Climber has hiked 14 miles and as the climber gets closer and closer to the top of the mountain, a dangerous thunderstorm builds above. The further the climber climbs, the more invested they are in reaching the top - and the more likely they are to continue climbing despite better judgement to turn around and climb to lower, safer terrain. This effect has been demonstrated in many mountaineering accidents, and I have personally been victim to this effect - fortunately I have escaped from those situations safely.
Preparing for mountaineering outtings requires good planning skills and a bit of knowledge on what to bring with you. Here are some of the key items to concern yourself with:
- If you've never been before, hook up with someone that has.
- Take a wilderness first aid course - you won't regret it.
- Get into shape. This is harder than it might sound. My personal preparation is very rudimentary, yet effective. In the winter and spring months, I walk up to 3 miles per day and at night I will do aerobic exercises. Some easy ones anyone can do include jumping jacks, walking up and down your stairs, running in place and lunges.
- Research the area where you will be going. This includes obtaining maps and understanding the proper routes as necessary.
- Pack the appropriate gear - see below for further details
- Start early! An alpine start is the best way to decrease the likelihood of exposure to afternoon thunderstorms. The general rule is to be up and down to treeline before noon. Alpine starts can also be rewarding in other ways, for example, I began my hike up Mount of the Holy Cross at 3:30 AM and was able to watch the sunrise at 13,000 ft.
- Learn how to read a TOPO map, compass, and GPS device. Do not rely on a GPS device soley unless your navigation skills are exemplary.
- Check the weather forecast for the mountain you are planning on climbing.
- Communicate with friends and family on your planned whereabouts. If you deviate from those plans, make sure someone knows about it. Let your family and friends know where you're going, how long you'll be gone, and what your anticipated routes are. These factors will be invaluable for search and rescue teams should you become injured or lost.
- Know your own limitations - if you start to feel adverse conditions, there is no shame in turning around.

Mount of the Holy Cross at sunrise - photo by Matt Payne
The following list of gear contains many of the items you will need in order to ensure a successful mountaineering trip. Additional gear would obviously be required if technical climbing was on your agenda. I've created links to my recommendations for each item type.
- Water: at least 4 oz per mile of travel - varies by individual and trips
- Food: Complex Carbohydrates, Proteins, Fats, and Salty foods are best. Some of my personal favorite food: Cheese, Nuts, Jerky, Summer Sausage, Powerbar Gel, Gatorade
- Synthetic clothing: Wear layers - I usually will wear a short-sleeved sythetic t-shirt underneath a long-sleeve synthetic base layer and some water and wind-proof pants.
- Down Jacket
- Fleece Jacket
- Nylon Shell Jacket
- Synthetic Hat (for sun)
- Warm Beanie Hat
- Gloves or mittens
- Backpack
- Map and/or GPS
- Headlamp
- First Aid Kit
- Sunglasses
- Camera
- Multitool
- Altimeter Watch
- Matches
- Sunscreen (30+ SPF)
- Climbing Helmet (depending upon mountain)
- Trekking Poles (optional)
- Gaiters (optional, depending on season)
- Broken-in mountaineering boots with gore-tex lining
- Water shoes for water crossings (if required) - I love my Chaco's.
- Ice Axe (some will argue that an ice axe should always be carried) - useful for snowfields and self-arrest during glissading
- Crampons (if needed)
- Microspikes

Matt Payne climbing the Class 4 ridge on Mount Lindsey. Photo by Ethan Beute
Here are the Ten Essesntials, as defined by The Mountaineers of Washington6:
1. Navigation (map and compass)
2. Sun protection
3. Insulation (extra clothing)
4. Illumination (flashlight/headlamp)
5. First-aid supplies
6. Fire
7. Repair kit and tools
8. Nutrition (extra food)
9. Hydration (extra water)
10. Emergency shelter
Here are some other important considerations to increase the safety of your group during your mountaineering adventure:
- Be careful not to kick rocks down on climbers below you. If you accidentily do this - please yell "ROCK!" so that those below you can prepare and take proper cover.
- Don't wander off without proper navigation skills and devices - you will get lost!
- If you are uncomfortable, hike with others and be careful to communication your expectations on traveling together vs. separated.
- Keep your eye open for dangerous wildlife. Elk, deer, bears, bighorn sheep and mountain goats can all pose hazards.
- Bring a cell phone - you never know if it will come in handy. Be courteous - don't use your cell phone on the summit unless you walk far enough away from earshot. No one wants to hear your conversation.
- Practice Leave No Trace ethics
- Be aware of your surroundings and be mindful of fellow mountaineers
Mountaineering in Colorado is dangerous; however, with the right amount of training, experience, gear, preparation and knowledge the majority of mountaineers will live to lead safe trips again and again. If you're still not convinced of the need for careful preparation and thinking, take a look at John Kirk's website on Colorado mountaineering accidents - he provides several examples of deaths and accidents in the Colorado high country. If you should have any other thoughts or questions regarding mountaineering safety, feel free to contact me. Don't become a statistic. Be safe.
References
2. Accidents in North American Mountaineering by The American Alpine Club
3. Recreational Fatalities in Colorado, 1996-1998
4. Acute Mountain Sickness: Medline Plus Medical Encylopedia
5. Janis, Irving L. (1972). Victims of Groupthink. New York: Houghton Mifflin. Janis, Irving L. (1982). Groupthink: Psychological Studies of Policy Decisions and Fiascoes. Second Edition. New York: Houghton Mifflin.
With only a small handful (10) of the highest 100 mountains in Colorado (Centennials) left to climb, I have become quite picky about my approach to choosing the trips I embark on. For my first climb of 2017, I chose to ascend 13,940 ft. French Mountain and its soft-ranked neighbor, 13,876 ft. Frasco Benchmark. These are two fantastic 13ers hidden in the Collegiate Range between Colorado's highest mountain, Mt. Elbert, and Colorado's 2nd highest mountain, Mt. Massive.
A KML file and overview of my hike are available over on GaiaGPS - which is my absolute favorite iPhone app! You can purchase it here and help support the site.
This was my 5th time in this basin for a climb, and hopefully the last (prior trips included climbs of Casco, Massive - twice, and Oklahoma). The crowds have become overwhelming due to the proximity of Colorado's two highest peaks. I drove in from Durango on a Friday afternoon, arriving around 10 PM to find only one flat spot to park my car at the trailhead for French and Oklahoma near South Halfmoon Creek. I slept in my car. I fear that one day these areas will be placed on a permit system due to the over crowding and popularity of 14ers (probably with no help from yours truly in writing these reports). The lack of respect for other people and the environment has become tragic. Within 50 feet of my parking spot at the trailhead, I found several areas where people used the bathroom and left toilet paper just laying right there on the surface - all within 10 feet of the creek, no less. C'mon people. Anyways...
This particular area will always have a special place in my heart and mind. I climbed French / Frasco Benchmark's neighbor, Casco Peak, on July 5th, 1986 when I was just 7-years-old. When my dad and I reached the summit, we noticed weather moving in but it did not seem too threatening. About 15-minutes later, our friend Dave arrived and asked if we heard the sound coming from the lightning rod. We found the long metal rod protruding straight up into the sky near the summit and it was humming with electricity. I remember wearing a ball-cap with one of those small metal bulbs on the top and it was humming too. We all raced to get off of the summit, and the lightning and thunder began to crash around us, with rain pouring down on the rocks. We all made it safely down the wet granite rocks, but it was my first exposure and experience with lightning and it always left an impression on me, later informing my trepidation and habits around start times and weather awareness in the mountains.
I set my alarm on this trip for 4:30 AM, hoping to avoid afternoon thunderstorms. The alarm sounded and I quickly got ready to go. I decided to wear my Chacos for the first 200 feet of the hike since I would have to cross South Halfmoon Creek, which was raging with about 3 feet of depth. My feet became ice cold, but welcomed the comfort of dry socks and shoes right after the crossing. The beta for this climb was pretty straight-forward - hike up the road until it terminates at the Iron Mike Mine and then ascend straight up the south face of French. Pretty simple! The ascent up into the basin where the Iron Mike Mine at was pretty steep at first, and required a second stream crossing after about a mile. The first light behind me to the east was pretty fantastic though.
Once up near tree-line, the whole basin opened up to reveal Casco Peak, French Mountain, and a whole lot of willows.
The clouds to the east were still magnificent above Mount Massive, seen here paired with Alpine Fireweed wildflowers in the foreground.
South Halfmoon Creek's headwaters were much tamer at the higher elevations and provided an excellent lead-in for the upper basin.
As I continued hiking up the road, my gaze kept returning to the east, where the clouds danced with the mountains.
The southern shoulder of Mount Massive was a prominent feature that constantly kept me looking back at it. I have fond memories of climbing Massive in early winter conditions in October of 2009.
As I climbed higher into the basin, the sun cast some interesting light on the southeast face of French Mountain, offering a preview for what was coming soon.
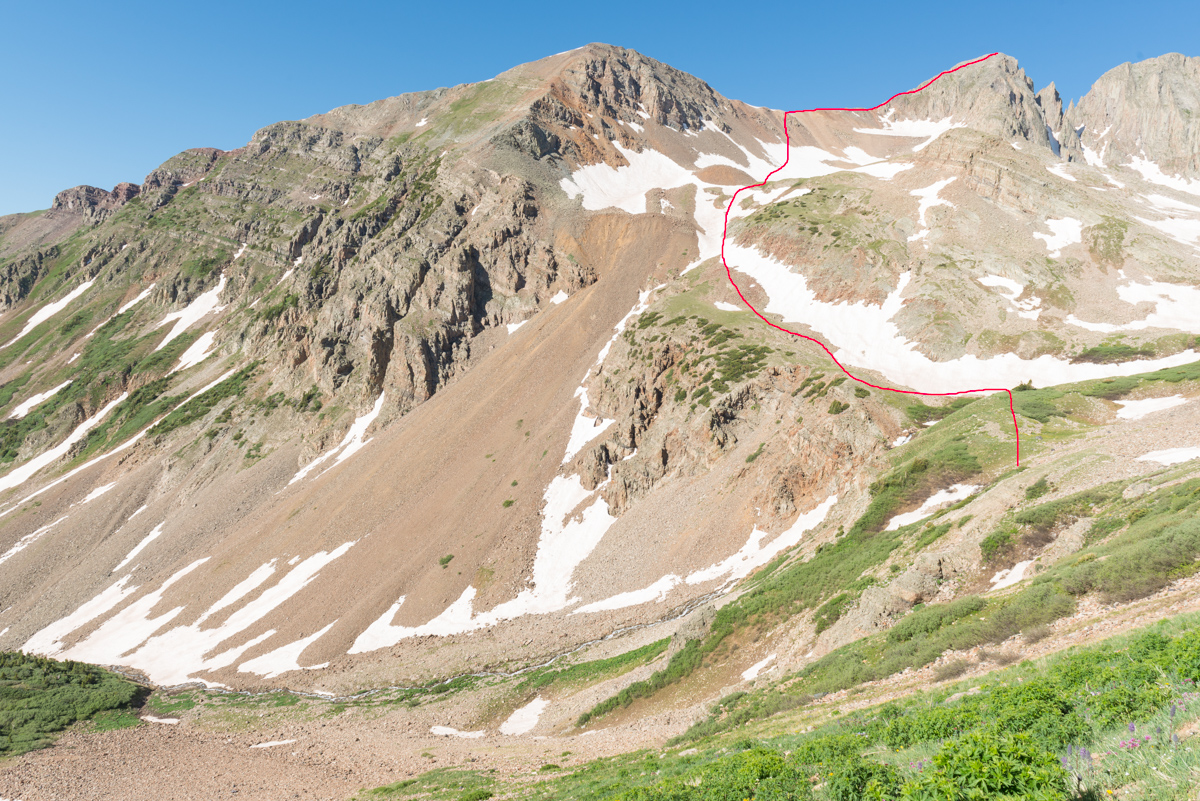
Above treeline, the route up French became quite obvious. In the photo below, you can see the route quite nicely - I basically went straight up, left of the snowfields and then crossed to the middle between the two snowfields and then up to the saddle.
My legs were feeling great, and I pushed hard to make good time up French's south slopes to find this nice grouping of Sky Pilot flowers with Casco Mountain (right) and La Plata Peak (left).
Upon reaching the saddle, I saw there were two other climbers ahead of me. Just two climbers. I love 13ers.

I chatted with the two climbers, who were doing French, Frasco, and Casco. They asked if I was doing the same. I explained I had already done Casco and that I was just hoping to get French today. They were really nice guys. Reaching the summit of French was about as straight forward as you can get on a mountain climb, as a simple and easy trail went from the saddle to the summit. The views were spectacular.
Once on the summit, I plowed through some lunch and took a panorama looking north/west/south, including La Plata Peak, Grizzly Peak, Casco Peak, Frasco Benchmark (middle), and the Elk Mountains in the distance (Snowmass, Maroon Bells, Capitol).

La Plata Peak commanded my attention - I just love the gnarly view of it from this side. The Three Apostles including Ice Mountain are seen left of La Plata (and comprise 2/10 of the Centennials I have remaining).
The view of the Elk Mountains from this part of the Collegiates has always been something I greatly appreciate as well. Snowmass Mountain (right) is an all-time favorite.
I decided to make the trip over to Frasco Benchmark, which was surprisingly quite enjoyable with some minor scrambling along the ridge. The benchmark was pretty obvious, but I was left wondering why they just say Frasco and don't include the elevation... oh well.
A look back at French from Frasco...
From Frasco, I really enjoyed the view of Casco Peak and began to see that clouds were forming for the daily afternoon thunderstorm. I was glad I was not continuing on to Casco. I really like this photo for some reason - the balance between La Plata (left) and Casco (right) is compelling.
I decided to go straight down what Roach describes in his 13ers guidebook as the "Fiascol" couloir between Frasco Benchmark and Casco Peak. It was pretty much what you'd expect - fun scree and dirt boot skiing. I kind of like this terrain - I can go really fast down it! As I descended, I took a photo of Casco Peak - it looked like the storms were going to hit soon.
Once down the scree field, I took a photo looking back up the gully - nothing special, but it shows the route!
Back near the Iron Mike Mine, I found a huge field of wildflowers which made a nice foreground for Colorado's highest mountain, Mount Elbert.
After reaching the car, I drove out and decided to drive to Colorado Springs to enjoy my 20-year High School Reunion. I'm old.
If you are wondering what kind of camera gear I take with my on my climbs, check out this page - it has links to all of my gear, which is now a mirrorless system to minimize weight and maximize my ability to reach those summits. Reach out if you have questions!
Hope you enjoyed this trip report! Next up: No idea!
Again, links to my GPS track are at the top of the trip report. Until next time...
I moved back to Colorado this past November. I liked Oregon but really missed my Colorado mountains. I landed a pretty fantastic job in Durango and have been working hard over the winter to get back into climbing shape and be ready to go for the summer and fall. The La Plata Mountains are very close to Durango, closer than I thought. A quick 45 minute drive and I was at the trailhead to some of the most impressive climbing in the state - and few even knows it is there. My friend Schuyler and I decided to do Babcock Peak (13,180 ft.), Colorado's 499th highest mountain. This choice was mostly due to how close it was to town and how interesting the approach looked on the map. I had heard that the traverse between Babcock and Spiller was impressive and we figured if it looked good we could try it. This was also our first climb together and we kept it pretty open-ended in terms of our goal for the day. My understanding is that Babcock's true summit is the point just West of the one we climbed to. We decided not to go all the way over there. To check out our full route and GPS file, check out my GaiaGPS track. You can purchase GaiaGPS here and help support the site.
We arrived at the TH at 7:30 AM - a late start by my standards. We were not too concerned with weather and knew that the high start at 10,300 ft. would save us some time. Our plan was to go straight up Tomahawk Basin and gain the east ridge of Babcock. When we arrived, our plan seemed to look like it would make a lot of sense.

Indeed, we just walked up the road until it made sense to turn up the valley. Looking back on Silver Peak from this angle was comforting.
The Tomahawk Basin opened up nicely for us - revealing a ledge system comprised of waterfalls and lots of untrailed terrain - welcome to bushwhacking up an obscure 13er!
I was constantly impressed by the rock formations and the steep crags that presented themselves as we continued up.
The upper basin opened up to reveal an incredible waterfall coming down the basin, all before a series of impressive crags and points at the terminus of the basin.
The huge waterfall coming down out of Tomahawk Basin was impressive - I was already formulating some plans to come back and photograph the falls at night or in the winter. Schuyler had his eye on a route up through the talus field to the right of the waterfall to avoid downclimbing, so that's what we did. It was a rather hideous mess of off-trail climbing on small boulders and rocks mixed with unconsolidated dirt and sand, making for a very frustrating ascent. In retrospect, we would have stayed right up the middle of the valley and up the grassy slopes to the right of the falls.
A view of the nasty rock field we went up and through. Nothing technical, just really frustrating terrain.
As we climbed higher the whole mountain came into view and we were able to better guage our route up - we decided on trying to stay on the snow as much as possible, with our actual route seen below in red.
The snow was very hard for the most part. In retrospect, I would have stayed on it for longer, gaining the ridge only after the snow totally faded. We ended up going straight up a scree field that was not very pleasant.

The moon was a nice feature for this climb, adding some interest to my photos and our view above the gnarly pinnacles on Babcock, which impressed us both.
A full on view of Babcock's east face showcased the very nasty terrain we would later find ourselves on.
The upper basin afforded nice views and a small meadow at the terminus of the snow fields.
The summit of Gibbs Peak peaked above the meadow. We both thought the ridge between Gibbs and Babcock looked doable, but it was not on our agenda for the day.
A look back down and across the valley revealed the summit of another obscure La Plata 13er, Diorite Peak, which appeared to have a road going all the way up to the ridge from Tomahawk Basin. We both looked forward to coming back to go up that one.
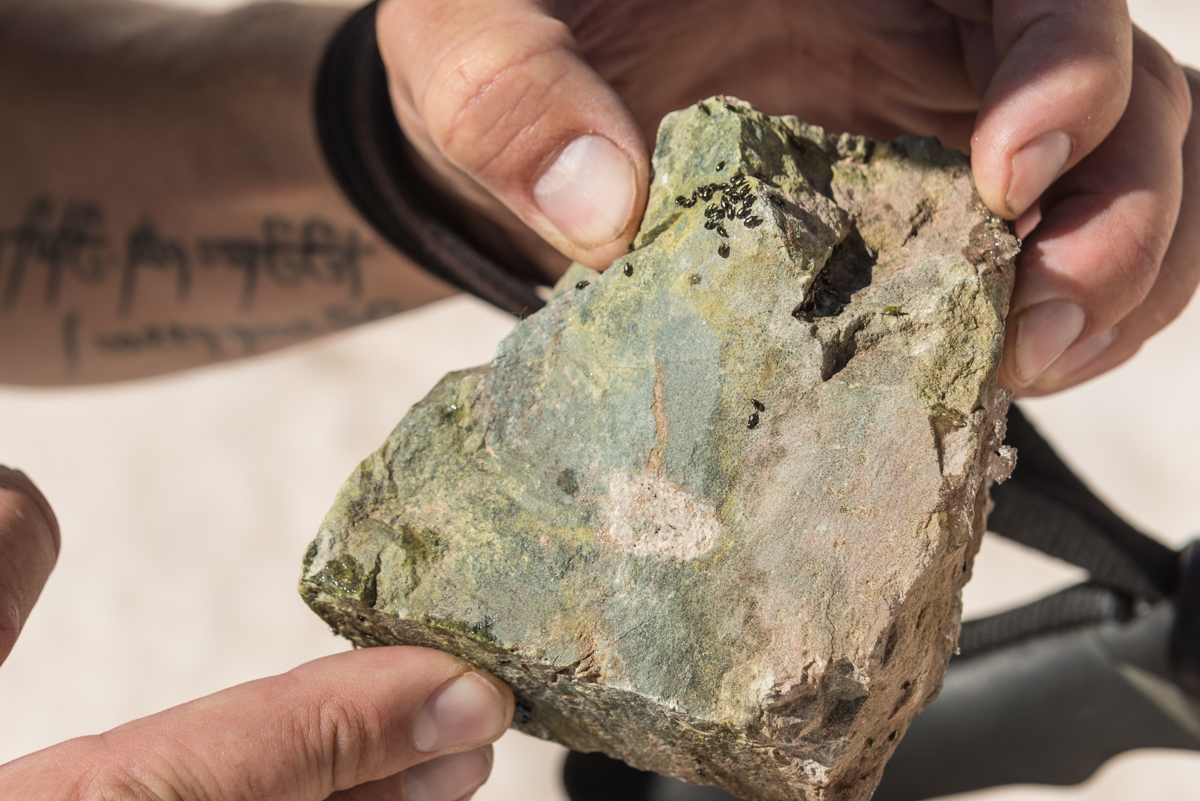
All the way up, we encountered these rocks that were covered in beetle larva, which was pretty interesting.
A view up the last part of the snow ascent before the saddle. This section was quite a slog.
Upon reaching the saddle, our view back across the valley at Gibbs and the top of Lavender (left) was impressive. Later on we saw two people climbing the snow couloir up Gibbs (middle), which looked like quite the challenge!
This is what the terrain near the top of the saddle looked like - nothing too difficult.
We both really enjoyed the view above the Gibbs / Diorite saddle towards the Wilsons and Lizard Head Peak. Scyhuler, being a much more avid rock climber than I, was really excited and is already formulating plans to tackle Lizard Head.
My gaze was more drawn towards Diorite and beyond to Chicaco Basin, the Grenadiers, and the Needles.
The saddle at the base of Babcock presented a nice angle of our final section for the ascent - which was a very nice Class 3+ ridge filled with solid, yet exposed rock.
The crown jewel and highest point of the La Platas, Hesperus, appeared left of Lavender and Gibbs.
Schuyler captured some shots with his phone too :-)
Here is another view of the road going all the way up Diorite. Those old miners were crazy!
A shot of me before our final ascent.
Here is a nice view of what the rock was like up the summit block of Babcock - solid, jagged, and full of awesome.
The exposure was real - here's some perspective looking down the valley to the south.
Schuyler and I celebrated briefly upon reaching the summit - nothing too difficult, but it did appear we were the first of the season. I rate this climb fairly highly based on the terrain and ease of access, coupled with total lack of other people. A really rewarding experience for sure.
Here's me gazing across at the impressive Grenadiers / Needles.
A full 360 degree panorama centered on West Babcock.

Below is a condensed panorama showing Hesperus (left) all the way over to Diorite (right).
My favorite view of all - a cropped version showing the Grenadiers (left) and the Needles (right). I've climbed most of them.
For our route down, we (stupidly) decided to head down another way, down the east face. I'm not sure why either of us thought it was a good idea, but we committed. It was a nasty combination to be sure. Lots of class 5 downclimbing and loose garbage. I would not recommend it.
The shot below does not fully show how bad the terrain really was here. I don't know how many times I need to learn the lesson to come back down the way you came, but I'm hoping this was my last time.
Below is a look back up what we decended. Again, it looks better than it was. We both had on our game faces for this downclimb and were uncomfortable throughout.
That concludes the trip report. Hopefully it was helpful to someone else looking to escape the crowds of the 14ers and enjoy some awesome solitude on a nice class 3+ 13er. A downloadable track and summary of our hike on GPS can be found HERE.
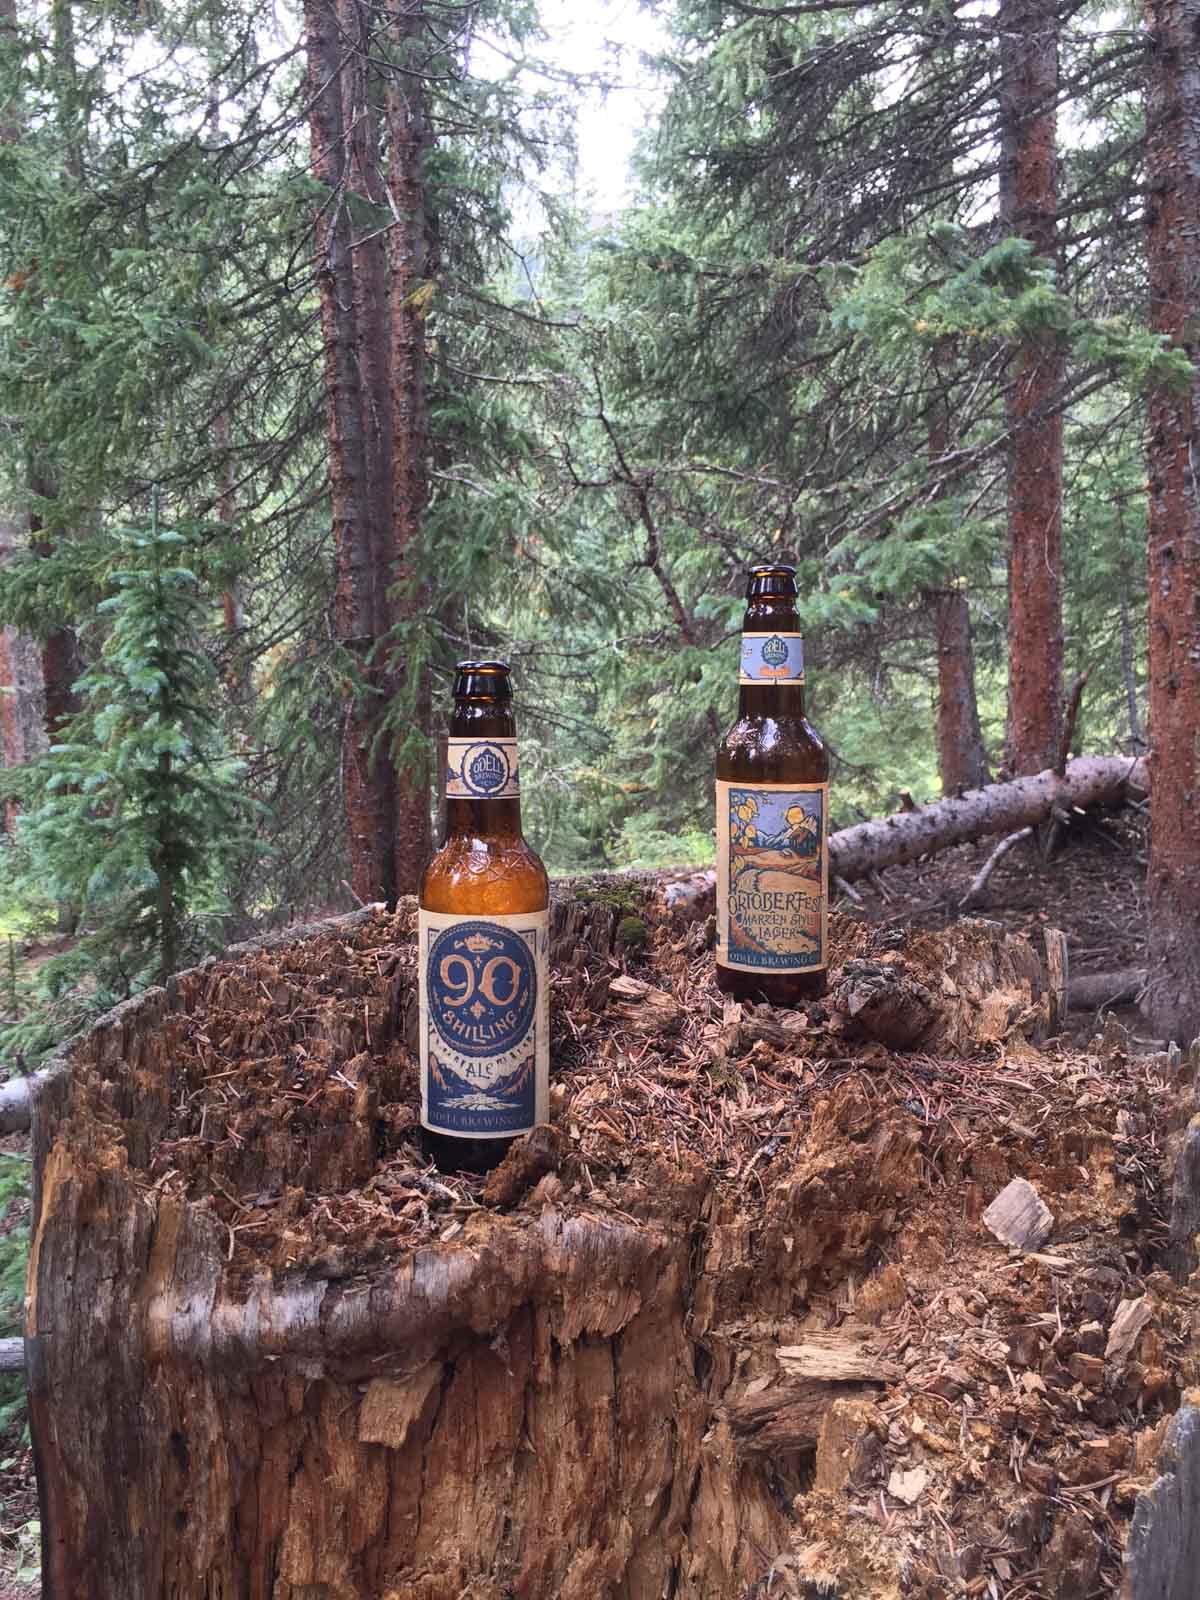
After an amazing day of rigorous hiking which culminated in a successful summit of Half Peak by Sarah Musick and I, we slept at our fantastic campsite in the picturesque valley below Cuba Gulch, near Lake City, Colorado. Instead of taking the longer, more scenic (and steeper) route to Jones Mountain via Cataract Gulch near our campsite, Sarah and I opted to drive over to American Basin and approach Jones Mountain from that side. Usually, climbers looking to summit Jones Mountain approach it from Silverton; however, because Sarah and I were already on the Lake City side of Engineer Pass and were driving a Suburu Forester, we decided to take an alternative route. I had researched our route ahead of time by consulting the out-of-print and quite handy 13er guidebook by Gerry Roach. Upon arrival at the American Basin trailhead for Handies, Sarah and I set-up camp and she decided to quickly hike up Handies since she had never done it before. I decided to stay behind and rest my legs. My ankle was still quite sore from my basketball injury two months prior and my legs were feeling pretty heavy yet from our climb up Half Peak. I spent the afternoon napping by my camera while taking a time-lapse video of wildflowers in American Basin. Upon Sarah's return from Handies we celebrated by opening up some Odell Myrcenary, one of my favorite Imperial IPAs. Good stuff.
After enjoying our beverages, I convinced Sarah to hike up American Basin with me for some photography. The clouds were setting up nicely for sunset and I found a sweet little waterfall which made a nice combination with American Peak in the background. Sarah shot a quick panorama of me setting up a shot in the basin with her phone which depicts the scene quite well I think.
And here's the shot I was setting up to take...
I also decided to hang out past sunset and well into the night in order to get some night photos. I always wanted to get a Milky Way selfie and I thought this spot would be perfect for that shot.
I also set-up for a Milky Way panorama from this spot, relying on the faint light of the moon to light up the hillside.
After freezing my hind quarters off, I decided to head back to camp and hit the sleeping bag for some sleep. Knowing the weather would be great, we decided we would start early enough to get some photographs of the basin at sunrise, but not so early that we would be hiking in the dark. Our route took us up the main Handies Peak trail and then off-route for most of the rest of the day. After hiking about 1/4 of the way up Handies, we split off the trail and started our leisurely stroll up the fragile tundra and wildflowers below American Peak. As the sun began to rise, American Peak began to light up with sweet alpenglow.
The view of UN 13,535 behind us wasn't so bad either...
After enjoying the awesome sunrise, we began to head up the un-trailed section to the west saddle of American Peak. Our target was the lighter colored rocks as seen below. We planned to just bushwhack our way up the side of the mountain.
The climb was not too bad - the hardest section was the loose scree and dirt just below the saddle.
We were quite excited to reach the saddle and get our first glimpses of Jones Mountain.
Our route took us up a very faint trail to the ridge between American Peak (left) and Jones Mountain (right). The hiking was pretty easy going.
Once we were between Jones and American the views opened up a bit and we could see just how rugged Jones looked from this vantage. The summit of Jones is seen at the far right.
We headed down (and then up again)...
Upon reaching the summit of Jones Mountain, we ran into another hiker and his dog. My mind was blown when I realized that the other hiker was Mike Megorden, a friend of mine from high school! We played on the high school football team together. Pretty small world!
Sarah and I celebrated our 16th summit together with views of the Grenadiers and Needles behind us. What an amazing view. Oh, how I had missed this part of Colorado!
I set-up my tripod and shot some panoramas using my telephoto lens. The air was still a bit hazy, which added some interesting tones to the photos. Looking south.
Looking south-east.
Looking east. You can see the rugged ridgeline of American Peak.
Looking north east - featuring Uncompahgre and Wetterhorn.
Looking north.
Looking north-west.

Zoomed in on Uncompahgre and Wetterhorn. I think this one would look pretty nice printed large.
After enjoying the views we decided to head back down. We were contemplating American Peak and would need to make a decision when we hit the American - Jones ridge. The weather was looking 50/50.
A glimpse sideways at Jones' north face reveals how rugged it really is.
I was pretty amazed at how great the flowers still looked for this time of year. Here's a shot of some alpine sunflowers with Jones in the background.
Sarah and I rested at the ridge and decided not to take on American Peak - the weather was starting to look a bit questionable; however, the tundra was quite inviting for nap-time.
Sarah and I took our time heading back, enjoying the great scenery on the way.
Back on the American Basin side, we ran into a huge field of wildflowers which I had to stop and take photos of. I really want to go back and get this same shot at sunset or sunrise someday. Here's a shot Sarah took of me composing my photo.
And the crown jewel shot of the day - a mix of awesome wildflowers with the shoulder of Handies Peak in the background at the right. American Basin truly is one of the best spots in Colorado.
Sarah and I got back to our campsite and packed up. We decided to drive back to Lake City and up Nellie Creek for our next adventure: Uncompahgre Peak. I had done Uncompahgre back in 2000 with my dad, but was excited to see if I could get some photos at sunrise from the top. We cracked open some more tasty Odell brews and prepared for our next adventure...
I hope you enjoyed following along for this adventure up Jones Mountain. Next up: Colorado 14er Uncompahgre.
This is the first installment of a three part series, exploring some amazing peaks in southwest Colorado near Lake City.
Living in Portland, Oregon has certainly slowed my progress towards climbing the highest 100 mountains in Colorado. Last year, I was only able to summit one mountain on my (at the time) remaining list of 17. This year I wanted to change that a bit. I started planning very early in the summer to spend about a week in Colorado trying to work on finishing my goal. I made plans with my best friend Sarah to head to the San Juan Mountains to tackle some of the more remote peaks I had remaining. Sarah still had the need to complete two 14ers in that area, including Handies and Uncompahgre, so we would certainly be able to string together some plans that included peaks on both of our lists. I flew in to Colorado Springs from Portland on August 19th with my wife. It also happened to be our 9th wedding anniversary. We had dinner with awesome old friends at a new vegan bar in Colorado Springs called the Burrowing Owl. I tried hard to sleep well that night, knowing Sarah would be at my door at 4 AM for our trip to the Lake City, Colorado area to begin our week of summiting peaks in Southwest Colorado.
For this trip we decided to car camp, which turned out to work really well. We played almost the whole trip by ear, not really planning any specific days in advance other than having the knowledge on how to get to various trailheads. I utilized my new F-Stop Loka backpack to ensure my Nikon D800 and the Nikon holy trinity (14-24 f/2.8, 24-70 f/2.8, 70-200 f/2.8) were secure and ready for adventure. I have to say in advance that I really liked using this pack for climbing mountains. Enough gear talk though - let's get to the adventure! Bear with me on this trip report, as it is the beginning of a great adventure that is very important to me. The photos progress in quality as we go!
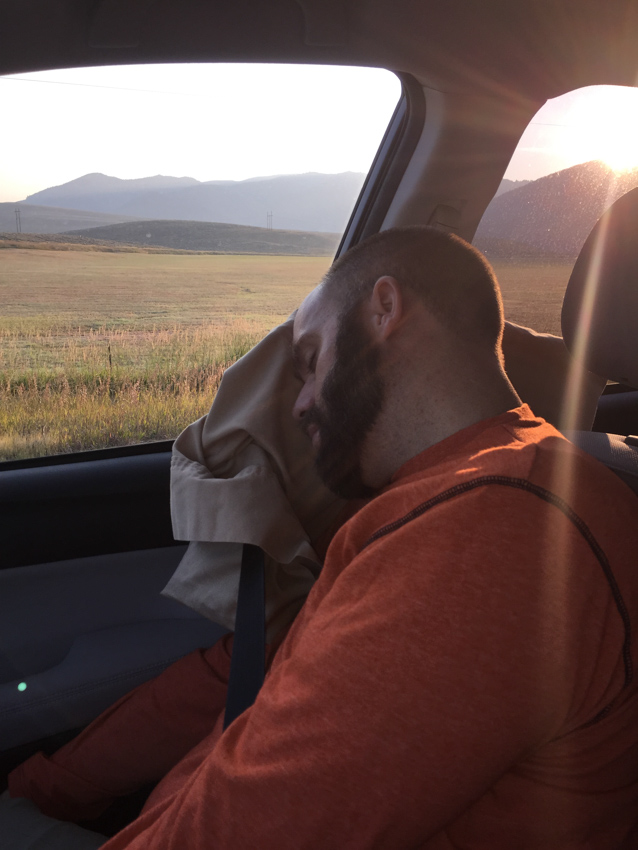
Sarah picked me up at 4 AM and we drove to Gunnison to buy groceries. I was absolutely exhausted from the night before and slept a bit in the car. Of course Sarah took full advantage of this and took a photo (a lot of the photos here are hers).
 Upon reaching Gunnison, we decided to buy a bit more food for meals, having only packed some dehydrated meals. We stocked up on tasty supplies and head for Lake City, one of my favorite spots in Colorado. Our first objective on this trip was to get as high as possible on the road leading to the trailheads that service Half Peak near the old ghost town of Sherman. I knew through research that the main trailhead was lower and that there was another trailhead much higher that offered a seclusive alternative route up Half Peak via Cuba Gulch. The advantage of using that upper trailhead would be that we could also use the area as a base camp to accomplish other goals, like Handies Peak, Jones Peak, Niagra Peak, and American Peak. If we did not decide to use that trailhead as a base camp, we could easily go up the road and hit American Basin, so it was a logical place to start.
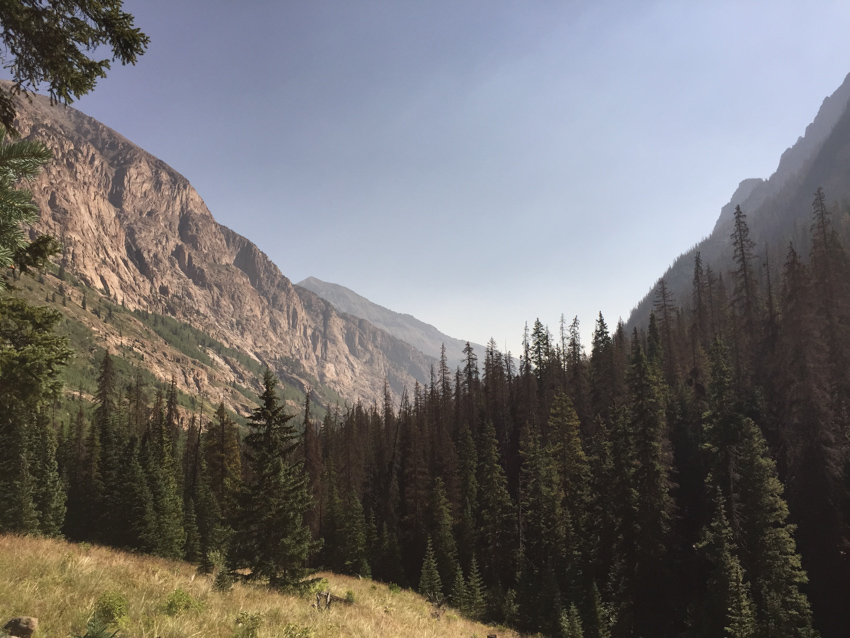
Sure enough, we found an incredible campsite just about a quarter mile before the end of the road and the start of the Cuba Gulch trailhead. The campsite offered perfect access to water and was nestled between an amazingly beautiful gully coming down off of the north side of Half Peak and a huge granite rock formation making up the bulk of the northern side of the valley. Having been away from Colorado for a year, I was quite honestly in heaven. I just loved the spot.
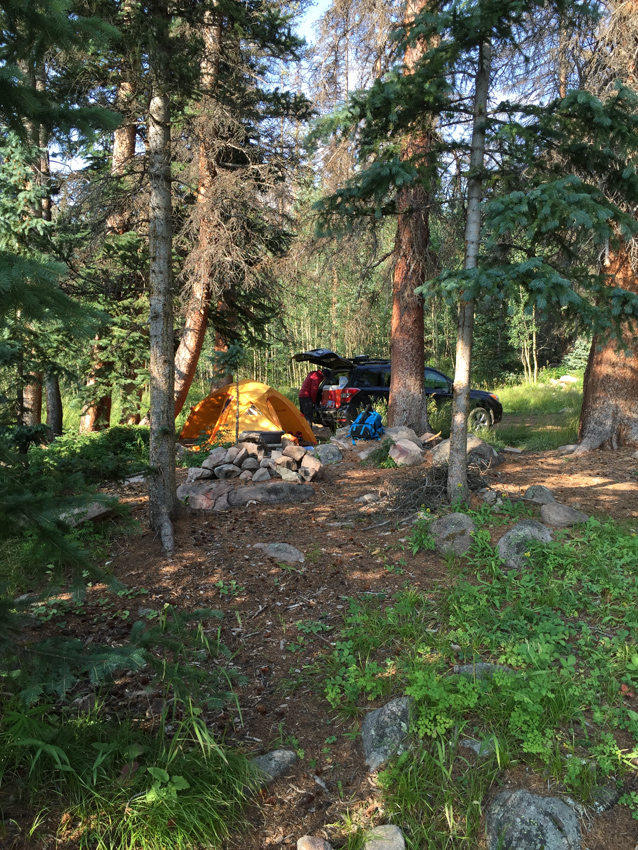  |
What a beautiful area.
After setting up our camp site we decided to assess the weather. The time was 11 AM and the weather looked absolutely fantastic. Having summited several high peaks in the afternoon and evening in the past, I was fairly confident that we could climb Half Peak with a late start as long as we kept an eye on the clouds. We both decided that we'd give it a shot and head for the trailhead, a mere 1/4 of a mile away. My main concerns for this week were altitude sickness and my ankle, which I had severely injured in June playing basketball pick-up game at a park near my apartment in Portland. The ankle was still sore and not 100%, but I felt pretty good in my great boots.
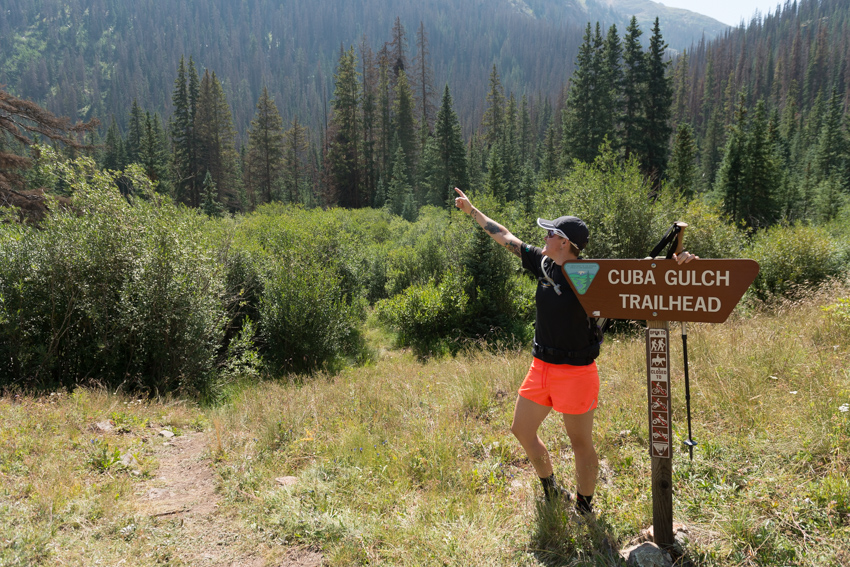
Sarah and I quickly reached the trailhead and shot some photos there, per tradition.
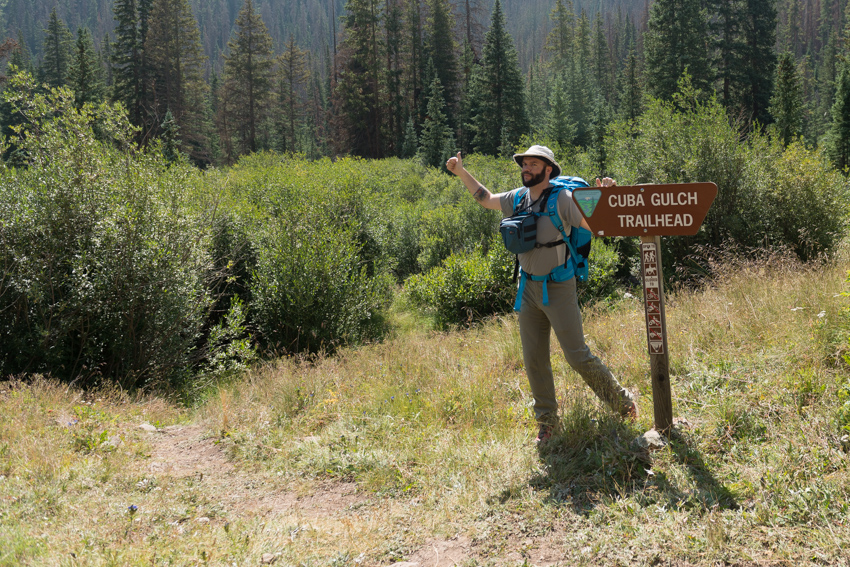
You could rest assured that locating Sarah at any point of the day's adventure would not be a problem.
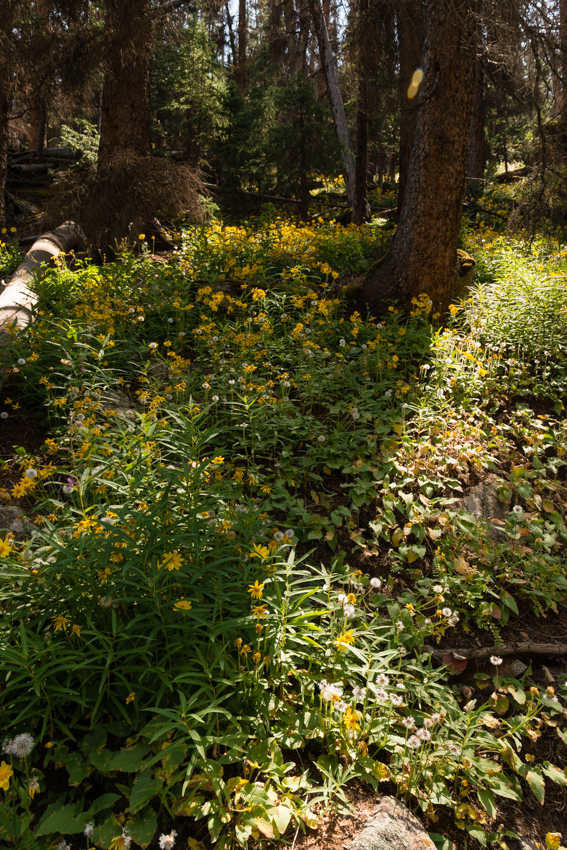
You know you miss Colorado when even after 2 minutes on the trail you let out a silly laugh like a child when you hike through some willows. Sarah stopped to see if I was OK and I just said that I was really happy to be in Colorado and she replied, "I figured that was what was going on." The amount of wildflowers on the trail was quickly evident and a very pleasant surprise. I figured they would all be long gone by late August; however, the trail was filled with tons of them!
The Cuba Gulch trail was just about perfect - not too heavily used, but not a total bushwhack. We found it to be a very nice adventurous trail off the beaten path, for sure. The climb up into the gulch was a long one, with the steepest sections happening only right at the start. We stopped only a couple of times - once at a really great footbridge over a waterfall for a requisite selfie.
I have to admit, it was pretty amazing to finally be back in the Colorado backcountry with Sarah - we have climbed so many awesome peaks together.
After about an hour and a half of hiking up through the dense forest and wildflowers, Cuba Gulch began to open up.
We followed the description provided by Gerry Roach's awesome 13ers book and found the end of the Cuba Gulch trail right before a huge open area of willows. We knew that from that area we'd need to navigate ourselves up a slope to the east following game trails. I opened up my topo map that I had borrowed from my dad and verified our position based on our surroundings and formulated a plan.
The slog up from here was pretty brutal - only faint game trails and lots of willows adorned the hillside before us. We finally prevailed though, and reached a nice plateau with views looking east at the rest of our day. Holy crap - we thought. Is that really Half Peak? That long, insane trek? All the way up that huge valley in front of us? Yep. Check out the huge ridge line! I don't think Sarah was too thrilled. Based on the map, I knew we'd need to cross that huge valley, as high as possible to the right and then hit the saddle between the lower peak on the right and Half Peak on the left. Giddy up.
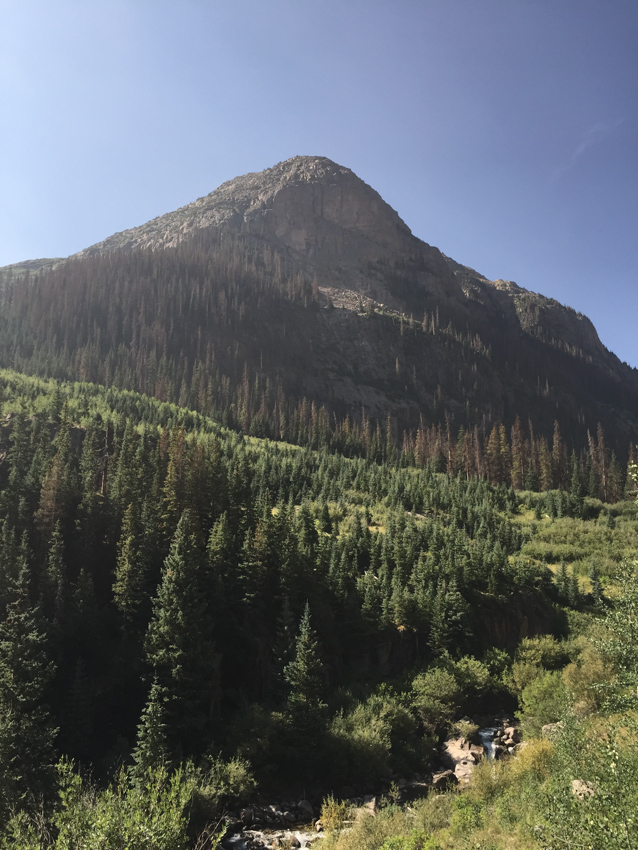
I spent some time here admiring the view of Half Peak - it really was quite a sight to see. The scale, the distance, the sheer awesomeness of the cliffs of its faces - everything was just so great to behold.

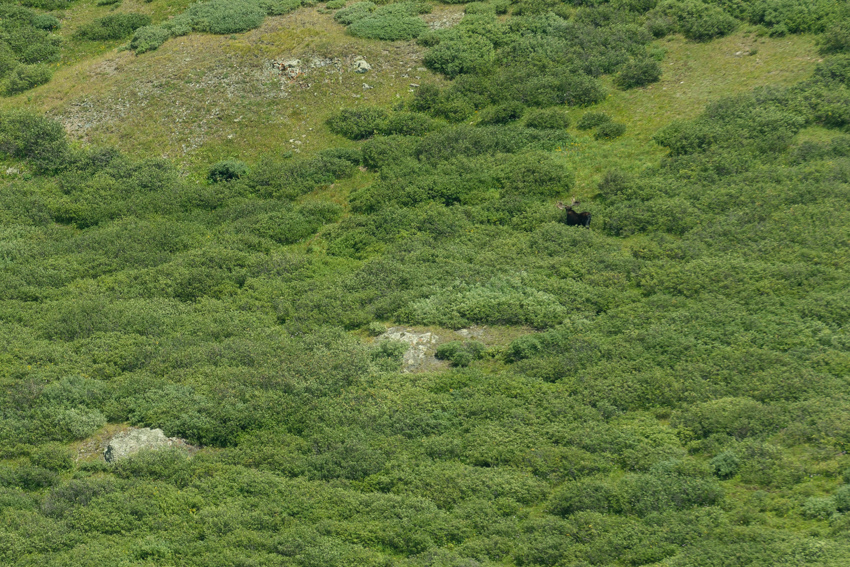
We decided to keep going - there were very few clouds in the sky, which was filled with light layers of haze likely produced by the recent huge wildflowers in the state of Washington. As we continued on the upper reaches of the basin, following the most southern slopes to avoid willows, I spotted a huge moose down in the basin below us, quite a distance away. This was a rare opportunity to utilize my heavy 70-200 lens to photograph him. He was really far away and so he still looks quite small, but you can easily make out his huge velvet antlers.
As we continued up the long basin, I could not help but admire the view of Half Peak's west face - it really stood out prominently among the area's peaks. This peak really has some very interesting features and looks totally different from all angles. We got to see it from the north a couple days later and it looked completely different.
Sarah caught me taking some photos of Half Peak's impressive cliffs.

It is worth mentioning that Sarah has been training for the Pikes Peak Ascent, while I've been training to taste all of the different beers that the great city of Portland, Oregon can offer. With that being said, I spent a great deal of the hike behind Sarah, which afforded me the opportunity to take lots of photographs of her as we climbed up.
As we reached the end of the basin's flatter section, we encountered some good up-climbing sections on loose, but very manageable rock.
The views from the upper basin were of course very good. We appreciated the lower 13ers and high 12ers that were visble from here, including this prominent point to the north of us, which I have yet to be able to identify.
We continued up very faint game trails until we began to identify some cairns in the distance, which belonged to the Continental Divide Trail, which headed east and south from our junction.
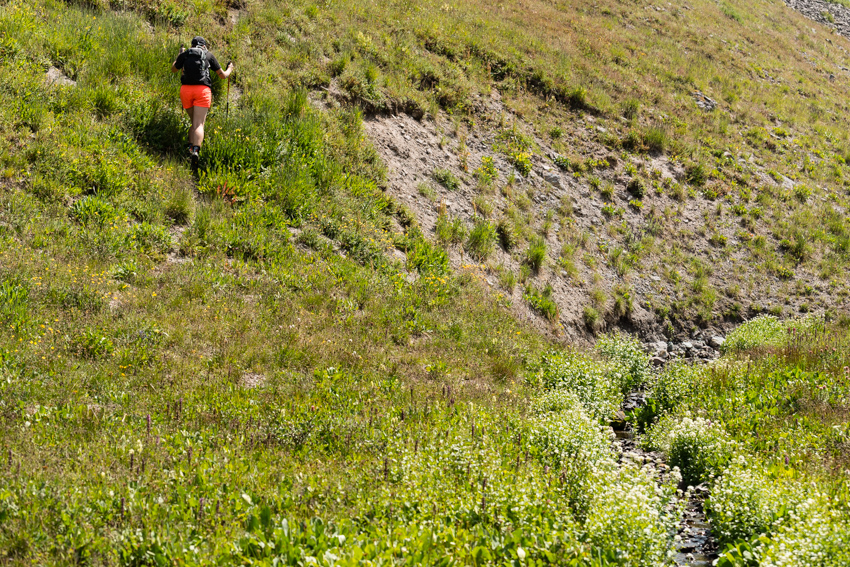
There were a lot of vantage points by which I could photograph Sarah looking really awesome on the ridges and trails.
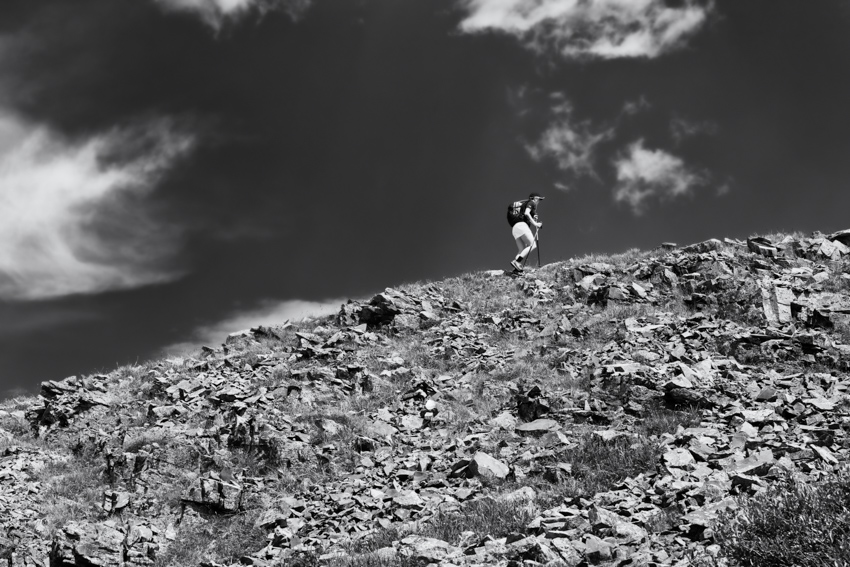
The numerous opportunities to photograph the scenes before me offered a nice respite from the steep climbing off-trail.
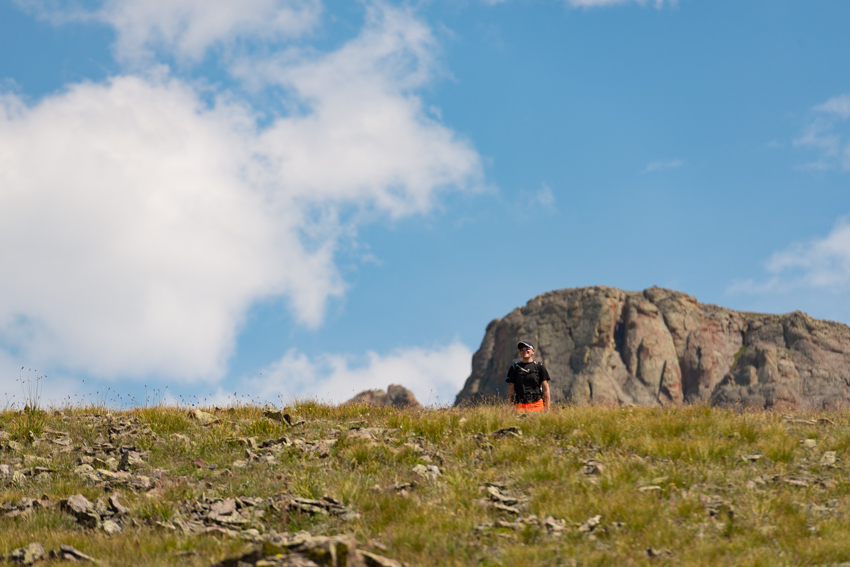
Once up the steep part of the basin, we stopped for a minute to enjoy the view. At this point I passed the camera off to Sarah to get some photos of me enjoying our surroundings.
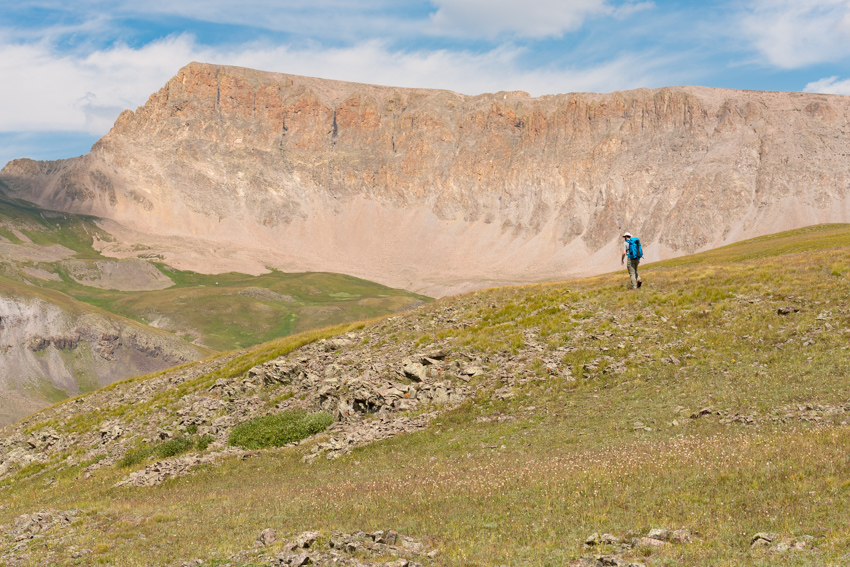
It is safe to say that I was really enjoying being in "my happy place" - the high country of Colorado.
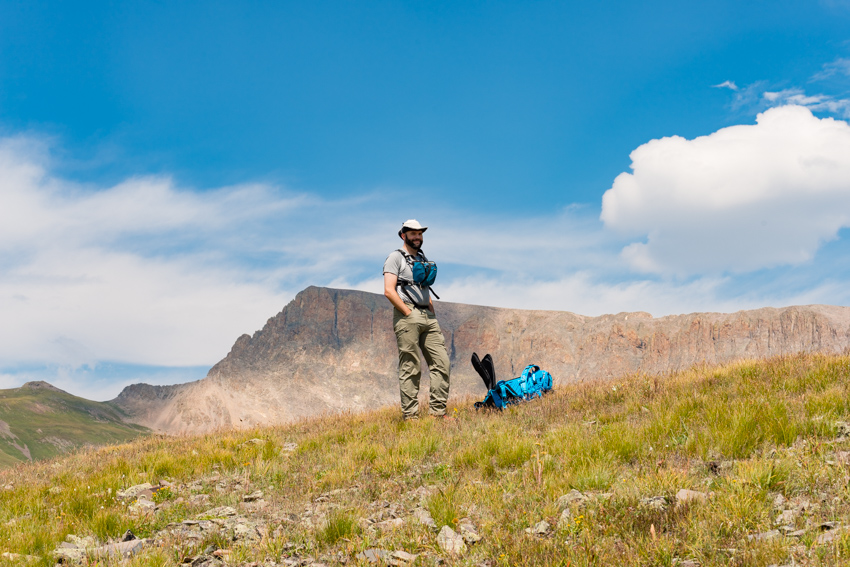
It was at this point that Handies Peak (big, center) and American Peak (far left) became visible. It was nice to see a couple of our future objectives.
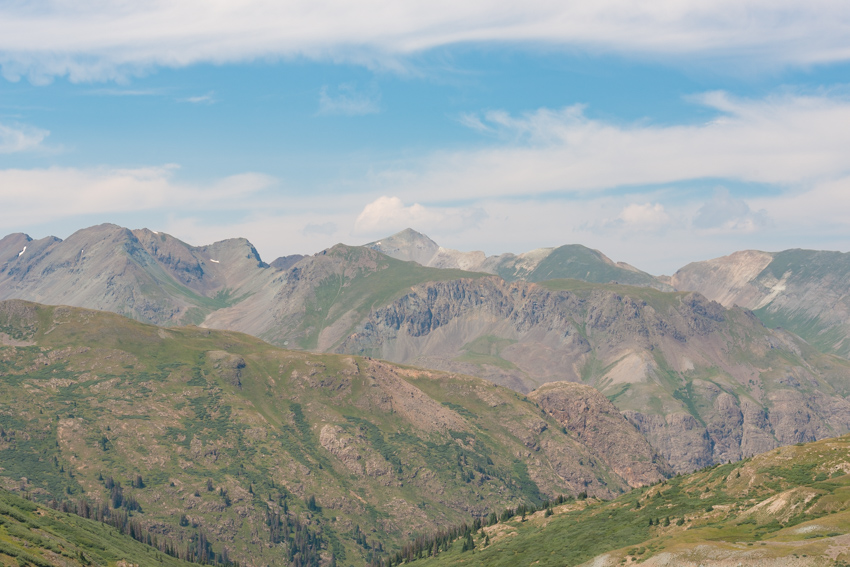
It might be hard to make out Sarah in this next panoramic photo, but it does help to show the massive scale of the scene before us here. Half Peak, which is very large, is actually just a small peak in the center of frame, with the American Basin peaks to the left. What an amazing approach Cuba Gulch provides!
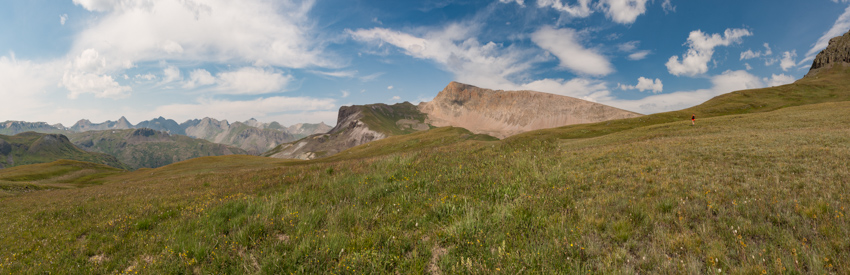
It was about here where we met up with the Continental Divide Trail, which immediately showcased two mountain bikers. It was quite a surprise to run into these two mountain bikers, and I could only imagine where their journey was taking them.
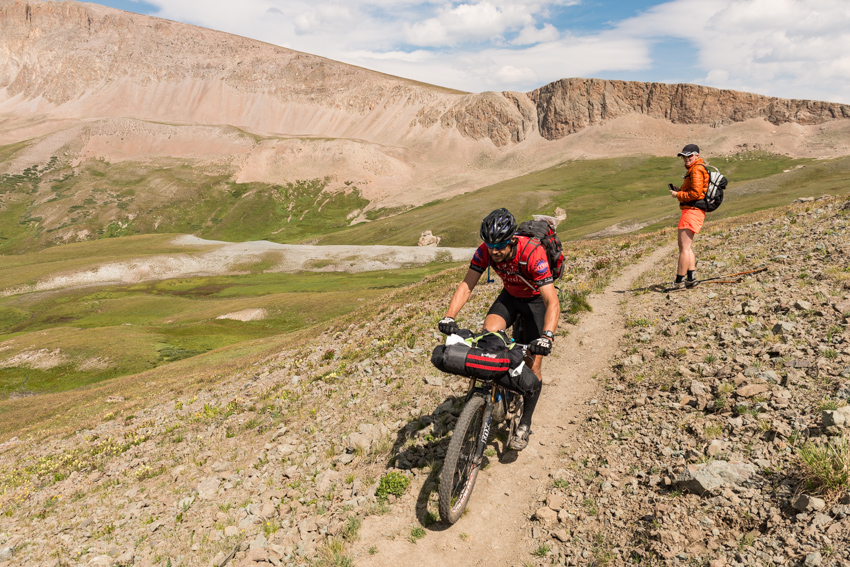
Half Peak made a nice backdrop for this mountain biker on the Continental Divide Trail.
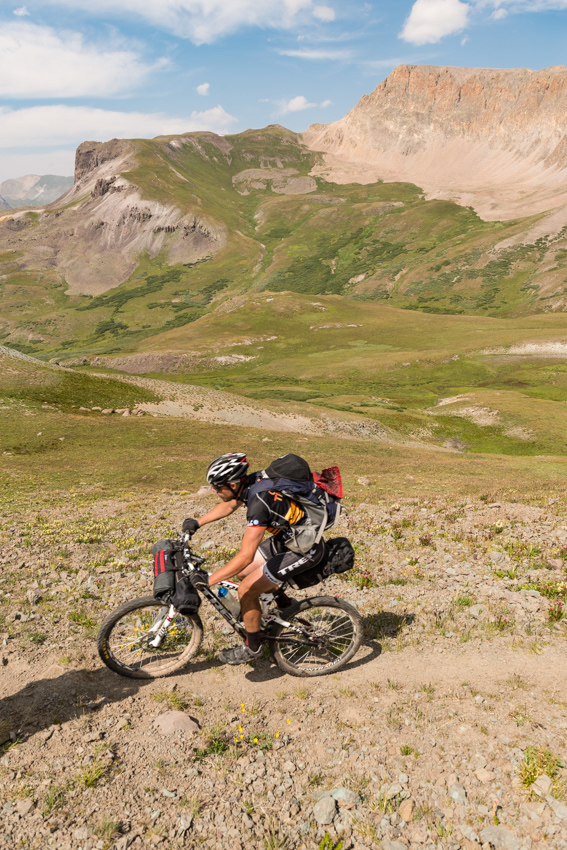
The Continental Divide Trail made for a nice leading line up to Sarah's visage in the distance. I was really enjoying all of the photography opportunities, but my legs were getting really tired.
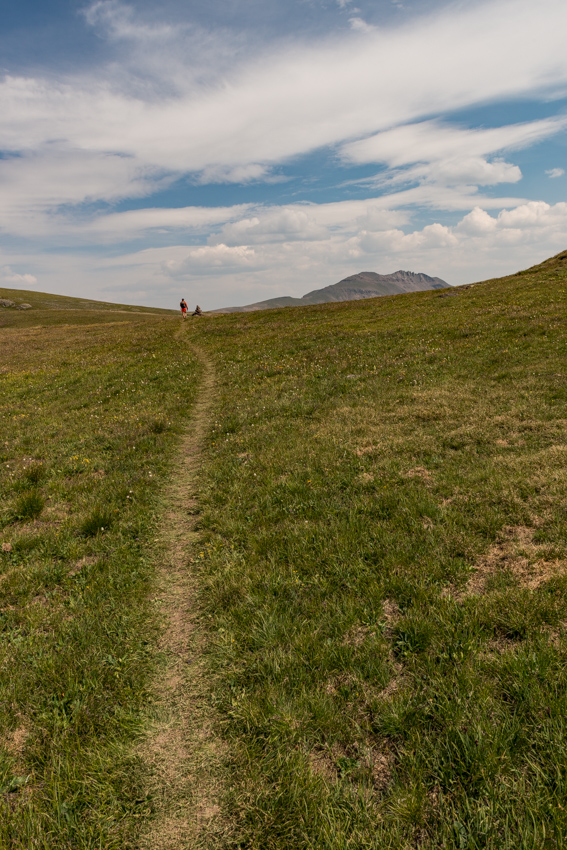
As I caught up with Sarah, our gaze was pulled to the east, where some very prominent peaks loomed in the distance. In this case, our view was of the mighty 13er, Carson Peak.
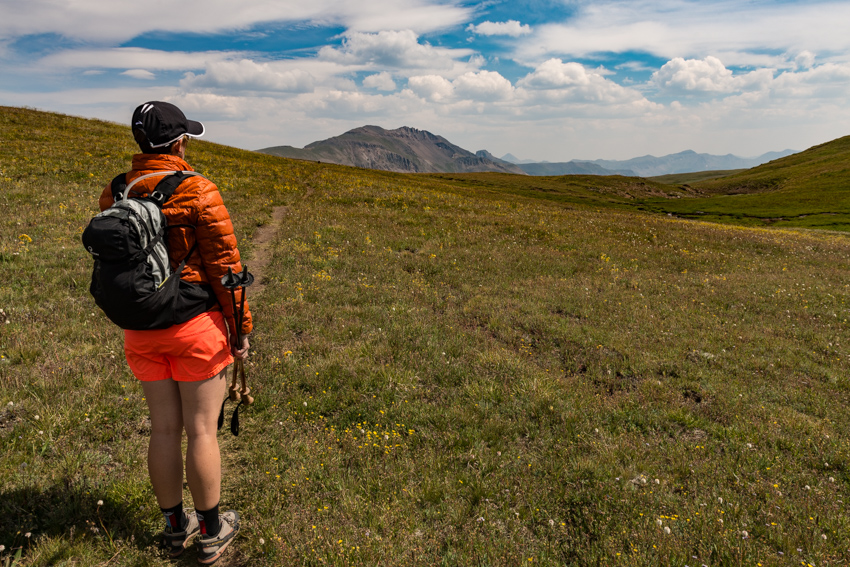
This was the point of no return. We had reached the terminus of the basin and the start of the huge ramp that was Half Peak. The ramp was at least 2 miles long by my estimate, perhaps even more. Unfortunately, I don't have any map software installed on my Mac to be able to measure the distance accurately; however, I can tell you - it was quite long! We spent a good 60 minutes hiking up this long ramp and about 2/3 of the way up we reached the start of the scrambling ridge section that I was excited to tackle. If you own Roach's 13er book, you'll recognize this view of Half Peak - the only photograph he shows in the whole book of the peak!
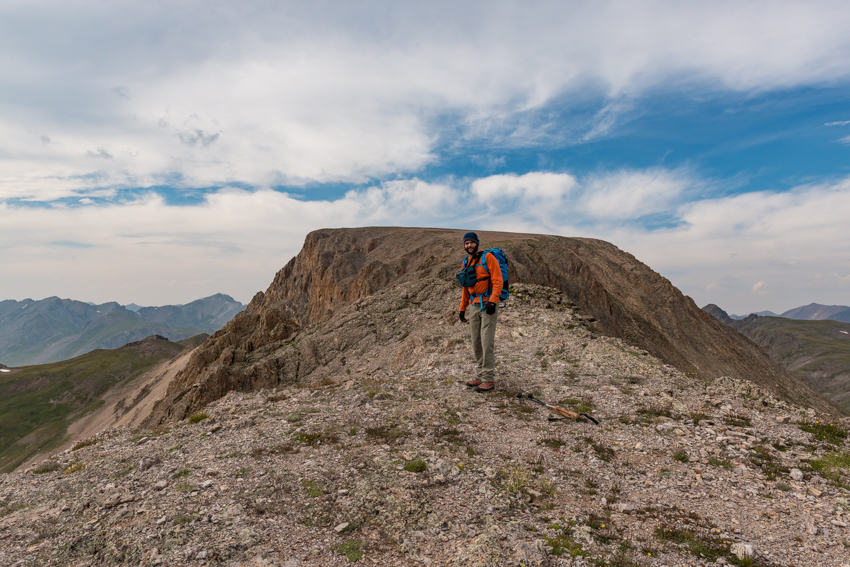
The hike up this beast took a toll on my legs, but I was super pumped to get closer to the top!
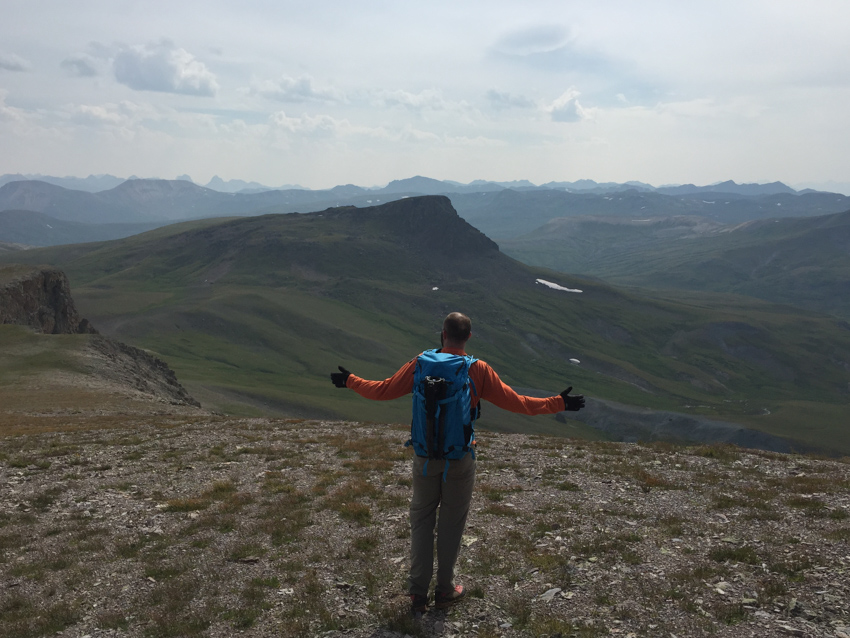
We continued up and found ourselves really enjoying the more difficult terrain on between the two flatter sections of the peak.
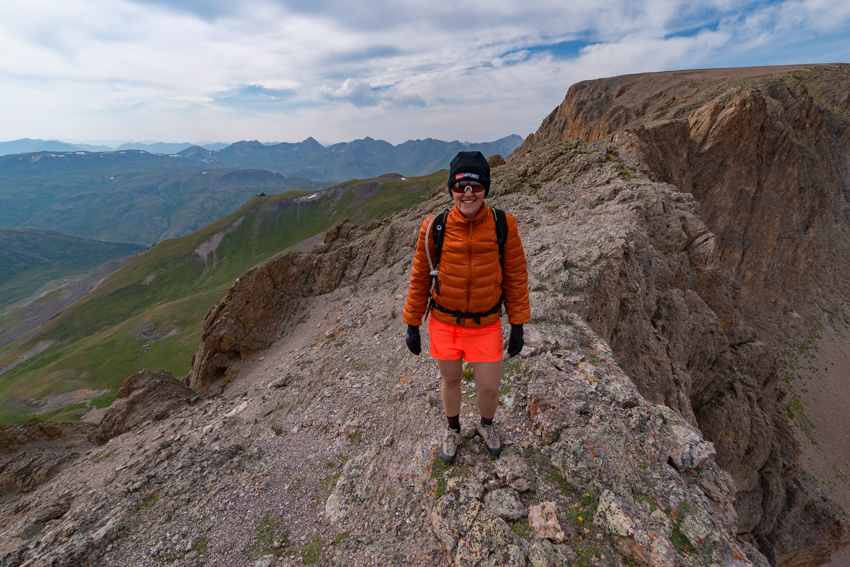
The clouds were holding nicely, intermixing with the haze to produce some really interesting effects, juxtaposed with the rugged terrain at our feet.
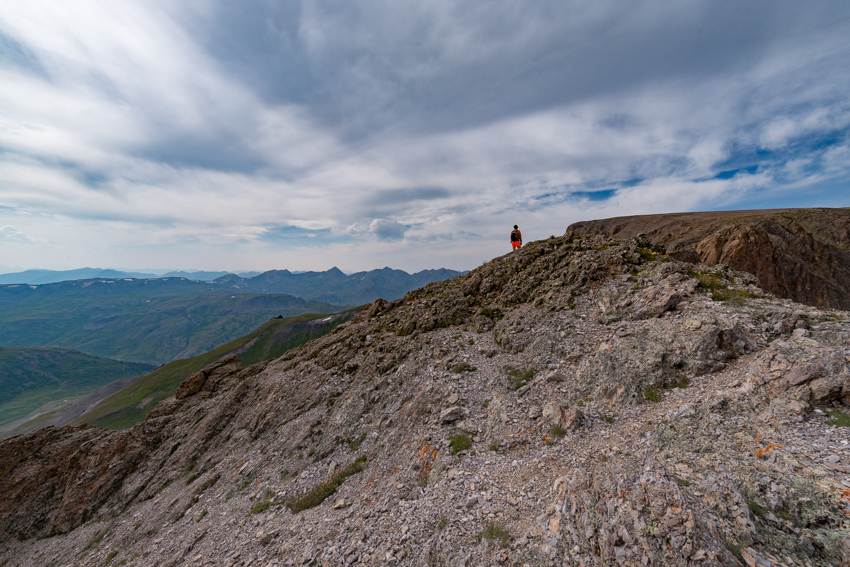
The ridge up Half Peak offered lots of amazing places to enjoy the rocks and view.
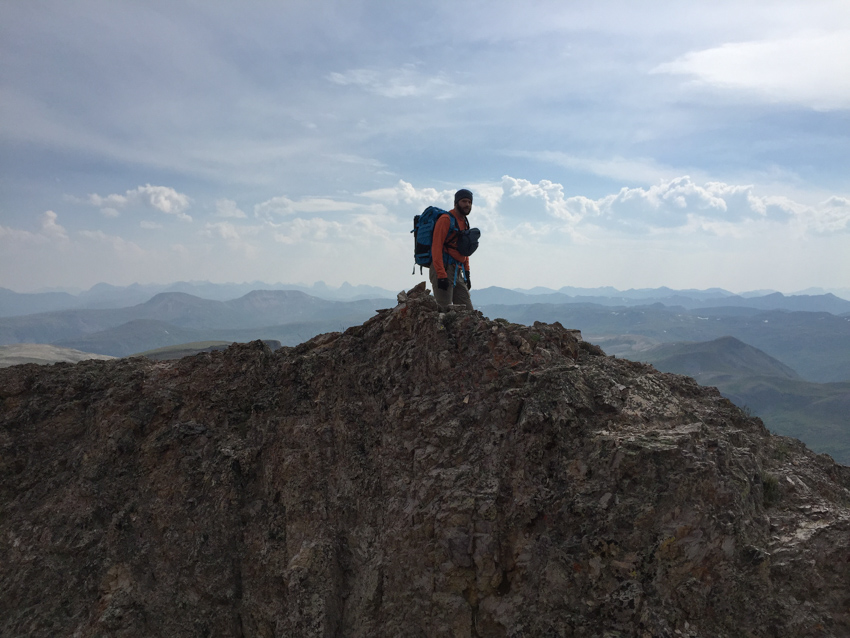
After a few more minutes of grunting up Half Peak's barren slope, we arrived at the summit, elated and exhausted.
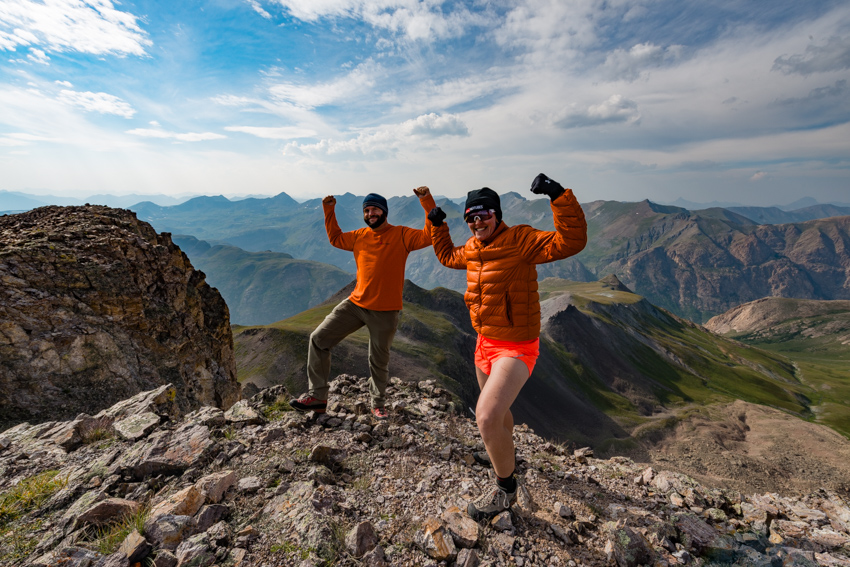
I was pretty lukewarm about the light, photographically speaking; however, I think this 180 degree panorama turned out pretty well. This is the view looking south-west-north from the summit. How many 14ers can you spot?
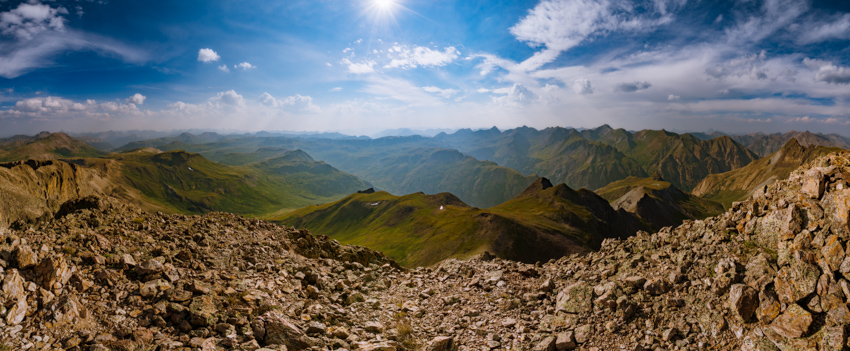
The views of my two favorite peaks - Vestal and Arrow (left and right respectively) were fantastic, only obscured a bit by the haze. I really liked how this black and white shot turned out. Again, nothing super special, but the subject is one of my favorites in the world.
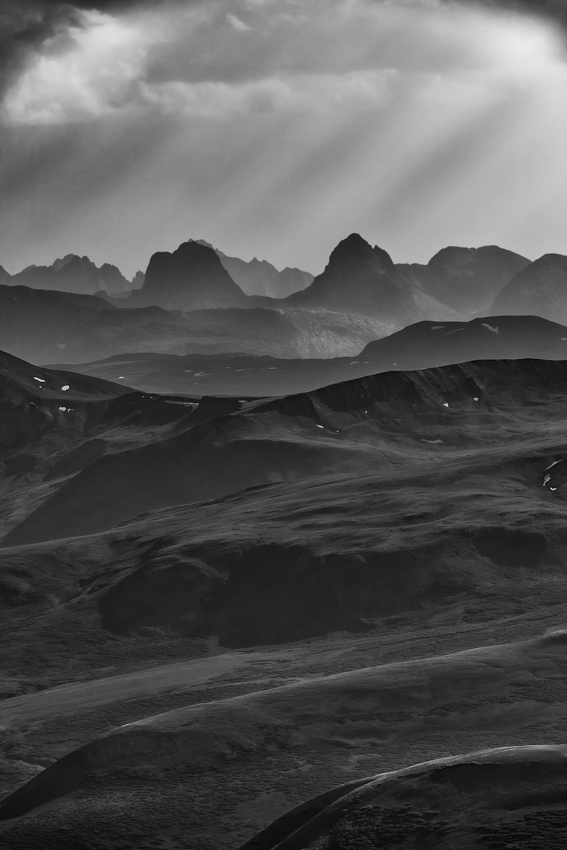
This next photo from the summit was looking north east. I had to really study my google tool to figure out that it was a shot of Quarter Peak in the foreground, and I'm pretty sure that's the 14er Sunshine behind it - or at least, I think that's what it is!
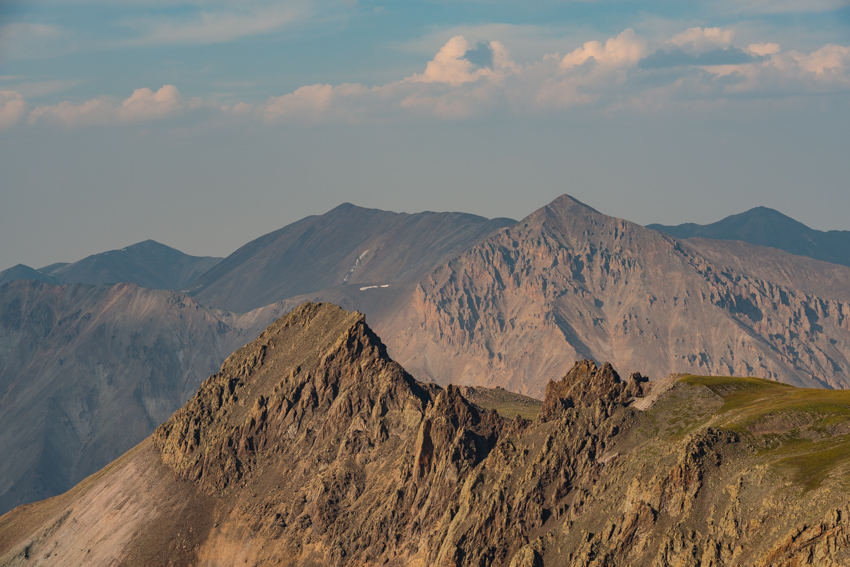
This next one should be easy - Wetterhorn and Uncompahgre!
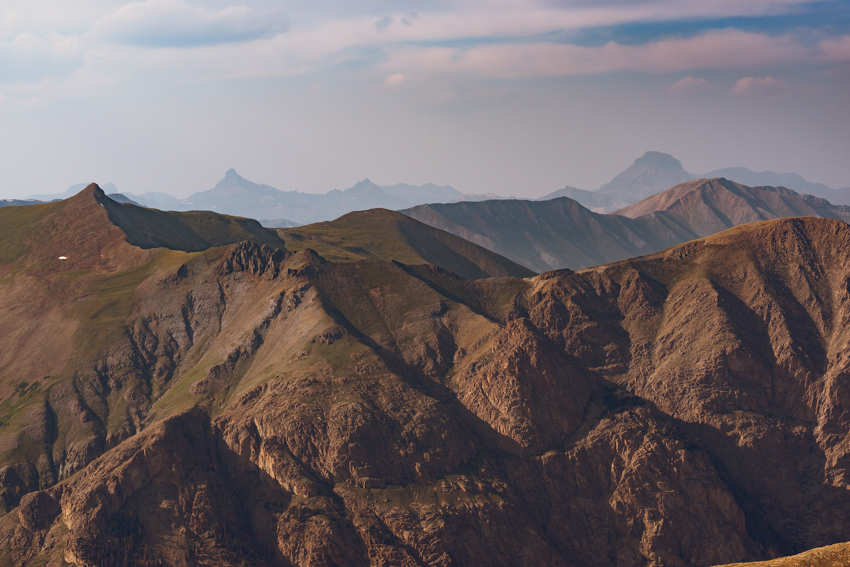
Sarah was taking our time on the summit to text our wives to let them know were still alive and OK on the summit. I just loved how Vestal and Arrow rose above her to the left.

Sarah of course took the opportunity to take some shots of me enjoying my craft from the top of the world.
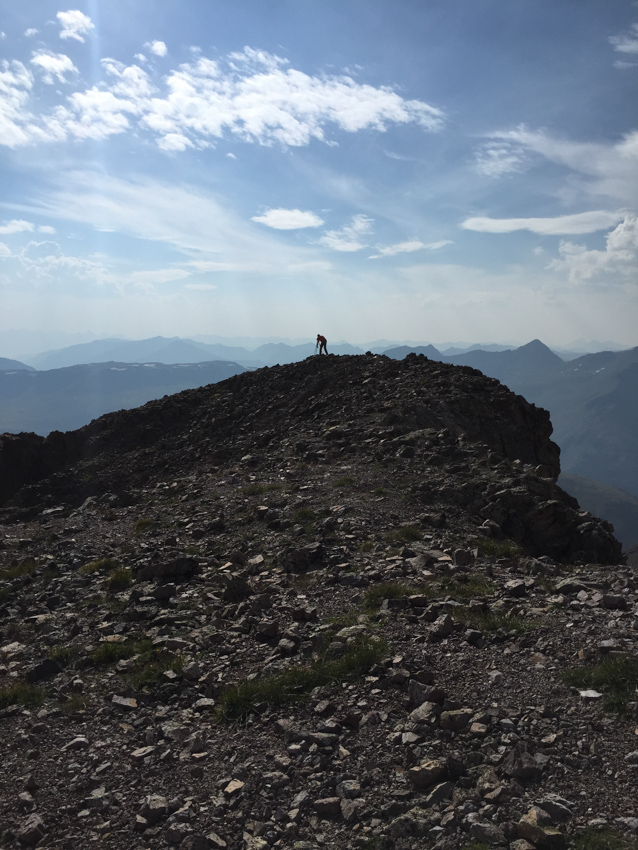
Geeking out.
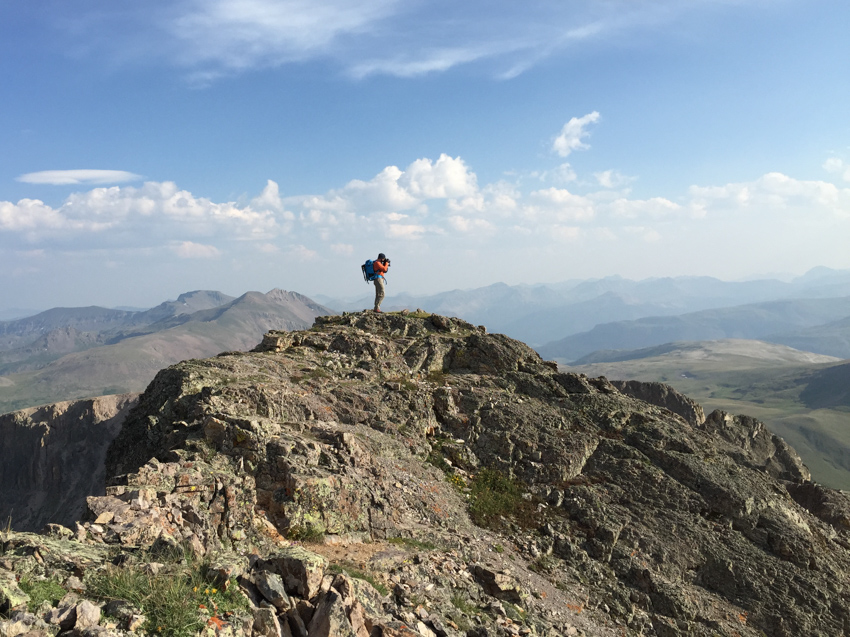
A glance down to the north and west presented some really intersting cliffs on a decending ridge away from Half Peak towards the trailhead - what a magical place.
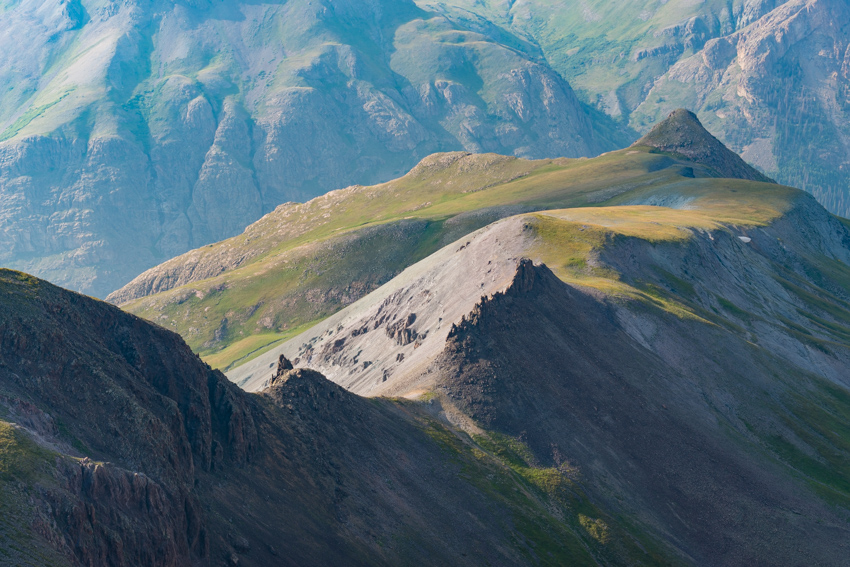
Next up - a wider panoramic view showing Handies, Wetterhorn, Uncompahgre, Sunshine and Redcloud. Not bad. Quarter Peak dominates on the right.
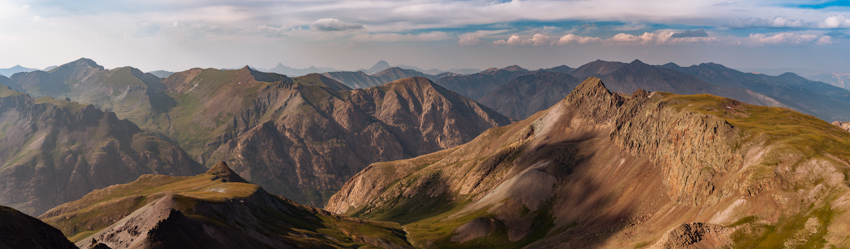
After basking in the glory of being on top of Colorado's 86th highest mountain, we decided it was time to head down. We did not want to get caught in the dark above tree line and it was already 5 PM. The look down from the top sure was good though...
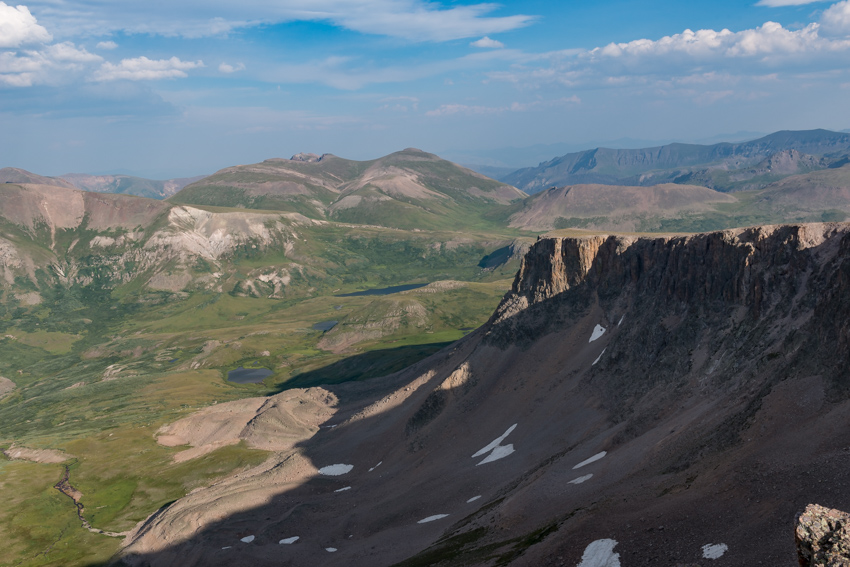
As the sun began to set, the light just kept getting better and better on our decent. I just loved this next photo - the catwalk of a ridge from Half Peak leads the eye through the bottom half of the frame and up to the more grandeur scene to the north, including the rugged Chicago Basin 14ers and Vestal & Arrow.
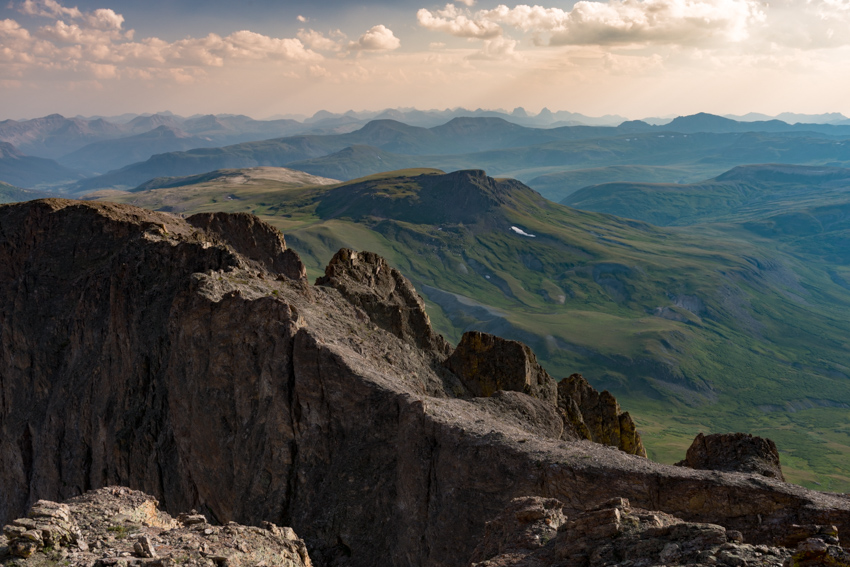
We reached the bottom of the huge ramp in no time at all, but my legs were just destroyed! My ankle was sore, I had taken several Ibuprofen, and I was pretty tired. We had to eat. The huge cairn marking the Continental Divide Trail seemed like a great place to stop.
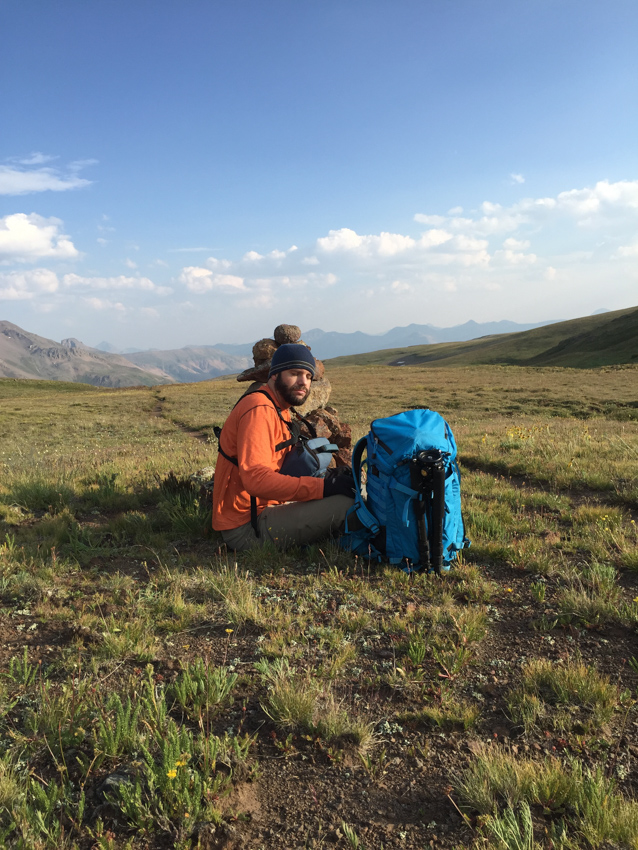
As the sun went down I found energy levels increase. The light was getting to be really great and I knew that it was going to be a magical sunrise. Sarah caught me taking lots of photos of flowers, which I could not help myself from doing. What can I say - I'm a sucker. I was too lazy at this point to get the tripod out though! Haha!
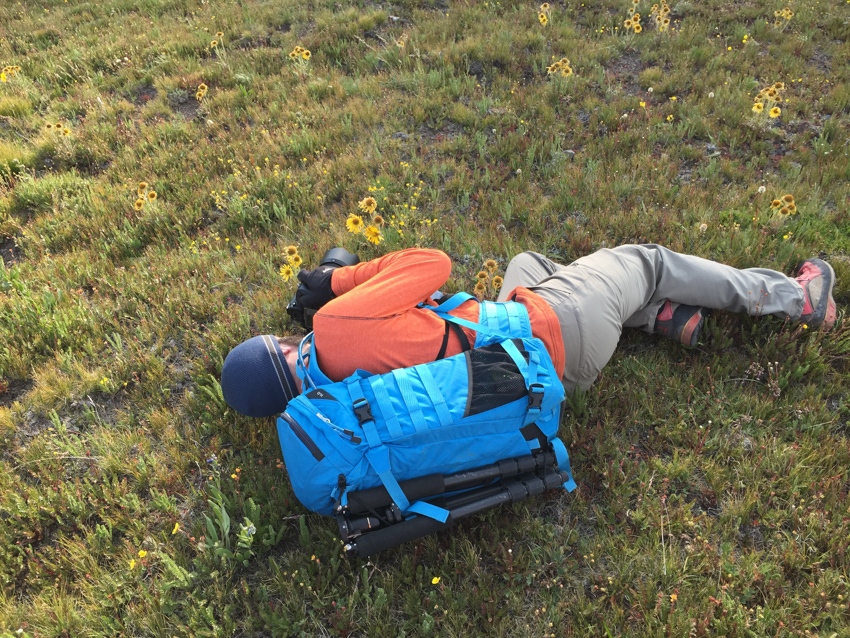
Sunset was quickly approaching, and golden hour had mostly arrived. The back-lit wildflowers were just incredible.
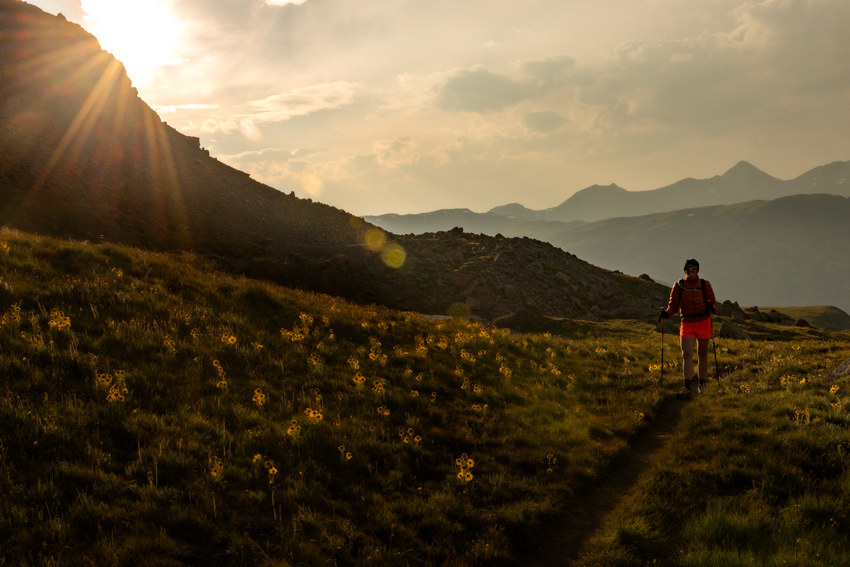
I found this awesome rock formation and captured a great sunstar right through it, which also illuminated these wildflowers in the foreground. Yes!
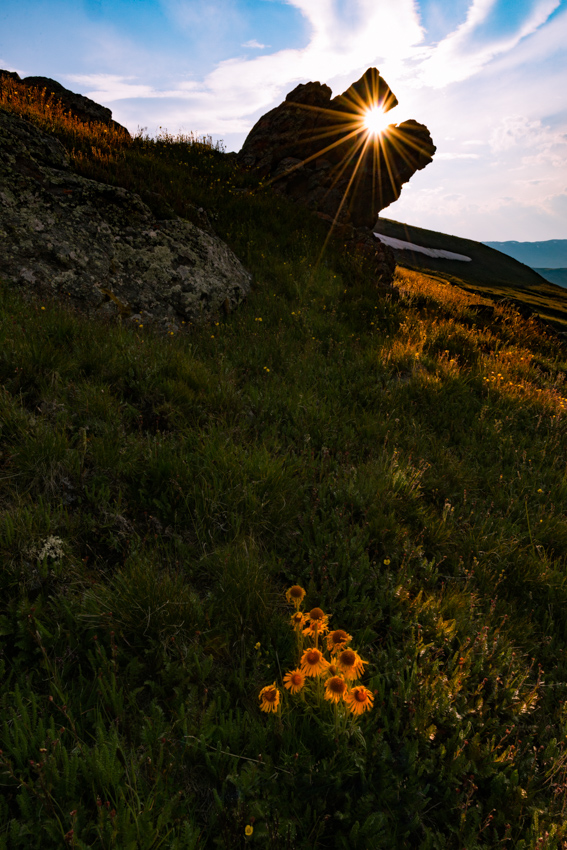
Half Peak at sunset just looked magical.
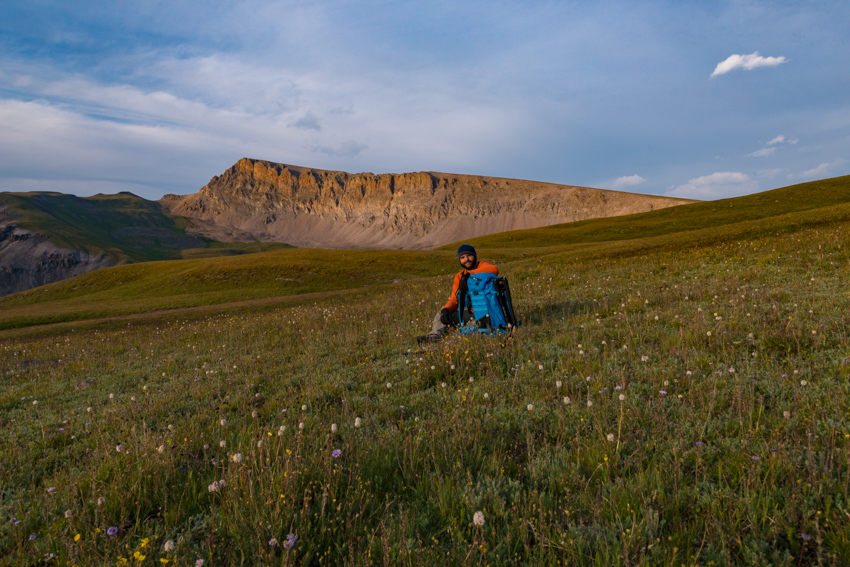
Descending the upper basin was like being in a Western movie - it was so surreal being all alone up there walking into the sunset.
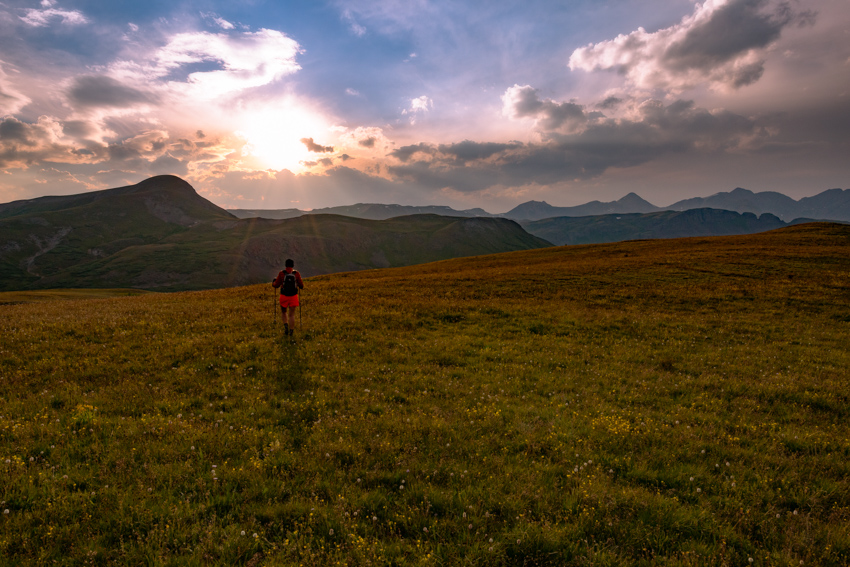
I found endless opportunities to photograph the scenes we stumbled upon, like this awesome huge stand of wildflowers with the killer sun colors lighting up the sky above.
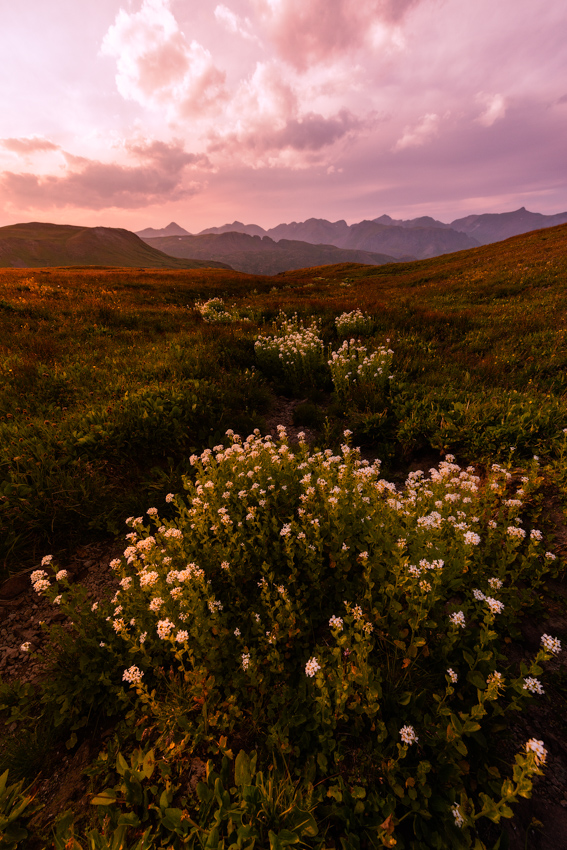
And then I found these awesome flowers, perfectly arranged before the setting sun. What a beautiful basin to enjoy.
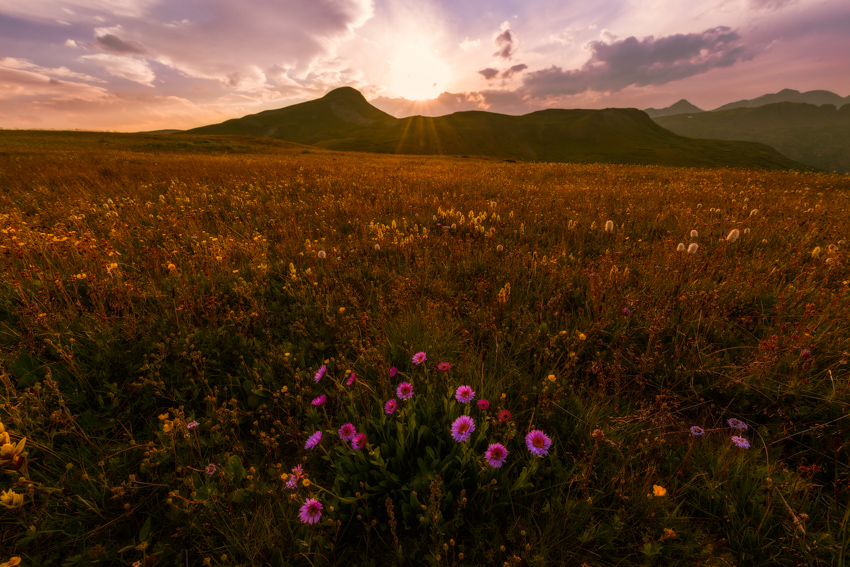
It was really hard peeling myself away from this area - the light, the flowers, the view, the stillness to the air - it was all just so therapeutic.
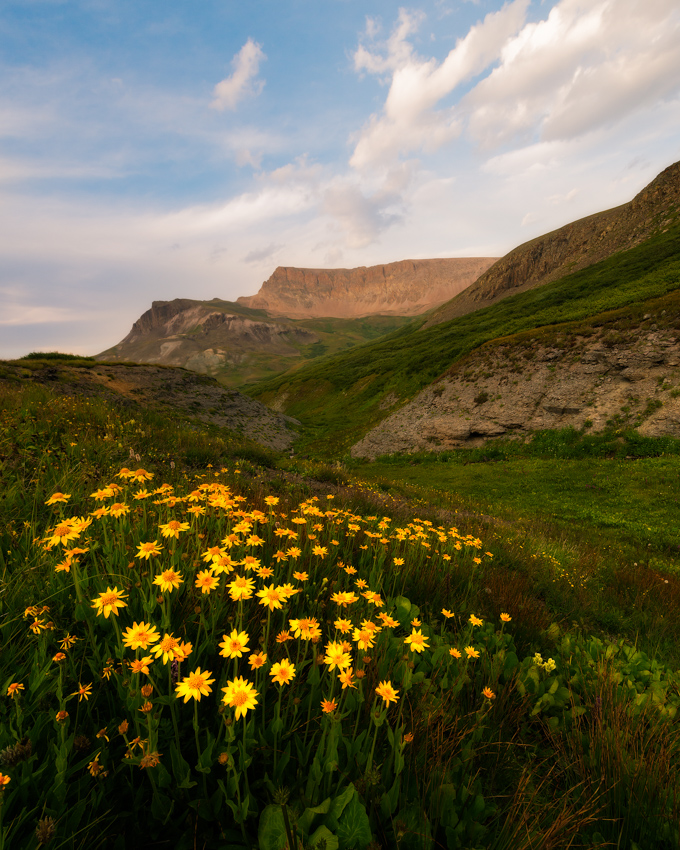
I think Sarah was getting a kick out of it also; however, I knew she was hungry and anxious to get back to the trail below.
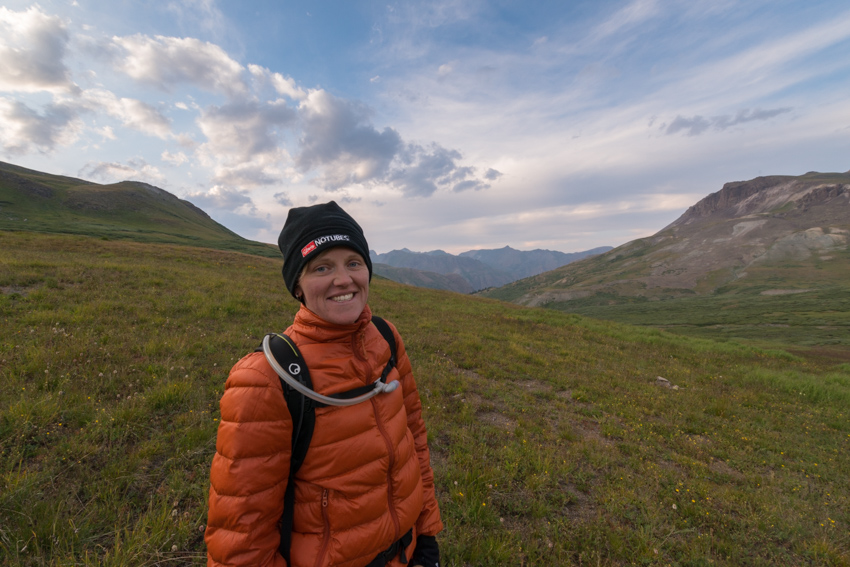
The colors in the sky were rapidly changing from moment to moment, likely exacerabated by the haze and smoke in the air. I didn't really mind!
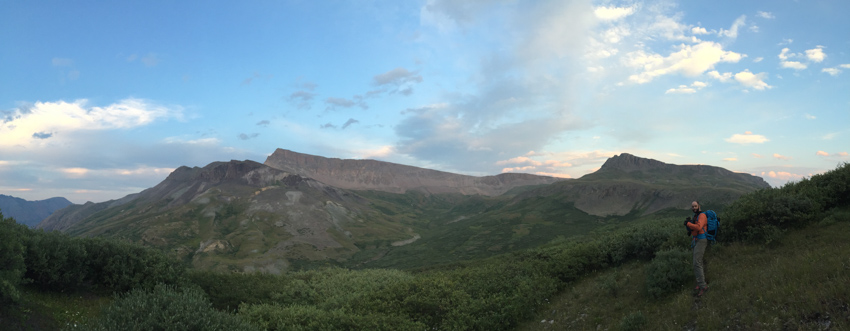
The pinks and purples were starting to color the sky - making for a very pleasing sunset.
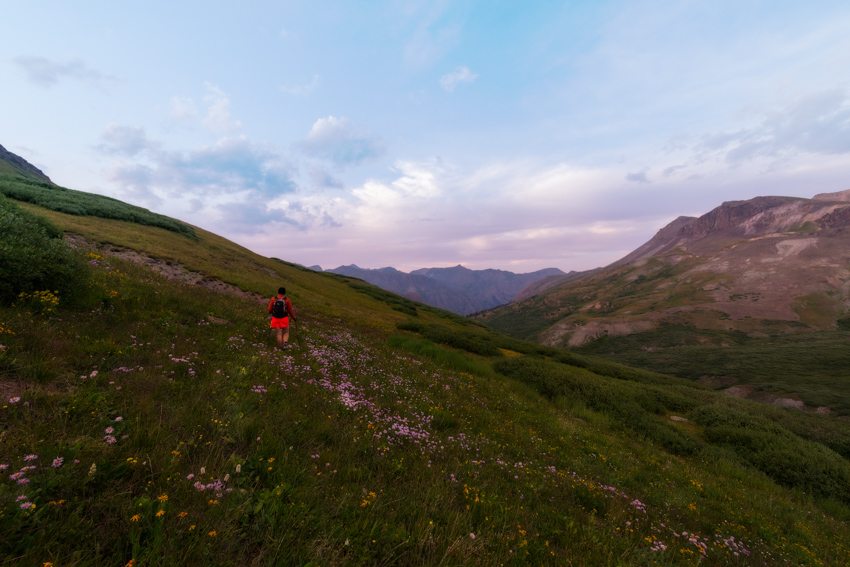
As we reached the lower reaches and the end of our view of Half Peak, I found myself gazing back often. It probably did not hurt that the sky was exploding with color.
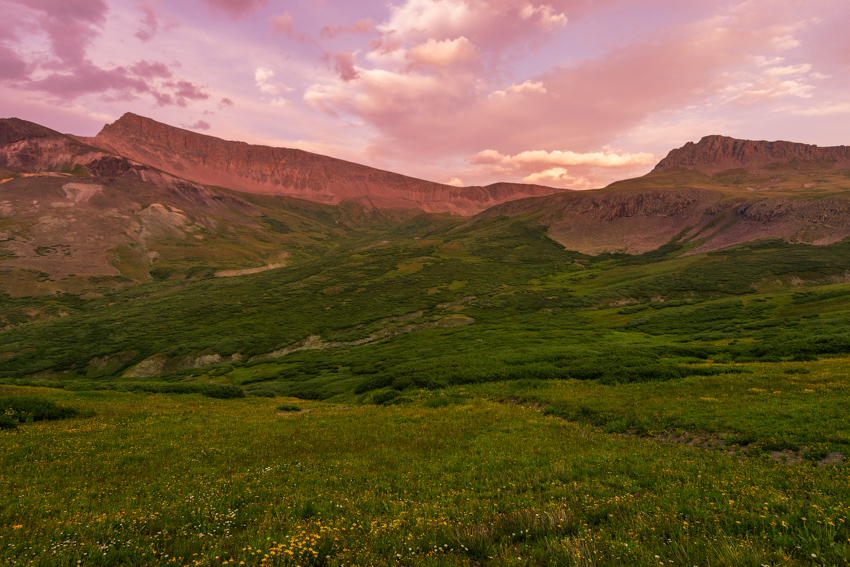
I even stumbled upon a small patch of Indian Paintbrush - which complimented the scene in a quite lovely way.
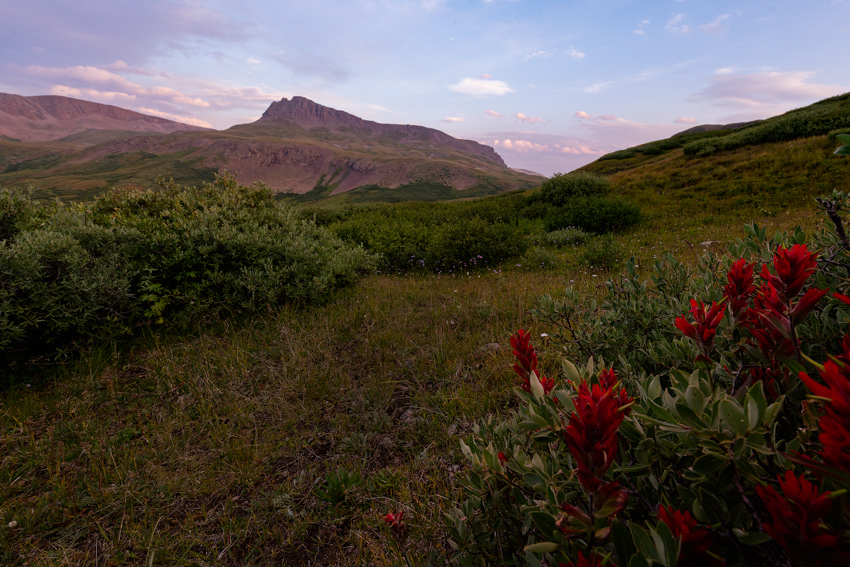
We finally reached the end of the upper basin where the drop off back into Cuba Gulch lay before us. I wanted to stop one last time up there to get some shots of the sunset, which had really produced some great color in the clouds to the west - see!?

One parting shot of Sarah before the downclimb into the nasty willows gave us our final view of Half Peak.
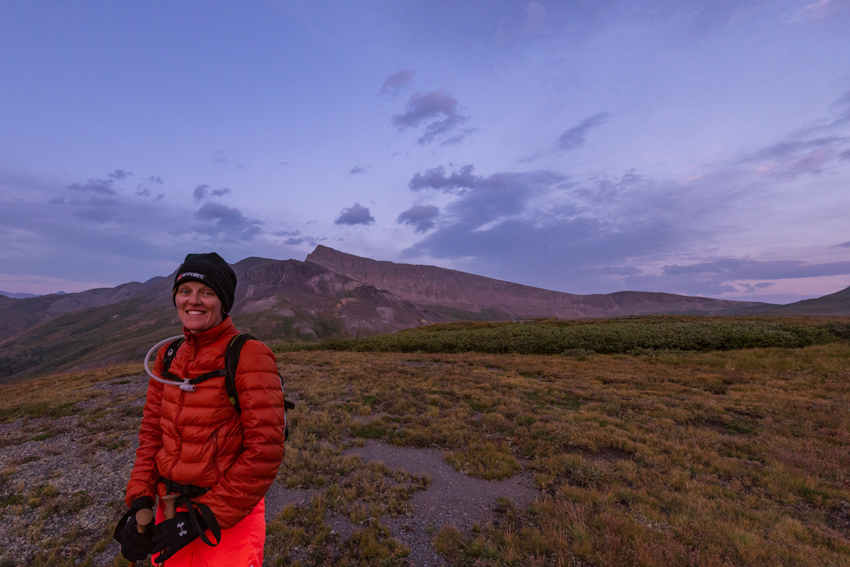
After a very long slog in the dark through Cuba Gulch, we finally reached the car in the dark at 9:30 PM, but not before encountering what we believed were two elk on the road between the trailhead and our campsite. They were quite stubborn and were scaring us a bit with their glowing eyes and strange behavior; however, Sarah's rock-throwing skills (not at the elk, at the ground) scared them off into the woods. We reached camp, cooked dinner, and crashed, despite the amazing night sky that was above. I just could not stay awake to photograph it. Not to worry though, in my next two trip reports for our next days of climbing, there will be plenty of night sky photos to make up for it. For now - enjoy one last parting shot of Sarah's feet while she was doing dishes the next morning - I just know she'll love it!
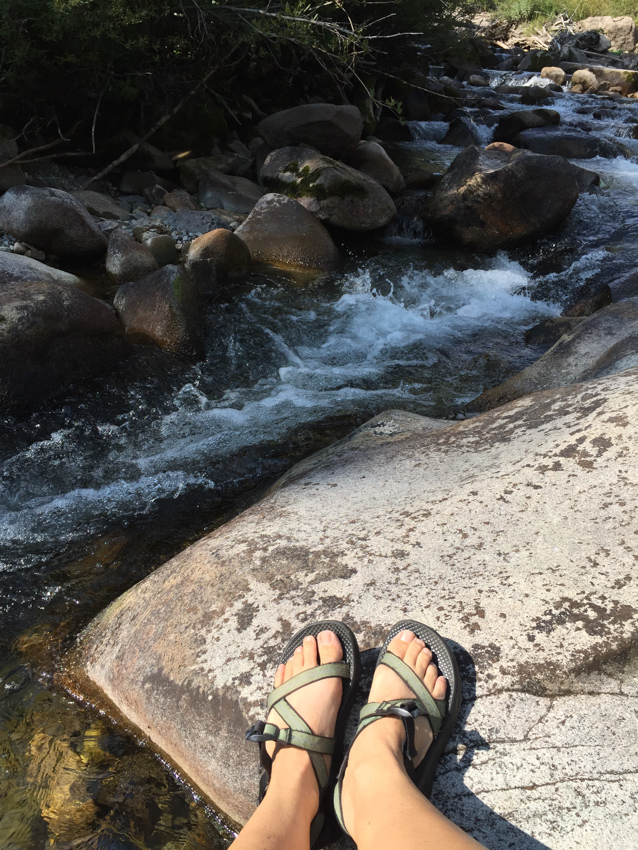
P.S. I'm pretty sure that Roach lists this hike at 11 miles RT; however, I think it was closer to 12 or 13 miles total.
Coming soon - my trip reports of Jones Mountain and Uncompahgre Peak! Hope you enjoyed this trip report of Half Peak via Cuba Gulch. If you'd like to inquire about any of the photographs, please do visit my photography website, or on Facebook! Feel free to leave a comment below as well. Happy trails!
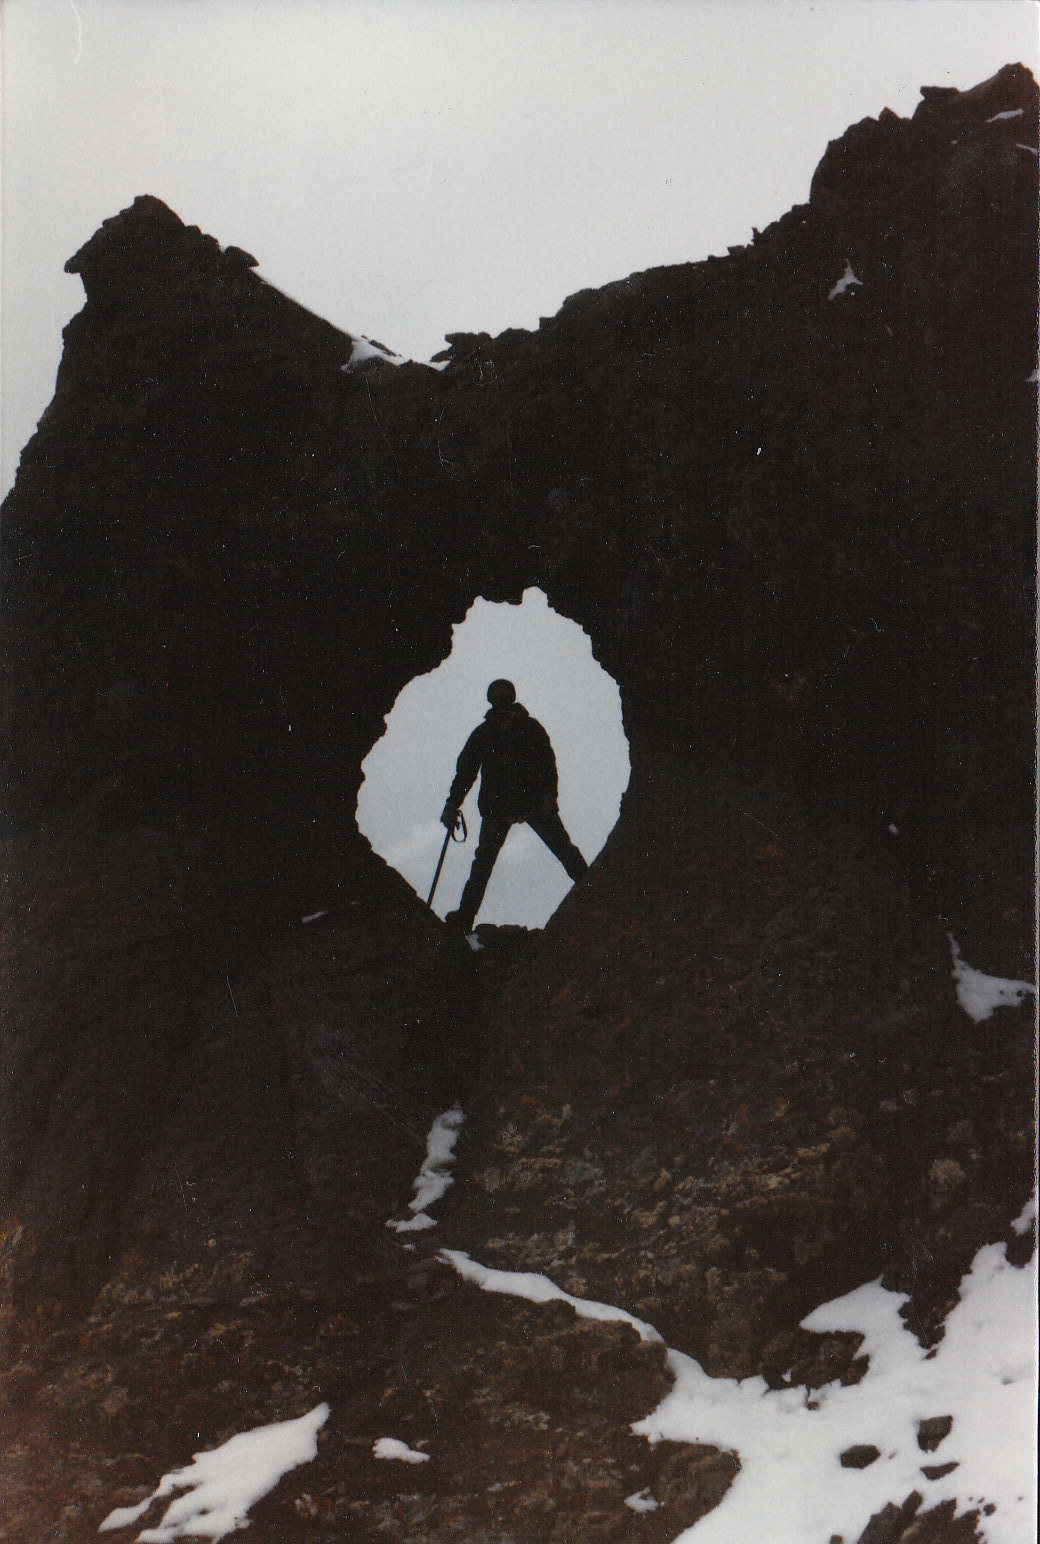
I had always dreamed of climbing Teakettle Mountain ever since seeing my dad's photo (left) of him standing in the Teakettle's handle back in the 1980's. Naturally, as a small boy, this feat was legendary, epic and awe-inspiring - surely one of the drivers behind my own quest to summit the highest 100 mountains in Colorado. So, when I received an email from Rick McBee asking if I'd be interested in climbing Dallas Peak and Teakettle Mountain, I was ecstatic. The climb up Dallas was remarkable and was probably one of my favorite ascents to date. After conquering Dallas, we were all thirsty for more technical climbing and prepared for an early morning start up Teakettle via the standard route in Yankee Boy Basin. An early morning drive to the start of the climb brought us to a small parking lot and the steep south slopes of Teakettle. Teakettle remained out of view for most of the climb, but it was always there in my mind. I had much less anxiety about Teakettle than Dallas Peak and felt quite confident after our success there; however, I knew it could still pose some significant challenges, especially on the upper parts of the climb prior to the ridge as well as the summit block. The 13,819 ft. summit of Teakettle Mountain is pretty close to the Yankee Boy Basin road as the crow flies; however, the route up takes you through some quite interesting and somewhat dangerous sections of "trail," mostly unmarked and full of loose rock and dirt.
Our group composition shifted from the prior day - we lost Ben and picked up a new partner named Brad Tucker - a good friend of Rick McBee's from Montrose. Brad was a dentist and somewhat new to climbing high peaks; however, he had done many rock climbs with Rick in the past and was a reliable and experienced climber (much more experienced at roped climbing than me).
We departed the parking lot at around 5:30 AM and bushwhacked straight up the side of the mountain, following game trails and small drainages until we reached a plateau below the huge and formidable boulder field below the ridge between Teakettle and Coffee Pot. We enjoyed views of Potosi Peak and the rising moon to the east of us on the way up the steep grassy slopes.

We were all spread out across the slopes as to not damage the vegetation on the way up - we never did find a trail on the lower section of the mountain.
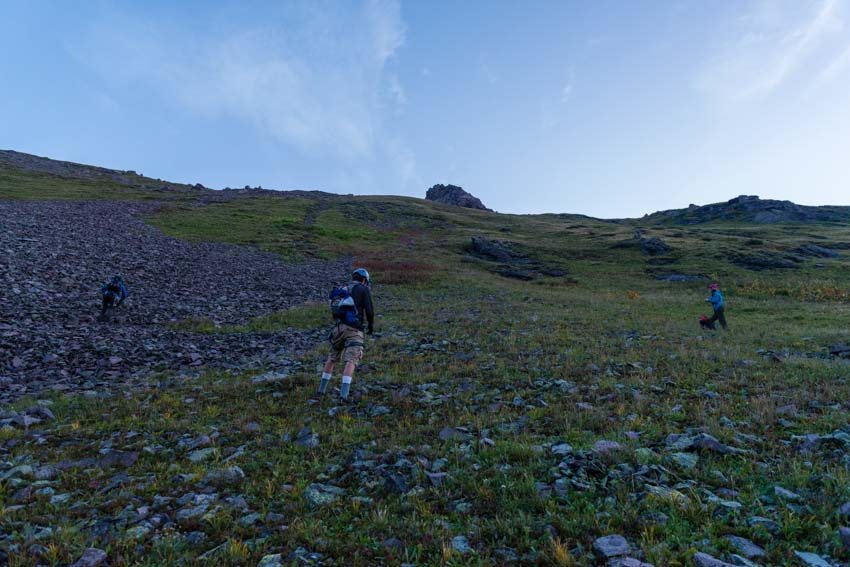
lI tried to stick with Natalie Moran so that I had someone to talk to on the way up the mountain - she was full of great stories!
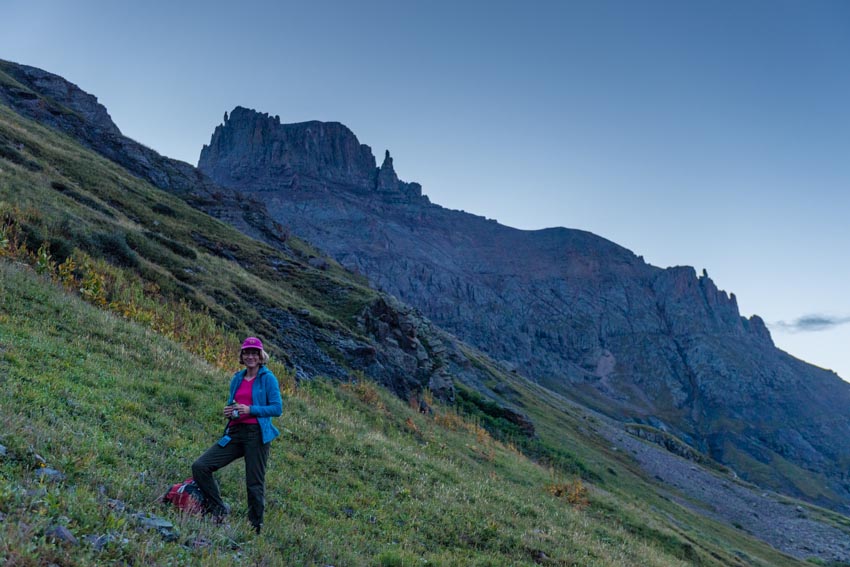
As we climbed up the slopes, views of both Mount Emma and Gilpin Peak were fantastic - the only thing that was missing was some clouds to make the sunrise more exciting; however, I welcomed the opportunity and chance at a storm-free day climbing in the San Juans.
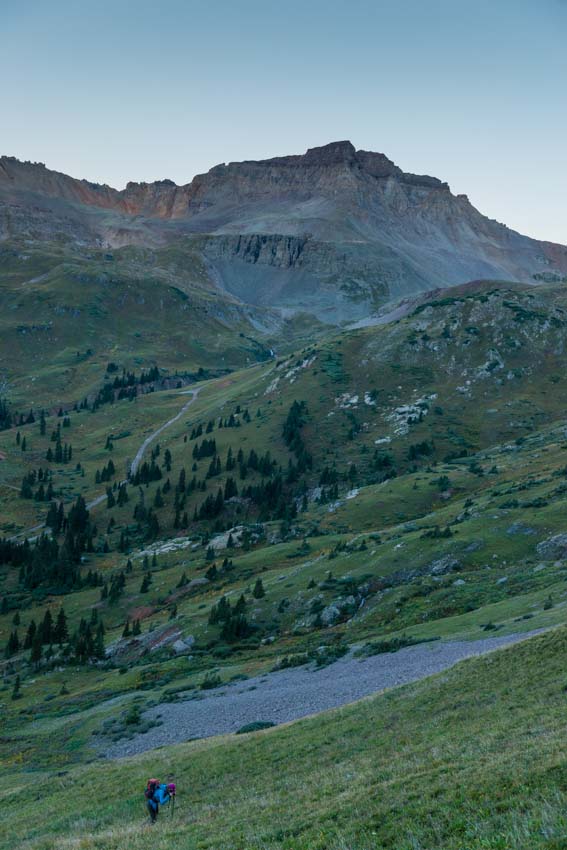
As sunrise hit the valley, the views back across to the south were great. Yankee Boy Basin never seems to disappoint.
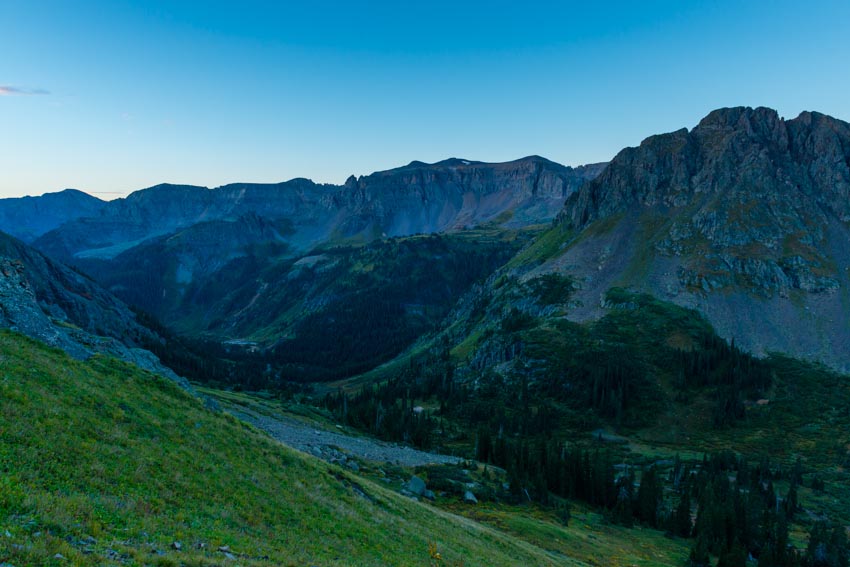
Finally, the sun hit the tips of the peaks across the way, briging new light Gilpin Peak and Yankee Boy Basin.
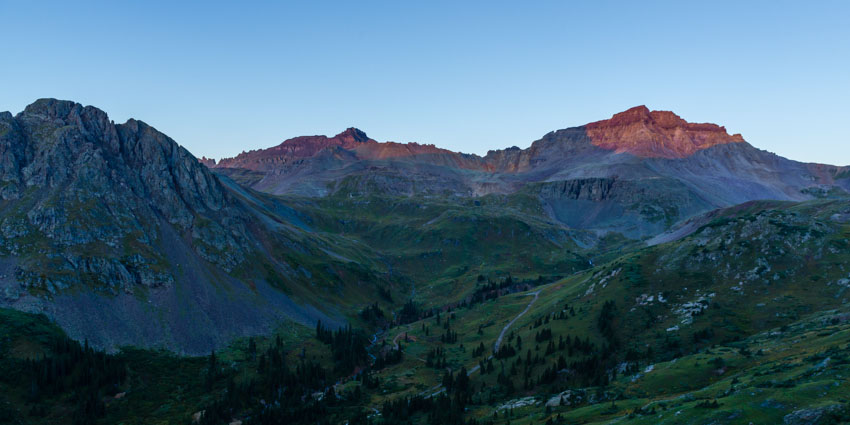
The sun even began touching the tip of Mount Sneffels, which looks a bit less impressive from this vantage point than normal.
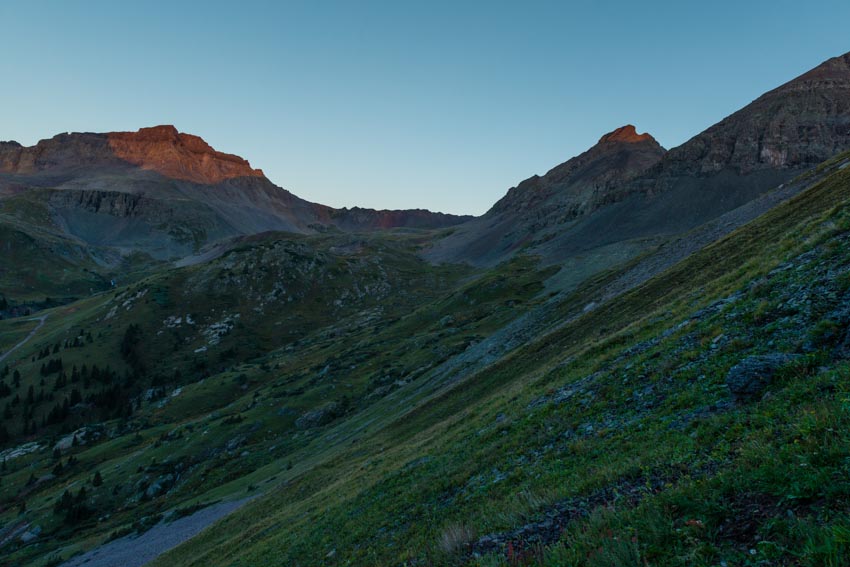
As we climbed up the slopes quickly, the rest of our climb came into view - a chossy rock gully. Oh joy.
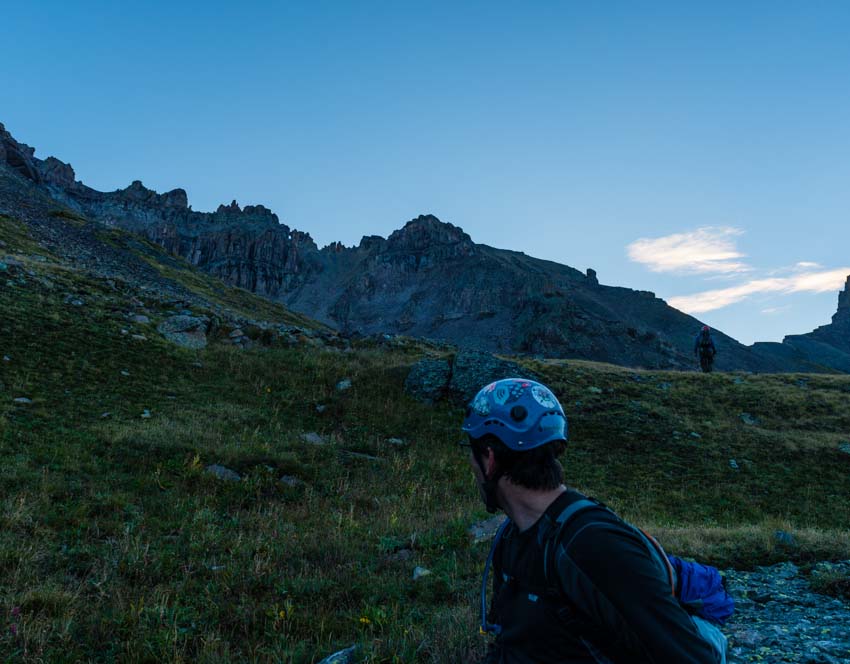
It was cool seeing the little hole in the rock, which is not to be mistaken for the Teakettle's handle; rather, this hole was just another sweet feature of the area. The goal was to climb that rock gully to the right of the hole and follow a smaller gully up to the left below the hole.
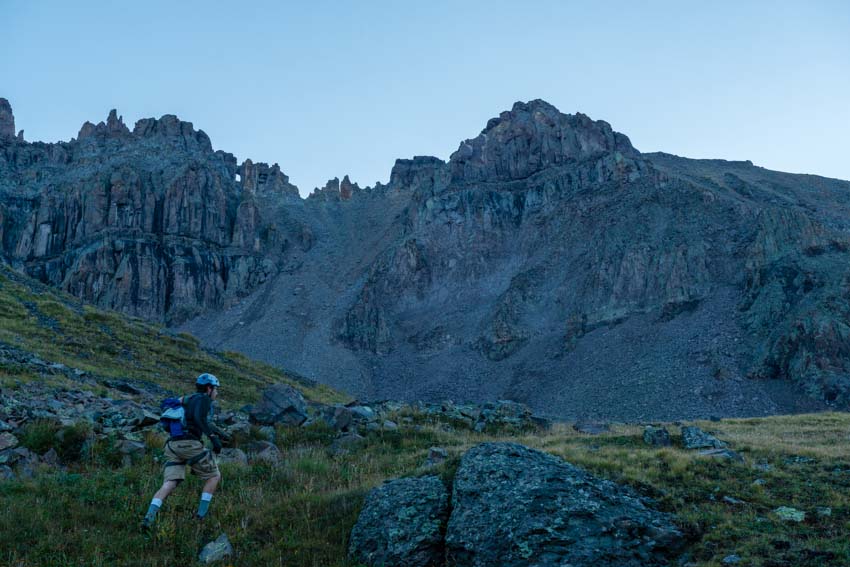
Natalie points out the route to Brad and Rick on our ascent.
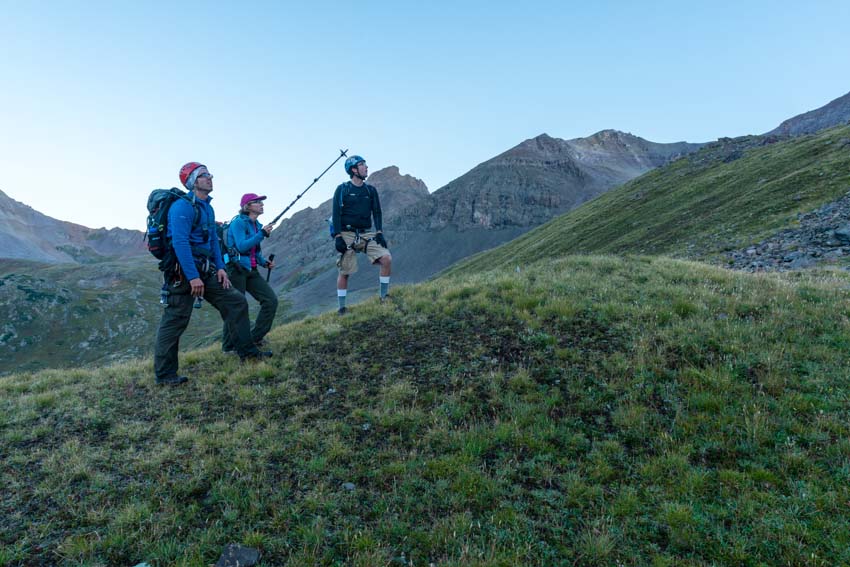
As we climbed up the face, more nice light was hitting the peaks behind us to the south.

I spotted a Bighorn Sheep up above us to the east; however, I only had my 24-70 lens on me at the time, so this was as good as I could do to photograph him. He made a ton of noise as he deftly climbed the seemingly impassable terrain of Teakettle Mountain.
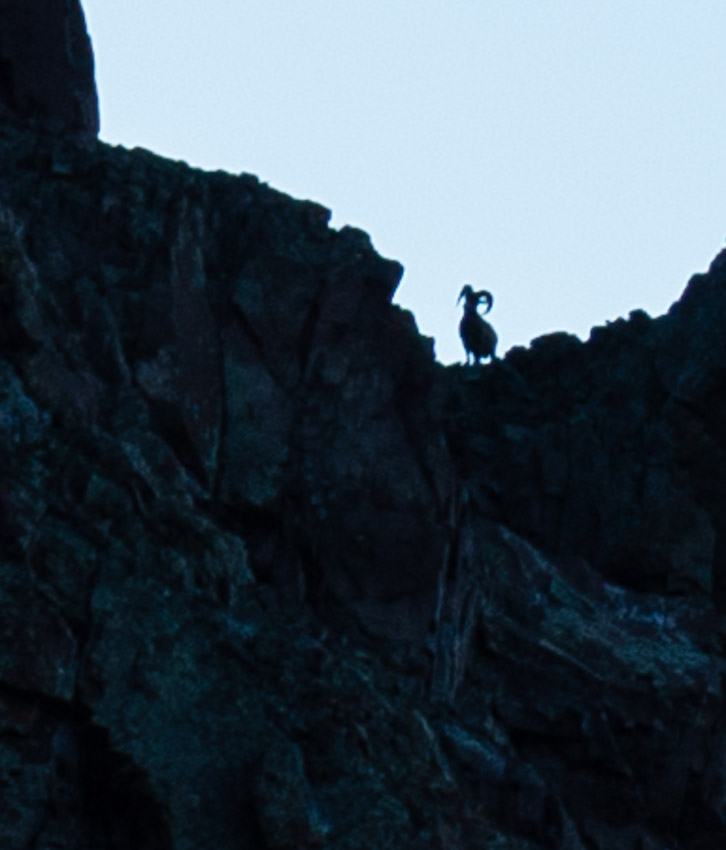
We reached the base of the chossy boulder gully - it looked pretty inviting - all I remember is that Natalie was thinking it would be much better to do this in spring when there was snow - I agreed. The rocks were loose and mixed with dirt and scree - a true climber's nightmare.
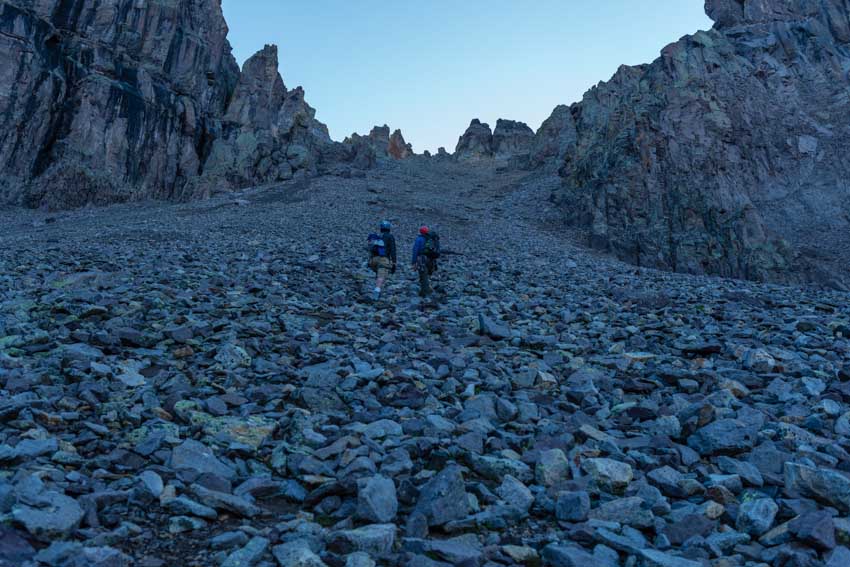
As we continued to gain elevation at a quick pace, Dallas Peak came into view for the first time - showcasing just how insane of a climb it really is - and how awesome it did feel that we accomplished that sucker just one day prior. It felt good to be knocking out the toughest peaks in Colorado.
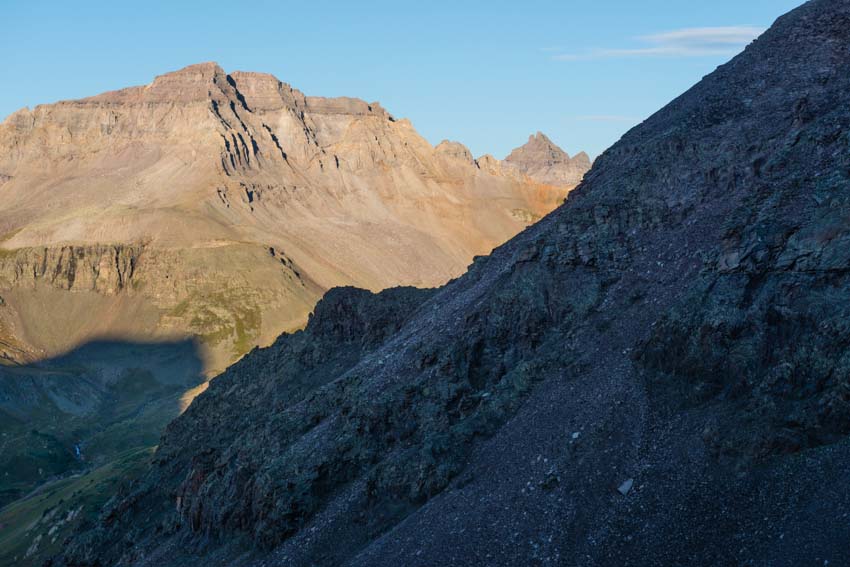
The next shot is just to demonstrate how rugged the terrain around us was. It was impressive to say the least.
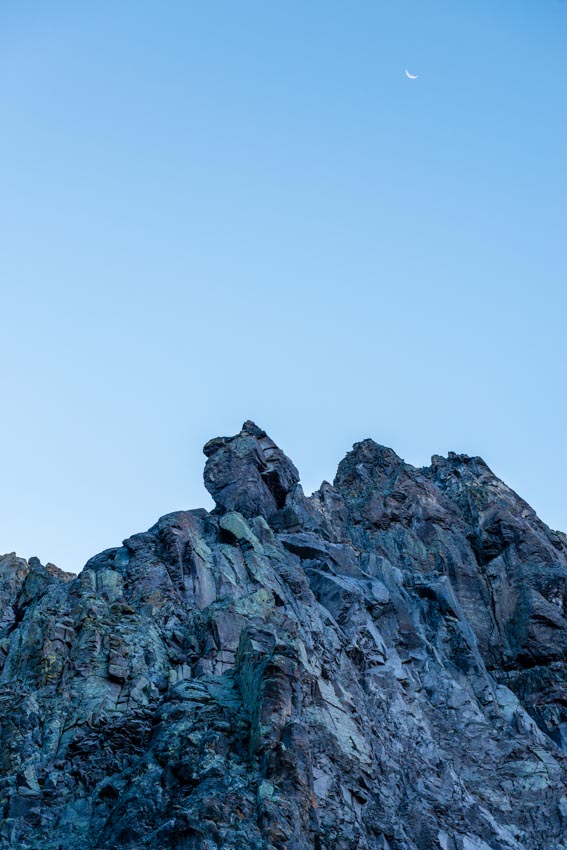
The higher we climbed, the more we could see out across Yankee Boy Basin. The tip of Sneffels came into view, giving some credence to my belief that it is one of the most impressive mountains in Colorado. This whole area is a sight for sore eyes.
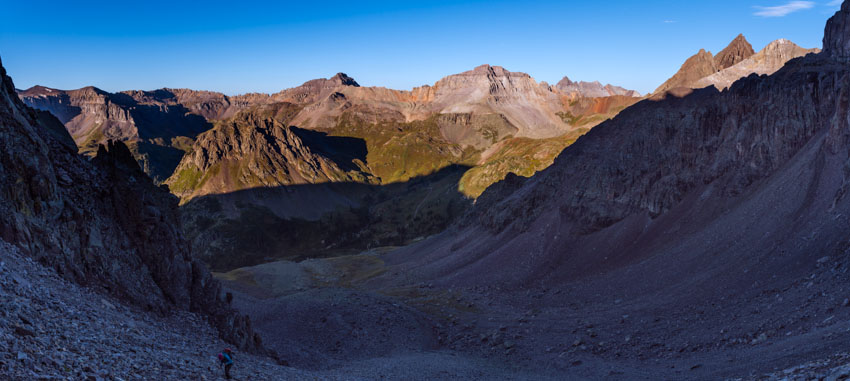
The chossy gully was really loose and steep and at times we had to stagger ourselves to prevent rock fall injury - groups really should take caution in this part of the climb due to how loose the rocks are. We knocked rocks down continuously as we went up.
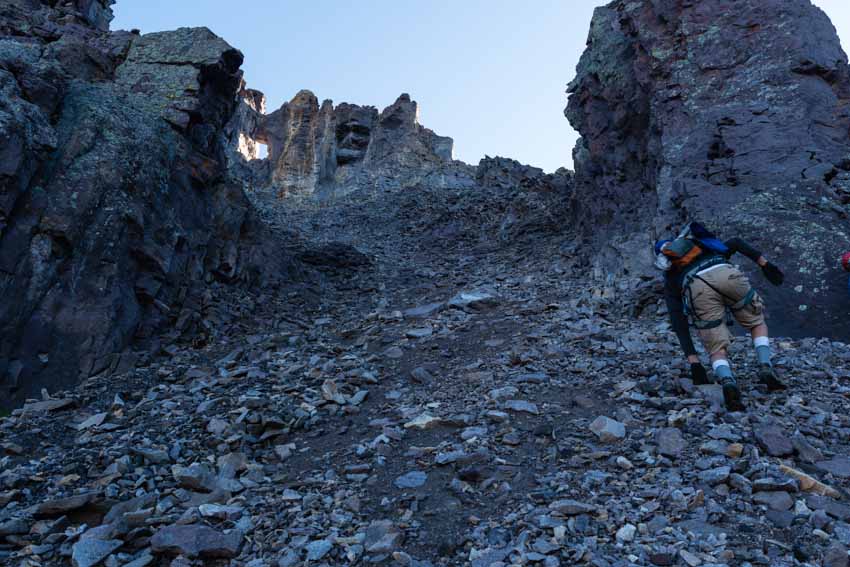
Here is another view of the ugly chossy loose nastiness we went up.
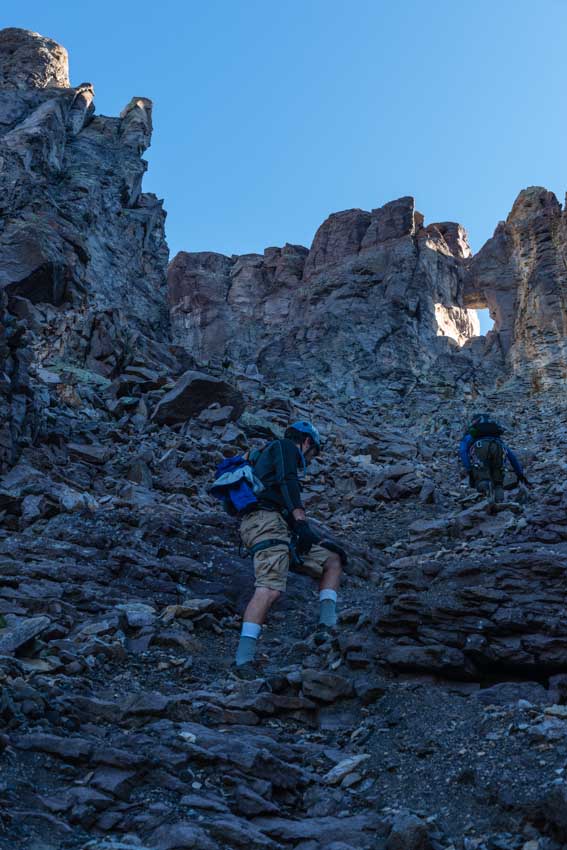
And here is a view looking down the gully and out across a sea of San Juan peaks.
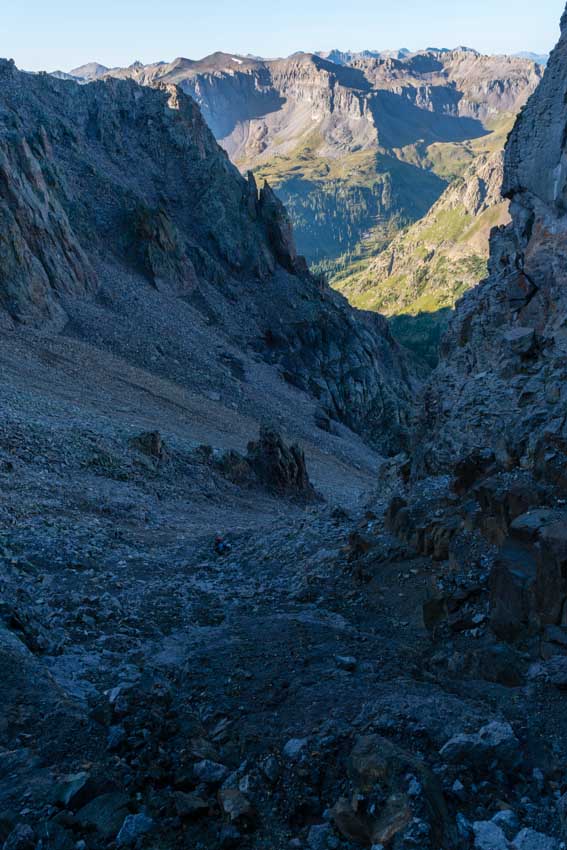
Once at the top of the gully, the views really opened up and we could finally see Coffee Pot, an unoffical peak to the east of Teakettle and impressive in its own right.
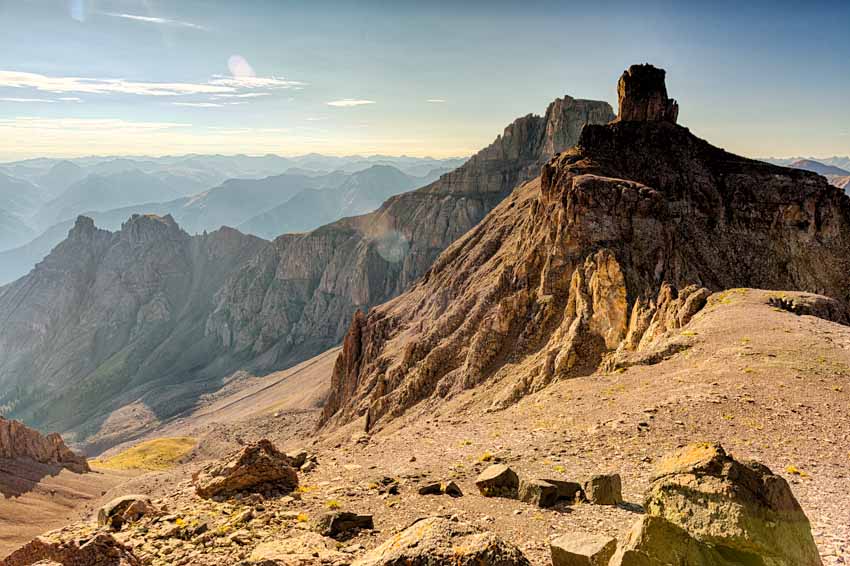
As Natalie emerged from the gully, she also enjoyed the views of Coffee Pot - with Dallas Peak behind her for scale!
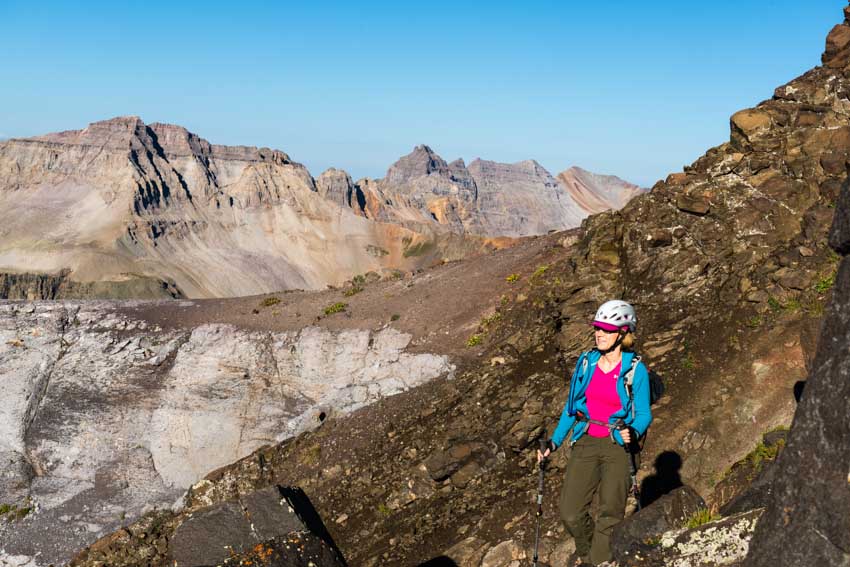
And of course, the selfie.
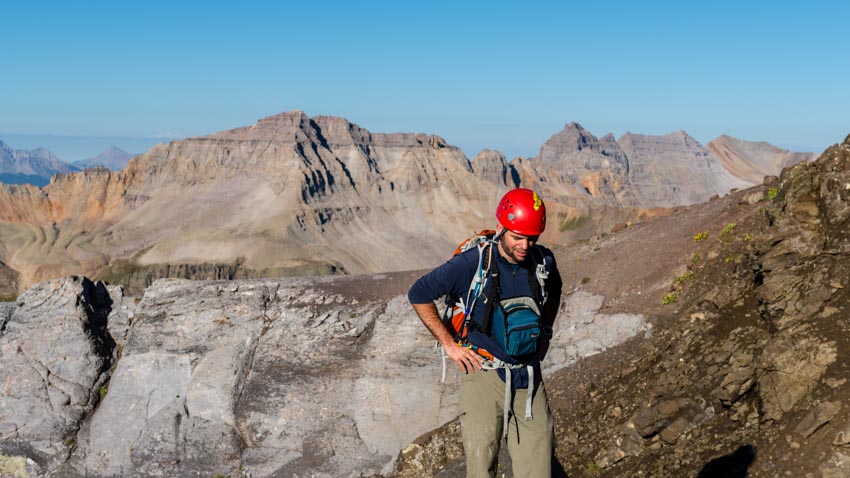
The ridge also afforded us views of Uncompahgre to the east - such an impressive view!
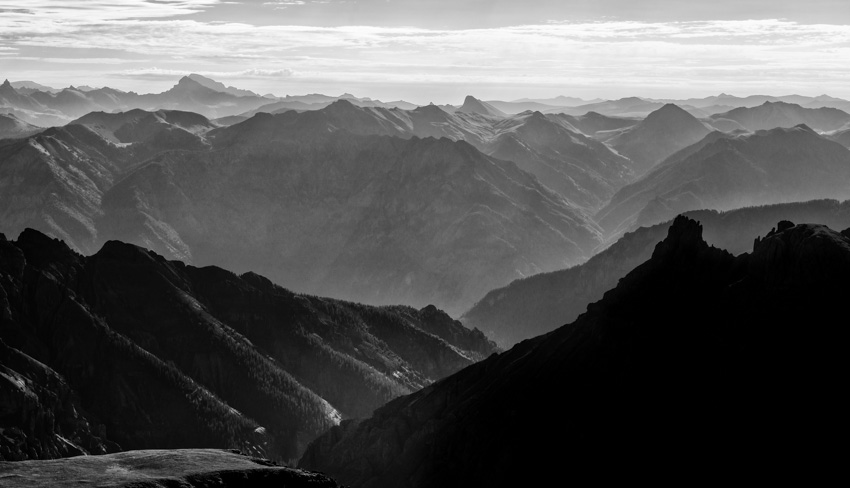
After enjoying the ridge for a few minutes, we decided to move on. The route took us up and over a few more small ridges and the actual mountain finally came into view - such a small little spire of a peak above us.
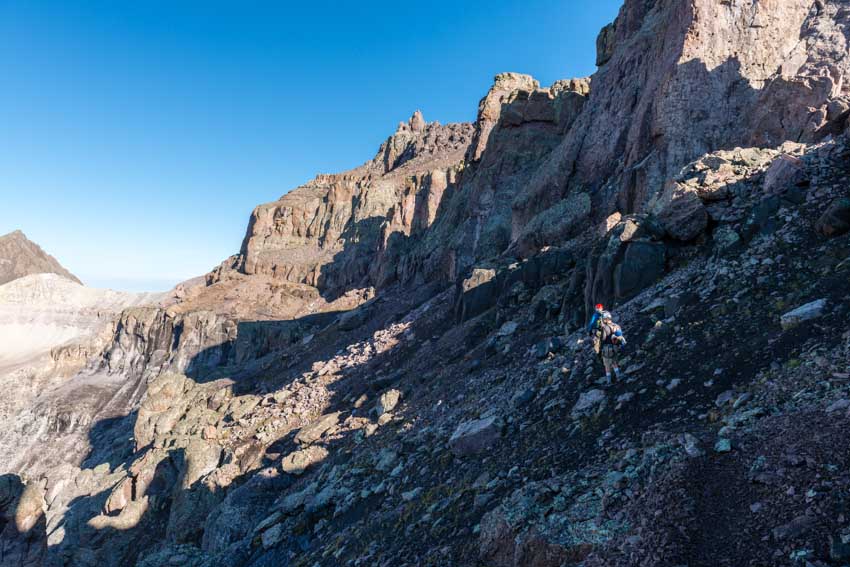
The trail from here became less solid but easily climbable, just not very sturdy. A lot of loose dirt and worn scree.
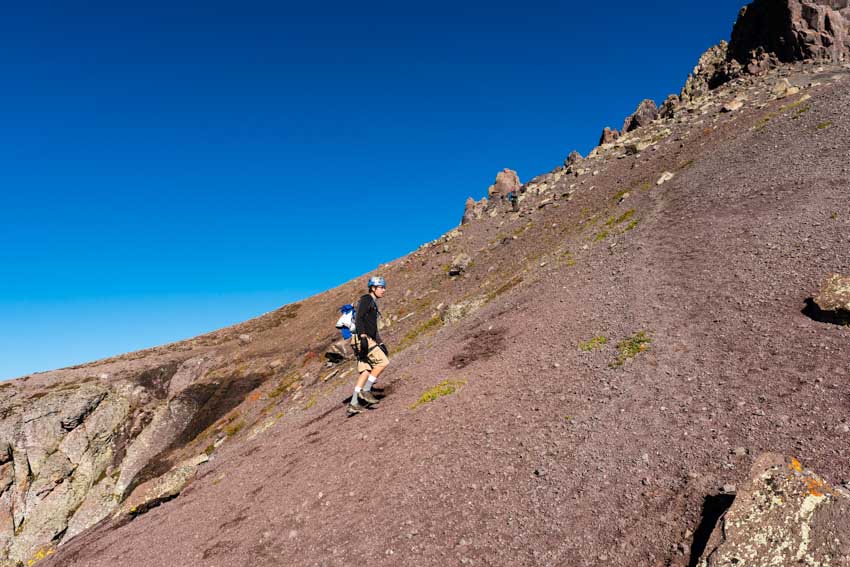
From the loose dirt trail, Natalie enjoyed the views, snapping off some photos with her small camera.
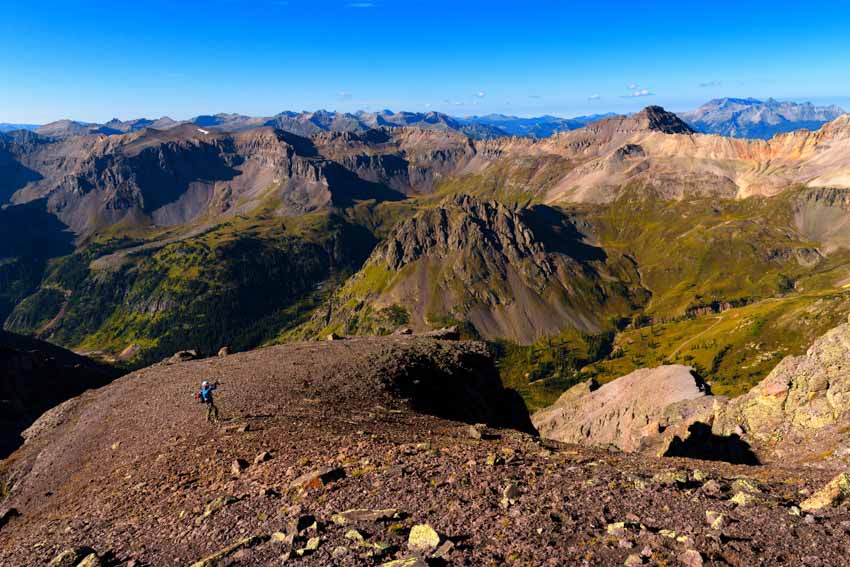
We finally reached the infamous Teakettle handle at the base of the technical portion of the climb and we all got a chance to celebrate from inside the handle - a San Juan classic! Brad -
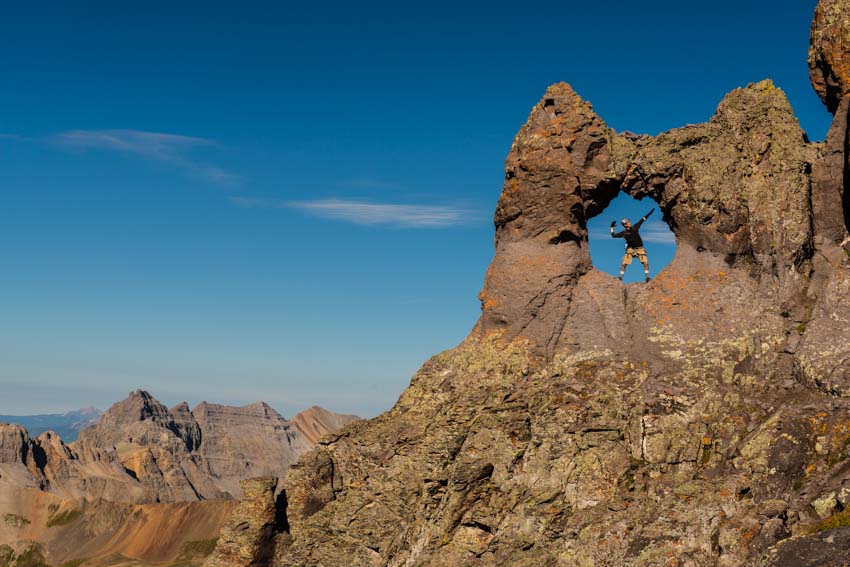
Matt enjoying the views of Dallas Peak.
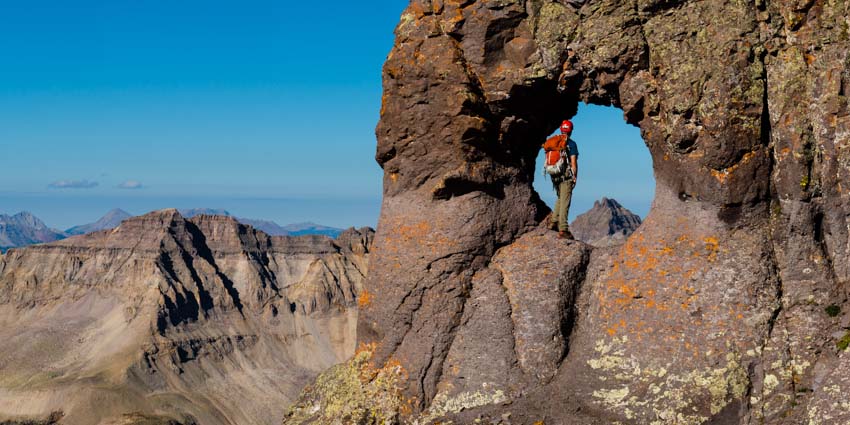
Natalie -
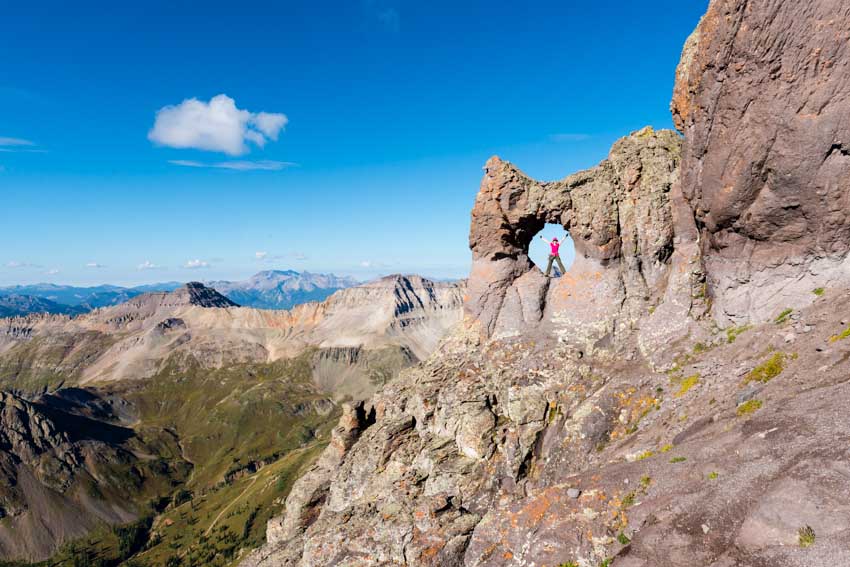
While we were busy having fun in the handle, Rick was prepping the climbing gear for our ascent up the 5.3 face of Teakettle Mountain.
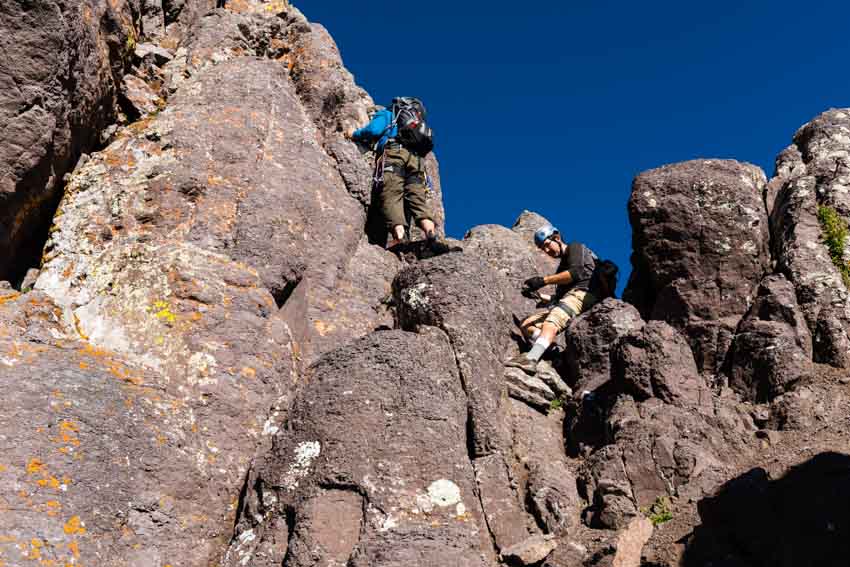
Rick led the climb quite easily and set some bomber protection for us to follow.
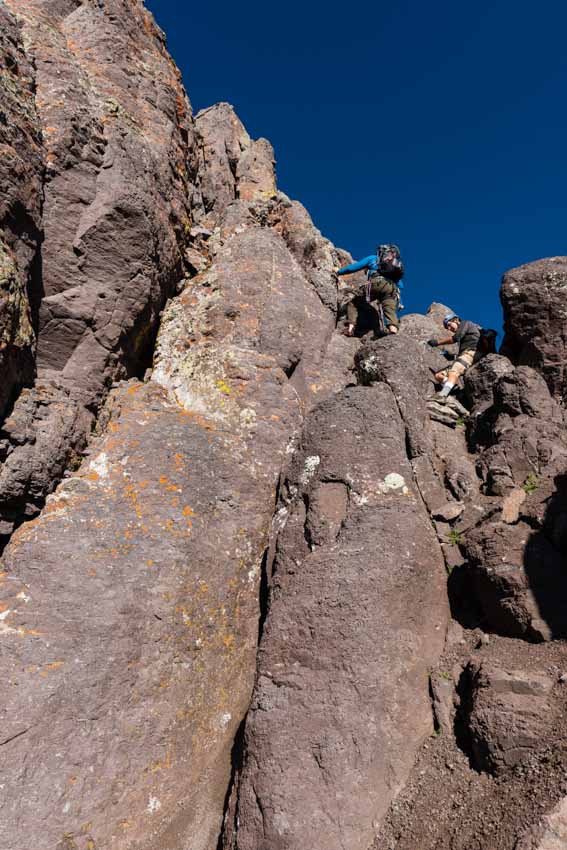
Here is a view looking up the face of Teakettle - an impressive spire with lots of great holds.
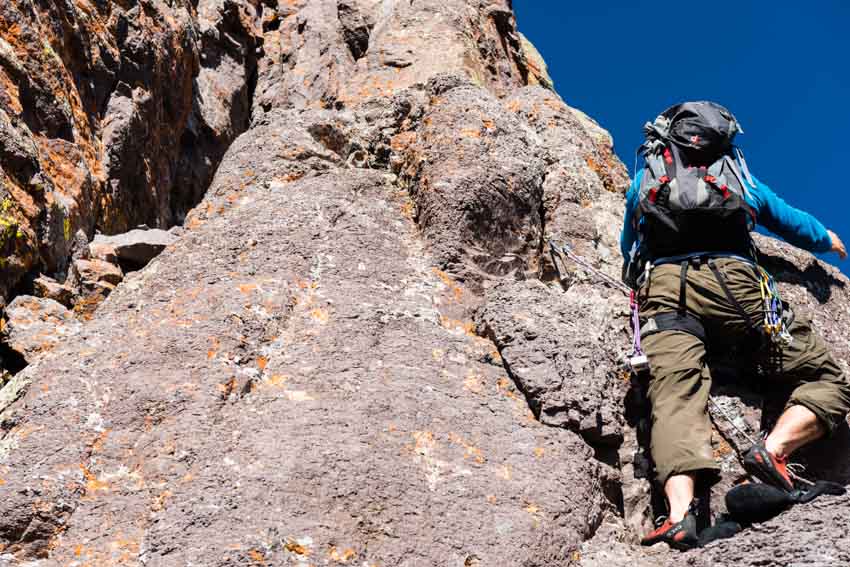
I went next to last and found the climb quite challenging but highly rewarding. Not nearly as difficult as Dallas Peak or Vestal Peak by any means, but the route was harder than I was expecting. I found the crux quite exhilerating and the summit was insane! It only measured 6 square feet at best and there was room for two or three people tops. The view of Sneffels and friends was outstanding. Who else can say they carried a Nikon D800 up to the top of both Dallas and Teakettle? :-)
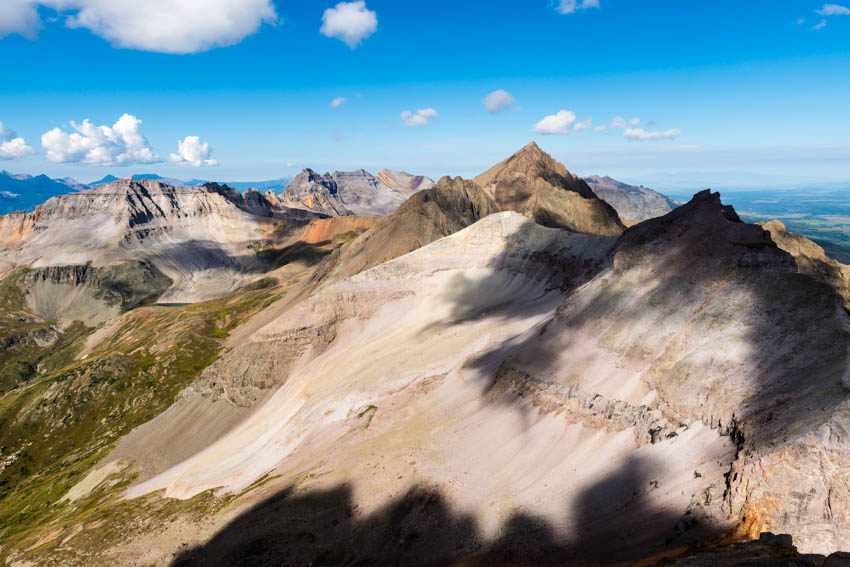
I stayed on top while Brad belayed Natalie from below. Here's Natalie topping out. This is seriously how big the summit is. That's my boot.
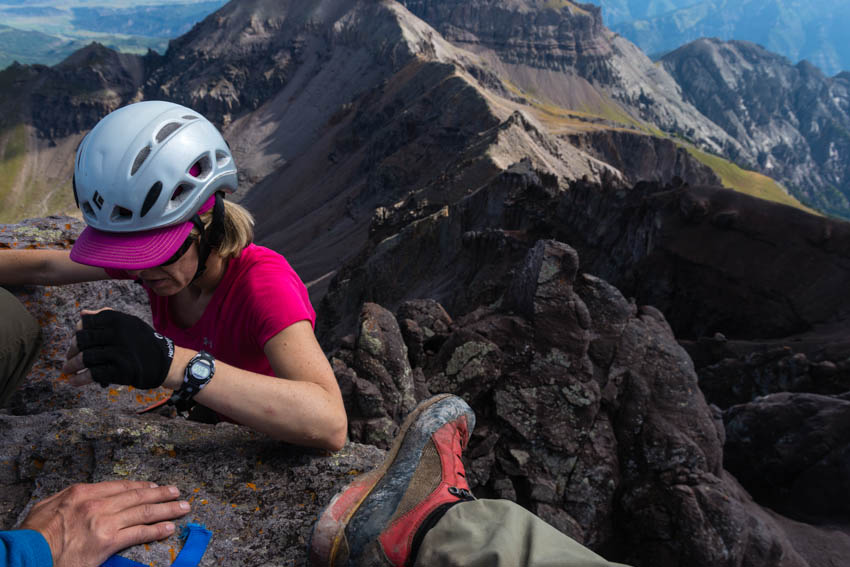
Here I am giving the two thumbs up on top. Such a strange summit - no room to even get up and move around. No 360 pano this time!
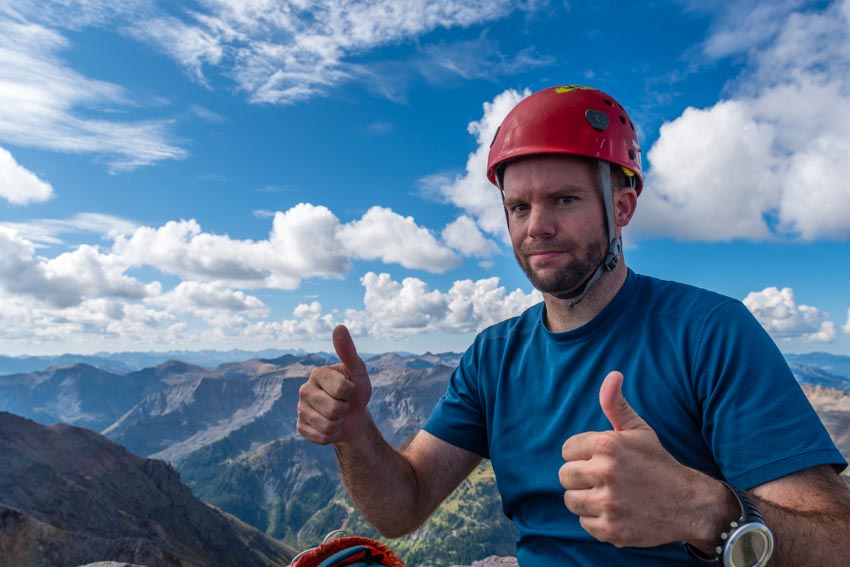
After successful summits from the whole group, we stopped to let Rick bask in the glory in the handle of the Teakettle. This shot is one of my favorites I've taken, ever. I just LOVE it. I hope you do too! This photo one grand prize at the Colorado Springs Creative Photography group's annual photo contest in 2013 and I also submitted it to the National Geographic Travel Magazine's contest a few months ago.
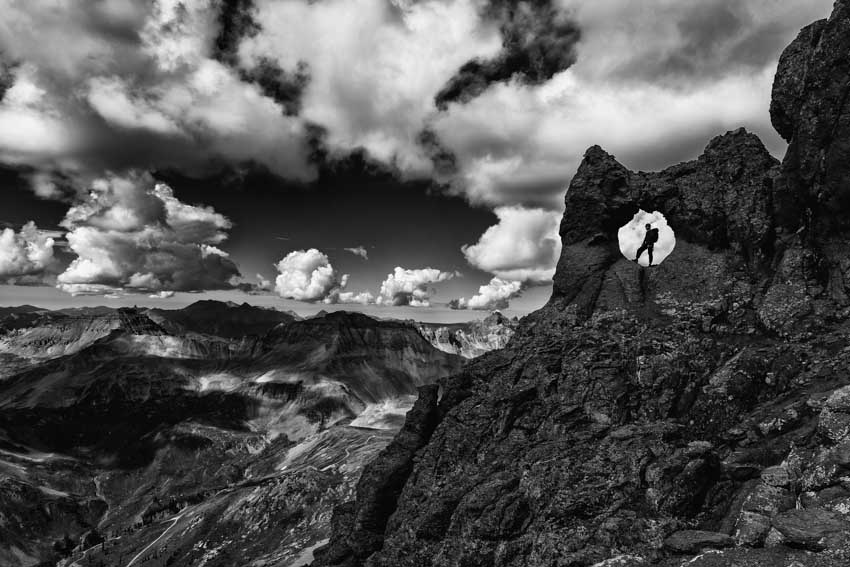
As we descended, we came across a few groups of people and we were all noticing storm clouds starting to build - we pondered a climb of Coffee Pot but after examination of the route by Rick and Natalie, we decided against it.
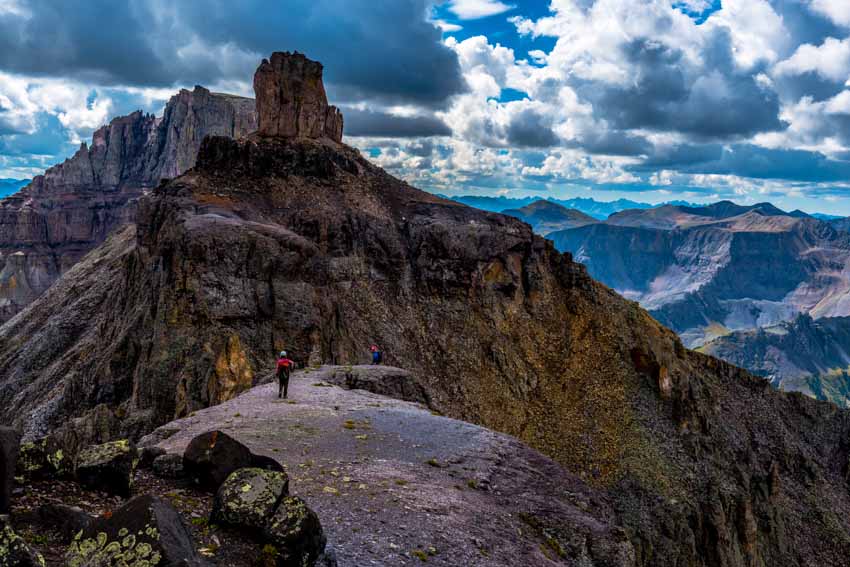
The whole party was quite ecstatic for our success - two for two. Here's Rick celebrating our conquest.
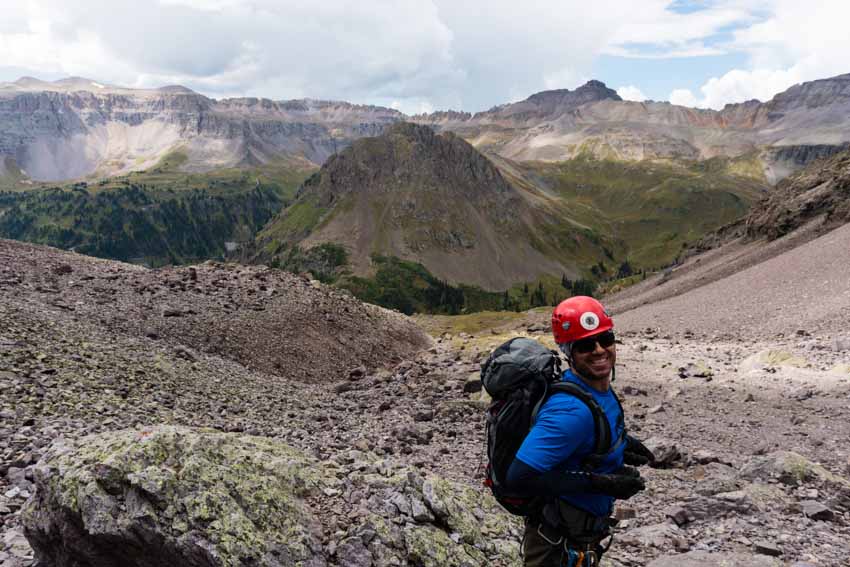
Another shot of Rick with the rugged San Juans behind him.
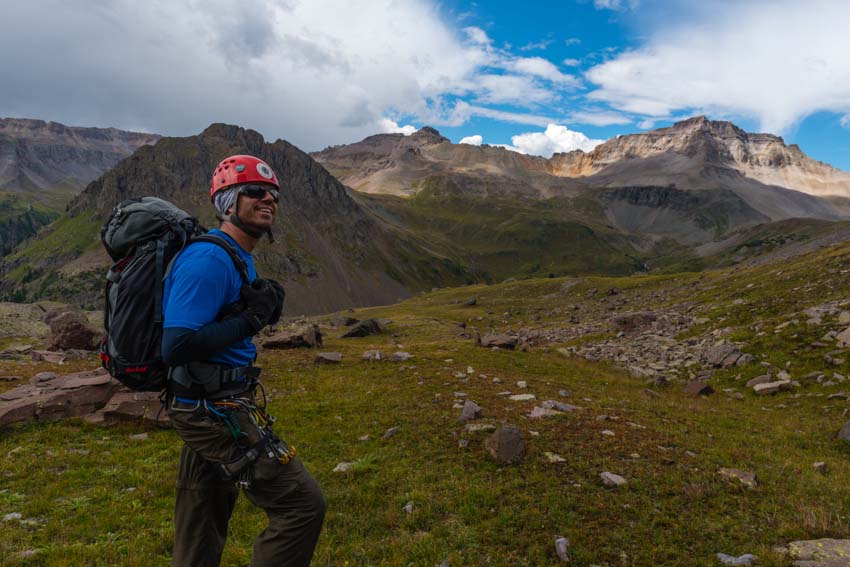
Unfortunately, Brad got really bad altitude sickness on the way down, which was good timing, considering the alternatives. We all helped him down the mountain as he vomited several times throughout the way out. We all really felt bad for the guy, but he was a real trooper! Natalie surely did not let it get her spirits down in this shot of her.
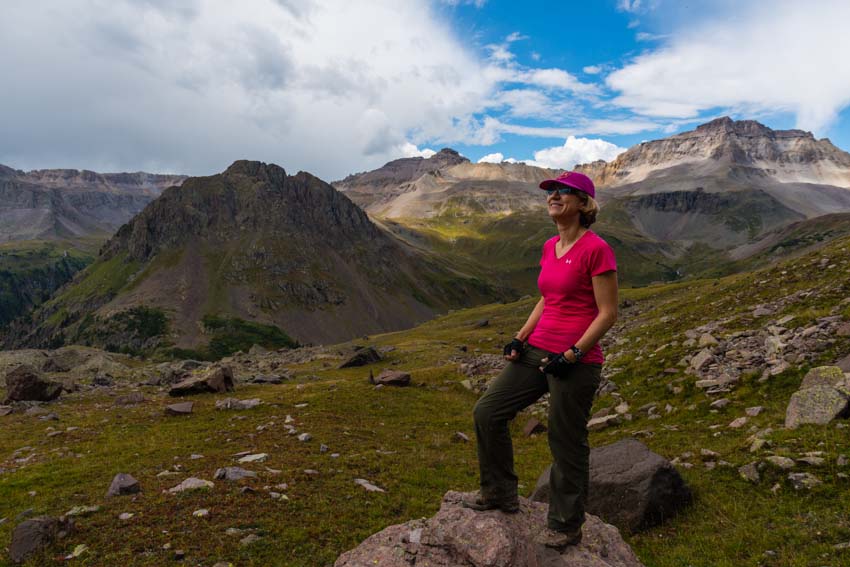
And this final image - hopefully not my last photograph of myself on the side of a Colorado Peak. I've since moved to Portland, Oregon and won't have many opportunities to climb in Colorado. I do have two trips planned this year, but my days of 20-30 peaks in a season are probably over. I'll continue to write about my adventures here in the Pacific Northwest, and I've begun recruiting other writers to keep this site alive, including Regina Primavera. If you are at all interested in contributing and getting trained, and want to reap the potential benefits - fame, fortune, experience (hahaha). Seriously though, let me know! Until next time...